
OW 5003 - Bread maker MOULINEX - Free user manual and instructions
Find the device manual for free OW 5003 MOULINEX in PDF.
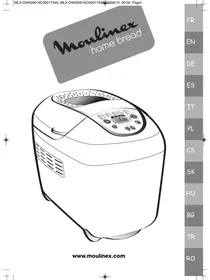



| Product type | Bread machine |
| Brand | MOULINEX |
| Model | OW 5003 |
| Power supply | 220-240 V, 50/60 Hz |
| Number of programs | 14 automatic programs: Basic bread, French, Whole wheat, Sweet, Rapid, Gluten-free, Salt-free, Omega-3 rich, Damper, Cake, Jam, Pasta, Yeast dough, Bake only |
| Bread sizes | 750 g, 1000 g, 1500 g |
| Crust color | 3 levels: Light, Medium, Dark |
| Delay start | Up to 15 hours in advance (except programs 5, 6, 9, 10, 11, 12, 13, 14) |
| Keep warm | 1 hour automatic after baking (programs 1 to 10) |
| Maximum dough capacity | 1500 g |
| Display | LCD screen |
| Included accessories | Bread pan, 2 kneaders, graduated cup, double measuring spoon (teaspoon and tablespoon), hook for removing kneaders |
| Materials | Lid with window, non-stick pan |
| Cleaning and maintenance | Clean exterior and interior with a damp sponge; pan and kneaders washable in warm soapy water; do not use abrasive products or dishwasher; do not immerse the appliance body |
| Safety | Automatic stop at end of program; protection against power cuts (7-minute backup); mandatory grounded outlet; do not touch hot window |
| Noise level | 55 dBA |
| Spare parts and repairability | Parts available at authorized after-sales service; power cord replacement by manufacturer or professional |
| Country of origin | Not specified |
Frequently Asked Questions - OW 5003 MOULINEX
User questions about OW 5003 MOULINEX
0 question about this device. Answer the ones you know or ask your own.
Ask a new question about this device
Download the instructions for your Bread maker in PDF format for free! Find your manual OW 5003 - MOULINEX and take your electronic device back in hand. On this page are published all the documents necessary for the use of your device. OW 5003 by MOULINEX.
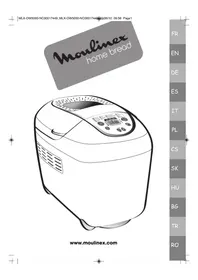
USER MANUAL OW 5003 MOULINEX
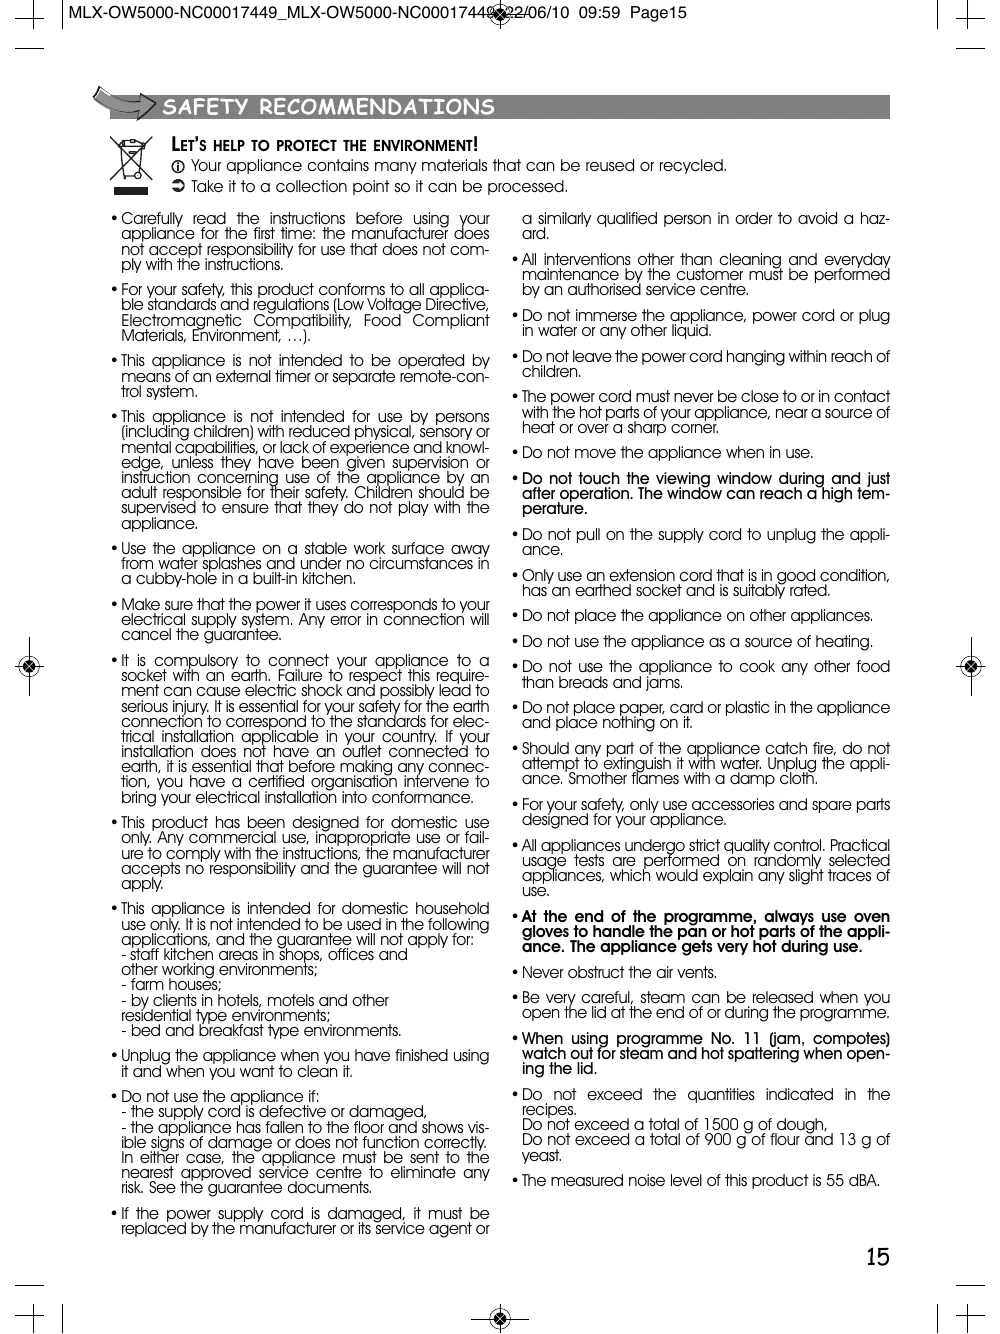
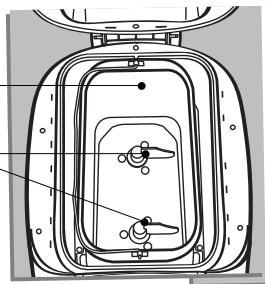
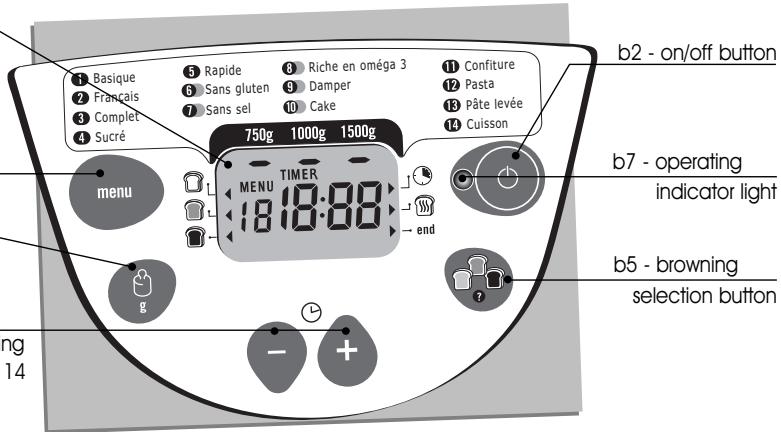
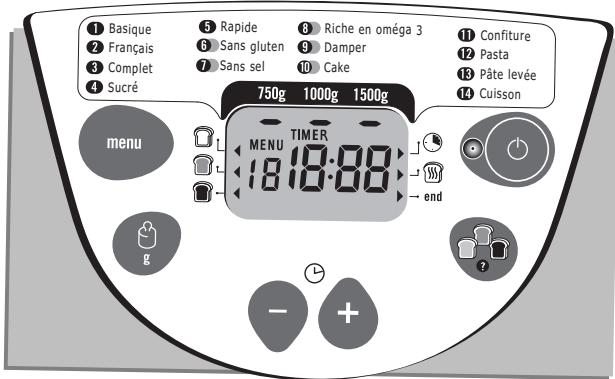
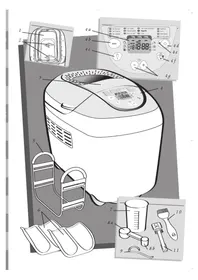
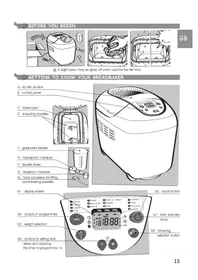
A - lid with window B - control panel
C - bread pan D - kneading paddles
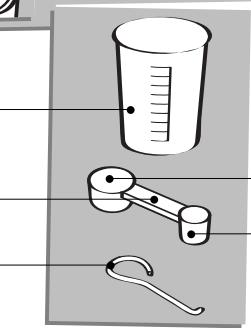
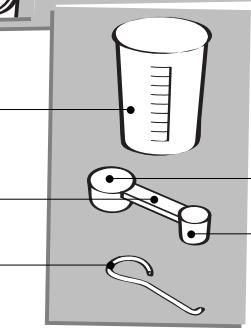
E - graduated beaker F - double doser G - hook accessory for lifting out kneading paddles
fl - tablespoon measure f2 - teaspoon measure
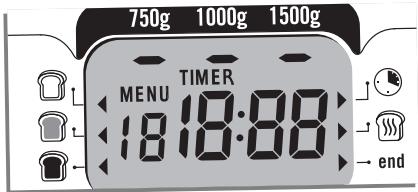
b1 - display screen
b6 - choice of programmes b3 - weight selection b4 - buttons for setting
delayed start and adjusting the time for programme 14
SAFETY RECOMMENDATIONS

LET'S HELP TO PROTECT THE ENVIRONMENT!
① Your appliance contains many materials that can be reused or recycled. Take it to a collection point so it can be processed.
- Carefully read the instructions before using your appliance for the first time: the manufacturer does not accept responsibility for use that does not comply with the instructions.
- For your safety, this product conforms to all applicable standards and regulations (Low Voltage Directive, Electromagnetic Compatibility, Food Compliant Materials, Environment, ...).
- This appliance is not intended to be operated by means of an external timer or separate remote-control system.
- This appliance is not intended for use by persons (including children) with reduced physical, sensory or mental capabilities, or lack of experience and knowledge, unless they have been given supervision or instruction concerning use of the appliance by an adult responsible for their safety. Children should be supervised to ensure that they do not play with the appliance.
- Use the appliance on a stable work surface away from water splashes and under no circumstances in a cubby-hole in a built-in kitchen.
- Make sure that the power it uses corresponds to your electrical supply system. Any error in connection will cancel the guarantee.
- It is compulsory to connect your appliance to a socket with an earth. Failure to respect this requirement can cause electric shock and possibly lead to serious injury. It is essential for your safety for the earth connection to correspond to the standards for electrical installation applicable in your country. If your installation does not have an outlet connected to earth, it is essential that before making any connection, you have a certified organisation intervene to bring your electrical installation into conformance.
- This product has been designed for domestic use only. Any commercial use, inappropriate use or failure to comply with the instructions, the manufacturer accepts no responsibility and the guarantee will not apply.
- This appliance is intended for domestic household use only. It is not intended to be used in the following applications, and the guarantee will not apply for:
- staff kitchen areas in shops, offices and
other working environments; - farm houses; - by clients in hotels, motels and other residential type environments; - bed and breakfast type environments.
- Unplug the appliance when you have finished using it and when you want to clean it.
- Do not use the appliance if:
- the supply cord is defective or damaged,
- the appliance has fallen to the floor and shows visible signs of damage or does not function correctly. In either case, the appliance must be sent to the nearest approved service centre to eliminate any risk. See the guarantee documents.
- If the power supply cord is damaged, it must be replaced by the manufacturer or its service agent or
a similarly qualified person in order to avoid a hazard. - All interventions other than cleaning and everyday maintenance by the customer must be performed by an authorized service centre. - Do not immerse the appliance, power cord, or plug in water or any other liquid. - Do not leave the power cord hanging within reach of children. - The power cord must never be close to or in contact with the hot parts of your appliance, near a source of heat, or over a sharp corner. - Do not move the appliance when in use. - Do not touch the viewing window during and just after operation. The window can reach a high temperature. - Do not pull on the supply cord to unplug the appliance. - Only use an extension cord that is in good condition, has an earthed socket, and is suitably rated. - Do not place the appliance on other appliances. - Do not use the appliance as a source of heating. - Do not use the appliance to cook any other food than breads and jams. - Do not place paper, card, or plastic in the appliance and place nothing on it. - Should any part of the appliance catch fire, do not attempt to extinguish it with water. Unplug the appliance. Smother flames with a damp cloth. - For your safety, only use accessories and spare parts designed for your appliance. - All appliances undergo strict quality control. Practical usage tests are performed on randomly selected appliances, which would explain any slight traces of use. - At the end of the programme, always use oven gloves to handle the pan or hot parts of the appliance. The appliance gets very hot during use. - Never obstruct the air vents. - Be very careful, steam can be released when you open the lid at the end of or during the programme. - When using programme No. 11 (jam, compotes) watch out for steam and hot spattering when opening the lid. - Do not exceed the quantities indicated in the recipes.
Do not exceed a total of 1500 g of dough. Do not exceed a total of 900 g of flour and 13 g of yeast.
- The measured noise level of this product is 55 dBA.
INTRODUCTION
TIPS FOR MAKING GOOD BREAD
- Please read these instructions carefully: the method for making bread with this appliance is not the same as for hand-made bread.
- All ingredients used must be at room temperature (unless otherwise indicated) and must be weighed exactly. Measure liquids with the graduated beaker supplied. Use the double doser supplied to measure teaspoons on one side and tablespoons on the other. All spoon measures are level and not heaped. Incorrect measurements give bad results.
- For successful bread making, using the correct ingredients is critical. Use ingredients before their use-by date and keep them in a cool, dry place.
- It is important to measure the quantity of flour precisely. That is why you should weigh out flour using a kitchen scale. Use packets of flaked dried yeast (sold in the UK as Easy Bake or Fast Action Yeast). Unless otherwise indicated in the recipe, do not use baking powder. Once a
packet of yeast has been opened, it should be sealed, stored in a cool place and used within 48 hours.
- To avoid spoiling the proving of the dough, we advise that all ingredients should be put in the bread pan at the start and that you should avoid opening the lid during use (unless otherwise indicated). Carefully follow the order of ingredients and quantities indicated in the recipes. First the liquids, then the solids. Yeast should not come into contact with liquids, sugar or salt.
GENERAL ORDER TO BE FOLLOWED:
Liquids (butter, oil, eggs, water, milk)
Salt
Sugar
Flour, first half
Powdered milk
Specific solid ingredients
Flour, second half
Yeast
BEFORE YOU USE YOUR APPLIANCE FOR THE FIRST TIME
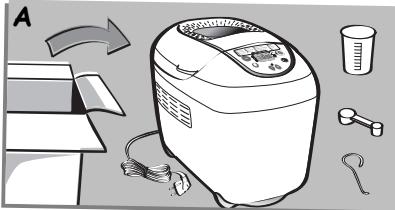
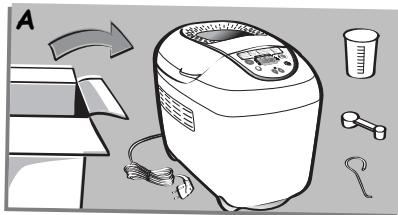
- Remove the accessories and any stickers either inside or on the outside of the appliance - A.
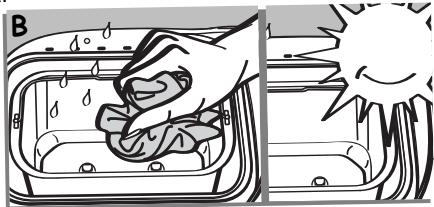
- Clean all of the parts and the appliance itself using a damp cloth.
USING YOUR APPLIANCE
- Fully unwind the power cord and plug it into an earthed socket.
- A slight odour may be given off when used for the first time.
CLEANING AND MAINTENANCE
- Unplug the appliance.
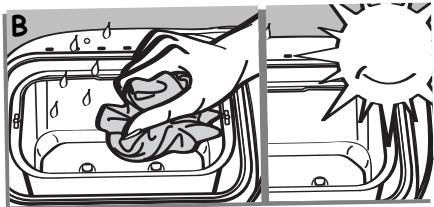
- Clean all the parts, the appliance itself and the inside of the pan with a damp cloth. Dry thoroughly - B.
- Wash the pan and kneading paddies in hot soapy water. If the kneading paddies remain stuck in the pan, let it soak for 5 to 10 min.
- If necessary, remove the cover to clean it in hot water.
- Do not wash any part in a dishwasher.
- Do not use household cleaning products, scouring pads or alcohol. Use a soft, damp cloth.
- Never immerse the body of the appliance or the lid.
QUICK-START
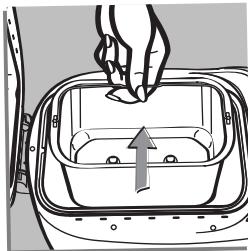
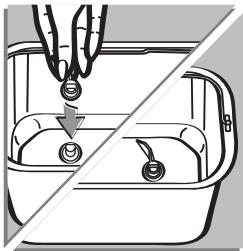
Lift out the bread pan by lifting the handle and pulling forwards and backwards to unclip the two sides, one by one.
Fit the kneading paddles.
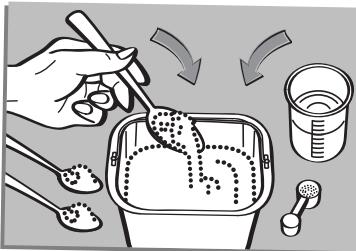

Put the ingredients in the pan in exactly the order recommended.
Make sure that all ingredients are weighed with precision.
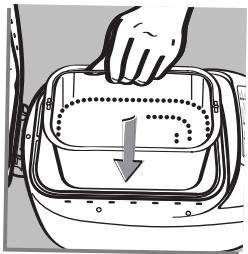
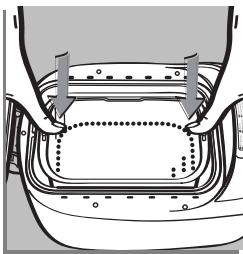
Place the bread pan in the breadmaker. Replace the bread trough and press on one side then the other to engage the mixer drives and clip it in on both sides.
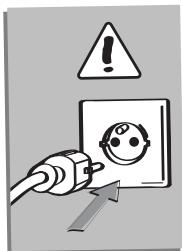
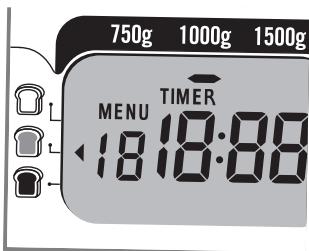
Close the lid. Plug in the bread maker. After you hear the beep, programme 1 settings are displayed by default, i.e. 1000g, medium browning.
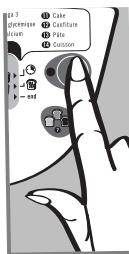
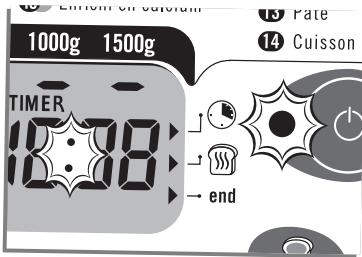
Press the ① button.
The indicator light will come on.
The timer colon flashes and the timer will count down. The operating indicator lights up.
The cycle will start.
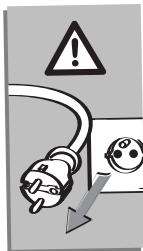
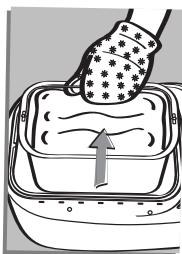
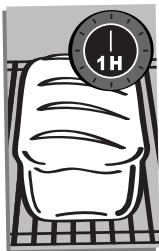
Unplug the breadmaker at the end of the cooking or warming cycle. Lift the bread pan out of the breadmaker by pulling on the handle. Always use oven gloves as the pan handle is hot, as is the inside of the lid. Turn out the hot bread and place it on a rack for at least 1 hour to cool.
To get to know your breadmaker, we suggest trying the BASIC BREAD recipe for your first loaf.
| BASIC WHITE BREAD (programme 1) | INGREDIENTS tsp > teaspoon - tbsp > tablespoon | |
| BROWNING = MEDIUM | - OIL = 2 tbsp | - POWDERED MILK = 2.5 tbsp |
| - WATER = 325 ml | - WHITE BREAD FLOUR = 600 g | |
| WEIGHT = 1000 g | - SALT = 2 tsp | - YEAST = 1,5 tsp |
| TIME = 3:20 | - SUGAR = 2 tbsp | |
A default setting is displayed for each programme. You will therefore have to select the desired settings manually.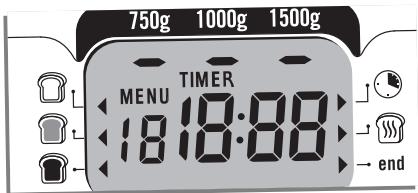
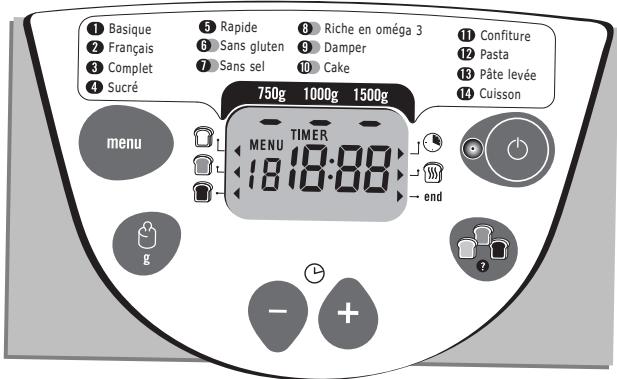
SELECTING A PROGRAMME
Choosing a programme triggers a series of steps which are carried out automatically one after another.
(MENU)
The MENU button enables you to choose a certain number of different programmes. The time corresponding to the programme is displayed. Every time you press the MENU button, the number on the display panel switches to the next programme from 1-14.
1 > basic white bread 2 > French bread 3 > whole wheat bread 4 > sweet bread
5 > fast bread 6 > gluten-free bread 7 > salt-free bread 8 > bread rich in omega
9 > damper 10 > cake 11 > jams and compotes 12 > pasta
13 > leavened dough (pizza for example) 14 > cooking only
- The Basic White Bread programme is used to make most bread recipes using white wheat flour.
- The French Bread programme corresponds to a traditional French crusty white bread recipe.
- Whole Wheat programme is used to make whole wheat bread using whole wheat flour.
- The Sweet Bread programme is for recipes containing more sugar and fat such as brioches and milk breads. If you are using special flour blends for brioche or rolls, do not exceed 1 kg of dough in total.
- The Fast Bread programme is specifically for the FAST bread recipe. The weight and browning settings are not available in this programme.
- Gluten-free bread is to be made exclusively from gluten-free ready-made mixes. It is suitable for persons with celiac disease, making them intolerant of the gluten present in many cereals (wheat, rye, barley, oats, Kamut, spelt wheat etc.). Refer to the specific recommendations on the packet. The trough must always be thoroughly cleaned to avoid any risk of contamination with other flours. In the case of a strictly gluten-free diet, take care that the yeast used is also gluten-free. The consistency of gluten-free
flours does not yield an ideal dough. The dough sticks to the sides and must be scraped down with a flexible plastic spatula during kneading. Gluten-free bread will be of a denser consistency and paler than normal bread.
- Bread is one of the greatest contributors to our daily salt intake. Reducing salt consumption can help reduce the risks of cardio-vascular problems.
- This bread is rich in omega 3 fatty acids, thanks to a complete and nutritionally balanced recipe. Omega 3 fatty acids contribute to the proper function of the cardiovascular system.
- The damper is based on a traditional Australian recipe, cooked on hot stones. It produces a compact, slightly brioche-like bread.
- Can be used to make pastries and cakes with baking powder.
- The Jams programme automatically cooks jams and compotes (stewed fruits) in the pan.
- Programme 12 only kneads. It is for unleavened pasta, like noodles for example.
- The Leavened Dough programme does not bake. It is a kneading and rising programme for all leavened doughs such as pizza dough, rolls, sweet buns.
- The cooking programme is limited to 10 to 70 min. only, adjustable in steps of 10 min with light, medium or dark browning.
It can be selected alone and used:
a) with the Leavened Dough programme, b) to reheat cooked and cooled breads or to make them crusty, c) to finish cooking in case of a prolonged electricity cut during a bread baking cycle.
The breadmaker should not be left unattended when using programme 14.
To interrupt the cycle before it is finished, the programme can be stopped manually by holding down the button ①.
SELECTING THE WEIGHT OF THE BREAD
The bread weight is set by default at 1000 g. This weight is shown for informational purposes. See the recipes for more details. Programmes 5, 9, 11, 12, 13, 14 do not have weight settings. Press the button to set the chosen product - 750 g, 1000 g or 1500 g. The indicator light against the selected setting comes on. Attention: certain recipes cannot be used to make a 750-g loaf. Refer to the recipe book.
SELECTING THE COLOUR OF THE CRUST (BROWNING)
By default, the colour of the crust is set at MEDIUM. Programmes 5, 9, 11 do not have a colour setting.
Three choices are possible: LIGHT/MEDIUM/DARK.
If you want to change the default setting, press the
button until the indicator light facing the desired setting comes on.
START/STOP
Press the ① button to switch the appliance on. The countdown begins.
To stop the programme or to cancel delayed programming, hold down on the ① button for 5 seconds.

CYCLES
On pages 22-23 is a table showing the steps in the various cycles according to the chosen programme.
KNEADING
For forming the dough's structure so that it can rise better.
> REST
Allows the dough to rest to improve kneading quality.
RISING
Time during which the yeast works to let the bread rise and to develop its aroma.
>BAKING
Transforms the dough into bread and gives it a golden, crusty crust.
WARMING
Keeps the bread warm after baking. It is recommended that the bread should be turned out promptly after baking, however.
KNEADING: the dough is in the 1st or 2nd kneading cycle or in a stirring period between rising cycles. During this cycle, and for programmes 1, 2, 3, 4, 6, 7, 8, 9, 10 you can add ingredients: dried fruit or nuts, olives, bacon pieces, etc.
A beep indicates when you can intervene. See the summary table for preparation times (page 22-23) and the "extra" column.
This column indicates the time that will be displayed on your appliance's screen when the beep sounds. For more precise information on how long before the beep sounds, subtract the "extra" column time from the total baking time.
For example: "extra" = 2:51 and "total time" = 3:13, the ingredients can be added after 22 min.
RISING: the dough is in the 1st, 2nd or 3rd rising cycle.
BAKING: the bread is in the final baking cycle. The word "end" lights to indicate the end of the cycle.
WARMING: for programmes 1, 2, 3, 4, 5, 6, 7, 8, 9, 10, you can leave your preparation in the appliance. A one-hour warming cycle automatically follows baking. The indicator lights.
The display remains at 0:00 for one hour of warming. The appliance beeps at regular intervals. At the end of the cycle, it stops automatically after 3 beeps. To stop the warming programme, unplug the appliance.
DELAYED START PROGRAMME
You can programme the appliance up to start 15 hours in advance to have your preparation ready at the time you want. This function cannot be used on programmes 5, 6, 9, 10, 11, 12, 13, 14.
This step comes after selecting the programme, browning level and weight. The programme time is displayed. Calculate the time difference between the moment when you start the programme and the time at which you want your preparation to be ready.
The machine automatically includes the duration of the programme cycles.
Using the ⊕ and ⊖ buttons, display the calculated time (up and down).
Short presses change the time by intervals of 10 min
- a short beep. Holding the button down gives continuous scrolling of 10-min intervals.
For example, it is 8 pm and you want your bread to be ready for 7 am the next morning. Programme 11:00 using the ⊕ and ⊖ buttons. Press the ① button. A beep is emitted. The facing indicator light switches on ① and the timer colon blinks. The countdown begins. The ON light switches on.
If you make a mistake or want to change the time setting, hold down the ① button until it makes a beep. The default time is displayed. Start the operation again.
With the delayed start programme do not use recipes which contain fresh milk, eggs, soured cream, yoghurt, cheese or fresh fruit as they could spoil or stale overnight.
PRACTICAL ADVICE
If there is a power cut: if, during the cycle, the programme is interrupted by a power cut or mishandling, the machine has a 7-min protection time during which the settings are saved. The cycle starts again where it stopped. Beyond that time, the settings are lost.
If you plan to run a second programme bake a second loaf, open the lid and wait 1 hour before beginning the second preparation.
To turn out your loaf of bread: it may happen that the kneading paddles remain stuck in the loaf when it is turned out. In this case, use the hook accessory
as follows:
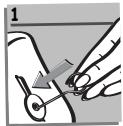
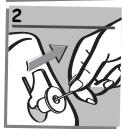
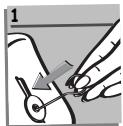
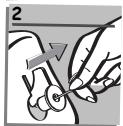
once the loaf is turned out, lay it on its side while still hot and hold it down with one hand, wearing an oven glove, with the other hand, insert the hook in the axis of the kneading paddle (drawing 1), pull gently to release the kneading paddle (drawing 2), repeat for the second kneading paddle turn the loaf upright and stand on a grid to cool.
INGREDIENTS
FATS AND OILS: fats make the bread softer and tastier. It also stores better and longer. Too much fat slows down rising. If you use butter, cut it into tiny pieces so that it is distributed evenly throughout the preparation, or soften it. You can substitute 15g butter for 1 tablespoon of oil. Do not add hot butter. Keep the fat from coming into contact with the yeast, as fat can prevent yeast from rehydrating. Do not use low fat spreads or butter substitutes.
Eggs: eggs make the dough richer, improve the colour of the bread and encourage the development of the soft, white part. If you use eggs, reduce the quantity of liquid you use proportionally. Break the egg and top up with the liquid until you reach the quantity of liquid indicated in the recipe. Recipes are designed for one 50g size egg; if your eggs are bigger, add a little flour; if they are smaller, use less flour.
Milk: recipes use either fresh or powdered milk. If using powdered milk, add the quantity of water stated in the recipe. It enhances the flavour and improves the keeping qualities of the bread. For recipes using fresh milk, you can substitute some of it with water but the total volume must equal the quantity stated in the recipe. Semi-skimmed or skimmed milk is best to avoid bread having a close texture. Milk also has an emulsifying effect which evens out its airiness, giving the soft, white part a better aspect.
WATER: water rehydrates and activates the yeast. It also hydrates the starch in the flour and helps the soft, white part to form. Water can be totally or partially replaced with milk or other liquids. Use liquids at room temperature.
FLOUR: the weight of the flour varies significantly
depending on the type of flour used. Depending on the quality of the flour, baking results may also vary. Keep flour in a hermetically sealed container, as flour reacts to fluctuations in atmospheric conditions, absorbing moisture or losing it. Use "strong flour", "bread flour" or "baker's flour" rather than standard flour. Adding oats, bran, wheat germ, rye or whole grains to the bread dough will give a smaller, heavier loaf of bread.
Using T55 flour is recommended unless otherwise specified in the recipe. Our recipes are optimised for the use of standard T55 flour. If you are using special flour blends for bread, brioche or rolls, do not exceed 1 kg of dough in total.
Sifting the flour also affects the results: the more the flour is whole (i.e. the more of the outer envelope of the wheat it contains), the less the dough will rise and the denser the bread. You can also find ready-to-use bread preparations on the market. Follow the manufacturer's instructions when using these preparations. Usually, the choice of the programme will depend on the preparation used. For example: Wholemeal bread - Programme 3.
SUGAR: use white sugar, brown sugar or honey. Do not use unrefined sugar or lumps. Sugar acts as food for the yeast, gives the bread its good taste and improves browning of the crust. Artificial sweeteners cannot be substituted for sugar as the yeast will not react with them.
SALT: salt gives taste to food and regulates the yeast's activity. It should not come into contact with the yeast. Thanks to salt, the dough is firm, compact and does not rise too quickly. It also improves the structure of the dough. Use ordinary table salt. Do not use coarse salt or salt substitutes.
YEAST: baker's yeast exists in several forms: fresh in
small cubes, dried and active to be rehydrated or dried and instant. Fresh yeast is sold in supermarkets (bakery or fresh produce departments), but you can also buy fresh yeast from your local baker's. In its fresh or instant dried form, yeast should be added directly to the baking pan of your breadmaker with the other ingredients. Remember to crumble the fresh yeast with your fingers to make it dissolve more easily. Only active dried yeast (in small granules) must be mixed with a little tepid water before use. Choose a temperature close to 37°C, less and it will not rise as well, more will make it lose its rising power. Keep to the stated amounts and remember to multiply the quantities if you use fresh yeast (see equivalents chart below).
Equivalents in quantity/weight between dried yeast and fresh yeast:
Dried yeast (in tsp.)
ADDITIONS (OLIVES, BACON PIECES, ETC.): you can add a personal touch to your recipes by adding whatever ingredients you want, taking care:
to add following the beep for additional ingredients, especially those that are fragile such as dried fruit, to add the most solid grains (such as linseed or sesame) at the start of the kneading process to facilitate use of the machine (delayed starting, for example), to thoroughly drain moist ingredients (olives), to lightly flour fatty ingredients for better blending, not to add too large a quantity of additional ingredients, especially cheese, fresh fruit and fresh vegetables, as they can affect the development of the dough, to finely chop nuts as they can cut through the loaf structure and reduce the cooked height.
PRACTICAL ADVICE
Bread preparation is very sensitive to temperature and humidity conditions. In case of high heat, use liquids that are cooler than usual. Likewise, if it is cold, it may be necessary to warm up the water or milk (never exceeding 35°C). Any liquid used should be tepid, about 20 to 25°C (except for Super Fast Bread which should be 35 to 40°C max.).
It can also sometimes be useful to check the state of the dough during the second kneading: it should form an even ball which comes away easily from the walls of the pan.
if not all of the flour has been blended into the dough, add a little more water,
If the dough is too wet and sticks to the sides, you may need to add a little flour.
Such corrections should be undertaken very gradually (no more than 1 tablespoon at a time) and wait to see if there is an improvement before continuing.
A common error is to think that adding more yeast will make the bread rise more. Too much yeast makes the structure of the bread more fragile and it will rise a lot and then fall while baking. You can determine the state of the dough just before baking by touching it lightly with your fingertips: the dough should be slightly resistant and the fingerprint should disappear little by little.
| PROG. | BROWING | WEIGHT | TOTAL TIME (h) | 1st KNEADING | REST | 2nd KNEADING | 1st RISING | 3rd KNEADING | 2nd RISING | 4th KNEADING | 3rd RISING | COOKING | EXTRA | KEEP HOT (h) |
| 1 | 1 | 750 | 3:15 | 0:05:00 | 0:05:00 | 0:15:00 | 0:40:00 | 0:00:10 | 0:25:00 | 0:00:15 | 0:50:00 | 0:55 | 2:55 | 1:00 |
| 1000 | 3:20 | 1:00 | 3:00 | 1:00 | ||||||||||
| 1500 | 3:25 | 1:05 | 3:05 | 1:00 | ||||||||||
| 2 | 750 | 3:15 | 0:05:00 | 0:05:00 | 0:15:00 | 0:40:00 | 0:00:10 | 0:25:00 | 0:00:15 | 0:50:00 | 0:55 | 2:55 | 1:00 | |
| 1000 | 3.20 | 1:00 | 3:00 | 1:00 | ||||||||||
| 1500 | 3:25 | 1:05 | 3:05 | 1:00 | ||||||||||
| 3 | 750 | 3:15 | 0:05:00 | 0:05:00 | 0:12:00 | 1:05:00 | 0:02:00 | 0:30:00 | x | 0:30:00 | 1:05 | 3:17 | 1:00 | |
| 1000 | 3:20 | 1:10 | 3:22 | 1:00 | ||||||||||
| 1500 | 3:25 | 1:15 | 3:27 | 1:00 | ||||||||||
| 2 | 1 | 750 | 3:34 | 0:05:00 | 0:05:00 | 0:12:00 | 1:05:00 | 0:02:00 | 0:30:00 | x | 0:30:00 | 1:05 | 3:17 | 1:00 |
| 1000 | 3:39 | 1:10 | 3:22 | 1:00 | ||||||||||
| 1500 | 3:44 | 1:15 | 3:27 | 1:00 | ||||||||||
| 2 | 750 | 3:34 | 0:05:00 | 0:05:00 | 0:15:00 | 1:10:00 | 0:02:00 | 0:20:00 | x | 0:40:00 | 1:05 | 3:17 | 1:00 | |
| 1000 | 3:39 | 1:10 | 3:22 | 1:00 | ||||||||||
| 1500 | 3:44 | 1:15 | 3:27 | 1:00 | ||||||||||
| 3 | 1 | 750 | 3:37 | 0:05:00 | 0:05:00 | 0:15:00 | 1:10:00 | 0:02:00 | 0:20:00 | x | 0:40:00 | 1:00 | 3:17 | 1:00 |
| 1000 | 3:42 | 1:05 | 3:22 | 1:00 | ||||||||||
| 1500 | 3:47 | 1:10 | 3:27 | 1:00 | ||||||||||
| 2 | 750 | 3:37 | 0:05:00 | 0:05:00 | 0:18:00 | 0:30:00 | x | 0:40:00 | 0:02:00 | 1:00:00 | 1:00 | 3:17 | 1:00 | |
| 1000 | 3:42 | 1:05 | 3:22 | 1:00 | ||||||||||
| 1500 | 3:47 | 1:10 | 3:27 | 1:00 | ||||||||||
| 4 | 1 | 750 | 3:45 | 0:10:00 | 0:05:00 | 0:18:00 | 0:30:00 | x | 0:40:00 | 0:02:00 | 1:00:00 | 1:00 | 3:17 | 1:00 |
| 1000 | 3:50 | 1:05 | 3:22 | 1:00 | ||||||||||
| 1500 | 3:55 | 1:10 | 3:27 | 1:00 | ||||||||||
| 2 | 750 | 3:45 | 0:10:00 | 0:05:00 | 0:18:00 | 0:30:00 | x | 0:40:00 | 0:02:00 | 1:00:00 | 1:00 | 3:17 | 1:00 | |
| 1000 | 3:50 | 1:05 | 3:22 | 1:00 | ||||||||||
| 1500 | 3:55 | 1:10 | 3:27 | 1:00 | ||||||||||
| 5 | - | 1000 | 1:20 | x | x | 0:13 | x | x | x | x | 0:22 | 0:45 | no | 1:00 |
| 6 | 1 | 750 | 2:15 | 0:05 | x | 0:10 | x | x | x | x | 1:00 | 1:00 | 2:05 | 1:00 |
| 1000 | 2:20 | 1:10 | 1:10 | 1:00 | ||||||||||
| 1500 | 2:25 | 1:10 | 2:15 | 1:00 | ||||||||||
| 2 | 750 | 2:15 | 0:15 | x | 0:10 | x | x | x | x | 1:00 | 1:00 | 2:05 | 1:00 | |
| 1000 | 2:20 | 1:10 | 1:10 | 1:00 | ||||||||||
| 1500 | 2:25 | 1:15 | 2:15 | 1:00 | ||||||||||
| 3 | 750 | 2:15 | 0:20 | x | 0:15 | x | x | x | x | 1:00 | 1:05 | 2:05 | 1:00 | |
| 1000 | 2:25 | 1:10 | 1:10 | 1:00 |
| PROG. BRON- WIGHT TOTAL | ||||||||||||||||||||||||||||||||||||||||||||||||||||||||||||||||||||||||||||||||||||||||||||||||||||
Note: for programmes 1 to 10 inclusive, total time does not include the keep hot time.

TROUBLESHOOTING GUIDE
Not getting the expected results? This table will help you.
| Pain trop levé | Pain affaisse après avoir trop levé | Pain pas assez levé | Croûte pas assez dorée | Côtés bruns mais peu pas assez cuit | Côtés et dessus enfarinés | |
| The ⑥ button was pressed during baking | ● | |||||
| Not enough flour | ● | |||||
| Too much flour | ● | ● | ||||
| Not enough yeast | ● | |||||
| Too much yeast | ● | ● | ||||
| Not enough water | ● | ● | ||||
| Too much water | ● | ● | ||||
| Not enough sugar | ● | |||||
| Poor quality flour | ● | ● | ||||
| Wrong proportions of ingredients (too much) | ● | |||||
| Water too hot | ● | |||||
| Water too cold | ● | |||||
| Wrong programme | ● | ● |

TECHNICAL TROUBLESHOOTING GUIDE
| PROBLEMS | SOLUTIONS |
| The kneading paddies remains stuck in the bread trough | • Let it soak before removing it. |
| The kneading paddies remains stuck in the loaf | • Lightly oil the kneading paddies before mixing the ingredients in the bread pan or use the accessory to turn out the loaf (page 20) |
| After pressing on ①, nothing happens | • The machine is too hot. Wait 1 hour between 2 cycles. • A delayed start has been programmed. |
| After pressing on ①, the motor is on but no kneading takes place | • The pan has not been correctly inserted. • Kneading paddies missing or not installed properly. |
| After a delayed start, the bread has not risen enough or nothing happens | • You forgot to press on ① after programming. • The yeast has come into contact with salt and/or water. • Kneading paddies missing. |
| Burnt smell | • Some of the ingredients have fallen outside the pan: let the machine cool down and clean the inside of the machine with a damp sponge and without any cleaning product. • The preparation has overflowed: the quantity of ingredients used is too great, notably liquid. Follow the proportions given in the recipe. |
DESCRIPTION
C-Baking pan D-Mixing hook
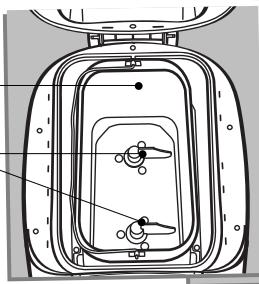
Jam Pasta 1 Dough level
14 Baking

b2- Start /
Stop button
b7-Operation
control light
Setting the
browning level
of the crust
SAFETY INSTRUCTIONS

THINK ABOUT THE ENVIRONMENT!
- If the power cord is damaged, it must be replaced by the manufacturer, its service agent, or similarly qualified persons in order to avoid a hazard.
If the power cord is damaged, it must be replaced by the manufacturer, its service agent, or similarly qualified persons in order to avoid a hazard.
In these cases, the appliance must be taken to the nearest service center to avoid any risk. - See the warranty card.
- If the power cord is damaged, it must be replaced by the manufacturer, its service agent, or similarly qualified persons in order to avoid a hazard. Any repair or maintenance must be carried out by a qualified specialist at the authorized service center.
- Do not immerse the appliance, plug, or power cord in water or any other liquid. Do not leave the power cord hanging within reach of children. The power cord must not come into contact with hot parts of the appliance, near the heat source or the oven.
- Do not place the appliance while it is operating. Do not cover the viewing window during operation. The window may become very hot.
- Do not unplug the appliance by pulling the power cord. Always check that the appliance is in good condition and suitable for replacement. Make sure that the parameters of the appliance correspond to those indicated on the rating plate.
- Do not place the appliance on top of another electrical appliance.
- Do not use the appliance as a heating device.
- Do not use the appliance for purposes other than baking bread and cakes. Do not place paper, cardboard, or plastic on the appliance and do not place anything on top of it. In case of malfunction, do not attempt to repair it with water. Unplug the appliance and wipe it with a damp cloth. For your safety, use only accessories and spare parts intended for your appliance. At the end of the program, use oven mitts to remove the bread pan and the hot parts of the appliance. The appliance and accessories become very hot during operation.
- Do not open the air vents. Be very careful, as you may get burned when making jam or during the program. When you start program 11 (jam, compote), pour the ingredients carefully, when you make jam.
- Do not exceed the specified quantities - do not exceed the quantity of 1500 g of dough, - do not exceed the quantity of 900 g of flour and 13 g of yeast.
- Approximate noise level of the device: 55 dB.
INTRODUCTION
Tips for successful bread making
1. Read the instructions for use carefully: The machine does not prepare bread according to the usual method! 2. All products must be at room temperature (unless otherwise specified) and must be measured accurately. Measure the liquids with the provided graduated cup. From one end of the cup measure the liquid ingredients, and from the other - the dry ones. With this measurement you will get a good result. 3. Store the products in a cool and dry place. 4. It is very important to measure the exact amount of flour. Therefore, the flour must be weighed on a kitchen scale. Use dry bread flour. Do not use chemical flour, unless the recipe specifies otherwise. The opened package must be used within 48 hours.
5. To prevent the dough from rising too much, we recommend that from the very beginning you put the liquid products in the pan and do not open the lid during the operation of the machine (unless otherwise specified). Follow exactly the sequence of adding the ingredients specified in the recipe quantities. First the liquids, then the dry products. The yeast must come into contact with the liquid ingredients with salt.
Follow the basic recipe:
Liquid ingredients (oil, eggs, water, milk) Salt Sugar First half of the flour and flour Other dry products Second half of the flour
BEFORE FIRST USE
- Remove the packaging, clean the accessories from the inside and outside of the device - A. - Clean all parts of the device with a damp cloth.
USING THE DEVICE
- Unwind the power cord and plug it into an earthed contact.
The device may emit smoke when used for the first time.
CLEANING AND MAINTENANCE
- Unplug the appliance from the electrical outlet. Clean the bread pan and the kneading blade with a damp cloth. Dry them well. If the kneading blade is stuck in the shaft, press it for about 5-10 minutes. If necessary, pour some water into the shaft to remove it.
- Never immerse the appliance in water or any other liquid.
Do not use household cleaning agents, abrasives, or sprays. Use a soft, damp cloth. Never immerse the machine or the pan in water.
START
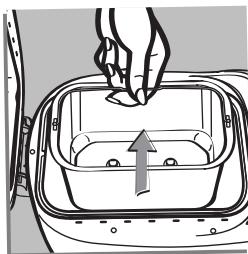
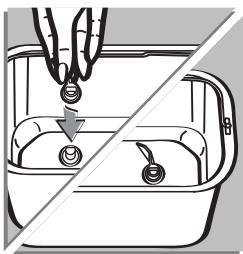
Remove the bread pan by pulling it upwards, tilting it slightly to release it from the two side brackets.
Follow the recipe
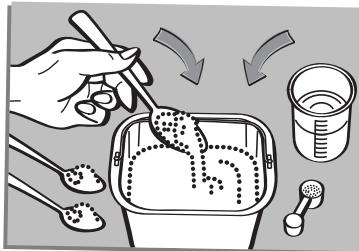
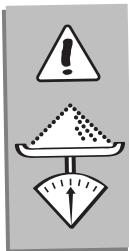
Place the ingredients in the bread pan in the specified order. Make sure all ingredients are measured accurately.
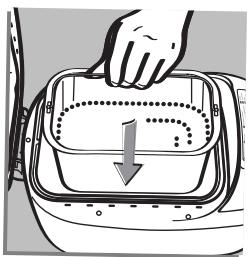
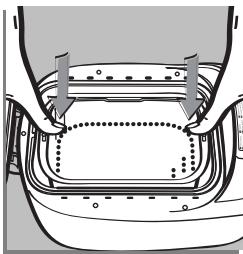
Place the bread pan into the machine. Press it down first on one side, then on the other towards the locking base, so that it is secured well on both sides.
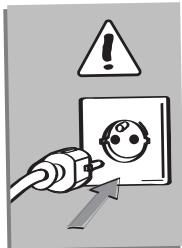
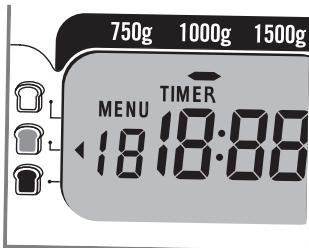
Plug the machine into the power outlet. You will hear a beep, and the display will show program 1 - 1000 g for a medium crust.
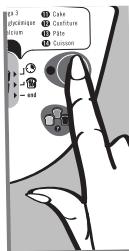
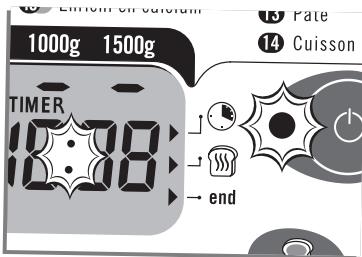
Press the button ①.
The indicator light will illuminate.
The two-dot display will flash.
The working cycle will start.
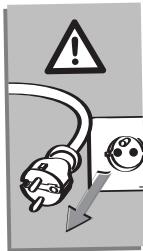
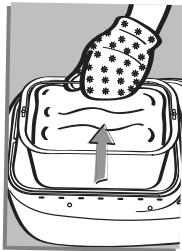
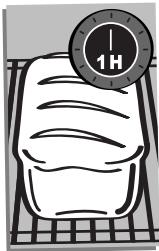
After the program ends, unplug the machine from the outlet. Remove the bread pan by pulling it upwards. Use oven mitts, as the pan is hot, as well as the inside of the machine. Remove the bread while it is still warm, and let it cool on a wire rack for about 1 hour.
To get familiar with the bread machine, we recommend that you prepare the BASIC BREAD RECIPE as a start.
| ОCHOВHA PELÇENTTA 3A XЛЯБ (пPORрама 1) | ПОНДУKTITЕ ч.l. > чана льжунka - с.l. > сусана льжунca |
| ИЗПИЧАЕ HA KОРИЧКATA = CPEДНО | - OЛЮ = 2 с.l. - МЛЯКО HA ПРAX = 2,5 с.l. |
| ТEGЛО = 1000 r | - BODА = 325 м.l - БРALSUHO = 600 r |
| - COJ = 2 ч.l. - МАя = 1,5 ч.l. | |
| ВРЕМЕ = 3 : 20 | - 3AXAP = 2 с.l. |
The program is with factory default settings.
You must manually select the desired options.
PROGRAM SELECTION
The program selection is made sequentially - the options appear automatically, one after another.
(MENU)
The MENU button allows you to select different programs. The time corresponding to the program appears. With each press of the MENU button, the display shows the next program (from 1 to 14):
13 > Tecto C
BTacBaHe
14 >camo neuehe
- Program for basic bread recipe. Use it to prepare the bread recipes with white flour. 2. With the French bread program, a crispy French loaf is prepared.
- Program for whole wheat bread is used for recipes that require whole wheat flour.
- Program for sweet bread is suitable for recipes that require more sugar. If you use ready-made dough for croissants or bread with milk, the dough should not exceed 1000g.
- The quick bread program is used with the quick bread recipe. With this program, you cannot set the crust color and the weight of the loaf.
- Gluten-free bread is prepared only from ready-made dough without gluten. It is suitable for people with gluten intolerance (celiac disease), as well as for those who follow a gluten-free diet. See the specific instructions on the packaging. The paddles must be cleaned periodically to avoid contamination from other flours. If you follow a strict gluten-free diet, make sure that the flour used is gluten-free. The consistency of gluten-free flours does not allow optimal mixing.
Therefore, when kneading, you need to detach the dough from the walls with a silicone spatula. Gluten-free bread is more crumbly and lighter than regular bread.
- Bread is one of the foods with which we consume the largest amount of salt daily. When reducing salt consumption, the risk of cardiovascular disease is reduced.
- This bread is rich in fiber and omega-3, thanks to the balanced and complete recipe. Fiber and omega-3 contribute to the good condition of the cardiovascular system.
- Traditional Austrian bread is baked on hot stones. With this recipe, the bread is fluffy and lightly browned. 10. ALLOWS PREPARATION OF DOUGH PRODUCTS AND SWEET CHEMICALS. 11. Program for jam automatically prepares jam in a movable container.
- Program 12: The dough is only kneaded. It is intended for dough without rising. Example: pasta.
- The program for dough with rising does not include baking cycles. It is intended for kneading and rising of various types of dough. Example: pizza dough.
- The bread baking program allows you to choose between 10 and 70 minutes of baking time, with a medium crust color. You can select it yourself or use the default:
a) In combination with the test program with delay, b) to fill in or to skip the entire baking process, c) to increase the baking time by extending the baking time and the baking time for the bread.
When you set program 14, the bread machine must not be left unattended during operation.
To stop the cycle before it is finished, press the stop button ① briefly.
SELECTION OF BREAD WEIGHTS
The bread machine is factory-set to 1000g. Use this only for information. For the actual weights, see the programs. Programs 5, 9, 11, 12, 13, 14 have an option for the weight of the loaf. Press button (8) to select the weight from 750g, 1000g, or 1500g. The selected option is indicated by a light. Note: Some recipes do not allow baking bread with less than 750g. See the recipe book.
SELECTION OF CRUST (BROWNING)
The factory-set crust is medium brown. Programs 5, 9, 11 have an option for crust selection. There are three options: LIGHT/MEDIUM/DARK crust. If you want to change the factory setting, press the button until the indicator light shows the desired option.
SWITCHING ON/OFF
Press button ① to switch on the machine. The display shows the default setting. To stop the program or to cancel the set settings, press and hold button ① for 5 seconds.

PROGRAMS
On the table on pages 110-111 you can see the different programs and their corresponding settings.
Month
Help
PnIIO6Ne apOMaT.
>Пechенe
Tectoto ce
n3nua,OTrope Ce
OΦopM KOpNka,
KoTTO CbUO TaKa
MOXe Da CtaHe N
xpynkaba.
>ПодьрхаHe Ha TOnJIiHaTa
3ana3Ba xla6a tobn cnei
n3nuehe. Bbnpekn TOB
PpeOpbUHTeJIHO da
n3BaInte XJI6a BEdHa
CJIeI N3IIuHaHETO My.
Meche: TECTOTO E B NpBnna NIN BTOPNIA ZIKbl Ha MeceHe NII E B Ipouec H a pa36bPkBaHe Mekdy DBA ZIKbIa H bTAcbAne. IIO BpeMe HA TO3N ZIKbl I npn InporpaMn 1,2,3,4,6,7,8,9,10 nMaTe Bb3MOxHOCT Da IO6abAte IPOyKTn: cySeHN IIOOBe, MaCInHn, NapYeHca 6ekOH n T.H. 3ByKOBnT CnHnB N yKa3Ba Kora ToCHo da rN Do6aBnTe. BNXTe TaBnCuata (Ha cTp. 110-111), KbJeTO ca DaJeHN BpeMeHATA 3a npriOTBHe, IN KOJOnHATA OCTaBaAso BpeMe". B Ta3N KOJoNA e Yka3aHO BpeMeTo, KoEtO ige CE n3NiUHe Ha dncPiEe HA MaShnHATA npn IpO3BvUbaHe Ha 3ByKOBnCnHn. 3a Da pa36epete Kora ToCHo ige Cyete CnHnla, DoCTaMbHo e OT ObIoTO BpeMe 3a NeueHe da N3BaDnTE BpeMeTo, DaJeHO B KOJOnHATA OCTaBaAso BpeMe". IpnMep: OCTaBaAo BpeMe" = 2:51 n O6to BpeMe" = 3:13, KoEtO 3Nau, Ye cbCTaBKnTe MORAT Da ce IO6abTcIed 22 MNHyTN.
Pressing: TEST THE OVEN WITH THE FIRST, SECOND OR THIRD CYCLE.
Bread: Put the bread in the last cycle. When the cycle is finished, the "END" (end) indicator light will turn on.
Baking time: For programs 1,2,3,4,5,6,7,8,9,10 you can leave the bread in the machine. After the baking process, the machine automatically starts a keep-warm cycle for a certain time. The indicator light will stay on. The time will remain at 0:00 for the keep-warm period. The machine will beep periodically. At the end of this period, the machine will automatically stop with a triple beep signal.
DELAYED START
You can program the machine to prepare bread at a specific time, up to 15 hours in advance. The delayed start program cannot be used for programs 5,6,9,10,11,12,13,14.
This setting is made after selecting the program, the degree of browning of the crust and the weight. The program duration is displayed. Calculate the time between the start of the program and the time you want the bread to be ready. The machine will automatically turn on the operation duration. With the help of the buttons and - set the time (十 - up, - - down). Each short press of the timer button adjusts by 10 minutes + a short signal.
PRACTICAL TIPS
Power interruption: If the machine is in operation and the program is interrupted due to a power failure, the machine has protection and the settings are saved for 7 minutes. The cycle continues from where it stopped. After this period, the settings are lost.
If you want to run two programs one after the other, wait 1 hour before starting the second one.
To remove the finished bread: It is possible that the kneading blades remain in the bread. In this case, you can use the "hook" accessory as follows:
With a long press, the setting continues for 10 minutes. Example: it is now 20:00 and you want the bread to be ready at 7:00 the next morning. Set 11 hours with the help of the buttons and - and press the button ①. A beep signal sounds. The indicator light turns on - the first two digits of the timer start to blink. Blinking means countdown. The indicator light stays on. If you have made a mistake and want to change the time, press the button ① until you hear a beep signal. The set time is displayed. Repeat the procedure.
Some ingredients are perishable. Do not use the delayed start program with fresh ingredients, including the following: fresh milk, eggs, sour milk, cheese, fresh yeast.
After you take out the bread, place it on a flat surface and cover it with a cloth, using a kitchen towel. Insert the hook into the hole of the kneading blade (Fig.1), carefully pull out the blade (Fig.2), remove the blade from the hook, then place the bread back on the cooling rack.
PRODUCTS
Flour: from the flour type depends the aroma and taste of the bread. Do not store flour for too long. When using flour, sprinkle it on a small part to distribute it evenly in the mixture, until the dough is ready. Do not add too much flour. The flour must come into contact with the dough, because it can damage the dough after the water.
Yeast: the yeast loosens the dough, makes it more fluffy and improves the consistency and the fluffy part of the bread. When adding yeast, accordingly reduce the amount of liquid. Pour the yeast into the liquid and stir with the liquid until the amount indicated in the recipe. The recipes are designed for yeast up to 50 g and if the yeast is larger, add a little flour; if it is smaller, you must add a little flour.
Milk: you can produce fresh milk or powdered milk. If you produce powdered milk, add the indicated amount of time. If you produce fresh milk, you can add it to the water: the total amount must be equal to the indicated amount of time. The milk helps the smooth mixing, so that the "loaf" is obtained evenly and accordingly a wonderful bread crust.
Water: the water activates the flour. The water loosens the dough and allows the formation of the fluffy part of the bread. The water can be partially or fully replaced with milk or with other liquids. They must be with the same temperature.
Flour: the quality of the flour depends to a large extent on its type. Depending on the quality of the flour, you can get different results. Store the flour in
a tightly closed container, because it reacts to changes in conditions and absorbs or releases moisture. Use standard flour for bread. If you add oatmeal, rye, whole grain, or other wholemeal flour to the bread dough, it will be heavier and less fluffy.
We recommend using standard white flour, unless otherwise indicated. The recipes suggest using ordinary flour T55. If you use a mixture of special flour for bread, cornmeal or wholemeal bread, the total amount of dough must not exceed 1000g.
The sifting of the flour is reflected in the results: the more wholemeal the flour is (i.e. it contains part of the bran and the germ of the grain), the weaker the dough will be and the bread will be obtained less fluffy. In the commercial network you can also find ready-made dough. See the manufacturer's instructions for proper use. The choice of program depends on the products used. Example: wholemeal bread - Program 3.
Sugar: use white or brown sugar or honey. Do not use powdered sugar or sugar cubes. The sugar preserves the dough, gives a pleasant taste and the bread and the crust are influenced by the crust.
Salt: gives taste to the food and regulates the action of the flour. It must not come into contact with the flour. Thanks to the salt, the dough is firm, compact and does not rise too quickly. Salt also improves the consistency of the dough.
The yeast is a living organism that is used in bread making. It can be used fresh or dried. It can be added directly to the dough. The yeast is sold in supermarkets (in the baking or fresh products section), but you can also buy it from the nearby bakery. Regardless of the format, it should be added directly to the dough and together with the other products. Don't forget to crumble the yeast with your fingers so that it can dissolve better. Only the active dry yeast (in small granules) needs to be mixed with a little warm water before use. Choose a temperature close to 37°C, but not higher, otherwise it won't rise well, and at a higher temperature the yeast will lose its rising energy. Add the required amount and remember to adjust the amount according to the flour (see equivalent below).
EQUIVALENTS IN QUANTITY/WEIGHT/VOLUME BETWEEN DRY, FRESH AND LIQUID YEAST:
Additions (oil, margarine, etc.): You can diversify the recipes with additional ingredients, but be careful of the following:
| Cyxa maB y.I. | ||||||||
| 1 | 1,5 | 2 | 2,5 | 3 | 3,5 | 4 | 4,5 | 5 |
| ПраЧа maB pyamоВe | ||||||||
| 9 | 13 | 18 | 22 | 25 | 31 | 36 | 40 | 45 |
Listen to the sound signal when adding ingredients. The most tender ones, you can add the harder seeds (like flaxseed and dry yeast) at the beginning of the kneading for better absorption (e.g., for a sourdough starter). Then add the moist products (oils), and finally add the liquid ingredients for better mixing. Don't add too much quantity, otherwise the dough won't turn out as it should.
PRACTICAL TIPS
The rising of the bread depends a lot on the temperature and humidity. For better results, it is recommended to use the preheated oven. To speed up the process, if it's cold, you can place the dough in a warm place (but not above 35°C).
It is also good to check the dough during kneading: it should form a smooth ball that separates well from the sides of the bowl.
If the dough remains unkneaded, you should add a little water, or in some cases, add a little flour. You should add very small quantities (not
more than 1 tablespoon at a time) and check the improvement before adding more.
A common mistake is to add too much flour, and the bread will be dry. In fact, if you add too much flour, the structure of the dough becomes unstable, it will be too dry, but it will collapse during baking. You can check the dough just before baking by pressing it lightly with your fingers: the dough should feel soft and resilient, and the imprint from your fingers should gradually disappear.
Note: In the bread machine, the time for the surface and the baking program is not included in the total time from 1 to 10 inclusive.
| 1000 | 205 | 100 | 1:05 | 1:10 | 1:15 | 1:20 | 1:25 | 1:30 | 1:35 | 1:40 | 1:45 | 1:50 | 1:55 | 1:60 | 1:65 | 1:70 | 1:75 | 1:80 | 1:85 | 1:90 | 1:95 | 1:99 | 1:10 | |
| 1000 | 205 | 100 | 2:05 | 1:05 | 1:10 | 1:15 | 1:20 | 1:25 | 1:30 | 1:35 | 1:40 | 1:45 | 1:50 | 1:55 | 1:60 | 1:65 | 1:70 | 1:75 | 1:80 | 1:85 | 1:90 | 1:10 | 1:15 | 1:20 |
| 1000 | 205 | 100 | 2:05 | 1:05 | 1:10 | 1:15 | 1:20 | 1:25 | 1:30 | 1:35 | 1:40 | 1:45 | 1:50 | 1:55 | 1:60 | 1:65 | 1:70 | 1:75 | 1:75 | 1:80 | 1:85 | 1:90 | 1:10 | 1:15 |
| 1000 | 205 | 100 | 2:05 | 1:05 | 1:10 | 1:15 | 1:20 | 1:25 | 1:30 | 1:35 | 1:40 | 1:45 | 1:50 | 1:55 | 1:60 | 1:65 | 1:70 | 1:75 | 1:78 | 1:80 | 1:85 | 1:90 | 1:10 | 1:15 |
| 1000 | 205 | 100 | 2:05 | 1:05 | 1:10 | 1:15 | 1:20 | 1:25 | 1:30 | 1:35 | 1:40 | 1:45 | 1:50 | 1:56 | 1:60 | 1:65 | 1:70 | 1:75 | 1:78 | 1:80 | 1:85 | 1:90 | 1:10 | 1:15 |
| 1000 | 205 | 100 | 2:05 | 1:05 | 1:10 | 1:15 | 1:20 | 1:25 | 1:35 | 1:40 | 1:45 | 1:50 | 1:56 | 1:60 | 1:65 | 1:70 | 1:75 | 1:78 | 1:80 | 1:85 | 1:90 | 1:10 | 1:15 | |
| 1000 | 205 | 100 | 2:05 | 1:04 | 1:05 | 1:10 | 1:15 | 1:20 | 1:25 | 1:30 | 1:35 | 1:40 | 1:45 | 1:50 | 1:56 | 1:60 | 1:65 | 1:70 | 1:75 | 1:78 | 1:80 | 1:85 | 1:90 | 1:15 |
| 1000 | 205 | 100 | 2:05 | 1:04 | 1:05 | 1:10 | 1:15 | 1:20 | 1:25 | 1:30 | 1:35 | 1:40 | 1:45 | 1:50 | 1:56 | 1:60 | 1:65 | 1:80 | 1:85 | 1:90 | 1:10 | 1:15 | 1:20 | |
| 1000 | 205 | 100 | 2:05 | 1:04 | 1:05 | 1:10 | 1:15 | 1:20 | 1:25 | 1:30 | 1:35 | 1:40 | 1:45 | 1:50 | 1:56 | 1:60 | 1:65 | 1:80 | 1:88 | 1:90 | 1:10 | 1:15 | 1:20 | |
| 1000 | 205 | 100 | 2:05 | 1:04 | 1:05 | 1:10 | 1:15 | 1:20 | 1:25 | 1:30 | 1:35 | 1:40 | 1:45 | 1:50 | 1:55 | 1:60 | 1:65 | 1:80 | 1:88 | 1:90 | 1:10 | 1:15 | 1:20 | |
| 1000 | 205 | 100 | 2:05 | 1:04 | 1:05 | 1:10 | 1:15 | 1:20 | 1:25 | 1:30 | 1:30 | 1:35 | 1:40 | 1:45 | 1:50 | 1:55 | 1:60 | 1:65 | 1:80 | 1:88 | 1:90 | 1:10 | 1:15 | 1:20 |
| 1000 | 205 | 100 | 2:05 | 1:04 | 1:06 | 1:10 | 1:15 | 1:20 | 1:25 | 1:30 | 1:35 | 1:40 | 1:45 | 1:50 | 1:55 | 1:60 | 1:65 | 1:80 | 1:88 | 1:90 | 1:10 | 1:15 | 1:20 | |
| 1000 | 215 | 2.5 | 0.05 | x | x | x | x | x | x | x | x | x | x | x | x | x | x | x | x | x | x | x | x | |
| 3 | 750 | 2.15 | 0.05 | x | x | x | x | x | x | x | x | x | x | x | x | x | x | x | x | x | x | x | ||
| 1000 | 205 | 2.25 | 2.5 | 1.00 | 1.20 | x | x | x | x | x | x | x | x | x | x | x | x | x | x | x | x | x |
| 14 | 2 | - | 0.10 10 MNYM | 1 | - | - | 0.15 | 0.030 | 0.120 | 0.050 | 0.150 | x | x | x | x | x | x | x | x | x | x | x | x | x | x | x | x | x | x | x | x | x | x | x | x | x | x | x | x | x | x | x | x | x | x | x | x | x | x | x | x | x | x | x | x | x | x | x | x | x | x | 10 MNYM | |||||||||||||||||||||||||||||||||||||
TROUBLESHOOTING

Not getting the expected results? This table will help you find your way.
(rejeta australiə)
13> yeast dough
3 > whole wheat bread
7 > salt-free bread
10> pastries
14> bake only
4 > sweet bread
8 > bread rich in omega 3
11 > jam
- SAFETY RECOMMENDATIONS
- LET'S HELP TO PROTECT THE ENVIRONMENT
- INTRODUCTION
- TIPS FOR MAKING GOOD BREAD
- GENERAL ORDER TO BE FOLLOWED
- BEFORE YOU USE YOUR APPLIANCE FOR THE FIRST TIME
- USING YOUR APPLIANCE
- CLEANING AND MAINTENANCE
- QUICK-START
- SELECTING A PROGRAMME
- (MENU)
- THE BREADMAKER SHOULD NOT BE LEFT UNATTENDED WHEN USING PROGRAMME
- SELECTING THE WEIGHT OF THE BREAD
- SELECTING THE COLOUR OF THE CRUST (BROWNING)
- START/STOP
- CYCLES
- KNEADING
- REST
- RISING
- BAKING
- WARMING
- DELAYED START PROGRAMME
- PRACTICAL ADVICE
- INGREDIENTS
- TROUBLESHOOTING GUIDE
- TECHNICAL TROUBLESHOOTING GUIDE
- DESCRIPTION
- SAFETY INSTRUCTIONS
- THINK ABOUT THE ENVIRONMENT
- TIPS FOR SUCCESSFUL BREAD MAKING
- FOLLOW THE BASIC RECIPE
- BEFORE FIRST USE
- USING THE DEVICE
- START
- PROGRAM SELECTION
- WHEN YOU SET PROGRAM 14, THE BREAD MACHINE MUST NOT BE LEFT UNATTENDED DURING OPERATION
- SELECTION OF BREAD WEIGHTS
- SELECTION OF CRUST (BROWNING)
- SWITCHING ON/OFF
- PROGRAMS
- MONTH
- ПECHЕНE
- ПОДЬРХАHE HA TONJIIHATA
- DELAYED START
- PRACTICAL TIPS
- PRODUCTS
- THE RISING OF THE BREAD DEPENDS A LOT ON THE TEMPERATURE AND HUMIDITY. FOR BETTER RESULTS, IT IS RECOMMENDED TO USE THE PREHEATED OVEN. TO SPEED UP THE PROCESS, IF IT'S COLD, YOU CAN PLACE THE DOUGH IN A WARM PLACE (BUT NOT ABOVE 35°C)
- NOT GETTING THE EXPECTED RESULTS? THIS TABLE WILL HELP YOU FIND YOUR WAY
Brand : MOULINEX
Model : OW 5003
Category : Bread maker