
DCI1583X - Built-in oven DE DIETRICH - Free user manual and instructions
Find the device manual for free DCI1583X DE DIETRICH in PDF.

| Product type | Built-in oven |
| Brand | De Dietrich |
| Model | DCI1583X |
| Dimensions (W x H x D) | 59.5 x 59.5 x 56.8 cm |
| Weight | Approximately 35 kg |
| Power supply | 230 V / 50 Hz |
| Maximum power | Approximately 3000 W |
| Energy class | A+ |
| Number of cooking functions | 8 (Fan forced, Natural convection, Turbo grill, Strong grill, ECO heat, Bread, Defrost, etc.) |
| Cleaning type | Pyrolysis (3 durations: 1h30, 1h45, 2h) |
| Programmer | Electronic with digital display |
| Timer | Yes, independent |
| Interior lighting | Yes |
| Door | Secure closing, locking during pyrolysis |
| Included accessories | Grid, drip tray, rotisserie |
| Cooking levels | 3 |
| Temperature range | 35 °C to 275 °C depending on function |
| Child safety | Automatic locking during pyrolysis |
| Repairability | Repairability index not provided |
Frequently Asked Questions - DCI1583X DE DIETRICH
User questions about DCI1583X DE DIETRICH
0 question about this device. Answer the ones you know or ask your own.
Ask a new question about this device
Download the instructions for your Built-in oven in PDF format for free! Find your manual DCI1583X - DE DIETRICH and take your electronic device back in hand. On this page are published all the documents necessary for the use of your device. DCI1583X by DE DIETRICH.
USER MANUAL DCI1583X DE DIETRICH
Dear valued customer,
To discover a De Dietrich product is to experience the range of unique emotions which only high-value items can produce.
The attraction is immediate, from the moment you set eyes on the product. The sheer quality of the design shines through thanks to the timeless style and outstanding finishes which make each appliance an elegant and refined little masterpiece in its own right, each in perfect harmony with the others.
Next, comes the irresistible urge to touch it. De Dietrich's design makes extensive use of robust and prestigious materials. The accent is placed firmly upon authenticity.
By combining state-of-the-art technology with top quality materials, De Dietrich produces beautifully crafted products to help you get the most from the culinary arts, a passion shared by all lovers of cooking and fine food.
We hope that you enjoy using this new appliance and we would love to receive your suggestions and to answer any questions you may have. Please feel free to contact our customer service department via our website.
To benefit from the many advantages offered by the brand, we recommend that you register your product at: www.de-dietrich.com.
Thank you for choosing a De Dietrich product.
De Dietrich
You can find a full range of information about the brand at www.de-dietrich.com
Visit the De Dietrich Gallery, 6 rue de la Pétinière (Paris eighth district)
Open from Tuesday to Saturday from 10 am to 7 pm
Customer service department: 0892 02 88 04
1/ DESCRIPTION OF YOUR APPLIANCE
Presentation of the oven 4
• Introduction to the programmer 5
2/ USING YOUR APPLIANCE
Using the programmer
o How to set the time 6
° Immediate cooking 7
- Programmed cooking
° Immediate cooking 8
^ Delayed start cooking 9
Using the timer function 10
Adjusting the brightness of the display 11
- The standby mode function 12
3/OVEN COOKING MODES 13
4 / CARING FOR AND CLEANING YOUR OVEN 15
Pyrolysis 15
- Delayed pyrolysis 16
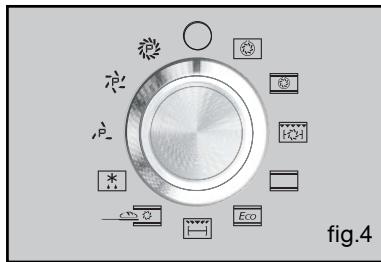
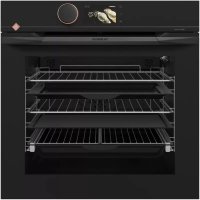
INTRODUCTION TO YOUR OVEN
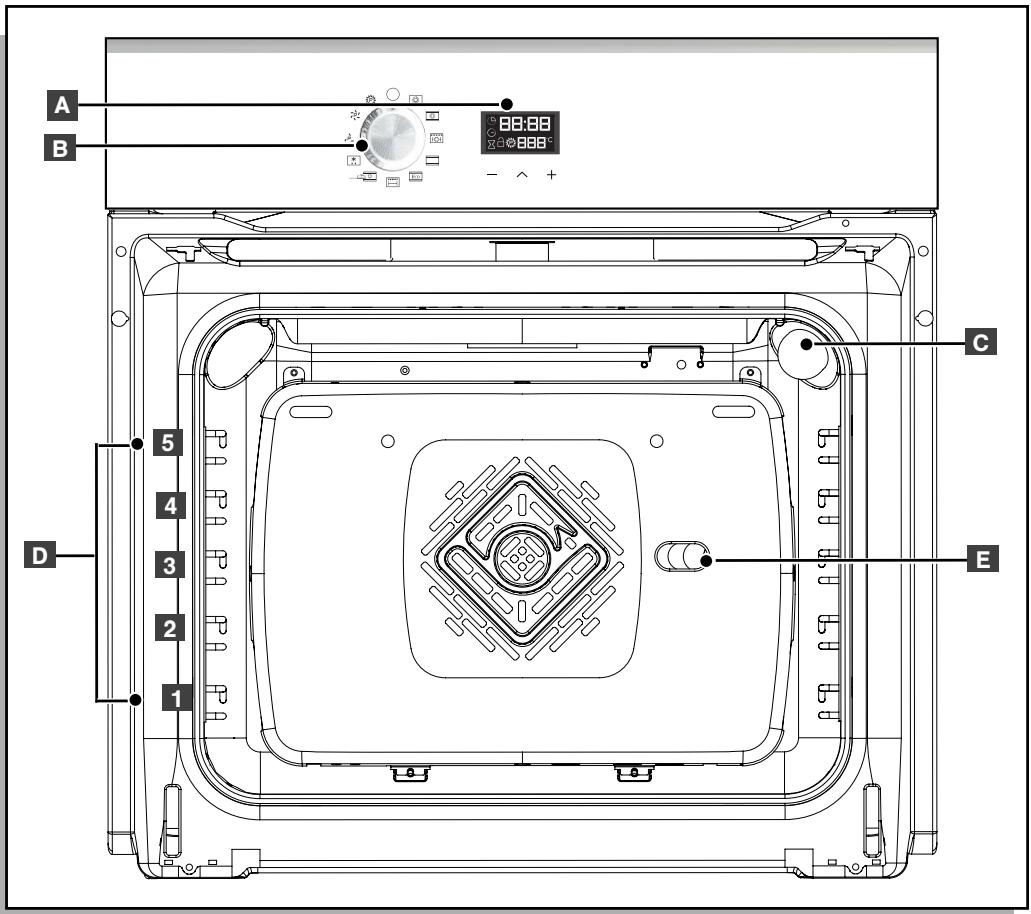

Programmer

function Selector

Lamp

Wire shelf supports

Hole for rotisserie

Note
This installation and use guide applies to several models. There may be minor differences between the details and fittings on your appliance and the description provided.
INTRODUCTION TO THE PROGRAMMER
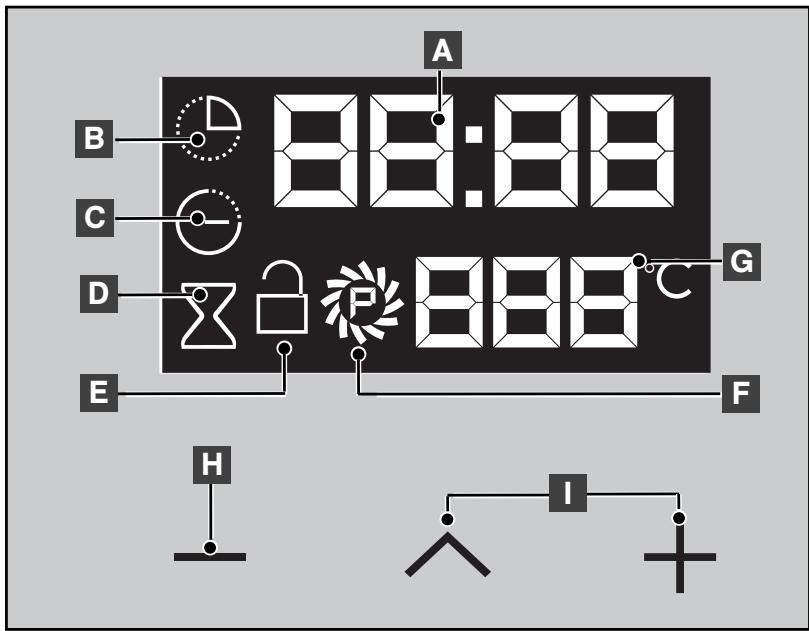
A Time and cooking time display
B Cooking time indicator
Cooking end time indicator
D Timer indicator
E Lock indicator (depending on model)
F Cleaning indicator (depending on model)
G Temperature display
H Selection button (cooking time and time)
Time setting buttons

Note
This installation and use guide applies to several models. There may be minor differences between the details and fittings on your appliance and the description provided.
- USING THE PROGRAMMER
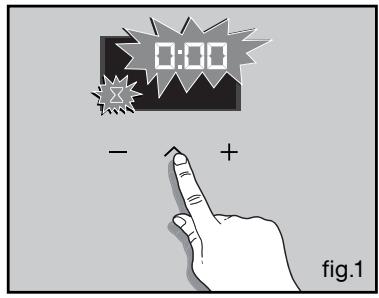
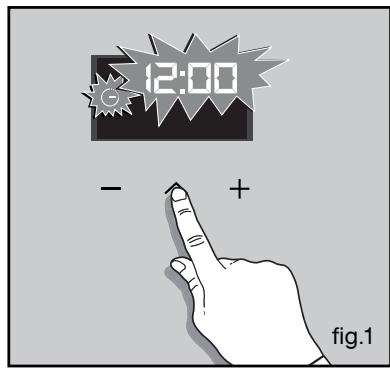
How to set the time
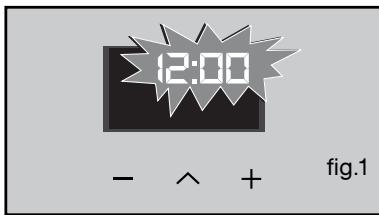
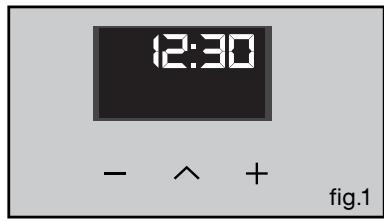
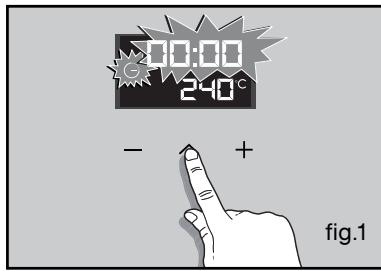
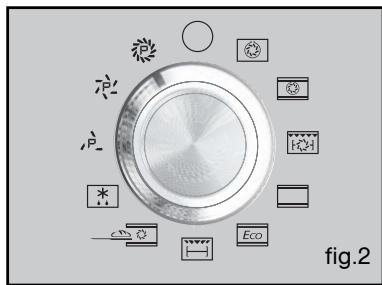
- When switching on
The display flashes, showing 12:00 (fig 1).
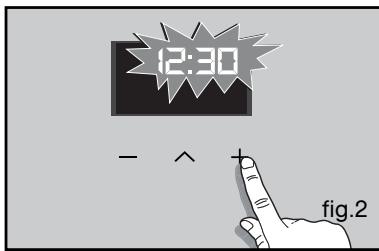
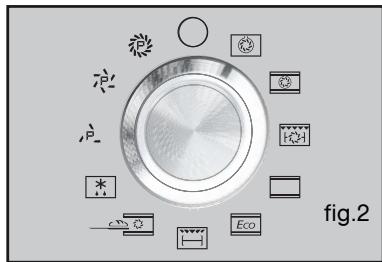
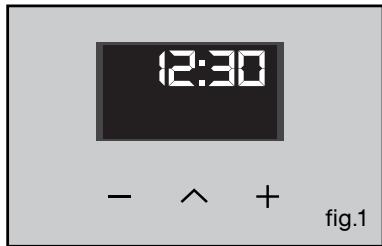
Set the time by pressing the + or - touch controls (holding your finger on the button allows you to scroll through the numbers more quickly) (fig.2).
Example: 12:30 pm
Press " " to confirm. The display stops flashing. plus.
- To reset the time on the clock
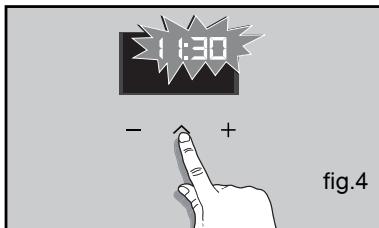
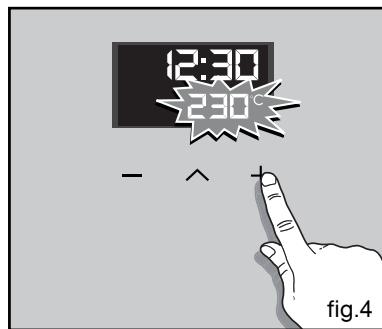
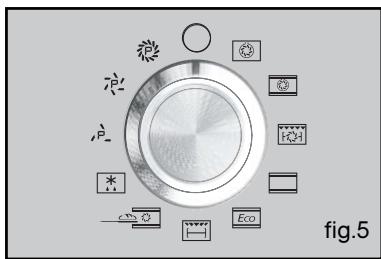
The function selector switch must be in the 0 position (fig.4).
Press the button " "for a few seconds until the display flashes (fig.4) and then release it. Beeps sound to indicate that the setting may now be changed.
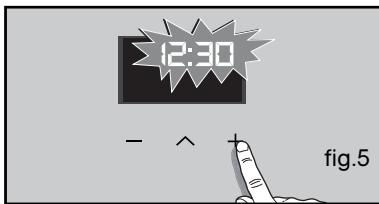
Adjust the clock setting with the + and - buttons (fig.5).
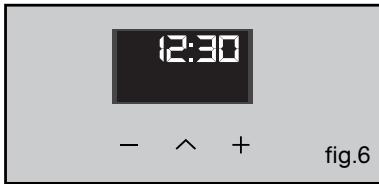
Press the " " button to confirm (fig.6).

Note
If “ ” is not pressed to confirm, the setting is saved automatically after a few seconds.
- Immediate cooking
- The programmer should be displaying only the time.
It should not be flashing (fig. 1).
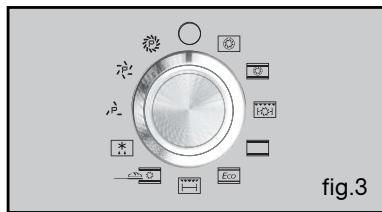
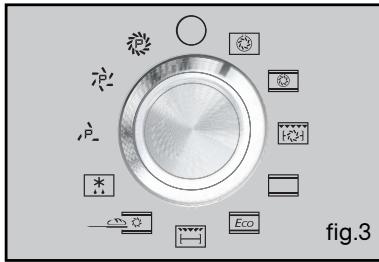
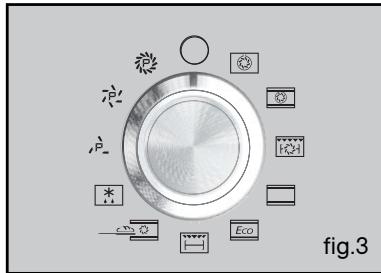
Turn the function selector to any position.
Example: position"” (fig.2).
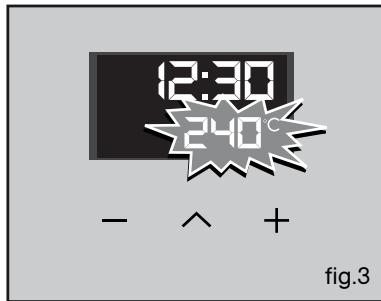
Your oven suggests the ideal temperature for the chosen cooking mode (fig. 3).
It is, however, possible to adjust the temperature using the + or - buttons (fig.4).
Place your dish in the oven, following the recommendations in the cooking guide.
The oven will then heat up and the temperature flashes.
A series of beeps sounds, when the oven has reached the selected temperature.
The display stops flashing.
To stop cooking, return the function selector to 0.

Warning
90 seconds after closing the door or start a cooking lamp turns off the oven cavity.
A simple press a button lights the lamp.

Note
After a cooking cycle, the cooling fan
continues to run for a time, to ensure optimum oven reliability.

Note
All types of cooking are done with the door closed.
PROGRAMMED COOKING
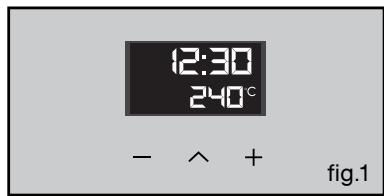
- Cooking with immediate start and programmed cooking time
-
Choose the desired cooking mode and set the temperature (fig. 1).
-
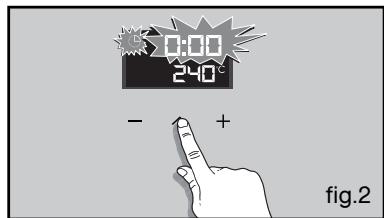
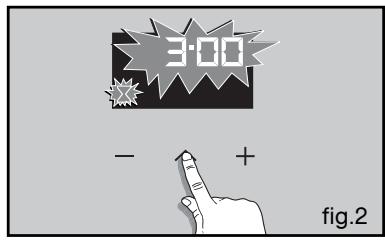
Press the “ ” button until the cooking ti
me indicator starts to flash ^ (fig. 1).
The display flashes 0h00, to indicate that the time may now be entered.
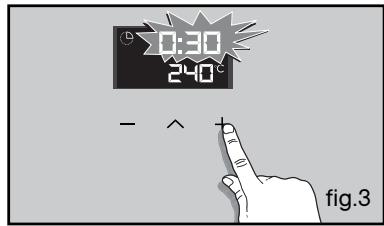
- Press the + or - buttons to set the desired time.
Example: 30 minutes cooking time (fig. 3).
The cooking time is saved automatically after a few seconds.
The cooking time display stops flashing.
The cooking time starts to count down immediately it is set.
When these three steps have been completed, the oven heats up:
A series of beeps sounds, when the oven has reached the selected temperature.
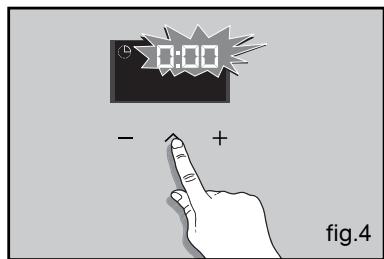
At the end of cooking (end of programmed time),
- the oven switches off,
-- the cooking time indicator and 0:00 flash (fig. 4),
- a series of beeps sounds for several minutes. The beeps may be stopped by pressing any button.
The display goes back to showing the time when the function selector switch is returned to 0 (fig. 5).
PROGRAMMED COOKING
- Cooking with delayed start and chosen cooking end time
Proceed as for programmed cooking.
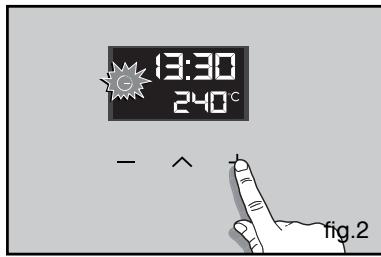
- After setting the cooking time, press the “ ” button until the end of cooking indicator flashes “ (- ”).
The display flashes to indicate that you may now enter a setting (fig. 1).
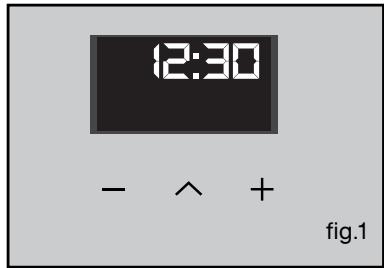
- Press the + or - button to set the desired cooking end time.
Example: end of cooking at 13h30 (fig. 2).
The end of cooking time is automatically saved after a few seconds.
The cooking end time display stops flashing. When these 3 steps have been completed, the oven heating start time is delayed so that cooking ends at 13:30.
At the end of cooking (end of programmed time),
-
the oven switches off,
-
the cooking time indicator and 0:00 flash (fig. 3),
-
a series of beeps sounds for several minutes. The beeps may be stopped by pressing any button.
The display goes back to showing the time when the function selector switch is returned to 0 (fig. 4).
The oven cavity is lit, once cooking starts.
- USING THE TIMER FUNCTION
- The oven's programmer may be used as an independent timer for counting down the time, without the oven being in use.
In that case, the timer display takes priority over the clock display.
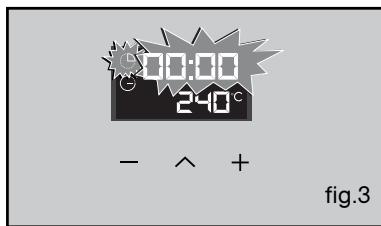
- Press the " " button (fig. 1) until the timer symbol starts to flash.
> 0.00 and a small hourglass both flash.
- Enter the desired time by pressing the + or
- buttons (fig.2).
- Press the " " button to confirm or wait a few seconds.
The display stops flashing after a few seconds and the timer starts to run, counting down the time in seconds.
Once the time has elapsed, the timer emits a series of beeps to let you know.
The beeps may be stopped by pressing any touch control.

Note
It is possible to alter or cancel the timer at any moment during the countdown.
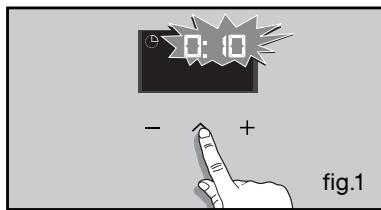
- SETTING THE DISPLAY BRIGHTNESS
You can adjust the brightness of your display. To do this:
- Set and confirm the time on your programmer at 0:10 (Fig. 1).
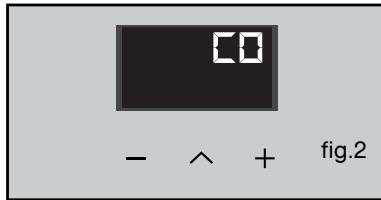
- Press the + and - buttons together for around 10 seconds until "CO" is displayed and you enter adjustment mode (Fig. 2).
- Press the + or- buttons, to set the desired brightness.
Once you have adjusted the brightness to your liking, wait a few seconds and return your programmer to the current time of day (fig.3).
- THE "STAND BY FUNCTION"
- Your oven has a standby function.
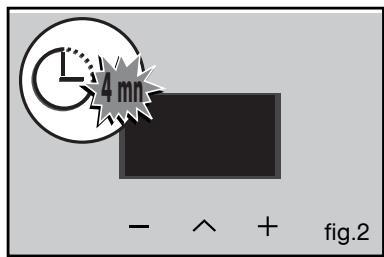
-The display indicates the time (fig. 1).
- After 4 minutes with no action by the user, the oven display returns to standby (fig. 2).
None of the buttons below the display can be used.
To reactivate the display, the function selector (fig. 3),
- The oven display is active once again and cooking is now possible.

COOKING MODES FOR A PYROLYSIS OVEN

Note
The cooking modes may be different, depending on the model.


CIRCULATING HEAT
(recommended temperature 190^ min 35^ max 250^)
- Cooking controlled by the heating element in the bottom of the oven and by the air circulation fan.
- Quick temperature rise. Some dishes can be placed in the oven while it is still cold.
- Recommended for keeping white meat, fish and vegetables moist.
For cooking multiple items on up to three levels.

COMBINED HEAT
(recommended temperature 180^ min 35^ max 230^ )
-
Cooking controlled by the upper and lower heating elements and by the fans.
-
Three combined sources of heat: a lot of heat from the bottom, a little circulating heat and a bit from the grill.
- Recommended for quiches, pies, wet fruit tarts, placed preferable on an earthenware dish.

TURBO GRILL + ROTISSERIE
(recommended temperature 190^ ,min 100^ max 250^)
-
Cooking heat is provided, alternately, by the upper element and by the air circulation fan.
-
Preheating is not necessary. Roasts and poultry are juicy and crisp all over.
- The rotisserie continues to run until the door is opened.
- Slide the drip tray on to the bottom shelf support.
- Recommended for all spit-roasted poultry or meat, for sealing and cooking a leg of lamb or rib of beef well-done. To retain the moist texture of fish steaks.

TRADITIONAL
(recommended temperature 200^ ,min 35^ max 275^)
-
Cooking controlled by the upper and lower heating elements and by the fan.
-
Quick temperature rise. Some dishes can be placed in the oven while it is still cold.
- Recommended for meat, fish and vegetables, preferably placed in an earthenware dish.
*

ECO
(recommended temperature 200^ min 35^ max 275^ )
-
Cooking controlled by the upper and lower heating elements.
-
This position allows energy savings while maintaining the quality of the cooking.
- The ECO position is used for energy label performance.
- All types of cooking are done without preheating.

HIGH GRILL + ROTISSERIE
(recommended positions 4 - min 1 - max 4)
- Cooking is done by the upper element.
- Preheating is not necessary. Roasts and poultry are juicy and crisp all over.
- The rotisserie continues to run until the door is opened.
- Slide the drip tray on to the bottom shelf support.
- Recommended for all spit-roasts, for sealing and cooking a leg of lamb or a rib of beef well-done. To retain the moist texture of fish steaks.

BREAD
(recommended temperature 205^ min. 35^ max. 220^ )
- Recommended cooking sequence for bread making.
- After preheating, place the ball of dough on the pasty dish - 2nd shelf.
- Don't forget to place a ramekin of water on the base to obtain a golden crispy crust.

DEFROSTING
(recommended temperature 35^ ,min 35^ max 75^)
-
Dishes are defrosted using a limited amount of heat and the fan.
-
Ideal for delicate dishes (fruit tarts, custard pies, etc.).
-
Meat, rolls, etc. are defrosted at 50^ (meat should be placed under the grill with a dish underneath to catch the drips from the defrosting which are not edible).
PYROLYSIS
- Immediate pyrolysis

Note
Remove cookware from the oven and in up any major spills.
- Check that the programmer is displaying the time of day and that it is not flashing.
You can choose between 3 pyrolysis cycle times:

pyrolysis time 1 hour 30 minutes.
pyrolysis time 1 hour 45 minutes.
pyrolysis time 2 hours.
- STARTING THE CLEANING CYCLE
In order to make the most of the heat already stored in the oven and so save energy:
Start a pyrolysis cycle immediately after cooking.
Remove any accessories from the oven and clean up any major spills.
Check that the programmer is displaying the time of day and that it is not flashing. (fig.1).
Simply set the cooking selector to the "Pyrolysis" or "Pyrolysis ECO" position (fig.2).
In "Pyrolysis" the oven will be unavailable for two and a half hours (2 hours of pyro + 30 minutes cooling down), and in "Pyrolysis ECO" for two hours (1:30 hrs of pyro + 30 minutes cooling down). (These times cannot be changed.)
These times include the cooling period until the door can be unlocked.
END OF CLEANING CYCLE
The pyrolysis operation stops automatically, at which time it is possible to open the door.
At the end of the pyrolysis cycle the display indicates 0:00.
Return the function selector to position 0 (fig.3).
When the oven is cool, use a damp cloth to remove the white ashes. The oven is clean again and ready for further cooking operations.
4 / MAINTAINING AND CLEANING YOUR OVEN
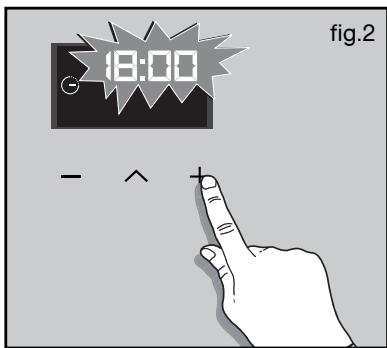
- DELAYED PYROLYSIS:
- Follow the instructions described in the section "Immediate pyrolysis", then:
- Turn the function selector to the desired pyrolysis position.
- Press the button.
The end of cooking time symbol “ ” flashes to indicate that it may now be set (fig.1).
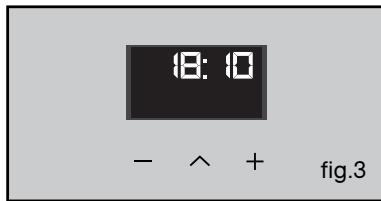
- Press the + or - button to set the desired end time (fig. 2).
Example: end of cooking at 18:00.
- After these steps, pyrolysis start is delayed so that it finishes at 6 o'clock.
When the pyrolysis cycle has finished, return the function selector to stop.
Horno De Dietrich
Para as cozeduras multiplas ate 3 niveis.

CALOR COMBINADO
(temperatura recomendada 180^ min. 35^ max. 230^ )
- De Dietrich
- 1/ DESCRIPTION OF YOUR APPLIANCE
- 2/ USING YOUR APPLIANCE
- 3/OVEN COOKING MODES 13
- / CARING FOR AND CLEANING YOUR OVEN 15
- INTRODUCTION TO YOUR OVEN
- Note
- INTRODUCTION TO THE PROGRAMMER
- - USING THE PROGRAMMER
- How to set the time
- - Immediate cooking
- Warning
- PROGRAMMED COOKING
- - Cooking with immediate start and programmed cooking time
- - USING THE TIMER FUNCTION
- - SETTING THE DISPLAY BRIGHTNESS
- - THE "STAND BY FUNCTION"
- COOKING MODES FOR A PYROLYSIS OVEN
- CIRCULATING HEAT
- COMBINED HEAT
- TURBO GRILL + ROTISSERIE
- TRADITIONAL
- ECO
- HIGH GRILL + ROTISSERIE
- BREAD
- DEFROSTING
- PYROLYSIS
- - STARTING THE CLEANING CYCLE
- END OF CLEANING CYCLE
- / MAINTAINING AND CLEANING YOUR OVEN
- - DELAYED PYROLYSIS:
- Horno De Dietrich
- CALOR COMBINADO
Brand : DE DIETRICH
Model : DCI1583X
Category : Built-in oven