FG879 - Vacuum Cleaner FAGOR - Free user manual and instructions
Find the device manual for free FG879 FAGOR in PDF.


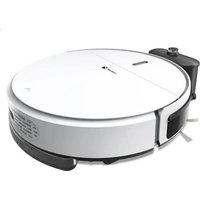
| Product type | Robot vacuum cleaner |
| Brand | FAGOR |
| Model | FG879 |
| Dimensions | Diameter 320 mm, Height 87 mm |
| Weight | 3 kg |
| Power supply | Lithium battery 2000 mAh, adapter 24 V DC 1 A |
| Battery life | 90 to 120 minutes |
| Charging time | 4 to 6 hours |
| Movement speed | 20 cm/s |
| Noise level | ≤ 68 dB |
| Operating temperature | -20 °C to 50 °C |
| Main functions | Automatic cleaning, edge cleaning, scheduled programming, auto recharging, remote control, voice function |
| Included accessories | Charging station, remote control, space delimiter, mopping cloth, water tank, side and main brushes, filter, dust bag |
| Water tank capacity | 200 ml |
| Compatible floor types | Hardwood, tile, cement, short-pile carpet (< 10 mm) |
| Safety | Obstacle and stair detection, automatic shut-off, motor overload protection |
| Maintenance and cleaning | Emptying the dust bag, cleaning the filter (every 5 days), cleaning brushes and sensors |
| Warranty | 1 year |
Frequently Asked Questions - FG879 FAGOR
User questions about FG879 FAGOR
0 question about this device. Answer the ones you know or ask your own.
Ask a new question about this device
Download the instructions for your Vacuum Cleaner in PDF format for free! Find your manual FG879 - FAGOR and take your electronic device back in hand. On this page are published all the documents necessary for the use of your device. FG879 by FAGOR.
USER MANUAL FG879 FAGOR
natural_image
Line drawing of a circular robotic vacuum cleaner with three legs and control knobs (no text or symbols)ASPIRATEUR ROBOT NETTOYEUR 3 EN 1
natural_image
Technical line drawing of a mechanical device with intersecting rods and a curved base (no text or symbols)P1-2
natural_image
Line drawing of a mechanical device with a curved top and two base supports (no text or symbols)P1-3
natural_image
Hand inserting a plug into an electrical socket (no text or symbols visible)
natural_image
Technical line drawing of a mechanical component with an arrow indicating direction (no text or symbols)P1-4
Description de la charge
Statut de la charge
natural_image
Line drawing of a circular mechanical device with a hand adjusting its component (no text or symbols)P2-1
natural_image
Technical line drawing of a circular mechanical device with internal components and a pointer indicating a component (no text or symbols present)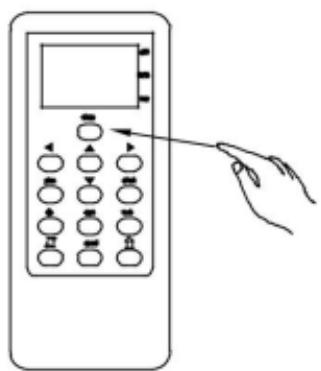
text_image
Diagram of a hand pointing to a control panel with multiple function buttons and a display screenP2-2
natural_image
Line drawing of a staircase with a small bucket and a circular object on the right wall (no text or symbols)P2-5
natural_image
Technical line drawing of a circular mechanical component with internal components and mounting brackets (no text or symbols)natural_image
Line drawing of a hand holding a circular device with three pins and a pointer (no text or symbols)P3-1
natural_image
Technical line drawing of a mechanical component with no visible text or symbolsP3-2
natural_image
Technical line drawing of a mechanical component with no visible text or symbolsP3-3

natural_image
Technical line drawing of a mechanical device with internal components and an arrow indicating direction (no text or symbols)P3-4
natural_image
Line drawing of a hand using a tool to lift or adjust a mechanical component (no text or symbols present)P3-5

natural_image
Technical line drawing of a mechanical device with no visible text or symbolsP3-9
natural_image
Technical line drawing of a circular mechanical or electronic component with internal components and two protruding blades (no text or symbols)P3-10
natural_image
Diagram of a mechanical assembly showing a gear and a threaded shaft (no text or labels)natural_image
Mechanical assembly diagram showing internal components and directional arrows (no text or labels)P3-14
natural_image
Diagram of a hand using a tool to adjust internal components of an electronic device (no text or symbols visible)P3-15
natural_image
Technical line drawing of a mechanical device with internal components and a hand holding a paper (no text or symbols)natural_image
Technical line drawing of a mechanical component with a close-up view of its circular base and internal features, showing a magnified inset (no text or symbols)natural_image
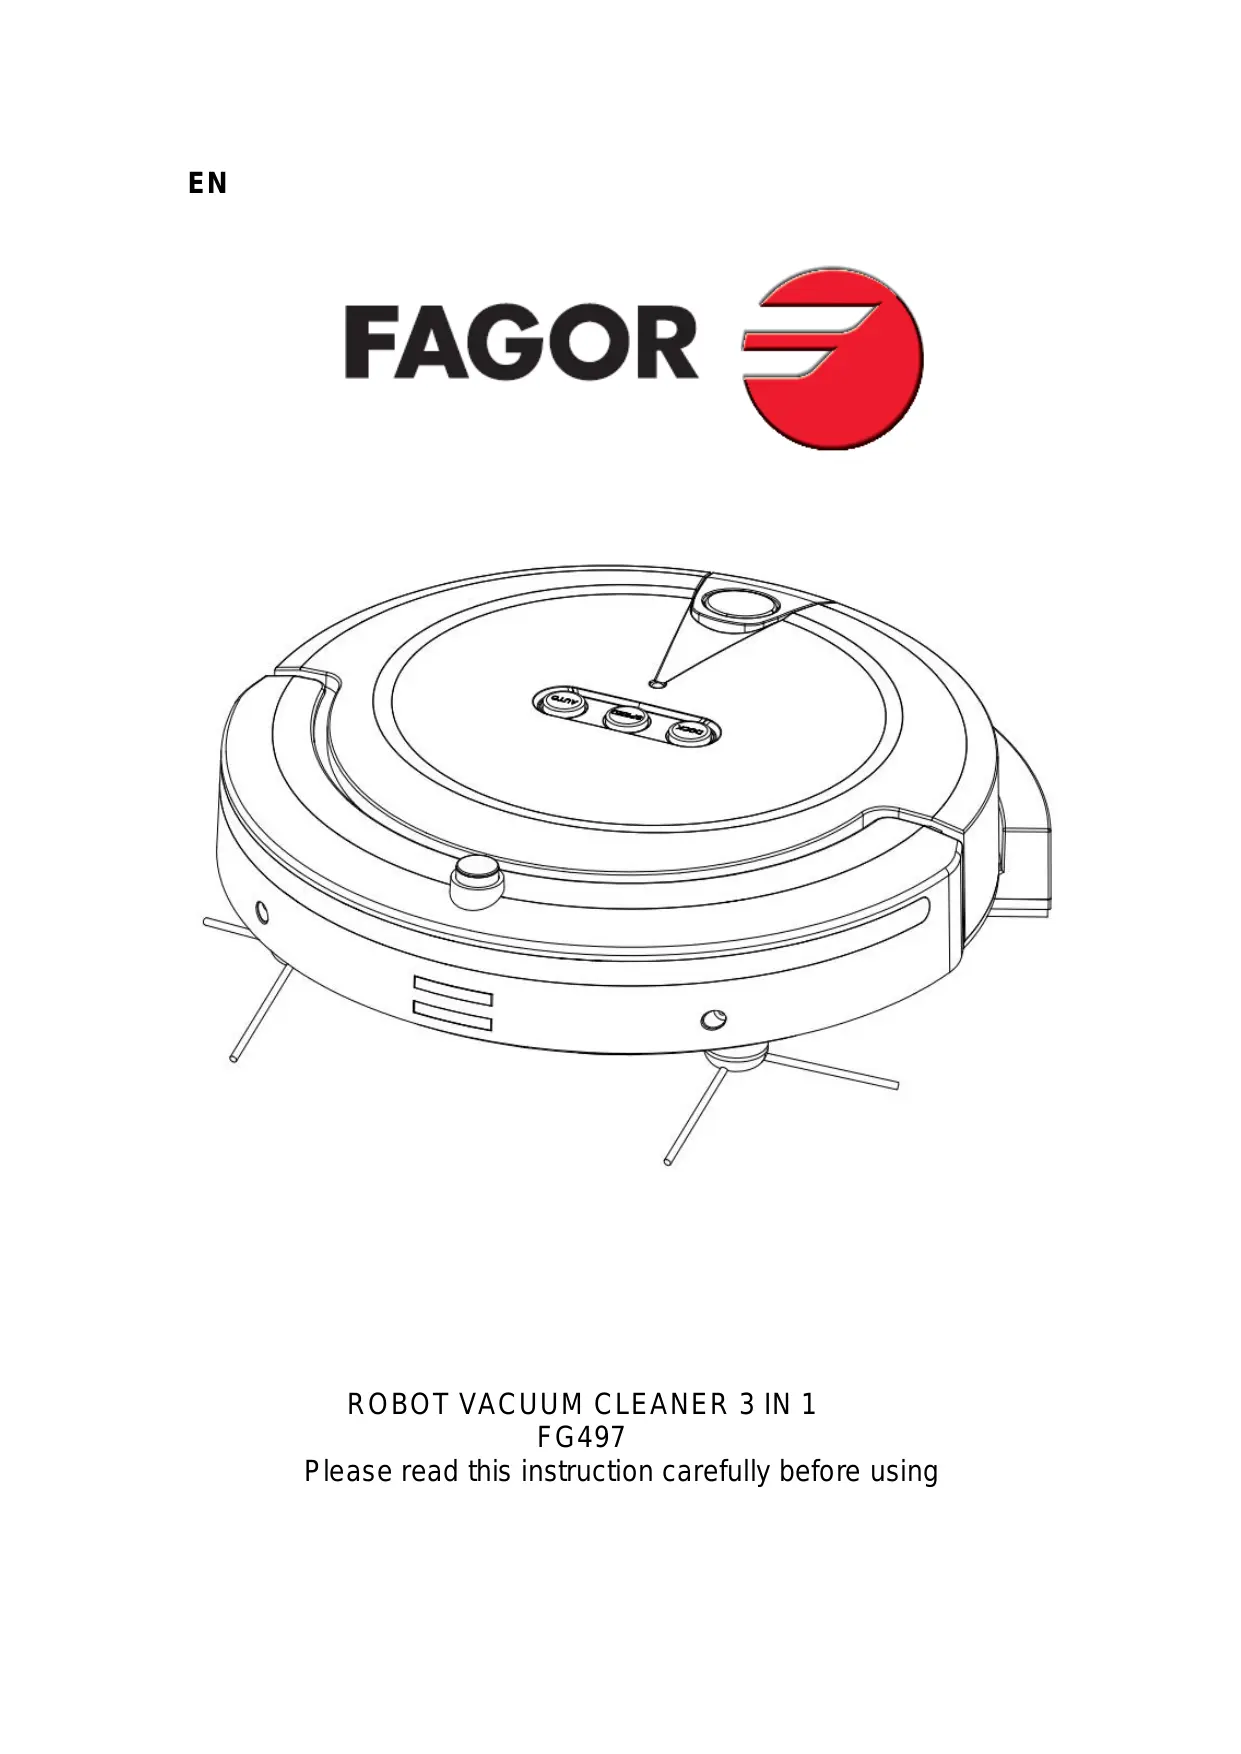
Line drawing of a circular robotic vacuum cleaner with three wheels and control buttons (no text or symbols)ROBOT VACUUM CLEANER 3 IN 1
FG497
Please read this instruction carefully before using
This safety precaution is aimed to avoid personal injury and property damage, please read the following terms carefully.
The following symbols indicate meanings as below:
Caution | Violation might cause caution personal in jury | Attention | Attention violation might cause machinery damage |

Caution
No one else can disassemble, maintain or transform the product except the maintenance designated by our company. Or it may cause fire, electric shock or personal injury. | Don't use other charger but the equipped one of the robot, or it may cause product damage, electric shock or fire due to high voltage. |
Don't touch high-voltage power cord of the electric appliance with wet hand,or it may cause electric shock. | Don't bend the power cord overly or place weight on it, or it may cause power cord damage, fire or electric shock. |
| Don't twist your clothes or any part of your body (head,finger etc.) into the brush or wheel of robot, or it may cause personal injury. | Don't approach cigarette, lighter, match and other heat objects or combustible materials such as the gasoline cleaner. |
Don't insert the charger to the socket of charging dock while the cleaner is working or maintaining. | Don't step the power cord while the cleaner is working, or it may cause electric shock. |

Attention
Don't forget to turn off the power while transporting or storing the cleaner for long, or the battery may be damaged. damaged. | Insert the power cord of the charge well or it may cause electric shock, short circuit, smoking even fire. |
Check whether the charger and stock is connected well,or it may cause charging failure even fire. | Remove all easily damage objects (including luminous objects, fabrics, glass bottle etc) before using, or it may cause damage to these objects, or affect the using of cleaner. affect the using of cleaner. |
| Please use the cleaner cautiously in the presence of | Don't stand or sit on the cleaner, or it may cause |
children to avoid frightening or harming them.  | damage to the cleaner, or personal injury. |
Don't make the cleaner take in water or other liquidfor fear of the product damage.  | Don't use the cleaner on small tables, chairs or othersmall space, otherwise the cleaner may be damaged. |
Don't use the cleaner outdoor, or it may cause theproduct damage.  | Don't use the cleaner in commercial place, or it may bedamaged by excessive use.  |
| Don't let the children operate or play with it. |
Product Components
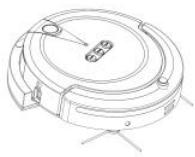
Main body
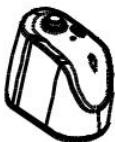
Space isolator
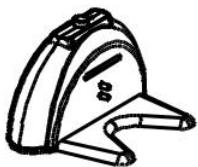
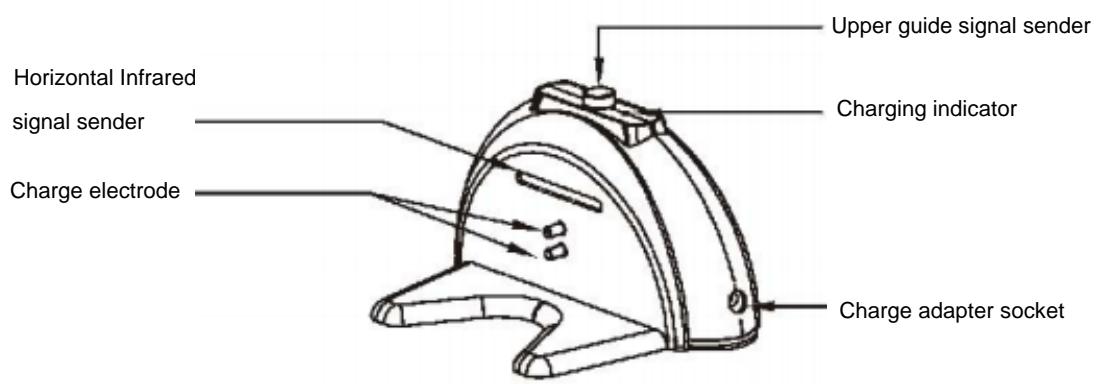
Charging dock
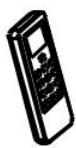
Remote control
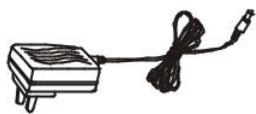
Charge adapter
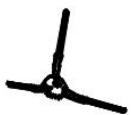
Side brush
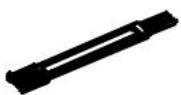
Cleaning brush
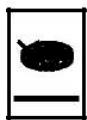
Instruction
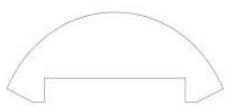
Mop
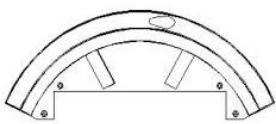
Water tank
Detail Parts

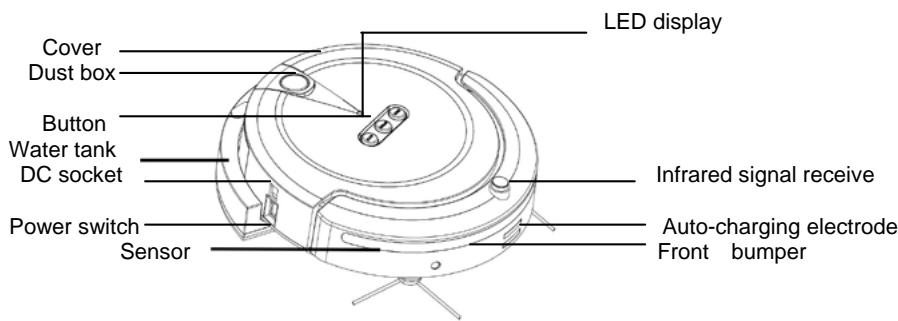
Top of main body
text_image
Cover Dust box Button Water tank DC socket Power switch Sensor LED display Infrared signal receive Auto-charging electrode Front bumper
text_image
Auto-charging button Auto-cleaning button DOCK SPEED AUTO Auto-cleaning buttonIndication of buttons
Detail Parts
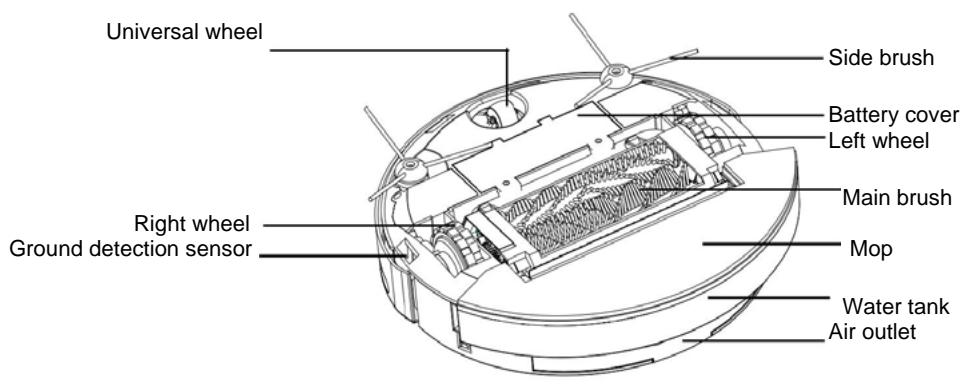
Bottom of main body
text_image
Universal wheel Right wheel Ground detection sensor Side brush Battery cover Left wheel Main brush Mop Water tank Air outletCharging dock
text_image
Horizontal Infrared signal sender Charge electrode Upper guide signal sender Charging indicator Charge adapter socket
Remote control without battery

Space isolator without battery

flowchart
graph TD
    A["Display screen"] --> B["Direction button"]
    B --> C["Setting button"]
    C --> D["Spot cleaning"]
    D --> E["Along wall cleaning"]
    E --> F["Speed Adjustment"]
    F --> G["Auto-recharaina"]
    G --> H["Reservation button"]
    I["Auto-cleaning"] --> J["Time setting"]
    J --> K["Week setting"]
    K --> L["Auto-recharaina"]
text_image
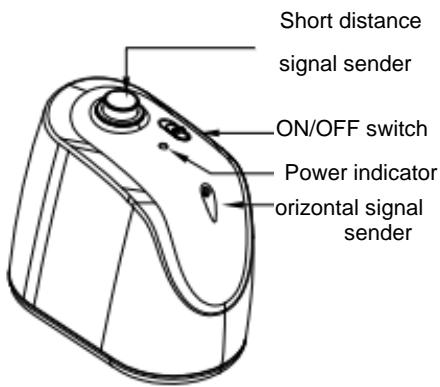
Short distance signal sender ON/OFF switch Power indicator horizontal signal senderWorking Environment
01.Wood floor.
02 .Tile floor and cement floor.
03 .Short-haired carpet (less than 10mm thick)

Attention: Please removed the side brush out before the robot working on short-haired carpet to avoid damage.
Before Cleaning
Manual charging
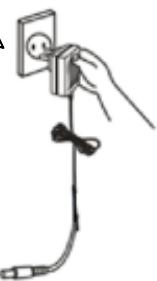
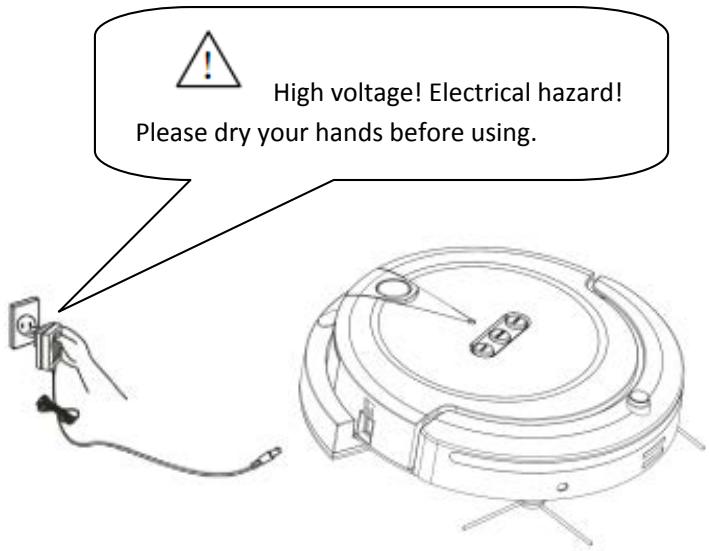
- You can choose to charge the robot with the adapter directly, refer to P1-1
- While charging, the power indicator flickering discontinuously with green light.
- After finished charging, the power indicator shining continuously with green light.

Attention: Please removed the side brush out before the robot working on short-haired carpet to avoid damage.
text_image
High voltage! Electrical hazard! Please dry your hands before using.P1-1
Charging Dock Installation
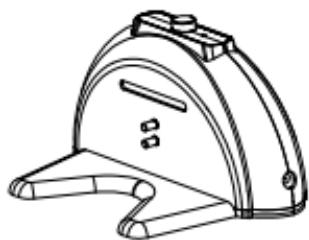
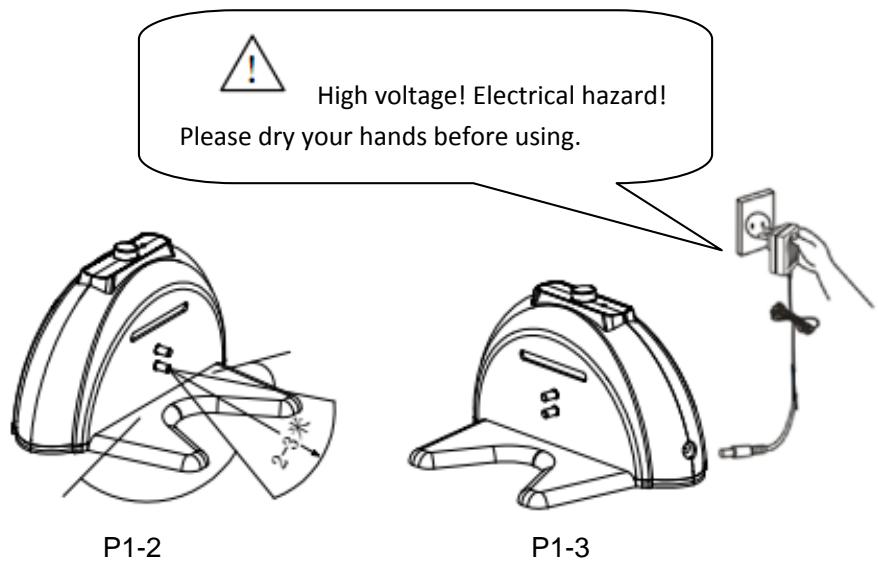
- Fix the charging dock to the wall and insure there is free space without obstacle in front, refer to P1-2
- Insert the output terminal of the adapter to the DC socket of charging dock, refer to P1-3.
- Please place the power cord along the wall.
text_image
High voltage! Electrical hazard! Please dry your hands before using. P1-2 P1-3
- Removed out the battery before abandon the robot.
- Switched off the power before remove out the battery.
- Recycle the battery after removed out.
Auto-charging
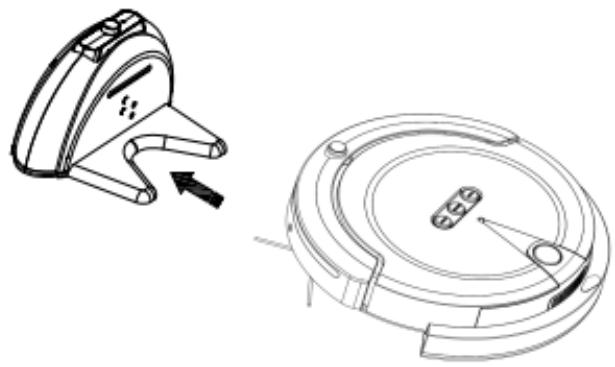
- Instead of manual charge, you can also make the robot charge itself automatically, refer to P1-4.
- With low battery, power indicator turn into red light, then robot will search the charging dock automatically.
- Within the infrared area, robot can receive the signal and connect with charging dock automatically.
natural_image
Technical line drawing of a mechanical component with an arrow indicating direction (no text or symbols)P1-4
Charging Description
Charging Status
- Please do not press any button of the robot while manual charging.
- Please manual charge the robot for 6 hours every time at the first three charging. After that you can choose the auto-charging method with 4 hour charging time.
- Please do not operate the robot with remote control while charging, to avoid the li of battery reduced due to this memory of working with charging unfinished.
- Please manual charge the robot with adapter while the battery is too low to start auto-charging function, refer to P1-3.
-
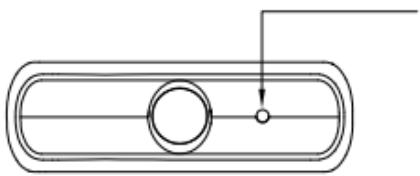
While the charging dock is connecting with electricity, its "Charging indicator" lighting in green, refer to P1-5.
-
When the robot found and connected with charging dock, "LED indicator" on robot cover flicker until full charged with green lighting.
natural_image
Pure technical line drawing of a rounded rectangular component with a circular hole and a small circle, no text or symbols present.Charging indicator
Start cleaning
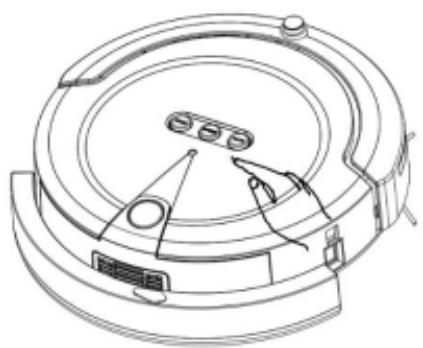
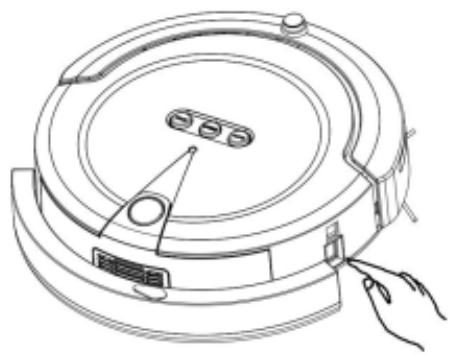
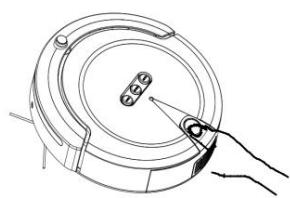
01 .Switch on the power to start, refer to P2-1.
02 .Choose "AUTO" button on robot cover or "clean" button on remote control, refer to P2-2.
03. After that, robot start automatical cleaning.
natural_image
Line drawing of a circular robotic vacuum cleaner with a hand pointing to the handle (no text or symbols)P2-1
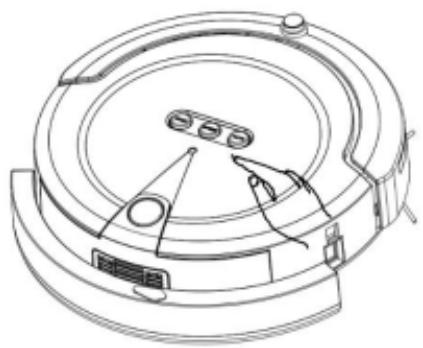
natural_image
Technical line drawing of a circular mechanical device with internal components and a hand interacting (no text or symbols)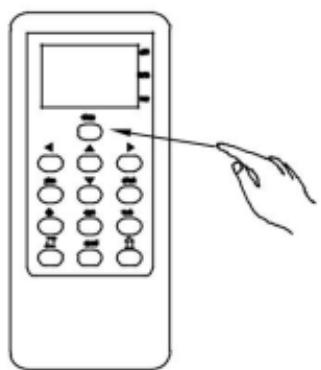
text_image
Diagram of a hand pointing to a control panel with multiple function buttons and a display screenP2-2
Cleaning Function
- Usage of panel buttons
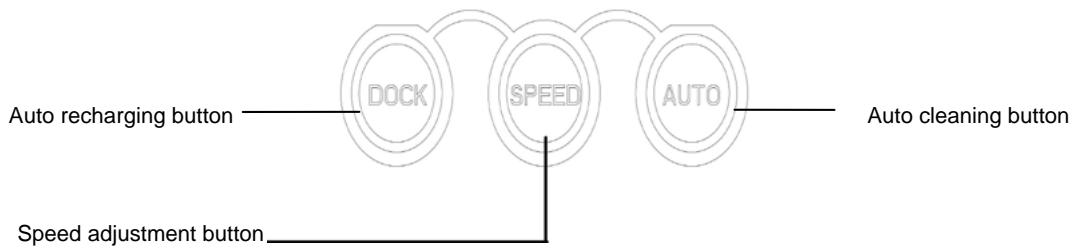
flowchart
graph LR
    A["Auto recharging button"] --> B["DOCK"]
    C["Speed adjustment button"] --> D["SPEED"]
    E["Auto cleaning button"] --> F["AUTO"]
- "SPEED" button: Adjust speed with this button according to the room space and personal habit.
(Low speed is more preferred while cleaning small room) Advantages of low speed:
a. Reduce the consumption of battery.
b. Relieve the force of impact during the collision with furniture.
- "AUTO" button: Start the robot into auto-cleaning mode with this button, it works until the indicator turned to red and start to search the charging dock with low battery
03."DOCK" button: Use this button to make the robot search charging dock itself.
2. Usage of remote control (without battery)
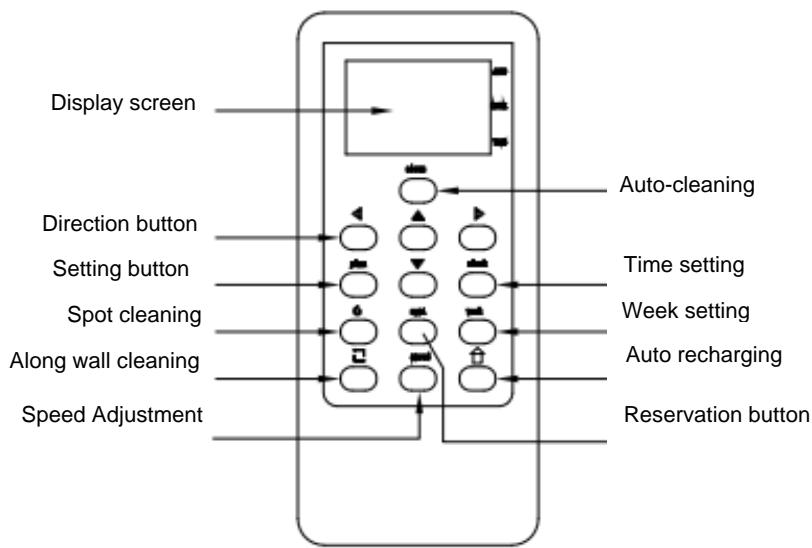
flowchart
graph TD
    A["Display screen"] --> B["Direction button"]
    B --> C["Setting button"]
    C --> D["Spot cleaning"]
    D --> E["Along wall cleaning"]
    E --> F["Speed Adjustment"]
    G["Auto-cleaning"] --> H["Time setting"]
    H --> I["Week setting"]
    I --> J["Auto recharging"]
    J --> K["Reservation button"]
Usage and function information of remote control:
| Function | Function Instruction |
| clean | Switch on the robot and press "clean" button, it starts work. |
| Current time andweek setting | 7.Switch on the robot.8.Press the time setting button "clock" on remote control, after the current hour 88: flickers, then use “▲▼”buttons to set hours.9.Press” ◀ ►to change between hour and minute, after the minute :88 flickers, then use“▲▼”buttons to set minutes.10.Press "week" button on remote control to get into week setting status.11.Then use “▲▼”buttons to choose from 1-7 and set current week.12.After finished setting, press "clock" button on remote control to confirm and exist. |
| Reservation timeandweek setting | 2.Switch on the robot.2.Press button "plan" on remote control, after the reservation hour 88: flickers, then use “▲▼”buttons to to reserve hours.3.Press” ◀ ►to change between hour and minute, after the minute :88 flickers, then use“▲▼”buttons to reserve and set minutes.4.Press "week" button on remote control to get into week setting status. Then use “▲▼” buttons to choose from 1-7 and reserve and set week.5.Press” ◀ ►” buttons to confirm week reservation information, select "ON" to execute reservation setting, select "OFF" to cancel reservation setting.6.After finished setting, press "appt" button on remote control to confirm reservation.7.Press "plan" button on remote control to exist reservation setting.8.After existed, aim the remote control to robot and press "appt" button to input reservation data into robot.9.Reservation setted successfully after received voice response. |
| During the standby or operating status of robot, press this button to start search and connect charging stock for self-charging, and press it again to stop charging. | |
| speed | "SPEED" button: Adjust speed with this button according to the room space and personal habit. |
| Forward▲button | Robot walks and cleans forward after pressed this button, and stop automatically if there is obstacle or stair in front. |
| Backward▼button | Press this button once, robot walks backward for a certain distance and stop. |
| Turn left◀button | Press this button once, robot turns left a little and stop. |
| Turn right | Press this button once, robot turns right a little and stop. |

Attention: 1. Do not press two or more buttons of remote control at the same time.
- The remote control distance is with 5m from robot, and also depends on different
working environment.
Voice function
Voice prompt instruction
| Operation | Voice prompt |
| Switch on power switch of robot | Hello, boss! I'm glad to serve you. |
| Press "AUTO" button of keyboard or remote control | Start to auto clean now! |
| Press "SPEED" button of keyboard or remote control | First press: clean quickly; Second press: clean normally. |
| Press "DOCK" button of keyboard or remote control, or when the battery is low | Start to auto charge now! |
| Press "APPT" button on remote control | Entered into reservation setting successfully. |
| After the robot plugged with adapter or connected with charging dock | Start to auto charge! |
| When the side brush motor is over-current | Side brush error. |
| When the middle brush motor is over-current | Middle brush error. |
| When the left wheel motor is over-current | Left wheel error |
| When the right wheel motor is over-current | Right wheel error. |
Usage of Space Isolator without battery
1. Setting of space isolator
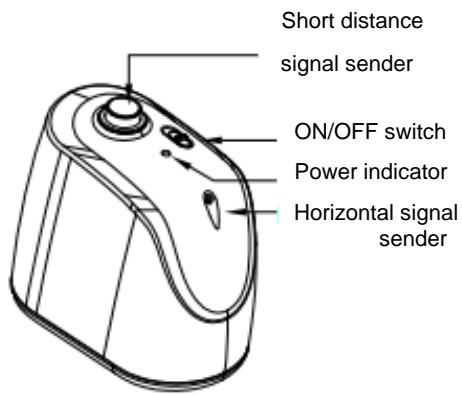
Space isolator builds a locked area by sending out infrared signal, so as to prevent the robot entering unnecessary area.
text_image
Short distance signal sender ON/OFF switch Power indicator Horizontal signal senderP2-3
natural_image
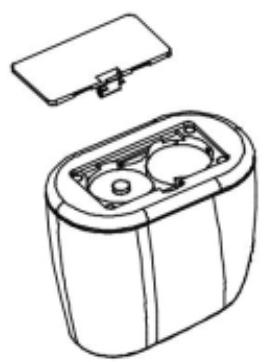
Line drawing of a battery pack with two internal compartments and a lid (no text or symbols)P2-4
- Please install battery before using the Isolator, refer to P2-4. Open the bottom cover of isolator and insert.
02.of 1# battery according to the polarity. Make sure the polarity with no mistake, or it may damage the Isolator. 02. Switch "ON/OFF switch" button on space isolator. ON means sending infrared signal normally, while OFF means closing space Isolator.
-
The power indicator lighting in green while the space isolator is working, and extinguished with low battery.
-
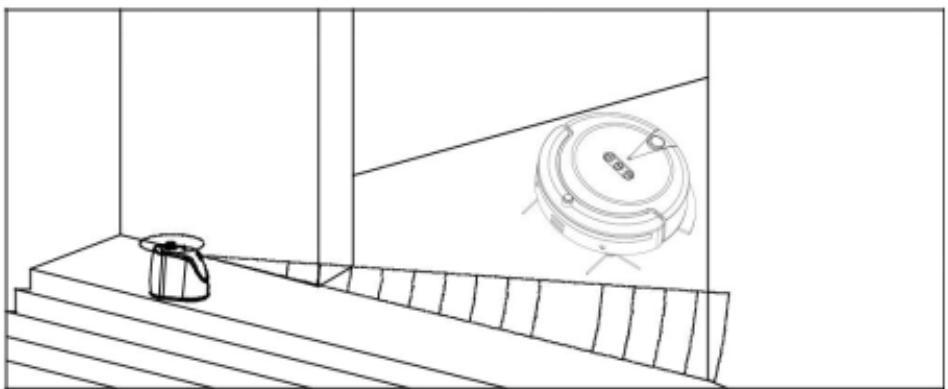
Space isolator sending short distance signal means: robot can not enter into area with 0.5m around space isolator. Space isolator sending horizontal signal means: robot can not enter into area (about 15 degree angle span) within 7m (straight direction of horizontal signal from isolator. Switch on the power and put isolator in the entrance of locked area, so as to build a virtual wall for preventing the robot entering unnecessary area.
-
Power indicator will extinguish when the battery is too low. Please change battery as soon as possible in case of damage the isolator.
2. Attentions of space isolator
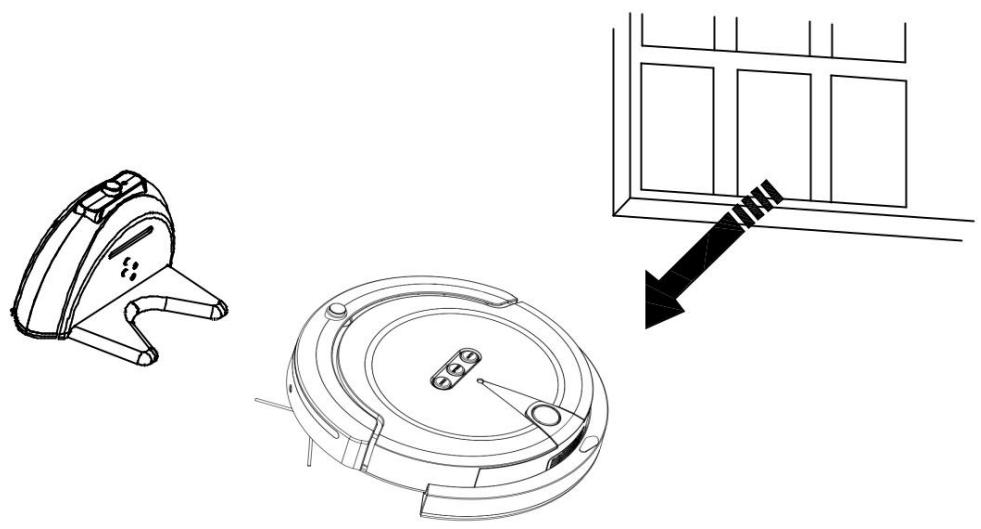
- Place the isolator in a distance of 20cm beside the door, refer to P2-5.
- You can also place the isolator at proper position to stop the robot passing thro.
- Remove obstacles out of the locked area before the isolator as much as possible fear of poor efficiency.
natural_image
Line drawing of a staircase with a small kettle and a circular device on the right wall (no text or symbols)Usage of mop
text_image
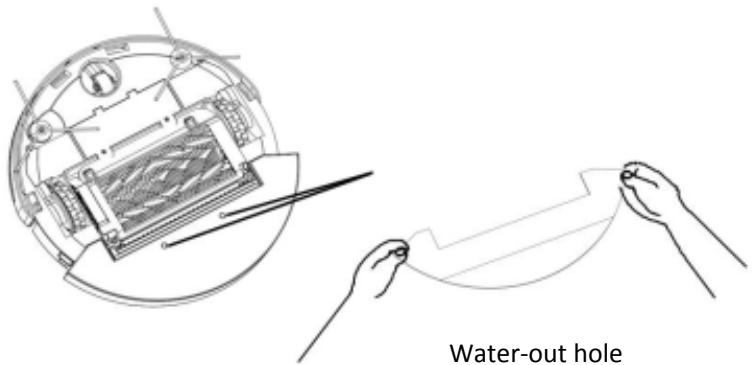
Water-out holeP2-6
01 .Turn over the robot and stick the mop onto the bottom part fitly, refer to P2-6.
02 .Place the robot on the floor and start it as normal.
03. It is better to clean the mop first and wring up before using.

Attention :Mop is only apply to hard floor, please take it out while the robot cleans on
short-hair carpet.
Usage of water tank
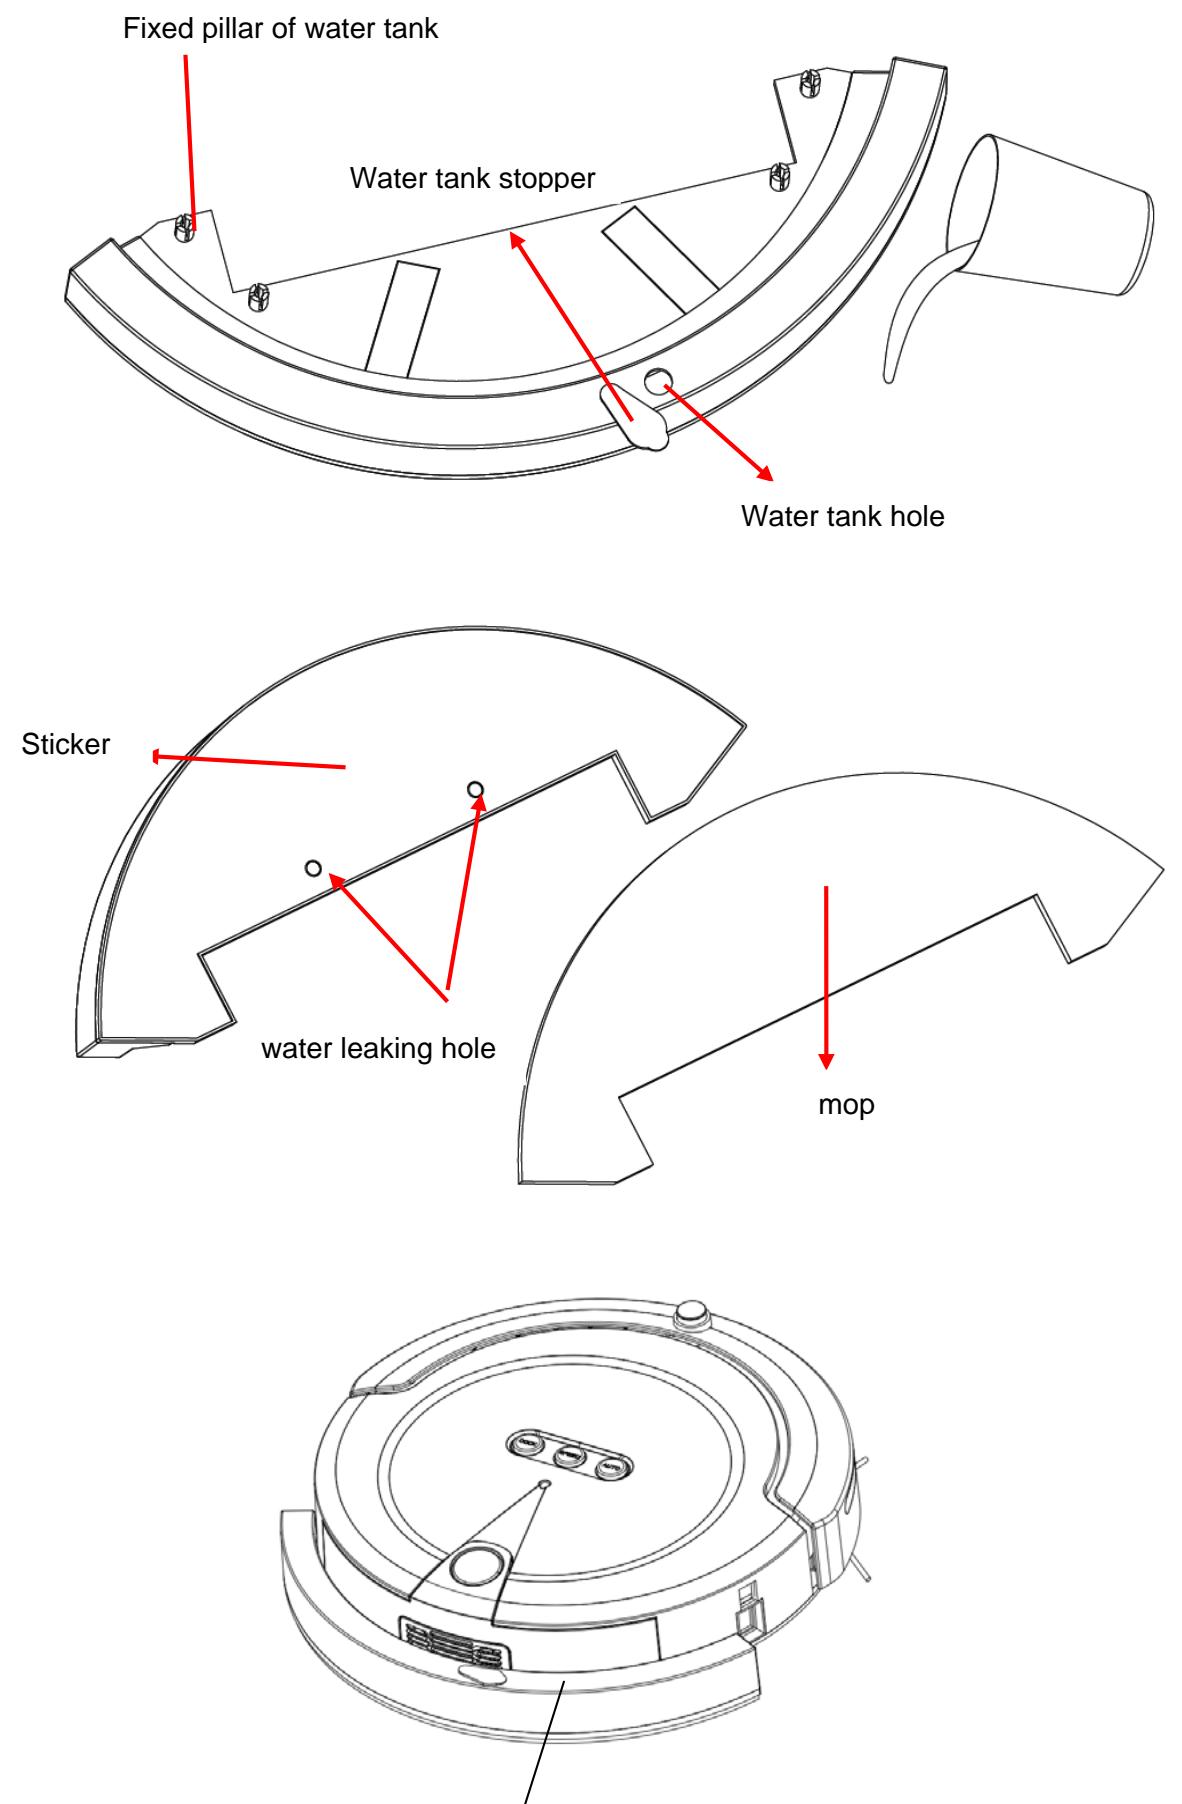
01、Pour water into the water tank hole, then cover it with water tank stopper after it is fulled with water. (make sure there is no water leak out from the water tank stopper), refer to picture 4-1
02、Hold the mop against the bottom of water tank correctly, then paste each edge onto the bottom uniformly, refer to picture 4-2.
03、Align the four fixed pillar of water tank with the four fixed holes on main body and dust box, press the water tank down with strength and make it totally fixed inside the bottom of main body, it means the water tank is installed well. Refer to picture 4-3
04、When the water is ran out, please take out the water tank and then pour water again (Warning: Do not pour water directly without taking out the water tank, it is very easy to wet the main body, which can infect the normal operation or damage the electric element inside main body).
05、When you need to take out the water tank, grasp the left and right sides of water tank and pull it out by swing the tank, until the water tank is separated out totally (please do not swing excessively, otherwise it might damage the machine).
Attention: 1. Please take out the water bank when the robot is in standby or charging. If you keep the water tank inside machine for a long time, the water inside might leak out and damage floor.
- The mop only applied to clean horniness floor, please take it out when the robot is working on undercoat carpet.
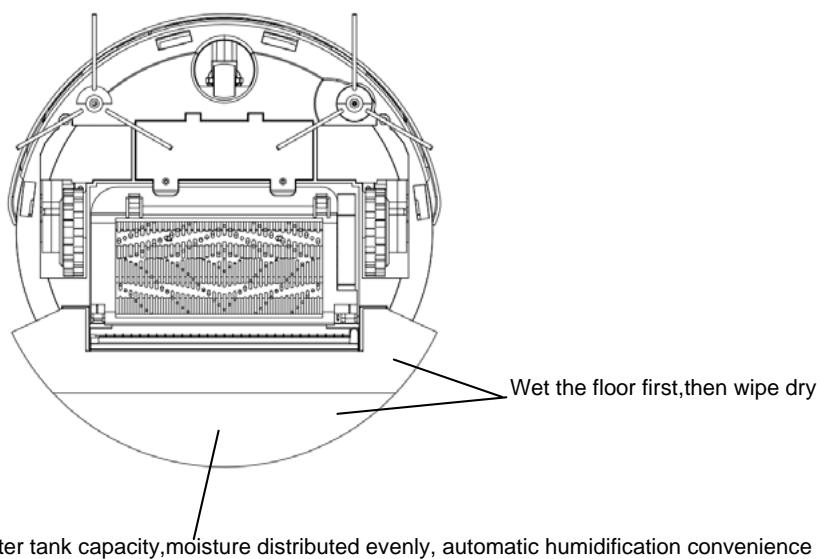
01.200ml water capacity, wet working, moisture distributed evenly, automatic supply, high density fabric, great water absorption.
- Shortcut easier to use, remove the water tank from the base of the appliance and fill it with Water.
text_image
Wet the floor first,then wipe dry water tank capacity,moisture distributed evenly, automatic humidification convenienceUpgrading big rag, Antibacterial mites fine fiber material with the undercut design, also can absorb small dust. magic stick design and easy to replace. Traditional rag: 78%, upgrading :98%, significantly improve the efficiency

Pay attention when using the water tank
when the machine is standing by or recharging, you need to remove the water tank to prevent the seeping water spoiling your wooden floor.
Cleaning & Maintain of Robot
Assembly & Disassembly of Dust box
Since all the dirt, dust and hair collected in the dust box after cleaning, please dump the rubbish every time and clean the robot.
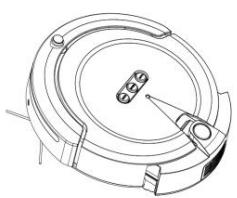
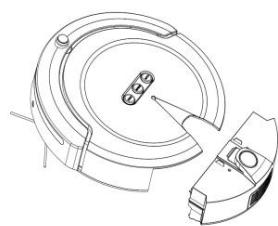
- Extract the dust box by press the button on top with your thumb, and hold it with other fingers, refer to P3-1.
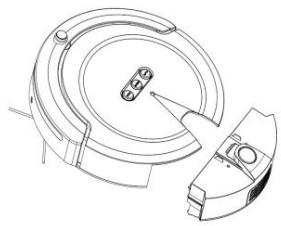
02.Pull the dust box out slightly, refer to P3-2. - Assemble the dust box by push it heavily, refer to P3-3.
natural_image
Technical line drawing of a mechanical component with a hand operating a tool (no text or symbols)P3-1
natural_image
Technical line drawing of a mechanical component with no visible text or symbolsP3-2
natural_image
Technical line drawing of a mechanical component with no visible text or symbolsP3-3

Cleaning of dust box
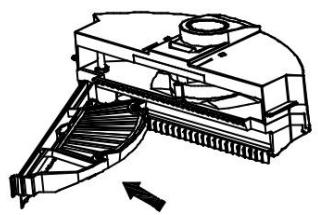
01.Open the dust box first and dump out rubbish, refer to P3-4.
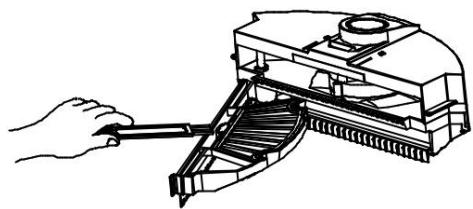
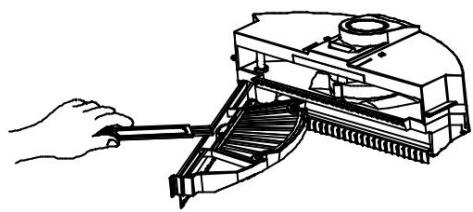
02. Then clean the dust box and filter with cleaning brush, refer to P3-5.
natural_image
Technical line drawing of a mechanical device with stairs and a cylindrical component (no text or symbols)P3-4
natural_image
Line drawing of a hand using a tool to adjust or install a mechanical component (no text or symbols present)P3-5

Cleaning with water is not allowed.
Cleaning of Filter
Dis-assembly & Cleaning:
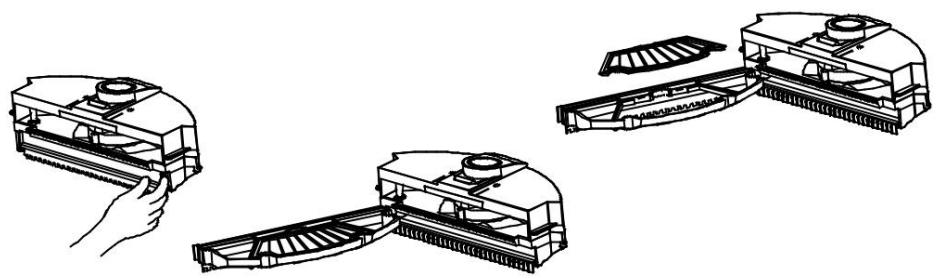
- Pull the buckle on the right side of filter by hand (refer to P3-6), and shift the bracket out off the dust box in left direction, refer to P3-7.
02.Pull out the filter upward, refer to P3-8. - You can clean the filter and sponge with water, but remember to dry them before assembly. Usually it is better to clean them in every 5 days.
Assembly
01.Inlet: Inset the filter into bracket at first, then push the bracket into dust box.
natural_image
Technical line drawing showing three views of a robotic vacuum cleaner's internal structure (no text or symbols)P3-6
P3-7
P3-8
Disassembly of Side Brush
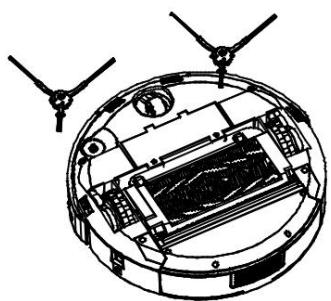
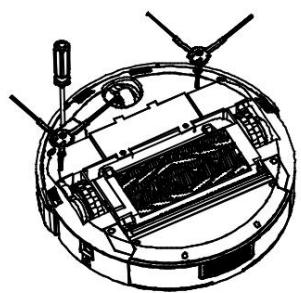
- Release the fixing screw on side brush with the cross screwdriver, then pull the side brush out directly, refer to P3-9.
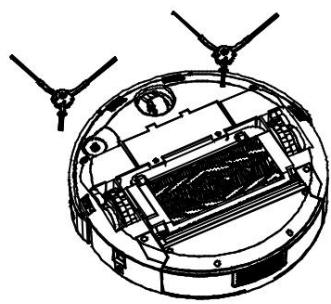
- Assembly: Install the side brush into hexagonal shaft and then fasten the screw, refer to P3-10.
natural_image
Technical line drawing of a mechanical device with no visible text or symbolsP3-9
natural_image
Technical diagram of a circular mechanical or electronic component with internal components and two protruding blades (no text or symbols visible)P3-10
Cleaning of Main Brush
1. Disassembly of Main Brush
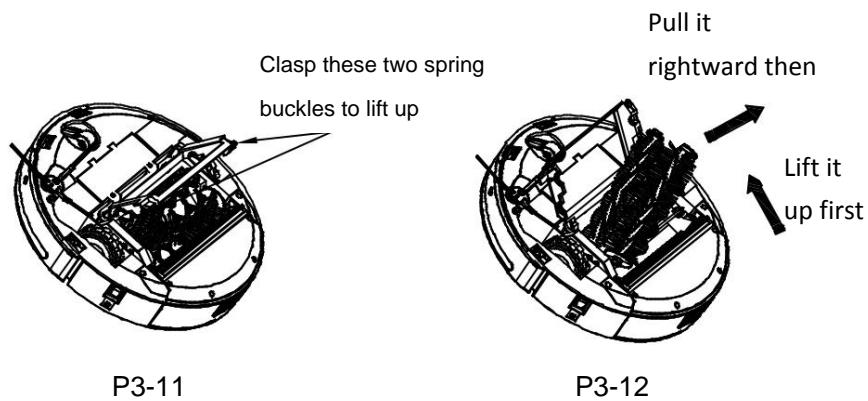
- Clasp the two spring buckles beside the main brush, and raise the cover, refer to P3-11
- Lift up the right side of main brush and then pull it out rightward. Take out the two brushes in turn, refer to P3-12.
text_image
Clasp these two spring buckles to lift up Pull it rightward then Lift it up first P3-11 P3-122. Assembly of Main Brush
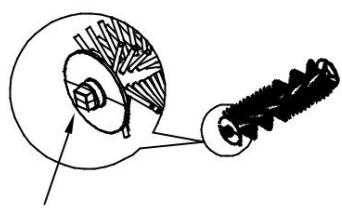
01.Hold the brush and make the quadrangular side of the shaft leftward, refer to P3-13.
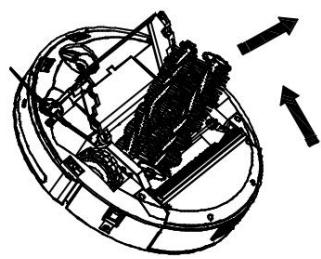
02. Insert the quadrangular side of the shaft to the exact left side of upper cover, push the brush into slightly, then press the right side of shaft into exact position, showed as P3-14.
03. Close the cover and fasten the buckle.
natural_image
Mechanical diagram showing a gear and worm gear assembly (no text or labels)Quadrangular
side in left
P3-13
natural_image
Mechanical assembly diagram showing internal components and directional arrows (no text or labels)P3-14
3.Cleaning of Main Brush
- Clear up the hair and dust on brush and suction inlet can improve the efficiency of cleaning.
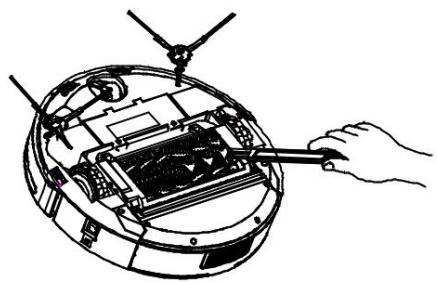
- Clean the scrap and dirt with cleaning brush, refer to P3-15.
- Spin the main brush gently to take out hairs and wires.
natural_image
Diagram of a hand using a tool to adjust or install electronic components on a device casing (no text or symbols visible)P3-15
4.Cleaning of Sensor
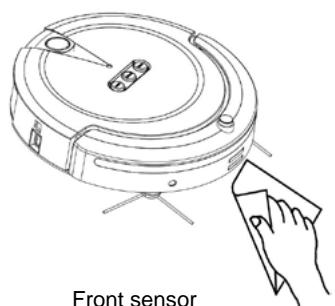
- Clean the sensor with cotton swab and soft cloth.
- Wall detection sensor is in the front of robot, while ground detection sensor is at the bottom of robot, refer to P3-16.
natural_image
Line drawing of a front sensor device with a hand interacting with it (no text or symbols on the device itself)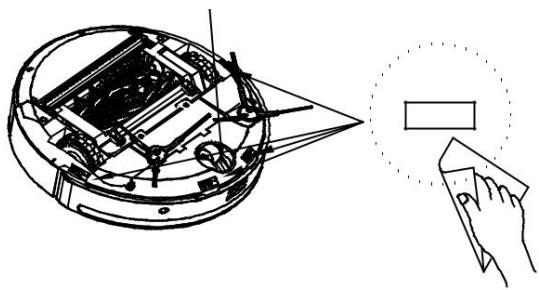
natural_image
Technical line drawing of a mechanical device with a magnified inset showing internal components (no text or symbols)Bottom sensor & Universal wheel
P3-16

- Please keep the sensor clean weekly so as to make the robot work better.
- Clean the universal wheel in time is better to the robot walking smoothly.
Storage
Keep the robot in a ventilated and dry environment.
natural_image
Technical line drawing of a mechanical component with a close-up view of its circular base and a window frame (no text or symbols)Robot Specification
| Model | FG497 |
| Size | Diameter: 320mm; Height: 87mm |
| Weight | 3Kg |
| Speed | 20cm/Sec |
| Charging time | 4~6H |
| Working time | 2000mAh/ 90-120mins |
| Noise | ≤ 68DB |
| Input | DC 24V 1A |
| Rated power | 26W |
| Applied temperature | -20°C---50°C |

Please forgive there is no further notice to inform any functional change of robot.
REMOVAL OF APPLIANCES USED
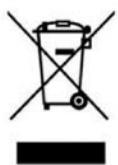
Directive 2002/96/EC on waste electrical and electronic Equipment (WEEE) requires that the appliance uses are not disposed of using the normal municipal waste. Old appliances must be collected separately in order to optimize the recovery and recycling of materials they contain and reduce the impact on
human health and the environment.
The symbol of the dustbin is used on all products to remind the obligations for separate collection. Consumers should contact their local authorities or dealer regarding the steps to follow for the removal of their old appliance. If you proceed with the scrapping of old equipment,
be sure to render useless what could be dangerous: disconnect the power cable flush with the device.
Danger:
Never attempt to use your appliance, if it shows signs of damage or the power cord or plug is damaged. If the power cord is defective it is important to have it replaced with the after sales service to eliminate any danger.
Only qualified and authorized persons are authorized to carry out repairs to your appliance.
Any repairs not in accordance with standards could significantly increase the level of risk for the user!
Defect resulting from improper handling, degradation or attempted repairs by third parties voids the warranty on the product. This also applies in case of normal wear and accessories from the appliance.
Important!
We recommend that you keep the packaging of your device at least for the duration of the warranty. The guarantee does not apply without the original packaging.
Warranty:
Your device has one year warranty. The warranty does not cover wear and breakage following a wrong use of the product.
FAGOR