CAN MOUSE - To scan IRIS - Free user manual and instructions
Find the device manual for free CAN MOUSE IRIS in PDF.
User questions about CAN MOUSE IRIS
0 question about this device. Answer the ones you know or ask your own.
Ask a new question about this device
Download the instructions for your To scan in PDF format for free! Find your manual CAN MOUSE - IRIS and take your electronic device back in hand. On this page are published all the documents necessary for the use of your device. CAN MOUSE by IRIS.
USER MANUAL CAN MOUSE IRIS
You swipe, it scans.

IRIScan Mouse
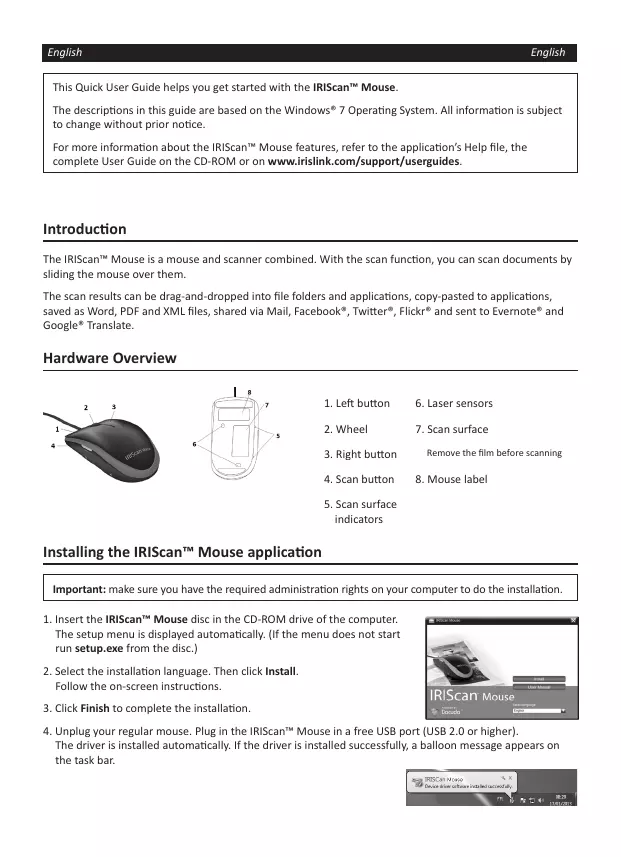
This Quick User Guide helps you get started with the IRIScan™ Mouse.
The descriptions in this guide are based on the Windows® 7 Operating System. All information is subject to change without prior notice.
For more information about the IRIscan™ Mouse features, refer to the application's Help file, the complete User Guide on the CD-ROM or on www.iriisink.com/support/userguides.
Introduction
The IRIScan™ Mouse is a mouse and scanner combined. With the scan function, you can scan documents by sliding the mouse over them.
The scan results can be drag-and-dropped into file folders and applications, copy-pasted to applications, saved as Word, PDF and XML files, shared via Mail, Facebook®, Twitter®, Flickr® and sent to Evernote® and Google® Translate.
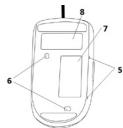
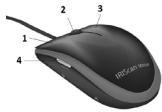
Hardware Overview
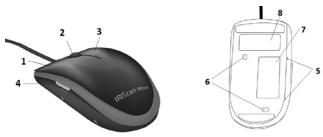
1.Left button
- Laser sensors
2.Wheel
-
Scan surface
-
Right button
Remove the film before scanning
-
Scan button
-
Mouse label
-
Scan surface indicators
Installing the IRIScanTM Mouse application
Important: make sure you have the required administration rights on your computer to do the installation.
-
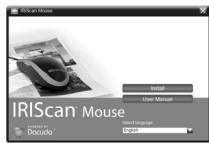
Insert the IRIScanTM Mouse disc in the CD-ROM drive of the computer. The setup menu is displayed automatically. (If the menu does not start run setup.exe from the disc.)
-
Select the installation language. Then click Install. Follow the on-screen instructions.
-
Click Finish to complete the installation.
-
Unplug your regular mouse. Plug in the IRScanTM Mouse in a free USB port (USB 2.0 or higher). The driver is installed automatically. If the driver is installed successfully, a balloon message appears on the task bar.

Using the IRIScanTM Mouse
Tip: to access the Help file before scanning, start the IRIScan™ Mouse application. Click the icon in the top left corner, then click Help.
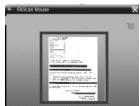
Step 1: Scan documents
- Place the mouse on the documents you want to scan.
- Press the Scan button once to start IRIScan™ Mouse.
- Move the mouse over the document to scan the desired area.

- To stop scanning, press the Scan button again. This opens the Edit screen.
To cancel the scanning, press Esc on the keyboard.
Notes
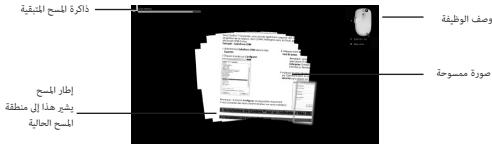
- During scanning, IRScan™ Mouse automatically zooms out and adjusts the view accordingly. To check whether the image is scanned properly, use the mouse wheel to zoom in/out the image. You can scan documents of up to A3 size.
- If you move the IRIScan™ Mouse too fast, the scan window turns yellow or red. Slow down the scanning if needed.
- If the scanned images appear distorted, stop moving the IRIScan™ Mouse briefly. The image will be calibrated automatically.
- When the scanning is done, the scanned image is automatically cut into a rectangular shape and aligned horizontally to the background.
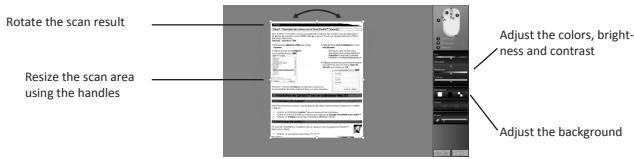
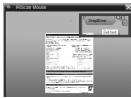
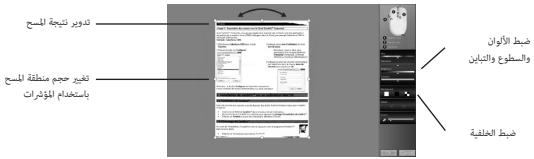
Step 2: Edit the scanned documents
In the Edit screen you can edit the scanned documents.
When you are done, click OK to accept the settings.
Note: when you click Cancel the scan result will not be saved to memory.
Step 3: save and share the scanned documents
The documents you scan can be shared and saved in several ways.
1. Drag-and-drop as image
- Open an application that supports images.
- Drag-and-drop the image to the application.


2. Drag-and-drop as text
IRIScanTM Mouse features I.R.I.S' powerful text recognition technology.
The default recognition language is set to English.
- Open a rich text-compatible application (E.g. Word).
- Drag-and-drop the Get Text icon to the application.
The recognized text and its layout are recreated in the application.


To change the text recognition language:
- Click Settings.
- Click Text Recognition.
- Select the required language(s) from the list. You can select up to 3 languages simultaneous.
- Click OK to confirm.

Note: you can also drag-and-drop the scan results directly to the Desktop or to file folders.
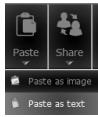
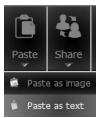
3. Paste as image or text
- Open the required application.
- Click Paste in IRIScanTM Mouse.
- Then select Paste as image or Paste as text.
4. Share images via Mail, Facebook, Twitter and Flickr.
- Click Share.
- Select the required application.
Note that you need a valid Facebook, Twitter and Flickr account and an internet connection to share documents via these applications.


5. Save in different output formats
- Click Save.
- Enter the file name and select a file type.
The supported file types are: png,JPEG,tiff,bmp,pdf,xmll and doc.
Notes: The image and pdf files you save can be hyper-compressed with the included IRISCompressor™.
When scanning tables, it is recommended to save them as xml files.
6. Send notes to Evernote or translate them with Google Translate
Evernote
- Make sure the Evernote application is installed on your computer.
- Log in to your Evernote account.
- In IRIScanTM Mouse click Apps > Evernote.
Your documents are uploaded to Evernote.
Google Translate
- In IRIScan™ Mouse click Apps > Google Translate.
- The recognized text in the scans is sent to Google Translate.
Note that an internet connection is required.
Paso 1: escanear documents
IcnoJb3ObaHne IRIScanTM Mouse
Cober. Tc6bI otKpBtB thai CNBnBepne KchNPOHBNHEM, 3anyCTe npINOJXEHME IRIScnTMouse.
LJIckHnTHaOHK oLeoBem BxHPmEYr, a 3aTEM hKnMHTe KhoNKy Hcp (CnpBaHa).
Uar 1: otckanhpnyTe DokymeNT
- NomeCTIeMbIbHaDOKyMeHTbI, KOTOpbIE XOTITe OTCKaHIpOBaTb.
- HaxMMTe KONky cKaHnpOBaHn OAnH pa3, YTO6bl 3anyCTnTB IRIScanTM Mouse.
- PpOBeIeMbIbIIO NO DOKyMeHTy, YTO6bI OTCKaHINPOBaT HyKHyIO Oblactb.

afojfofofofofofofofofofofofofofofofofofofofofofofofofofofofofofofofofofofofofofofofofofofofofofofofofofofofofofofofofofofofofofofofofofofofofofofofofofofofofofofo
Cilll llllgl 1 g wsh jwsh jwsh jwsh jwsh jwsh jwsh
aai 10
1
.IRIScanTM Mouse 13 (a) Paste
.(as) Paste as text 1 (s) Paste as image


.Flickr ^3 Twitter ^3 Facebook ^3
(25j)Share 3g
.
Flickr, Twitter, Facebook
aaii 1
jg jg jg jg jg jg jg jg jg jg jg jg jg jg jg jg jg jg jg jg jg jg jg jg jg jg jg jg jg jg jg jg jg jg jg jg jg jg jg jg jg jg jg jg jg jg jg jg jg jg jg
.()Helpgjg jglgjgglgglgglg
gdo 10gdo
Lggo Lgmo 1y j gll aaiu bgl g0.1
.IRIScanTM Mouse 100000000000000000000000000000000000000000
Lgauu u jll aegbblabdlabblubuub uuiuuljwgljoo
.(j)Edit aiaa jll iia ggy. yj yj jj jbj jbj jbj jbj j
aagaaagaaagaae ESC de baiol jgall 100
#
JISI LSSW. cssg sgs gagg IIRScanTM Mouse gagg gagg
Gio ciuaa 1000 8.8gall 234/259 8.8gll alao piai 1000 8.8gall 000 a3
A3
JIRIScanTM Mouse u
y1y1y1y12 y1y12
IRIScanTM Mouse
Lai 0a
•
gslsbog Jusu 3g0g0g aogabll gall sllal pglal gals no
aolllg
iigio aogabul cduiuubul yoo: 8gbsd
1000000000000000000000000000000000000000000000000000000000000000
.1011yUg()OKgjzJ 2
.3J11 J 3a a a baa (a) Canel g jas lais:ab
.IRIScanTM Mouse
.7 7
pIaIbI JyJy: yblly jolal aedl lde aep IRScanTM Mouse Ijgo clogbIe o jbjg
. www.irislink.com/support/userguides
aou
IIRScanTM Mouse
.1iuiuoi oia ggs wgl
PDF, Word clalas lghao gaoa bao jia aow gaoi ao bao bao jia oai jia oai jia oai
Google 密 Translate, Evernote ^密 , Flickr ^密 , Twitter ^密 , Facebook ^密 ,
jgljdldeaoo
jzjzjzj.7
zwhl zhw .V wgl1 alas .r
j3g 10
j#
wglj gala. A
zhuol
2
IRIScanTM Mouse
ppll plll 1000 jgssll jge de aoljll ojyll gse de cglg s
JISIgSILBabgsbIgIRsCmT Mouse
setup.exe 1a a a a a b 1b 13] )
.()Installgjzaip.
.
Jusw (a) Finsh qg jai.
IRIScanTM Mouse 002 p3 p4.12 a12 a12 wlll 100 gdi p3.
(USB2.0) USB
a 1


Document to Knowledge
PRODUCTS & TECHNOLOGIES
I.R.I.S. Products & Technologies
I.R.I.S. - Louvain-la-Neuve (Belgium)
I.R.I.S. AG - Aachen (Germany)
I.R.I.S. Inc. - Delray Beach (United States)
I.R.I.S. HK Ltd - Hong Kong (China)
www.irislink.com