CAN EXECUTIVE 4 DUPLEX - To scan IRIS - Free user manual and instructions
Find the device manual for free CAN EXECUTIVE 4 DUPLEX IRIS in PDF.


User questions about CAN EXECUTIVE 4 DUPLEX IRIS
0 question about this device. Answer the ones you know or ask your own.
Ask a new question about this device
Download the instructions for your To scan in PDF format for free! Find your manual CAN EXECUTIVE 4 DUPLEX - IRIS and take your electronic device back in hand. On this page are published all the documents necessary for the use of your device. CAN EXECUTIVE 4 DUPLEX by IRIS.
USER MANUAL CAN EXECUTIVE 4 DUPLEX IRIS
IRIScan™ Executive 4
1. Introduction
This User Guide helps you get started with the IRIScan Executive 4, a mobile duplex scanner.
It is compatible with Windows only.
The default scan settings of the IRIScan Executive 4 are the following:
- Duplex mode
Color - 300 dpi Its maximum resolution is 600 dpi.
Please read this guide before operating this scanner and its software. All information is subject to change without prior notice.
The software delivered with this scanner is:
Readiris Corporate 14
Cardiris 5
- Button Manager
- Capture Tool
For detailed information about the full range of features of Readiris, Cardiris, the Button Manager and the Capture tool, see their corresponding documentation on www.irislink.com/support.
2. Software Installation
Important Notes
- Install the software before you connect the scanner to your computer.
- Check the System Requirements on the I.R.I.S. website to make sure your system is compatible.
Precautions
- Keep the scanner out of direct sunlight. Direct exposure to the sun or excessive heat may cause damage to the unit.
- Do not install the scanner in a humid or dusty place.
- Place the scanner securely on an even, flat surface. Tilted or uneven surfaces may cause mechanical or paper-feeding problems.
- Retain the scanner box and packing materials for shipping purposes.
Installation
- Go to www.irislink.com/softwaredownload.
- Scroll down to IRIScan Executive 4 and click the Download button.
- Once the download is complete, run the IRIScanExecutive4.exe file.
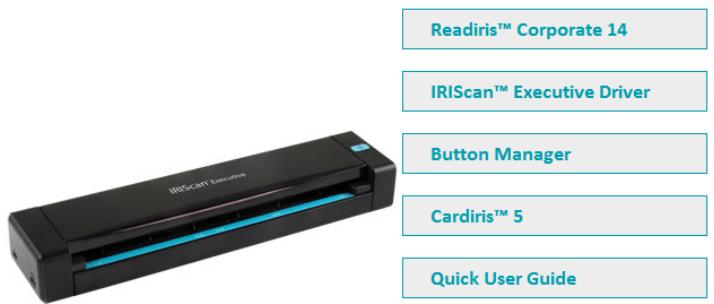
- The following setup screen is displayed:
www.irislink.com
IRIScan Executive 4
- Click "Readiris Corporate 14" to install Readiris. Follow the on-screen instructions.
Important: make sure to install this version of Readiris Corporate 14. Other versions of Readiris are not guaranteed to work with the Button Manager software.
- Return to the setup screen and click "IRIScan Executive Driver" to install the scanner driver.
-
Click "Next" until you reach the step "Plug in the USB Cable".
-
Connect the micro USB connector to the USB port of the scanner.
- Connect the other end of the USB connector to a USB port on your computer.
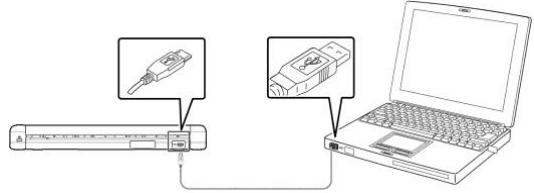
- When the driver is successfully installed the following message appears: "This device is now ready to use".
- Click "Finish" and return to the setup screen.
- Click "Button Manager" to install the Button Manager. A language selection window appears.
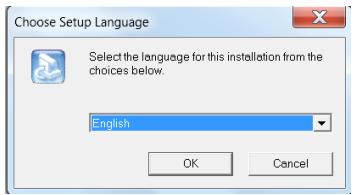
- Choose the language you wish to install. The InstallShield wizard guides you through the rest of the installation.
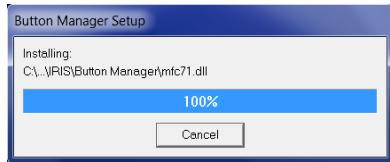
- Click "Finish" to complete the installation.
- Click "Cardiris 5" to install Cardiris. Follow the on-screen instructions.
Note: all license numbers required to activate the software can be found on the license sheet included in the box.
Attention: only use the USB cable delivered with your scanner. Using other USB power adapters may damage the scanner and void the warranty.
3. Supported Documents
The scanner is designed to obtain the best scanning results with the following types of originals:
Photos and documents (3"x5", 4"x6", 5"x7", 8.5"x14") (76 x 127mm, 102 x 152 mm, 127 x 177 mm, 216 x 356 mm)
Business cards [standard 3.5^ × 2^ (88 x 50 mm) or larger]
Long page (8.5"x36") (216 x 914 mm) for 300 dpi only
Paper Weight: 60 107 ~g / m^2 (16~28 lb)
Unsuitable Documents
Do not use the following types of originals for scanning, or the scanner may malfunction or cause the original to jam in the slot.
Originals thicker than 0.8mm
Originals with either side shorter than 50 mm
Originals with lots of black or dark colors
Originals with dark colors surrounding the edges
Printed media (newspapers, magazines, etc.)
Soft and thin materials (thin paper, cloth, etc.)
Originals that exceed 14 inches long and 8.5 inches wide (for 600 dpi)
4. Using the Scanner
4.1 Top view
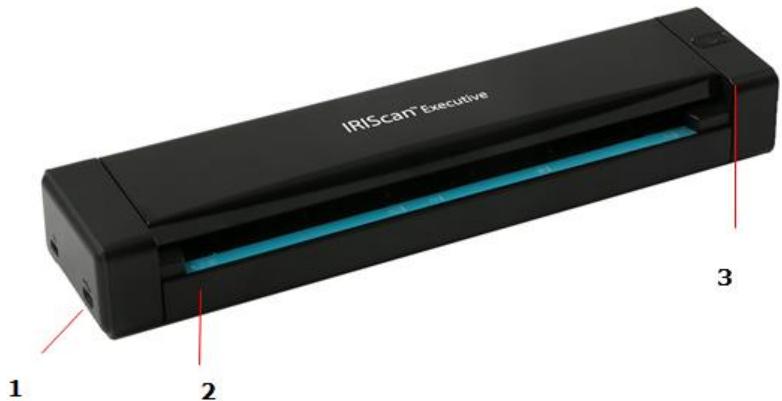
| Item | Name | Description |
| 1 | Micro USB port | Connect to a computer via the micro USB cable. |
| 2 | Feed slot | Insert document into the feed slot: • Face UP • Aligned with the LEFT edge to begin scanning. |
| 3 | Power/Scanner button | Press and hold for 3 seconds to power on/off. The blue led lights up and stays on when the scanner is powered on. Press once to scan. Important: the scanner must be connected to a computer to power it on and to scan. |
4.2 Led info
| Blue led, on. | Scanner is powered on. |
| Blue led, blinking. | Scan in progress. |
| Green led, blinking fast. | Scan error or paper jam. |
| Led is off. | Scanner is powered off. Notes: When the scanner is idle for 240 minutes it auto powers off. When your computer is not connected to a power source and you put it to Hibernate the blue led turns off. |
4.3 Scanning with the IRIScan Executive 4
The IRIScan Executive 4 can be used in several ways:
- With the Button Manager to scan documents directly to Readiris for text recognition, scan them to other applications of your choice, to multiple Cloud destinations, etc.
From within Readiris or Cardiris.
From within the Capture Tool.
In this User Guide we only describe the basics how to scan.
Separate User Guides are available for the Button Manager, the Capture Tool, Readiris and Cardiris.
The documentation package can be found on the Technical Support section of www.irislink.com.
Basic Scanning
Important!
- Insert only one page at a time, and insert the next one only when the previous one is done. Otherwise, the scanner may malfunction.
-
The paper detector is quite sensitive. Please do not push your document into the feeding slot or the top of your image will be cut. Simply let go the document when it begins to feed into the slot.
-
Connect the scanner to your computer using the provided USB cable. The scanner is powered on automatically.
- Insert your document FACE UP into the feeder and align it to the LEFT edge of the feeder.
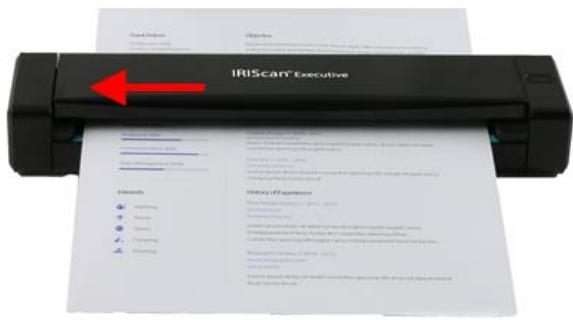
- Gently push the document into the feed slot.
- Press the Scanner button once to start scanning. The document will be sent to the default destination of the Button Manager.
Note: it takes a few seconds for the scanner to start.
Scanning like an ADF (Automatic Document Feeder)
The IRIScan Executive 4 can also be used as an ADF in which you insert one sheet after the other without having to click or press Scan every time.
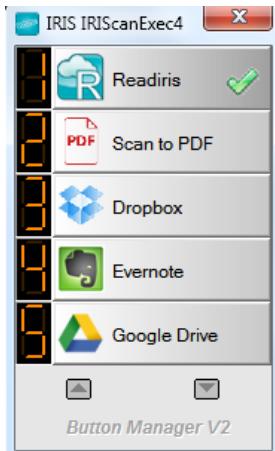
- Start the Button Manager from All Programs > IRIS Button Manager.
- Right-click the button you want to use.
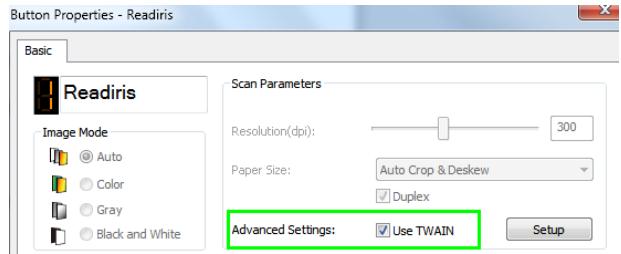
- Select Use Twain next to Advanced Settings, and click OK to confirm.
Tip: to remove Blank pages from your scans, click the Setup button next to Use Twain. Click the Separation tab and select Blank Page Removal Threshold. The more you move the slider to the left, the sooner a page will be considered blank.
- Now insert a page into the scanner and click the button you configured.
- Once the page has been fed through a message appears informing you you have 15 seconds to insert another page.
- Insert the other pages you want to scan one by one.
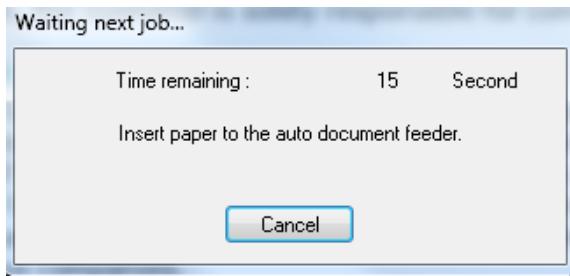
- When you are done scanning all your pages, click Cancel.
5. Maintenance
5.1 Calibrate the scanner
Calibrate only if the scanned image looks fuzzy, the color looks abnormal (e.g., darker than normal), after more than 8,000 scans, or the scanner has been stored without use for a long time. The calibration process resets the Contact Image Sensor to resume its color and sharpness precision.
- Connect the scanner to your computer.
-
Start the Capture Tool.
-
Click Start > All Programs > IRIS IRIScan Executive 4 Scanner > Capture Tool
- Select your driver type and scanner model and click OK.
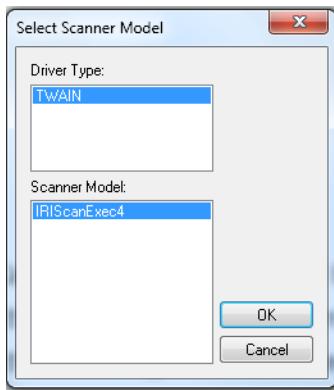
- The Capture Tool dialog box will be displayed.
- Click the "Setup" button to open the Scanner Properties dialog box.
- Click the "Settings" tab and then click the "Calibration" button.
- The "Insert calibration sheet" dialog box appears.
- Hold the edges of the calibration sheet (included) and insert it with the text facing up and the white area feeding first into the feeder (As shown below).
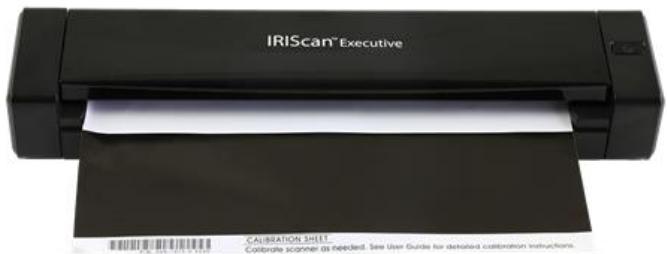
- Click "OK" in the "Insert calibration sheet" dialog box to start calibrating the scanner.
WARNING: If the calibration failed, the led will be flashing and an error message will be displayed on the screen. Disconnect and reconnect the scanner and then repeat the calibration.
5.2 Cleaning the scanner
In order to maintain an optimal scan quality and prevent dust accumulation, it is recommended you clean the scanner (outer casing and feed rollers) approximately every 200 scans, or if vertical lines or stripes appear on the scanned image.
Use only the recommended and supplied tools to clean the scanner.
WARNING: Do not use any solvents or corrosive liquid (i.e., alcohol, kerosene, etc.) to clean any part of the scanner, otherwise the plastic material may be permanently damaged.
- Open the cover by holding the scanner with one thumb on the feeder and another thumb on the cover. Carefully and firmly press your thumb into the feeder and then raise the cover. This will cause the top of the scanner to release from the bottom of the scanner.
- Gently wipe the glass and feed rollers on the scanner, and the CIS cover with the cleaning cloth (included).
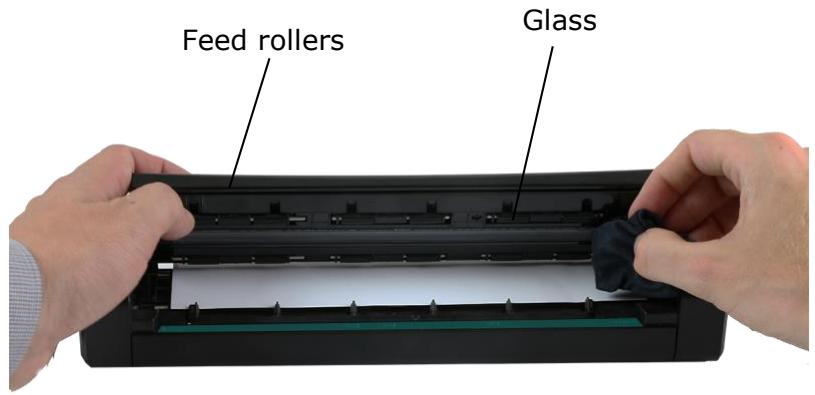
6. Troubleshooting
6.1 Clearing a Paper Jam
When a document is jammed inside the feeder the scanner led blinks green.
To clear a jam from the feeder, press and hold the Power button for 3 seconds to power off, then press quickly to power on again. The jammed document will be fed through automatically.
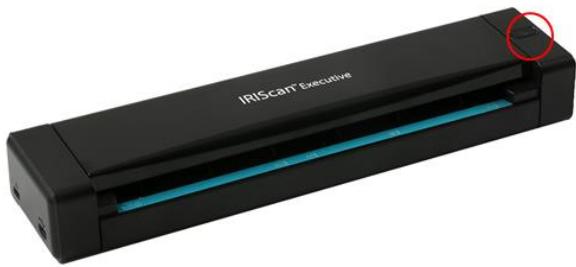
If the document is still jammed, follow these steps to remove it:
- Open the cover by holding the scanner with one thumb on the feeder and another thumb on the cover. Carefully and firmly press your thumb into the feeder and then raise the cover. This will cause the top of the scanner to release from the bottom of the scanner.
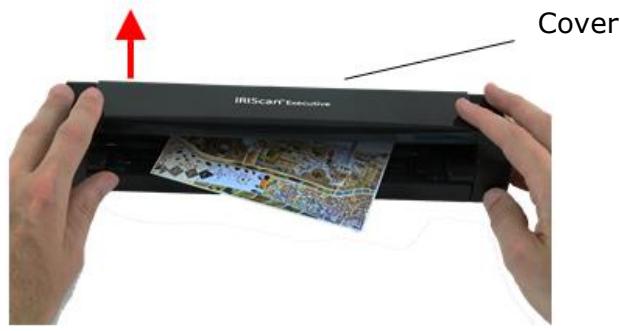
- Remove the item.
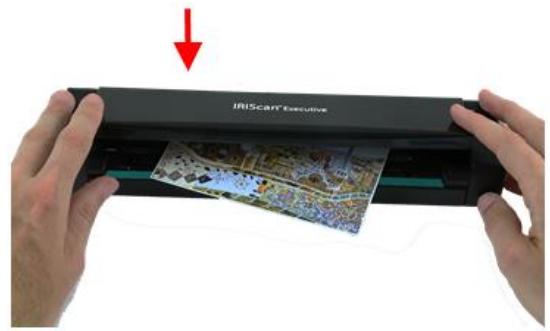
- Close the cover and reinsert the item to rescan.
6.2 Questions and Answers
| Question: | Why doesn’t my scanner power on |
| Answer: | Make sure the scanner is connected to your computer using the provided USB cable. |
| Question: | Why does my scanned image always come out too dark? |
| Answer: | 1. Please adjust the screen settings to SRGB. 2. Please adjust the brightness settings on the screen from application software. |
| Question: | Why are there strange lines on the scanned document? |
| Answer: | Please check the following: 1. Are there scratches on the original or is the original clean ? 2. Remove any stains or dust from the original before scanning. 3. Clean the rollers and glass with the included cleaning cloth. (Refer to the section “Clean the scanner”) |
| Question: | When I choose 600 dpi as optical resolution, why are the "auto crop" and "deskew" functions disabled? |
| Answer: | Since performing auto crop and deskew consumes great deal of system memory, it is recommended to select an optical resolution below 600 dpi to prevent errors. |
| Question: | Should the scanner feel warm to the touch? |
| Answer: | It is normal for the scanner to emit a small amount of heat after prolonged use. However, if there are strange odors coming from the scanner or the scanner feels a little bit hot to the touch, turn the scanner off immediately. |
6.3 Product Support
Should you still experience issues using the IRIScan Executive 4, consult the Technical Support section of www.irislink.com.
7. Specifications
All specifications are subject to change without notice.
Model Number :
IRIScan Executive 4
Image Technology:
Contact Image Sensor (CIS)
Optical Resolution:
600 dpi
Scanning Modes:
Black & White
Gray
Color
Paper Weight:
16~28 lbs (60~107 g/m²)
ID Card Thickness:
Up to 0.8mm
Interface:
Micro USB port compatible with USB 2.0
USB Power:
5Vdc, 500mA
Power Consumption:
< 2W (operation)
<0.6W (standby)
Operating Temperature:
5^ 35^ (41^ 95^)
Humidity:
20%~85% RH
Dimensions: (HxWxD)
11.4" x 2" x 1.4"
(290 × 52 × 35 mm)
Weight:
0.88 lbs (400g)
8. Legal Information
Copyright
IRIScanExecutive4-dgi-10062016-01
Copyright © 2016 I.R.I.S SA. All rights reserved.
Information in this document is subject to change without notice. The software described in this document is furnished under a license agreement or nondisclosure agreement. The software may be used or copied only in accordance with the terms of those agreements. No part of this publication can be reproduced in any form or by any means without prior written permission of I.R.I.S. SA.
Material scanned by this product may be protected by governmental laws and other regulations, such as copyright laws, the customer is solely responsible for complying with all such laws and regulations.
Trademarks
Microsoft is a U.S. registered trademark of Microsoft Corporation.
Windows, Windows Vista, Windows 7, Windows 8 and Windows 10 are either registered trademarks or trademarks of Microsoft Corporation in the United States and/or other countries.
Microsoft and Windows are registered trademarks of Microsoft Corporation.
Other names and products mentioned in this document may be trademarks or registered trademarks of their respective companies.
Warranty
The information contained in this document is subject to change without notice.
I.R.I.S. makes no warranty of any kind with regard to this material, including, but not limited to, the implied warranties of fitness for a particular purpose.
I.R.I.S. shall not be liable for errors contained herein or for incidental or consequential damages in connection with the furnishing, performance, or use of this material.
Safety Instructions
Follow these safety instructions when setting up and using the scanner:
- Read all these instructions, and follow all warnings and instructions given in this document.
- Place the scanner close enough to the computer for the interface cable to reach it easily.
- Never handle the scanner with damp or wet hands, in nomadic mode, or when used as a fixed unit.
- When connecting this product to a computer or other device with a cable, ensure the correct orientation of the connectors. Each connector has only one correct orientation. Inserting a connector in the wrong orientation may damage both devices connected by the cable.
- Other than placing a mini SD card or new batteries in the openings provided for the purpose and indicated on the scanner, do not insert objects into any opening as they may touch dangerous voltage points or short out parts and lead to a risk of electrocution.
- Place the product on a flat, stable surface large enough to safely hold the product and the document to be scanned.
- Never disassemble the scanner.
- If the product overheats or produces smoke or an unusual odour, discolours or becomes deformed in an abnormal way, immediately turn off the scanner, remove the batteries where applicable, and disconnect the cables. Stop using the scanner and contact your dealer or IRIS customer support to receive instructions on the procedure to follow.
Take care not to drop the scanner or expose it to physical impacts. - Do not place or store the scanner outdoors, in a car, near heat sources, in locations that are dusty, damp or exposed to impact, vibration, condensation, high temperatures, sunlight, strong light, or rapid changes in temperature or humidity.
- Never attempt to disassemble, modify, or repair the scanner or any of its components yourself.
- Special precaution concerning the model equipped with Wifi transmission only (IRIScan Book Executive 3, IRIScan Anywhere 3 Wifi, IRIScan Pro 3 Wifi):
- Radio waves from this product may adversely affect the operation of other devices, such as medical equipment, measuring instruments in aeroplanes, or automatically controlled devices, such as pacemakers, automatic doors, or fire alarms, and any other device that is sensitive to radio waves.
- When using this product near such devices or inside a medical facility, follow the directions marked on the devices concerned and the instructions for authorized staff members at the facility, and follow all posted warnings and directions on the device to avoid causing an accident.
USB power supply
- The USB cable should be placed to avoid abrasions, cuts, bending, twisting, and kinking of the connectors.
- Do not place objects on top of the USB cable and do not allow the cable to be stepped on or run over.
- Be particularly careful to keep the USB cable straight at the end.
- Unplug the scanner and the USB cable, and refer servicing to qualified service personnel under the following conditions: liquid has entered the scanner; the scanner has been dropped
- or the case has been damaged; the scanner does not operate normally or exhibits a distinct change in performance.
- After fully charging the scanner using the USB cable (the battery indicator is then fully displayed on the screen), disconnect the cable to use in nomadic mode.
Battery-related safety instructions
- For models with interchangeable batteries (IRIScan Book), never leave dead batteries in the device, because they may corrode and cause irreversible damage to the device (the warranty does not cover this type of incident). When replacing the batteries, handle them carefully to avoid all risk of injury or fire due to leakage, overheating, explosion, erosion, or any other damage to the product.
- For models with a built-in rechargeable, non-interchangeable lithium battery (IRIScan Anywhere 3 or IRIScan Anywhere 3 Wifi), do not open the scanner and never remove the battery. It should be replaced by certified technical personnel only. In case of doubt about battery performance, stop using the scanner and contact your dealer or IRIS customer support to receive instructions on the procedure to follow.
- If you are not planning to use the scanner for a long period (more than a month), be sure to remove the batteries from models that allow it (IRIScan Book).
- If you have not used the scanner with non-interchangeable lithium battery (IRIScan Anywhere 3 or IRIScan Anywhere Wifi) for at least a month, remember to charge it fully before its first use.
- Keep batteries out of the reach of children. If battery acid comes into contact with skin or eyes, immediately rinse the affected area thoroughly with water and seek medical treatment. If a battery is swallowed, seek medical treatment immediately.
- If battery acid leaks from a battery, wipe it off with a cloth and replace the battery with a new one.
- Use alkaline, lithium or Ni-MH batteries (AA or AAA size) for the IRIScan Book 3 and IRIScan Book Executive 3 respectively.
- Do not use new and old batteries together or mix different types or brands of battery.
- Insert the batteries so that the polarities are as indicated.
- Remove dead batteries promptly.
- Do not expose batteries to heat, fire or water.
- Do not remove batteries with metal objects such as tweezers or the tip of a pen.
- Cover the ends of the batteries with tape to prevent combustion or explosion when disposing of them.
Make sure always to follow local battery disposal regulations.
FCC Radio Frequency Interference Statement
This product has been tested and found to comply with the limits for a class B digital device, pursuant to Part 15 of the FCC rules. Operation is subject to the following two conditions: (1) this device may not cause harmful interference, and (2) this device must accept any interference received, including interference that may cause undesired operation. The FCC Class B limits are designed to provide reasonable protection against harmful interference in a residential installation. This equipment generates, uses, and can radiate radio frequency energy and, if not installed and used in accordance with the instructions, may cause harmful interference to radio communications. However, there is no guarantee that interference will not occur in a particular installation. If this equipment does cause harmful interference to radio or television reception, which can be determined by turning the equipment off and on, the user is encouraged to try to correct the interference by one or more of the following measures:
Reorient or relocate the receiving antenna.
- Increase the separation between the equipment and receiver.
- Connect the equipment into an outlet on a circuit different from that to which the receiver is connected.
- Consult your point of purchase or service representative for additional suggestions.
CE
European Union Regulatory Notice
Products bearing the CE marking comply with the following EU Directives:
Low Voltage Directive 2006/95/EC
EMC Directive 2004/108/EC
- Restriction of the use of certain hazardous substances (RoHS) Directive 2011/65/EU
CE compliance of this product is valid if powered with the correct CE-marked AC adapter provided by I.R.I.S. s.a.
This product satisfies the Class B limits of EN55022, EN55024, safety requirements of EN 60950 and ROHS requirements of EN50581.
*This product is certified as Class 1 LED product.

Disposal of Waste Equipment by Users in Private Households in the European Union

This symbol on the product or on its packaging indicates that the product can not be disposed of with your other household waste. Instead it should be sent to appropriate facilities for recovery and recycling in an effort to protect human health and the environment. Fore more information about where you can drop off your waste equipment for recycling, please contact your local city office, your household waste disposal service or the shop where you purchased the product.