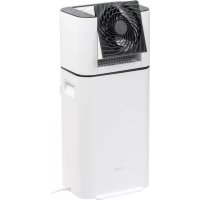
SCAN BOOK 2 - To scan IRIS - Free user manual and instructions
Find the device manual for free SCAN BOOK 2 IRIS in PDF.
User questions about SCAN BOOK 2 IRIS
0 question about this device. Answer the ones you know or ask your own.
Ask a new question about this device
Download the instructions for your To scan in PDF format for free! Find your manual SCAN BOOK 2 - IRIS and take your electronic device back in hand. On this page are published all the documents necessary for the use of your device. SCAN BOOK 2 by IRIS.
USER MANUAL SCAN BOOK 2 IRIS
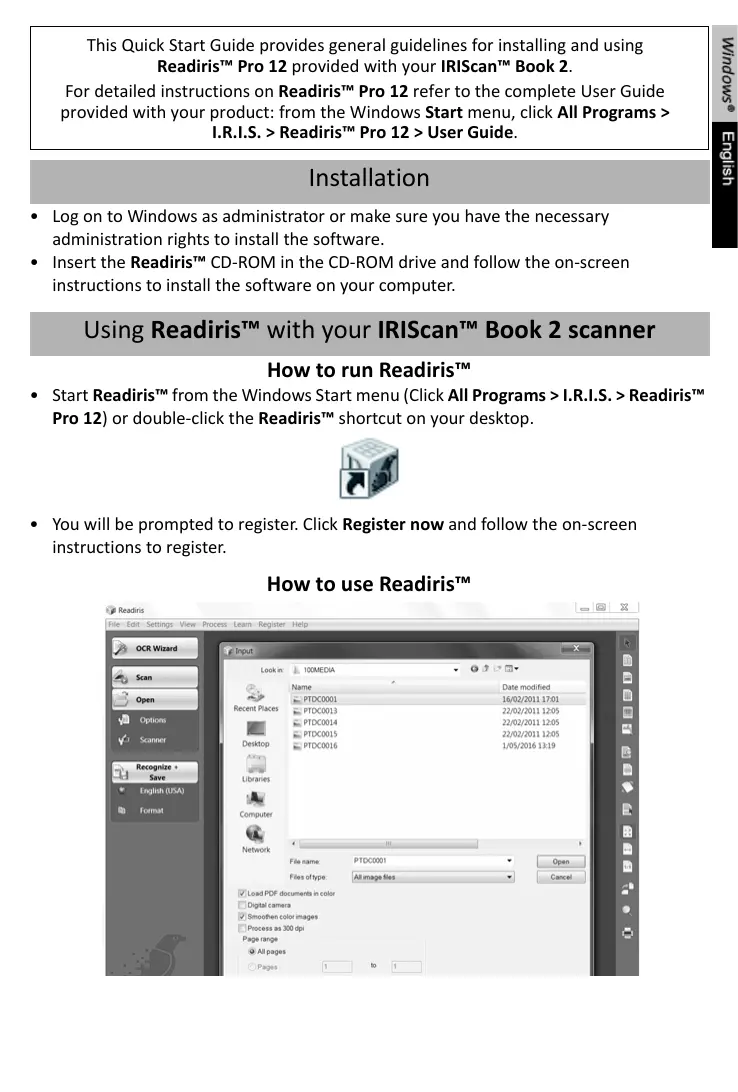
This Quick Start Guide provides general guidelines for installing and using Readiris™ Pro 12 provided with your IRIScan™ Book 2.
For detailed instructions on Readiris™ Pro 12 refer to the complete User Guide provided with your product: from the Windows Start menu, click All Programs > I.R.I.S. > Readiris™ Pro 12 > User Guide.
Installation
- Log on to Windows as administrator or make sure you have the necessary administration rights to install the software.
- Insert the Readiris™ CD-ROM in the CD-ROM drive and follow the on-screen instructions to install the software on your computer.
Using Readiris™ with your IRIScan™ Book 2 scanner
How to run Readiris™
- Start Readiris™ from the Windows Start menu (Click All Programs >I.R.I.S. >Readiris™ Pro 12) or double-click the Readiris™ shortcut on your desktop.

- You will be prompted to register. Click Register now and follow the on-screen instructions to register.
How to use Readiris™
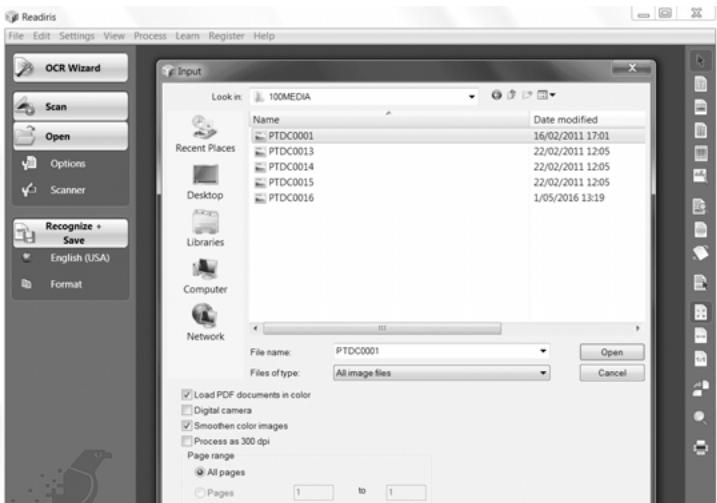
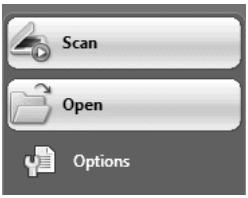
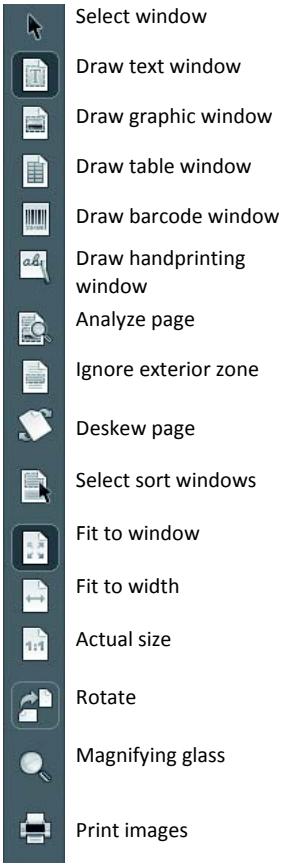
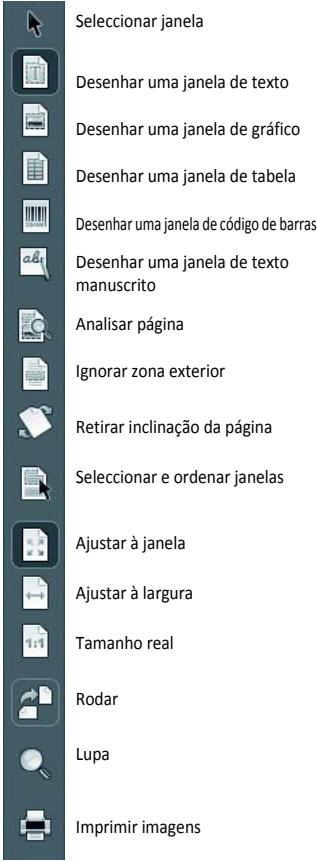
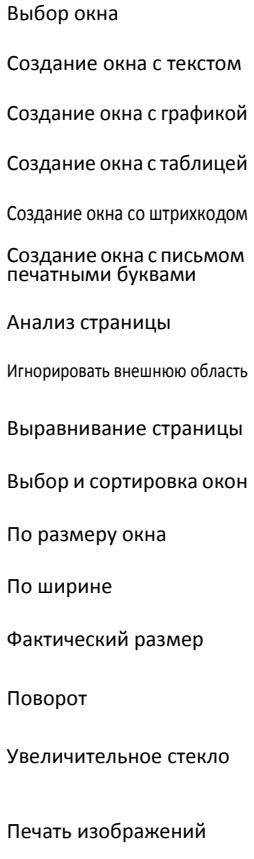
Step 1: Use the left toolbar to load and process your documents
Readiris™ can process all kinds of documents containing text, graphics, tables, complex columns, etc. Even dot matrix and degraded texts.
- Click Options to activate the possible processing options:
Page Analysis (default option): it splits up your documents in recognition zones.
Page Deskewing: it straightens documents that were scanned at an angle.
Rotation options: they rotate your documents in the required direction.
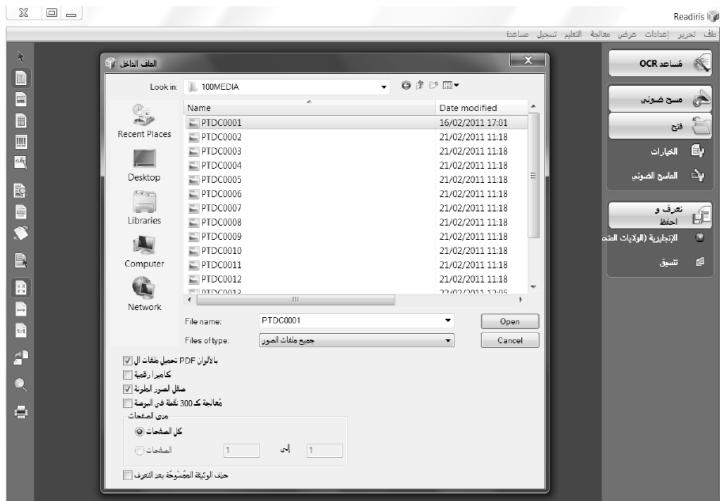
- Power on your IRIScan™ Book and connect it to your computer.
A window will open prompting you to load your IRIScan™ Book images. Select the images you want to open and click Open.
Note: to open images at a later time, click the Open button on the main toolbar and manually search for the images you want to open.
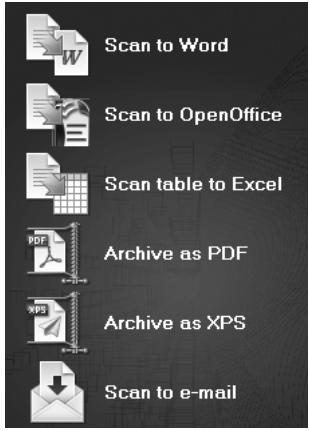
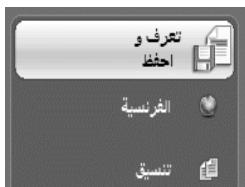
Step 2: Recognize and save your documents
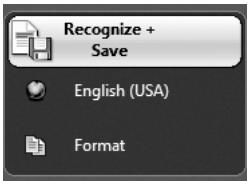
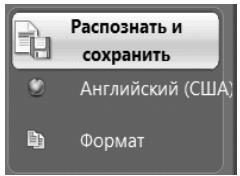
1 Click the globe icon to select the language of your documents.
Tip: You can favor recognition speed over accuracy and vice versa by moving the slider.
- Click Format to select the target application (Word, OpenOffice, Excel, etc.) or output format (DOCX, ODT, PDF, PDF-iHQCTM, PDF/A, XPS, XPS-iHQCTM, etc.) of your documents, then select the required options.
iHQCTM
Use the iHQC™ technology to highly compress your PDF and XPS documents.
- Click Recognize + Save to execute the recognition and save your documents.
To edit your documents, use the right toolbar buttons. Examples:
- Refine the automatic page analysis by sorting the zones and by drawing new text, graphic, table, barcode and handprinting windows. Also manually create barcode and handprint windows if needed.
- Define a limited recognition zone using Ignore exterior zone. All data outside the zone will be discarded.
- Use Deskew page to straighten the document page.
- Use Rotate to set the correct text orientation.
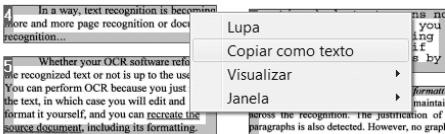
- Right-click on the scanned image to access useful functions.

Readiris™ smart tools
OCR Wizard
You can access the OCR Wizard from the left toolbar.
The wizard smoothly guides you through the settings required to operate Readiris™.

SmartTasks
The SmartTasks are predefined commands that allow you to launch the main Readirist™ functions at a time (scan, recognition, conversion).
Your documents are directly transferred to Word, OpenOffice, etc. (Many other applications and formats are available.)
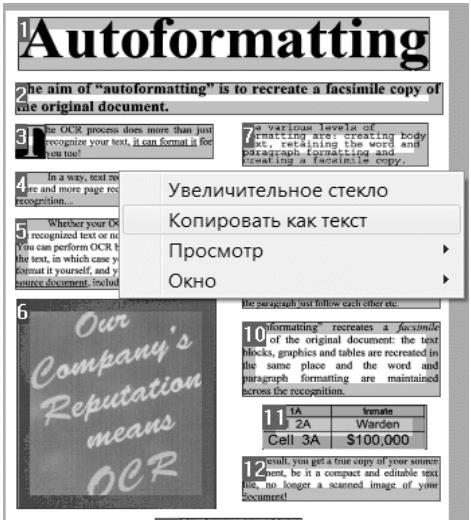
the aim of "autoformatting" is to recreate a facsimile copy the original document.

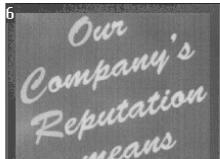
10 "foliformating" recreates a facin copy of the original document: the blocks, graphics and tables are recreated the same place and the word a paragraph formatting are maintain across the recognition.
| Cell 1A | Inmate |
| Cell 2A | Warden |
| Cell 3A | $100,000 |
Ferramentas inteligentes do Readiris™
Assistente de OCR
- Bключite ckaHep IRIScanTM Book n IOДКЛIOЧITE erO K KOMMbHTepy.
Otkpoetc oKHO c npdeIIOXeHnem 3aRpy3ntb n3o6paKeHnra IRIScanTM Book. BbIbepuTe n3o6paKeHnra, KOtOpble HuykHO OTKpbITb, N haKMnTe KhoNky OTkpbITb.
PpmeaHne. UTo6bl OTKpbITb I3O6paKeHnna03DHee, HAnMnTe KKnKBy OTKpbITb Ha rIaNbHOI NaHEJI INCTpyMeHTOB IN BpyHyIO HauDiTE I3O6paKeHnra, KOToBpIe
Uar 2. Pacno3haIte n coxpaHnte DOkymeHTbl.
Hoe6xOJIMoOTKpbItb.
1Дль ВьбopaЯЗыka ДOKум entOB уeiknHe 3naHoc rno6yca. Cobet.MoJHo yBelenuHt bckopocb paCNo3HaBaHnra 3a cuet ToHoctn Haobopot, nepeDbirra 6eryHok.
2. Haxmte KhoNky FOpMaT, qTo6bl BbIbpaTb ceJeBoe npJIoJxHeNe (Word, OpenOffice, Excel n np.) nn FOpMaT BbIOda (DOCX, ODT, PDF, PDF-iHQCTM, PDF/A, XPS, XPS-iHQCTM n dp.) dJa DOKyMeHToB, a 3aTeM Bbl6epnTe HuyKhble napametpbI.
iHQCTM
TexHOrnIg iHQCTM nCIOJIb3yETc dIy CIIbHOrO cKaTnIe PDF- n XPS-DOKymeHTOB.
- HauMnte PaCno3HaTb n CoXpaHnTb, yTo6bl paCno3HaTb n CoXpaHnTb DOKymeHTbl.
Pn Heo6xOaHMOCTN DOKymeHTb MoXHO N3MeHNtB nepe npeo6pa3OBaHHeM
ДлpeдakTIpOBaHnI DOKyMeHTOB NcNoIb3yIte KHOJIKNHa npabOи NaHeJIn NHCTpyMeHTOB.
Пгимеры:
- UTOHHeHne aBToMaTnueCKOrO aHaJIIN3a CToPAHcbl nyTeM cOpTnObKN 30H n CO3dAnH RAHOBBIX 3OH C TeKCTOM, rpaΦNkoJ, wTpNXKOaAMn n Ta6IaAMn, a TAKKe 30H neaTaN neaTHbIMn 6ykbamn. Kpome TORo, pRn Heo6XoIMMoCTn MOxH OByHyIO CO3daTb 3OHbI CO wTpNXKOaAMn n NcMbOM neaTHbIMn 6ykbamn.
3aDahne orpaHnueHHo 6bIacTn paCnO3HaBaHnna C nOmoUIO npaMepTa HrHOpnpOBaTb BHeuHIO O6bAcb. Bce daHHbte 3a npedeJAMn 6bIacTn 6ydyT ot6poWeHbl. - IcnoIb3OBAHne npaMeTpRa BbipabHbAHnec TpaHnCblДЯ BbipabHbBaHnrcTpaHnCbl DOKUMeHTa.
- Исторынения паиметра Поворот Дли за干嘛 поарынок opneHTaци Текта.
- UeKnTe nO6paKeHne npabO KHOKnO Mblu IaIOCTyNa K NOJe3HbIM YHKcIyM.

HHTeJIeKtYaJIbHbIe HNcTpymeHtbl ReadirisTM
Macrep OCR
Mactep OCR moxno 3anyctntb c nomooslo lebo nahein HnCTpymEnTOB.
Mactep nomoraet hacptb npamaetpbI, Heo6xOdImbIe dIra pa60tbc ReadirisTM.

SmartTask
IRIScanTM Book 2 1500000000000000000000000000000000000000000000000000000000000000000000000000000
ReadirisTM
Windows 1 (1) Start ReadirisTM
(ReadirisTM Pro 12 < I.R.I.S. < (J) All Programs
lll llll 1e gall ReadirisTM Jaiiai jaojai jai

Jillll llllge aagall lalilll g jai. Jillll
ReadirisTM
g 1
aaiiia aie iie 1
Jus no sall and all j 0jill aas
J 1
OpenOffice Word)
PDF DDT DOCX)
(XPS-iHQCTM XPS,PDF/A,PDF-iHQCTM
aalal
iHQCTM
Aie XPS,PDF 1iHQC
1
Cioogj jdi
Jgjzdi j
jgljlaabjldaiu
aaii aiee
a#
a jilali abjial jalai
aaiiie
i j i j
aill
Jus
jn + 1 = 12 - jn


a a
a
iuiuai Jds jao gulilall aannll laiy
a 1
The aim of "autoformatting" is to recreate a facsimile copy of the original document.
31 The OCR process does more than just recognize your text. It can format it for you too!
In a way, text recognition is becoming more popular page recognition or document recognition.
Whether your OCR software reforms recognized text or not is up to the user. You can perform OCR because you just need the text, in which case you will edit and format it yourself, and you can recreate the source document, including its formatting
The various levels of formatting are creating body text. The first level is the beginning and paragraph formatting and creating a facsimile copy.
Creating body text means nohtreating is applied!you
10 formatting recreates a facsimile of the original document: the text blocks, graphics and tables are recreated in the same place and the word and paragraph formatting are maintained across the recognitium.
| 1A | Innate |
| 2A | Warden |
| Cell 3A | $100,000 |
- Result: you get a four copy of your source document, be it a compact and editable text file, no longer scanned image of your Document!