
CKVM2M - KVM Switch CONCEPTRONIC - Free user manual and instructions
Find the device manual for free CKVM2M CONCEPTRONIC in PDF.

| Brand | CONCEPTRONIC |
| Model | CKVM2M |
| Product type | 2-port KVM switch with integrated cables |
| Number of controllable computers | 2 |
| Maximum video resolution | 2048 x 1536 pixels |
| Video bandwidth | 400 MHz |
| Interfaces | 1 VGA input, 2 VGA outputs; PS/2 keyboard and mouse ports (or USB depending on configuration, not specified) |
| Switching method | Keyboard shortcuts (Hotkey): Scroll Lock + Scroll Lock + up/down arrow |
| Auto-Scan mode | Yes, 8-second interval |
| LED indicators | LED on indicating active port; flashing during selection |
| Required software | None |
| Operating system compatibility | All (no driver needed) |
| Dimensions (approx.) | 100 x 65 x 25 mm |
| Weight (approx.) | 150 g |
| Power supply | Powered by computer keyboard/mouse ports (no external source required) |
| Housing material | ABS plastic |
| Maintenance and cleaning | Disconnect before cleaning; use a soft dry cloth; avoid solvents |
| Safety | Use only with compatible equipment; do not expose to moisture; turn off computers before connecting |
| Spare parts and repairability | Product not user-serviceable; contact technical support if problems occur |
| General information | Designed for home or office use; technical support available at www.conceptronic.net |
Frequently Asked Questions - CKVM2M CONCEPTRONIC
User questions about CKVM2M CONCEPTRONIC
0 question about this device. Answer the ones you know or ask your own.
Ask a new question about this device
Download the instructions for your KVM Switch in PDF format for free! Find your manual CKVM2M - CONCEPTRONIC and take your electronic device back in hand. On this page are published all the documents necessary for the use of your device. CKVM2M by CONCEPTRONIC.
USER MANUAL CKVM2M CONCEPTRONIC
Congratulations on the purchase of your Conceptronic KVM switch.
The enclosed Hardware Installation Guide gives you a step-by-step explanation of how to install the Conceptronic KVM Switch.
When problems occur, we advise you to go to our support-site (go to www.conceptronic.net and click 'Support'. Here you will find the Frequently Asked Questions Database.
When you have other questions about your product and you cannot find it at our website, then contact us by e-mail: support@conceptronic.net
For more information about Conceptronic products, please visit the Conceptronic Web Site: www.conceptronic.net
ENGLISH
This all in one KVM switch with built in KVM cable kit does not need extra KVM cables.
There is no software needed and video resolutions up to 2048x1536 at 400Mhz bandwidth is supported.
With a simple hot-key combination you can select the computer and your keyboard status will be restored when switching between the computers.
The LEDS at our KVM switch will inform you about the status.
1. Hardware Installation Conceptronic KVM Switch
Please turn off all your devices (computers, monitors etc.) before installation of the Conceptronic KVM Switch.
To have the KVM switch work correctly you have to connect the cables of your Mouse, Monitor and Keyboard to the KVM switch
The keyboard cable in the purple connector, the mouse cable in the green connector and the VGA (Monitor) cable in the blue connector.
Now you can connect the cables of the KVM switch to your computer.
The Green connector is your mouse cable and the purple one is your keyboard cable.
Note: do not use the hotkey function during boot-up process of your computer
2. Usage
Normally there is one LED lit when the KVM switch is connected to a computer. When you select one of the two computers with the hot key combination the selected port will flash.
ENGLISH
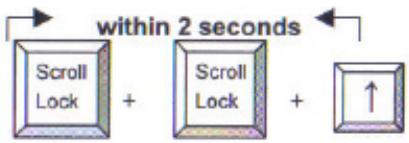
3. Keyboard HOT KEY commands
1
flowchart
graph LR
    A["Scroll Lock"] + B["Scroll Lock"] + C["↑"]
    style A fill:#f9f,stroke:#333
    style B fill:#f9f,stroke:#333
    style C fill:#ccf,stroke:#333
    note right of A: within 2 seconds
2
text_image
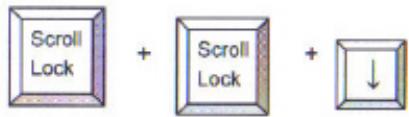
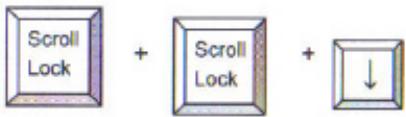
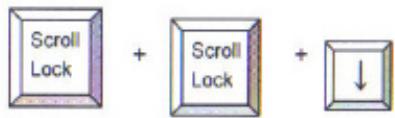
Scroll Lock + Scroll Lock + ↓Select PC port:
3

text_image
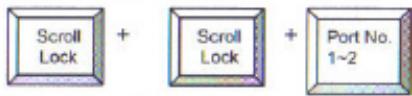
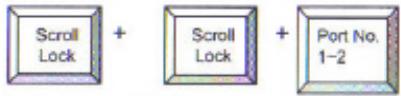
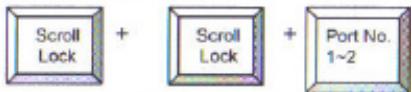
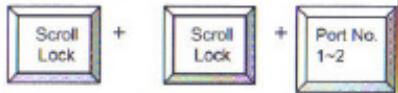
Scroll Lock + Scroll Lock + Port No. 1~24
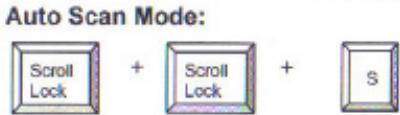
Auto Scan Mode:
5

text_image
Scroll Lock + Scroll Lock + SThere are 2 hotkey combinations to switch between your computers
-
Using: Scroll-Lock, Scroll-Lock
-
Using: Scroll-Lock, Scroll-Lock
Or use:
-
Using: Scroll-Lock, Scroll-Lock
-
Using: Scroll-Lock, Scroll-Lock
For these sequences you have 2 seconds. It's not necessary to have the num-lock on.
The last functionality possible with the HOT-KEY command is the AUTO-SCAN mode.
- Using: Scroll-Lock, Scroll-Lock
than the Conceptronic KVM switch will automatically switch between the 2 computers with an 8 seconds interval.
ENGLISH
We advise you to use the spacebar to disable the auto scan feature.
4. Troubleshooting
Make sure that all cables are well connected. We advise you to label all cables with ie. a number for every computer to avoid confusion.
5. Booting up your computer
We strongly advise you not to press any keys on the keyboard while the selected computer is booting. It's possible that you will have a keyboard error or your keyboard will not be detected by your computer.
6. Mouse & Keyboard
Mouse and/or Keyboard is not detected:
Make sure the keyboard and/or mouse works when it is directly plugged into the computer
Do not press the keys on the keyboard while booting
Do not move or press the buttons of the mouse when switching between the two computers
ESPAÑOL
Conceptronic CKVM2M
flowchart
graph LR
    A["Scroll Lock"] + B["Scroll Lock"] + C["↑"]
2
text_image
Scroll Lock + Scroll Lock + ↓Select PC port:
3
text_image
Scroll Lock + Scroll Lock + Port No. 1~24
Auto Scan Mode:
5

text_image
Scroll Lock + Scroll Lock + Stext_image
Scroll Lock + Scroll Lock + ↓Select PC port:
3
text_image
Scroll Lock + Scroll Lock + Port No. 1-24

text_image
Auto Scan Mode: Scroll Lock + Scroll Lock + S5
- Kombination: Scroll-Lock, Scroll-Lock
- Kombination: Scroll-Lock, Scroll-Lock
Oder:
- Kombination: Scroll-Lock, Scroll-Lock
- Kombination: Scroll-Lock, Scroll-Lock
text_image
Scroll Lock + Scroll Lock + ↓Select PC port:
text_image
Scroll Lock + Scroll Lock + Port No. 1~2Auto Scan Mode:

text_image
Scroll Lock + Scroll Lock + Stext_image
within 2 seconds 1 Scroll Lock + Scroll Lock + 2 Scroll Lock + Scroll Lock + 3 Select PC port: 4 Scroll Lock + Scroll Lock + Port No. 1~2 5 Auto Scan Mode: 6 Scroll Lock + Scroll Lock + Sflowchart
graph LR
    A["Scroll Lock"] + B["Scroll Lock"] + C["↑"] --> D["within 2 seconds"]
2
text_image
Scroll Lock + Scroll Lock + ↓Select PC port:
3
text_image
Scroll Lock + Scroll Lock + Port No. 1~24
text_image
Auto Scan Mode: Scroll Lock + Scroll Lock + S5