CRT 21-29 - TV NORDMENDE - Free user manual and instructions
Find the device manual for free CRT 21-29 NORDMENDE in PDF.
User questions about CRT 21-29 NORDMENDE
0 question about this device. Answer the ones you know or ask your own.
Ask a new question about this device
Download the instructions for your TV in PDF format for free! Find your manual CRT 21-29 - NORDMENDE and take your electronic device back in hand. On this page are published all the documents necessary for the use of your device. CRT 21-29 by NORDMENDE.
USER MANUAL CRT 21-29 NORDMENDE
NAMES AND FUNCTIONS OF CONTROLS- Front / Back
The remote control uses two 1.5V batteries. For battery installation and replacement follow the procedure:
- Turn the remote control unit upside down. Press down the grip of battery compartment and slide the cover in the direction of the arrow.
- Install two new batteries. Make sure that battery polarity matches with the "+" , - " marks inside the battery compartment or else it could damage the unit.
Close the battery compartment cover.
Note: All specifications are subject to change without notice.
TELEVISION INSTALLATION - Connect antenna or video facility.
| SCART 1 | SCART 2 |
| RGB in , CVBS in | RGB in , CVBS in, |
| Audio in / Audio out | Audio in / Audio out |
| YC in (Only in Black & White) | YC in |
| RF out (Tuner out) | Monitor out |
These figures are just for reference - Queste figure sono solo per riferimento - Ces figures sont seulement indicative - Das Bild dient nur als Beispiel - Figuras para referencia solamente - Estas figuras são justas para a referencia
CONTENTS
- 5
- CONTROL YOUR TV. 6
- MENU OPERATION 8
- TELETEXT OPERATION 11
- TROUBLE SHOOTING 12
- CORRECT DISPOSAL OF THIS PRODUCT 53
- WARRANTY CERTIFICATE 54
1. IMPORTANT SAFEGUARDS
Warning: to prevent fire or shock hazard, do not expose this TV set to rain or moisture.
LOCATION
Place the TV set on a flat level surface and in a dry area, free from dust and moisture. Do not place the unit direct sunlight, or were it would be affected by smoke, stream, vibrations or heat radiating appliances. To prevent excessive internal temperature rise, place the unit so that there is at least 15cm of space between it and the surrounding walls.
FIRE AND SHOCK PRECAUTIONS
Adequate ventilation must be provided to prevent heat build up inside unit. Keep the inside of unit free from foreign objects, such as hairpins, nails, paper, etc. Do not the build the set into the bookcase or other enclosures in which it would be poorly ventilated. Do not place it on carpet or a bad as low ventilation holes could become obstructed.
Do not set liquids, including flower vases filled with chemicals or water etc., on top of the unit as liquid could get inside the unit. If a hazardous object falls inside the TV set, unplug it immediately and call a qualified technician for removal.
When placing or moving the TV set, take care to insure that the power cord is fitted into the allocated slot. To avoid damage to the power cord, never allow heavy objects such as the TV set itself to be placed on the power cord. Keep cord away from heat radiating appliances. Do not allow cord to become knotted or tangled. Do not lengthen the cord. When removing the power plug from the socket, always hold onto the plug, never pull by the cord.
WARNING
Do not remove the back cover of the TV set. Accidental contact with high voltage components could result in electric shock. When internal adjustment is necessary, please contact your distributor.
If your set produces sound but not picture, or it emits smoke or produces a strange sound or smell, continued operation is dangerous. Immediately turn off power and remove the power plug from the socket and contact your distributor.
During vacation or other occasions when you will not be using the set for an extended period, remove the power plug from the socket.
This appliance should not be operated by children or infirm persons, without adequate supervision.
CUSTOMER NOTICE
If a continual DISCOLOURATION or a COLOURED PATCH appears on your picture image, it may be caused by one of the following:
External speakers placed near to the TV.
Vacuum cleaners switched ON or OFF near the TV.
Moving or rotating the position of the TV while it is turned on.
The TV has been left in the STANDBY mode for some period of time, without being turned OFF using the front panel power button. If this happens, then:
Switch OFF the TV by using the FRONT PANEL POWER button.
Leave the TV switch OFF for at least 20 minutes.
Switch ON the TV using the FRONT PANEL POWER button.
Note: You may need to repeat steps 1, 2 and 3 for the best result.
2. CONTROL YOUR TV
To use the TV, follow the instructions below.
-
Fit the batteries into the remote control.
-
Plug the TV into a power socket.
-
The plug for connection to the grid power socket will power your TV.
- The TV can only be connected to 220-240V~ 50-60Hz alternate current.
-
If the plug comes loose from the power cord, do not connect it to a power socket: you might be electrocuted.
-
Connect the external aerial or the cable aerial to the socket on the back of the TV.
- Press ON/OFF key on the TV.
- The light on the TV will turn on: the TV is in "Stand-By" mode.
2-1 MAIN POWER ON/OFF
When in "Stand-By" mode, press this button to switch on the TV.
Press again to go back to "Stand-By" mode.
To switch off the TV, press ON/OFF on the TV.
Notes:
- When in "Stand-By" mode, the TV can also be switched ON by pressing the "channels Up/Down" buttons on the remote control or on the TV.
- The TV is provided with an automatic switch-off feature (Automatic Power OFF). When in "No Signal" mode, the TV automatically goes to "Stand-By" mode after a few minutes.
- Every time the TV is switched on, TV mode is automatically selected; if an input signal is received by the SCART plug, SCART AV mode is automatically selected.
2-2 TV/AV SELECTION TV/AV

By repeatedly pressing the [TV/AV] key, you can select the desire input source as follows:
$$ \mathrm {T V} \rightarrow \mathrm {S C T 1} \rightarrow \mathrm {R G B} \rightarrow \mathrm {S C T 2} \rightarrow \mathrm {Y / C} \rightarrow \mathrm {A V} $$
Note:
- When input is SCART signal, TV automatically goes in SCT mode to receive SCART signal, even if TV/AV button is not pressed.
- SCT2 and front/side AV are parallel. Video priority given to AV input. If video is connected then there will be no audio in SCT2 how ever picture can be seen.
- It is recommended SCT2 and front AV input not to be connected at the same time.
2-3 MUTE

By pressing this key, sound output will be muted.
Press [MUTE] again, or Volume Up, and sound Volume will return.
2-4 DIRECT ACCESS TUNING
Using the numeric keys on Remote Control Unit. Programs can be selected directly.
2-5 SELECT TELETEXT MODE
TTX
Press [TTX] button on the remote control unit and enter to TELETEXT mode.
By this button, mode will be changed as:
$$ \mathrm {T V} \leftarrow \rightarrow \text {T e l e t e x t} $$

The overview station page or the last page viewed (in case you already watched TELEXT at this channel previously) appears.
If you need to return to TV mode, press again the [TTX] button on the remote control.
2-6 QUICK VIEW

TV Mode: program will quick back to the previous program being watched.
AV Mode: Back to TV program.
2-7 PICTURE MENU

Press this button on the remote control unit and enter to PICTURE MENU.
Press again this button to remove it
2-8 SOUND MENU

Press this button on the remote control unit and enter to SOUND MENU Press again this button to remove it
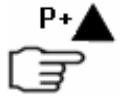
2-9 PROGRAM UP/DOWN
Press [P+] key, to change Program Up. Press [P-] key, to change Program Down.

2-10 VOLUME CONTROL

Press [V+] key, for Volume Up. Press [V-] key, for Volume Down.
2-11 SELECTABLE PICTURE P.STD

By repeatedly pressing this key, picture effects will change as follows:
CUSTOM MOVIE SPORT STANDARD GAME
2-12 SELECTABLE SOUND STD

By repeatedly pressing this key, sound effects will change as follows.
CUSTOM VOICE MUSIC THEATRE
2-13 MENU
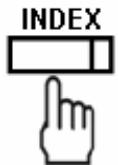
TV mode: Press [INDEX] button to see the available MENU
MENUs display disappears about 15 sec. after last selection.
2-14CALL

Displays present source information with details of input signal connected.
2-15 ZOOM

By repeatedly pressing this key, zoom effects will change as follows.
NORMAL EXPAND AUTO
2-16 NICAM
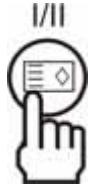
If received signal is NICAM signal, by pressing I/II key sound will be selected Stereo /Mono. If received signal is NICAM dual signal sound can be selected dual I / dual II and mono.
3. MENU OPERATION
Press [INDEX] key to display MENU pages. Scroll the MENU by using [V+]/[V-] key, as follows:
TV MODE
SOUND PICTURE DIRECTORY SETTING TUNING
SCT1, RGB , SCT2 , Y/C, AV MODE
SOUND PICTURE SETTING
MENUs display disappears about 15 sec. after last selection.
You can also directly select PICTURE MENU by press the [PICTURE MENU] key on remote control unit, select SOUND MENU by press the [SOUND] key.
3-1 SOUND MENU
Select the Sound menu by pressing the [ MENU ] and [V+] / [V-] key on remote or on TV set .
Pressing the [P + ] / [P - ] key, highlighted item will move up and down.
- VOLUME, BALANCE, BASS, TREBLE
Press [P + ] / [P - ] key on remote or on TV set to select Volume, Balance, Bass or Treble.
Press [V + ] / [V - ] key on remote or on TV set to adjust these parameter.
Press the [ MENU ] key to confirm your choice.
Press the [ MENU ] key to exit.
Repeat any functions if required.
- When selected item is AVL (Automatic Volume Leveller), pressing the [V + ] / [V - ] key, the AVL function can be on or off.
- When selected item is LOUDNESS, pressing the [V + ] / [V - ] key, the "LOUDNESS" function can be on or off.
- When selected item is ENHANCED, pressing the [V + ] / [V - ] key, the "LISTENING MODE" can be changed between
NORMAL and INCREDIBLE STEREO mode, (if signal received is mono, the effect will be "INCRED.MONO"). - When selected item is EQUALIZER, select the desired frequency by pressing the [V + ] / [V - ] key and adjust it to desired setting by [P + ] / [P - ] key.
- When selected item is PRESET, pressing the [V+] / [V-] key effects will change as follows.
CUSTOM VOICE MUSIC THEATRE
3-2 PICTURE MENU
Select the Picture menu by pressing the [ MENU ] and[V+] / [V-] key on remote or on TV set.
Pressing the [P + ] / [P - ] key, highlighted item will move up and down.
- BRIGHTNESS, CONTRAST, COLOUR, SHARPNESS,
Press [P+]/ [P-] key on remote or on TV set to select Brightness, Contrast, Colour, Sharpness or Tint.
Press VOL+VOL- keys on remote or on TV set to adjust these parameter.
Press the [ MENU ] key to confirm your choice.
Press the [ MENU ] key to exit.
Repeat any functions if required.
NOTE:
TINT is applicable for only NTSC play back only
Use this function to adjust tint of picture for NTSC signal
-
When selected item is PIC.IMPROVEMENT, pressing the [V + ] / [V - ] key the function can be on or off.
-
When selected item is FCC, pressing [V + ] / [V - ] key FCC can adjust the colour temperature of the picture to
NORMAL WARM (reddish) COOL (bluish)
- When selected item is PRESET, pressing [V+] / [V-] key PRESET can be changed as follows:
CUSTOM MOVIE SPORT STANDARD GAME
- When selected item is ZOOM, pressing [V+] / [V-] key ZOOM, can be changed as follows:
AUTO NORMAL EXPAND
3-3DIRECTORY
This TV set is equipped with functions ACI (Automatic Channel Installation) and ATS (Automatic Sorting)
A. If the broadcasted program has the ID code, the function ACI automatically assigns the name to the found channels.
B. The system ATS memorizes and sorts the channels. During the automatic search, these functions require about 30 sec. for every channel.
Select the Directory menu by pressing the [ MENU ] and [V + ] / [V - ] key, on remote or on TV set.
Pressing the [P + ] / [P - ] key, highlighted item will move up and down.
Pressing the [V + ] / [V - ] key, highlighted item will move right and left.
1. MOVE Channel
To move or sorting the channels
Press [P+] /[P-] key on remote or on TV set to select the Channel to move
Press "GREEN" key
Press [P + ] / [P - ] key on remote or on TV set to select the new position for the Channel
Press "GREEN" key to confirm
2. DELETE Channel
To delete the channels not desired.
Press [P + ] / [P - ] key on remote or on TV set to select the Channel to delete
Press "RED" key
Press [ MENU ] key to confirm.
3-4 SETTING
Select the Setting menu by pressing the [ MENU ] and [V + ] / [V - ] key on remote or on TV set.
Pressing the [P + ] / [P - ] key, highlighted item will move up and down.
Function: other functions setting.
When selected item is "SOURCE OSD", pressing the [V+] / [V-] key, the OSD function can be on or off.
If SOURCE OSD is ON, the number of channel will be displayed on the screen.
LANGUAGE is used to select OSD display Language as per requirement.
Press [V + ] / [V - ] key on remote or on TV set to select required OSD Language:
English, French, Deutsch, Spanish, Portuguese, Swedish, Italian, Polish, Slovenian, Croatian, Hungarian, Greek, Dutch, Czech,
Press the [ MENU ] key to confirm.
Press the [ MENU ] key to exit.
By selecting COUNTRY TV set will automatically select ACI /ATS functions corresponding to that country.
Press [P + ] / [P - ] key on remote or TV set to select Country.
Press [V+] / [V-] key, on remote or on TV set to select the Country as per requirement
Austria, Belgium, France, Gr.Britain, Germany, Italy, Netherl,Other, turkey.
Press the [ MENU ] key to confirm. Press the [ MENU ] key to exit
CHILD LOCKis used to lock or unlock the TUNING MENU.
- To lock Tuning Menu:
Press [P + ] / [P - ] key on remote or TV set to select Child Lock.
Press [V + ] / [V - ] key on remote or on TV set to select the Lock ON
Press [P + ] / [P - ] key on remote or TV set to select Lock Code
Type Password
The password is " 0000" by default.
Press the [ MENU ] key to confirm. Press the [ MENU ] key to exit
- To unlock Tuning Menu
Press [P + ] / [P - ] key on remote or TV set to select Child Lock.
Type Password
Press [V + ] / [V - ] key on remote or on TV set to select the Lock OFF
Select the TIMERS menu by pressing [MENU] and [P + ] / [P - ] key on remote or on TV set.
Press [V + ] / [V - ] key, on remote or on TV set to enter into Timers sub menu
SLEEP TIMER: [P + ] / [P - ] key select 'SLEEP TIMER'. Using [V + ] / [V - ] key, sleep timer can be set to 0 to 120 min. in interval of 5
min.
NOTE:
Sleep Timer is deactivated when TV set is switch to stand by or mains power supply is switched Off.
REMINDER TIMER: Using [P + ] / [P - ] key select the "REMINDER TIMER".
Using [[V + ] / [V - ] key, sleep timer can be set to 0 to 120min . in interval of 5min
NOTE :
Remind Timer gets deactivated when set is switched off by mains power.
OFF TIMER: Using [P + ] / [P - ] key select the OFF TIMER. Using 0 to 9 digit key on remote set the OFF TIMER to desired time.
ON TIMER: Using [ +] / [ -] key select the ON TIMER. Using 0 to 9 digit on remote set the ON TIMER. At the set time TV set will turn ON.
ON PROGRAM: Using [P + ] / [P - ] key select 'ON PROGRAM' Using 0 to 9 digit on remote, set the program number.
TELETEXT LANGUAGE: Using the [P + ] / [P - ] key, select the "TELETEXT LANGUAGE".
Using the [V + ] / [V - ] key, TELETEXT language will change as follows:
TELETEXT East/West: Press [V+] / [V-] key, TXT east and west will change as follows: East→ West
Using the [P + ] / [P - ] key, select the BLUE BACK, using the [V + ] / [V - ] key,, select the "ON" or "OFF".
Select RT CLOCK (real time clock)menu by pressing [V + ] / [V - ] key on remote or on TV set.
RT CLOCK displays the time broadcasted by TV station.
Press [V + ] / [V - ] key, on remote or on TV set to select CLOCK.
Press [V + ] / [V - ] key, on remote or on TV set to select OFF, 24Hrs or AM/PM.
TIME displays the time set by user as a Current Time.
Press [V + ] / [V - ] key, on remote or on TV set to select Hours and set hours by [P + ] / [P - ] key on remote or on TV set. Hours can be set from 00÷ 23
Press [V + ] / [V - ] key, on remote or on TV set to select Minutes and set minutes by [P + ] / [P - ] key on remote or on TV set.
Minutes can be set from 00:59.
Press the [ MENU ] key to confirm. Press the [ MENU ] key to exit.
3-5 TUNING MENU
Select the Tuning menu by pressing the [ MENU ] and [V + ] / [V - ] key, on remote or on TV set.
Pressing the [P + ] / [P - ] key, highlighted item will move up and down.
PROGRAM NO.
Press [P + ] / [P - ] key to select "Program No".
Press [V + ] / [V - ] key, to select a program.
PROGRAM NAME
This setting is necessary if you would assign the name to a program (max 7 char.)
Select the Program Name by pressing the [P + ] / [P - ] key on remote or on TV set.
Press [V + ] / [V - ] key on remote or on TV set to write the channel name
Select the characters/numbers by pressing the [P + ] / [P - ] keys on remote or on TV set (you can shift by pressing [V + ] / [V - ] key.
Press the [ MENU ] key to confirm. Press the [ MENU ] key to exit
COLOUR SYSTEM
Function: Select correct colour system. This setting is necessary if the picture is not reproduced Correctly
Using [P + ] / [P - ] key to select "COLOUR SYSTEM".
Repeatedly pressing [V + ] / [V - ] key,to change as follows:
$$ A U T O \rightarrow N T S C - 4. 4 3 \rightarrow P A L 4. 4 3 \rightarrow S E C A M \rightarrow S E C A M - L / L ^ {\prime} $$
By default this is set to "AUTO". If proper colour do not appear change the colour system.
SOUND SYSTEM
Funcion: Select correct sound system. This setting is necessary if the sound is not reproduced Correctly
Using [P + ] / [P - ] key to select "SOUND SYSTEM".
Repeatedly pressing [V + ] / [V - ] key, to change as follows:
AUTO BG I DK L/L' BG NICAM
By default this is set to "AUTO". If there is no proper sound then change the sound system.
AUTO SEARCH (ASM)
Press [P + ] / [P - ] key, to select "ASM".
Press [V + ] / [V - ] key to start "ASM" and all available channels will be memorized.
Wait until function has finished.
MFT (FINE TUNING)
Function: fine Tuning for current setting.
Select the Channel No. in Directory Menu or selecting it by pressing numeric keys.
Using [P + ] / [P - ] key, select "MFT".
Using [V + ] or [V-] key, adjust for best tuning.
AFC (Automatic Frequency Control)
Using [P + ] / [P - ] key, select "MFT".
Using [V + ] / [V - ] key, select ON or OFF
SKIP
You can skip unwanted channels .
The skipped channels will not be selected with [P + ] / [P - ] key on remote or TV set, but skipped channels can be selected by pressing skipped program number by direct digit number selection keys on remote.
- Select the channel number to be skipped with [P + ] / [P - ] key on remote or on TV set.
- Press [P + ] / [P - ] key on remote or on TV set to select Skip function in Tuning menu
- Press [V + ] / [V - ] key, on remote or TV set to switch it ON.
- Press the [ MENU ] key to confirm. Press the [ MENU ] key to exit
- The number of channel will change colour, from yellow to red
- To unskip the channel follow the above steps by selecting skipped Channel No. and select Skip parameters, press [V+] / [V-] key, on remote or TV set to switch Skip to OFF.
- The number of channel will change colour, from red to yellow.
LOCK (channel lock) is used to lock or unlock channels not desired. This function is active only if CHILD LOCK is ON.
Press [P + ] / [P - ] key, to select "LOCK".
Press [V + ] / [V - ] key to set LOCK ON or OFF.
4. TELEXT OPERATION
4.1 SELECT TELETEXT MODE
Select the channel which is broadcasting the TELETEXT program you want to watch.
Press [TTX] key on the remote control unit and enter to TELETEXT mode.
By this key, mode will be changed as:
TV Teletext
The overview station page or the last page viewed (in case you already watched TELETEXT at this channel previously) appears.
If you need to return to TV mode, press again the [TTX] key on the remote control.
4.2 PAGE SELECTION
You can enter directly desired page number with the remote control 0 - 9 numeric keys.
You can sequentially select page by pressing [P + ] or [P-] key.
4.3 HOLD
Some TELETEXT information is contained on more than one page, the pages automatically changing after a given reading time.
Press [HOLD] key to stop the page changing.
Press [HOLD] key again to allow the page to change.
4.4 REVEAL
Some TELETEXT pages contain quiz or game questions with hidden answers.
Press the [CALL] key to see the answers.
Press the [CALL] key again to hide the answers.
4.5 ZOOM (T/B/F Top/Bottom/Full)
To enable easier reading (larger display).
Press the [zoom] key to display the TOP HALF of the page.
Press again to display the BOTTOM HALF of the page.
Press again to return to a FULL PAGE display.
Note: changing pages reverts to a FULL PAGE display.
4.6 CANCEL
When a page is selected in TELETEXT mode it may take some time before it becomes available, pressing the [CANCEL] key will switch to the TV mode. When the required page is found the page number will appear at the top of the TV picture, press the [CANCEL] key to return to the selected TELETEXT page.
Note: You cannot change TV program while in this mode.
4.7 FAST TEXT (For possible future reference)
The RED, GREEN, YELLOW & CYAN keys are used for quick access to colour coded pages transmitted by FAST TEXT broadcast.
4.8 OTHER FUNCTIONS
INDEX - To return to index page.
MIX - To turn on/off TELETEXT background.
5. TROUBLE SHOOTING
Before arranging for service, firstly know the status and then check simply as follows:
| Problems | Check |
| No picture or sound. | Check if the power supply is plugged in. Check if the power switch is in “ON” position. |
| Picture is OK, no sound. | Check if the volume control is set to the minimum or mute position. |
| Remote control doesn’t work. | Check if the power switch is in “ON” position. Check if the batteries are out of use or not connected well. Make sure that there is no strong light striking the sensor window of remote control unit. Check there are no obstacles between the sensor window and remote control unit. |
| No TV signal. | Check if the TV/AV key is not set to TV status. Check if the antenna is well connected. Check if you installed the TV correctly. |
| No external video signal. | Check if you installed the TV correctly. Check if the TV/AV key is set to AV position. |
| Picture lacks colour or picture too dark. | Check colour, brightness and contrast controls are correctly adjusted. |
| All channels lose colour intermittently. | Check if the antenna is broken. Check if the antenna is disconnected. Check if the antenna is damaged. |
| Poor reception, loss of colour with certain channels. | Check if channels are correctly tuned (see “Fine tuning”). |
| Diagonal stripes appear on picture. | The receiver may be affected by interference (e.g. from nearby radio broadcasting transmitter or from another TV receiver). |
| Picture has “snow”. | Check if the antenna is broken. Check if the antenna is disconnected. Check if the antenna is damaged. |
| Ghost images appear. | Check if the antenna direction has been changed by a storm or strong wind, etc. (because ghost images are caused by the arrival at the antenna of both the signal which has travelled directly from the transmitter and the signal which has been reflected from a hill or a large building. The direction of the antenna should be chosen for minimum ghosting). |
INDICE
- 13
- COMANDI DEL TELEVISORE 14
- FUNZIONAMENTO DEI MENU 16
- FUNZIONAMENTO DEL TELEVIDEO 19
- RISOLUZIONE DEI PROBLEMI 20
- CORRETTO SMALTIMENTO DEL PRODOTTO 53
- CERTIFICATO DI GARANZIA 54
1. IMPORTANTI MISURE PRECAUZIONALI
English, French, Deutsch, Spanish, Portuguese, Swedish, Italian, Polish, Slovenian Croatian, Hungarian, Greek, Dutch, Czech.
Austria, Belgium, France, Gr.Britain, Germany, Italy, Netherl, Other, turkey.
2-12 CHOIX DU SON STD (SELECTABLE SOUND STD)

English, French, Deutsch, Spanish, Portuguese, Swedish, Italian, Polish, Slovenian Croatian, Hungarian, Greek, Dutch, Czech.
Austria, Belgiun, France, Gr.Britain, Germany, Italy, Netherl,Other, turkey.
(Contrast), Farbe (Colour), Kontur (Sharpness).
English, French, Deutsch, Spanish, Portuguese, Swedish, Italian, Polish, Slovenian Croatian, Hungarian, Greek, Dutch, Czech.
PROGRAMNAME(Program Name)
$$ \begin{array}{l} \text {M O D O T V (T V M O D E)} \ S O N I D O \left(S O U N D\right)\rightarrow I M A G E N \left(P I C T U R E\right)\rightarrow D I R E C T O R I O \left(D I R E C T O R Y\right)\rightarrow A J U S T E \left(S E T T I N G\right) \ \rightarrow \text {S I N T O N I A (T U N I N G)} \ \end{array} $$
$$ \begin{array}{l} S C T 1, R G B, S C T 2, Y / C, M O D O A V \ S O N I D O (S O U N D) \rightarrow I M A G E N (P I C T U R E) \rightarrow A J U S T E (S E T T I N G) \ \end{array} $$
English, French, Deutsch, Spanish, Portuguese, Swedish, Italian, Polish, Slovenian Croatian, Hungarian, Greek, Dutch, Czech.
Austria, Belgiun, France, Gr.Britain, Germany, Italy, Netherl,Other, turkey.
2-9 PROGRAMA PARA CIMA/PARA BAIXO (PROGRAM UP/DOWN)
English, French, Deutsch, Spanish, Portuguese, Swedish, Italian, Polish, Slovenian Croatian, Hungarian, Greek, Dutch, Czech.
Austria, Belgium, France, Gr.Britain, Germany, Italy, Netherl, Other, turkey.
AUTOMÁTICO (AUTO) → NTSC-4.43 → PAL 4.43 → SECAM → SECAM-L/L'
This marking shown on the product or its literature, indicates that it should not be disposed with other household wastes at the end of its working life. To prevent possible harm to the environment or human health from uncontrolled waste disposal, please separate this from other types of wastes and recycle it responsibly to promote the sustainable reuse of material resources. Household users should contact either the retailer where they purchased this product, or their local government office, for details of where and how they can take this item for environmentally safe recycling. This product should not be mixed with other commercial wastes for disposal.
THE COMPANY RESERVES THE RIGHT TO BRING TECHNOLOGICAL, AESTHETICAL AND DIMENSIONAL CHANGES, FOR PRODUCT IMPROVEMENT OR FOR MANUFACTURING NEEDS, WITHOUT NOTICE.
AL FINE DI MIGLIORARE I PROPRI PRODOTI E PER ESIGENZE DI PRODUZIONE, L'AZIENDA SI RISERVA IL DIRITTO DI APPORTARE MODIFICHE TECNOLOGICHE, ESTETICHE E DI DIMENSIONI SENZA PREAVVISO.
AFIN D'AMELIORER SES PRODUITS ET POUR LES EXIGENCES DE LA PRODUCTION, L'ENTREPRISE SE RESERVE LE DROIT D'APPORTER DES MODIFICATIONS TECHNOLOGIQUES, ESTHETIQUES ET DE DIMENSIONS SANS PREAVIS.
This symbol certifies that the product has been manufactured in compliance with the European Standards.
NORDMENDE is a trademark of THOMSON used under license to VDC Technologies SpA ITALY.