
Wegavision UHD49A - Television NORDMENDE - Free user manual and instructions
Find the device manual for free Wegavision UHD49A NORDMENDE in PDF.


| Product Type | 4K UHD LED TV |
| Brand | Nordmende |
| Model | Wegavision UHD49A |
| Screen Size | 49 inches (124 cm) |
| Resolution | 3840 x 2160 pixels (4K UHD) |
| Panel Type | LED VA |
| Dimensions (without stand) | 110.5 x 64.0 x 8.0 cm |
| Dimensions (with stand) | 110.5 x 70.0 x 25.0 cm |
| Weight (without stand) | 11.5 kg |
| Weight (with stand) | 12.0 kg |
| Power Supply | 220-240 V, 50/60 Hz |
| Power Consumption (standby) | <0.5 W |
| Connectivity | 3x HDMI, 2x USB, Ethernet, Wi-Fi, Bluetooth |
| Operating System | Smart TV (Linux) |
| Main Features | DVB-T2 HD, CI+, HDR, Dolby Audio, Parental Control |
| Maintenance and Cleaning | Clean with a soft, dry cloth. Do not use abrasive products. |
| Safety | Do not expose to moisture. Use on a stable surface. |
| Spare Parts and Repairability | Repairability index: 6.5/10. Available parts: power supply, motherboard. |
| Warranty | 2 years |
| Box Contents | TV, remote control, batteries, stand, manual |
Frequently Asked Questions - Wegavision UHD49A NORDMENDE
User questions about Wegavision UHD49A NORDMENDE
0 question about this device. Answer the ones you know or ask your own.
Ask a new question about this device
Download the instructions for your Television in PDF format for free! Find your manual Wegavision UHD49A - NORDMENDE and take your electronic device back in hand. On this page are published all the documents necessary for the use of your device. Wegavision UHD49A by NORDMENDE.
USER MANUAL Wegavision UHD49A NORDMENDE
natural_image
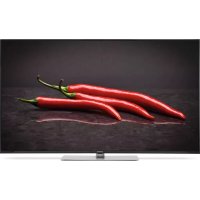
Large black flat-screen TV with 'NEARANTON' branding on the front screen (no additional text or symbols visible)Digitalfernseher
Wegavision UHD 43A/49A/55A
1 Abbildungen
UHD 43A und UHD 49A

Manufactured under license from Dolby Laboratories. Dolby, Dolby Audio and the double-D symbol are trademarks of Dolby Laboratories.
HEVCAvance™
Covered by one or more claims of the patents listed at patentlist.hevcadvance.com.
natural_image
Isometric line drawing of a rectangular electronic component with internal components, labeled 'Abbildung 1' (no other text or symbols)


natural_image
Diagram of a mechanical assembly with a rolled roller and directional arrow, no text or symbols present⚠ VORSICHT
4.3 Programm wählen
UHD 55A

| Button Explanation | ||
| 1 | ON/OFF | Turn on the TV set/enable standby. |
| 2 | SOURCE* | Select an input source. |
| 3 | MENU* | TURN ON/OFF the OSD menu. |
| 4 | + CH - | Channel up/down in TV mode, or select an option in the OSD menu. |
| 5 | + VOL - | Increase/decrease volume or set an option marked in the OSD menu. |
*Not available for UHD 55A
1.1 Remote control

| 1. ON/OFF | Turn on or off (standby) |
| 2. MUTE | Turn on sound or mute. |
| 3. P.MODE | Select picture mode. |
| 4. S.MODE | Change audio mode. |
| 5. FAV | Open the favourites list. |
| 6. SLEEP | Enable the sleep timer to turn off the TV set after a certain period of time. |
| 7. FREEZE | Freeze video display. Press again to release the display. |
| 8. CH.LIST | Display the channel list. |
| 9. AUTO | Automatic setting in VGA mode. |
| 10. ASPECT | Turn on different display modes. |
| 11. 0-9 | Numeric buttons |
| 12. Apps | Call up the apps |
| 13. ⬆ | Return to the last viewed channel. |
| 14. MENU | Open the on-screen menu (OSD). |
| 15. EXIT | Leave the on-screen menu. |
| 16.▲▼◄► | Use the arrow buttons to select menu options or settings. |
| 17. OK | Confirmation button; select OSD menu options. |
| 18. SOURCE | Display and select available video sources. |
| 19. DISPLAY | Open the information window. |
| 20. CH (+/-) | Use these two buttons to switch between TV channels. |
| 21. VOL (+/-) | Increase or decrease the volume of the TV set. |
| 22. TEXT | Enable teletext mode. |
| 23. EPG | Open the electronic programme guide. |
| 24. AUDIO | Press audio for PAL-BG/Stereo or PAL-BG Mono (ATV) & audio languages. |
| 25. SUBTITLE | Open the subtitle menu to select subtitles. |
| 26. INDEX ◀◀ | Open the list and information about the teletext pages. Play previous chapter, title or track. |
| 27. HOLD ➕ | Freeze the current teletext page on the screen. Play next chapter, title or track. |
| 28. SIZE ◀◀ | Change picture size in teletext mode. Search backward. |
| 29. REVEAL ➔ | Show or hide the hidden content in teletext mode. Search forward. |
| 30. TIMESHIFT ► | Start the timeshift function. Start playback. |
| 31. STOP ■ | Stop playback of the current programme. |
| 32. ● | Start recording. |
| 33. || | Pause playback. |
| 34. COLOUR BUTTONS | Depending on the request in the OSD menu. |
2 Safety instructions
Read these operating instructions carefully.
Keep these operating instructions in a safe place.
Observe all warnings.
Follow all instructions.
Do not use the TV set near water.
Clean only with a dry cloth.Do not obstruct the ventilation openings. Install according to the manufacturer's instructions.
Do not install near any heat sources such as radiators, heat registers, stoves, or other devices (including amplifiers) that produce heat.
Lay the power cord in such a way that no one can step on it and that it cannot be bent, especially at the plugs, multiple sockets and at the point where the power cord emerges from the device.Only use accessories specified by the manufacturer.
Only use with the carts, stands, tripods, brackets or tables included or recommended by the manufacturer. When using a cart, caution should be exercised when moving the cart/TV set as both parts could tip over.
Disconnect the TV set from the mains during thunderstorms or extended periods of disuse.
Maintenance work may only be carried out by qualified maintenance personnel. Maintenance is required if the device is damaged, i.e. if the power cord or plug is damaged, liquid or objects have penetrated the device, the device has been exposed to rain or moisture, or if the device does not work properly or has been dropped.
WARNING: The TV set must be protected from rain and moisture to avoid the risk of fire or electric shock.
The device is not splash- or drip-proof. Do not place any objects filled with liquids such as vases on the device.
The power plug or the device plug must always be freely accessible.
Outdoor use: This TV set is not suitable for outdoor use. Protect the TV set from rain to prevent the risk of fire or electric shock. Protect the TV set from exposure to direct sunlight since it could otherwise become hot or damaged.

Safety:
DO NOT REMOVE THE BACK COVER (OR BACK) TO AVOID THE RISK OF ELECTRIC SHOCK. THERE ARE NO USER SERVICEABLE PARTS INSIDE. MAINTENANCE MAY ONLY BE CARRIED OUT BY QUALIFIED PROFESSIONALS.

Dangerous voltage: This lightning flash with arrowhead symbol within an equilateral triangle is intended to alert the user to the presence of dangerous voltage within the product's enclosure that may be of sufficient magnitude to constitute a risk of electric shock.

Instructions:
The exclamation point within an equilateral triangle is intended to alert the user to the presence of important operating and maintenance instructions in the literature accompanying the product.
WARNING!
Do not install the TV set in an unstable position. The TV set could fall, causing serious or even fatal accidents. Many injuries, especially in children, can be avoided by implementing the following precautions.
Only use cabinets or sockets recommended by the TV set manufacturer.Only use furniture that can withstand the weight of the TV set.
Make sure that no edges of the TV set protrude over the load-bearing piece of furniture.
Do not place the TV set on elevated pieces of furniture (such as wall cabinets or bookshelves) without securing both the piece of furniture and the TV set with an appropriate bracket.
Do not place the TV set on fabrics or other materials between the device and the load-bearing surface.
Explain to children the risks of climbing on pieces of furniture to reach the TV set or its buttons.
The above information will apply equally to your old TV set that is withheld or transported.
2.1 Regulatory information
TechniSat hereby declares that the radio equipment type Nordmende Wegavision UHD 43A/49A/55A complies with EU directive 2014/53/EU.
The full text of the EU declaration of conformity is available at the following Internet address:
This product is quality tested and provided with the legal warranty period of 24 months from the date of purchase. Please keep the voucher as a proof of purchase. For warranty claims, please contact the product dealer.
Your device bears the CE mark and complies with all required EU standards.
Changes and misprints reserved. As of 5/18
Copy and duplication only with prior permission of the publisher.
TechniSat and Wegavision are registered trademarks of
NORDMENDE is a trademark of Technicolor or its affiliates, used under licence from TechniSat Digital GmbH.
Further information about your and other devices can be found on the Nordmende homepage
www.nordmende-ce.de
For any questions, problems, and information about this device, our technical hotline is available:
Mon - Fri 8:00 am - 8:00 pm at:
06592/712 1500.
For any required return of the device, please use only the following address:
HDMI, the HDMI logo and High Definition Multimedia Interface are trademarks or registered trademarks of HDMI Licensing LLC.
Manufactured under licence from Dolby Laboratories. Dolby, Dolby Audio and the double-D symbol are trademarks of Dolby Laboratories.
HEVC Advance™
Covered by one or more claims of the patents listed at patentlist.hevcadvance.com.
2.2 Intended use
This TV set is intended solely for the reception and reproduction of video and audio signals via the specified sources. It must not be operated in high humidity areas (for example, in a bath or sauna).
3 Putting the device into operation
3.1 Scope of supply
1x digital TV set
1x remote control
2x batteries
2x stands, including mounting hardware (stand screws)
1x quick reference guide
3.2 Fixing the stands
- Place the TV set with its front side on a soft cloth or padding. Position the bottom as follows.
- Insert the screws (stand screws supplied in the bag) into the screw holes and tighten them with a screwdriver.
- Put the TV set upright again.

natural_image
Isometric line drawing of a rectangular electronic device with internal components, labeled 'Figure 1' (no text or symbols on the diagram itself)

natural_image
Illustration of a flat-screen TV with no visible text or symbols on the screen or background3.3 Wall mounting
Carefully secure an optional wall bracket to the back of the device and install the wall bracket perpendicular to the floor on a sturdy wall. If you would like to attach the TV set to other structures, please contact a qualified professional. We recommend that the wall mounting be carried out by a professional installer.


Only use screws and wall brackets that comply with the VESA standards. The standard dimensions of the wall brackets can be found in the following table.

| Model 43” 49” / 55” | ||
| VESA (A x B) 200 x 200 400 x 200 | ||
| VESA screws(wall mount screw) | M6x10 M6x8 / M6x12 | |
| Number of screws 4 4 | ||
3.4 Reception and external devices

You can use different external devices to connect to the TV set and switch on the corresponding input mode to select the external device. More details about the connection can be found in the operating instructions for your external device.

Possible external devices*: HD receivers, DVD players, audio systems, USB storage devices, and other external devices.

Audio system Blu-ray player Laptop DVD player Camcorder
* The connection with external devices may vary depending on the model.
Connect external devices to the TV set regardless of the order of the TV connections.
More details about the functionality of the external device can be found in the corresponding operating instructions.

Turn off the power before connecting the external device to the TV set.
The TV set can play back various multimedia sources depending on the external device connected (DVD player, etc.) and the input source enabled.
3.4.1 Connecting aerial/satellite signal
Connect the digital cable connection (DVB-C) or digital terrestrial television (DVB-T2) reception cable to the AERIAL/CABLE socket on the digital TV set.
Connect the digital satellite system (DVB-S/S2) reception cable to the SAT 1 socket on the digital TV set.
3.5 Inserting batteries
- To remove the battery compartment cover, press the marked area on the cover and then pull down on the cover and lift it up.
- Insert the batteries according to the markings (+) and (-) in the battery compartment.
- Replace the battery cover in reverse order.


natural_image
Diagram of a mechanical assembly with rollers and components, no text or symbols presentCAUTION
Only use the specified AAA batteries.
Do not mix old and new batteries. Otherwise, the batteries may break or leak, which in turn may cause fire or injury.
Insert the batteries according to the markings (+) and (-). Improper installation may cause the batteries to leak, which in turn may cause fire or injury.
Dispose of the batteries according to the local laws and regulations.Keep the batteries away from children or pets.
Remove the batteries if you will not be using the remote control for a long time.
3.5.1 Using the remote control
Point the remote control sensor directly at the bottom right corner of the TV set.
The operating range of the remote control is approx. 10 metres with an angle of approx. 30 degrees.
Remove any obstacles between the remote control and the sensor.

i Remove the batteries if you will not be using the remote control for a long time.
i Replace both batteries with new ones if the remote control does not work properly or the operating range is reduced.
4 Basic functions
4.1 Turning the TV set on and off
Press the ON/OFF button on the remote control.

i You can also use the on/off button on the bottom/side control panel.
i If no input signal is detected within 15 minutes, the TV set will turn off automatically.
4.2 Adjusting volume
Press the VOL+ button on the remote control or the device to increase the volume. Press the VOL- button to decrease the volume. You can use the MUTE button to mute the sound until the button is pressed again or the volume is adjusted.

4.3 Selecting a programme
There are several ways to select a programme.
Press the OK or CH.LIST button to call up the channel list. Here you can now use the ▼/▲ buttons to select a programme and play it back with OK.

Press the CH+ or CH- button on the remote control or the device to switch through the programmes. Use the ⬤ button to call up the last viewed programme.
4.4 Selecting sources
Press the SOURCE button on the remote control to call up the source selection. Here you can now use the ◀/▶ and OK buttons to select and switch to a source. You can choose between DTV (DVB-C, DVB-T/T2), DVB-S (DVB-S/DVB-S2), HDMI 1-3, and AV (Analogue Audio/Video Input).
4.5 Menu operation
Multiple device functions and settings can be controlled via the menu. The menu is divided into the main menu (Apps, Settings, Media, and Signal Sources), submenus, and respective functions/options.

When the menu is called, you are directly in the main menu Settings.
Use the ◀/▶ and ▼/▲ buttons to navigate in the menus and functions/options. The marking (white frame) will move accordingly. Press the OK button to enter a submenu or function/option.
There are several ways to enable/disable a function/option:
Switch on/off (with ◀/▶ buttons or OK button),
Standard several options available (signalled by the white dots below the options, can be changed with the ◀/▶ buttons),
another submenu is available. Press the OK button or the ▶ arrow button to enter the submenu.
To select a Main Menu, press the MENU button (you are now in the Main Menu > Settings) and the ▲ arrow button once. You are now in the main menu selection indicated by a coloured bar below the active main menu. You can now use the ◀/▶ buttons to select Apps, Settings, Media or Signal Sources in the main menu. Press the ▼ arrow button, to return to the submenu selection.
In these instructions, buttons or menus to be pressed appear in bold. Overlays or functions/options appear in [square brackets].
4.6 Info box
Each time you switch to another channel, an info box appears at the top of the screen. This info box displays some information about the currently running programme. The overlay duration can be adjusted in the menu.

1 Channel list number
2 Channel name
3 Favourite and/or encryption
4 Programme title with start and stop time and progress bar
5 Additional information (depending on the programme, for example, subtitles, aspect ratio, resolution, genre)
6 Additional information about the programme (press the ▶ arrow button to display)
7 Current date and time
8 Next programme with start and stop time
i The info box can also be accessed by pressing the DISPLAY button.
4.7 Encrypted programmes
If you would like to play back encrypted programmes, you must first insert a suitable CI/CI+ module with a suitable smart card in the CI+ module slot on the back of the TV set. You can recognise encrypted channels by the key symbol in the channel list or in the info box. If a programme is PIN protected, you can enter the PIN using the numeric buttons on the remote control.
4.8 Picture and sound switching
To quickly change the current picture or sound mode, use the P.MODE button to change the picture mode or the S.MODE button to change the sound mode. The selected mode is displayed on the screen. The following picture modes are available: Standard, Personal, Dynamic, Film, and Economy. The following sound modes are available: Standard, Personal, Music, Sports, and Film.
4.9 Audio track and subtitles
Press the Audio button on the remote control to open the available audio tracks. Select the preferred audio track and press the OK button. Various audio tracks can be available depending on the channel or programme.
The same procedure is used to select subtitles. Again, it depends on the channel or programme, which subtitles are available. Press the SUBTITLE button to call up the subtitle selection.
4.10 Changing the aspect ratio
Repeatedly press the ASPECT button on the remote control to change the aspect ratio. It is particularly advantageous if a programme has a 4:3 aspect ratio when it would otherwise be displayed with black bars on the right and left.
4.11 Sleep timer
Repeatedly press the SLEEP button on the remote control to enable a sleep timer. After reaching the set time, the device will turn off automatically. You can choose between Off, 10min, 20min, 30min, 60min, 90min, and 120min.
4.12 Teletext
Use the TEXT button to call up the channel's teletext. You can enter the number with the numeric buttons to select the pages. With the top text function, you can use the colour buttons on the remote control to jump directly to the respective page that is displayed in the colour field on the screen. To leave the teletext, press the EXIT button.
5 Initial setup wizard
After putting the digital TV set into operation for the first time, the initial setup wizard will start. Here you can make initial and basic settings that you can change at a later date.
After each selection and confirmation with the OK button, you will automatically go one step further. If you would like to go one step back, press the MENU button.
Press the OK button to start the initial setup.
Selecting a language
Use the ◀/▶ and ▼/▲ buttons to select a language for the display of menus and messages. Press the OK button to confirm the language.
Selecting location
Use the ◀/▶ and ▼/▲ buttons to select a location of your TV set. Press the OK button to confirm the location.
Internet connection
Here you can specify whether your device should be connected to the Internet or not. Use the ◀/▶ buttons and select [Yes] or [No]. Then press the OK button.

If you have selected [Yes], then you must agree to the privacy policy. To do so, select [Accept] and then press the OK button.

Use the ▼/▲ buttons to navigate through the text.
Setting up the Internet connection
If you have authorised the Internet connection and have accepted the privacy policy in the previous section, you can now set up the Internet connection.
You can skip this section if your device is already connected to the Internet via a router with a LAN cable.
Select [Select Wi-Fi] to establish a wireless connection with a Wi-Fi router.
You can select your preferred Wi-Fi network in the list below. If the Wi-Fi network is password protected, you will be prompted to enter the password using the on-screen keyboard. Then select [OK]. If you have entered the password correctly, you can proceed to the next section.
Selecting a signal source
Use the ◀/▶ and ▼/▲ buttons to select your preferred signal source.
DTV- Digital terrestrial television DVB-T2 or digital cable television DVB-C
DVB-S- Digital satellite television DVB-S
AV- Analogue audio/video input of external devices
HDMI- Digital input of external devices.

If you have selected [DTV] as the signal source, you must perform a channel search upon completion of the initial setup. Further details can be found in the chapter “9 Channel search” on page 42.
If you have selected [DVB-S], the device will start with a preprogrammed channel list.
Loading programme information
If the Internet connection has been authorised and set up, the programme information will be loaded as the last step. This may take a moment.
Setup completed
Press the OK button to complete the initial setup.
6 Programme guide
In the programme guide, the current and the next programme are displayed clearly in a timeline view for the currently selected channel and the following channels in the channel list. The vertical green line represents the current time. You can use the ◀/▶ and ▼/▲ arrow buttons to select a programme. You can press the OK button to display more information about the programme or assign the programme to a recording timer.
If you have set up an Internet connection, the EPG data will be updated overnight. To configure the EPG function, press the MENU button and select Settings > EPG.
7 DVR function
Thanks to the DVR (Digital Video Recorder) function, you do not need an external recording device (such as video or DVD recorder) to record a programme since this function allows you to record to a USB storage device.

DVB-S, DVB-C, and DVB-T2 sources can be used to make DVR records of programmes.

Please note that there may be channel-related restrictions when recording and subsequently playing back DVR records from encrypted channels such as HD+ platform so that not all recording/playback functions of the device can be used. Nordmende cannot affect these restrictions and they cannot be bypassed by the device.
7.1 DVR recording
For DVR recording, the following recording modes are available:
1. Instant recording
Select this type of recording to instantly record the currently running programme with the press of a button.
2. Timer-controlled recording
This function allows you to have your TV set turned on and off for the selected programme to be recorded in your absence. In this case, you can programme the timer either manually or automatically using the EPG.
3. Timeshift recording
Timeshift recording enables time-shifted television. It means that you can play back the recording with a time lag while it is still running.
7.1.1 Instant recording
Turn on the programme/source that you would like to record.
Press the Record button (32) on the remote control to record the currently running programme.
Press the Pause button (33) to stop playback of the currently running programme at a specific point.
Press the Play button (30) to resume playback of the programme from that point.
Press the STOP button (31) to stop and save the record. Press the OK button to confirm.
7.1.2 Timeshift recording
If you have to interrupt viewing a programme due to a telephone call or otherwise, you can press the Play button (30) to pause playback of that programme and start recording the currently running programme at the same time.
Press the Play button (30) again to resume playback of the programme from that point.

You will now see the programme with a time offset for the live broadcast (timeshift; see the timeshift function section of the operating instructions) while the currently running programme continues to be recorded in the background.
To stop the timeshift, press the STOP button (31) and then press the OK button to confirm.

Timeshift records will not be permanently stored on the USB storage device, but only while the timeshift is active.

The size of the timeshift file created on the USB storage device can be adjusted. Once the limit has been reached, the beginning of the timeshift will be deleted.
7.2 Timer recording
This function allows you to have your TV set turned on and off for the selected programme to be recorded in your absence. In this case, you can programme the timer either manually or automatically using the EPG.
Press the EPG button to open the EPG.
Select a programme you would like to record and press the OK button. Select [Record] and press the OK button. Then you can check the programme data and adjust, if necessary. Then select [Save] to save the timer.
8 Media playback
Media playback allows you to access and play back video, image, and music files stored on external USB storage devices. It also gives you access to your DVR records. To call up the Media Navigator, proceed as follows:
Press the MENU button and select the [Media] main menu.
Select [USB] as a playback medium.
Here you will now see all media files and folders stored on the USB storage device.
Select the appropriate file and press the OK button to play.

The play buttons on the remote control (Play, Pause, Fast forward, Rewind, Stop) allow you to control the playback of films/DVR records or music tracks.
9 Channel search
To be able to carry out a channel search, you must first select the corresponding reception source via the source selection.
Press the SOURCE button and select a reception source:
DTV - digital cable (DVB-C) and digital terrestrial programmes (DVB-T/T2).
DVB-S digital satellite programmes (DVB-S/S2).
Press the OK button to confirm.
Once the reception source has been selected, you can now open the channel search:
Press the MENU button and use the Settings main menu to select the [Channel] submenu.
DTV
Select DVB terrestrial > [DVB-T] to search for the DVB-T/T2 channel or [Cable] to search for the DVB-C channel.
Select [Auto search] to start the search. The frequencies/channels and found TV channels and radio stations will be displayed on the screen.
Once the search has been completed, the channel search will automatically disappear and the first channel in the channel list will be played back.
DVB-S
In Satellite settings > Aerial settings, select whether your satellite system has an LNB or whether it is a multifeed system with multiple satellite positions.
Select the corresponding satellite by means of which a channel search will take place.
In Channel type, you can specify whether only free channels [Free], only encrypted channels [Encrypted] or both channel types [Free+Encrypted] should be searched for.
In Service type, you can specify whether only TV channels [DTV], only radio stations [Radio] or both [All] should be searched for.
In Search mode, you can set how the search should be carried out. The [Blinder scan] will search for all available satellite frequencies, but the search can take more time to complete. The [Network search] goes faster, but may not find all channels. It is recommended to use the default search.
Then select [Auto search] to start the search. The frequencies/channels and found TV channels and radio stations will be displayed on the screen.
Once the search has been completed, the channel search will automatically disappear and the first channel in the channel list will be played back.
10 Troubleshooting
| ProblemRemedy | |
| No picture, no sound • Check that the TV | set is connected to the power supply.• Check the connection of the power cord and/or other cables. |
| Picture OK, no sound • Check the volume | setting.• Check the connection of the external device.Mute active? |
| Poor or no colour, sound available • Check the “Brightness” and “Contrast” settings in the PICTURE menu. | |
| Double images/contours, sound available • | Check the connection and the orientation of the antenna.• Fine tune TV channels.• Check the connection of the external device.• The broadcaster may experience transmission problems.Try switching to another channel. |
| Snowy picture, poor sound • Check the connection and the orientation of the antenna.• The broadcaster may experience transmission problems.Try switching to another channel. | |
| Periodic disturbances • Remove electrical devices from the environment of the TV set. | |
| Poor stereo sound • The broadcaster may experience transmission problems.Try turning on Mono. | |
| The remote control does not work. • Check that the batteries are inserted correctly.• The batteries may be empty. Replace the batteries with new ones.• Remove any obstacles between the remote control and the infrared receiver of the TV set.• Make sure the infrared receiver of the TV set is not exposed to strong light sources. | |
| “No signal” appears on the screen. • The TV set receives no signal through the inputs.• Check that the reception cables are connected properly.• Check that the external devices are turned on. | |
| The “No signal” or “Unsupported signal” indication appears (only in RGB mode). | • Check that the TV set supports the display resolution or display frequency of your PC. See overview with recommended RGB input signals. |
| Picture not aligned (only in PC mode) • Select “Auto adjust” to align the picture. | |
11 Specifications
| Model | UHD 43A UHD 49A | UHD 55A | |
| Diagonal 43” 49” 55” | |||
| Resolution 3840*2160 3840*2160 3840*2160 3840*2160 3840*2160 3840*2160 3840*2160 3840*2160 3840*2160 3840*2160 3840*216 | x 8W 2 x 8W | ||
| Speaker system 2 x 8W 2 x 8W | |||
| Power supply 100-240V~, 50/60Hz 100-240V~, 50/60Hz | |||
| Power consumption 100W (operation)0.4W (standby) | 130W (operation)0.4W (standby) | 135W (operation)0.4W (standby) | |
| Wi-Fi IEEE 802.11b/g/n | 2.4Ghz, max. 19dBm | IEEE 802.11b/g/n2.4Ghz, max. 19dBm | IEEE 802.11b/g/n2.4Ghz, max. 19dBm |
| Ambient conditions Temperature:0°C ~ 40°CHumidity: 20% ~80%non-condensing | Temperature:0°C ~ 40°CHumidity: 20% ~80%non-condensing | Temperature:0°C ~ 40°CHumidity: 20% ~80%non-condensing | Temperature:0°C ~ 40°CHumidity: 20% ~80%non-condensing |
| Storage Temperature:-20°C ~ +60°CHumidity: 10% ~90%non-condensing | Temperature:-20°C ~ +60°CHumidity: 10% ~90%non-condensing | Temperature:-20°C ~ +60°CHumidity: 10% ~90%non-condensing | Temperature:-20°C ~ +60°CHumidity: 10% ~90%non-condensing |
| Supported resolutions HDMI: 480i, 576i, 480p,576p, 720p, 1080i,1080p, 2160p | HDMI: 480i, 576i, 480p,576p, 720p, 1080i,1080p, 2160p | HDMI: 480i, 576i, 480p,576p, 720p, 1080i,1080p, 216o p | HDMI: 480i, 576i, 480p,576p, 720p, 1080i,1080p, 2160p |
| Media formats Images: JPEG, BMPMusic: MP3Video: MP4, MPG | Images: JPEG, BMPMusic: MP3Video: MP4, MPG | Images: JPEG, BMPMusic: MP3Video: MP4, MPG | Images: JPEG, BMPMusic: MP3Video: MP4, MPG |
| USB mass storage FAT32, max. 500GB5V, 500mA max. | FAT32, max. 500GB5V, 500mA max. | FAT32, max. 500GB5V, 500mA max. | FAT32, max. 500GB5V, 500mA max. |
Wegavision UHDA
[Deutsch/English]
natural_image
Isometric line drawing of a rectangular electronic device with internal components, labeled 'Figure 1' (no text or symbols on the diagram itself)

natural_image
Illustration of a flat-screen television set labeled 'Figure 3' (no text or symbols on the screen itself)3.3 Fixation au mur

natural_image
Diagram of a mechanical assembly with rollers and structural components, no text or symbols presentATTENTION
natural_image
Isometric line drawing of a rectangular electronic device with internal components, labeled 'Immagine 1' (no other text or symbols)

natural_image
Illustration of a flat-screen television displaying the title 'Immagine 3' (no other text or symbols)
natural_image
Diagram of a mechanical assembly with rollers and structural components, no text or symbols presentATTENZIONE
natural_image
Isometric line drawing of a rectangular electronic component with internal components, labeled 'Afbeelding 1' (no other text or symbols)

natural_image
Diagram of a mechanical assembly with rollers and components, no visible text or symbols⚠️ VOORZICHTIGHEID
4.3 Programma selecteren

- Digitalfernseher
- Abbildungen
- HEVCAvance™
- ⚠ VORSICHT
- Programm wählen
- Safety instructions
- Safety:
- WARNING!
- Regulatory information
- Intended use
- Putting the device into operation
- Scope of supply
- Fixing the stands
- Wall mounting
- Reception and external devices
- Connecting aerial/satellite signal
- Inserting batteries
- CAUTION
- Using the remote control
- Basic functions
- Turning the TV set on and off
- Adjusting volume
- Selecting a programme
- Selecting sources
- Menu operation
- Info box
- Encrypted programmes
- Picture and sound switching
- Audio track and subtitles
- Changing the aspect ratio
- Sleep timer
- Teletext
- Initial setup wizard
- Selecting a language
- Selecting location
- Internet connection
- Setting up the Internet connection
- Selecting a signal source
- Loading programme information
- Setup completed
- Programme guide
- DVR function
- DVR recording
- Instant recording
- Timer-controlled recording
- Timeshift recording
- Instant recording
- Timeshift recording
- Timer recording
- Media playback
- Channel search
- DTV
- DVB-S
- Fixation au mur
- ATTENTION
- ATTENZIONE
- ⚠️ VOORZICHTIGHEID
- Programma selecteren
Brand : NORDMENDE
Model : Wegavision UHD49A
Category : Television