ART 26 COMBITRIM - Brush cutter BOSCH - Free user manual and instructions
Find the device manual for free ART 26 COMBITRIM BOSCH in PDF.
| Product Type | Cordless brushcutter |
| Brand | BOSCH |
| Model | ART 26 COMBITRIM |
| Power Supply | 18 V, 1.3 Ah lithium-ion battery |
| Cutting Diameter | 26 cm |
| No-load Speed | 7400 rpm |
| Charger | AL 2204 CV, charging time 180 min |
| Weight (according to EPTA) | 2.4 kg |
| Adjustable Handle | Yes, adjustable height and angle |
| Cutting Head Adjustment | Pedal for tilt, edging possible |
| Protection | Protection guard, shaft protection bracket |
| Safety | Automatic shutdown in case of deep discharge (ECP), start-up lock |
| Noise Level | Sound pressure 80 dB(A), sound power 88 dB(A) |
| Vibrations | Less than 2.5 m/s² |
| Operating Temperature Range | 0°C to 40°C |
| Maintenance | Clean with soft brush and cloth, no water or solvents |
| Spare Parts | Original BOSCH blades, compatible batteries and chargers |
| Repairability | Authorized BOSCH after-sales service |
| Warranty | Compliance with EU directives |
Frequently Asked Questions - ART 26 COMBITRIM BOSCH
User questions about ART 26 COMBITRIM BOSCH
0 question about this device. Answer the ones you know or ask your own.
Ask a new question about this device
Download the instructions for your Brush cutter in PDF format for free! Find your manual ART 26 COMBITRIM - BOSCH and take your electronic device back in hand. On this page are published all the documents necessary for the use of your device. ART 26 COMBITRIM by BOSCH.
USER MANUAL ART 26 COMBITRIM BOSCH
Power Tools Division
70745 Leinfelden-Echterdingen
www.bosch-pt.com
F016 L70 510 (2007.11) O / 279
ART
23 LI | 26 LI

BOSCH
de Originalbetriebsanleitung
en Original instructions
fr Notice originale
es Manual original
pt Manual original
it Istruzioni originali
nl Oorspronkelijke
gebruiksaanwijzing
da Original brugsanvisning
sv Bruksanvisning i original
no Original driftsinstruks
fi Alkuperäiset ohjeet
el PwToTuO obnyiw xphoNc
tr Original isletme talimati
pl Instrukcja oryginalna
cs Puvodním námodem k používání
sk Póvodný námod na použitie
hu Eredeti hasznalatiutasitas
ru OdHHNK pyKOBoDCTBa ITO 3KcIIaTaun
uk OpunirhaIbHa IHCtpyKci3 ekTlayataui
ro Instruetiuni de folosire originale
bg OpHnHaHaNo pBkoBOcTBo 3a ekCnAoTaun
sr Originalno uputstvo za rad
sl Izvirna navodila
hr Originalne upute za rad
et Algupärane kasutusjuhend
Iv Instrukcijam
originalvaloda
It Originali
instrukcija

Deutsch. 7
English. Page 17
Francais.. Page 27
Espanol . 37
Portugues . 47
Italiano 57
Nederlands.. 69
Dansk . 79
Svenska. Sida 88
Norsk. 97
Suomi . Sivu 106
Eληνικά Σελιδα 115
Türkce Sayfa 126
Polski Strona 135
Cesky. Strana 146
Slovensky Strana 155
Magyar. Oldal 165
Pycckn. CtpaHnca 176
YkpaIHcbKa CtopiHa 188
Româna.. 199
Быларски...................................Стравиц 209
Srprski Strana 221
Slovensko Stran 231
Dr. Egbert Schneider Senior Vice President Engineering
Dr. Eckerhard Ströttgen
Head of Product Certification

i.v. Moju
20.08.2007, Robert Bosch GmbH, Power Tools Division D-70745 Leinfelden-Echterdingen
Zu Ihrer Sicherheit
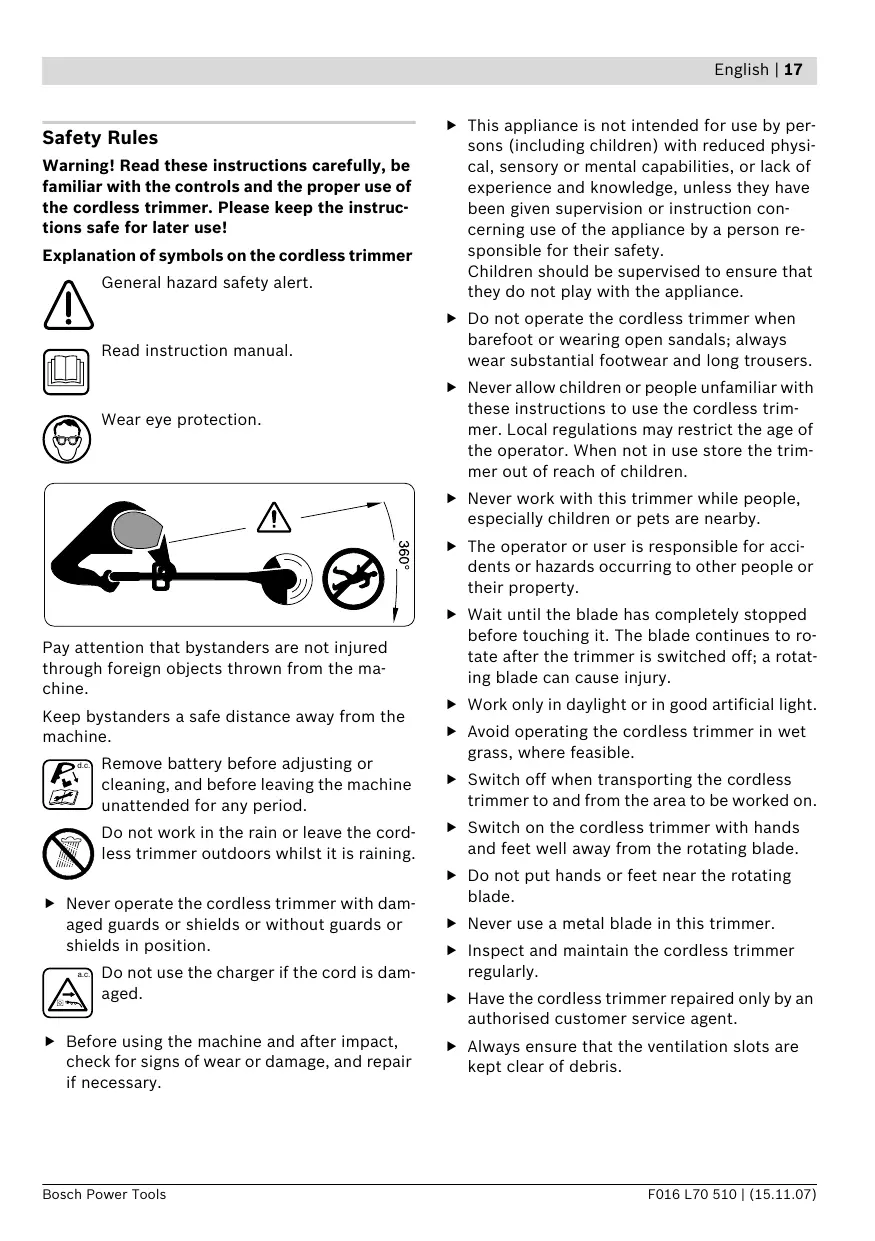
Warning! Read these instructions carefully, be familiar with the controls and the proper use of the cordless trimmer. Please keep the instructions safe for later use!
Explanation of symbols on the cordless trimmer

General hazard safety alert.

Read instruction manual.

Wear eye protection.

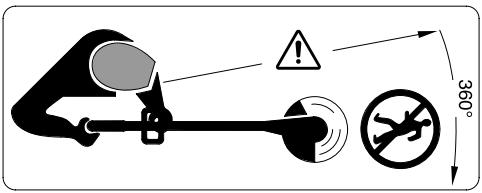
Pay attention that bystanders are not injured through foreign objects thrown from the machine.
Keep bystanders a safe distance away from the machine.

Remove battery before adjusting or cleaning, and before leaving the machine unattended for any period.

Do not work in the rain or leave the cordless trimmer outdoors whilst it is raining.
- Never operate the cordless trimmer with damaged guards or shields or without guards or shields in position.

Do not use the charger if the cord is damaged.
Before using the machine and after impact, check for signs of wear or damage, and repair if necessary.
This appliance is not intended for use by persons (including children) with reduced physical, sensory or mental capabilities, or lack of experience and knowledge, unless they have been given supervision or instruction concerning use of the appliance by a person responsible for their safety. Children should be supervised to ensure that they do not play with the appliance.
Do not operate the cordless trimmer when barefoot or wearing open sandals; always wear substantial footwear and long trousers.
- Never allow children or people unfamiliar with these instructions to use the cordless trimmer. Local regulations may restrict the age of the operator. When not in use store the trimmer out of reach of children.
- Never work with this trimmer while people, especially children or pets are nearby.
The operator or user is responsible for accidents or hazards occurring to other people or their property.
Wait until the blade has completely stopped before touching it. The blade continues to rotate after the trimmer is switched off; a rotating blade can cause injury.
Work only in daylight or in good artificial light.
- Avoid operating the cordless trimmer in wet grass, where feasible.
- Switch off when transporting the cordless trimmer to and from the area to be worked on.
- Switch on the cordless trimmer with hands and feet well away from the rotating blade.
Do not put hands or feet near the rotating blade.
Never use a metal blade in this trimmer.
Inspect and maintain the cordless trimmer regularly.
Have the cordless trimmer repaired only by an authorised customer service agent.
Always ensure that the ventilation slots are kept clear of debris.
Switch off and remove the battery:
- whenever you leave the machine unattended for any period
- before replacing the blade
-
before cleaning or working on the cordless trimmer.
-
Store the machine in a secure dry place out of the reach of children. Do not place other objects on top of the machine.
Replace worn or damaged parts for safety.
Ensure replacement parts fitted are Bosch approved. - Ensure the switch is in the off position before inserting battery pack. Inserting the battery pack into machines that have the switch on invites accidents.
- Recharge only with the charger specified by the manufacturer. A charger that is suitable for one type of battery pack may create a risk of fire when used with another battery pack.
- Use only battery packs intended specifically for the machine. Use of any other battery packs may create a risk of injury and fire.
- When battery pack is not in use, keep it away from other metal objects like paper clips, coins, keys, nails, screws, or other small metal objects that can make a connection from one terminal to another. Shorting the battery terminals together may cause burns or a fire.
Under abusive conditions, liquid may be ejected from the battery; avoid contact. If contact accidentally occurs, flush with water. If liquid contacts eyes, additionally seek medical help. Liquid ejected from the battery may cause skin irritation or burns.
Functional Description

Read all safety warnings and all instructions. Failure to follow the warnings and instructions may result in electric shock, fire and/or serious injury.
Intended Use
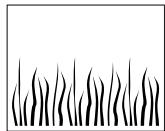
The machine is intended for the cutting of grass and weeds under bushes, as well as on slopes and edges that can not be reached with the lawn mower.
Intended use is related to operation within 0^ and 40^ ambient temperature.
Delivery Scope
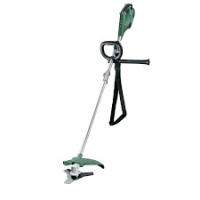
Carefully remove the machine from its packaging and check if the following parts are complete:
- Cordless trimmer
- Blade guard
- Adjustable handle (fitted)
- Cutting disc
- Blade
Battery Charger - Operating instructions
When parts are missing or damaged, please contact your dealer.
Product Features
The numbering of the components shown refers to the representation of the machine on the graphic pages.
1 On/Off switch
2 Lock-off button for On/Off switch
3 Handle
4 Handle screw
5 Adjustable handle
6 Adjusting collar
7 Shaft
8 Ventilation slots
9 Trimmer head
10 Blade
11 Blade guard
12 Foot pedal for trimmer-head angle adjustment
13 LED indicator
14 Battery charger
15 Battery
16 Cutting disc
17 Pin
18 Plant protector
19 Serial number
The accessories illustrated or described are not included as standard delivery.
Technical Data
| Cordless Trimmer | ART 23 Li | ART 26 Li | |
| Article number | 3 600 H78 K.. | 3 600 H78 L.. | |
| No-load speed | rpm | 7500 | 7400 |
| Adjustable handle | ● | ● | |
| Trimmer-head angle adjustment/edging adjustment | ● | ● | |
| Cutting diameter | cm | 23 | 26 |
| Weight according to EPTA-Procedure 01/2003 | kg | 2.3 | 2.4 |
| Serial number | See serial number 19 (type plate) on the machine | ||
| Battery | Li-Ion | Li-Ion | |
| Article number | 2 607 336 037 | 2 607 336 039 | |
| Rated voltage | V= | 14.4 | 18 |
| Capacity | Ah | 1.3 | 1.3 |
| Charging period (battery discharged) | min | 180 | 180 |
| Battery Charger | AL 2204 CV | AL 2204 CV | |
| Article number | 2 607 225 2.. | 2 607 225 2.. | |
| Charging current | mA | 230 | 230 |
| Allowable charging temperature range | °C | 0-45 | 0-45 |
| Weight according to EPTA-Procedure 01/2003 | kg | 0.7 | 0.7 |
Noise/Vibration Information
Measured values determined according to 2000/14/EG (1.60 m height, 1.0 m clearance) and EN 28 662.
Typically the A-weighted noise levels of the product are: Sound pressure level 80 dB(A); Sound power level 88 dB(A). Uncertainty K = 5 dB.
Wear hearing protection!
The hand-arm acceleration is typically below 2.5m / s^2
Declaration of Conformity C
We declare under our sole responsibility that this product is in conformity with the following standards or standardization documents: EN 786, EN 60 335 according to the provisions of the directives 89/336/EWG, 98/37/EG, 2000/14/EC.
2000/14/EC: The guaranteed sound power level LWA is lower than 94 dB (A). Conformity assessment procedure according to Annex VI.
Notified body: SRL, Sudbury England
Notified body identifications number: 1088
Technical file at:
Robert Bosch GmbH, PT/ESC,
D-70745 Leinfelden-Echterdingen
Dr. Egbert Schneider Senior Vice President Engineering
Dr. Eckerhard Strötgen
Head of Product Certification


20.08.2007, Robert Bosch GmbH, Power Tools Division D-70745 Leinfelden-Echterdingen
For Your Safety
Switch off and remove battery from machine before adjusting or cleaning.
The blade continues to rotate for a few seconds after the cordless trimmer is switched off.
Caution - do not touch the rotating blade.
Assembly
Battery Charging
Observe correct mains voltage: The voltage of the power source must agree with the voltage specified on the nameplate of the unit. Equipment marked with 230V can also be connected to 220V or 240V .
Use only the charging unit supplied. Only this charging unit is matched to the lithium-ion battery used in the product.
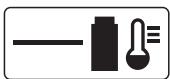
The battery is equipped with temperature monitoring that allows charging only in the temperature range between 0^ and 45^ . In this manner, a high battery service life is achieved.
Note: The battery is supplied partially charged. To ensure full capacity of the battery, completely charge the battery in the battery charger before using your power tool for the first time.
The lithium ion battery can be charged at any time without reducing its service life. Interrupting the charging procedure does not damage the battery.
Removing the Battery A
Press the battery unlocking button and pull out the battery 15 toward the rear.
Charging Procedure
The charging procedure starts as soon as the mains plug is plugged into the socket and the battery is then inserted into the battery charger 14.
Firstly, place the battery 15 as shown in the figure onto the front of the battery charger (0) and then press the battery 15 down at the rear (2). To remove the battery, proceed in reverse order.
Due to the intelligent charging method, the charging condition of the battery is automatically detected and the battery is charged with the optimum charging current, depending on battery temperature and voltage.
This gives longer life to the battery and always leaves it fully charged when kept in the charger for storage.
Note: The charging procedure is only possible when the battery temperature is within the allowable charging temperature range, see section "Technical Data".
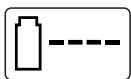
Flashing Battery Charge Indicator 13
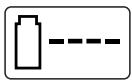
The charging procedure is signalled by a flashing battery charge indicator 13.
Continuous Lighting of the Battery Charge Indicator 13
Continuous lighting of the battery charge indicator 13 indicates that the battery is fully charged or that the tempera
ture of the battery is not within the allowable charging temperature range, and cannot be charged for this reason. The battery is charged as soon as the allowable charging temperature range is reached.
When the battery is not inserted, continuous lighting of the battery charge indicator 13 indicates that the mains plug is inserted in the socket and that the battery charger is ready for operation.
Charging Advice
With continuous or several repetitive charging cycles without interruption, the charger can warm up. This is not meaningful and does not indicate a technical defect of the battery charger.
A significantly reduced working period after charging indicates that the battery is used and must be replaced.
The Electronic Cell Protection (ECP) protects the lithium ion battery against deep discharging. When the battery is run down or discharged, the machine is shut off by means of a protective circuit: The blade no longer rotates.
Do not continue to press the On/Off switch after an automatic shut-off of the machine.
The battery can become damaged.
Product Assembly

Do not insert the battery until the cordless trimmer is completely assembled.
Ensure that the cordless trimmer is assembled in the following order:
Mounting the Blade Guard
Place the blade guard 11 on the trimmer head 9.
Hook the blade guard onto the trimmer head and push it toward the rear.
Press the blade guard downward until securely latched (click).
Mounting the Cutting Disc/Blade

Press the cutting disc 16 onto the drive shaft (click).

Position the blade 10 onto the pin 17, push it down and pull it outward until it engages.
Operation
Starting

Remove stones, loose pieces of wood and other objects from the cutting area.
The blade continues to rotate for a few seconds after the cordless trimmer is switched off. Allow the motor/blade to stop rotating before switching "on" again.
Do not rapidly switch off and on.
Inserting the Battery
Insert the battery into the machine as shown. The battery must be felt to engage.
Switching On
Press the lock-off button 2 and hold while actuating the On/Off switch 1.
Release the lock-off button 2 again.
Switching Off
Release the On/Off switch 1.
Note: There is a short delay in the motor starting after engaging the on/off switch 1.
Adjustment
Using the Adjustable Handle
The adjustable handle 5 can be set in various positions:
To change the position, loosen the handle screw 4 and move the adjustable handle 5.
- Tighten the handle screw 4 securely to fix the adjustable handle 5 in the adjusted position.
Adjusting the Trimmer Length F
1Turn the adjusting collar 6 by 90^
Pull the shaft out to increase the height, or push the shaft in to decrease the height. Re-tighten the adjusting collar 6.
Adjusting the Trimmer-head Angle G
To change the cutting angle, press the foot pedal 12 down and move the shaft 7 to the requested position.
Release the foot pedal 12.
Adjusting for Edging Mode
H Adjusting the trimmer-head angle:
Press the foot pedal 12 down.
Move the shaft 7 to the lowest position. Release the foot pedal 12 again.
1 Moving the trimmer head:
Loosen the adjusting collar 6.
Turn the shaft 7 by 90^ to adjust the trimmer head 9 for trimming/edging as shown. Re-tighten the adjusting collar 6.
Working Advice

Protect the battery from heat, for example, also the continuous exposure to sun radiation and fire.
Product will not function if temperature is below 0^ or above 45^
Cutting Grass
Move the cordless trimmer left and right, keeping it well away from the body.
The trimmer can efficiently cut grass up to a height of 15 cm. Cut higher grass in stages.
Trimming Edges
Guide the cordless trimmer along the edge of the lawn. Avoid contact with paved surfaces, stones or garden walls, as this will wear the blade rapidly.
For better control, use the plant protector 18 (accessory) as a guide.
Cutting Around Trees and Bushes
Carefully cut around trees and bushes so that they do not come into contact with the blade.
Plants can die if you damage the bark.
K For better control, use the plant protector 18 (accessory) as a guide.
Battery Duration
The battery duration is dependent on the working conditions:
Light conditions:
up to 800 metres (ART 23 Li)
up to 1000 metres (ART 26 Li)
Medium conditions:
up to 350 metres (ART 23 Li)
up to 440 metres (ART 26 Li)
Tough conditions:
up to 60 metres (ART 23 Li)
up to 75 metres (ART 26 Li)
Changing the Blade D

Before any work on the machine itself, remove the battery from the machine.
To remove the worn blade 10, push it inward until it snaps off of the pin 17.
Clean the pin 17 of any residual plastic/debris with a sharp knife.
To mount a new blade 10, place the blade 10 onto the pin 17, push it down and pull it outward until it engages.
Note: Only use Bosch replacement blades. They have been developed specially for improved cutting and feed performance. The use of other blades will lead to a deterioration in performance.
Troubleshooting
The following chart lists problem symptoms, possible causes and corrective action, if your machine does not operate properly. If these do not identify and correct the problem, contact your service agent.
Warning: Switch the machine off and remove the battery prior to any troubleshooting.
| Problem | Possible Cause | Corrective Action |
| Blade guard can not be mounted over cutting disc | Incorrect assembly | Remove cutting disc and mount blade guard again; also see "Assembly" |
| Trimmer fails to operate | Battery discharged | Recharge battery; also see "Battery Charging" |
| Battery too hot/cold | Allow to cool/warm | |
| Trimmer runs intermittently | Internal wiring of machine damaged | Contact Service Agent |
| On/Off switch defective | Contact Service Agent | |
| Excessive vibrations/noise | Machine defective | Contact Service Agent |
| Blade broken | Replace the blade | |
| Cutting time per battery charge too low | Battery has not been used for long period or only for short terms | Fully charge battery; also see "Battery Charging" |
| Grass too high | Cut in stages | |
| Battery dead or defective | Replace the battery | |
| Blade will not move | Battery discharged | Recharge battery; also see "Battery Charging" |
| Machine defective | Contact Service Agent | |
| Machine does not cut | Blade broken | Replace the blade |
| Battery not fully charged | Recharge battery; also see "Battery Charging" | |
| Grass entangled around cutting disc | Remove grass | |
| Continuous lighting of the battery charge indicator 13 | Battery not (properly) inserted | Properly insert battery into battery charger |
| No charging probedure possible | Battery contacts contaminated | Clean the battery contacts (e.g. by inserting and removing the battery several times) or replace the battery |
| Battery defective | Replace the battery | |
| Battery charge indicator 13 does not light up | Mains plug of battery charger not plugged in (properly) | Insert mains plug (fully) into the socket outlet |
| Socket outlet, mains cable or battery charger defective | Check the mains voltage; have the battery charger checked by an authorised after-sales service agent for Bosch power tools |
Maintenance and Service
Maintenance and Cleaning

Before any work on the machine itself, remove the battery from the machine.
Note: To ensure long and reliable service, carry out the following maintenance regularly.
Regularly check for obvious defects such as loose fixings, and worn or damaged components.
Check that covers and guards are undamaged and correctly fitted. Carry out necessary maintenance or repairs before using.
If the machine should happen to fail despite the care taken in manufacture and testing, repair should be carried out by an authorised customer service agent for Bosch garden products.
In all correspondence and spare parts order, please always include the 10-digit article number given on the type plate of the machine.
After Trimming/Storage

Switch the machine off and remove the battery. Ensure battery is removed before storage.
Clean the exterior of the machine thoroughly using a soft brush and cloth. Do not use water, solvents or polishes. Remove all grass and debris, especially from the ventilation slots 8.
Turn the machine on its side and clean the cutting guard 11 inside. If grass cuttings are compacted, remove with a wooden or plastic implement.
Check if guards and protective devices are undamaged and properly mounted. Before using, carry out possibly necessary maintenance and repairs.
The battery should be stored between 0^ and 45^ .
After-sales service and customer assistance
Our after-sales service responds to your questions concerning maintenance and repair of your product as well as spare parts. Exploded views and information on spare parts can also be found under:
www.bosch-pt.com
Our customer consultants answer your questions concerning best buy, application and adjustment of products and accessories.
Great Britain
Robert Bosch Ltd. (B.S.C.)
P.O.Box 98
Broadwater Park
North Orbital Road
Denham
Uxbridge
UB 95HJ
Tel. Service: +44 (0844) 736 0109
Fax: +44 (0844) 736 0146
Australia, New Zealand and Pacific Islands
Robert Bosch Australia Pty. Ltd.
Power Tools
Locked Bag 66
Clayton South VIC 3169
Customer Contact Center
Inside Australia:
Phone: +61 (01300) 307 044
Fax: +61 (01300) 307 045
Inside New Zealand:
Phone: +64 (0800) 543 353
Fax: +64 (0800) 428 570
Outside AU and NZ:
Phone: +61 (03) 9541 5555
www.bosch.com.au
Transport
The battery is tested according to UN document ST/SG/AC.10/11/Rev.3 Part III, subsection 38.3. It has effective protection against internal overpressure and short circuiting as well as devices for the prevention of violent rupture and dangerous reverse current flow.
The lithium-equivalent content in the battery is below applicable limit values. Therefore, the battery is not subject to national or international regulations pertaining to dangerous mediums, neither as an individual component nor when inserted into a machine. However, the regulations governing dangerous goods may be relevant when transporting several batteries. In this case, it can be necessary to comply with special conditions (e.g., concerning the packaging). For more information, please refer to the instruction sheet (in English) under the following Internet address: http://purchasing.bosch.com/en/start/Allgemeines/Download/index.htm.
Disposal
The machine, accessories and packaging should be sorted for environmental-friendly recycling.
Only for EC countries:

Do not dispose of power tools into household waste!
According the European Guideline 2002/96/EC for Waste Electrical and Electronic Equipment and its implementation into national right,
power tools that are no longer usable must be collected separately and disposed of in an environmentally correct manner.
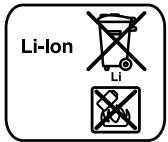
Battery packs/batteries:
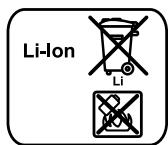
Li-ion:
Please observe the instructions in section "Transport", page 26.
Do not dispose of battery packs/batteries into household waste, fire or water. Battery packs/batteries should be collected, recycled or disposed of in an environmental-friendly manner.
Only for EC countries:
Defective or dead out battery packs/batteries must be recycled according the guideline 91/157/EEC.
Batteries no longer suitable for use can be directly returned at:
Great Britain
Robert Bosch Ltd. (B.S.C.)
P.O.Box 98
Broadwater Park
North Orbital Road
Denham
Uxbridge
UB 95HJ
Tel. Service: +44 (0844) 736 0109
Fax: +44 (0844) 736 0146
Subject to change without notice.
Dr. Egbert Schneider Senior Vice President Engineering
Dr. Eckerhard Strötgen
Head of Product Certification

i.v. Mojgcu
20.08.2007, Robert Bosch GmbH, Power Tools Division D-70745 Leinfelden-Echterdingen
Pour votre sécurité
Robert Bosch (France) S.A.S.
Dr. Egbert Schneider Senior Vice President Engineering
Dr. Eckerhard Strötgen
Head of Product Certification

i.v. Mojgcu
20.08.2007, Robert Bosch GmbH, Power Tools Division D-70745 Leinfelden-Echterdingen
Para su seguidad

Dr. Egbert Schneider Senior Vice President Engineering
Dr. Eckerhard Strötgen
Head of Product Certification
ppa. Maee i.v. Nogcu
20.08.2007, Robert Bosch GmbH, Power Tools Division D-70745 Leinfelden-Echterdingen
Para sua segurarca
Desligar o aparelho e remove o acumulador, antes de realizar problemas de ajuste ou de limpeza.
A lámina de corteaina continua a functionar durantealguns segundosaposdesligar o aparador delrelva sem fio.
Senior Vice President
Engineering
Dr. Eckerhard Strötgen
Head of Product
Certification

i.v. Moju
20.08.2007, Robert Bosch GmbH, Power Tools Division
D-70745 Leinfelden-Echterdingen
Dr. Egbert Schneider Senior Vice President Engineering
Dr. Eckerhard Strötgen
Head of Product Certification

i.v. Moju
20.08.2007, Robert Bosch GmbH, Power Tools Division D-70745 Leinfelden-Echterdingen
Voor uweiligkeit

Dr. Egbert Schneider Senior Vice President Engineering
Dr. Eckerhard Strötgen
Head of Product
Certification


20.08.2007, Robert Bosch GmbH, Power Tools Division D-70745 Leinfelden-Echterdingen
Bosch Service Center
Telegrafvej 3
2750 Ballerup
Tel. Service Center: +45 (04489) 8855
Fax: +45 (04489) 87 55
E-Mail: vaerktoej@dk.bosch.com
Transport
Akkuen er testet ith. UN-manualen
Dr. Egbert Schneider Senior Vice President Engineering
Dr. Eckerhard Strötgen
Head of Product Certification

i.v. Moju
20.08.2007, Robert Bosch GmbH, Power Tools Division D-70745 Leinfelden-Echterdingen
För din sakerhet

Endast for EU-lander:

Endast for EU-lander:
Dr. Egbert Schneider Senior Vice President Engineering
Dr. Eckerhard Strötgen
Head of Product Certification


20.08.2007, Robert Bosch GmbH, Power Tools Division D-70745 Leinfelden-Echterdingen
Dr. Egbert Schneider Senior Vice President Engineering
Dr. Eckerhard Strötgen
Head of Product Certification


20.08.2007, Robert Bosch GmbH, Power Tools Division D-70745 Leinfelden-Echterdingen
Turvallisuussyista
IIInpoopoeic yia OpuBo kal dovnoeiC
Oi tuec metpnonc eXakpiBwOngav ouoWva me Tnv obnyia 2000/14/EK (1,60 m uoc 1,0 m anoTaon) kaTnv EN 28 662.
H ouφwva μe tnv kaμnλn A ekτιηθεια
xapaktnpiotikn στaθμn akouotiknc pieoanc tou
μnxavmatoç avεpxetai oε 80 dB(A). Στaθμn
akouotiknc pieoanc 88 dB(A). Avoσφalεia
μετροπc K = 5 dB.
Φopáte ωταοπιβες!
H xapaktnpiotikn vonn xepiou-mpaTou eivai ukpote np 2,5 m/s2.
Anwon ouβarotntra C
uenuOvWc oTI to npoiov auto eknnpwvei Touc eEic kavoviaouc n kataaekuaatikec ouotaeic:EN 786,EN 60335 ouawva tic diataeic twv obnyiw 89/336/EOK,98/37/EK,2000/14/EK.
Dr. Egbert Schneider Senior Vice President Engineering
Dr. Eckerhard Ströttgen
Head of Product Certification

20.08.2007, Robert Bosch GmbH, Power Tools Division D-70745 Leinfelden-Echterdingen
Tia Tnv aopalea oac

Na 8eTeTo mXavna EKTOc
LeitoupyiaC kal va apaipite Tnv
muataia npiv ano onoiabhnotepyaia
puOuian C/kaI ka9apaiou.
To paiaip konnc ouvexiei va kiveitai yia
peiká deutepoIenTa μeTa Tn θeon ekToc
λeIToupyiac tou xlookontkou μnatapiac.
Ppooox- mny ayyiEeTe to nepioTpeopevo maXaip KOnIc.
Συναρολόγηση
Φoption μnatapiac
e npooxn otyn taon biKtuou: H taon nnc mnync peumuoc npenei va tauticetai me tyn taon nou avaypafetai otny ivakida kataokeuaotn tou unxavnuatoC. Mnxavmuatae xapaktnpiotikn taon 230 V mnpoov va xpnoimointhetaov ka e taon 220 V/240 V.
Na xpnaiomnoieite to ophiotn nou nepiexeta otnsoukeuaia. Movo autoc o ophiotnc taipiaei otn mnatapia 1ovtwv laiou nou xpniomnoieita oto unxavnua oac.
H mntapia diathetai ia diatae n eithnpnonc tnc
0epuokpaaic n onoia enitpei tn foption movo
otnv nepioxh 0C kai
45 ^ C .Etai emituyxavetai ia ueyaln diapkeia
zwnc nnc mntapiaac.
YnobsEi: H mntapia npabidietai mepiikc foepiouevn. Ia va eaoqalioe Te nV pAnpn Tox TnC mntapiaac npenei va Tny foptiaeote OTo foptioTn npiv Tnv xnpoonoioe yia npwn foopa.
H mntapia iovtwv A thiou mtopei va oopriotei ava naa stiyh. H diaokonn tnc ooptionc dev annte iynmuatapia.
Apaipoeon mntatapiac A
Pntote to nIaKtpo anoavdaawonc matapia c kai aapieote tynmuatapia 15 ano to niow mepooc tou naxavnatoc.
ΦoPtion
Oe an oE leitroupyia
Pntote tv anokleiao aTheiTNC 2, kpatote tv natnevo kalakoloutheta natote to diakotn ON/OFF 1.
Aphote eLeuthetapo tov anoklaioa o aEaIntnc ZeueNc 2.
OeON eKToC λeIToupyiac
AphoTe eLeuOePoTo δiakonTN ON/OFF 1.
YnobeiEi:OTav natiOeTe to biakottn ON/OFF 1 o kivntnpac Eekiva eia Eaixiotn xpvikn kaoustepn.
Dr. Egbert Schneider Senior Vice President Engineering
Dr. Eckerhard Strötgen
Head of Product Certification


20.08.2007, Robert Bosch GmbH, Power Tools DivisionD-70745 Leinfelden-Echterdingen
Güvenliginiz icin

350 metreyekadar (ART 23 Li)
Bosch San. ve Tic. A.S.
Ahi Evran Cad. No:1 Kat:22
Polaris Plaza
80670 Maslak/Istanbul
Müsteri Danismani: +90 (0212) 335 06 66
Müsteri Servis Hatti: +90 (0212) 335 07 52
Nakliye
Dr Egbert Schneider Senior Vice President Engineering
Dr Eckerhard Ströttgen
Head of Product Certification

i.v. Mojgcu
20.08.2007, Robert Bosch GmbH, Power Tools Division D-70745 Leinfelden-Echterdingen
Robert Bosch Sp. z o.o.
Dr. Egbert Schneider Senior Vice President Engineering
Dr. Eckerhard Strötgen
Head of Product Certification


20.08.2007, Robert Bosch GmbH, Power Tools Division D-70745 Leinfelden-Echterdingen
Pro Vaši bezpečnost
Bosch Service Center PT
K Vapence 1621/16
692 01 Mikulov
Tel.: +420 (519) 305 700
Fax: +420 (519) 305 705
E-Mail: servis.naradi@cz.bosch.com
www.bosch.cz
Preprava
Senior Vice President
Engineering
Dr. Eckerhard Strötgen
Head of Product
Certification

i.v. Mo Tu We Th Fr So Su
20.08.2007, Robert Bosch GmbH, Power Tools Division D-70745 Leinfelden-Echterdingen
Dr. Egbert Schneider Senior Vice President Engineering
Dr. Eckerhard Ströttgen
Head of Product Certification

i.v. Moju
20.08.2007, Robert Bosch GmbH, Power Tools Division D-70745 Leinfelden-Echterdingen
Az OnBiztonsagsaert

He pa6oTaIe TIOA DOXDEM H He OCTaBIAIte aKKyMMyAITOPHbI TpIMMep CTOrTb IOA DOXDEM.
HnB Koem cayuee He pa6oTaTe C TpMMepom C IOBpeJxDeHHbIMN KOJIaKaMn 3aunTHbIMN yCTpoiCTBaMn, Hn eCAn OHN CHrTbl.

HeIIOb3yITeCb 3apAHybIM yCTpoiCTBOM C IOBpeKdEHHbIM UHypom IITaHn.
TocLe yda pa o6cJeYte HnCTpyMeHT Ha n3HOC mIOBpeJdeHn Ipi NaHO6HocTn CdaTe ero Ha peMOHT Pepd NCIOb3OBaHHem.
Hacto3n 3eKtpOHCTpyMeHT He
IpeaHa3NaueH AIN CIOA3OBaHN AuaMn
(BkAoua DeTe) C OpraHueHHbIMN
H3uueCKHMn, OprAHOeTTUeCKMn Hn
ymCTBeHHbIMn CTOOC6HOCTAMn Hn C
HeOCTaTOUHbIM OTbTOM H/nn
HeOCTaTOUHbIMn 3HaHnAIMn, Pa3BE TOBko,
eCN OHn HaxoJTCr IOd HA3Opom Aua,
OTBeTCTBeHHOrO 3a INx 6e30nAcHOCTb, nN
TOLyuaOT OT Hero IHCTpyKcNn IIO
3KcTIayataunn HaCToJIeO
3eKTPoIHCTpyMeHTa.
AeTN OAnKhbl HaxoAHTCa IIOA IIpncMOTPOM
IAAOBecTeueHnIcTIOAb3OBAHH
3ANEKTPOINHCTpyMeHTa IMN IIO Ha3HaueHnIO n He dA INrP.
HeIb3a Kocntb aKKyMyAToPbHbIM Tpmmpeom 6oCnKOM HnB OTKpbIToN AteHne Obyu N BceTa HaDeBaTe PPOHyU, 3aKpbItyU ObyBb n DAHHbIe 6pOKn.
HnB Koem clyuae He pa3pewaTe IIOb3OBAbTcR aKKyMaIaTOpHbIM TpHMMePOM DeTAM HN HUaM,He O3HaKOMeHHbIM C HAcTOrJUmM INHCTpyKcIaMn. HaNoHaBbIe IPeADINCAHn MOrT OpaHnUBaTb DOYCTmbl B03pact OepaTopa. XpaHtET PImMep HeDOcRAeMO DA JDeTei.
He pa6oTaIe C nHCTpyMeHTOM, eCAn B HeIOcpeADCTBEHHOJ 6AUN3n HAXOaTcR AIOuN, B OOC6eHHoCTn DeTn, IAN DOMaUSHne KINBOTbIe.
OpepaTopnnIIOb3ObaTeIbOTBeTCTBEH3a HeecuactThbIe ClyuaH uyepe6,HaheceHHbI ApyrHM Anzam HN Nx NMyueCTBy.
He kacaTecb BpaaauoeroC Hoxa do ero TIOHOn octaHOBKn. Hox BpaaeTcE eue TOCAE BbIKAUOeHnA DBNrAeI IIO INHePcIN MoKxET HaHeCTn TpaBMy.
Pa6oTaTeToIbKOIIpNAnHeBOMOCBeSeHn HxopoWem NCKyCCTBeHHOMOCBeSeHn.
TIO BO3MOXHOCTn, He 3KcTIyATHypyTe aKKyMAYTOpHbI TpIMMeP IIO MOKpoTtpaBe.
BbiklouaTe aKKyMaIrTopHbI TpIMMep Iprn TpaHCtOpTnPoBKe K o6paBaIbAeMoI Ploaadn I o6paTHo.
BkIouaIte aKkyMylAToPbHb TpMMep TOIbKO IPIN DOCTaTOUHOM paCtOHaHH BpaauoJooROc HOka OT pyK HOr.
CoxpanaIte 6e3oIacHoe paCCTOHaHne oT pyK HOr K BpaAuaIOuEmyca HOxy.
He IpiMHeHЯTe MeTaAMnueckN HOX DAJ 3TOrTO TpIMMepa.
PeryArpHO BbIIOHAnHeTe KOHTpOaBn 06cayxHBaHne aKKMyTApTOrO TpIMMepa.
PemOHt aKKyMaIaTOpHOrTo TpHMMepe TOpyuAte ToIbKO aBTOpI3OBAHHbIM cepBnCHblM MaCTepCKmM.
ПOTOCKAHNO CLEANTe 3a YNCTOTOBBEHTNAUONHHbIX WIIUEB.
BbIaHTe TpMMep HbIHMaTe aKKMyAToP:
- BceIgda,ecnBbIOCTaBIAeTe HNCTpyMeH 6e3 Ha30pa
- Tpepa Cmeho Hoxa
-пегд оочтков И пи Вьltонен paBOT Ha aKKymyIaTOpHOM TpIMMepe.
XpaHnTe HNCTpyMeHT B HaAeXHOM, CyXOM HeoOcraEaEMOM AaIaTeMecTe. He CTaBbTe Ha HNCTpyMeHT NkKaKne IpEaMeTbI.
Да coхpaehnЯ 6e3oTachocTh MeHЯTe n3HOWeHHbI e Hn TIOBpeXdEHHbI yactN.
3aMeHbI NcToB3yTe opnHaNbHbIe 3aIacHbIe qactn fnpMb Bosch.
Ipeed yctaHOBkoakymyIaTopa IPOBepbTe BbIKAOUeHHOe COCTOHN HeCTpymeHa. YcTaHOBka aKKymaIaTopa BO BkIOUeHHbIM HnCTpymeHT MOKeT PnIBecTH K HeCuaCTHBIM CnyaAM.
3apKaTe aKcymyTOpbl ToAboKo 3apAHybIMN yCTpoiCTBaMn, peKOMeHdYEmbIMN n3ROTOBHTeAM.
3apdHoe yctpoCTBO, PpeDcMOTpeHHoe
AONTEPEeEHNO BnDa aKKyMyAToPOB,
MOXeT PnBBeCTN K ITOxApHOI OTAChOCTN IPrN
HCIOb3OBaHN eO C dpyHMn
aKKyMyAToPamn.
PpIMHeHTe B HnHcTpymEHTax ToIbKO TpeDyCMOTpeHHbIe AkKMyAITopbl. PpIMHeHne Apynx AKKyMAnTOpOB MOKeT TpINBeCTN K TpaBMam ITOXkapHOI OTaCHOCTN.
3aunuaiTe HeNcToB3yEmbI aKKymyTOpOT KaHueApcknx CkpeTOK, MOHeT, KluOeH, RBO3DeI, BnHTOB INpyrNX MaAeHbKHX MeTAAHueCKNx PpeDMTOB, KOtOpBle MOrYT 3akopoNTb TIOAUca. KopotKoe 3aMbKaHne TIOUOCB aKKymyTApota MoKeT PpNBecTH K OXoRam HAn TIOKapy.
Pn HnepaBnAbHom nCIOAe3ObaHnn n3 aKKymyITopa MoKet TOTEy KNDKOCTb. N36eraTe cOnpNKoCHOBENHc Hei. Pn CnyaHOM IIOIaDaHN Ha KOxy OTOLOCKaTb BOoN. Pn IIOIaDaHN 3ToH JNDKOCTN B rla3a, o6paNTecb 3a TMOUbK BpaCy. BbIeKaIo7aaykKymyIaTOPHaJ XNDKOCTb MOKeT Bbl3BaTb pa3DpaKeHHe KOxN OOKOrn.
OtncaHne yHKcnn

IpouHTte Bce yka3aHn HnHctpyKcnnnoTexhne 6e0nacHOCTn.
YnyueneHn,doNyueHHbIe npn CO6AIODeHn yka3aHn HNCTpyKcH NTO texHnKe 6e3oPacHOCTn,MOyT cTaB npuHnO 3AEkTpnueCKOro Iopaxke
Hnra,TOXapaN TAgKeIbIX TpaBM.
TpImeHHe Hn Ha3HaueHHIO
HaCTOaHIn HnCTpyMeHT PpeHa3HaueH Aa CTpNkKn TpaBbI n CopnKa IIO KcyTAmn, a TaKke Ha cKIoHax n dAoi 6pa6oTKn KpOMok, K KOToPbIM He Do6paTbcra0HOKocnKoN.
NcnoIb3OBAHHe IIO Ha3HaueHHo pacIpoCTpaHaeTcHa TeMIIepaTypO okpykaIoUe Cpebl O 0^ do 40^
KOMTIAEKTIOCTABKN
Octopokno pacnaknyte trpmmep n npoBepbTe Haunne cLeaHoux uacte:
H3o6paxeHHbIe coCTaBbIe qactn
HymepauncaocTaBbixxacte BblIOHa HIO n3o6paXeHHIO Ha cTpaHnue C NMLOcTpaunm.
1 BbikHouaTeIb
2БLOKINPOBka BKAIOUeHnI
3 Pyka
4 BInTdoIOnAHnTeaBHOpyKoRTKN
5 IpectabIeMaJ dOToIaHInTeIbHaJ pyKoRTKa
6 3axumnaBtynka
7 Tpy6a
8 BeHTnlaIauHNoHHbI Inpope3N
9 TOnOBka TpHMMepa
10 Hox
11 3aunThbIKoKoyx
12 PdAaIaI3MeHnYrIa roIobKn TpIMMepa
13 CBeToaNoHaN HnHaKaun
14 3apAHOe yCTpoIcTBO
15 AkkymyTOp
16 Pexkyuaa rapeIka
17 WtncfT
18 3aunTHa cko6a
19 Homep cepnn
M3o6paXeHHbIe HnOtnCaHbIe PpHaHaJExHoCTn He BXoAaT B CTaHdApTHbI KOMTIAeKT TocTabKn.
TexHnueckne DaHHbIe
Dr. Egbert Schneider Senior Vice President Engineering
Dr. Eckerhard Strötgen
Head of Product Certification

i.v. Mojgcu
20.08.2007, Robert Bosch GmbH, Power Tools Division D-70745 Leinfelden-Echterdingen
AaBawei 6e3oNaChOCTn

BbIKAOHTb HNCTpymeH N CHaTb aKKyMaIATop DO hauaaa pa60 Tn HAcTPOKe HAN YNCTke.
TocLe BbIKIoUeHnAkkymyAToPnHorO TpMMepa HOK BpaauaetcE ue HeckoBko CekyHd IIO HnHepuHH.
Octopoxho - He KacaTecb Bpaauozeroc HOxa.
C6opka
3apAkaakymyToppa
YuHTbIbAaTe HApJxHHe cTe:HaPjxHHe
HCTOUYHnKa TOKa DOAnKHO COOTBeTcTBoBaTb
DaHHbIM Ha TnIOBoi Ta6AnuKe HnCTpyMeHTa.
3LeKtpOnHnCTpyMeHTbI Ha 230 B pa6oTaIoN Ipi
HaPjxHHeB 220 B.
ПпмениToIbko NocTaBaeHoe BmecTe c Инстчим entom 3apdHoe yctpoiCTBO.ToIbko ЗTO 3apdHoe yctpoiCTBO corlaacobHo C СИNTHEBO-инhhim akKymyIaTOpom Baшero Инстчим enta.
AkkymyIaTOP Oshaen YcTPOINCTBOM KOHTPOAN TeMTpepaTybl, KOTOPOE IO3BOANET IPOUN3BOADtB 3apnky ToIbKO B IIpeDeIax TemPePaTyplb OT 0^ Do 45^ .3TmM DOCTnraetc TPOAOXHTeMbHb CpOK cAyK6bl AKKymyIaTOPa.
Yka3aHne: AkkyMylAToP IocTaBAAeTcH He IIOHOCtBu 3apJxKeHHbIM. AIA oBeCteueHnI IOHO MOUHOCTn aKkyMylAToP 3apJAnTe ero IIOHOCTbIO TpeE PEPBbIM PIPmHeHnEM.
IHTNEBO-NOHHbI aKKMyAANTOP MoKet 6bITb 3apJxH B AIO6oe BpeMg 6e3 cOKpaueHn Cpoka C LyX6bl. IpeKpaueHne Ipouecca 3apJ4KN He HaHOCTBpeDa aKKMyAANTOpY.
CHaTHe aKKyMylAToPa A
HaKmHTe Ha KlaBnUy pa36bOKnOpOBKN bItTHe aKKyMylTop 15 nHCTpyMeHaTa.
Tpocecc 3aprakn
ПюцeccЗардн haunHaeTc ca3yпocle BkluoehnBnKn shHypa 3apdHOrO yctpoNCTBa B lTePceIbHyIO p03eTKU n IocLeyIOse yCTaHOBKn aKKymyTAToPA B 3apdHoe yctpoNCTBO 14.
Посавыт eakумларop 15 coflachno pncyHky chauala cpeaHn Ha 3aprdnoe yctpoiCTBO ()и 3aTeM haxmnte Ha akyyuIarTop 15 c3aHn Do ynpa (2). Chmaite akyyuIarTop c 3aprdHoro yctpoiCTBa B O6paTHO TIOcAeDobateAhoCTN.
HHTeIHHErTHbIM MeToD 3apAaN aBtOMaTHeeCKn OIPpeEJIeT COCTOAHHe 3apAa AKKyMylTOpa N B 3aBNCmOcTN OT eTO TemIepaTypbl HAnpJxKeHn3 apAka OcyuectBAreTC C OTTHMaAbHbIM TOKOM.
3TMMdoCTnraetcbepexHoe o6paueHne c aKkymyAToPOMIpi CoXpAHENB 3apAHOm yCTpoiCTBe OH BcERda TIOAHOCTbHO 3apJKeH.
Yka3aHne: 3apRdKa BO3MOXHa TOIbKO IpiN TeMIIepaType aKKyMylTopa B IIpeDeIax DnApa3OHa 3apRdKN, CM. pa3deI «TexHueckne DaHHble».
ПюбlaceковыCBETИнДИКаТopaЗарда aKKуMaIЯТopa13
HnAnKaTOp 3apJa aKKyMaIaTopa
13 CnHaN3npye Tpouecc
3apM MraHHeM.
HnpepbBnBcBETNnAkaTopa3apda aKkymyAToPA 13
HenpepbIBhbi CBET
HДИКaTopa 3apraa aKKyMylTopa13 yka3bIBAeT Ha TIOAHOCTbO 3apxKeHHoe
coCTOHNHe aKKyMylTOpa Hn Ha IIpepbBaHHe IpoUecca 3apAKn IIpn BbIXOe TeMTpepAtypbl aKKyMylTOpa 3a IIpeDeIbI DOTyCTHMOrO dHaIIa3oHa. KaK ToIbKO TeMTpePAtya 6yDeT B DOTyCTHMOM dHaIIa3OHe HaUHeTc 3apA dKKyMylTOpa.
Bes akkyMAYTopa HnpepbIBhbi CBET HnDnKaTopa 3apda 13 O3Haayet, YTO Bnka shHypa BCTaBHeHa B WTeIeAHyIO po3eTKy I 3apdHoe yctpoiCTBO hXoADHTCB pa6ooyem COCTOHHN.
Yka3aHnI IIO 3apAke aKKymyIToPA
При НпрөрьИВьIx Ил МногOKpaTHO ТВОТРЯБМIX UKKλх 3арДК 6e3 ПерөрьИВа ЗарДhoe yСтpoICTBO можЕт HarpeTBС. ṄTO, ODHaKO, He Bbl3bIBAe TОпасEHи N He yKa3bIBAeT На ТExHnueCKуH 百 HcNtPaBHOCTb ЗАЕКТРОИHCTPyMeHTa.
3haHTeBHeO cokpaueHne IPOdoAaKTHeBHOCTn pa60tblTOcE 3apraJa yKa3bIbAet Ha cTapeHne aKKymyTATopOB H Heo6xOaHMOCTb IN 3aMeHbl.
ANTHeBO-NOHHbI aKKyMylTOp OCHaSeH 《3eKtPOHHo 3aunToJ yueek (ECP)》 npOTnB rly60kOpa3prdkn.3aunTHna CXema BbIKIOUaET 3eKtPOHHCTpymENT ppi pa3pJxKeHHom aKKyMylTOpE.Hox He Bpa7aetc.
Tocae aBTOMaTHueCKORo BbIKAIOUeHn HcTpymEnTa He haxmMaTe 6oBwe Ha BbIKAIOuHaTeA. AKKyMyAITop MoKet 6bITb TOBpeXKeH.
C6opka HnHctpymenta

AkkymyIaTOp BCTaBIArToIbKO TocLe ToIHOH c6OpKn AkkymyIaTOpHOro TpHMpepa.
AkkymyTOpHbI TpHMMep Co6HpTaB TOAbko B CLeaYUoSeIIOcAeOBAteAhoCTh:
MOHTAX 3aunTHoro KOIanaKa
HacaIte 3aunTHbIKoTnak 11 Ha rOLOBky TpMMepa 9.
3aBeNTb 3aUHTbI KOIaK Ha rOLOBKe TpIMMepe IN CdBNUHTb eRo HzaA.
Haxmte Ha 3aunTHbI KOJIaK BnH3 DO HaeKHOΦHKcHPOBaHN (ueAOK).
YctaHObKa peKyuIe TapeAkn/Hoxa
HaIpeccyTe pexyuTo TapeKky 16 Ha IpiNbOHOB BAL (ueAOK).
D UCTaHOBnTe HOX 10 HaIHTnΦT 17, HaxMnTe Ha HOX N BbITaHnTe eO HApJxy Do ΦHKcnpoBaHn.
Pa6ota c HcTpymeHTOM
BkIoueHne
Y6epHTe C PteAycmOTpeHHoI AIA KOWeHnI IIOUaADn AepeBAAHbI N APyrHe PteAedtbl.
TocLe BbIKUoHEnn aKKyMylAToPHorO TpMMepa HOX BpaaTaEe che HeckoIbKO cekyHa IIO HHepuHH. DoxAnTeCb OctaHOBKn MOTopa/HoKa IpeEd CLeaDyUoHm BKlIOUcHHeM.
HeIb3a BbIKAIOUaT b NKIAIOuTa HNCTpyMeHT 6e3 IpomexkyTOHOro TepepbBa.
YctaHObKa aKKymyIToPa
BcTabBe aKKyMaIaTOp B INHCTpyMeHT cOrlaCHO n3o6paXeHHIO. AKKyMaIaTOp DOAnKeH 3aMeTHO fHKCnPOBaTbCra.
Bkluoyenne
HaxaTb Ha 6IoKnPoBkY BkIIOUeHn8 2 N B 3ToM IOLOXKeHH 3aDeICTBOBaTb BbIKHOuOaTeAb 1.
OTnyctntb 6LoKnpoBky BkIoueHn2.
BbikloueHne
OTnyCTnTb BbIKHOuAte1b 1.
Yka3aHHe: AByraTeIb 3aIyUcKaeTc Ipiu 3aDeIcTBoBaHn BbIKluOaTeIa 1 C He3HaUHTeIbHbIM 3aMeAHeHem.
Hactpoika nHcTpymenta
IcTIOb3OBAHnne IpepeTaBIAReMoN pyuKnE
IpeceTablaReMa pyuKa 5 MoXeT 6bItb yCTaHOBLeHa B pa3AuHbIX TIOLOXeHnIx:
1ДЯиЗмЕннЯ ПОLOЖЕня СLEдуET OTПУСТьВИNTpyKN4ип electabntb pyky5.
3aTbBnHTpyK4AaΦHKcPOBaHnIpeCTaBEmo pyK5ByctaHOBHeHOMTOAOKeHHN.
HactpoKa dAnHbI uTaHnF
1Повернтул захимнуюВтуку6Ha 90^
2△ydyHHeHHBbITHybIaHry,AynKopauHbAHN BdBHNb ee.3aTHyb3aXMHyIO BtAYKy 6.
I3meHHeNe yrHa hakLoHa roLOBKn TpHMMepaG
AIN3MeHEnyIgIa Cpe3a HaKaTb Ha TeJa1b 12
NIOBepHyTB TAnHry 7 B XeLaemoe PNOJKeHne.
OTnycTHNb TeJa1b 12.
TIOAOXeHne dAa 06pa6OTKn KpOMok
HactpoKa yIa roIobKn TpIMMepa
HaKaTb Ha TnEaAnb 12.
IIpnbBecn 7bTaHry 7 B CaMOe HNKeHeIIOAOKeHne. OTyCTNb TpeAa1b 12.
Ппетершени roLOвКТриммера
0Tnyctntb 3axnMHyBtLy6.
II P o b e p h y t b 7Ha 90^ n yctahOBnTb roLOBky TpHMMepa 9 DA KCAUINBaHN HN CTpnKKn KpOMOK COIaCHO N3O6paXeHNIO. 3aTAYb 3axmMHy O BTyKy 6.
Yka3aHnI IO TpIMHeHHIO

3aunuaTe aKKyMaTOpOT BO3eCTBnB BlicOKnx Tempeatyp, HAnpHMeP, CNbHOJ COAHeuHOI paNaauH NOrH. INcTpymENT He pa6oTaET Pn TEMepaType Hxke 0^ HN Bblse 45 ^ C!
CtpnxkKa TpaBbl
IpepeMaJTe aKKMyAaTOpHbI TpMMep HaIeBO HnHaPaBO N BIdepKbBaTe Ipi 3TOM DOCTaTOUHOe paCtOraHHe K TeLy.
3ΦΦEKTINBHO AKKyMAYTOpHbI TpMMep CTpNkEe TpaBy C BbICOTOn Do 15 cm. BoJeE BbICOKyTO TaBy CaeDyeT CTpNb CTpyHeHuTaO.
06pa6oTka Kpomok
BeaTe aKKyMaTOpHbI TpMMep BdoB KpOMKn Ra3OHa.ДЯпгдOTВpaSeHn6 b6tpoRo n3HOca LeCKN NCKAIOaHTe COPIKOCOBHe nC TBepdbIMN IOBepXHOCTaMn N KaMeHHbIMN Hn KNpTNuHbIMN CTeHaMn.
KДЯOBleUeHnpa6ObTI pIpMEnHaTe cKo6y 3aunTbI DepeBbeB 18 KaK BCpOMOraTeIbHoe HApBaIauOooye yCTpoIcTBO (PpHaAdJeXHoCTb).
CtpnKka TpaBbI BOKpyr AepeBbeB N KycToB L
Octopoxho cTpHnHTe TpaBy BOKpyr DepeBbeB KycTOB, UTo6bI He BOHTN B KOHTAKT C AeCKoN.
1000 metpoB (ART 26 Li)
CpeHne ycAoBn
30 350 MeTpOB (ART 23 Li)
0440 MeTpOB (ART26Li)
TaekeIbie ycaOBn
060 MeTpOB (ART 23 Li)
70 5 MeTpoB (ART 26 Li)
3aMeHa HOXaD

OuHCTHTb UTnΦT 17 OCTpbIM HOXOM OT OCTaTKOB TAACTMacCbI IN BCEX 3aqr3HeHH.
HOBBI HOK 10 HacaNTb 10 Ha UTnΦT 17 BbIXaTb BHN3 N BbITaHTb HapyKy DO ΦNKcnpoBaHH.
Yka3aHHe: TpIMMeHnTe HOxN TObKO OTΦnPmbl Bosch. 3Ta CteuHaBnA pa3pa6OtKa o6laaet yUyUeHHbIMn pexyUmm CBOIcTBaMn. HoXn dpyrNX Ipon3BOAnTeJe HMeOT xuDyHO Ipon3BOAnTebHOCTb.
Понски Неньсправност
B cIeIyUoIe Ta6IuIe IprnBeDeHb Iprn3HaKn I Bo3MOxHocTH yCtpaHHeIeEKTOB Ha Clyuaa HncItpaBHO pa6ObI BaSeMaaHHb. EcAn Bam He ydaCTcN C 3ToI pOMOsbIO loKaAN3HpOBaT b ycTaPAHb Ipo6IeMy, To o6paHTecb B BaUy cepBnchYIO MaCTepcKyIO.
BnmaHne! O naa IOnsKa HeNcIpaBHOCTe BbIKIOHTb IHCTpyMeNT N BbHyTb aKKyMylrTOp.
| Призник | Возможнaya п riчни | Устенения |
| Зашиные koлтык невозможно поставит на д рекушей тAPEков. | Нелравильна монтajх | Сnéту рекушию тapestалу и зашою установить зашиные koлтык, см. «Мontax» |
| Травимер не равотаet | Разражень akкулайтор АKKUMYЛAJTOP холочь/горячий | Зарады akкулайтор, см. Ташие уразался по зарадке Даite akкулайтopy harpeься/octыть |
| Травимер равотает с пегбаям | Ненистовость вунт佩него эльскромоNTажа машны | Образи teсь в сөрвисчю maстерский Образи teсь в сөрвисчю maстерский |
| Черзераима вибраць/шуm | Машина несправна Поломан HOX | Образи teсь в сөрвисчю maстерский Заменчы HOX |
| Низкая п现代物流istsь к一步一步 akkumулайтopa | АKKUMYЛAJTOP п现代物流istsь bokhoe Вremя не сизова лесу И сизова лесу товко Крахковеременho Высокая трава АKKUMYЛAJTOP вьработал сб氧 срок сухь | Плноctью зарадпь akkuулайтор, см. Ташие уразался по зарадке Стrelгichte сту老人家 Заменчы akkuулайтор |
| Нож не двигается | Разражень akкулайтор Машина несправна | Зарады akкулайтор, см. Ташие уразался по зарадке Образи teсь в сөрвисчю maстерский Заменчы HOX |
| Инст贫困人口 не сөрожet | Поломан HOX АKKUMYЛAJTOP заражень полочью Трава hamotалась вokту рекушей тapestлки | Заменчы HOX Зарады akкулайтор, см. Ташие уразался по зарадке Удалиь траву |
| Признak | Возможная рpreciна | Устранения |
| Индikatop зардк аKKулготор 13 сvetпс нелретьно | АKKулготор BCTaВLEн ПОЛHOCТью | Привиьно BCTaВИь аKKулготор B Зaporадhoe усточьо |
| АKKулготор He заржаetс АKKулготор He заржаetс АKKулготор He заржаetс АKKулготор He заржаetс АKKулготор He заржаetс АKKулготор He заржаetс АKKулготор He заржаetс АKKулготор He зarkу АKKулготор He зarkу АKKулготор He зarkу АKKулготор He зarkу АKKулготор He зarkу АKKулготор He зarkу АKKулготор He зarkу АKKулготор He зarkу АKKулготор He зarkу АKKu АKKу АKKу АKKу АKKу АKKу АKKу АKKу АKKу АKKу АKKу АKKу АKKу АKKу АKKу АKKу АKKу АKKу АKKу АKKу АKKу АKKу АKKу АKKу АKKу АKKу АKKu АKKу АKKу АKKу АKKу АKKу АKKу АKKу АKKу АKKу АKKу АKKу АKKу АKKу АKKу АKKу АKKу АKKу АKKу АKKу АKKу АKKу АKKу АKKу Аkkу АKKу АKKу АKKу АKKу АKKу АKKу АKKу АKKу АKKу АKKу АKKу АKKу АKKу АKKу АKKу АKKу АKKу АKKу АKKу АKKу АKKу АKKу АKKу АKKу АКу АКу АКу АКу АКу АКу АКу АКу АКу АКу АКу АКу АКу АКу АКу АКу АКу АКу АКу АКу АКу АКу АКу АКу АКу АСу АСу АСу АСу АСу АСу АСу АСу АСу АСу АСу АСу АСу АСу АСу АСу АСу АСу АСу АСу АСу АСу АСу АСу АСу АКу АКу АКу АКу АКу АКу АКу АКу АКу АКу АКу АКу АКу АКу АКу АКу АКу АКу АКу АКу АКу АКу АКу АКу АKу АКу АКу АКу АКу АКу АКу АКу АКу АКу АКу АКу АКу АКу АКу АКу АКу АКу АКу АКу АКу АКу АКу АКу АКу АЗу АКу АКу АКу АКу АКу АКу АКу АКу АКу АКу АКу АКу АКу АКу АКу АКу АКу АКу АКу АКу АКу АКу АКу АКу АН АКу АКу АКу АКу АКу АКу АКу АКу АКу АКу АКу АКу АКу АКу АКу АКу АКу АКу АКу АКу АКу АКу АКу АКу АКУ АКу АКу АКу АКу АКу АКу АКу АКу АКу АКу АКу АКу АКу АКу АКу АКу АКу АКу АКу АКу АКу АКу АКу АКу АКY АКу АКу АКу АКу АКу АКу АКу АКу АКу АКу АКу АКу АКу АКу АКу АКу АКу АКу АКу АКу АКу АКу АКу АКу АКy АКу АКу АКу АКу АКу АКу АКу АКу АКу АКу АКу АКу АКу АКу АКу АКу АКу АКу АКу АКу АКу АКу АКу АКу АКи АКу АКу АКу АКу АКу АКу АКу АКу АКу АКу АКу АКу АКу АКу АКу АКу АКу АКу АКу АКу АКу АКу АКу АКу АК: АКу АКу АКу АКу АКу АКу АКу АКу АКу АКу АКу АКу АКу АКу АКу АКу АКу АКу АКу АКу АКу АКу АКу АКу АКу | Привиьно BCTaВИь ВЛТeРсeльчы БЛТePсeльчы СЛТePсeльчы ДЛТePсeльчы ЕЛТePсeльчы БЛТePсeльчы СЛТePсeльчы ДЛТePсeльчы ЕЛТePсeльчы БЛТePсeльчы СЛТePсeльчы ДЛТePсeльчы ЕЛТePсeльчы БЛТePcS儿чы СЛТePсeльчы ДЛТePсeльчы ЕЛТePсeльчы БЛТePсeльчы СЛТePсeльчы ДЛТePсeльчы ЕЛТePсeльчы БЛТePсeльчы СЛТePсeльсчы ДЛТePсeльчы ЕЛТePсeльчы БЛТePсeльчы СЛТePсeльчы ДЛТePсeльчы ЕЛТePсeльчы БЛТePсeльчы СЛТePсeльчы ДЛТePсeльсчы ЕЛТePсeльчы БЛТePсeльчы СЛТePсeльчы ДЛТePсeльчы ЕЛТePсeльчы БЛТePсeльчы СЛТePсeльчы ДЛТePсeльчы ЕЛТePсeльсчы ВЛТePсeльчы СЛТePсeльчы ДЛТePсeльчы ЕЛТePсeльчы ВЛТePсeльчы СЛТePсeльчы ДЛТePсeльчы ЕЛТePсeльчы ВЛТePсeльчы СЛТePсeльчы ДЛТePсeльчы ЕЛТePсeльчы ВЛТePсeльсчы СЛТePсeльчы ДЛТePсeльчы ЕЛТePсeльчы ВЛТePсeльчы СЛТePсeльчы ДЛТePсeльчы ЕЛТePсeльчы ВЛТePсeльчы СЛТePсeльсчы ДЛТePсeльчы ЕЛТePсeльчы ВЛТePсeльчы СЛТePсeльчы ДЛТePсeльчы ЕЛТePсeльчы ВЛТePсeльчы СЛТePсeльчы ДЛТePсeльсчы ЕЛТePсeльчы ВЛТePсeльчы СЛТePсeльчы ДЛТePсeльчы ЕЛТePсeльчы ВЛТePсeльчы СЛТePсeльчы ДЛТePсeльчы ЕЛТePсeльсчы ВЛТePсeльчы СЛТePсeльчы ДЛТePсeльчы ЕЛТePсeльчы ВЛТePсeльчы CЛТePсeльчы ДЛТePсeльчы ЕЛТePсeльчы ВЛТePсeльчы СЛТePсeльчы ДЛТePсeльчы ЕЛТePсeльчы ВЛТePсeльчы СЛТePсeльчы ДLТePсeльчы ЕЛТePсeльчы ВЛТePсeльчы СЛТePсeльчы ДLТePсeльчы ЕЛТePсeльчы ВЛТePсeльчы СЛТePсeльчы ДLТePсeльчы ЕЛTePсeльчы ВЛТePсeльчы СЛТePсeльчы ДLТePсeльчы ЕЛТePсeльчы ВЛТePсeльчы СЛТePсeльчы ДLТePсeльчы ЕЛТePсeльчы ВЛТеPсeльчы СЛТePсeльчы ДLТePсeльчы ЕЛТePсeльчы ВЛТePсeльчы СЛТePсeльчы ДLТePсeльчы ЕЛТePсeльчы ВЛТePсeльчы СЛТe Pсeльчы ДLТePсeльчы ЕЛТePсeльчы ВЛТePсeльчы СЛТePсeльчы ДLТePсeльчы ЕЛТePсeльчы ВЛТePсeльчы СЛТePсeльчы ДLТePСeльчы ЕЛТePсeльчы ВЛТePсeльчы СЛТePсeльчы ДLТePсeльчы ЕЛТePсeльчы ВЛТePсeльчы СЛТePсeльчы ДLТePсeльчы ЕЛТePсEeMHTb ВЛТePсeьмHTb СЛТePсeьмHTb ДLТePсeьmHTb ЕЛТePсeьmHTb ВЛТePсeьmHTb ДLТePсeьmHTb ЕЛТePсeьmHTb ВЛТePсeьmHTb ДLТePсeьmHTb ЕЛТePсeьmHTb ВЛТePсeьmHTb ДLТePсeьmHTb ЕЛТePсeьmHTb BЛТePсeьmHTb СЛТePсeьmHTb ДLТePсeьmHTb ЕЛТePсeьmHTb ВЛТePсeьmHTb СЛТePсeьmHTb ДLТePсeьmHTb ЕЛТePсeьmHTb ВЛТePсeьmHTb СЛТePсeьmHTb ДLТePсeьmHTb ЕЛТePсeьmHTb ВЛТeFtSb СЛТeFtSb ДLТeFtSb ЕЛТeFtSb ВЛТeFtSb СЛТeFtSb ДLТeFtSb ЕЛТeFtSb ВЛТeFtSb СЛТeFtSb ДLТeFtSb ЕЛТeFtSb ВЛТeFtSb СЛТeFtSb ДLТeFtSs. ЕЛТeFtSb ВЛТeFtSb СЛТeFtSb ДLТeFtSb ЕЛТeFtSb ВЛТeFtSb СЛТeFtSb ДLТeFtSb ЕЛТeFtSb ВЛТeFtSb СЛТeFtSb DArtSb ВЛТeFtSb СЛТeFtSb DArtSb ВЛТeFtSb СЛТeFtSb DArtSb ВЛТeFtSb СЛТeFtSb DArtSb ВЛТeFtSb СЛТeFtSb DArtSb ВЛТeRfSb СЛТeRfSb DArtSb ВЛТeRfSb СЛТeRfSb DArtSb ВЛТeRfSb СЛТeRfSb DArtSb ВЛТeRfSb СЛТeRfSb DArtSb ВЛТeRfSb СЛТeRfSb DArtSb |
Texo6cAyyKnBaHne n cepBnC
Texo6cayxmbaHne n ouhctka

Do haua pa6oT IO Texo6cayxuBaHHIO HacTPOKe IHCTpyMeHTA BbHyTb aKKyMaTOp.
Yka3aHHe: AAn o6ecIeueHHI pOdoAIXteAIBHOcpoKa cLyXbI n HAdEJHOI pa60Tb I MaINHBIpeRyAHPo BblIOANHnTe CLeAUYUOne pa60Tb IToTexo6cLyXnBaHnO.
KoHTpoIb HNCTpyMeHtHa HoueBnHbIe AeΦekTbI, KaK To, pa36oIaTBWeEeC KpeIeHne I N3HOweHHbIe IAN IOBpeXdEHHbIe YactN.
KoHTpoIb HcIIpaBHOcoCtOaHnKpblweK 3aIHTbIX yCTPOiCTB INx IIpaBHaHoE KpeIaIeHne. Heo6XoAMMbIe Ipeep pa6oToI IpoUecCbI IO Texo6cLyXuBaHNIO nn peMOHTy.
Ecam Maunha, HecmOTpa Ha TuaTeBhIe MeToaBln3ROTOBLeHnHa NcTbTaHnB bHAdET n3 CTPoA, TopeMOHT cLeyet IopuHTb ATOpU3OBaHHoCepBnCHoM MaCTepCKo DAn HHCTpyMeHTOBΦnpMb Bosch.
TpoKaIyIcTa, BO BCeX 3aIpcax H 3aKa3ax Ha 3aIpaCTn 6o3aTeIbHo yKa3bIbaiTe 10- pa3pIaHbI IpeMETHbI HomeP IO TINIOBOI Ta6IuKe INHcTpymEHTa.
Tocae ctpnKnn XpaHennr

BbIKIOHTb HNCTpymeH N BbIHytb aKKMyAITOP. Y6eIHTecb B TOM, 4TO TEpeI IOCTaHOBkoH Ha XpaHeHne aKKMyAITOP BbIHyt.
TuaTeIbHo OoNCTHe TprMMep ChapyKn
TpaIIKOH MRAKOH He IprImeHnTe
BODy, pactBoPHTeAN HnIPOhpyOuHne CpeDCTBa.
YdaIaIte BCE CKOTIIeHn TpaBbI N3aRp3HeHn,
OCo6eHHo C BeHTIaIzUHOHbIX IIPOpe3e8.
ПлохиTe HNCTpyMeHn Ha 6OKOBYu CTOPOHy n OuchTHe 3aunTHbI KOJIaK 11 N3HyTpN. CnPeccoBaHHbIe CKoJIaEHnIa TpaBbl ydaJHrTe DepeBHHo IAN IIaCTNKOBOIoTAOTQKOI.
AkkymyIaTOp CLeAeYet XpaHnTb IpiN TeMnepaType B IpeDeIax O 0^ 45°C.
CepBnchoe 06cIyXHBaHne m KOHCyIbTaZnI TOKyTNaTeAeI
CepBnchbI OTeA OTBeTHT Ha BCE Baun BoipocbI IIO pemOHTy N o6cLyKbBaHnBaWero IpoDyKaTa I TaKke IIO 3aTuaCTaM. MoTaNbIe ueptexN HnΦopMaun IIO 3aTuaCTaM BbI HaJTe TaKke IIO aDpeCy:
www.bosch-pt.com
KoMaekTnB KOHCyIbTaHToB Bosch OxOTHO TOMO-KeT Bam B BoPocax ToKpyIKN, TpIMeHEnH N HacTPOkN pOdoYkTOB n PInHaAeJxHocTei.
Pocchra
OOO «Робет Бowitz»
CepBnchbI ueHtp IO o6cLyXkBaHHIO
3AeKTPoHHCTpyMeHtA
yI. Akademika Kopoleba 13, cTpoehne 5
129515, MockBa
TeA.: +7 (0495) 9358806
TeA.:+7(0495)9355364
ΦaKc: +7 (0495) 9358807
E-Mail: rbru_ct_asa_mk@ru.bosch.com
OOO «PobepT BoW»
CepBnchbI ueHtp IO o6cLyXkBaHHIO
3AnektpOnHCTpymEnTa
yI.3aIueBa,41
198188, CaHKT-TeTepe6pyr
TeA.: +7 (0812) 7 84 13 07
ΦaKc: +7 (0812) 7 84 13 61
E-Mail: rbru.pt_asa_spb@ru.bosch.com
OOO «Робет Бош»
CepBnchbI ueHtp IO o6cLyKbAHnHO
3AeKTPoHHCTpymEnTa
Topckn MmKpopaH, 53
630032, HOBOSHUPCK
TeA.: +7 (0383) 3599440
ΦaKc: +7 (0383) 3599465
E-Mail: rbru.pt_asa_nob@ru.bosch.com
OOO «Робет Бowitz»
CepBnchbI ueHtpo 6cayxnbHIO
3AeKTPoHHCTpyMeHtA
U.ΦoHTOBx 6pHraD,14,
620017,EkatepHb6ypr
TeA.: +7 (0343) 3658674
TeA.: +7 (0343) 378 77 56
ΦaKc: +7 (0343) 3 78 79 28
Bepaycb
ACU YT-18
220064 MInHcK, yI. KypuaToBa, 7
TeA.: +375 (017) 2 10 29 70
Φaκc: +375 (017) 2 07 04 00
TpaHcnpT
AkkymyIaTOp HcIbITan IIO pyKOBoAcTBy UN ST/SG/AC.10/11/n3d. 3 uactb III, IIOpa3deA 38.3.AkkymyIaTOp OcHaaJeH eΦΦeKTbBHOJ 3aIHTOnI IPOrTHB BHyTpEHHero N36blTOUHorO DaBLeHnI KOPOTKO 3aMbIKaHnI, a TaKxge yCTpOietBAMn dA IpeDOrBpaUeHnI cTaTHueCko I3lOMa IIOB BO3DeIcTBnEM pa3OBoH Na- rpy3Kn I OTACHoro o6paTHoro ToKa. 3KBuBaJIeTHOe KOIhueCTBO AHTNBAKKymyIaTope HIXe COOTBeTCTBYUoIHX IpeDeIbHbIX 3Ha- ueHnI. IOTOMy Ha aKKymyIaTOp, KaK OTdEblHyIO qACTb, TAK IN BO BCTpoEHHom B INHCTPmEHT CO- CTOAHnI, He pAcTIPOCTPaHAnIOTCr IpaBVIIa DIAI OTaChbIX BeSeCTB. ODAHko, IpeDINcaHnI DAI OTaChbIX BeSeCTB MOYr IIpiNo6pectn CBoe 3NaueHHe IPIr TPAHCIOPTnpOBKe HeCKoJIbKnx aKKymyIaTOpOB. B TAKOM Clyuae, MoXET cTAb HeO6xoDMbIM, Co6AIoDaTb Oco6bIe ycLOBnI (HaIPmEp, dA yIyakOBn). IIOpO6HoCTN Bbl MoXeTe HaHTN B aHRANckO IIamrTke IIO cLeMyIoSeMy aDpccy B INHTepHete: http://purchasing.bosch.com/en/start/ Allgemeines/Download/index.htm.
yTHAN3aUN
OTcIyKINBUNe CBOI cPOK 3eKTPoHCTpyMeHTbl, pInHaIeXHoCTn I yNaKOBKn CLeDyET CdaBaTb Ha 3KOLOrHueCKN UcHcyU peuPKyAunIO OTxOoB.
ToIbko DAa CTpaH-uaHeOB EC:

He BbIbpaBbIaTe 3eKtpOnHCTpyMeHTbI B KOMMyHaIbHbI MyCOp! CoIaChO EByPoIeNcKo IupeKTHBe 2002/96/EC O cTapbIX 3eKtpnuecknx I 3eKtpOnHHbIX HcHCTpyMeHTax I npIbopax, a TaKke O pIpetBO
peHHN 3ToI DnpeKTHBbI B HaaHNoHaIbHOe IpaBO, OTCAYKNBWHne CBOI cPOK 3eKTpOnHCTpyMeNTbl DOJXHBIO TDeAIBHO Co6HpTaBCn I CdaBaTbCn Ha 3KOLOrHueCKn YnCTyIO yTHIN3aUHO.
AkkymyIaTopb,6aTapeH:
MOH Li:
TJkaynta, yuNbBaIte yka3aHne B pa3dJe «TpaHcnpT», ctp. 186.
He BbI6paCbIBaIe aKkyMMyAITOpbl/6aTapeN BV KOMMyHaIbHbIy MycOp, He 6pOcaIte INB OOrHb IIN B BOy. AkKyMaIATopbl/6aTapeN CLeDyET Co6nPaTb N CdaBaTb Ha peUnpKvIaIuHO Hn Ha 3KoIoRtnueckn UHCTUO yTHnI3aIuHO.
ToAboAaCTpaH-ueHOB EC:
HeNCnPpABHbIe HnPiPnSeAChne B HeRoADHOCTb aKkymyTOpbl/6aTapeNdoXhbl 6bItb yTNn3nPoBaHbI coLaacHo DnpeKTnBe 91/157/E3C.
OctabAem 3a c06oI IpaBO Ha H3MeHeHHa.
Bka3iBKn 3 Texhikn 6e3nekn
Ybara! YBaXHo IIpoUHTaTe HnKYeIOnaHi BkazIBKn. O3HaHOMTeC3 0prAHaMn yIpaBAlHHI I IpaBnHm KOpNCTyBaHHM TpImepom 3 akymayTopHO 6aTaPeEIO. DObpe 36epiraTe IHCTpyKciIO 3 ekCnIyatauII DAЯ IOnaIbIwOrO KOpNCTyBaHHH HeIO.
TIOCHENH NOO CnMBoIb Ha TpIMepi 3 akymyIaTOPO6aTapeeio

3araIbHa BkazIBKa Ha He6e3IeKy.

Почтаи te iHctpykuio 3 ekcnyaTauii.

BdraTe 3axnChi Okyarni.
CπiδKynte 3a Tm, ξo6 yuKopiDi Tla, ξo BiDItaIOTb, He TOpaHnH NIODei Pio6An3y.
IIOAn IIOBHHI 3HaxoANTcH Nlwe Ha 6e3peuHi BIdCTahi BiI pInlaLy.

Iepsh HIX IIPOUHATN, HAcTPOIOBAtn Iprnaad a6o Ha KOpOTKm Yac 3aANuHTN NOro 6e3 Hargy,BnIMtB akymyAHTOPHy 6bataeio.

He npaioiTePi ddoouem i He 3aunuai Te Tprnep 3 akymyIaTOpHOIO 6aTaapeEIO B D0U HAIBOPI.
HikoH He npaioHe 3 TpHmepom 3 akymayTopHO 6atapeEIO, kkuo ToxkoJKeHi a60 3nTt KpnKn a6o 3axncHi pncIpoi.

He KopnctyItec3aepAnHm PnncTpoeM, Rkso TPOWKoKHeH NHypr KNBaeHH.
PiicAeEeKtpnHOrO ydApy IpeBepTe npHaHaIpeMeT3HOWeHHa6oIOWkoDKeHb i 3a Heo6XiHnicTo IpeA BnKOpNCtAHNM BiDaaiTe HOrO y peMOHT.
LcEIIpIaADHeIpIaHaueHnDnBVKOpNCTaHHOc0bAMn(BkIoUaOHuDitee)3O6MeJKeHMNIcXiUHMn,yTTeBMn a6oPO3ymOBHMn 3aTHOCTAMn a6o HeIOCTaTHIMDOCBiOM Ta/a6o HeIOCTaTHIM 3HaHHaMn-CE DO3BOIAReTcPobHTn AInwe y TOMBYNTaKy,AKnIO 3a HmN CTOCTepirae Oc0Ba,IO BIDTOBIAe 3aixHIO63TeKy,a6o BOHNOTPMHOTb BiD He BkAizBKN IOoTOrO,AICd BHKOpNCTOBYBatn PpIaAD.Heo6xIdHO CTOCTepirATn 3a DIbMn,IO6pekoHaTHC,IO BOHN He rpaHbT 3IPINAAOM.
He npaioTe 3 TpImepom 3 akymyAToPHO6batapeEO 6oCoHIX a60 y BiKpnTnx caHaIax i 3aBXn MaTe Ha co6i Miune B3yTTI i DOBri uTaHH.
B JKOAnomy pa3i He Do3BOJnTe KOpNCTyBaTNC TPrIMePOM 3 AkymyAToPHOIO 6batapeEO dITm i OcO6am, 10 He 3NaHOMI 3 UMMn IHCTpyKcIaMn. HaioHaJIbHI pInPiNC MoKyTb OBMeKByBatn DOYCTHMn BIK KOpNCTyBaVA. RaIO Bn Came He IpaIooTe 3 TPrIMePOM, 36epiraTe NOro B HeDOCTyTHOMy DAJIteM Micu.
HikoH He npaOnTe 3 npuaOm, KOH n6h3y 3haoTbCn AOH, 3OKpeMa dITn, a0domaHi TBapHH.
3a HeuacChi BnTApKn, TlEChi yWkoJKeHHI HIXN XIODei I IOwKOJKeHHyUKOro MaHa BiTOBiae KopHCTyBaU.
Iepw hix TopkaTncs DO HOxa, 3auekaTne, TOKN BIn He 3yTNHtbcn. Picar BmKHeHHa MoTopa HIX 1e IIPOdoBxye O6epTaTnci MoKeI pIn3BeCTn Do ITOpaHeHb.
- IpaHouTe ImUe Ipiu DeEHOMy CBiTai a6o Ipiu Do6pOmy WtUHyOMy OCBITaehHi.
3a moXnBicHNeKOpNCTyTecrTpMepom 3 akymnyTopHO6bapeEOHaMOKpi TpaBi.
Tepea TepeheceHHm TpHmepa 3 akymyAToPHO6bTaapeeO 3/0 Micu po60TH BmHKaTe HOrO.
BmkaTe TpHMe3 akyMylrTOPO6bataeEO Lmse ToDi, KOAn pyKn HOrn 3NaXoANTMHyTbCn Ha DoCTaTHi BiDctaHI BIDHOxKa, 0o o6epTaETbcN.
He pncbyte pykn i Hn n hiK, 0o o6epTaetbcra.
B XkoHOMy pa3i He BnKOpNCToByTe B cboMy npuaDi MeTaBeI Hoxi.
PeryaepnoIpepeBipnTe TpHmep 3 akyMaTOpHO6batapeiO i3diChIOte NOro Texo6cayroByBaHHr.
BiiDaaBaIte TpImep 3aKymyIaTOpHO6baTapeeIO Ha peMOHT AIISe B aBTOpn3ObaHi cepBicHi MaIcTePHI.
Iocinho CkkyTe 3a Tm,06y BeHTnAuiHnx uHnHex He 6yO TpaBn.
BmNkaTe pniIaI bHMaTe aKymyAToPhy 6aTaapeIO:
-3aBxAnIpeepTtM,JK 3aHnHTN IIpHaa6e3 HaIgAky,
-пекд.TиM,ЯКMiHЯТиHIX
-peo ouuueHHa 60po6otamn 3
O6cayrobyBaHHraPmepa 3 akymyrTopHOIO
6ataapeio.
36epiraTe PpHnAaB 6e3neHOMy, cyxomy i HeoocJXHomy dIaIteMicui. He cTabe iHsi IpeDMeTu Ha PpHnAa.
3MIPkyBaHbTexHikn6e3πekmMiHaTe 3HOWeHi a6o NtowKOxKeH deTaI.
CaikyTe 3a TmM, IO6 HOBI aTeaI bYbB Bld Bosch.
TepeaTHM, Jk BCTabAHTn akymyAHTOpHy 6atapeo, pekeohaTeC, oO pHnaAD BmKHeHO. BcTpOMAAHHN aKymyAHTOpHOi 6atapei y BBIMKHHTn pHnAaMD MoKe pHn3BOaNTn DO HeuacNHx BNtAaKIB.
3apJxte aKymaTOpH6aTapei AHe B 3apAHHx PnCTpOx, 0pekomeHdoBahi BnroTOBIObayem. 3apAHHn PnCTpi MoKe 3aMaTnCRA, KIO B HbOMy 6ydyTB 3apAkaTnC Hnepe6auehi akymaTOpH6aTapei.
BHKOPNCOTByTe B pHnAaX Anwe tepe6aehi akymyAToptHi 6atapei. BHKOPNCTAHHH iHnIX akymyAToptHnx 6atapei MOKe Ipn3BOAnTH Do TpaBM i He6e3TKe NTOxExKi.
36epiraTe akyMaTOpHy 6aTapeIO, zo came He 3actocobyetbca, BiDaIik BiKaHueAerpcBkHX cKpIitOK, MOHeT, TBnHTiB Ta iHux HeBeAknX MeTaIeBHX IpeMdetiB, IO MoKyTB cPnUnHnTH TnepeMKHeHHa KOntakTiB. Kopotke 3amNkaHHa MIX KOHTaKTAmn akyMaTOpHOi 6aTaapei MoKe Ipn3BOADHTNo oTIky a6o IooKexi.
Pn HnepBnHbOMy BnKOpHcTaHHi 3 aKymyAToPtoHoo 6aTape MoKe BnteKn pHa. YnKaIte KOnTakTy 3 Heo. Pn BnTnAkoBOMy KOhtaKti PpOmHTe BiITOBiDHe Micue BOdoIO. Raio piaHa IOTpaIIa B ooi, ODoAtKOBO 3BepHItbCn DO Aikapra. BnteKn pHa 3 aKymyAToPtoHoo 6aTape MoKe BnKAnkATn PoOpa3HeHHa Xkipn a6o ximiuHi OTIKN.
Ottnc pPnHcHpy po60TH

IpouHTaTe BcI IOTepeXeHHia Bka3iBKn. HeoOeJkaHnI IOTpeAKeHb i Bka3iBOK MOKe IPrN3BOaHTn Do ydApy eAeKtpnUHm CTPymom, Tojexki Ta/a60 cepno3HNx TpaBM.
TpH3HaueHH TpHAAy
Пплад Ппзначенид Дд 3ріЗУВанг Трави i 6ур'ян Кплд Кцами, a takож На кocoropax i Пплд Кразми, Кдн He doctaе ra3OHokocapka.
BnKopnctaHn 3a npn3HaueHHm po3paXoBaHe Ha TeMTepeAtpy 3OBHIuHbOro cepeDoBua BiD 0^_DO40^.
06cπoctabkn
ObepejHo BnMItb IpiNAA 3 yPaKOBKn i IpeBipTe IOBHy HArBHCtB ycix Hxue3a3HaueHnx DeTaIe:
- Tpimep
- 3axnchnn koxyx
PerybobaHa OdaTkoBa pyKoRTKa (MOHTOBaHa) - DnCKOBn HIX
-Hix - 3apAHH pIpcTpiI
Ihctpykui3ekcpiyaatauii
KuO YoOcB He BnCTaayae 6oOcb ToWkoDxKeHe, 6yDb Aacka, 3BepHITbCBy MaRa3HN.
3o6paxehi KOMTOHEHTN
Hymepaia 3o6paXeHNx KOMTIOHEHTIB TocnlaeTbCnHa 3o6paXeHNn PpnaAdy Ha CTOpIHcI 3MaHOHKOM.
1 BmNkau
2БлokaTopВиMuKaua
3 PykoTka
4ΓBnHT,doaTkoBa pyKoRTka
5 PeryIbObHaNoDaTkoBa pyKoRTka
6 3aTnCKHa BTVIka
7 Tpy6a
8 BeHTnAriHi 1iAHnH
9 TOnOBKa TpImepa
10 Hix
11 3axnchno koxyx
12 Hoxha TeaAaB DnpeyuObaHH KytarolOBKn TpImepa
13 CbItAoIOaHn iHAnKaTOp
14 3apAHHI pIncTpiI
15 AkymyIaTopHa 6aTapeR
16 AnckOBn Hix
17 Wtnt
18 3axnch6yreB
19 CepiHnH Homep
3o6paXeHe 4n OTHcAne TpHAAaAHe He HAAeKHTb DO cTaNdApTHorO 06cIgry NocTaBKn.
TexhiHi daHi
Dr. Egbert Schneider Senior Vice President Engineering
Dr. Eckerhard Strötgen
Head of Product Certification

i.v. Mojgcu
20.08.2007, Robert Bosch GmbH, Power Tools Division D-70745 Leinfelden-Echterdingen
AaBawoi 6e3neKn

TpeaTHM,RAIPOBOAnTHpo60TH 3 NaCTPOIOBAHHa6O OunHHeNHA,BNMKHITb PnHaAD Ta BnIMtB aKymyAToPHy 6aTaapeo.
TicA BHMKHeHH TpHMepa 3 aKyMaIaTOPHOo 6aTaapeio HIX ue deKiAbKa cekyHa 0eepTaetbca.
06epeXHo - He TopKaITeCra Do HOxA, 1o 06epTaεTbca.
MoHTaX
3apAkaHHaKymyTopa
3BaXaIeHaHappyyMepeXi: HappyraB
Akepei CTpyMy IOBHHa BiITOBiAtn DaHIM Ha
3aBOcBki T6nnuCi IpnlaNy. PpnaAdn,
po3paxoBaHi Ha 230 B, moKytb IpaObaTn
TaKoX i BiD 220 B/240 B.
KopnctyTecaIuIeOdaHm3apAHH mIpnCTpoem. IuIeHaue3apAHHIpnCTpiI pO3paxoBaHHIitIEBO-ioHHn aKyMyAHTOP,IO BHKOpncTOByetbcry BaWOMy pInaI.
AkymyIaTOPHa 6aTapeMa e IeMeENT A
KoHTPOIAO3a TeMTpepaTPOIO, JAKN DOITyCKaE
3apAAHHAINHe B TeMTpepaTPhOMy AiTnA3OHi
BID 0^ Do 45^ .LIM3a6e3PeuyeTBc
TpBaAInn ekCIIaYataiHn pe3epB
akMyIaTopa.
Bka3iBka: AkymyIaTOp TocTaayTbCyaactKOB0 3apJxehnM. Lio6 akymyIaTOp mir peaIiyBaTH CBOIO IOBHy EMHicTb, Ipeep TM, JIK IepuN pa3 IpaIIOBAtn 3 IprnaIaOM, akymyIaTOp Tpe6a ITOBHICTO 3apJaHTn y 3apJaHOMy IpnCTpoi.
AitieBO-ioHHn akymyAToP moKHa 3apJxAtn KOAn 3aBROdHo, ce He ckopoUye noro ekTlya-tauiHn pecypc. IpeepBaHHn pOuecy 3apJxKaHHn He IOsKOxJyE akymyAToP.
BnMaHnaAkyMylATopa A
HaTnCHiB Ha KHOITy PO36LOKyBaHHaKyMylAToPA, IOTARHITb aKyMylAToPHy 6aTapeo15 Ha3aD i BmIMtB II 3 PnAAdy.
3apAxAHH
Пюцес зарджангя понhaeТьск,Кол Мерекништпселызараног�пристоюбуde BCTPOMLEHINВpo3etkyiakymyANTOPHa6aTaper 6bye BCTPOMLEHaBzapdHnIpiNcTiPI14.
CToaKy BCTaHOBi aKymyAITop 15, Ra306paKeHo Ha MaIIOHky, CTepeAdy Ha 3apAHHn IpiNCTpii (O) i NOTIM HATNCHTb 33aDy Ha aKymyAITop 15 (2). LIO6 BnHrTn aKymyAITop, dIte y 3BOPOTHomY IopAky.
3aBdAKn iIteAireHTHocTi IpoceApyr 3apJxHaHH CtyPiHB 3apJxKeHOCTi akymyAToPHO6bataei aBTOMaTHUHO pO3Pi3HaETbcra Ta 3apJxKaHH 3diJcHIOEbC0 ONTImaIbHmM CTpyMOM B 3aJeXHOCTi BiD TEMpepatyp Ta HApTyHn akymyAToPora.
Lc36epiraacymyIaTOpHy 6aTapeIO, i - pnp ii 36epexeHHi y3aprHOMy pInCTpoI - BOHa 3abXdn 6yde IOBHCtHO 3apxKeHa.
Bka3iBka: Ipouec 3apJxHaHH MoKlNBn LmWe B TOMy BNtAky, kIIO TeMtpaTypa akymyIaTropHoi 6aTaapei 3haxOHTbcRb Mekax DOITyCTHMOro TMeTpApHrO DiaT3oHy 3apJxHaHH, dNb. po3di «TexHiH daHi».
MnraHHN iHnKaTopa 3apJxKeHHa akymyAToPHOi 6aTapei 13
Ipouec 3apJxKaHHN cnHaJI3yEbCnMraHHm IHnKaTopa 3apJXKeHHN akymayrTopHo6aTapei 13.
ToctiHne cbiuHHe iHAnKaTopa 3apAKeHHa kAmyIaTOPHOi 6aTapei 13

NoctiHne cBiuEHHa
iHAnKaTopa3apAKeHHaKymyAToPHoBaTapei13CnHaI3ye,oAoKymyAToPHa
6aTapeI IOBHCIO 3apJxKeHa a6o 10 Tempepatypa akymyAToPHOi 6aTapei 3HAXOHTbCn ITO3a MekAmn DOITMmOro TempeatypHOr OiaIa3OHy 3apJxKaHH i TOMy 3apJxKeHH He MoKlHe. TiIbKn-Ho 6yde DCsHTN DoITCmN TeMepeatypHn iiaIa3OH 3apJxKeHH, akymyAToPHa 6aTapeI TOHc 3apJxKATNC.
KaIoo akymyAToPHa 6aTape He BCTpOMeHa, NoCTiHHe CBiueHH CBIITAOHOro IHAnKAtopa 13 CbiuHTb Ipo Te, IIO WTeNcEb BCTpOMeHny po3ETky i 3apAHn II pncTpiI roTOBn DO pO6OTn.
Bka3iBKn 0oDo 3apAxxaHH
При постийнх сиклax зарджанн a6o taKnx, ио 6e3перетрьноTOВТОюТьс OДИN 3a OДИМ dekiьka pa3iB, зардни писчті моче harpiTSC. OДнak ще He e He6e3пeuнm i He cBiДЧИТь по ТEXHИЧу HecправHICTb зардНого пристpoI.
3aHaT0 KOpOTka TpNbBaIcTb po6Otn nicA 3apJxKaHH CBiUHTb Ipo Te, IIO aKymyAITop BnuepePab Ce6e i Noro Tpe6a NomHrtn.
AitieBO-IOHHn akymyIaTOp 3axHneHn BiD rN6OKoRo po3prJkaHn 3a DOnOMoTOO «Electronic Cell Protection (ECP)». Ppi pO3prJxKeHOMy akymyIaTOpi PpINla3aBdRc CXemI 3axHCTy BmNkAcTbcr. Hix 6Ibwe He pyxaTeBCr.
TicAABOMATNUHOrOBHMKaHHNTPHAAy 6iAbhe He HATNCkyTe Ha BmHKaU. Me MoKe TPOWKODHTn aKymyAANTOp.
MOHTaX IIpHnAaY

BcTpOMAJIte akymyAToPHy 6aTaapeo
Hnwe ToDi, KOHN TpHmep 3
akymyAToPHO 6aTaapeeIO NOBHiCTIO
3i6paHn.
36npaTH TpHMeP 3 akymyAaTOpHO 6aTapeEIO Tpe6a B TaKOMy IopRAky:
Mohtax 3axnchoi Kpnshkn
HaiaHbTe 3axnchny KpnKky 11 Ha roLoBky Tprimepa 9.
3aBeiTb 3axnChy KpnkUy B 3auePHeHHHa roLoBci TpImepa i NocyHbTe ii Ha3a.
2PnHTNCHIb 3axnchNy KpnKy DOHN3y ("Klauc").
MOHTAX DnCKOBORO HOXa/Hoxa
Haiinbte Anckobn HIX 16 HaPiNbOaHn BaA,HaTnCHyBwn Ha HbOro(Klau)
HaDiHbTe HIX 10 Ha UTnΦT 17, pIHTNCHITb Ioro DOHN3y Ta BiDTRHITb, UO6 BIn 3aIWOY 3auePENHeHH.
Eknyataia
Touatok po60tn

Pn6paTe kaminH,ApouKn iinwi npeMetn 3micu,De Bn 36paTece npiDiatn TpaBy.
TicA BmKHeHH TpHMepa 3 aKyMaTOpHOo 6aTaapeeio HIX ue DekeiIbKa cekyHa 06epTaetbcra. Iepw HIX 3HOBy BMnKaTH npHaa, 3auekaTe, POKn MOTop/Hix He 3yINHHTcbra.
He BMHKaHTe 3aHaTTo uBnKO TICAR BmHKaHH.
BcTpOMaHnHa akymyAToPho6aTaapei
BcTpOMITb akymyIaTOPHy 6aTapeIO B pInHaA, RA Ioka3aHO. AkymyIaTOPHa 6aTapeI IOBHHa BiDuTHO yBiTN B 3aueIIeHHA.
BMKaHn
HaTnCHiB Ha 6IoKaTOp BmNkaua 2 i B HATnCHyTomy CtaHi HaTnCHiTb Ha BmNkau 1.
BiDnyctitb 6LoKaTOp BmNkaCa 2.
BmmkaHH
BiDyctiB BmNkau 1.
BkaibKa:PiicnHaTncKaHHaBVIMKau1 MOTOP3aIpyckaETbcra3He3HaUHO 3aTpMkoIO.
HactpoIOBaHHN TpHnAaY
BnKOpncTaHnpeYbObaHoIpyKoTKnE
PerybObaHy pykoTky 5 MoXHa BCTaHOBIOBaTHy pi3Hi TIOLOXKeHHa:
1Lio6 3miHHTIIOLOXeHHB, BiPyCTiTB rBNHT Ha pykoTci 4 ta IepemictiB peryAbobaHy pykoTky 5.
3aTnHtBnHT Ha pyKoTci 4, 106 3aFikCyBaTH perYbOBAHy pyKoTKy 5 y BCTaHOBLeHOMy TIOLOXeHHI.
PeryAIOBaHHI DOBXHNI TpMHepa F
1Повернitsь 3аTNCKHyВTuKy6Ha 90^
2AIAIIOOBoXeHHBNTaHITb Tpy6y,AIACKOpoueHHN BCTpOMiTB Tpy6y Ia6we.3HOBy3aTARHtB 3aTHCKHy BTVKky 6.
PeryIIOBaHnK KyTa roLoOBKn TpImepa C
Lio6 3mHHTN Kyt cKoWyBaHHr TpaBn, pPHTNCiTb HOxHy PeaA1b 12 Ta HaxnIiTb Tpy6y 7 B Heo6XiDHe PNOOKeHHr.
BiIpyctITb HOKHy PIIaIb 12.
HactpoIOBaHHA 3pi3yBaHHa TpaBn IOTiKaPAMN
H PeryuioBaHHa KyTa roLoOBKn TpImepa:
IpnTncHItb HOxHy Teaab 12.
IIpepmictb Tpy6y 7 y HauHHKue ToLoXeHHA. 3HOby BiNTb HOxHy Tea1b 12.
I TepecyhTe roLobky TpImepa:
BbIpyctIb 3aTnCKHy BtUky 6.
II NobephiTb Tpy6y 7 Ha 90^ ,io6 hactpoiTn roLOBky TpImepa 9 DAA CKOswyBaHH TaBn/3pi3yBaHH TpaBn IIOiK Kaamn, kI KTOka3aHO. 3HOby 3aTARHtB 3aTNCKy BTykY 6.
Bka3iBkn 0oDo pO6OtN

3axnauTe akymyIaTOpHy 6aTaapeo BiD cTeKn, 3OKpeMa, HAp., BiD coHryHnx TpOmeHIB, a TaKoX BiD BOrHIO. Ptnaad He npaioe TpN TemtepaTypi Hxue 0°C a6o Bnue 45°C!
TpiDi3yBaHHa TpaBn
BoitbTpHemOp3akymyAToPtoHO6aTapeEIO
IbOpyi IpaBopyu, TpMaOnuNoRoHa
DOCTaTHiBiCTaHI BiCe6e.
TpMep 3 akymyAToPHO 6aTaapeEIO B cTaHi efeKTHBHO 3pI3aTN TpaBy BnCOTOIO DO 15 cm. BiBb BnCOky TpaBy Tpe6a NiApI3aTN NocTyNOBO.
Piap3yBaHHraPbHn TpAaKpaMa
BeiItbTpImep3akymyAToPHOIO6aTaapeEIO y3oBxKpao ra3OHy.106yHNKHyTN WBNkOro 3HOCy HOKa, yHnKaIe KOHTaKTy 3 TBepdMM IOBepxHAM Ta CTHaMn.
KДЯКрацоуВeDEHнВИКОPGИСТОВУTe 3axnchN6ByeIbAIAIpeB18BAKoCTI OITOMIXHOHaIIpMHO3acO6y(PpnaAaJ)
Texhiue 06cLyroByBaHHi ouHneHH

TepeA BCima po6oTAMn BmMaIte akymyAToPhy 6aTaPeIO 3 PpHaAy.
Bka3iBka: PeryaRho BnKoHyIte HnXue3aHauehi po60Tu 3TexHIOHO o6cLyROyBaHN, 106 3a6e3PiuHTN DOBry i NaiHy ekCnPyatauio IpnAady.
PergaepnopeBiprYePiuaHaIpeMet ABHnHexeOIAkIB,KaHAp.,IOcA6eHnKpiIaENHHiCpauHObAHnA6oTouKoJKeHHaTeaJe.
IpebeipnTe, uH He IpoKoKeHi KpnIkn i 3axnci Iprnctpo i uN IpaBnIbHO BOHN CnAITb. Ipeed TouaTkom ekCIIyatauii 3dIChITb Hoe6xidhi po60Tu 3 o6cLyroBvBaHnHa 60 peMOHTy.
JaKuo He3BaXaIouH Na peTeIbHy IpoUeDpy BnroTOBLeHHN I BnIPO6yBaHHN IIpHaA Dce-TaKn BnIe 3 Aady, pEmOH MaE BnKOHyBaTH NlWe MaJCTepH, ABTopu3OBAHa DA JCAoBHX eKeTpoIHCTpymEnTiB Bosch.
При BCIXdoDAtKOBINx3aINTaHHxTa 3aMOBLeHHi 3aTuaCTHn,6yIbIaCKa,3a3HaayTe 10-3NaHnH HOMepAIA 3aMOBLeHHN,IO CTOITb Ha 3aBOcBkI Ta6AnuCi ПriHJaY.
Ticra po6otn/36epirahna

BmKHiTb PnHaI i BmMitb akymyAToPhy 6aTapeo. Ipeep 36epiraHHM IpekoHaTeC, 0c akymyAToPha 6aTapeR BmHrTa.
IpyHTOBHO IpoouHuaTe TpHMeP 30BHi M'RAKOU OI ToUKOIO I raHcipKOIO. He BnKOpNCTOByte BOy, PO3uHHNKn Ta IPOlipyBaIbHI peOuBHNI. BnDaJIaJIte yci cKoTIaIHnI 3a6pyDHeHb i uactHnOK, OcO6ANBO KOLO BEHTNAJIiHNX OTBopIB 8.
TOKlaIb II pIIaHa Ha6i k I IpoUncITb 3cepeHn 3axnchy KpnuKy 11. 3piaHy TpaBy, 00 ToHa6nBaIacB, BmIMtB 5MaTKOM DepeBHN a6o TAACTMaCn.
IpebeipnTe, uH He IpoKoKeHk KpHsKn i 3axnChi II pncTpoi i uH IpaBnBHO BOHcNdAITb. Ipeed noaTkOM ekCIIyatauii 3aiChITb Hoe6xdiHPi po60Tu 3 o6cLyroBvBaHn a6o peMOHTy.
AkymyANTophy 6aTapeo CIAID 36epiTaTHIpi TEMIIepaTyPi BiD 0^ DO 45^
Cepbicha MaicTeprn i o6cayrobyBaHHKJIeHTiB
B cepbicih MaictepHi Bn OTPmaeTe BiIIObiBaHa Baasi 3aHHTAHNCTOCOBHO pemOHy iTexHHyHoro 06cLyROByBaHHaBo IPOdykTy.
MaioHKn B deTaIaX i InOpMaIIO IooO 3aIuaCTNH MoKHa 3HaTn 3a aDpecoIo:
www.bosch-pt.com
KohcybTaHTn Bosch 3 paadicto DOIOTOMOxyt Bam npu 3aHNTaHHx CTOCOBHO KyiBIA, 3aCTOCyBaHN i HalaorDkeHn IPOdYkTIB i npuaAdo DO HNX.
YkpaHa
Bou CepBic LcHtp EAnkTpOiHcTppyMeHTiB
ByI. KpaHn, 1, 02660, KnB-60
TeA.:+38(044)5120375
TeA.:+38(044)5120446
TeA.: +38 (044) 5 12 05 91
Φaκc: +38 (044) 5 12 04 46
E-Mail: service@bosch.com.ua
Aapeca PeriohaBnHex rapaTiiHnHex cepBichix MaicTepeHb 3a3HaueHa B HaioHaBHomy rapaTiiHOMy TaIoHi.
TpaHcTOpTuBaHHa
AkymyIATOP IpeBipEnH BiIIOBIAHO Do IHCTpyKuII OOH ST/SG/AC.10/11/peA.3, u. III, PioPoz3iA 38.3.Bin Mae eFekTNBnH 3axnCT BiD BHyTpiHbHoro HADHopMaIbHOrO TnCKy i KopoTko 3aMnKaHHa, a TaKox BiD CTaTHUHorO 3Amy Pn Dii pa3OBoro HaBaHTaxeHH i BiD He6e3neuHoro 3BOPOTHORO CTPMy.
KilbkiCTe EKBiBaIeHTa AiTiIO, 10 MoCtNTbcB AakymyAToPi, MeHsHa 3a BiIDIObHy rpaHnHy BeIuNHy.3 iEi IpiuHn AkymyAToP - aHI cam IO co6i, aHI 6dyuH BcTpOMLeHm y IIpuIaD - He IIIAraE HaioHObHM i MIXhApOdHM IprINICam 5oDo He6e3TeuHnx BaHTaXIB. ODAk IprINHC NIO DO He6e3TeuHnx BaHTaXIB MoKyTB H6TyN UHHOctI Ipn TpaHcTOpTuBAHHi DeKiBXoKx AkymyAToPiB. B Takomy pa3i MoXe CStn Heo6XiHNM DOTPMyBaTHc PEBHx YMOB (HaIIp., CTOCBOH OytakOBKn). BiIbIeTaIbHiU IHΦopMaizIO MOxHa OTPMaTI 3 IaM'YrTKn aHrAiCbKOIO MOBO B lHTepHeti 3a TakoIO aDpecoIo:
http://purchasing.bosch.com/en/start/ Allgemeines/Download/index.htm.
BudaeHH
EeKToPiuaaHn, PnHaAaI yIyakOBky Tpe6a 3daBAtn Ha eKOIoIuHO uNCTy IOBTOpHy nepepo6ky.
Lambda KpiaH EC:

He BnKnaaIte eNeKtpoPiHaAnB IO6yTOBe CmITTJ!
BIDIOIHO DO EBPONIEcboi DnpekTbN 2002/96/EG Ipo BIDpaaBoaHi eAEKTo- i eAEKToHHi Pnnai ii II PepeTBOpEHnB
HaioHbHomy 3aKoHOaBCTBi eIeKtPOIpnlaH,
IO BnIbIa 3 BxHBaHHra, IOBHHI 3daBaTNCr
OKpeMo i yTHi3yBaTHcEKOIoRiUHO UcHTM
CTOCO6OM.
AkymyIaTOpn/6aTapeiKn:
AitieBO-oHHi:
Dr. Egbert Schneider Senior Vice President Engineering
Dr. Eckerhard Strötgen
Head of Product Certification
ppa. Maee i.v. Nogcu
20.08.2007, Robert Bosch GmbH, Power Tools Division D-70745 Leinfelden-Echterdingen
Pentru siguranta dumneavoastr

Opri scula electrica si independarti acumulatorul inaintea lucrarilor de reglare sau curata.
Bosch Service Center
Str. Horia Macelariu Nr. 30-34, 013937 Bucuresti
Tel. Service scule electrice: +40 (021) 4 05 75 40
Fax: +40 (021) 405 75 66
E-Mail: infoBSC@ro.bosch.com
Tel. Consultanţă tehnica: +40 (021) 4 05 75 39
Fax: +40 (021) 405 75 66
E-Mail: infoBSC@ro.bosch.com
www.bosch-romania.ro
Transport
Acumulatorul este testat conform manualului UN ST/SG/AC.10/11/Rev.3 fascicula III, subparagraful 38.3. El beneficiza de o protectie deficienta la suprapresiune interna si scurtcircuitare fiind deasemeni prevazut cu dispositive de protectie care impiedica ruperea forata si curentul invers periculos.
TeMTepaTpHnT DnHaTa3OH Ha pa6oTa c eIeKtPOnHCTpyMeHTa e MeKdy 0^ n 40^
OKOMTIAEKTOBka
BHHMaTeHNO 3BaTe eNeKtpOnHcTpyMeHTa OT OToKaOBKaTa H PpOBepTe DaA N OKOMPTeKTOBKaTa My e TbHa:
- TpeBOKocauka
- Ppea3eH KoxyX
Perynpyema pboKoXBaTka (pa6pnuHOMHTnpaHa) - Pekceu dnck
- Pexkeu Hox
3apraHNO yctpOcTBO
PbkoBOCTBO3aekPiOataun
Ako HMa HnTcBaun Hn TOBpeHn elementn, Moa, oBpHeTe ce KbM Baun TBproBeu.
H3o6pa3eHH eAeMeHTn
HomepupaheTo Ha n3o6pa3eHnTe eAeMeHTn ce OTHacrdo n3o6paXeHHeTO Ha eEaKTPoHHCTpyMeHTa Ha cTpaHnCata C fHyprnte.
1 TycKOB IpeKbcBaU
2БLOKINPOBkaHaПИСКOBИ ПпЕкьСВаU
3 PbkoXBaTk
4 BnHT, cTOMaTaTeHa npbKoXBaTka
5 Perynpyema pbkoxBaTka
6 3actonopBaasa Btynka
7 Tpb6a
8 BeHTnlaaHOnHH OTBOpN
9 Pexeega IaBa
10 PekeHnK
11 Ppea3eH KoxyX
12 KpaenIean3apeynpaHnBbHaHa KaHOHa pexeaaTgAba
13 CBeToaHoa
14 3aprHObyctpoiCTBO
15 AkymlyaTopha 6aTepeHn
16 Pekeun dnck
17 LInΦT
18ПпeДпaЗнасКоБа
19 CepneH Homep
I3o6pa3eHnte Ha fhyprnTe Hn OTncaHn B pkoBOAcTBoT0 3a ekCTtAoataunr DOtbaHNTeAHn TIPNCTOco6aehn He ca BKAOueHN B OKOMTAEKTOBkata.
TexHHueckn daHHN
| Актуларова Травокocака | ART 23 Li | ART 26 Li |
| Каталожен Homep | 3 600 H78 K.. | 3 600 H78 L.. |
| СкорOST на вьртени на праzenхов | min-1 | 7500 |
| Рergулируема ръковытka | ● | |
| Рergулиpane на вьгILA на наимлona на ржесцета гава/настоюване за рязаниВбиизост do рьб | ● | |
| Диаметер на рязани | cm | 23 |
| Маса съласно EPTA-Procedure 01/2003 | kg | 2,3 |
| Серень Homep | Вижты сэршиныnomer 19 (tabeika насыекшпс无所谓) на машина | 2,4 |
| Актуларова батерия | Li-lon | Li-lon |
| Каталожен Homep | 2 607 336 037 | 2 607 336 039 |
| Номинано наразожения | V= | 14,4 |
| Катацитet | Ah | 1,3 |
| Вре'mе за заразождае (при наразлноразroduна akтуларова сатерия) | min | 180 |
| Зарадно уст四项 | AL 2204 CV | AL 2204 CV |
| Каталожен Homep | 2 607 225 2.. | 2 607 225 2.. |
| Зараден ТOK | mA | 230 |
| Доюстим темпера typени диапазон назатерия | °C | 0-45 |
| Маса съласно EPTA-Procedure 01/2003 | kg | 0,7 |
HnΦopMaun 3a n3λbUbaH yum n Bn6paunn
CtoHocHTe ca OIPpeIeHn CbIaCHO 2000/14/EG (BncoUHa 1,60 m, pa3cToHne 1,0 m) n EN 28 662.
PabHnIeToAHa reHepnpaHnIyM o6nKHOBeHo e: paBnIe Ha 3ByKObTO HaaRaHe 80 dB(A); MoIHOCT Ha 3Byka 88 dB(A). HeoIpeDeIeHOcT K=5 dB.
Dr. Egbert Schneider Senior Vice President Engineering
Dr. Eckerhard Strötgen
Head of Product Certification

i.v. Mojgcu
20.08.2007, Robert Bosch GmbH, Power Tools Division D-70745 Leinfelden-Echterdingen
3a Bawaata cnrypnoct

IpeN Da n3BbPwBaTe hAcTpoKN ITo eEeKTPoHnHCTpyMeHTa HAn Da To TOuNCTBaTe, N3KAIOUOte
eNeKTPoHHCTpymeHTa N3BaAdTe akymylaTophata 6aTeprna.
CaeH3KluOvaBeHa akyMylaTopHaTa TpeBOKocaKa HOXbT IpoAbAkaBa Da ce BbpTu HrkoKo CeyHn To Hnepu.
BHHMaHHe-HeDOnHpAaTe BbPraunCe HOK.
MOnTnpaHe
3apekdahe Ha akymylaTopHaTa 6aTePnA
Cn3BaIe H3NCKBAAHHTa 3a3xpaHBaIO
HaIpeXeHHe: HaIpeXeHHeTo Ha 3axpaHBaII
H3TOUHK Tp6Ba Da CbBtAa C daHHITE,
H3TINCAHN Ha Ta6eKkata Ha eAEKtpOHcTpyMeHTa.
ELeKtpOHcTpyMeHTn, 6o3NaueH c 230 V,
MOrat Da 6bDat 3axpaHBAHn n c 220 V/240 V.
I3TOM3BaHTe cAmo BkUOyeHOTOBOKOMTIAEKTOBkata 3apAHO yCTpoNCTBO.CAMToe C IAPAmeTpN,IOXODAUS 3a I3TIOA3BaHaTaIpiu Baun eAEKTPOHnCTpyMeHT ANTHeBO-NOHAAkyMylatopHa 6atePn.
AkyMylaTOPHaTa 6aTepeHIMa TeMnepaTypeH KOHTPOL, KOnTO IIO3BOIABa 3apeKdaHeTo caMo B dHaIpa3OHa MeJxdy O ^ C n 45^ .Taka ce yBeIuHaBa DbIroTpaiHocCTHa Ha aKyMylaTOPHaTa 6aTepeHra.
YtBaHe: AkymlyaToPnHaTa 6aTepeRc Ce DoCTaBn YaactNuHO 3apeDeHa. 3a Da DocTnHrTePeBnHa KaIaunTeHa akymlyaToPnHaTa 6aTepeRn, IpeDn TbpBOTO N3TOnl3BaHe RaapeDeTe DOKpaB B 3apAHO TO YcTPOINCTBO.
IHTeBO-IOHHaTakymyAToPnHa6aTePnMoKe Da 6bDe3apeKdHaNTOBCaKO BpeMe,6e3TOBa Da CbKpaUaBA DbIroTpauHocTTa N.IpeKbcBaHe Ha 3apeXdaHeToCbIo He N BpeAn.
N3BaXdAHe Ha akymyIaTopHata 6aTepeHn A
HaTnCHeTe OcB6OxDaBaUaN8 6yToH 3a akymyAtoPnHaTa 6aTePnI N3BaDeTe akymyAtoPnHaTa 6aTePnI 15 Ha3aD ot eEleKTPoHHCTpymenta.
3apexkahe
Пюесьт Ha 3аразждане 3апочь Всднага Слд КATO ШпселТ Ha 3аразното устону 6ьд ВКИОчЕВ в КонтактЯ и Слд ТОВ akymлалорнata 6атетря 6ьд постав�а в Зразното устону 14.
IocTaBeTe aKymyLaToPHaTa 6aTePn1 15 Ha 3apAHO ToYcTPOiCTBO, KaKTO e IIOka3aHO Ha fHpyaT, TbPBo OTIPpeD (1) H CAd TOBa II pHTncHeTe aKymyLaToPHaTa 6aTePn1 15 B 3aDHnI KpaHADOly (2). N3BaJaaHeTo Ha aKymyLaToPHaTa 6aTePnCe N3BbPwBa B O6paTHaTl PocLeDoBaTeAHOCT.
БlarodapeHne Ha HHTeHreHTOCCTHa Na Ipoceca Ha 3apeXdaHe CbCTOHHeTO Ha aKymyAToPnHaTa 6aTePna Ce pa3PiO3HaBa N Tc Ce 3apeXda C OTTHMaHnTOK 3a TeKyuIte CN TeMIIpePaTypaN HaTIPexHne.
Taka JINBOITbHa akyMylaTOpHaTa 6aTepya Ce yIbJXaBa, a, pIu CbXpaHЯBaHe Bbpxy 3apAHOTo yCTpoiCTBO, T e BInHaI HAnbHO 3apeDeHa.
YtBaHe: AkymylatopnHaTa 6aTeepnCe 3apeKda camo aKO TempepaTpaTa N e B rpaHnUte Ha OToyCTHMn IAHaTaN OH, BNKeT pa3DeI «TexHnueeCKN DaHHN».
Mnrau CBeToDNo3a 3apeKdaHe Ha akymlaTophata 6aTeprna 13
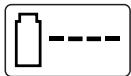
IpouecbT Ha 3apejdahe cyeka3Ba ype3 Mrahe HaCBETOINOda 13.
HenpeKbchato cBeTeu CBeToAno13
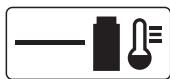
HnpeKbchato CBteHe Ha CBTeODNoDa 13 yka3Ba, ye akymyAtoPnHaTa 6aTePn e 3apeDeHa HnBnHO nnue
TeMTepaTpyata Ha akymytaOpHaTa 6aTePnE u3BbH DOITyCTHMnI INTEpBa3a 3apeKDaHe, TOpaI KoETo B MOMeHTa akymytaTOPHaT a6aTePnI He ce 3apeJka. Korato TeMTepaTpyata IToTaNHe B DIOYCTHMnI TEMTepaTypeN INTEpBaA, TPOueCbT Ha 3apeKDaHe 3aIOUvBa.
HEnpeKbchato CBeTeHe Ha CBeToNDNoDa 13, KOraTO HrMa IIOCTaBeHa aKymyAaTOPHa 6aTePnIya3Ba, Ye IeIeTcEaBt E BkIAUoye H 3axpaHbAaTaMpexa N 3aprAnHO YoCTpOInCTBO e rOtOBo 3apa6ota.
Yka3aHn3a3apeKdaHe
При Heпгекьсато 3apexДанe, респ. При неколковратно последовateлho 3apexДанe на akymlyaTopn6bTeprn6be3пгекьсвае Зардно усточь може д ce harpee. Това e HopMaNo И Нуka3Ba 3a НачneTo на TEXHNUeCKN DeФЕKT Ha 3apdHOTO усточь.
CbueCTBeHO cbKpaTeHO BpeMe 3a pa60Ta cIeA3apeXdahe Ioka3Ba, ye akymytaTopHa7aBatePnE n3xA6eHa N Tp8Ba Da 6bDe 3aMeHeHa.
IHTneBO-IOHHaTa akymyAToPHa 6aTepeRn e 3aUnTeHa cpeu DbIoKO pa3peKDaHe OT «Electronic Cell Protection (ECP)».Прп pa3peDeHa akymyAToPHa 6aTepeRn eAEKTPoINHCTpyMeHTbT Ce I3KIAUcBa OT IIpeDIIa3eH WAIaTEp: HOXbT Cnnpa Da ce BbpTN.
CLeA abTomaTHUHO n3KIAOuBaHe Ha eIeKtponHcTpyMeHtA He IpoDaBXaBAaTe Da haTHnCKaTe TpckOBHn PpekbcBau.
AkyMaIaTopHaTa 6aTePnMoKe Da 6bDe IOBpeDeHa.
Crlo6raBaHe Ha eAleKtpoHnHctpyMeHa
IIOCTaBeTe aKymyLaTopHata 6aTepe naEBA cAe KaTo TpeBOKocauKaTa 6bDe HATbHO CRIo6eHa.
CraobBaHetoHa akymyAToPHaTa TpeBokocauka Tpr6Ba Da ce H3BbpHn B CaeHATA TocAeOBaTeAHOCT:
MOnThnpaHHe Na ppeApa3HnKoKxuX 3
IocTaBeTe Ipea3HnKoJx 11 Ha peKeuaTa rIaBa 9.
0KauTe TpeDn3HnKoKxHa pKeaTaTgAbaI Hn3MeCTe Ha3a.
IIpHTNCHeTe PpeIa3HnKoKyxHaOly, DOKaTO YcETnTe OTuETANBO IpeUpaKaBaHe (KAnK).
MOnTnpaHe Ha peXeunH aNck/Hoxa
CПпнше ржшядс 16Кьм 3аБИЖВаиь (KИNK).
D NocTaBeTe HOka 10 Ha uΦTa 17, pIPTuChHeTe ro HADOly Iro N3AbpTaNte HaBbH, DOKaTo ycETe IIpeuPaKBaHe.
Pa6ota cypeda
BkIouBaHe
OTCTpaHete OT MRCTO, KbDeTo ue KOcHTe, KaMbHN, KLoHn N ApyTN TBbpAn PpeMetn.
CLeD n3KIAUOBAHe Ha aKymyAaTopHaTa TpeBOKocaKa HOXbT IPOdIaXaBa Da ce BbptN HRAKOceYHnTo INHepZn. IPeDN da BKAIOuBaTe IOBTOPHo, N3UaKaIe To BbPTeHTo Ha eLEKTPoDBHrAteLA/HOxA Da CITpe HAITbAHO.
He BKAIOUBAIte eAeKTPoHCTpymeHTa HETOCpeACTBEHO CAEKDATO CTFOHKAIOUHAN.
TocTabrHe Ha akymyLatopHata 6aTepeHra
BkapaTe akymylaTOpHaTa 6aTepeRnB eIeKtPOnHCTpyMeHTo, KaKTo e Ioka3aHo Ha fHyrpaTa. Tp6Ba Da ycetHe OTcETAUBO npEupakBaHe.
BkIouBaHe
HaTnCHete n 3aApbXkTe 6yToHa 3a De6IoKnpaHe Ha TpCKOBnI PpeKBcBaU 2 n CaeD TOBa HATnCHete npCKOBnI PpeKBcBaU 1.
OTnycheTe 6yToHa 3a De6IoKnPaHe Ha IyCKOBnI pKeBcBaU 2.
N3KIAOyBaHe
OTnycheTe nycKOBnI pekcbau 1.
YtBtBaHe: EAnKtpoDbnIgATEIaTcCTapTnpa MaKo CLeA KaTo 6bDe HATNCHaT PyCKOBnT PpeKcbau 1.
HactpoBaHe Ha eNeKtponHcTpymenta
N3TNOA3BaHe Ha TIOABHXKaHa TaPbKoXBaTaKa
TIOBnXhata pKoXBaTka 5 MoKe Da 6bDe IOCTaBeHa B pa3AnuH NTOAOKeHn:
3a da II pOMeHNTe IIO3NcIra, pa3BnTe BnHTa Ha pbKoXBaTKaTa 4 N I3MeCTe IIOBHXHaTa pbKoXBaTKa 5.
3aTeHHeBnHTa4,3a Da 3aCTOpHnTE IOaBnKHaTa pbkoXBaTka5Bn36paHaTa IO3nIy.
PeryuHahe Ha BnCOnHnTa Ha TpeBokocauKaTa F
3aBbptete 3aTgaaTa BTyka 6 Ha 90^
3a yIbIxABaHe n3IbPnAe He nIpaBIAuTaIaHa, 3a CkbcBaHe BkapaTe HaBbTppe.
3aTeHHeTe OTHOBO 3aTgAaata BAyKa 6.
PeryIpaHe Ha bIbIa Ha NaKIoHa Ha pexeMaTa rIaBa C
3a Da II pOMeHnTe HaKLoHa Ha pR3aHe, HAtncHeTeIeAa12 N 3aBpTeTe HaPpaBAAuTa UaHra7B JKeAHaTa ITO3nU.
OTTyncheTe TeaAa12.
HactpoBaHe 3a pHa3aHe B 6An3oCTdo pb6
HacpoTe HaKaIOna Ha peKeEuTa rIaBa:
HaTnCHeTe PteaIa1 12.
TocTaBeTe HaipraBAAbaTa 7 B HauHaTHo3nua. OTHOBO OTyCHeTe Pdaa 12.
1 N3MeCTBaHe hapeXeUaTa rAba:
Ocbo6oDeTe 3aTgAaTaBtUkA 6.
3aBbptTe HaIIpaBAIbAaTa 7Ha90° cIpyMo pexeaaT a IaBa 9 KaKTo e ITOka3aHo Ha fHypata. OTHOBO 3aTeHHe TByKaTa6.
Yka3aHnHa 3a pa6ota

TpeIpaBte akymyIaTOPHaTa 6aTePnO T PerpBaHe, HApN. BCAECTBHe Na CIIHn H PraKa CbHueBa CBETAMHa NOrbH.
EeKtpoHHcTpymEnbT He pa6Otn IpiH Tempepatyn IO C Hn Ha4 45^!
Koche Ha Tpeba J
ПпеметвайтakумалtopнатТревokocак haЯBOиHaясноиВHMмавайтдяДьжпTe ha6e3oTacho pa3ctOAHne OT TIAOTO cN.
AkyMaTOpHaTa TpeBOKocaKa MoKe Da pexKe efeKTHBHO TpeBa C BnCOnHa Do 15 cm. Ako TpeBaTa e IIO-BnCOKa,Я pexTe Ha CTbTKn.
KocheB6An3OcTdo p6oBe
BoDeTe aKymyIaTopHaTa TpeBOKocauKa
ycIpopeHn Ha pb6a Ha KocehaT PIoU.3a Da
n36eHHeTe 6bp3o H3HOCBaHe Ha HOxa,
n36raBaTe KOHTaKT C TBbPd NIOBbPxHOCTN IAN CTehn.
K 3a IIO-DO6po yIpaBaeHne H3TIOA3BaHTe TpeIpa3HaTa CkOba 3a DbPBeTa 18 KaTO OTopa 3a BODeHe (He e BKAIOueHa B OKOMTIaEKTOBkaTa).
P83aHe OKOLO AdbPBBeTa H Xpactn
PexkTe BHNMaTeAHO OKOLO DbPBeTa H xpaTn, 3a Da He rN DoOpTe C pexeunHox. Ako 6bDe IOBpeHa Kopata Ha paCTehnra, e Bb3MOxHo Te Da yMpaT.
3a IIO-06po yIpaBaeHne H3IOA3BaHTpeIa3HaTcCKo6a 3a DpBETA 18 KaTO OTopa 3a BODeHe (He e BKAIOueHa BOKOMTIeKTOBkata).
H3dpbXKMOBCT Ha akymyAtohata 6aTepeHn
BpeMeTo 3a pa60Ta Ha akymyIaTopHaT aTeepn 3aBncn OT pa6OTHnTe yCLOBn:
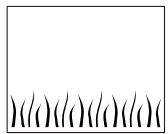
Aekn pa60THy cIobna:
0800 metpa (ART23Li)
01000 metpa (ART 26 Li)
CpeaHOTeKn pa6oTHuCAOBH:
0350 MeTpa (ART 23 Li)
0440 MeTpa (ART 26 Li)
Texkpa60THyCLOBH:
060 MeTpa (ART 23 Li)
075 MeTpa (ART 26 Li)
CmHa Ha Hoxa D
I! PpeHn 3BbPwBaHe Ha KaKBnTo n Da e DeHOCTH IO eAEKTPoHNCTpyMeHTa, N3BAxKaAte AkymyAtoPHTa 6aTePN.
3a Da n3BaAdnTe n3HoCeHnHa HOK 10, rO
IpnTnCHHeTe HaBbTppe,doKaTo n3CKoUH OT uNΦTa
17.
TouncTeTe UuTa 17 CocTpboK OTO BCNUKIN TOIeHaAN IIO HeO uactnN H3aMbpcBaHnA.
3a Da MOHTnPaTe HOB HOK 10IOCTaBeTe HOXa 10 Ha uΦTa 17, pIITNCHeTe rHaOly n rO H3DbPnAite HaBbH, DOkATO yCetnte IpeuPaKBaHe.
YtBtBaHe: I3IIOA3BaIe TcMo OpIINHaHn pe3epBHN HOKOB, IpnO3BOoCTBO Ha Boi. Te Ca cTeuHa pa3pa6OTka HmAT IOo6peHn CBoiCTBa Ha p3aHe. I3IIOA3BaHTo Ha ApyHn HOKOB BOH N DO BLOwABe Hn IpnO3BOoHTeIHOCTTa.
OCTpaHbAhe Ha deΦeKTH
Ta6nata TIO-ANOY IOKa3Ba CmITOMn Ha AekeTN KAK MOKeTe Da CN IOMOrHeTe, aKO eKtponHCTpyMeHTb BV IIpeCTaHe da pa60TH HOpMaHO. AKO He MOKeTe DA OTKpHeTe NOTCPaHNTe IPO6Ma, KaTO CLeBAte INHCTpyKcHnTE B Ta6nata, ce O6bPHeTe KbM OTOpN3IpaH cepBn3 3a eKtponHCTpyMeHTn Ha Boi.
BnHmAHne: IIpeAn Da oTcTaHbAte DeΦeKTH n3KlOuTe eλeKTPoHnCTpyMeHTa N 3BaTe aKymlaTophata 6aTePn.
IpeHn3BbpuBaHe Ha KaKBHTO n Da e DeHIOCTn IIO eEKeKTPoHnCtpyMeNTa, H3BaXdAaTe aKymyAatopHata 6aTePn.
YtBaHe: N3TbHnBaHte CaeHNte IpoUeDpyn IIO IOAdPbXKa peoOBHO, 3a Da cN OcHpyrTe DbIroTpaiHo HnaEJaHO TIOA3BaHe Ha eAEKTPoHHCTpymeHa.
IpeNoDnHNO IpoBepaBaiTe eAleKtponHCTpymeHTa 3a BbHN HIOBpeH, HApT. pa3Xa6eHn CbeHHeHn I n3HOceHn Hn IOBpeEHn eMeHTn.
Пюверяваite ДдИ Кадацпеши И прдпзнITE CBорьхеня сИЗправи И правиноMHOTнари.ИЗБршытЕ Heo6xODmHTe peMOHTHДeINHOCTNпрдДа 3aIOHHTe pa6Ota C eLEKТponHCTpyMeHTA.
Ako BbIpeKe IpEun3HOTo Ipon3BOAcTBO HBNMaTeALHO N3NITBaHe eAEKToPnHcTpymeHTbT ce TOBpeAn, peMOHTbT Tpr6Ba Da 6bDe I3BbPseH B OTOpn3IpaH cepBn3 3a eAEKToPnHcTpymeHTn Ha BoW.
Korato ce 6opblaate C BbIPOCS KbM
IpeCTaBHTeNTe Ha BoW, BnHaRn IIOcoUBaYTe
10-uzpeneHnKaTALoXeH HOMep, n3PiNcHn Ha
Ta6eAkata Ha eEeKTponHCTpymEnTa.
CLeEd PtpHKLIOUbaHe Ha pa6Ota/cbXpaHbAbe

H3KluOeTe eLeKtpOnHcTpymEHTa H3BaDeTe akymyAatopHata 6aTePn.
TpeN da pIn6epete
eLeKtpOnHcTpymEHTa, ce yBePeTe, 4e akymyAatopHata 6aTePn e H3KluOeTe
Touhcte BbHsHo TpeBOKocaKaTa rpnKAnBO C Meka Yetka N KbpIIa. He n3Tol3BaIte BoDA, pa3TBOpHTeI IIN IIOuNCTBaIu IpeIapATn. OtCTpaHete BCnUKN HaTpynHn OCTaTbUHn OT TpeBa I uactuIc, OOC6eHO OT BeHTuaUOnHHInTe OTBOP8 8.
TIOCTaBeTe eIeKtPOnHcTpyMeHTa IeHaI NaCTpaHn IIOUHcTe TpeDIIa3HN KOKyX 11 OTbTpe.OTcTaPaHete KOMIIaKTHi HaTPyTBAHnOT TpeBa CdbpBEHO III PaCTMaCOBO TpyTne.
YBepTe ce, Ye KaIaIHTe I PpeIa3HnTe CbOpBXeHnI He ca TIOBpeDeHn I yHKUHOHnpa TpabuHNo. N3BbPwBaIte Heo6XoAMMTE peMOHTn DeHIOCTn PpeDn Da 3aIOuHHe Ta6Ota C eEAEKTPoHNCTpyMeHTa.
AkyMaToPHaTa 6aTepeN Tp8Ba Da ce cbxpaHraBa Pn TeMtepaTpy Mekdy O ^ C n 45^
CepBn3 n KOHCyIaTauN
CepBn3bT 1e OTROBOpH Na BbIpOcHTe Bn OTHOCHO peMOHTN IIOADpbXkA Ha 3aKyIpEnHr O T BACIPOaYKT, KaTOn OTHOCHO pe3epBHN qactN. MoTHAXHN cepTeKN HΦopMaun 3a pe3epBHN qactN MOKeTe Da HaMePHTe CbIoo N Ha www.bosch-pt.com
EkntbT OT KOHCyTAHTn Ha BoW ige Bn IOMorHe C yOBOACTBne IIpi BBIIPOCS OTHOCHOaKyIyBaHe, IIpiLOXKeHHe N Bb3MOxHocTH 3a HAcTpoBaHe Ha pa3AnuHN IIPOdYKTN OT IIpon3BOcCTBeHaTa rama Ha BoW II aOnbHInTeAHH IIpncTTOco6LeHn 3a TxA.
Po6epT Bow EOoA -BbIaRapn
Bou CepBn3 LcHbP
IapaHIOHHN I3BbHrapaHcIOHHN peMOHTN
yI.Cpe6bphNQ3-9
1907 Cofn
TeA.: +359 (02) 962 5302
TeA.:+359(02)9625427
TeA.: +359 (02) 962 5295
c: + 359(02)624649
TpaHcnpTnpahe
AkymylaTophata 6aTePnna e n3PiTaHa cBflaCHO hapbUnnka Ha OOH ST/SG/AC.10/11/3 n3DaHne, Yact III, Pa3deI 38.3. TЯ Иma efeKTHBHa 3aUnTAt OBtpeSho CBpXHaIraHe N KbCO CbeDInHeHne I e 3aUnTeHa CpeSy MexaHnHo TIOBpeXdaHne I OTaCHn O6paTHN TOKOB. EKBVALEHTHO KOAnYeCTBO ANTN, CbDbPxKaIoCe B aKymylaTophata 6aTePnna, e IIOA IIpeDeIHO-DOITyCTMmTE IparOBe. 3aTOBa aKymylaTophata 6aTePnna He IIOAExKn Ha NaUOnHaAN Hn MekdyHapOAnHn HOPMN 3a pa6Ota COTaCN CTOKN/MATEpNaIi. BbIpeKn TOBa Iprn TpaHCNoPTnPaHToHa MHORO aKymylaTophata 6aTePnna Te3n HOpMN Ipa3IPOe6n MoRat Da cTaHAT BaUNdHN. B TakINBa ClyuAn MoKe Da e Heo6xOAnMo CTAbaHTo Ha CteUHaHN IIpeDInCaHry (HaIPr. OTHOCHO ONaKOBkata). IIOpO6HocTH MoKeTe Da HayuIne B AnCTOBkata (Ha aHrAnckn e3NK) Ha CLeADHn Adec B INHTepHET: http://purchasing.bosch.com/en/start/ Allgemeines/ Download/index.htm.
BpaKyBaHe
C orIeD OIIa3BaHe Ha OKoIHaTa CpeDa eIeKToHnHCTpyMeHTbT, DIOIbAHNteAhnTe IpiNCIOco6BHe H N OIIaKOBkATA Tp8Ba Da 6bDaT IOAOKeHH Na IIOXODJaI ppepa6OTka 3a IIOBtOPHOTO n3-ITOIABaHe Ha CbDbPkaUHe Ce B TxA CypOBHN.
Camo 3a ctpaHH ot EC:

He n3xBpIyIe eIeKtpOnHCTpyMeHTn IIPIN 6IbTOBNTe OTIaDbUc! CbIaCHO dIpeKTHBaTa Ha EC2002/96/EG OTHOcO 6paKaYBaHne IeKTPnueeCKN IeKTPoHNu yCTPOICTBa H yTBbpXDaBaHeTo N
KaTo HaaHOnHaJIeH 3aKOH eLeKTPoHnHCTpyMeHTnTe, KOIto He MoTa Da ce H3IOA3BaT IOBeue, Tpr6Ba Da Ce Cb6Hpat OTdEALHO Da 6bDaT IOdaRaHn Ha ITOXODJa7a IIpepa6OTka 3a OTOIA3OTBOPBAHe Ha Cb4bPjKaaIHTe Ce B T8X BTOpuHN CyPOBHH.
AkyMaIaTOPHn HAN O6NkHOBeHN 6aTePHN:
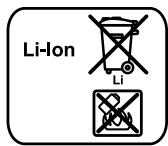
Li-Ion:
Moi, cIa3BaIte yka3aHnIra B pa3dE «TpaHcTOpTnpaHe», cTpaHnIca 219.
He n3xBpIaIe 6aTeepn Ipn 6bntoBIne OTnAbuN Nn BB BDOxpaHnHnua, He rN n3rapJe. O6nKHOBeHHn Nn akymyAtoPn H6aTeepn Tpr6Ba Da 6bDat cb6npaHn, peunKnnpaHn Nn yHnIoXkaBAHN IO eKoLoTnueH NaHn.
Camo 3a ctpaHn ot EC:
cbrlaacno HnpekTnBa 91/157/EWG deekeKTnHnnn n3xa6ehn akymylatopn nn o6nkHObeHH6aTePNn Tp8Ba Da 6bDat peuNKUnpaHn.
Ppabata 3a n3MeHeHHaTaTa3eHN.
Uputstva o sigurnosti
Pažnja! Sa pažnjom pročitajte sledeća uputstva. Upoznajte se sa elementima za rad i pravilnom upotreptom aku-trimera za travu. Molimo da sigurno sačuvate uputstvo za rad za kasniju upotrebu.
Objašnjavanje symbola na aku-trimeru za travu

Opste uputstvo o opasnosti.

Dr. Egbert Schneider Senior Vice President Engineering
Dr. Eckerhard Strötgen
Head of Product Certification

i.v. Moju
20.08.2007, Robert Bosch GmbH, Power Tools Division D-70745 Leinfelden-Echterdingen
Radi vase sigurnosti

Iskljucite uredaj i ukonite aku-bateriju, preNgu sto izvedete radove podesavanja i cijscenja.
Dr. Egbert Schneider Senior Vice President Engineering
Dr. Eckerhard Strötgen
Head of Product Certification


20.08.2007, Robert Bosch GmbH, Power Tools Division D-70745 Leinfelden-Echterdingen
Za vašo varnost

Pred nastavljanem ali ciscenjem naprave izklopite napravo in odstranite iz njeakumulator.
Dr. Egbert Schneider Senior Vice President Engineering
Dr. Eckerhard Strötgen
Head of Product Certification


20.08.2007, Robert Bosch GmbH, Power Tools Division D-70745 Leinfelden-Echterdingen
Za vasu sigurnost

Pije podesavanja ili ciiscenja uredaj iskljuciti i izvaditi aku-bateriju.
Nakon sto se aku-sisac tratine iskljuci, noz se okrece jo snekoliko sekundi.
Oprez - ne dirati rotirajuci nož.
Montaža
Punjenje aku-baterije
Pridržavati se mreznog napona: Napon izvora struje mora se podudarati sa podacima na tipskoj pločici uredaja. Urežaji označeni sa 230 V mogu raditi i na 220 V/240 V.
Koristite samo isporučeni punja. Samo ovaj punjač je usklaeden sa Li-ionskom aku-baterijom ugradenom u vašem urežaju.
Aku-baterija je opremljena kontrolom temperature koja dopuša punjenje samo u temperaturnom području izmedu 0°C i 45 °C. Na tajće se način postići dugi vijek trajanja akubaterije.
Dr. Egbert Schneider Senior Vice President Engineering
Dr. Eckerhard Strötgen
Head of Product Certification


20.08.2007, Robert Bosch GmbH, Power Tools Division D-70745 Leinfelden-Echterdingen
Töobutus

Dr. Egbert Schneider Senior Vice President Engineering
Dr. Eckerhard Strötgen
Head of Product Certification

i.v. Moju
20.08.2007, Robert Bosch GmbH, Power Tools Division D-70745 Leinfelden-Echterdingen
Jusu drosibai

Ik reizi pirms regulësanas vai tirišanas izsledziet instrumentu un iznemiet no ta akumulatoru.
Péc akumulatora zälaja trimera izslëgşanas tã griezëjasmens vél dažas sekundes turpina rotét.
levrojiet piesardzibu-nepieskarieties rotejošajam griezejasmenim.
Salikšana
Akumulatora uzlade
Pievadiet pareizu elektrotikla spriegumu!
Elektrobarošanas avota spriegumam jaatbilst vertibai, kas noradita uz uzlades icerces markejuma plaksnites. icerces, kas paredzetas 230V spriegumam, var darbinat ari no 220 V vai 240 Velektrotikla.
Dr. Egbert Schneider Senior Vice President Engineering
Dr. Eckerhard Ströttgen
Head of Product Certification


20.08.2007, Robert Bosch GmbH, Power Tools Division D-70745 Leinfelden-Echterdingen
Jusu saugumui