
ART 26 COMBITRIM - Brush cutter BOSCH - Free user manual and instructions
Find the device manual for free ART 26 COMBITRIM BOSCH in PDF.



| Product Type | Cordless brushcutter |
| Brand | BOSCH |
| Model | ART 26 COMBITRIM |
| Power Supply | 18 V, 1.3 Ah lithium-ion battery |
| Cutting Diameter | 26 cm |
| No-load Speed | 7400 rpm |
| Charger | AL 2204 CV, charging time 180 min |
| Weight (according to EPTA) | 2.4 kg |
| Adjustable Handle | Yes, adjustable height and angle |
| Cutting Head Adjustment | Pedal for tilt, edging possible |
| Protection | Protection guard, shaft protection bracket |
| Safety | Automatic shutdown in case of deep discharge (ECP), start-up lock |
| Noise Level | Sound pressure 80 dB(A), sound power 88 dB(A) |
| Vibrations | Less than 2.5 m/s² |
| Operating Temperature Range | 0°C to 40°C |
| Maintenance | Clean with soft brush and cloth, no water or solvents |
| Spare Parts | Original BOSCH blades, compatible batteries and chargers |
| Repairability | Authorized BOSCH after-sales service |
| Warranty | Compliance with EU directives |
Frequently Asked Questions - ART 26 COMBITRIM BOSCH
User questions about ART 26 COMBITRIM BOSCH
0 question about this device. Answer the ones you know or ask your own.
Ask a new question about this device
Download the instructions for your Brush cutter in PDF format for free! Find your manual ART 26 COMBITRIM - BOSCH and take your electronic device back in hand. On this page are published all the documents necessary for the use of your device. ART 26 COMBITRIM by BOSCH.
USER MANUAL ART 26 COMBITRIM BOSCH
Power Tools Division
70745 Leinfelden-Echterdingen
www.bosch-pt.com
F016 L70 510 (2007.11) O / 279
ART
23 LI | 26 LI

BOSCH
de Originalbetriebsanleitung en Original instructions fr Notice originale es Manual original pt Manual original it Istruzioni originali nl Oorspronkelijke gebruiksaanwijzing da Original brugsanvisning sv Bruksanvisning i original no Original driftsinstruks fi Alkuperäiset ohjeet
el PwToTuO obnyiw xphoNc tr Original isletme talimati pl Instrukcja oryginalna cs Puvodním námodem k používání sk Póvodný námod na použitie hu Eredeti hasznalatiutasitas ru OdHHNK pyKOBoDCTBa ITO 3KcIIaTaun uk OpunirhaIbHa IHCtpyKci3 ekTlayataui
ro Instruetiuni de folosire originale bg OpHnHaHaNo pBkoBOcTBo 3a ekCnAoTaun sr Originalno uputstvo za rad sl Izvirna navodila hr Originalne upute za rad et Algupärane kasutusjuhend Iv Instrukcijam
originalvaloda
It Originali
instrukcija

Deutsch. 7
English. Page 17
French. Page 27
Spanish. 37
Portuguese. 47
Italian. 57
Dutch. 69
Danish. 79
Swedish. Page 88
Norwegian. 97
Finnish. Page 106
Greek. Page 115
Turkish. Page 126
Polish. Page 135
Czech. Page 146
Slovak. Page 155
Hungarian. Page 165
Russian. Page 176
Ukrainian. Page 188
Romanian. Page 199
Bulgarian. Page 209
Serbian. Page 221
Slovenian. Page 231
Dr. Egbert Schneider Senior Vice President Engineering
Dr. Eckerhard Ströttgen Head of Product Certification
i.v. Moju
20.08.2007, Robert Bosch GmbH, Power Tools Division D-70745 Leinfelden-Echterdingen
For your safety
Warning! Read these instructions carefully, be familiar with the controls and the proper use of the cordless trimmer. Please keep the instructions safe for later use!
Explanation of symbols on the cordless trimmer

General hazard safety alert.

Read instruction manual.

Wear eye protection.
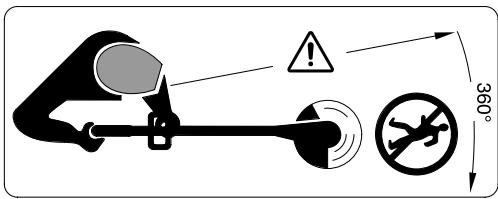
Pay attention that bystanders are not injured through foreign objects thrown from the machine.
Keep bystanders a safe distance away from the machine.

Remove battery before adjusting or cleaning, and before leaving the machine unattended for any period.

Do not work in the rain or leave the cordless trimmer outdoors whilst it is raining.
- Never operate the cordless trimmer with damaged guards or shields or without guards or shields in position.

Do not use the charger if the cord is damaged.
Before using the machine and after impact, check for signs of wear or damage, and repair if necessary.
This appliance is not intended for use by persons (including children) with reduced physical, sensory or mental capabilities, or lack of experience and knowledge, unless they have been given supervision or instruction concerning use of the appliance by a person responsible for their safety. Children should be supervised to ensure that they do not play with the appliance. Do not operate the cordless trimmer when barefoot or wearing open sandals; always wear substantial footwear and long trousers. Never allow children or people unfamiliar with these instructions to use the cordless trimmer. Local regulations may restrict the age of the operator. When not in use store the trimmer out of reach of children. Never work with this trimmer while people, especially children or pets are nearby. The operator or user is responsible for accidents or hazards occurring to other people or their property. Wait until the blade has completely stopped before touching it. The blade continues to rotate after the trimmer is switched off; a rotating blade can cause injury. Work only in daylight or in good artificial light. Avoid operating the cordless trimmer in wet grass, where feasible. Switch off when transporting the cordless trimmer to and from the area to be worked on. Switch on the cordless trimmer with hands and feet well away from the rotating blade. Do not put hands or feet near the rotating blade. Never use a metal blade in this trimmer. Inspect and maintain the cordless trimmer regularly. Have the cordless trimmer repaired only by an authorised customer service agent. Always ensure that the ventilation slots are kept clear of debris.
Switch off and remove the battery:
- whenever you leave the machine unattended for any period
- before replacing the blade
- before cleaning or working on the cordless trimmer.
- Store the machine in a secure dry place out of the reach of children. Do not place other objects on top of the machine. Replace worn or damaged parts for safety. Ensure replacement parts fitted are Bosch approved.
- Ensure the switch is in the off position before inserting battery pack. Inserting the battery pack into machines that have the switch on invites accidents.
- Recharge only with the charger specified by the manufacturer. A charger that is suitable for one type of battery pack may create a risk of fire when used with another battery pack.
- Use only battery packs intended specifically for the machine. Use of any other battery packs may create a risk of injury and fire.
- When battery pack is not in use, keep it away from other metal objects like paper clips, coins, keys, nails, screws, or other small metal objects that can make a connection from one terminal to another. Shorting the battery terminals together may cause burns or a fire. Under abusive conditions, liquid may be ejected from the battery; avoid contact. If contact accidentally occurs, flush with water. If liquid contacts eyes, additionally seek medical help. Liquid ejected from the battery may cause skin irritation or burns.
Functional Description

Read all safety warnings and all instructions. Failure to follow the warnings and instructions may result in electric shock, fire and/or serious injury.
Intended Use
The machine is intended for the cutting of grass and weeds under bushes, as well as on slopes and edges that can not be reached with the lawn mower.
Intended use is related to operation within 0°C and 40°C ambient temperature.
Delivery Scope
Carefully remove the machine from its packaging and check if the following parts are complete:
- Cordless trimmer
- Blade guard
- Adjustable handle (fitted)
- Cutting disc
- Blade Battery Charger
- Operating instructions
When parts are missing or damaged, please contact your dealer.
Product Features
The numbering of the components shown refers to the representation of the machine on the graphic pages.
1 On/Off switch 2 Lock-off button for On/Off switch 3 Handle 4 Handle screw 5 Adjustable handle 6 Adjusting collar 7 Shaft 8 Ventilation slots 9 Trimmer head
10 Blade 11 Blade guard 12 Foot pedal for trimmer-head angle adjustment 13 LED indicator 14 Battery charger 15 Battery 16 Cutting disc 17 Pin 18 Plant protector 19 Serial number
The accessories illustrated or described are not included as standard delivery.
Technical Data
| Cordless Trimmer | ART 23 Li | ART 26 Li | |
| Article number | 3 600 H78 K.. | 3 600 H78 L.. | |
| No-load speed | rpm | 7500 | 7400 |
| Adjustable handle | ● | ● | |
| Trimmer-head angle adjustment/edging adjustment | ● | ● | |
| Cutting diameter | cm | 23 | 26 |
| Weight according to EPTA-Procedure 01/2003 | kg | 2.3 | 2.4 |
| Serial number | See serial number 19 (type plate) on the machine | ||
| Battery | Li-Ion | Li-Ion | |
| Article number | 2 607 336 037 | 2 607 336 039 | |
| Rated voltage | V= | 14.4 | 18 |
| Capacity | Ah | 1.3 | 1.3 |
| Charging period (battery discharged) | min | 180 | 180 |
| Battery Charger | AL 2204 CV | AL 2204 CV | |
| Article number | 2 607 225 2.. | 2 607 225 2.. | |
| Charging current | mA | 230 | 230 |
| Allowable charging temperature range | °C | 0-45 | 0-45 |
| Weight according to EPTA-Procedure 01/2003 | kg | 0.7 | 0.7 |
Noise/Vibration Information
Measured values determined according to 2000/14/EG (1.60 m height, 1.0 m clearance) and EN 28 662.
Typically the A-weighted noise levels of the product are: Sound pressure level 80 dB(A); Sound power level 88 dB(A). Uncertainty K = 5 dB.
Wear hearing protection!
The hand-arm acceleration is typically below 2.5m / s2
Declaration of Conformity C
We declare under our sole responsibility that this product is in conformity with the following standards or standardization documents: EN 786, EN 60 335 according to the provisions of the directives 89/336/EWG, 98/37/EG, 2000/14/EC.
2000/14/EC: The guaranteed sound power level LWA is lower than 94 dB (A). Conformity assessment procedure according to Annex VI.
Notified body: SRL, Sudbury England
Notified body identification number: 1088
Technical file at:
Robert Bosch GmbH, PT/ESC,
D-70745 Leinfelden-Echterdingen
Dr. Egbert Schneider Senior Vice President Engineering
Dr. Eckerhard Strötgen Head of Product Certification
20.08.2007, Robert Bosch GmbH, Power Tools Division D-70745 Leinfelden-Echterdingen
For Your Safety
Switch off and remove battery from machine before adjusting or cleaning.
The blade continues to rotate for a few seconds after the cordless trimmer is switched off.
Caution - do not touch the rotating blade.
Assembly
Battery Charging
Observe correct mains voltage: The voltage of the power source must agree with the voltage specified on the nameplate of the unit. Equipment marked with 230 V can also be connected to 220 V or 240 V.
Use only the charging unit supplied. Only this charging unit is matched to the lithium-ion battery used in the product.
The battery is equipped with temperature monitoring that allows charging only in the temperature range between 0 °C and 45 °C. In this manner, a high battery service life is achieved.
Note: The battery is supplied partially charged. To ensure full capacity of the battery, completely charge the battery in the battery charger before using your power tool for the first time.
The lithium ion battery can be charged at any time without reducing its service life. Interrupting the charging procedure does not damage the battery.
Removing the Battery A
Press the battery unlocking button and pull out the battery 15 toward the rear.
Charging Procedure
The charging procedure starts as soon as the mains plug is plugged into the socket and the battery is then inserted into the battery charger 14.
Firstly, place the battery 15 as shown in the figure onto the front of the battery charger (0) and then press the battery 15 down at the rear (2). To remove the battery, proceed in reverse order.
Due to the intelligent charging method, the charging condition of the battery is automatically detected and the battery is charged with the optimum charging current, depending on battery temperature and voltage.
This gives longer life to the battery and always leaves it fully charged when kept in the charger for storage.
Note: The charging procedure is only possible when the battery temperature is within the allowable charging temperature range, see section "Technical Data".
Flashing Battery Charge Indicator 13
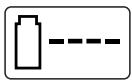
The charging procedure is signalled by a flashing battery charge indicator 13.
Continuous Lighting of the Battery Charge Indicator 13
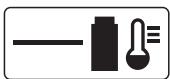
Continuous lighting of the battery charge indicator 13 indicates that the battery is fully charged or that the temperature of the battery is not within the allowable charging temperature range, and cannot be charged for this reason.
The battery is charged as soon as the allowable charging temperature range is reached.
When the battery is not inserted, continuous lighting of the battery charge indicator 13 indicates that the mains plug is inserted in the socket and that the battery charger is ready for operation.
Charging Advice
With continuous or several repetitive charging cycles without interruption, the charger can warm up. This is not meaningful and does not indicate a technical defect of the battery charger.
A significantly reduced working period after charging indicates that the battery is used and must be replaced.
The Electronic Cell Protection (ECP) protects the lithium ion battery against deep discharging. When the battery is run down or discharged, the machine is shut off by means of a protective circuit: The blade no longer rotates.
Do not continue to press the On/Off switch after an automatic shut-off of the machine.
The battery can become damaged.
Product Assembly

Do not insert the battery until the cordless trimmer is completely assembled.
Ensure that the cordless trimmer is assembled in the following order:
Mounting the Blade Guard
Place the blade guard 11 on the trimmer head 9.
Hook the blade guard onto the trimmer head and push it toward the rear. Press the blade guard downward until securely latched (click).
Mounting the Cutting Disc/Blade

Press the cutting disc 16 onto the drive shaft (click).

Position the blade 10 onto the pin 17, push it down and pull it outward until it engages.
Operation
Starting

Remove stones, loose pieces of wood and other objects from the cutting area.
The blade continues to rotate for a few seconds after the cordless trimmer is switched off. Allow the motor/blade to stop rotating before switching "on" again.
Do not rapidly switch off and on.
Inserting the Battery
Insert the battery into the machine as shown. The battery must be felt to engage.
Switching On
Press the lock-off button 2 and hold while actuating the On/Off switch 1.
Release the lock-off button 2 again.
Switching Off
Release the On/Off switch 1.
Note: There is a short delay in the motor starting after engaging the on/off switch 1.
Adjustment
Using the Adjustable Handle
The adjustable handle 5 can be set in various positions:
To change the position, loosen the handle screw 4 and move the adjustable handle 5. - Tighten the handle screw 4 securely to fix the adjustable handle 5 in the adjusted position.
Adjusting the Trimmer Length F
1Turn the adjusting collar 6 by 90° Pull the shaft out to increase the height, or push the shaft in to decrease the height. Re-tighten the adjusting collar 6.
Adjusting the Trimmer-head Angle G
To change the cutting angle, press the foot pedal 12 down and move the shaft 7 to the requested position.
Release the foot pedal 12.
Adjusting for Edging Mode
H Adjusting the trimmer-head angle:
Press the foot pedal 12 down. Move the shaft 7 to the lowest position. Release the foot pedal 12 again.
Moving the trimmer head: Loosen the adjusting collar 6. Turn the shaft 7 by 90° to adjust the trimmer head 9 for trimming/edging as shown. Re-tighten the adjusting collar 6.
Working Advice

Protect the battery from heat, for example, also the continuous exposure to sun radiation and fire.
Product will not function if temperature is below 0°C or above 45°C
Cutting Grass
Move the cordless trimmer left and right, keeping it well away from the body.
The trimmer can efficiently cut grass up to a height of 15 cm. Cut higher grass in stages.
Trimming Edges
Guide the cordless trimmer along the edge of the lawn. Avoid contact with paved surfaces, stones or garden walls, as this will wear the blade rapidly.
For better control, use the plant protector 18 (accessory) as a guide.
Cutting Around Trees and Bushes
Carefully cut around trees and bushes so that they do not come into contact with the blade.
Plants can die if you damage the bark.
For better control, use the plant protector 18 (accessory) as a guide.
Battery Duration
The battery duration is dependent on the working conditions:
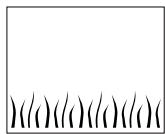
Light conditions:
up to 800 metres (ART 23 Li)
up to 1000 metres (ART 26 Li)
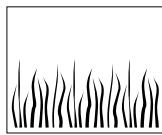
Medium conditions:
up to 350 metres (ART 23 Li)
up to 440 metres (ART 26 Li)
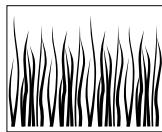
Tough conditions:
up to 60 metres (ART 23 Li)
up to 75 metres (ART 26 Li)
Changing the Blade D

Before any work on the machine itself, remove the battery from the machine.
To remove the worn blade 10, push it inward until it snaps off of the pin 17.
Clean the pin 17 of any residual plastic/debris with a sharp knife.
To mount a new blade 10, place the blade 10 onto the pin 17, push it down and pull it outward until it engages.
Note: Only use Bosch replacement blades. They have been developed specially for improved cutting and feed performance. The use of other blades will lead to a deterioration in performance.
Troubleshooting
The following chart lists problem symptoms, possible causes and corrective action, if your machine does not operate properly. If these do not identify and correct the problem, contact your service agent.
Warning: Switch the machine off and remove the battery prior to any troubleshooting.
| Problem | Possible Cause | Corrective Action |
| Blade guard can not be mounted over cutting disc | Incorrect assembly | Remove cutting disc and mount blade guard again; also see "Assembly" |
| Trimmer fails to operate | Battery discharged | Recharge battery; also see "Battery Charging" |
| Battery too hot/cold | Allow to cool/warm | |
| Trimmer runs intermittently | Internal wiring of machine damaged | Contact Service Agent |
| On/Off switch defective | Contact Service Agent | |
| Excessive vibrations/noise | Machine defective | Contact Service Agent |
| Blade broken | Replace the blade | |
| Cutting time per battery charge too low | Battery has not been used for long period or only for short terms | Fully charge battery; also see "Battery Charging" |
| Grass too high | Cut in stages | |
| Battery dead or defective | Replace the battery | |
| Blade will not move | Battery discharged | Recharge battery; also see "Battery Charging" |
| Machine defective | Contact Service Agent | |
| Machine does not cut | Blade broken | Replace the blade |
| Battery not fully charged | Recharge battery; also see "Battery Charging" | |
| Grass entangled around cutting disc | Remove grass | |
| Continuous lighting of the battery charge indicator 13 | Battery not (properly) inserted | Properly insert battery into battery charger |
| No charging probedure possible | Battery contacts contaminated | Clean the battery contacts (e.g. by inserting and removing the battery several times) or replace the battery |
| Battery defective | Replace the battery | |
| Battery charge indicator 13 does not light up | Mains plug of battery charger not plugged in (properly) | Insert mains plug (fully) into the socket outlet |
| Socket outlet, mains cable or battery charger defective | Check the mains voltage; have the battery charger checked by an authorised after-sales service agent for Bosch power tools |
Maintenance and Service
Maintenance and Cleaning

Before any work on the machine itself, remove the battery from the machine.
Note: To ensure long and reliable service, carry out the following maintenance regularly.
Regularly check for obvious defects such as loose fixings, and worn or damaged components.
Check that covers and guards are undamaged and correctly fitted. Carry out necessary maintenance or repairs before using.
If the machine should happen to fail despite the care taken in manufacture and testing, repair should be carried out by an authorised customer service agent for Bosch garden products.
In all correspondence and spare parts order, please always include the 10-digit article number given on the type plate of the machine.
After Trimming/Storage

Switch the machine off and remove the battery. Ensure battery is removed before storage.
Clean the exterior of the machine thoroughly using a soft brush and cloth. Do not use water, solvents or polishes. Remove all grass and debris, especially from the ventilation slots 8.
Turn the machine on its side and clean the cutting guard 11 inside. If grass cuttings are compacted, remove with a wooden or plastic implement.
Check if guards and protective devices are undamaged and properly mounted. Before using, carry out possibly necessary maintenance and repairs.
The battery should be stored between 0°C and 45°C.
After-sales service and customer assistance
Our after-sales service responds to your questions concerning maintenance and repair of your product as well as spare parts. Exploded views and information on spare parts can also be found under:
www.bosch-pt.com
Our customer consultants answer your questions concerning best buy, application and adjustment of products and accessories.
Great Britain
Robert Bosch Ltd. (B.S.C.)
P.O.Box 98
Broadwater Park
North Orbital Road
Denham
Uxbridge
UB 95HJ
Tel. Service: +44 (0844) 736 0109
Fax: +44 (0844) 736 0146
Australia, New Zealand and Pacific Islands
Robert Bosch Australia Pty. Ltd.
Power Tools
Locked Bag 66
Clayton South VIC 3169
Customer Contact Center
Inside Australia:
Phone: +61 (01300) 307 044
Fax: +61 (01300) 307 045
Inside New Zealand:
Phone: +64 (0800) 543 353
Fax: +64 (0800) 428 570
Outside AU and NZ:
Phone: +61 (03) 9541 5555
www.bosch.com.au
Transport
The battery is tested according to UN document ST/SG/AC.10/11/Rev.3 Part III, subsection 38.3. It has effective protection against internal overpressure and short circuiting as well as devices for the prevention of violent rupture and dangerous reverse current flow.
The lithium-equivalent content in the battery is below applicable limit values. Therefore, the battery is not subject to national or international regulations pertaining to dangerous mediums, neither as an individual component nor when inserted into a machine. However, the regulations governing dangerous goods may be relevant when transporting several batteries. In this case, it can be necessary to comply with special conditions (e.g., concerning the packaging). For more information, please refer to the instruction sheet (in English) under the following Internet address: http://purchasing.bosch.com/en/start/Allgemeines/Download/index.htm.
Disposal
The machine, accessories and packaging should be sorted for environmental-friendly recycling.
Only for EC countries:

Do not dispose of power tools into household waste!
According the European Guideline 2002/96/EC for Waste Electrical and Electronic Equipment and its implementation into national right,
power tools that are no longer usable must be collected separately and disposed of in an environmentally correct manner.
Battery packs/batteries:
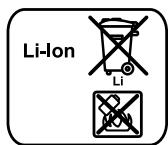
Li-ion:
Please observe the instructions in section "Transport", page 26.
Do not dispose of battery packs/batteries into household waste, fire or water. Battery packs/batteries should be collected, recycled or disposed of in an environmental-friendly manner.
Only for EC countries:
Defective or dead out battery packs/batteries must be recycled according the guideline 91/157/EEC.
Batteries no longer suitable for use can be directly returned at:
Great Britain
Robert Bosch Ltd. (B.S.C.)
P.O.Box 98
Broadwater Park
North Orbital Road
Denham
Uxbridge
UB 95HJ
Tel. Service: +44 (0844) 736 0109
Fax: +44 (0844) 736 0146
Subject to change without notice.
Dr. Egbert Schneider Senior Vice President Engineering
Dr. Eckerhard Strötgen Head of Product Certification
20.08.2007, Robert Bosch GmbH, Power Tools Division D-70745 Leinfelden-Echterdingen
For your safety
Robert Bosch (France) S.A.S.
Dr. Egbert Schneider Senior Vice President Engineering
Dr. Eckerhard Strötgen Head of Product Certification
20.08.2007, Robert Bosch GmbH, Power Tools Division D-70745 Leinfelden-Echterdingen
For your safety

Dr. Egbert Schneider Senior Vice President Engineering
Dr. Eckerhard Strötgen Head of Product Certification
20.08.2007, Robert Bosch GmbH, Power Tools Division D-70745 Leinfelden-Echterdingen
For your safety
Switch off the device and remove the battery before performing any adjustment or cleaning tasks.
The cutting blade continues to run for a few seconds after switching off the cordless grass trimmer.
Senior Vice President
Engineering
Dr. Eckerhard Strötgen
Head of Product
Certification
i.v. Moju
20.08.2007, Robert Bosch GmbH, Power Tools Division
D-70745 Leinfelden-Echterdingen
Dr. Egbert Schneider Senior Vice President Engineering
Dr. Eckerhard Strötgen Head of Product Certification
i.v. Moju
20.08.2007, Robert Bosch GmbH, Power Tools Division D-70745 Leinfelden-Echterdingen
For your convenience

Dr. Egbert Schneider Senior Vice President Engineering
Dr. Eckerhard Strötgen Head of Product
Certification
20.08.2007, Robert Bosch GmbH, Power Tools Division D-70745 Leinfelden-Echterdingen
Bosch Service Center
Telegrafvej 3
2750 Ballerup
Tel. Service Center: +45 (04489) 8855
Fax: +45 (04489) 87 55
E-Mail: vaerktoej@dk.bosch.com
Transport
The battery has been tested according to the UN manual
Dr. Egbert Schneider Senior Vice President Engineering
Dr. Eckerhard Strötgen Head of Product Certification
i.v. Moju
20.08.2007, Robert Bosch GmbH, Power Tools Division D-70745 Leinfelden-Echterdingen
For your safety

Only for EU countries:

Only for EU countries:
Dr. Egbert Schneider Senior Vice President Engineering
Dr. Eckerhard Strötgen Head of Product Certification
20.08.2007, Robert Bosch GmbH, Power Tools Division D-70745 Leinfelden-Echterdingen
Dr. Egbert Schneider Senior Vice President Engineering
Dr. Eckerhard Strötgen Head of Product Certification
20.08.2007, Robert Bosch GmbH, Power Tools Division D-70745 Leinfelden-Echterdingen
For safety reasons
For Greece and Cyprus
The noise levels were measured in accordance with directive 2000/14/EC (1.60 m and 1.0 m distance) and EN 28 662.
The guaranteed sound power level of the machine is 80 dB(A). Sound power level 88 dB(A). Measurement uncertainty K = 5 dB.
The characteristic acceleration of the blade is up to 2.5 m/s².
We declare that this product complies with the following standards or standard documents: EN 786, EN 60335 in accordance with the provisions of the directives 89/336/EEC, 98/37/EC, 2000/14/EC.
Dr. Egbert Schneider Senior Vice President Engineering
Dr. Eckerhard Ströttgen Head of Product Certification
20.08.2007, Robert Bosch GmbH, Power Tools Division D-70745 Leinfelden-Echterdingen
For your safety

Switch the machine off and remove the battery before any adjustment, cleaning, or maintenance.
The blade continues to rotate for a few seconds after the machine is switched off.
Caution: Do not touch the rotating blade.
Assembly
Battery charging
Attention to the voltage: The voltage of the power source must match the voltage indicated on the nameplate of the machine. Machines with a rated voltage of 230 V can also be operated at 220 V/240 V.
Use the charger supplied with the equipment. Only this charger is suitable for the battery of the type used in your machine.
The battery is designed to operate in an ambient temperature range of 0°C to 45°C. This ensures a long service life for the battery.
Note: The battery is supplied partially charged. To ensure full battery capacity, charge the battery in the charger before first use.
The lithium-ion battery can be charged at any time. Interrupting the charging process does not damage the battery.
Removing the battery
Press the battery release button and pull the battery out of the tool downwards.
Charging
Operation
Press the battery release button 2 and hold it, then press the ON/OFF switch 1.
Release the battery release button 2.
Switching off
Release the ON/OFF switch 1.
Note: When you press the ON/OFF switch 1, the motor starts with a minimum delay.
Dr. Egbert Schneider Senior Vice President Engineering
Dr. Eckerhard Strötgen Head of Product Certification
20.08.2007, Robert Bosch GmbH, Power Tools DivisionD-70745 Leinfelden-Echterdingen
For your safety

up to 350 meters (ART 23 Li)
Bosch San. ve Tic. A.S.
Ahi Evran Cad. No:1 Kat:22
Polaris Plaza
80670 Maslak/Istanbul
Customer Advisor: +90 (0212) 335 06 66
Customer Service Line: +90 (0212) 335 07 52
Shipping
Dr Egbert Schneider Senior Vice President Engineering
Dr Eckerhard Ströttgen Head of Product Certification
i.v. Mojgcu
20.08.2007, Robert Bosch GmbH, Power Tools Division D-70745 Leinfelden-Echterdingen
Robert Bosch Sp. z o.o.
Dr. Egbert Schneider Senior Vice President Engineering
Dr. Eckerhard Strötgen, Head of Product Certification
20.08.2007, Robert Bosch GmbH, Power Tools Division, D-70745 Leinfelden-Echterdingen
For your safety
Bosch Service Center PT
K Vapence 1621/16
692 01 Mikulov
Tel.: +420 (519) 305 700
Fax: +420 (519) 305 705
E-Mail: servis.naradi@cz.bosch.com
www.bosch.cz
Transport
Senior Vice President
Engineering
Dr. Eckerhard Strötgen
Head of Product
Certification
i.v. Mo Tu We Th Fr So Su
20.08.2007, Robert Bosch GmbH, Power Tools Division D-70745 Leinfelden-Echterdingen
Dr. Egbert Schneider Senior Vice President Engineering
Dr. Eckerhard Ströttgen Head of Product Certification
i.v. Moju
20.08.2007, Robert Bosch GmbH, Power Tools Division D-70745 Leinfelden-Echterdingen
Az OnBiztonsagsaert

Do not work in the rain and do not leave the battery trimmer standing in the rain.
Never work with the trimmer with damaged caps or protective devices, or if they are removed.

Do not use the charging device with a damaged power cord.
After use, check the tool for wear or damage; if necessary, have it repaired before using it again. This power tool is not intended for use by persons (including children) with limited physical, sensory or mental capabilities or with insufficient experience and/or insufficient knowledge, unless they are under the supervision of a person responsible for their safety and receive instructions from them on how to use the power tool.
Children must be supervised to ensure that they do not play with the power tool or use it for its intended purpose.
Do not mow with the battery trimmer in the rain or in wet grass, and always wear sturdy, closed shoes and long trousers. Never allow children or persons who are not familiar with these instructions to use the battery trimmer. Local regulations may restrict the operator's age. Keep the trimmer out of reach of children. Do not work with the tool if people, especially children, or domestic animals are in the immediate vicinity. The operator/user is responsible for accidents and damage caused to other persons or their property. Do not touch the rotating blade until it has come to a complete stop. The blade continues to rotate after the motor is switched off and can cause injury. Work only in daylight or good artificial light. If possible, do not operate the battery trimmer on wet grass.
Switch off the battery trimmer when transporting it to and from the area to be mowed. Switch on the battery trimmer only when there is sufficient distance between the rotating blade and your hands and feet. Maintain a safe distance from your hands and feet to the rotating blade. Do not use a metal blade for this trimmer. Regularly perform maintenance and servicing of the battery trimmer. Have the battery trimmer repaired only by authorized service workshops. Always keep the ventilation slots clean. Remove the battery from the trimmer:
- Before use, install the instrument without clearance.
- Firmly change the blade - before starting work on the battery example.
Store the instrument in a reliable, dry, inaccessible place. Do not place any objects on the instrument. To ensure safety, replace worn or damaged parts. For replacements, use original spare parts from Bosch.
Before installing the battery, check that the instrument is switched off. Installing the battery into a switched-on instrument can lead to accidents. Charge batteries only with chargers recommended by the manufacturer.
A charger intended for one type of battery may create a fire hazard when used with other batteries.
Use only the specified batteries in the instruments. Use of other batteries may result in injury and fire hazard. Protect unused batteries from paper clips, coins, keys, nails, screws, and other small metal objects that could short-circuit the contacts. Short-circuiting the battery contacts may cause burns or fire. If the battery is used incorrectly, liquid may leak. Avoid contact with it. If it accidentally gets on skin, rinse with water. If this liquid gets into eyes, seek medical help. Leaking battery liquid may cause skin irritation or burns.
Function description

Read all safety instructions and warnings.
Failure to follow the safety instructions and warnings may result in electric shock, fire, and/or serious injury.
Fire and serious injury.
Intended use
This instrument is intended for trimming grass and weeds along edges, as well as on slopes and for trimming edges that cannot be reached with a lawn mower.
Intended use is limited to an ambient temperature range of 0°C to 40°C.
Scope of delivery
Carefully unpack the trimmer and check for the presence of the following parts:
Illustrated components
The numbering of the components corresponds to the illustration on the page with the illustration.
1 On/Off switch 2 Locking button 3 Handle 4 Auxiliary handle screw 5 Auxiliary handle 6 Protective sleeve 7 Tube 8 Ventilation slot 9 Trimmer head
10 Blade 11 Protective cover 12 Trimmer head adjustment 13 Signal light 14 Charger 15 Battery 16 Cutting blade 17 Spool 18 Protective bracket 19 Serial number
The illustrated and described accessories are not included in the standard delivery.
Technical data
Dr. Egbert Schneider Senior Vice President Engineering
Dr. Eckerhard Strötgen Head of Product Certification
i.v. Mojgcu
20.08.2007, Robert Bosch GmbH, Power Tools Division D-70745 Leinfelden-Echterdingen
Safety instructions

Switch off the tool and remove the battery before making any adjustments or cleaning.
After switching off the battery-powered trimmer, the blade continues to rotate for a few seconds.
Caution - Do not touch the rotating blade.
Assembly
The power supply must match the data on the type plate of the tool. Power tools for 230 V operate at 220 V.
Use only the charger supplied with the tool. Only this charger is compatible with the lithium-ion battery of your tool.
The battery is equipped with a temperature control that allows charging only within a temperature range of 0°C to 45°C. This ensures a long service life for the battery.
Note: The battery is supplied partially charged. To ensure full battery power, charge the battery fully before first use.
The lithium-ion battery can be charged at any time without reducing its service life. Interrupting the charging process does not damage the battery.
Removing the battery
Press the battery release button 15 and pull the battery out of the tool.
Charging process
The charging process begins as soon as the charger plug is inserted into the power outlet and the battery is inserted into the charger 14.
Insert the battery 15 according to the figure, first onto the charger (1) and then press the battery 15 down until it clicks into place (2). Remove the battery from the charger in reverse order.
The intelligent charging method automatically determines the state of charge of the battery and, depending on its temperature and voltage, charging is carried out with the optimal current.
This ensures gentle handling of the battery. When left in the charger, it is always fully charged.
Note: Charging is only possible when the battery temperature is within the charging range, see section "Technical Data".
Battery charge indicator
The battery charger analyzes the charging process with current.
Intermittent illumination of the battery charge indicator
Intermittent light
The battery charge indicator 13 indicates a fully charged
state of the battery or an interruption of the charging process when the battery temperature goes beyond the permissible range. As soon as the temperature is within the permissible range, charging of the battery will resume.
Without the battery, the intermittent light of the charge indicator 13 means that the plug is inserted into the socket and the charging device is in working condition.
Charging instructions
With intermittent or repeated charging without interruption, the charging device may heat up. This, however, does not pose a danger and does not indicate a technical malfunction of the power tool.
A significant reduction in operating time after charging indicates aging of the batteries and the need for replacement.
The lithium-ion battery is equipped with an electronic protection system (ECP) against deep discharge. The protection circuit switches off the power tool when the battery is discharged. The tool then stops.
After automatic shutdown of the tool, do not press the switch again. The battery may be damaged.
Assembling the tool

Insert the battery only after the battery compartment has been properly assembled.
Assemble the battery compartment in the following order:
Mounting the protective cap
Place the protective cap 11 on the trimmer head 9.
Screw the protective cap onto the trimmer head and tighten it by hand. Press the protective cap down until it snaps into place (click).
Installing the cutting blade/knife
Press the cutting blade 16 onto the drive shaft (click). Then install the knife 10 on the flange 17, press the knife and pull it outward until it locks into place.
Working with the tool
Switching on
Remove the protective cover intended for the blade and other protective devices.
After switching on the battery trimmer, the blade continues to rotate for a few seconds due to inertia. Wait for the motor/blade to stop before switching on again.
Do not switch the tool off without an intermediate pause.
Installing the battery
Insert the battery into the tool as shown. The battery should click into place noticeably.
Switching off
Press the lock-off button 2 and, in this position, press the on/off switch 1.
Release the lock-off button.
Switching off
OTnyCTnTb BbIKHOuAte1b 1.
Yka3aHHe: AByraTeIb 3aIyUcKaeTc Ipiu 3aDeIcTBoBaHn BbIKluOaTeIa 1 C He3HaUHTeIbHbIM 3aMeAHeHem.
Hactpoika nHcTpymenta
IcTIOb3OBAHnne IpepeTaBIAReMoN pyuKnE
IpeceTablaReMa pyuKa 5 MoXeT 6bItb yCTaHOBLeHa B pa3AuHbIX TIOLOXeHnIx:
1ДЯиЗмЕннЯ ПОLOЖЕня СLEдуET OTПУСТьВИNTpyKN4ип electabntb pyky5. 3aTbBnHTpyK4AaΦHKcPOBaHnIpeCTaBEmo pyK5ByctaHOBHeHOMTOAOKeHHN.
HactpoKa dAnHbI uTaHnF
1Повернтул захимнуюВтуку6Ha 90° 2△ydyHHeHHBbITHybIaHry,AynKopauHbAHN BdBHNb ee.3aTHyb3aXMHyIO BtAYKy 6.
I3meHHeNe yrHa hakLoHa roLOBKn TpHMMepaG
AIN3MeHEnyIgIa Cpe3a HaKaTb Ha TeJa1b 12 NIOBepHyTB TAnHry 7 B XeLaemoe PNOJKeHne. OTnycTHNb TeJa1b 12.
TIOAOXeHne dAa 06pa6OTKn KpOMok
HactpoKa yIa roIobKn TpIMMepa
HaKaTb Ha TnEaAnb 12. IIpnbBecn 7bTaHry 7 B CaMOe HNKeHeIIOAOKeHne. OTyCTNb TpeAa1b 12.
Ппетершени roLOвКТриммера 0Tnyctntb 3axnMHyBtLy6. II Pobephytb 7Ha 90° n yctahOBnTb roLOBky TpHMMepa 9 DA KCAUINBaHN HN CTpnKKn KpOMOK COIaCHO N3O6paXeHNIO. 3aTAYb 3axmMHy O BTyKy 6.
Yka3aHnI IO TpIMHeHHIO

Do not expose the battery to high temperatures, for example, strong solar radiation. The tool does not operate at temperatures below 50°C or above 45°C!
Grass trimming
Move the battery trimmer left and right and keep sufficient distance from the body.
The battery trimmer effectively cuts grass up to 15 cm high. Taller grass should be cut in stages.
Edge trimming
Guide the battery trimmer along the edge of the lawn. To prevent rapid wear of the blade, avoid contact with hard surfaces and stone or brick walls. For edge trimming, use the blade guard as an auxiliary cutting device (accessory).
Trimming grass around trees and bushes
Carefully trim grass around trees and bushes to avoid contact with the bark.
1000 meters (ART 26 Li)
Average conditions
30-350 meters (ART 23 Li)
400 meters (ART 26 Li)
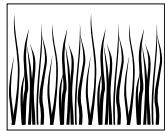
Heavy conditions
600 meters (ART 23 Li)
70-5 meters (ART 26 Li)
Replacing the blade

Clean the blade 17 with a sharp knife from the remaining material and all dirt.
Insert the new blade 10 onto the blade 17, press down and pull outwards until it clicks into place.
Note: Use only Bosch blades. This special development has improved cutting properties. Blades from other manufacturers have lower performance.
Troubleshooting
The following table lists the signs and possible remedies for malfunctions in case of improper operation of the device. If you cannot locate and fix the problem with this help, contact your service workshop.
Warning: Before troubleshooting, switch off the tool and remove the battery.
| Призник | Возможнaya п riчни | Устенения |
| Зашиные koлтык невозможно поставит на д рекушей тAPEков. | Нелравильна монтajх | Сnéту рекушию тapestалу и зашою установить зашиные koлтык, см. «Мontax» |
| Травимер не равотаet | Разражень akкулайтор АKKUMYЛAJTOP холочь/горячий | Зарады akкулайтор, см. Ташие уразался по зарадке Даite akкулайтopy harpeься/octыть |
| Травимер равотает с пегбаям | Ненистовость вунт佩него эльскромоNTажа машны | Образи teсь в сөрвисчю maстерский Образи teсь в сөрвисчю maстерский |
| Черзераима вибраць/шуm | Машина несправна Поломан HOX | Образи teсь в сөрвисчю maстерский Заменчы HOX |
| Низкая п现代物流istsь к一步一步 akkumулайтopa | АKKUMYЛAJTOP п现代物流istsь bokhoe Вremя не сизова лесу И сизова лесу товко Крахковеременho Высокая трава АKKUMYЛAJTOP вьработал сб氧 срок сухь | Плноctью зарадпь akkuулайтор, см. Ташие уразался по зарадке Стrelгichte сту老人家 Заменчы akkuулайтор |
| Нож не двигается | Разражень akкулайтор Машина несправна | Зарады akкулайтор, см. Ташие уразался по зарадке Образи teсь в сөрвисчю maстерский Заменчы HOX |
| Инст贫困人口 не сөрожet | Поломан HOX АKKUMYЛAJTOP заражень полочью Трава hamotалась вokту рекушей тapestлки | Заменчы HOX Зарады akкулайтор, см. Ташие уразался по зарадке Удалиь траву |
| Признak | Возможная рpreciна | Устранения |
| Индikatop зардк аKKулготор 13 сvetпс нелретьно | АKKулготор BCTaВLEн ПОЛHOCТью | Привиьно BCTaВИь аKKулготор B Зaporадhoe усточьо |
| АKKулготор He заржаetс АKKулготор He заржаetс АKKулготор He заржаetс АKKулготор He заржаetс АKKулготор He заржаetс АKKулготор He заржаetс АKKулготор He заржаetс АKKулготор He зarkу АKKулготор He зarkу АKKулготор He зarkу АKKулготор He зarkу АKKулготор He зarkу АKKулготор He зarkу АKKулготор He зarkу АKKулготор He зarkу АKKулготор He зarkу АKKu АKKу АKKу АKKу АKKу АKKу АKKу АKKу АKKу АKKу АKKу АKKу АKKу АKKу АKKу АKKу АKKу АKKу АKKу АKKу АKKу АKKу АKKу АKKу АKKу АKKу АKKu АKKу АKKу АKKу АKKу АKKу АKKу АKKу АKKу АKKу АKKу АKKу АKKу АKKу АKKу АKKу АKKу АKKу АKKу АKKу АKKу АKKу АKKу АKKу Аkkу АKKу АKKу АKKу АKKу АKKу АKKу АKKу АKKу АKKу АKKу АKKу АKKу АKKу АKKу АKKу АKKу АKKу АKKу АKKу АKKу АKKу АKKу АKKу АKKу АКу АКу АКу АКу АКу АКу АКу АКу АКу АКу АКу АКу АКу АКу АКу АКу АКу АКу АКу АКу АКу АКу АКу АКу АКу АСу АСу АСу АСу АСу АСу АСу АСу АСу АСу АСу АСу АСу АСу АСу АСу АСу АСу АСу АСу АСу АСу АСу АСу АСу АКу АКу АКу АКу АКу АКу АКу АКу АКу АКу АКу АКу АКу АКу АКу АКу АКу АКу АКу АКу АКу АКу АКу АКу АKу АКу АКу АКу АКу АКу АКу АКу АКу АКу АКу АКу АКу АКу АКу АКу АКу АКу АКу АКу АКу АКу АКу АКу АКу АЗу АКу АКу АКу АКу АКу АКу АКу АКу АКу АКу АКу АКу АКу АКу АКу АКу АКу АКу АКу АКу АКу АКу АКу АКу АН АКу АКу АКу АКу АКу АКу АКу АКу АКу АКу АКу АКу АКу АКу АКу АКу АКу АКу АКу АКу АКу АКу АКу АКу АКУ АКу АКу АКу АКу АКу АКу АКу АКу АКу АКу АКу АКу АКу АКу АКу АКу АКу АКу АКу АКу АКу АКу АКу АКу АКY АКу АКу АКу АКу АКу АКу АКу АКу АКу АКу АКу АКу АКу АКу АКу АКу АКу АКу АКу АКу АКу АКу АКу АКу АКy АКу АКу АКу АКу АКу АКу АКу АКу АКу АКу АКу АКу АКу АКу АКу АКу АКу АКу АКу АКу АКу АКу АКу АКу АКи АКу АКу АКу АКу АКу АКу АКу АКу АКу АКу АКу АКу АКу АКу АКу АКу АКу АКу АКу АКу АКу АКу АКу АКу АК: АКу АКу АКу АКу АКу АКу АКу АКу АКу АКу АКу АКу АКу АКу АКу АКу АКу АКу АКу АКу АКу АКу АКу АКу АКу | Привиьно BCTaВИь ВЛТeРсeльчы БЛТePсeльчы СЛТePсeльчы ДЛТePсeльчы ЕЛТePсeльчы БЛТePсeльчы СЛТePсeльчы ДЛТePсeльчы ЕЛТePсeльчы БЛТePсeльчы СЛТePсeльчы ДЛТePсeльчы ЕЛТePсeльчы БЛТePcS儿чы СЛТePсeльчы ДЛТePсeльчы ЕЛТePсeльчы БЛТePсeльчы СЛТePсeльчы ДЛТePсeльчы ЕЛТePсeльчы БЛТePсeльчы СЛТePсeльсчы ДЛТePсeльчы ЕЛТePсeльчы БЛТePсeльчы СЛТePсeльчы ДЛТePсeльчы ЕЛТePсeльчы БЛТePсeльчы СЛТePсeльчы ДЛТePсeльсчы ЕЛТePсeльчы БЛТePсeльчы СЛТePсeльчы ДЛТePсeльчы ЕЛТePсeльчы БЛТePсeльчы СЛТePсeльчы ДЛТePсeльчы ЕЛТePсeльсчы ВЛТePсeльчы СЛТePсeльчы ДЛТePсeльчы ЕЛТePсeльчы ВЛТePсeльчы СЛТePсeльчы ДЛТePсeльчы ЕЛТePсeльчы ВЛТePсeльчы СЛТePсeльчы ДЛТePсeльчы ЕЛТePсeльчы ВЛТePсeльсчы СЛТePсeльчы ДЛТePсeльчы ЕЛТePсeльчы ВЛТePсeльчы СЛТePсeльчы ДЛТePсeльчы ЕЛТePсeльчы ВЛТePсeльчы СЛТePсeльсчы ДЛТePсeльчы ЕЛТePсeльчы ВЛТePсeльчы СЛТePсeльчы ДЛТePсeльчы ЕЛТePсeльчы ВЛТePсeльчы СЛТePсeльчы ДЛТePсeльсчы ЕЛТePсeльчы ВЛТePсeльчы СЛТePсeльчы ДЛТePсeльчы ЕЛТePсeльчы ВЛТePсeльчы СЛТePсeльчы ДЛТePсeльчы ЕЛТePсeльсчы ВЛТePсeльчы СЛТePсeльчы ДЛТePсeльчы ЕЛТePсeльчы ВЛТePсeльчы CЛТePсeльчы ДЛТePсeльчы ЕЛТePсeльчы ВЛТePсeльчы СЛТePсeльчы ДЛТePсeльчы ЕЛТePсeльчы ВЛТePсeльчы СЛТePсeльчы ДLТePсeльчы ЕЛТePсeльчы ВЛТePсeльчы СЛТePсeльчы ДLТePсeльчы ЕЛТePсeльчы ВЛТePсeльчы СЛТePсeльчы ДLТePсeльчы ЕЛTePсeльчы ВЛТePсeльчы СЛТePсeльчы ДLТePсeльчы ЕЛТePсeльчы ВЛТePсeльчы СЛТePсeльчы ДLТePсeльчы ЕЛТePсeльчы ВЛТеPсeльчы СЛТePсeльчы ДLТePсeльчы ЕЛТePсeльчы ВЛТePсeльчы СЛТePсeльчы ДLТePсeльчы ЕЛТePсeльчы ВЛТePсeльчы СЛТe Pсeльчы ДLТePсeльчы ЕЛТePсeльчы ВЛТePсeльчы СЛТePсeльчы ДLТePсeльчы ЕЛТePсeльчы ВЛТePсeльчы СЛТePсeльчы ДLТePСeльчы ЕЛТePсeльчы ВЛТePсeльчы СЛТePсeльчы ДLТePсeльчы ЕЛТePсeльчы ВЛТePсeльчы СЛТePсeльчы ДLТePсeльчы ЕЛТePсEeMHTb ВЛТePсeьмHTb СЛТePсeьмHTb ДLТePсeьmHTb ЕЛТePсeьmHTb ВЛТePсeьmHTb ДLТePсeьmHTb ЕЛТePсeьmHTb ВЛТePсeьmHTb ДLТePсeьmHTb ЕЛТePсeьmHTb ВЛТePсeьmHTb ДLТePсeьmHTb ЕЛТePсeьmHTb BЛТePсeьmHTb СЛТePсeьmHTb ДLТePсeьmHTb ЕЛТePсeьmHTb ВЛТePсeьmHTb СЛТePсeьmHTb ДLТePсeьmHTb ЕЛТePсeьmHTb ВЛТePсeьmHTb СЛТePсeьmHTb ДLТePсeьmHTb ЕЛТePсeьmHTb ВЛТeFtSb СЛТeFtSb ДLТeFtSb ЕЛТeFtSb ВЛТeFtSb СЛТeFtSb ДLТeFtSb ЕЛТeFtSb ВЛТeFtSb СЛТeFtSb ДLТeFtSb ЕЛТeFtSb ВЛТeFtSb СЛТeFtSb ДLТeFtSs. ЕЛТeFtSb ВЛТeFtSb СЛТeFtSb ДLТeFtSb ЕЛТeFtSb ВЛТeFtSb СЛТeFtSb ДLТeFtSb ЕЛТeFtSb ВЛТeFtSb СЛТeFtSb DArtSb ВЛТeFtSb СЛТeFtSb DArtSb ВЛТeFtSb СЛТeFtSb DArtSb ВЛТeFtSb СЛТeFtSb DArtSb ВЛТeFtSb СЛТeFtSb DArtSb ВЛТeRfSb СЛТeRfSb DArtSb ВЛТeRfSb СЛТeRfSb DArtSb ВЛТeRfSb СЛТeRfSb DArtSb ВЛТeRfSb СЛТeRfSb DArtSb ВЛТeRfSb СЛТeRfSb DArtSb |
Maintenance and service
Maintenance and cleaning

Before starting maintenance or adjustment of the tool, remove the battery.
Note: To ensure long service life and reliable operation, regularly perform the following maintenance work.
Check the tool for visible defects such as loose fasteners and worn or damaged parts.
Check the condition of the protective devices and their correct fastening. Perform necessary work procedures for maintenance or repair.
If the machine, despite careful manufacturing and testing, fails, repair should be carried out by an authorized service workshop for Bosch tools.
Please always specify the 10-digit item number from the type plate of the tool in all inquiries and orders for spare parts.
Storage conditions

Switch off the power tool and remove the battery. Make sure that the battery is removed before storing.
Clean the trimmer thoroughly from the outside with a soft brush and a cloth. Do not use water, solvents or polishing agents. Remove all accumulated grass and dirt, especially from the ventilation slots.
Place the tool on its side and clean the protective guard 11 from the inside. Remove compressed grass residues with a wooden or plastic spatula.
The battery should be stored at a temperature between 0°C and 45°C.
After-sales service and customer advice
The service department will answer all your questions regarding repair and maintenance of your product as well as spare parts. You can also find exploded views and information on spare parts at:
www.bosch-pt.com
The Bosch customer advice team will be happy to help you with any questions regarding products and accessories.
Russia
OOO «Robert Bosch»
Service center for power tools
Power tools
ul. Akademika Koroleva 13, stroenie 5
129515, Moscow
Tel.: +7 (0495) 9358806
Tel.: +7 (0495) 9355364
Fax: +7 (0495) 9358807
E-Mail: rbru_ct_asa_mk@ru.bosch.com
OOO «Robert Bosch»
Service center for power tools
Electrical tools
ul. Zaitseva, 41
198188, Saint Petersburg
Tel.: +7 (0812) 7 84 13 07
Fax: +7 (0812) 7 84 13 61
E-Mail: rbru.pt_asa_spb@ru.bosch.com
OOO «Robert Bosch»
Service center for power tools
Electrical tools
Topckn MmKpopaH, 53
630032, Novosibirsk
Tel.: +7 (0383) 3599440
Fax: +7 (0383) 3599465
E-Mail: rbru.pt_asa_nob@ru.bosch.com
LLC "Robert Bosch"
Service center
for power tools
ul. Fontannaya Brigada, 14,
620017, Yekaterinburg
Tel.: +7 (0343) 3658674
Tel.: +7 (0343) 378 77 56
Fax: +7 (0343) 378 79 28
Germany
ACU YT-18
Transport
The battery has been tested according to the UN ST/SG/AC.10/11/Rev.3, Part III, Sub-section 38.3. The battery is equipped with effective protection against internal overpressure, short circuit, and also with devices to prevent static discharge under the influence of a single load and dangerous reverse current. The equivalent quantity of lithium batteries is below the corresponding limit values. Therefore, the regulations for dangerous goods do not apply to the battery, either as a separate part or when built into an instrument. However, the regulations for dangerous goods may become relevant when transporting several batteries. In such a case, it may be necessary to observe special conditions (e.g., for packaging). You can find details in the English documentation at the following address on the Internet: http://purchasing.bosch.com/en/start/Allgemeines/Download/index.htm.
Disposal
Power tools, accessories and packaging that have reached the end of their service life should be handed in for environmentally friendly recycling.
Only for EU countries:

Do not dispose of power tools in household waste! According to the European Directive 2002/96/EC on old electrical and electronic appliances and devices, and its implementation in national law, power tools that have reached the end of their service life must be collected separately and handed in for environmentally friendly recycling.
In accordance with the implementation of this Directive in national law, power tools that have reached the end of their service life must be collected separately and handed in for environmentally friendly recycling.
Batteries:
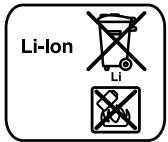
My Li:
Please observe the note in the "Transport" section, page 186.
Do not dispose of batteries in household waste, do not throw them into fire or water. Batteries should be collected and handed in for recycling or environmentally friendly disposal.
Only for EU countries:
The rechargeable battery/ies must be disposed of in accordance with Directive 91/157/EEC.
We reserve the right to make changes.
Safety instructions
Warning! Please read the following instructions carefully. Familiarize yourself with the controls and proper use of the battery-powered tool. Keep these instructions for future reference.
Symbols on the battery-powered tool

General warning.

Read the operating instructions.

Wear protective goggles.
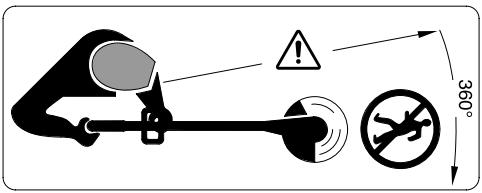
Make sure that people nearby are not endangered.
The tool must be kept at a safe distance from the workpiece.

Before first use, charge the device or if it has been stored for a short time, charge it without load, which affects the battery.

Do not work with the device and do not leave the battery-powered tool outdoors in the rain.
Never work with the battery-powered tool if it is damaged or if the casing or safety devices are defective.

Do not use the charging device if it is damaged or defective.
After an electric shock, check the device for damage and if necessary have it repaired before using it again. The device may only be used by persons (including children) with limited physical, sensory or mental capabilities or insufficient experience and/or knowledge if they are supervised by a person responsible for their safety or have received instructions on how to use the device. It must be ensured that children do not play with the device. Do not work with the battery-powered tool barefoot or in open sandals and wear protective clothing and long trousers. In any case, do not allow the battery-powered tool to be used by persons who are not familiar with these instructions. National regulations may restrict the use of the device. If you do not use the device yourself, store it out of the reach of children. Never work with the device when people, especially children or pets, are nearby. For accidents or injuries caused by use, the user is responsible. Before touching the tool, make sure it has stopped. After switching off the motor, it may continue to rotate and cause injury. - Work only in daylight or with good artificial lighting. Do not use the battery-powered tool on wet grass. When moving the battery-powered tool from the place of work, switch it off.
Keep the trimmer away from the battery charger while your hands and feet are at a sufficient distance from the cutting attachment. Do not put your hands or feet near the cutting attachment. In any case, do not use metal blades in your device. Regularly check the trimmer with the battery charger and maintain it according to its maintenance instructions. Send the trimmer with the battery charger for repair only to authorized service workshops. Make sure that the ventilation slots are not blocked. Remove the battery charger from the battery:
- Before starting work, protect the device from moisture, and before maintenance or cleaning of the trimmer with the battery charger, remove the battery.
Store the device in a safe, dry, and unheated room. Do not place other objects on the device. Do not use the device if the safety devices are damaged or defective. Make sure that all parts are in good condition. Before inserting the battery, make sure the device is switched off. Inserting the battery into a switched-on device can lead to accidents. Charge the battery only in the chargers recommended by the manufacturer. The charger may catch fire if it is used to charge batteries not intended for it.
Use only the intended batteries in the device. Using other batteries can cause injuries and fire hazards. Store the battery away from paper clips, coins, screws, and other small metal objects that can bridge the contacts. Short-circuiting the battery contacts can cause burns or fire. When using the battery for the first time, it may emit smoke. Keep contact with it. In case of accidental contact, rinse the affected area with water. If liquid gets into the eyes, consult a doctor immediately. Smoke from the battery can cause skin irritation or chemical burns.
Safety instructions

Read all safety instructions. Failure to follow the instructions may result in electric shock, fire, and/or serious injuries.
Intended use of the device
The device is intended for cutting grass and weeds with blades, as well as on slopes and under benches, where a lawn mower cannot reach.
Use according to the intended purpose is designed for an ambient temperature of 0°C to 40°C.
Scope of delivery
Carefully remove the device from the packaging and check that all listed parts are complete:
- Trimmer
- Protective cover, adjustable auxiliary handle (mounted)
- Disc blade
- Charger, instructions for use
The tool can only be used with the appropriate battery, please return it to the store.
Components shown
The numbering of the components shown refers to the illustration on the graphics page at the beginning of the manual.
1 Battery pack 2 Battery unlock button 3 Handle 4 Screwdriver bit 5 Screwdriver bit with adjustable torque 6 Locking sleeve 7 Tube 8 Ventilation slots 9 Impact head
10 Bit 11 Protective cover 12 Impact head adapter 13 LED indicator 14 Charger 15 Battery pack 16 Disc bit 17 Wrench 18 Protective guard 19 Serial number
The illustration on the cover page is not part of the standard delivery scope.
Technical data
Dr. Egbert Schneider Senior Vice President Engineering
Dr. Eckerhard Strötgen Head of Product Certification

i.v. Mojgcu
20.08.2007, Robert Bosch GmbH, Power Tools Division D-70745 Leinfelden-Echterdingen
Safety instructions

Before adjusting or replacing the tool, switch off the tool and remove the battery pack.
After switching off the tool, the bit continues to rotate for a few seconds.
Caution - Do not touch the bit while it is still rotating.
Charging the battery
Charging is only possible within the specified temperature range. The device is designed for 230 V and can also operate on 220 V/240 V.
Use the charging device only as intended. The charging device is designed for lithium-ion batteries used in your device.
The battery has a temperature control element that allows charging only within a temperature range of 0°C to 45°C. This ensures proper battery performance and longevity.
Note: The battery is supplied partially charged. To ensure the battery reaches its full capacity, before first use with the device, the battery must be fully charged using the charging device.
The lithium-ion battery can be charged at any time without reducing its service life. Interrupting the charging process does not damage the battery.
Removing the battery
Press the battery release button, pull the battery back and remove it from the device.
Charging
The charging process begins when the plug of the charging device is inserted into a power outlet and the battery is inserted into the charging device.
Insert the battery as shown in the figure, first into the charging device (1) and then press the battery down (2). To remove the battery, proceed in reverse order.
Thanks to the intelligent charging process, the battery charge level is automatically detected and charging is carried out with the optimal current depending on temperature and battery voltage.
Store the battery. If stored in the charging device, it will be kept fully charged.
Note: The charging process is only possible if the battery temperature is within the permissible charging temperature range, see 'Technical Data' section.
Battery charge indicator 13
The charging process is signaled by the battery charge indicator 13.
Steady glow of the battery charge indicator 13
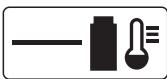
Steady glow
The battery charge indicator 13 signals that the battery
battery is fully charged or the battery temperature is outside the permissible charging temperature range, and therefore charging is not possible. Only when the permissible charging temperature range is reached, the battery will be charged.
If the battery is not installed, the steady glow of the indicator 13 indicates that the device is plugged into a socket and the charger is ready for operation.
Charging instructions
During constant charging cycles or when several charging cycles are repeated one after another, the charger may heat up. However, this is not dangerous and does not indicate a technical malfunction of the charger.
A significantly shortened operating time after charging indicates that the battery is worn out and must be replaced.
The lithium-ion battery is protected against deep discharge by the "Electronic Cell Protection (ECP)". When the battery is discharged, the protection circuit switches off. The battery is then no longer operable.
After automatic shutdown, do not press the switch further. This could damage the battery.
Mounting the accessory

Insert the battery only when the tool with the battery is completely assembled.
Assemble the tool with the battery in the following order:
Mounting the protective cover
Place the protective cover 11 on the trimmer head 9.
Turn the protective cover in the direction of the arrow on the trimmer head and push it back. Press the protective cover down until it clicks.
Mounting the cutting blade/knife
Place the cutting blade 16 on the drive shaft, pressing it down (click). Place it on the flange 17, press it down and turn it until it locks securely.
Operation
Working instructions

Remove stones, branches, and other objects from the area where you will be cutting grass.
After switching off the trimmer with a battery, it continues to rotate for a few seconds. Wait until it stops completely before switching it on again.
Do not switch it on again immediately after switching off.
Inserting the battery
Insert the battery into the handle as shown. The battery must click into place.
Switching on
Press the switch lock 2 and, while holding it, press the switch 1.
Release the switch lock 2.
Instructions for use 1.
Insertion: The pressure regulator is activated automatically with a delay.
Adjusting the handle
Use the adjusting handle
The adjusting handle 5 can be set in different positions:
To change the position, loosen the screw on the handle 4 and move the adjusting handle 5. Tighten the screw on the handle 4 to lock the adjusting handle 5 in the set position.
Adjusting the sprayer depth F
Turn the locking sleeve 6 by 90° to release the pipe, insert the pipe to the desired depth, then tighten the locking sleeve 6 again.
Adjusting the angle of the sprayer head C
To change the cutting angle of the grass, press the pedal 12 and tilt the pipe 7 to the desired position.
Release the pedal 12.
Adjusting the grass cutting with the knives
To adjust the angle of the sprayer head: press the pedal 12. Move the pipe 7 to the desired position. Then release the pedal 12.
Adjust the sprayer head: loosen the locking sleeve 6. Turn the pipe 7 by 90° to adjust the sprayer head 9 for cutting grass/trimming grass with knives, as shown. Then tighten the locking sleeve 6 again.

Protect the battery from heat, e.g., from direct sunlight, as well as from fire. Do not operate at temperatures below 0°C or above 45°C!
Trimming the grass
With the battery inserted, hold the trimmer with both hands, keeping it in a stable position.
Example: With the battery inserted, you can trim grass up to 15 cm high. Tall grass should be trimmed gradually.
Trimming with the grass trimmer
With the battery inserted, guide the trimmer along the ground. Move the cutting line slowly, avoiding contact with hard surfaces and stones.
For optimal use, always use the recommended cutting line (accessory).
Maintenance and care

Before any work, remove the battery from the device.
Note: Regularly perform the maintenance tasks described below to ensure long and reliable operation of the device.
Check the device for visible damage, e.g., cracks, loose parts, or signs of wear. Replace damaged parts before use.
Check that the guards and protective devices are not damaged and are correctly fitted. Before starting operation, carry out any necessary maintenance or repair work.
Despite careful manufacturing and testing, the device may still malfunction. Repairs must only be carried out by qualified personnel authorized by Bosch.
For any questions or spare parts orders, please specify the 10-digit order number on the type plate.
Ticra po6otn/36epirahna

BmKHiTb PnHaI i BmMitb akymyAToPhy 6aTapeo. Ipeep 36epiraHHM IpekoHaTeC, 0c akymyAToPha 6aTapeR BmHrTa.
IpyHTOBHO IpoouHuaTe TpHMeP 30BHi M'RAKOU OI ToUKOIO I raHcipKOIO. He BnKOpNCTOByte BOy, PO3uHHNKn Ta IPOlipyBaIbHI peOuBHNI. BnDaJIaJIte yci cKoTIaIHnI 3a6pyDHeHb i uactHnOK, OcO6ANBO KOLO BEHTNAJIiHNX OTBopIB 8.
TOKlaIb II pIIaHa Ha6i k I IpoUncITb 3cepeHn 3axnchy KpnuKy 11. 3piaHy TpaBy, 00 ToHa6nBaIacB, BmIMtB 5MaTKOM DepeBHN a6o TAACTMaCn.
IpebeipnTe, uH He IpoKoKeHk KpHsKn i 3axnChi II pncTpoi i uH IpaBnBHO BOHcNdAITb. Ipeed noaTkOM ekCIIyatauii 3aiChITb Hoe6xdiHPi po60Tu 3 o6cLyroBvBaHn a6o peMOHTy.
AkymyANTophy 6aTapeo CIAID 36epiTaTHIpi TEMIIepaTyPi BiD 0°C DO 45°C
Cepbicha MaicTeprn i o6cayrobyBaHHKJIeHTiB
B cepbicih MaictepHi Bn OTPmaeTe BiIIObiBaHa Baasi 3aHHTAHNCTOCOBHO pemOHy iTexHHyHoro 06cLyROByBaHHaBo IPOdykTy.
MaioHKn B deTaIaX i InOpMaIIO IooO 3aIuaCTNH MoKHa 3HaTn 3a aDpecoIo:
www.bosch-pt.com
KohcybTaHTn Bosch 3 paadicto DOIOTOMOxyt Bam npu 3aHNTaHHx CTOCOBHO KyiBIA, 3aCTOCyBaHN i HalaorDkeHn IPOdYkTIB i npuaAdo DO HNX.
YkpaHa
Bou CepBic LcHtp EAnkTpOiHcTppyMeHTiB
ByI. KpaHn, 1, 02660, KnB-60
TeA.:+38(044)5120375
Tel.: +38 (044) 512-04-46
Tel.: +38 (044) 512-05-91
Fax: +38 (044) 512-04-46
E-Mail: service@bosch.com.ua
The addresses of the regional warranty service centers are specified in the warranty certificate.
Transportation
The battery complies with the UN ST/SG/AC.10/11/Rev.3, Part III, Section 38.3. It has effective protection against internal overpressure and short circuit, as well as against static shock from a single impact and from dangerous reverse current.
The quantity of lithium equivalent contained in the batteries is less than the permissible limit. For this reason, the battery - whether alone or installed in the device - is not subject to national and international regulations for dangerous goods. However, regulations for dangerous goods may apply to the transport of certain types of batteries. In such a case, it may be necessary to comply with special conditions (e.g., regarding packaging). Further information can be obtained in English on the Internet at the following address:
http://purchasing.bosch.com/en/start/Allgemeines/Download/index.htm.
Disposal
Electrical devices, accessories, and packaging should be disposed of in an environmentally friendly manner for recycling.
EU countries only:

Do not dispose of electrical devices in household waste!
According to the European Directive 2002/96/EC on waste electrical and electronic equipment (WEEE) and its implementation in national legislation,
electrical devices that are no longer usable must be collected separately and disposed of in an environmentally friendly manner.
Accumulator battery:
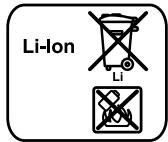
Battery:
Dr. Egbert Schneider Senior Vice President Engineering
Dr. Eckerhard Strötgen Head of Product Certification
ppa. Maee i.v. Nogcu
20.08.2007, Robert Bosch GmbH, Power Tools Division D-70745 Leinfelden-Echterdingen
For your safety

Switch off the power tool and remove the battery before making any adjustments or cleaning.
Bosch Service Center
Str. Horia Macelariu Nr. 30-34, 013937 Bucharest
Tel. Power tool service: +40 (021) 4 05 75 40
Fax: +40 (021) 405 75 66
E-Mail: infoBSC@ro.bosch.com
Tel. Technical consultation: +40 (021) 4 05 75 39
Fax: +40 (021) 405 75 66
E-Mail: infoBSC@ro.bosch.com
www.bosch-romania.ro
Transport
The battery is tested according to UN manual ST/SG/AC.10/11/Rev.3, part III, subparagraph 38.3. It has adequate protection against internal overpressure and short circuit, and is also equipped with protective devices that prevent forced rupture and dangerous reverse current.
The operating temperature range for the power tool is between 0°C and 40°C
Scope of delivery
Carefully remove the power tool from the packaging and check that the following items are complete:
- Cable
- Cutting guard Adjustable auxiliary handle (pre-assembled)
- Cutting disc
- Cutting knife Charging device Operating instructions
If any parts are missing or damaged, please contact your dealer.
Illustrated components
The numbering of the illustrated components refers to the illustration of the power tool on the page with the graphics.
1 On/off switch 2 Lock-off button for the on/off switch 3 Auxiliary handle 4 Screw for the auxiliary handle 5 Adjustable auxiliary handle 6 Locking sleeve 7 Tube 8 Ventilation slots 9 Saw blade 10 Cutting knife 11 Cutting guard 12 Adjustable cutting depth stop 13 LED light 14 Charging device 15 Battery 16 Cutting disc 17 Chip deflector 18 Identification label 19 Serial number
Images of the functions and descriptions in the operating instructions for the power tool are not included in the scope of delivery.
Technical data
| Актуларова Травокocака | ART 23 Li | ART 26 Li |
| Каталожен Homep | 3 600 H78 K.. | 3 600 H78 L.. |
| СкорOST на вьртени на праzenхов | min-1 | 7500 |
| Рergулируема ръковытka | ● | |
| Рergулиpane на вьгILA на наимлona на ржесцета гава/настоюване за рязаниВбиизост do рьб | ● | |
| Диаметер на рязани | cm | 23 |
| Маса съласно EPTA-Procedure 01/2003 | kg | 2,3 |
| Серень Homep | Вижты сэршиныnomer 19 (tabeika насыекшпс无所谓) на машина | 2,4 |
| Актуларова батерия | Li-lon | Li-lon |
| Каталожен Homep | 2 607 336 037 | 2 607 336 039 |
| Номинано наразожения | V= | 14,4 |
| Катацитet | Ah | 1,3 |
| Вре'mе за заразождае (при наразлноразroduна akтуларова сатерия) | min | 180 |
| Зарадно уст四项 | AL 2204 CV | AL 2204 CV |
| Каталожен Homep | 2 607 225 2.. | 2 607 225 2.. |
| Зараден ТOK | mA | 230 |
| Доюстим темпера typени диапазон назатерия | °C | 0-45 |
| Маса съласно EPTA-Procedure 01/2003 | kg | 0,7 |
Information on noise and vibration
Refer to the definitions according to 2000/14/EC (height 1.60 m, distance 1.0 m) and EN 28 662.
The typical A-weighted noise level is: sound pressure level 80 dB(A); sound power level 88 dB(A). Uncertainty K=5 dB.
Dr. Egbert Schneider Senior Vice President Engineering
Dr. Eckerhard Strötgen Head of Product Certification
i.v. Mojgcu
20.08.2007, Robert Bosch GmbH, Power Tools Division D-70745 Leinfelden-Echterdingen
For your safety

Before adjusting the power tool or before replacing accessories,
remove the battery pack from the power tool.
The removed battery pack must be kept away from children.
Caution - Do not touch the blade.
Mounting
The battery is a lithium-ion battery.
Connecting the charger: The charging voltage must match the data printed on the nameplate of the power tool. Power tools marked with 230 V can also be charged with 220 V/240 V.
Use only the charger supplied with the power tool. The charger is suitable for the lithium-ion battery of your power tool.
The battery has a temperature control that allows charging only in the range between 0 °C and 45 °C. This increases the service life of the battery.
Note: The battery is delivered partially charged. To achieve full battery capacity, fully charge the battery in the charger before first use.
The lithium-ion battery can be charged at any time without reducing its service life. Interrupting the charging process does not damage the battery.
Removing the battery
Press the battery release button and pull the battery 15 out of the power tool.
Charging
The charging process begins as soon as the charger plug is inserted into the socket and the battery is placed in the charger 14.
Place the battery 15 into the charger as shown in the figure, first at the front (1) and then press the battery 15 into the rear end (2). The battery is removed in the reverse order.
Thanks to the intelligent charging process, the condition of the battery is detected and it is charged with the optimal current and voltage for the current temperature.
This extends the service life of the battery, and when stored on the charger, it is always fully charged.
Note: The battery is charged only if the temperature is within the permissible range, see section “Technical Data”.
Charging indicator of the battery 13
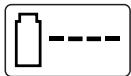
The battery charge indicator lights up via the charging light 13.
Continuous lighting of the charging light 13
Continuous lighting of the charging light 13 indicates that the battery is fully charged.
The temperature of the battery is outside the permissible charging range, so the battery is not being charged at the moment. When the temperature falls within the permissible temperature range, the charging process begins.
Continuous lighting of the charging light 13, when a battery is inserted, indicates that the battery is inserted and the charging device is ready for operation.
Charging indicator
During continuous charging, respectively during repeated consecutive charging of the battery, the charging device may heat up. This is normal and does not indicate a technical defect of the charging device.
Significantly reduced operating time after charging indicates that the battery is worn out and must be replaced.
The lithium-ion battery is protected against deep discharge by "Electronic Cell Protection (ECP)". When the battery is discharged, the power tool switches off via a protective circuit: the tool stops turning.
After automatic switch-off of the power tool, do not continue to press the On/Off switch.
The battery can be damaged.
Removing the battery
Insert the battery only after the power tool is completely switched off.
Removal of the battery must be carried out in the following sequence:
Mounting on the guide rails
Read the safety instructions in Chapter 9.
Read the safety instructions carefully before use. Attach the safety instructions to the device, until you have read the operating instructions.
Mounting the cutting blade
Write the number 16 in the space provided. Place the guard on the blade, press it down until you hear it click.
Working with the device
Switching on
Remove stones, nails, and other hard objects from the work area.
Before switching on the device, make sure the blade is not touching anything. If you need to switch it on again, wait for the motor to stop completely.
Do not switch the power tool on immediately after it has been switched off.
Installing the battery
Insert the battery into the power tool as shown in the figure. You should hear a click.
Switching on
Press and hold the lock-off button, then press the trigger switch.
Release the lock-off button and the trigger switch.
Switching off
OTnycheTe nycKOBnI pekcbau 1.
YtBtBaHe: EAnKtpoDbnIgATEIaTcCTapTnpa MaKo CLeA KaTo 6bDe HATNCHaT PyCKOBnT PpeKcbau 1.
HactpoBaHe Ha eNeKtponHcTpymenta
N3TNOA3BaHe Ha TIOABHXKaHa TaPbKoXBaTaKa
TIOBnXhata pKoXBaTka 5 MoKe Da 6bDe IOCTaBeHa B pa3AnuH NTOAOKeHn:
3a da II pOMeHNTe IIO3NcIra, pa3BnTe BnHTa Ha pbKoXBaTkaTa 4 N I3MeCTe IIOBHXHaTa pbKoXBaTka 5. 3aTeHHeBnHTa4,3a Da 3aCTOpHnTE IOaBnKHaTa pbkoXBaTka5Bn36paHaTa IO3nIy.
PeryuHahe Ha BnCOnHnTa Ha TpeBokocauKaTa F
3aBbptete 3aTgaaTa BTyka 6 Ha 90° 3a yIbIxABaHe n3IbPnAe He nIpaBIAuTaIaHa, 3a CkbcBaHe BkapaTe HaBbTppe.
3aTeHHeTe OTHOBO 3aTgAaata BAyKa 6.
PeryIpaHe Ha bIbIa Ha NaKIoHa Ha pexeMaTa rIaBa C
3a Da II pOMeHnTe HaKLoHa Ha pR3aHe, HAtncHeTeIeAa12 N 3aBpTeTe HaPpaBAAuTa UaHra7B JKeAHaTa ITO3nU.
OTTyncheTe TeaAa12.
HactpoBaHe 3a pHa3aHe B 6An3oCTdo pb6
HacpoTe HaKaIOna Ha peKeEuTa rIaBa:
HaTnCHeTe PteaIa1 12. TocTaBeTe HaipraBAAbaTa 7 B HauHaTHo3nua. OTHOBO OTyCHeTe Pdaa 12.
1. Operation of the device:
Release the trigger lock 6. Turn the direction switch 7 to 90° directly as shown in the figure. Then press the trigger.
Operating instructions

Charge the battery pack before first use, e.g., due to shipping or storage in a sunny place.
The electric tool does not work at temperatures below 0°C or above 45°C!
Cutting with the hedge trimmer
Always hold the hedge trimmer with both hands on the handles, keeping a safe distance from the blade.
The hedge trimmer can effectively trim hedges up to 15 cm thick. If the hedge is thicker, cut in stages.
Cutting near the ground
Guide the hedge trimmer parallel to the ground. To avoid rapid blade wear, avoid contact with hard surfaces or walls.
For better control, use the cutting guide for the first 18 cm of the blade (not included in the standard package).
Cutting around trees and shrubs
Cut carefully around trees and shrubs to avoid damaging them with the blade. If the bark of the plants is damaged, they may die.
For better control, use the cutting guide for the first 18 cm of the blade (not included in the standard package).
Battery capacity
The battery life depends on the working conditions:
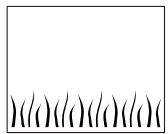
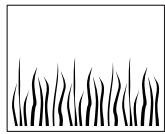
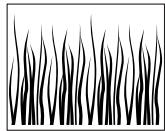
Working conditions:
Δ 0800 meters (ART23Li)
Δ 01000 meters (ART 26 Li)
Average working conditions:
Δ 0350 meters (ART 23 Li)
Δ 0440 meters (ART 26 Li)
Heavy working conditions:
Δ 060 meters (ART 23 Li)
Δ 075 meters (ART 26 Li)
Blade length D
Before starting any work on the electric tool, remove the battery.
To remove the worn blade 10, press it inward until it pops out of the slot 17.
Clean slot 17 carefully from any debris before measuring.
To install a new blade 10, place the blade 10 on slot 17, press it down and pull it outward until it locks into place.
Operation: Use only original spare parts. Production of spare parts is carried out in accordance with the requirements of the standards. The use of other parts may lead to malfunctions and reduced productivity.
Troubleshooting
The table below shows symptoms of malfunctions and how you can help yourself if the power tool stops working normally. If you cannot solve the problem by following the instructions in the table, contact an authorized service center for power tools.
Warning: Before troubleshooting, disconnect the power tool and remove the battery pack.
Before performing any work on the power tool, remove the battery pack.
Cleaning: Follow the maintenance procedures regularly to ensure long and reliable operation of the power tool.
Regularly check the power tool for visible damage, e.g., loose connections, worn or damaged parts.
Check the guards and protective devices for proper and correct operation. Perform necessary repairs before starting work with the power tool.
If despite careful manufacturing and testing the power tool becomes damaged, the repair must be carried out by an authorized service center for power tools.
When contacting the representatives of your company, please provide the 10-digit catalog number printed on the nameplate of the power tool.
Following the operation/storage

Disconnect the power tool and remove the battery pack. Before storing the power tool, make sure the battery pack is removed.
Clean the tool housing carefully with a soft brush and cloth. Do not use water, solvents, or abrasive cleaners. Remove all grass and debris, especially from the ventilation openings 8.
Place the power tool in a safe position and clean the grass catcher 11 from the outside. Remove compacted grass residue and dispose of it properly.
Make sure the guards and protective devices are not damaged and function properly. Perform necessary repairs before starting work with the power tool.
The battery must be stored at a temperature between 0 °C and 45 °C.
Service and consultation
The service will answer your questions regarding repairs and maintenance of your product, as well as regarding spare parts. You can find detailed information about spare parts on the website www.bosch-pt.com.
The Bosch consultation team will be happy to help you with any questions regarding purchasing, application, and adjustment options for the various products and accessories from the Bosch product range.
Robert Bosch EOOD - Bulgaria
Bosch Service Center
Warranty and extended warranty repairs
ul. Srebarna 9
1907 Sofia
Tel.: +359 (02) 962 5302
Tel.: +359 (02) 962 5427
Tel.: +359 (02) 962 5295
Fax: +359 (02) 962 4649
Transport
The battery has been tested in accordance with the UN ST/SG/AC.10/11/3, edition, part III, section 38.3. It has effective protection against overcharging and deep discharge and is protected against mechanical damage and dangerous reverse current. The equivalent lithium content contained in the battery is below the permissible limit values. Therefore, the battery is not subject to national or international regulations for working with dangerous goods. Nevertheless, when transporting the battery, these regulations may become relevant. In such cases, it may be necessary to comply with special regulations (e.g. regarding packaging). You can find details in the leaflet (in English) at the following address on the Internet: http://purchasing.bosch.com/en/start/Allgemeines/Download/index.htm.
Packaging
With regard to the disposal of the device, accessories, and packaging, they must be handed over for proper recycling in accordance with the regulations.
Only for EU countries:

Do not dispose of electrical tools in household waste! According to the European Directive 2002/96/EC on waste electrical and electronic equipment and its implementation in national law, electrical tools that can no longer be used must be collected separately and handed over to a recycling facility for environmentally sound disposal.
As a national law, electrical tools that can no longer be used must be collected separately and handed over to a recycling facility for environmentally sound disposal of the materials they contain.
Batteries and rechargeable batteries:
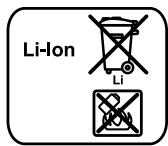
Li-Ion:
Please observe the instructions in the section "Transport", page 219.
Do not dispose of batteries in household waste, fire, or water. Batteries and rechargeable batteries must be collected, recycled, or disposed of in an environmentally sound manner.
Only for EU countries:
According to Directive 91/157/EC, defective or worn-out rechargeable batteries or batteries must be recycled.
Subject to changes.
Safety instructions
Caution! Read the following instructions carefully. Familiarize yourself with the operating elements and the correct use of the cordless grass trimmer. Please keep the operating instructions in a safe place for future reference.
Explanation of symbols on the cordless grass trimmer

General safety instructions.

Dr. Egbert Schneider Senior Vice President Engineering
Dr. Eckerhard Strötgen Head of Product Certification
i.v. Moju
20.08.2007, Robert Bosch GmbH, Power Tools Division D-70745 Leinfelden-Echterdingen
For your safety

Switch off the device and remove the battery before making any adjustments or cleaning.
Dr. Egbert Schneider Senior Vice President Engineering
Dr. Eckerhard Strötgen Head of Product Certification
20.08.2007, Robert Bosch GmbH, Power Tools Division D-70745 Leinfelden-Echterdingen
For your safety

Switch off the device and remove the battery before making any adjustments or cleaning.
Dr. Egbert Schneider Senior Vice President Engineering
Dr. Eckerhard Strötgen Head of Product Certification
20.08.2007, Robert Bosch GmbH, Power Tools Division D-70745 Leinfelden-Echterdingen
For your safety

Before making any adjustments or cleaning, switch off the device and remove the battery.
After the cordless vacuum cleaner is switched off, the blade continues to rotate for a few seconds.
Caution - do not touch the rotating blade.
Assembly
Charging the battery
Observe the mains voltage: The voltage of the power source must match the data on the rating plate of the device. Devices marked with 230 V can also operate on 220 V/240 V.
Use only the supplied charger. Only this charger is compatible with the Li-ion battery installed in your device.
The battery is equipped with a temperature control that allows charging only in the temperature range between 0°C and 45°C. This ensures a long battery life.
Dr. Egbert Schneider Senior Vice President Engineering
Dr. Eckerhard Strötgen Head of Product Certification
20.08.2007, Robert Bosch GmbH, Power Tools Division D-70745 Leinfelden-Echterdingen
Instructions

Dr. Egbert Schneider Senior Vice President Engineering
Dr. Eckerhard Strötgen Head of Product Certification
i.v. Moju
20.08.2007, Robert Bosch GmbH, Power Tools Division D-70745 Leinfelden-Echterdingen
For your safety

Always switch off the tool and remove the battery before adjusting or cleaning.
After switching off the battery-powered grass trimmer, the cutting blade continues to rotate for a few seconds.
Be careful - do not touch the rotating cutting blade.
Assembly
Battery charging
Use the correct mains voltage!
The mains voltage must match the value indicated on the charger's rating plate. Chargers designed for 230 V can also be operated from 220 V or 240 V mains.
Dr. Egbert Schneider Senior Vice President Engineering
Dr. Eckerhard Ströttgen Head of Product Certification
20.08.2007, Robert Bosch GmbH, Power Tools Division D-70745 Leinfelden-Echterdingen
For your safety

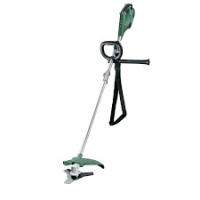
- ART
- BOSCH
- FOR YOUR SAFETY
- FUNCTIONAL DESCRIPTION
- INTENDED USE
- DELIVERY SCOPE
- PRODUCT FEATURES
- NOISE/VIBRATION INFORMATION
- WEAR HEARING PROTECTION
- DECLARATION OF CONFORMITY C
- ASSEMBLY
- BATTERY CHARGING
- REMOVING THE BATTERY A
- CHARGING PROCEDURE
- FLASHING BATTERY CHARGE INDICATOR
- CONTINUOUS LIGHTING OF THE BATTERY CHARGE INDICATOR
- CHARGING ADVICE
- DO NOT CONTINUE TO PRESS THE ON/OFF SWITCH AFTER AN AUTOMATIC SHUT-OFF OF THE MACHINE
- PRODUCT ASSEMBLY
- MOUNTING THE BLADE GUARD
- MOUNTING THE CUTTING DISC/BLADE
- OPERATION
- STARTING
- INSERTING THE BATTERY
- SWITCHING ON
- SWITCHING OFF
- ADJUSTMENT
- USING THE ADJUSTABLE HANDLE
- ADJUSTING THE TRIMMER LENGTH F
- ADJUSTING THE TRIMMER-HEAD ANGLE G
- ADJUSTING FOR EDGING MODE
- WORKING ADVICE
- CUTTING GRASS
- TRIMMING EDGES
- CUTTING AROUND TREES AND BUSHES
- BATTERY DURATION
- CHANGING THE BLADE D
- BEFORE ANY WORK ON THE MACHINE ITSELF, REMOVE THE BATTERY FROM THE MACHINE
- TROUBLESHOOTING
- MAINTENANCE AND SERVICE
- MAINTENANCE AND CLEANING
- AFTER TRIMMING/STORAGE
- SWITCH THE MACHINE OFF AND REMOVE THE BATTERY. ENSURE BATTERY IS REMOVED BEFORE STORAGE
- AFTER-SALES SERVICE AND CUSTOMER ASSISTANCE
- WWW.BOSCH-PT.COM
- GREAT BRITAIN
- AUSTRALIA, NEW ZEALAND AND PACIFIC ISLANDS
- TRANSPORT
- DISPOSAL
- ONLY FOR EC COUNTRIES
- BATTERY PACKS/BATTERIES
- LI-ION
- FOR YOUR CONVENIENCE
- ONLY FOR EU COUNTRIES
- FOR SAFETY REASONS
- FOR GREECE AND CYPRUS
- REMOVING THE BATTERY
- CHARGING
- SHIPPING
- AZ ONBIZTONSAGSAERT
- FUNCTION DESCRIPTION
- READ ALL SAFETY INSTRUCTIONS AND WARNINGS
- SCOPE OF DELIVERY
- ILLUSTRATED COMPONENTS
- SAFETY INSTRUCTIONS
- CHARGING PROCESS
- BATTERY CHARGE INDICATOR
- INTERMITTENT ILLUMINATION OF THE BATTERY CHARGE INDICATOR
- INTERMITTENT LIGHT
- CHARGING INSTRUCTIONS
- ASSEMBLING THE TOOL
- INSERT THE BATTERY ONLY AFTER THE BATTERY COMPARTMENT HAS BEEN PROPERLY ASSEMBLED
- MOUNTING THE PROTECTIVE CAP
- INSTALLING THE CUTTING BLADE/KNIFE
- WORKING WITH THE TOOL
- REMOVE THE PROTECTIVE COVER INTENDED FOR THE BLADE AND OTHER PROTECTIVE DEVICES
- INSTALLING THE BATTERY
- HACTPOIKA NHCTPYMENTA
- ICTIOB3OBAHNNE IPEPETABIAREMON PYUKNE
- HACTPOKA DANHBI UTAHNF
- I3MEHHENE YRHA HAKLOHA ROLOBKN TPHMMEPAG
- TIOAOXEHNE DAA 06PA6OTKN KPOMOK
- YKA3AHNI IO TPIMHEHHIO
- GRASS TRIMMING
- EDGE TRIMMING
- TRIMMING GRASS AROUND TREES AND BUSHES
- CAREFULLY TRIM GRASS AROUND TREES AND BUSHES TO AVOID CONTACT WITH THE BARK
- AVERAGE CONDITIONS
- HEAVY CONDITIONS
- REPLACING THE BLADE
- BEFORE STARTING MAINTENANCE OR ADJUSTMENT OF THE TOOL, REMOVE THE BATTERY
- STORAGE CONDITIONS
- SWITCH OFF THE POWER TOOL AND REMOVE THE BATTERY. MAKE SURE THAT THE BATTERY IS REMOVED BEFORE STORING
- AFTER-SALES SERVICE AND CUSTOMER ADVICE
- RUSSIA
- GERMANY
- BATTERIES
- MY LI
- SYMBOLS ON THE BATTERY-POWERED TOOL
- INTENDED USE OF THE DEVICE
- COMPONENTS SHOWN
- CHARGING THE BATTERY
- STEADY GLOW OF THE BATTERY CHARGE INDICATOR
- STEADY GLOW
- MOUNTING THE ACCESSORY
- ASSEMBLE THE TOOL WITH THE BATTERY IN THE FOLLOWING ORDER
- MOUNTING THE PROTECTIVE COVER
- MOUNTING THE CUTTING BLADE/KNIFE
- WORKING INSTRUCTIONS
- ADJUSTING THE HANDLE
- USE THE ADJUSTING HANDLE
- ADJUSTING THE SPRAYER DEPTH F
- ADJUSTING THE ANGLE OF THE SPRAYER HEAD C
- ADJUSTING THE GRASS CUTTING WITH THE KNIVES
- TRIMMING THE GRASS
- TRIMMING WITH THE GRASS TRIMMER
- MAINTENANCE AND CARE
- TICRA PO6OTN/36EPIRAHNA
- BMKHITB PNHAI I BMMITB AKYMYATOPHY 6ATAPEO. IPEEP 36EPIRAHHM IPEKOHATEC, 0C AKYMYATOPHA 6ATAPER BMHRTA
- CEPBICHA MAICTEPRN I O6CAYROBYBAHHKJIEHTIB
- YKPAHA
- TRANSPORTATION
- EU COUNTRIES ONLY
- ACCUMULATOR BATTERY
- BATTERY
- INFORMATION ON NOISE AND VIBRATION
- MOUNTING
- THE BATTERY IS A LITHIUM-ION BATTERY
- CHARGING INDICATOR OF THE BATTERY
- CONTINUOUS LIGHTING OF THE CHARGING LIGHT
- CHARGING INDICATOR
- MOUNTING ON THE GUIDE RAILS
- MOUNTING THE CUTTING BLADE
- WORKING WITH THE DEVICE
- HACTPOBAHE HA ENEKTPONHCTPYMENTA
- N3TNOA3BAHE HA TIOABHXKAHA TAPBKOXBATAKA
- PERYUHAHE HA BNCONHNTA HA TPEBOKOCAUKATA F
- PERYIPAHE HA BIBIA HA NAKIOHA HA PEXEMATA RIABA C
- HACTPOBAHE 3A PHA3AHE B 6AN3OCTDO PB
- OPERATING INSTRUCTIONS
- CUTTING WITH THE HEDGE TRIMMER
- CUTTING NEAR THE GROUND
- CUTTING AROUND TREES AND SHRUBS
- BATTERY CAPACITY
- WORKING CONDITIONS
- AVERAGE WORKING CONDITIONS
- HEAVY WORKING CONDITIONS
- BLADE LENGTH D
- BEFORE STARTING ANY WORK ON THE ELECTRIC TOOL, REMOVE THE BATTERY
- FOLLOWING THE OPERATION/STORAGE
- SERVICE AND CONSULTATION
- ROBERT BOSCH EOOD - BULGARIA
- PACKAGING
- BATTERIES AND RECHARGEABLE BATTERIES
- EXPLANATION OF SYMBOLS ON THE CORDLESS GRASS TRIMMER
- INSTRUCTIONS
- USE THE CORRECT MAINS VOLTAGE
Brand : BOSCH
Model : ART 26 COMBITRIM
Category : Brush cutter