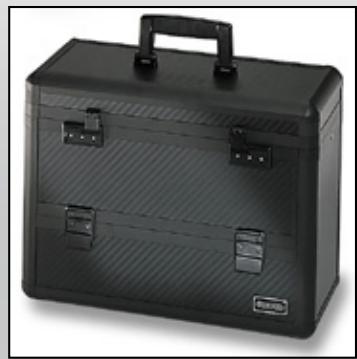
DATABOX PROFILE - Carrying case DICOTA - Free user manual and instructions
Find the device manual for free DATABOX PROFILE DICOTA in PDF.
| Product Type | Transport case for laptop and printer |
| Brand | DICOTA |
| Model | DATABOX PROFILE |
| Size | 15 inches (for laptop) |
| Printer Compatibility | HP DJ 450, HP DJ 460, HP Officejet H470, Canon i80/iP90 Series, iP100 |
| Fastening System | QuickFix (optional) |
| Removable Compartments | For cables, for CDs, for accessories |
| Fold-down Tray | Yes, for printer |
| Removable Cover | For cable storage |
| Integrated Multi-outlet | Yes |
| Included Accessories | 8 self-adhesive 3M Velcro strips, 2 pouches, 1 CD compartment |
| Power Supply | Recharge via power cable (not included) |
| Recommended Use | Case open, do not close immediately after use |
| Safety | Install on a stable surface, avoid moisture and dust, avoid heat sources |
| Bluetooth Function | Data transfer possible if equipped |
| Manufacturer | DICOTA |
Frequently Asked Questions - DATABOX PROFILE DICOTA
User questions about DATABOX PROFILE DICOTA
0 question about this device. Answer the ones you know or ask your own.
Ask a new question about this device
Download the instructions for your Carrying case in PDF format for free! Find your manual DATABOX PROFILE - DICOTA and take your electronic device back in hand. On this page are published all the documents necessary for the use of your device. DATABOX PROFILE by DICOTA.
USER MANUAL DATABOX PROFILE DICOTA
We thank you for choosing a DICOTA product. Before using your DataBox Profile 15" for the first time, please read the following manual carefully. DataBox Profile 15" can be used with printers currently on the market, HP DJ 450, HP DJ 460, HP Officejet H470 Canon series i80/iP90 and iP100 with or without support from the Canon Portable Kit (more printers on request!). For more information please consult your dealer or check www.dicota.com for information which Notebooks are compatible.
Table of contents
General information 6
- Work environment 6
- Operational current 7
Scope of supply 7
Interior features 7
-Case lid 7
-Case 7
Installation of mobile printer 8
Installation of power socket 9
Storage of power supply units 9
Connection: Notebook and printer 10
General information – DataBox Profile 15"

Work Environment
In general, please take care to operate your DataBox Profile 15" on a stable and skid-fast surface. Especially avoid work surroundings which are dusty or humid! When opening your DataBox Profile 15", please make sure that the case stands with the case handle upwards!
Avoid operating your DataBox Profile 15" near extreme heat sources (i.e. any heating elements). Protect your DataBox Profile 15" from direct sunlight!
→ For exact information regarding the temperature of the work surroundings, please study the manual of your Notebook or printer manufacturer.
→ The devices should only be operated while the case is open.
After some time of operation, the case may not be closed immediately to ensure a cooling-off period!

Operational current / charging procedure
→ When connecting to a power socket, please ensure that the power cable is first connected to the case and then to the power socket!
The charging procedure should generally be done while the case is open!
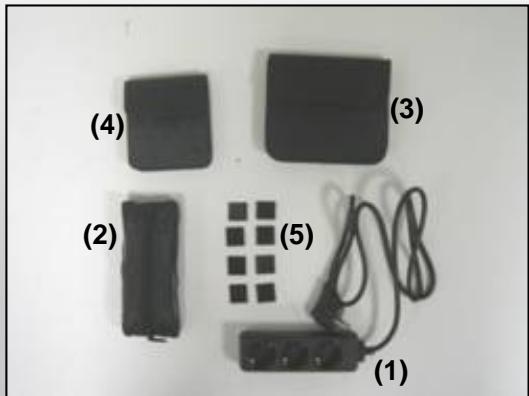
Scope of supply – DataBox Profile 15"
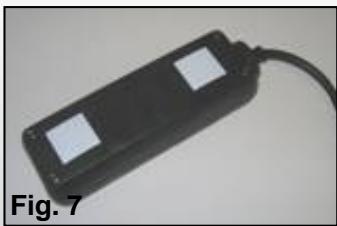
(1) Multiple power socket
(2) Detachable cable pouch
(3) Detachable CD case
(4) Detachable pouch for more accessories
(5) 8 × 3M Velcro pads (self-adhesive)
Interior features – DataBox Profile 15"
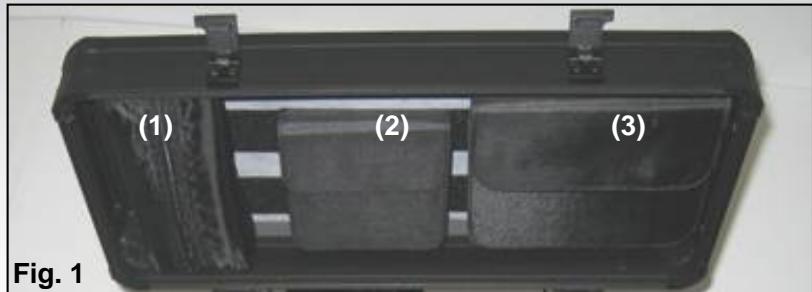
Case lid (Fig.1)
(1) Detachable cable pouch
(2) Detachable pouch for more accessories
(3) Detachable CD case
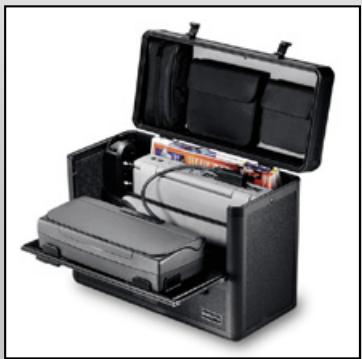
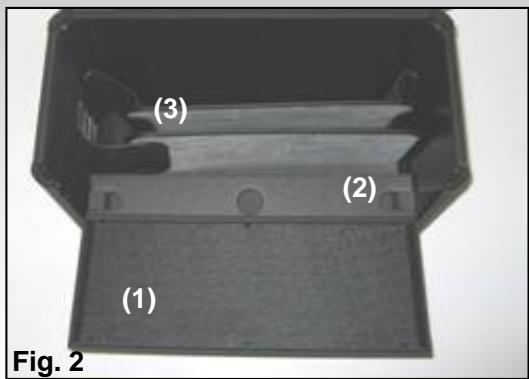
Case interior (Fig. 2)
(1) Printer lid can be opened
(2) Flexible lid for cable storage
(3) Divider for Notebook and documents

Installation of mobile printer
Open your DataBox Profile 15". If you have not ordered the „QuickFix“ printer holder for your specific printer, proceed as follows:
1) Take four Velcro pads and press two corresponding pairs together. (Fig. 3 showing a pair being pressed together)
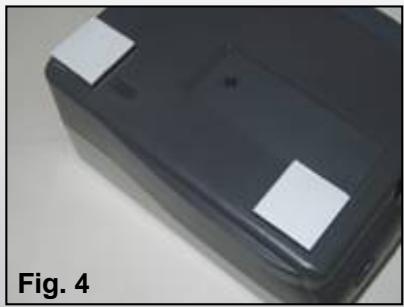
2) Now you have two Velcro pairs with protective films on each side. Remove the protective film on one side of each pair to reveal the adhesive tape beneath and press them to one corner each of your printer. (Fig. 4; the white tape must still be removed, the Velcro pads can also be placed in the center of the printer).

CAUTION!
Before you mount the printer, please check the intended position on the flap since incorrect mounting can cause problems during printer operation.
3) The easiest way to mount the printer is on the open front flap. Mount the printer with its back side (battery side) on the closed cable box in the center and press against the lid. The further back you mount the printer the better for balance, since then the DataBox Profile 15" does not tip over so easily.
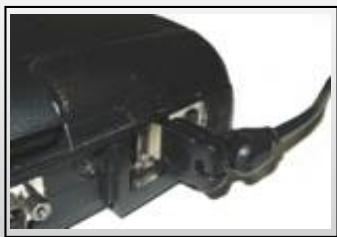
Installation of mobile printer with printer holder „QuickFix“!*
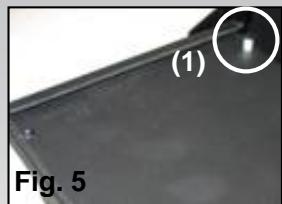
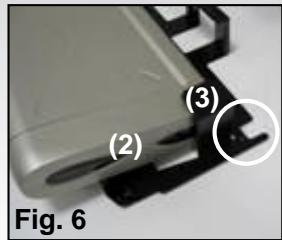
1) Open the DataBox Profile 15" and the printer lid. There are two holders on the rear side of the printer lid. (Fig. 5 (1)). These are designated "QuickFix" mounts.
2) The printer must first be shoved into the „QuickFix“ printer holder (Fig. 6 (2)). Please make sure that the printer is safely fastened in the holder. The holder with the printer is then placed on the printer lid and connected to the other holders (Fig. 5 (1)). In doing so, the grooves of the „QuickFix“ holder (Fig. 6 (3)) must be fully inserted into the holders on the printer lid.
Due to the fact that DataBox Profile 15" is based on the "Floor-to-Desk" system and the Notebook is operated on a table outside the case, the installation of the printer to the Notebook must be done according to the standard installation procedure of the printer or Notebook. How to connect the Notebook with the printer is explained on page 10!
For more information please contact us at info@dicota.com.
*Depending on the printer, there may be other „QuickFix“ holders similar to the one shown!
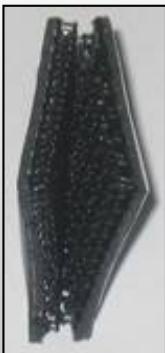
Fig. 3
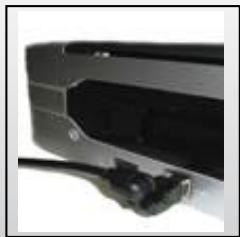
Installation of power supply
1) Take the remaining four Velcro pads and press two corresponding pairs together. Now you have two Velcro pad pairs with a protective film on each side (also see Page 3, Fig. 1).
2) Remove the film on one side of each pad pair and press this side to the bottom of the synthetic box. Press the divider pads to the back side of the DataBox Profile 15". Now you can attach the synthetic box to the left inner side of the DataBox Profile 15" by removing the remaining protective films.

CAUTION!
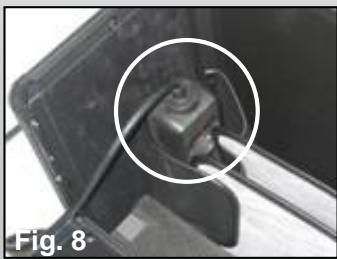
You must first insert the power plug through the round opening (!) to the side pocket. (This can be done on the left or right side.) In case a Velcro pad is already attached to the inner left side, you need only remove the protective film of the corresponding side and attach it to the bottom side of the synthetic box (Fig. 5).
Storage of power supply units
How to store the power supply units:
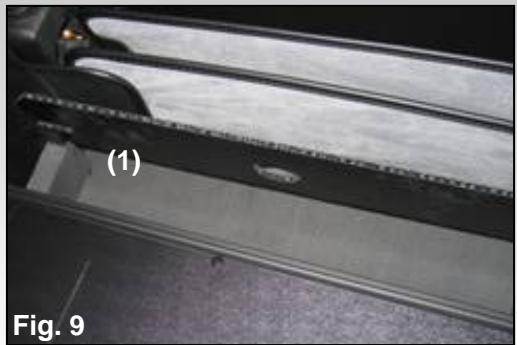
On the inside of the DataBox Profile 15", there is a movable lid (Fig. 9 (1)) which protects the power supply units.
Place the power supply units that belong to your Notebook and printer into this compartment. Lead the cables between power supply unit and Notebook (or power supply unit and printer) through the openings left or right of the lid and close the lid. Connect the power plugs with the multi-power socket and place the cables on the foot of the DataBox Profile 15".
Connection Notebook - printer
Switch on your Notebook and proceed as follows:
There are two options for connecting the Notebook to your printer:
1) Connect printer and Notebook with a USB cable. This cable is not included in the DataBox Profile 15"!
Ensure correct cabling here as well! It is best to lead the USB cable around the printer.
Also make sure that the USB cable is not obstructing the paper bin, thus causing paper jams!
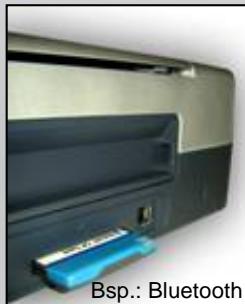
2) Data transfer between printer and Notebook via Bluetooth: (only possible if Notebook and printer are Bluetooth-compatible!)
Bluetooth is an up-to-date radio standard enabling wireless data transfer. On behalf of the Notebook, the connection is established via an internal interface or a PC-card module. On behalf of the printer, the connection can be established via a Compact Flash module.

CAUTION!
Always place your Notebook in the middle compartment between the divider pads, front side down, to prevent damaging Notebook cables and plugs.
Charging the system:
Before connecting the multi-plug cable to a power socket, read the manual of your Notebook and/or printer carefully. (This cable is not included in the scope of supply). Never close the DataBox Profile's 15" lid while the printer or Notebook is being operated or the Notebook is being charged. Closing the lid can cause overheating. The DataBox Profile 15" should always be placed on an even surface to prevent it from tipping over while open.