
GSCT 3,6 - Hedge trimmers ATIKA - Free user manual and instructions
Find the device manual for free GSCT 3,6 ATIKA in PDF.
| Product type | Hedge trimmer and grass shear |
| Brand | ATIKA |
| Model | GSCT 3,6 |
| Nominal battery voltage | 3,6 V |
| Battery capacity | 1,3 Ah |
| Battery type | Lithium-ion |
| Cutting width (grass shear) | 80 mm |
| Cutting length (hedge trimmer) | 110 mm |
| Blade gap | 8 mm |
| Operating time | Approx. 40 min |
| Charging time | Approx. 4 h |
| Sound pressure level (LPA) | 74,6 dB(A) |
| Measured sound power level (LWA) | 86,4 dB(A) |
| Guaranteed sound power level (LWA) | 90 dB(A) |
| Weight (hedge trimmer without pole) | 0,64 kg |
| Weight (hedge trimmer with telescopic pole) | 1,07 kg |
| Weight (grass shear without pole) | 0,55 kg |
| Weight (grass shear with telescopic pole) | 0,99 kg |
| Charger | Input 230 V~ 50 Hz, Output 6 V / 300 mA, Protection class II |
| Telescopic pole | Yes, included |
| Included accessories | Grass blade, hedge blade, blade guards (2), charger, telescopic pole, wheel support, tightening screw, manual |
| Additional functions | 3 adjustable working positions, adjustable working height from 25 to 40 mm, start lock |
| Safety | Start lock, ON/OFF switch, blade guards, low battery indicator, automatic stop |
Frequently Asked Questions - GSCT 3,6 ATIKA
User questions about GSCT 3,6 ATIKA
0 question about this device. Answer the ones you know or ask your own.
Ask a new question about this device
Download the instructions for your Hedge trimmers in PDF format for free! Find your manual GSCT 3,6 - ATIKA and take your electronic device back in hand. On this page are published all the documents necessary for the use of your device. GSCT 3,6 by ATIKA.
USER MANUAL GSCT 3,6 ATIKA
Shrub- and grass shear
Original instructions
Do not operate machine before having read the operating instructions, understood all the notes and assembly the machine as described here.
Keep the instructions in a safe place for future use.

| Extent of delivery | 13 |
| Operating times | 13 |
| Declaration of conformity | 13 |
| Symbols on product / charger | 14 |
| Symbols operating instructions | 14 |
| Normal intended use | 14 |
| Residual risks | 14 |
| Security instructions | 15 |
| – Workplace safety | 15 |
| – Electrical safety | 15 |
| – Safety of persons | 15 |
| – Using and handling the power tool | 16 |
| – Using and handling the battery-operated product | 16 |
| – Service | 16 |
| Safety notes for battery-operated shrub and grass shears | 16 |
| Safety notes for charger | 16 |
| Safety instructions | 16 |
| Description of device / Spare parts | 17 |
| Before the first commissioning | 17 |
| – Charging the rechargeable battery | 17 |
| – Assembling the telescopic handle | 17 |
| Commissioning | 17 |
| Working instructions | 18 |
| Maintenance and cleaning | 18 |
| Changing the cutting tools | 19 |
| Storage | 19 |
| Guarantee | 19 |
| Disposal | 19 |
| – Removing the rechargeable battery | 19 |
| – Transport | 19 |
| Possible faults | 20 |
| Technical data | 20 |
Extent of delivery
After unpacking, check the contents of the box
That it is complete
Check for possible transport damage
Report any damage or missing items to your dealer, supplier or the manufacturer immediately. Complaints made at a later date will not be acknowledged.
1 shrub and grass shear with assembled grass cutting tool
1 cutting tool guard - grass cutting tool
1 cutting tool guard - shrub cutting tool
1 charger
1 shrub cutting tool
1 telescopic handle*
1 wheel attachment*
1 operating instructions
(*Partly optional accessories)
Operating times
Before initiating the device please observe the provisions pertaining to corresponding laws (regional provisions) for the noise control.
EC Declaration of Conformity
according to EC directive: 2006/42/EC
We,
ATIKA GmbH & Co. KG
Schinkelstraße 97
59227 Ahlen - Germany
herewith declare under our sole responsibility that the product
Shrub and grass shear type GSC 3,6 Shrub and grass shear type GSCT 3,6
is conform with the above mentioned EC directives as well as with the provisions of the guidelines below:
2000/14/EG, 2004/108/EG and 2006/95/EG.
Conformity assessment procedure: 2000/14/EC - Appendix V. Measured sound power level LWA 86,4 dB (A). Guaranteed sound power level LWA 90 dB (A).
Following harmonized standards have been applied: EN 60745-1:2009; EN 60745-2-15:2009 IEC EN 60335-2-94:2008; FprEN 60335-2-94:2009 in parts EN 50366:2003+A1:2006; EN ISO 10517:2009
Keeping of technical documents at:
ATIKA GmbH & Co. KG - technical department - Schinkelstr. 97 - 59227 Ahlen - Germany
Ahlen, 01.03.2010
A. Pollmeier, management
Symbols on product
| Carefully read operator's manual before handling the machine. Observe instructions and safety rules when operating. | |
| Wear hardhat, eye and ear protection. | |
| Wear safety shoes. | |
| The tools are very sharp. Do not cut in your fingers and toes. | |
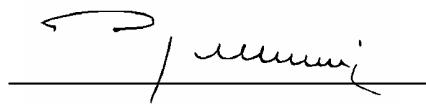
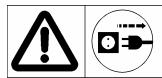
| Danger by after-running cutting tool! | |
| Danger – objects may be thrown out at high speed. | |
| Keep other persons away from the work area. Safety distance at least 6 m. | |
| Do not operate the device near cables, power or phone lines. Keep a safety distance of 10 m to overhead power lines when working with the device. | |
| Do not expose to rain. Protect against humidity. | |
| Electrical devices do not go into the domestic rubbish. |
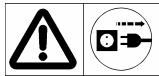
Symbols on charger
| Protection class II | |
| Always use the charger in dry rooms only. | |
| The charger is equipped with a safety isolating transformer. | |
| Safety temperature limiting | |
| Negative polarity | |
| Electrical devices do not go into the domestic rubbish. |
Symbols operating instruction
| Threatened hazard or hazardous situation. Not observing this instruction can lead to injuries or cause damage to property. | |
| Important information on proper handling of the saw. Not observing this instruction can lead to faults in the chain saw. | |
| User information. This information helps you to use all the functions of the chain saw optimally. | |
| Assembly, operation and servicing the chain saw. Here you are explained exactly what to do. | |
| The numbers refer to the figures on the pages 2 through 3. |
Normal intended use
- This product is designed for easy cutting work on lawn edges and shrubs in house and hobby gardens only.
- The intended usage also includes compliance with the operating, servicing and repair conditions prescribed by the manufacturer and following the safety instructions included in the instructions.
- Any other use is deemed not to be intended use. The manufacturer is not liable for any type of damage resulting from this: the user bears the sole risk.
- Unauthorized modifications to the machine preclude any liability of the manufacturer for resulting damages of any kind.
- The relevant accident prevention regulations for the operation as well as the other generally acknowledged occupational medicine and safety rules must be complied with.
Residual risks
Even if used properly, residual risks can exist even if the relevant safety regulations are complied with due to the design determined by the intended purpose.
Residual risks can be minimised if the "Safety information" and the "Intended usage" as well as the whole of the operating instructions are observed.
Observing these instructions, and taking proper care, will reduce the risk of personal injury or damage to the equipment.
- Risk of injuries of fingers and hands by the cutting tool (grass and shrub cutting tool).
- Injury by catapulted workpiece parts.
Electric shock. - Risk from electricity, by using non-standard electrical connections.
- Touching live parts of opened electrical components.
- Impairment of hearing when working on the machine for longer periods of time without ear protection.
In addition, in spite of all the precautionary measures taken, non-obvious residual risks can still exist.
Safety Notes
General Power Tool SafetyWarnings
WARNING
Read all safety warnings and all instructions. Failure to follow the warnings and instructions may result in electric shock, fire and/or serious injury.
Save all warnings and instructions for future reference.
The term "power tool/garden product" in the warnings refers to your mains-operated (corded) garden product or battery-operated (cordless) garden product.
1. Work area safety
a) Keep work area clean and well lit. Cluttered or dark areas invite accidents.
b) Do not operate power tools in explosive atmospheres, such as in the presence of flammable liquids, gases or dust. Power tools create sparks which may ignite the dust or fumes.
c) Keep children and bystanders away while operating a power tool. Distractions can cause you to lose control.
2. Electrical safety
a) Power tool plugs must match the outlet. Never modify the plug in any way. Do not use any adapter plugs with earthed (grounded) power tools. Unmodified plugs and matching outlets will reduce risk of electric shock.
b) Avoid body contact with earthed or grounded surfaces, such as pipes, radiators, ranges and refrigerators. There is an increased risk of electric shock if your body is earthed or grounded.
c) Do not expose power tools to rain or wet conditions. Water entering a power tool will increase the risk of electric shock.
d) Do not abuse the cord. Never use the cord for carrying, pulling or unplugging the power tool. Keep cord away from heat, oil, sharp edges and moving parts. Damaged or entangled cords increase the risk of electric shock.
e) When operating a power tool outdoors, use an extension cord suitable for out-door use. Use of a cord suitable for out-door use reduces the risk of electric shock.
f) If operating a power tool in a damp location is unavoidable, use a residual current device (RCD) protected supply. Use of an RCD reduces the risk of electric shock.
3. Personal safety
a) Stay alert, watch what you are doing and use common sense when operating a power tool. Do not use a power tool while you are tired or under the influence of drugs, alcohol or medication. A moment of inattention while operating power tools may result in serious personal injury.
b) Use personal protective equipment. Always wear eye protection. Protective equipment such as dust mask, nonskid safety shoes, hard hat, or hearing protection used for appropriate conditions will reduce personal injuries.
c) Prevent unintentional starting. Ensure the switch is in the off-position before connecting to power source and/or battery pack, picking up or carrying the tool. Carrying power tools with your finger on the switch or energising power tools that have the switch on invites accidents.
d) Remove any adjusting key or wrench be-fore turning the power tool on. A wrench or a key left attached to a rotating part of the power tool may result in personal injury.
e) Do not overreach. Keep proper footing and balance at all times. This enables better control of the power tool in unexpected situations.
f) Dress properly. Do not wear loose clothing or jewellery. Keep your hair, clothing and gloves away from moving parts. Loose clothes, jewellery or long hair can be caught in moving parts.
g) If devices are provided for the connection of dust extraction and collection facilities, ensure these are connected and properly used. Use of dust collection can reduce dust-related hazards.
4. Power tool use and care
a) Do not force the power tool. Use the correct power tool for your application. The correct power tool will do the job better and safer at the rate for which it was designed.
b) Do not use the power tool if the switch does not turn it on and off. Any power tool that cannot be controlled with the switch is dangerous and must be repaired.
c) Disconnect the plug from the power source and/or the battery pack from the power tool before making any adjustments, changing accessories, or storing power tools. Such preventive safety measures reduce the risk of starting the power tool accidentally.
d) Store idle power tools out of the reach of children and do not allow persons unfamiliar with the power tool or these instructions to operate the power tool. Power tools are dangerous in the hands of untrained users.
e) Maintain power tools. Check for misalignment or binding of moving parts, breakage of parts and any other condition that may affect the power tool's operation. If damaged, have the power tool repaired before use. Many accidents are caused by poorly maintained power tools.
f) Keep cutting tools sharp and clean. Properly maintained cutting tools with sharp cutting edges are less likely to bind and are easier to control.
g) Use the power tool, accessories and tool bits etc. in accordance with these instructions, taking into account the working conditions and the work to be performed. Use of the power tool for operations different from those intended could result in a hazardous situation.
5. Battery tool use and care
a) Recharge only with the charger specified by the manufacturer. A charger that is suitable for one type of battery pack may create a risk of fire when used with another battery pack.
b) Use power tools only with specifically designated battery packs. Use of any other battery packs may create a risk of injury and fire.
c) When battery pack is not in use, keep it away from other metal objects, like paper clips, coins, keys, nails, screws or other small metal objects, that can make a connection from one terminal to another. Shorting the battery terminals together may cause burns or a fire.
d) Under abusive conditions, liquid may be ejected from the battery; avoid contact. If contact accidentally occurs, flush with water. If liquid contacts eyes, additionally seek medical help. Liquid ejected from the battery may cause irritation or burns.
6. Service
a) Have your power tool serviced by a qualified repair person using only identical replacement parts. This will ensure that the safety of the power tool is maintained.
Safety notes for battery-operated shrub and grass shears
- Keep away all body parts from the cutting blades. Do not attempt to remove cut material or to hold material to be cut while the cutting tool is in operation. Only remove jammed material after the unit was switched off. A single moment of inadvertence when using the hedge shear may result in severe injury.
- Make sure that all protective devices and handles are attached before using the unit. Never attempt to put into service an incomplete unit or a unit that was improperly modified.
- Hold the power tool on the insulated handle surfaces as the cutting blades may come into contact with the unit's mains supply cable. A contact of the cutting blades with a live conductor may apply hazardous voltage to metallic parts of the unit and cause electric shock.
- Carry the hedge shear on its handle with the cutting tool stopped. Always install the guard when transporting or storing the hedge shear. A careful handling of the unit minimises the risk of injury by the cutting tool.
- Keep the cable away from the cutting area. During the work, the cable may be hidden by shrubbery and accidentally cut.
- This device is not intended to be used by persons (including children) with restricted physical, sensory or mental abilities or a lack of experience and/or know-how unless they are supervised by a person responsible for their safety or they have been instructed by such a person on the use of the device.
- Supervise children to make sure they do not play with the device.
- Adhere to national regulations that might specify an age limit for the user of the unit.
Safety notes for chargers
- Do not use the charger in moist or wet ambience. There is an increased risk of an electric shock when water penetrates into the charger.
- Only use the charger for the dedicated power tool. Its use for other power tools may result in injuries and fire.
- Keep the charger clean. Contamination may result in electric shock.
- Do not operate the charger on combustible surfaces (such as paper, textiles). There is a risk of fire as the charger heats up during the charging process.
- Before each use, check the charger, charger cable and cable connector for damages. Do not use damaged chargers. Have your charger only be repaired by qualified specialized personnel with genuine spare parts. This will ensure that the device is kept in a safe condition.
Safety instructions
- Within his area of work the operator is responsible for third parties.
- Do not leave the power tool in direct sunlight and protect it against heat. Otherwise, there is a risk of explosion.
- Remove unconditionally any foreign objects (e.g. wires).
- Before starting the machine, make sure that your hands and feet are kept at a safe distance to the cutting tool.
- Be sure that the cutting tool already moves before you start cutting.
- Caution! The cutting tool stops delayed after the machine is switched off. Do not try to slow down the cutting tool by the hand.
-
Turn off the machine and wait until the cutting tool is stationary when:
-
the cutting tool comes into contact with soil, stones, nails or other foreign objects (⇒ check whether the cutting tool/machine is damaged)
- carrying out repair works
- carrying out servicing and repair works,
- removal of faults (including blocking of knives)
- transporting and storage
-
leaving unattended (even during short interruptions)
-
Maintain the machine carefully:
-
Before continuing to use the machine, the protective devices must be inspected to ensure that they work perfectly and with their intended function
- Damaged guards and parts must be properly repaired or exchanged by a recognized, specialist workshop; insofar as nothing else is stated in the instructions for use.
- Damaged or illegible safety warning labels should be replaced immediately.
Do not carry out repair operations on the machine other than those described in section "Maintenance" but contact the manufacturer or authorized customer service centre.
Use only original spare parts, accessories and special accessory parts. Accidents can arise for the user through the use of other spare parts. The manufacturer is not liable for any damage or injury resulting from such action.
Description of device
| Pos. | Name | Order number |
| 1 | Shrub and grass shear | |
| 2 | Battery warning lamp | |
| 3 | Trip switch | |
| 4 | ON/OFF switch | |
| 5 | Switch | |
| 6 | Handle | |
| 7 | Charging female connector | |
| 8 | LED - charging indicator | |
| 9 | Receiver (wheel set) | |
| 10 | Cover | 364175 |
| 11 | Grass cutting tool | 364176 |
| 12 | Shrub cutting tool | 364177 |
| 13 | Cutting tool guard -grass cutting tool | 364181 |
| 14 | Wheel set | 364173 |
| 15 | Clamping screw | 364174 |
| 16 | Telescopic handle holder | |
| 17 | Charger cable male connector | |
| 18 | Charger | 364182 |
| 19 | Telescopic handle * | 364172 |
| 20 | Handle | |
| 21 | Unlocking knob | |
| 22 | Adjusting knob | |
| 23 | Cutting tool guard - shrub cutting tool | 364180 |
| 24 | Safety label - 1 | 364179 |
| 25 | Safety label - 2 | 364186 |
(*Partly optional accessories)
Before the first commissioning
Charging the rechargeable battery
Always use the supplied charger to charge the lithium ion battery integrated in the machine.
- Only charge the battery at temperatures between 10^ and 40^ . Otherwise, the battery may be damaged or its service life may be reduced.
Mains connection: Compare the voltage given on the machine model plate e.g. 230V with the mains voltage and connect the hedge trimmer to the relevant and properly earthed plug.
Fully charge the lithium ion batteries before first use or after a longer storage period of the machine.
Plug the charger cable male connector (17) into the charging female connector (7) on the machine and connect the charger to an electrical socket.
The charging indicator LED (8) will light up red. Charging is in progress.
The machine will warm up during the charging process. This is normal.
Do not use the machine during the charging process.
The charging process is completed (after approx. 4 hours) when the charging indicator LED lights green.
After completed charging, disconnect the charging cable connector (17) at first and then the charger from the mains.
Telescopic handle*
(*Partly optional accessories)
Assembling the telescopic handle
Only use the telescopic handle together with the grass cutting tool to cut edges on the ground.
3 Slide the wheel set (14) on the receiver (9) and fix it using the clamping screw (15).
Insert the telescopic handle (19) into the telescopic holder (16) until it engages with a click.
Adjusting the operating height
Press the adjusting knob (22).
- You can release the adjusting knob while pulling or pushing the telescopic handle.
The adjusting knob engages in the next position.
Removing the telescopic handle
Press on the unlocking knob (21) and pull the telescopic handle out of its holder (16).
Commissioning
Switching On / Off
Switch on
1 Remove the cutting tool guard (13 / 23).
Push the trip switch (3) and then press the ON/OFF switch (4).
Release the trip switch.
If the machine is used together with the telescopic handle, it can only be turned on/off on the handle (20).
When the battery is run down the battery warning lamp (2) comes up red and the machine stops automatically. Do not continue to operate the ON/OFF switch as the battery may be damaged.
Charge the lithium ion batteries (念) "Charging the battery"
Switch off
Release On/Off switch.
The cutting tool stops delayed after the machine is turned off. Therefore wait until the cutting tool is stationary before you restart the product.
Working instructions
You may not start to operate the machine until you have read these operating instructions, observed all the instructions given and installed the machine as described!

Always keep your hands and feet at a safe distance to the cutting tool.
Vibrations
If persons who have blood circulation problems are too often exposed to vibrations damages to the nervous system or to blood vessels may occur.
You can reduce vibrations:
-
by thick and warm working gloves,
-
shorter working time (have longer breaks).
See a doctor if your fingers swell, you don't feel well or your fingers become numb.
Working with the shrub shear

Scare animals off the hedge before starting to cut in order to prevent them from being injured.
Due to its double sided knives the shrub shear can be guided forward and backward or by oscillating movements from one to another side.
- The maximal diameter to cut depends on the wood's type, age, moisture and hardness.
Best time for hedge trimming:
Leaved hedge:
June and October
Conifer hedge:
April and August
Quickly growing hedge:
from May and then every 6 weeks
Working with the grass shear
Guide the device along the lawn edge at a reasonable and uniform speed.

Make sure that the knives do not come into contact with border and other stones or walls. The knives may be damaged.

To trim long lawn edges use the telescopic handle (partly optional).

To trim different working heights use the wheel set (partially optional).
The unit can be adjusted to 3 working positions
Push the switch (5) backwards.
The handle (6) can be turned into the desired position.
Release the switch (5) and make sure that it engages. The handhold is fixed.
Adjusting the working height
The unit can be fixed at working heights of 25 or 40mm
Loosen the clamping screw (15) and adjust the wheel set to your desired position.
Position 0^
Grass height 25 mm
Position 30^
Grass height 40 mm
Re-tighten the clamp screw.
Maintenance and Care
Before each maintenance and cleaning work
- Stop the engine.
- Wait until the cutting device does not longer move.
- Wear protective gloves
Maintenance and repair work other than those described in this chapter is only allowed to be carried out by service staff.
For maintaining and cleaning, removed security devices must unconditionally be mounted properly and proved again.
Use only original parts. Other parts can result in unexpected damages and injuries.
Maintenance
The cutting tool will not come to a standstill immediately after cut-off. Before starting any service work wait until all parts are stationary.
To guarantee a long and reliable usage of the shrub and grass shear carry out the following maintenance works regularly.
Check the machine for obvious defects such as
- loose, hung out or damaged cutting tools
- worn or damaged components
- correct assembly and faultless covers and protective devices
Necessary repair works or maintenance works have to be carried out before the usage of the machine.
Cleaning

Clean the machine thoroughly after each application so that the faultless function is kept.
- Clean the case with a soft brush or a dry cloth.
- Keep handles dry and free of oil and grease.
Water, solvents and polishing agents shall not be applied.
- Check that the ventilation slots for the motor cooling are free (risk of overheating).
- Clean the gear unit using a soft brush.
-
Lubricate the gear wheels using acid-free grease (petroleum jelly).
-
Clean the cutting device on a regular basis using a brush or a cloth.
Never clean the knives with water Risk of corrosion!
Oil the cutting tools regularly. Never use any grease!
Use for instance environmentally acceptable spray oil.
Changing the cutting tools
Risk of injury to the fingers and hands when carrying out work on the cutting tool.
The cutting tools are subject to heavy wearing. Immediately exchange cutting tools when the faultless function is not guaranteed.
4 If you have used the product with assembled telescopic handle press the unlocking knob (21) and pull the telescopic handle out of its holder (16).
3 Loosen the clamping screw (15) and remove the wheel set.
8 Lift the locking tab (a) ① and slide away the cover (10) in arrow direction ②
Remove the cutting tool.
9 Clean the gear unit and lubricate the gear wheels if required (acid-free grease such as petroleum jelly).
10 Place the cover. The catching tabs must be aligned with the marks.
Slide the cover (10) until it engages with a click.
Storage
- Store unused equipment with fitted cutting tool cover in a dry, locked place out of the reach of children.
Before a longer storage observe the following in order to prolongate the service life of the machine and to guarantee a smooth running operation:
thoroughly clean the machine.
Lubricate the gear wheels using acid-free grease (petroleum jelly).
Oil all moving parts (knives) with environmentally compatible oil.
(1) Never use any grease.
Push the guard on the cutting tool.
Guarantee
Please observe the enclosed terms of guarantee.
Disposal
Give devices, accessories and packaging to an ecofriendly recycling.
For EU countries only.

Electrical devices do not go into the domestic rubbish.
Give devices, accessories and packaging to an ecofriendly recycling. According to the European Directive 2002/96/EC on electrical and electronic scrap, electrical devices that are no longer serviceable must be separately collected and brought to a facility for an environmentally compatible recycling.

Li-ion
Lithium ion batteries do not fall under domestic rubbish.
According to the European Directive 2006/66/EC on batteries and rechargeable accumulators, defective batteries/accumulators must be recycled. Bring batteries/accumulators, which are no longer usable, to local collecting points or dealers.
Removing the rechargeable battery
Fully run down the lithium ion battery before removing.
- Turn on the product and allow it to operate until it is stationary.
- Remove the screws and the housing cover.
- Disconnect the battery from its connectors and remove it.
Transport
The lithium ion battery has passed the test procedures according to the guideline "Transport of dangerous goods" ST/SG/AC.10/11/Rev.3 Part III, 38.3
The battery is safe against internal excess pressure, extreme temperatures and short circuits or external forces.
The lithium ion content of the rechargeable battery (either as separate part or integrated in the device) is below the required limit and thus does not fall under national or international dangerous goods regulations. However, when transporting multiple batteries, dangerous goods regulations may be relevant and special safety requirements must be met, e.g. identification of the packaging.
Technical datas
Possible faults
| GSC | GSCT | |
| Type | 3,6 | 3,6 |
| Rated battery voltage | 3.6V | 3.6V |
| Capacity | 1.3Ah | 1.3Ah |
| Rechargeable battery | Lithium ion | Lithium ion |
| Cutting width - grass shear | 80 mm | 80 mm |
| Cutting length - shrub shear | 110 mm | 110 mm |
| Distance of knives | 8 mm | 8 mm |
| Operating time, approx. | 40 min | 40 min |
| Charging time, approx. | 4 h | 4 h |
| Sound pressure level LPA | 74,6 dB (A) | |
| Measured sound power level LWA | 86,4 dB (A) | |
| Measuring uncertainty KPA / KWA | 3.0 dB (A) | |
| Guaranteed sound power level LWA | 90 dB (A) | |
| Hand arm vibration | 1.63 m/s2 | |
| Measuring uncertainty K | 1.5 m/s2 | |
| Telescopic handle | - | ● |
| Weight of the shrub shear | 0.64 kg | 1.07 kg |
| Weight of the grass shear | 0.55 kg | 0.99 kg |
| Charger | ||
| Input | 230V~ 50 Hz | |
| Output | 6V, 500mA | |
| Protection class | II |

Before each maintenance and cleaning work: — switch off device
-
wait until the cutting tool comes to a stop
-
wear protective gloves
After each fault clearance, put into operation and recheck all security installations.
| Fault | Possible cause | Removal |
| Machine does not start after switch-ing on | Lithium ion battery run downLithium ion battery defectiveON/OFF-switch defectiveInternal fault | Charge the lithium ion batteryContact the customer service |
| Machine with assembled telescopic handle does not start after switch-ing on | Telescopic handle not correctly engaged in its holder | Check the plug-type connections |
| Machine does not work with full performance | Lithium ion battery run downLithium ion battery defectiveGear unit contaminated | Charge the lithium ion batteryContact the customer serviceClean the gear unit (see section "Cleaning") |
| Machine does not cut properly | Cutting tool blunt/worn | Have the cutting tool reground or replace it |
| Machine cuts with interruptions | ON/OFF switch defectiveInternal fault | Contact the customer service |
| Engine is running, cutting device does not move | Cutting device blockedInternal fault | Remove objectManufacturer or responsible customer service must be called |
| Cutting device gets hot | Missing lubrication => frictionCutting blades are bluntCutting tool has nicks | Oil the cutting deviceHave the cutting tool reground or replace itCheck the cutting tool |
| Cutting time with fully charged battery too short | Missing lubrication => frictionCutting blades contaminatedRechargeable battery is lowBattery service life exhausted | Oil the cutting bladesClean the cutting bladesCharging the rechargeable batteryContact the customer service |
Table des matieres
Release On/Off switch.
2000/14/EG, 2004/108/EG, 2006/95/EG.
IpoceDypa 3a OueHbAne Ha CbOTBETCTBNETo:
2000/14/EG-прилхенье V
n3mpeHOn paBnIe Ha cnIaTa ha 3Byka LwA 86,4 dB (A).
rahpno paHnue Ha cnlaTa Ha 3Byka Lw90 dB (A).
PpIIOXeHc cIeHNTe xapMOHN3npaHn CTaNapTn:
EN 60745-1:2009; EN 60745-2-15:2009
IEC EN 60335-2-94:2008; FprEN 60335-2-94:2009
EN 50366:2003+A1:2006; EN ISO 10517:2009
TexHnueckata DOKyMeHTaunCe CbXpaHraBa B:
ATNKAΓm6X&Ko.KΓ-Texnuecko6hpo-
OT MaH Ha OKOJIO BcEKN 6 CeMnU
Pa6ota c HoxncaTa 3a TpeBa
Bode Te ypea c noxOJa u paBHomepHa ckopoc TnIbXHo n p6a Ha TpeBaTa.

IpnTOBa BHNMaBaIte HOXOBTe Da He ONnpaT B KAmbHnTe Ha p6oBeTe, B KaMbHn IJN CTeHn. HoxOBete MORAT da ce NOBpejT

3a py3aHeTo Ha DbIpyb6OBe TpeBa 3n0JI3BaIte TeJeCKOnHuaHa DpXkKa (OTcACh CneuHa npHaJNeKHOCT).

Perylnpahe Ha pa60Thata BncoOuHa
YpeBbT MoKe Da ce fNkCupa Ha pa6oTHa BncouHa ot 25 n 40 MM.
Pa3BbpteteФнксupaи6oNT (15) n noctabete KOMnIeKta KOJIeNa B JKeJahOTo NOJIOKeHne.
Положенoes
BicocuHa Ha TpeBaTa 25 MM
Положения 30°
BicocuHa Ha TpeBaTa 40 MM
3aTeHHeTe OTHOBO fHKcnpaun8 6oT (14).
TexHnuecka noDpBxxka n noocTbaHe
IpeiBcKa pa6oTa no nopDpBxKkata nNouchTbaHeTo:
ИЗКЛЮВа�уpeда
- n3yaKaIte HOXOBeTe da cnpaT
Hocete 3aunTHn pbkauu
Pa60Tu NTOxHnueckata NOIrpBxKa I NOUcTBAHeTo,pa3NHyNOT ONICAHHTe B HAcTOruNpa3DeJI, MORa Tda Ce N3BbPWBatcamo OT cepBn3a.
3aunTHnTe npncnocoblenia, KOTo ca cBaJIeHc ueI n3BbPbBaHe Ha texHnuecka nOdprbXka I NooNCTBaHe, Tp6Ba Da bDat OTHOBnADLeXHO MOHTnpaHn INPOBepen.
Ia ce n3PON3BAT cAmO opnHnHaHn YactN. IpyrN YactN Morat da npedn3BnKaT HepeDnIMN IOBpeN HapahBaHnA.
TexHueecka noDnpbXkKa
Cleid n3KJIIOUVAHeTo pexeIyI NT HNCTpymeHT He cnpa BeHara. IpeDN da 3aONuHete C peMOHTa IIN NODPbXkata N3UaKaITe BCNUKn Yactn Da CnpaT.
3a da ce rapaHTnpa IPOdbJXHnTeHa n HAdexdHa ynoTpe6a Ha HOxuata 3a Xpactn n TpeBa, N3BbPbBaIte peoOBHO paBOTnte IO texHnueckata NOdpbKka.
PpOBepaBaiTe BepnKHaTa pe3aUka 3a OueBnHn HeoCTaTbci
pa3xla6eHn, npOBuNCHaJI NII NIOBpeHn HOXOBe
- n3HOceHn HJIHapaHeH pa6OTn Bb3JI
- npabnHMOHTnpaH N NOxOJaI INOKpNTN ININpeDna3HcBOpbXKeHNA.
Heo6xOJUMnTe peMOHTn nIIN pa6OTn no TexHnueckata npDpBkKa Tp8Ba Da ce npOBeDat npedn yNoTpe6aTa Ha eJeKtpNueckn HnCTpymEnT.
Почистванe

IouncBaIte ypea rpnKlnBO cIeB BCya ynoTpe6a, 3a da ce 3ana3n 6e3ynpeuHaTa fynKcIy.
- Почистете Корпунca с мека четка плссысуарцал.
-ПодьржайтpeькoxватКITE cyxи He3ambpcEHn CbC mOJIa, MacJOI n rpec.
He Tp8Ba Da 6bDat ynoTpe6BaHn B0a, pa3TBapAun CpeDCTBa n POnIpaUn CpeDCTBa.
-Obphe Te BHMaHne Ha TOBa, 3a npOBetpaHaTe Da 6bDat Cbo6oHn 3a oxJaXdaHeTo Ha DnIraTeJI (OnaChOCT OT pErpaBaHe).
- Почистете редуктора с мека чека.
CmaXeTe 3b6Hnte KoJIeJa c rpec 6e3 cbIbpxaHne Ha KInCeJIHa (Ba3eJIH).
- PeIDOBHO NOUICTBaIte HOXKOBeTe C YeTka IIN Kbpna.
Hnkora He nouchTaBaiTe HOXOBeTe C Boda
→ ONaCHOCT OT Kopo3nA
PeIOBHO Cma3BaIte HOXOBeTe.
Hnkora He n3non3BaIte rpec!
YnoTpe6BaBte eKoJorHNo MaCNo.
CmHa Ha HoxkOBete
OnapocOT HapaHraBe Ha npbCTnTe n pbceTe npn pa60n no pexeue mexaHn3bM. Hocete 3aunTHn pbkabu.
Hoxobete ca noIIOxehn Ha roJMyo HatoBapBaHe n 3HocBaHe. He3a6abH0 CMeHete HOXOBete, aKO 6e3ynpueHaTa paOta He e rapaHTnpaHa.
4 Korato n3noJ3BaTe ypeDa c TeleckOnnHaTa dpbXka, HATNCHeTe OCBO6OxJaBaIoTo KOnYe (21) n 3dbpnaTe TeteckOnnHaT a DpbXka OTeleckOnnHnI dbpXkaU (16).
3 Pa3BbPteTe ΦnKcnpaun 6oT (15) n cBaIeTe KOMIIeKTa KOJIeJa.
8 HaTnCHHeTe cKpaTa nHaKa (a) ① Harope mMaxHeTe Kaaka (10) B noCoka Ha CTpeIkata ②.
CbaJeTe HOka.
9Почисте редуктора И пп Нухда смаде 3b6нITE колета (rpec 6e3 cbдьржане Ha KUCeJIHa, HanpIMep Ba3eINH).
10 NocTaBete KaIaKa: KcpaIte PAnKn Tp6Ba Da CbNpaHAT C MapKpaIte BbpXObE
MecTeTe KaNaKa (10), DoKaTo Ce Ye uPaKaBaHe.
CbXpaHHe
- YpeiTe, KOnTo He Ce n3PON3BaT, CbXpaHЯBaIte C NOCTaBeHa 3aUHTa Ha HOXOBeTe Ha CyXO, 3aTBOpeHO MRCTO, HEDOCbIHO 3a Deua.
- OБьрhte Bнманe Ппеди NO-прдьжntelно CBхpaehne Ha cIeДHOTo, 3a Da yIbJxNte XINBOTa Ha Maшинatura и DA rapaHTnpate Jeecho obcnyXbaHe:
HanpaBeTe OCHOBNO NOUHCTBaHe.
CmaKeTe 3b6HnTe KOneNa c rpec 6e3 cbIbpxKaHne Ha KInCeJIHa (Ba3eJIH).
Cmajte BCnKn DnKxeu Ce yactn (HOxOBe) c MacNo, KoEt o 6e3BpeHNo 3a OKoJHaTa cpeJa.
Hnkora He n3noJ3BaIte rpec!
NocTabete 3aunTaHa Hoxa.
Tapaanuz
Molb B3emTe POB BVHMaHne npINIOxKeHaTa rapaHcNoHnA deKnapaun
I3xBbPpIaHe
UpeiTe, npHaJnEJXHOCHTe n ONAKOKBNTe Tp6Ba Da ce npedabat 3a npepa6oTKa B CbOTBETCTBne c pa3npopeiTe 3a ona3BaHe Ha OKOHHaTa cpeia.
Camo 3a ctpaHnte ot EC

EneKtpnuecknte ypeHn He 6nBa da ce n3xBpIaT B KOHTeHepnTe 3a 6nTOBn OTnabu.
CnopeeBponeeckata DnapeKtna 2002/96/EO 3a cTapnte eJeleKtpnueckn n eJeleKtpoHn ypeN Heu3POn3BaEMnte eJeleKtpnueckn ypeN Tp6Ba da ce cb6npat pa3dEInHO n da ce peuzknapat, be3 da ce BpeNi Ha OKoJIHaTa CpeJa.

Li-ion
JIITHeBO-IOHHnTe 6aTePmH He 6bBa Da ce H3XBpIaT B 6HTOBnTe OTNaIbU, B OrBn IIN BvB BOJa.
CbIJaCHO EByPoneckata DnpeKTHBa 2006/66/EO 3a 6aTeepnte n akymyIaTOPnTe DepeKTHnTe nn 3xa6BeHn akymyIaTOPn/6aTeepn Tp8Ba Da ce peuKnpat. IpeDaBaiTe HeroDnHTe 3a ynoTp6a akymyIaTOPn/6aTeepn Ha KOMyHaJIHnTe c6OpHn nyHKTOBE nII B TbProBCKnTE o6eKTH.
BaTepyTa e 3aIHTeHa OT BbTpEShO CBpbXHaIraHe, ekCTpeMHN TemnepaTpyn I KbCO CbeDnHeHne IIN DeIcTBnE CbC CnJa OT BbH.
JIHTHeBO-IOHHTO CbIbPxAHne Ha 6aTePnra (KoTHe e HnTO OTDeJIHa Yact, HnTO e BrpaIeHa B ypeDa) e NOD Heo6XoIMMaT a rpaHnUHa CToHOC T 3aTOBa He NOnaDa NOD HauHOHaNHTe IIN MEXdYHapOdH NpeDnCaHna 3a ONaCHNe TOBapn. Ho npn TpaHCnOpTnpaHne Ha NObeYe 6aTePnn HapeD6bata 3a ONaCHNe TOBapn MOKe Da npNiDo6ne 3NaueHne n Tp86Ba da 6bDat N3NbJHEn OPepeJeHn 3aUHTn MEPKn. HanpImep 3aNdIbJnxTeJIHo 0603NaHabAhe Ha ONaKOBkata.
Bb3MOxHn HEN3npaBHOCTN
Ппеди BCяко OTстраньа He HeN3npaBHOCT: - n3KlHouBaIte ypeda
I3yakaKeTe HOxOBeTe Da CnpaT
Hocete 3aunTHn pbkauu
CneI otctpaHbAhe Ha Hen3npaBHOCTte NcHete OTHOB B yNtpe6a n npOBePeTe BCnKn oBe3oNaCBAuN yCTpoiCTBa.
2000/14/EG, 2004/108/EG, 2006/95/EG.
2004/108/CE, 2006/95/CE, 2000/14/CE.
A. Pollmeier, management
Symbolen apparatus
2000/14/WE, 2004/108/WE i 2006/95/WE.
2000/14/UE, 2004/108/UE, 2006/95/UE.
- Extent of delivery
- Operating times
- EC Declaration of Conformity
- Symbols on product
- Symbols on charger
- Symbols operating instruction
- Normal intended use
- Residual risks
- Safety Notes
- General Power Tool SafetyWarnings
- WARNING
- Work area safety
- Electrical safety
- Personal safety
- Power tool use and care
- Battery tool use and care
- Service
- Safety notes for battery-operated shrub and grass shears
- Safety notes for chargers
- Safety instructions
- Description of device
- Before the first commissioning
- Charging the rechargeable battery
- Telescopic handle*
- Assembling the telescopic handle
- Adjusting the operating height
- Removing the telescopic handle
- Commissioning
- Switching On / Off
- Switch on
- Switch off
- Working instructions
- Vibrations
- Working with the shrub shear
- Working with the grass shear
- Maintenance and Care
- Maintenance
- Cleaning
- Changing the cutting tools
- Storage
- Guarantee
- Disposal
- Removing the rechargeable battery
- Transport
- Table des matieres
- Pa6ota c HoxncaTa 3a TpeBa
- Perylnpahe Ha pa60Thata BncoOuHa
- TexHnuecka noDpBxxka n noocTbaHe
- TexHueecka noDnpbXkKa
- PpOBepaBaiTe BepnKHaTa pe3aUka 3a OueBnHn HeoCTaTbci
- Почистванe
- IouncBaIte ypea rpnKlnBO cIeB BCya ynoTpe6a, 3a da ce 3ana3n 6e3ynpeuHaTa fynKcIy.
- CmHa Ha HoxkOBete
- CbXpaHHe
- Tapaanuz
- I3xBbPpIaHe
- Bb3MOxHn HEN3npaBHOCTN
- Symbolen apparatus
Brand : ATIKA
Model : GSCT 3,6
Category : Hedge trimmers