
MR PIZZA - Pizza oven PALSON - Free user manual and instructions
Find the device manual for free MR PIZZA PALSON in PDF.

| Product type | Electric pizza oven |
| Brand | PALSON |
| Model | MR PIZZA |
| External dimensions (approx.) | 45 × 45 × 20 cm |
| Weight (approx.) | 5 kg |
| Power supply | 220-240 V ~ 50/60 Hz |
| Power (approx.) | 1500 W |
| Max pizza diameter | 30 cm |
| Temperature regulator | 3 positions: 1 (warming), 2 (180°C), 3 (220°C) |
| Cooking stone | Rotating, removable, washable with water (no detergent) |
| Indicator lights | Green (temperature reached), Red (operation) |
| Viewing window | Yes, to check cooking |
| Handle | Heat-resistant to lift lid |
| Safety | Automatic shut-off in position 0, hot surface, do not immerse |
| Cleaning | Stone: hot water without detergent; body: damp cloth; do not put in dishwasher |
| Usage | Household use only |
| Spare parts and repairability | Repair exclusively by an authorized service center with original parts |
Frequently Asked Questions - MR PIZZA PALSON
User questions about MR PIZZA PALSON
0 question about this device. Answer the ones you know or ask your own.
Ask a new question about this device
Download the instructions for your Pizza oven in PDF format for free! Find your manual MR PIZZA - PALSON and take your electronic device back in hand. On this page are published all the documents necessary for the use of your device. MR PIZZA by PALSON.
USER MANUAL MR PIZZA PALSON
1 Temperature regulator
2 Green temperature control light
3 Red operation control light
4 Ventilation grooves
5 Legs
6 Handle
7 Window
8 Lid
9 Supply cable
10 Upper element
11 Lower element
12 Cooking stone
Our products are designed to attain the highest quality, functionality and design standards. We hope you enjoy your new "MR.PIZZA" pizza maker from PALSON.
SAFETYWARNINGS
- Read the instructions thoroughly before using the device. Follow the safety instructions in order to avoid any damage caused by inappropriate use.
If this device were to be given to someone else, it should be accompanied by its instructions book. - Keep these usage instructions in a safe place.
- This device is not suitable for commercial use.
Before using it for the first time, please make sure that the main voltage corresponds to the instructions on the specifications label, as connecting it to an incorrect voltage could damage the device and even break it. If you do not know your main voltage, ask an electrician. - Connecting it to an incorrect voltage could damage the device and even break it.
- Do not under any circumstances change the plug.
- Do not pull the power cable to unplug it from the socket.
- Make sure that there is no risk of the cable hanging.
- Make sure that the cable has not been crushed, twisted or chafed against sharp edges.
- Regularly check the power cable for any damage.
- Never touch the plug's pins after disconnecting it from the socket.
If an extension lead were to be used, it must be suitable for a corresponding output.
This appliance is not designed to be used by people (including children) with physical, sensory or mental disabilities or who have no experience or knowledge, except when supervised or have been given instructions on the use of the appliance by the person looking after them. Children must be supervised to ensure that they do not play with the appliance. - If the power cable is damaged, it must be replaced by the manufacturer, authorised technical service or qualified engineer to prevent dangerous situations.
ELECTRICAL APPLIANCE USAGE:
Put the electrical appliance on a flat, heatproof and strong surface. Maintain a minimum distance of 15cm from other electrical appliances.
The electrical appliance must be put in the following places:
Near to heat sources (such as gas burners, pots and stoves).
Near to inflammable objects (such as curtains).
- Damp places (such as the bathroom).
- Outdoors.
RISK OF ELECTRIC SHOCKS:
Do not use the electrical appliance if the following has occurred to the appliance or the power cable:
Visible damage.
The electrical appliance has been dropped.
- The pizza maker has come into contact with water.
Do not put the appliance into water or other liquids. Prevent the power cable/plug from coming into contact with water or damp.
Clean the surface of the pizza maker with a slightly damp cloth.
Do not touch the power cable/plug with wet hands.
In the event of damage to the device or a malfunction, unplug it immediately. If the device were not to operate correctly, it should be checked by the Authorised Technical Service.
Never try to repair the electrical appliance yourself. It should only be repaired by the Authorised Technical Service with original spare parts. This will guarantee the safety of the device.
Do not allow anybody who is not familiar with this device or who has not read the instructions to use it. This applies particularly to children and the disabled.
Keep out of the reach of children.
Always disconnect the plug after each use and before cleaning.
Never leave the electrical appliance unattended if the plug is plugged in.
Make sure that the power cable is not damaged by the heat given out by the appliance.
Only use the accessories supplied with the electrical appliance.
Do not use the pizza maker if the cooking stone is damaged.
Do not use the electrical appliance without the cooking stone.
Do not move the device during use.
Attention! The electrical appliance gets very hot during use. Leave the device to cool down completely after use and before touching its surface or any other part.
The temperature of the accessible surfaces may be high when the appliance is operating.
During and after use, only touch the electrical appliance's handle. Take care when lifting the lid as hot steam can be given off.
VENTILATION:
Do not cover the ventilation grooves during use.
Do not insert any objects in the ventilation grooves.
INFORMATION AND RECIPE IDEAS
You can bake a pizza quickly and easily with this electrical appliance.
Both frozen and homemade pizzas and French sticks can be baked with the pizza maker.
Make sure that the diameter of the pizza does not exceed 30~cm . If the pizza is too big it could stick to the electrical appliance's lid and hinder the movement of the cooking stone.
French sticks and other similar products should not under any circumstances touch the upper element.
Many different ingredients can be used to make your pizza. Below are some tips on suitable ingredients and recipes.
TIPS:
Leave wet food to drain well, such as fish or canned food before using them.
Put the topping on the pizza base just before cooking it. This will prevent the pizza base from getting too soaked.
RECIPES:
Pizza dough (dough with yeast)
Ingredients: 400g of flour, a bag of dry yeast (7g) salt, a pinch of sugar, 5 tablespoons of olive oil, 200ml of tepid water.
Kneed the mixture until the dough is soft and without any lumps. Cover it and leave it to rest for 30 minutes in a hot place.
Kneed the dough again. Cut it in half and stretch each half out onto a surface sprinkled with flour until you have a circle measuring 30 cm in diameter. Leave the edges slightly thicker. You can now cover it with whatever you like.
Pizza topping: Neapolitan
Ingredients: 500 g canned tomatoes, 1 onion, 10 g of salami, olives, sardine fillets, 100 g of mozzarella, 2 tablespoons of olive oil, salt, pepper, oregano and thyme.
Preparation: Slice the tomatoes, onion, salami and olives. Put them on top of the base. Put the sardine fillets and mozzarella cheese in thin slices on top. Sprinkle salt, pepper, oregano and thyme evenly over the pizza. Then sprinkle it with olive oil.
Pizza topping: Tomato mozzarella
Ingredients: 1 handful of basil, a clove a garlic, 100g of crème fraîche, 50g of mascarpone cheese, salt and pepper, 8 small tomatoes, 200g of mozzarella, 3 tablespoons of pine kernels.
Preparation: Wash the basil and leave it to drain. Chop the garlic finely. Mix the crème fraîche and mascarone together. Mix the garlic and basil. Season with salt and pepper. Wash the tomatoes and slice them. Dice the mozzarella cheese and chop the pine kernels finely. Cover the dough with the basil mixture and put the tomatoes and diced mozzarella on top. Sprinkle with pine kernels. After baking, decorate with fresh basil leaves.
BEFORE THE FIRST USE:
Remove all the electrical appliance's internal and external packaging. Check the electrical appliance for any damage during transport and make sure that it has come with all its components.
The box is ideal for storing the device when it is not going to be used for long periods of time.
Make sure that the plug is disconnected.
Clean the pizza maker on a flat and heatproof surface.
Do not put the pizza maker on fragile pieces of furniture, as its legs could discolour the surface. Put a non-slip tablecloth underneath the pizza maker if necessary.
The electrical appliance may give off some smoke the first time it is used. This is normal. This is caused by residues inside the electrical appliance that are burnt the first time the pizza maker heats up.
Warning: Keep the packaging out of the reach of children.
HANDLING:
Insert the cooking stone in the pizza maker. Make sure that the stone is correctly inserted in the horizontal position. (Fig. 2 and 3).
Turn the temperature regulator to the "0" position. Lower the lid completely. You should only plug the pizza maker in a this moment. The red operation light will turn on and the cooking stone will start to turn.
Preheat the electrical appliance: Turn the temperature regulator to temperature 1, 2 or 3 (see the following table). The green heat control light will turn on.
The elements now start to heat up the pizza maker. Keep the lid closed when the pizza maker is heating up. The pizza maker is hot enough to bake your pizza when the green heat control light turns off.
Warning: The electrical appliance is heating up too much during use! Pick the electrical appliance up with the handle during and after use.
Ready-made pizza preparation: Remove the plastic film and wrapping from the pizza before putting it into the pizza maker. Open the lid (take care with the steam when you open it). Place the pizza on the cooking stone. Make sure that the pizza does not overlap the cooking stone's edge. Close the lid.
The temperature setting and baking time depend on the base, the type and quantity of topping and personal tastes –thick or thin and crusty. Watch your pizza through the window during baking. The topping and base should be brown, but not too dark.
The following table contains standard values. When baking ready-made pizzas, make sure that you also read the manufacturer's instructions.
| ADJUSTMENT | USE |
| 0 | The pizza maker is at the minimum temperature setting. |
| 1 | Heating a ready-made pizza. |
| ADJUSTMENT | TEMPERATURE | TYPE OF PIZZA | PIZZA BASE | COOKING TIME (MIN.) |
| 2 | 180 +/- 15°C | Ready-made pizza(Refrigerated) | Thin | 10 |
| 2 | 180 +/- 15°C | Ready-made pizza(Refrigerated) | Thick | 12 |
| 3 | 220 +/- 15°C | Frozen pizza | Thin | 13 – 16 |
| 3 | 220 +/- 15°C | Frozen pizza | Thick | 15 – 20 |
| 2 | 180 +/- 15°C | Home-made pizza | Thin | 8 – 12 |
| 2 | 180 +/- 15°C | Home-made pizza | Thick | 10 – 15 |
| 2 | 180 +/- 15°C | French stick (frozen) | 7 – 9 |
The temperature can be adjusted at any time during the cooking.
The green heat control light turns on and off occasionally during the cooking process. This indicates that the pizza maker heats up from time to time to maintain the selected temperature.
The pizza maker can be opened for a moment during the cooking to check if the pizza is ready. After closing the pizza maker, the cooking stone will change direction.
Taking the pizza out:
Open the lid with the handle. Take the pizza off the cooking stone with a spatula and put it onto a large plate (minimum 30 cm in diameter).
Close the lid again if you want to bake more pizzas in the pizza maker.
Finishing baking:
Turn the temperature regulator to the "0". Unplug the electrical appliance. Leave the lid closed so that the electrical appliance cools down. Check that the pizza maker cools down out of the reach of children.
TROUBLESHOOTING
| PROBLEM | CAUSE | SOLUTION |
| Screeching is heard inside the electrical appliance. | The cooking stone is rubbing against the inside of the electrical appliance. | The cooking stone occasionally coming into contact with the inside of the electrical appliance is normal. |
| The cooking stone does not turn or has difficulty doing so. | The cooking stone has not been inserted correctly. | Leave the electrical appliance to cool down completely. Put the cooking stone inside the device correctly. |
| The cooking stone is obstructed by the pizza. | Place the pizza on the cooking stone correctly. | |
| The pizza is too big. | Cut the pizza into pieces and bake them separately. | |
| The pizza base is not nice and crusty. | The pizza maker has not been preheated. | Preheat the electrical appliance before putting the pizza in. |
| The temperature has been set too low. | Turn the temperature regulator to a higher temperature (2 or 3) | |
| The pizza has not been baked for long enough. | Extend the baking time. | |
| The pizza is burnt. | The temperature has been set too high. | Turn temperature regulator down. |
| The pizza has been baked for too long. | Shorten the baking time the next time. |
CLEANING AND CARE:
Unplug the electrical appliance and leave it to cool down completely before cleaning.
Cooking stone cleaning:
Put the cooking stone in hot water, to remove any remains of food.
Warning! No do use any washing up liquid to clean the cooking stone, as it may seep into the cooking stone's pores and then be absorbed by the food.
Remove any remains of food from the cooking stone. Then swill it again with water and dry it.
If you can not remove the food remains this way, follow the instructions listed below:
Mix 75g of powdered yeast with three tablespoons of water. Apply the mixture on the dirty parts of the cooking stone.
Leave it to soak for 20 minutes. Clean the remains of food from the cooking stone. Swill the cooking stone again under water and dry it.
Do not under any circumstances scrape the remains of food from the cooking stone with sharp objects.
Pizza maker cleaning:
Clean it with a soft, damp cloth or sponge. Make sure that water does not come into contact with the heat producing elements. Then dry.
Do not submerge the pizza maker in water!
Never use paraffin, solvents or any type of abrasive or strong cleaning products to clean the electrical appliance.
Please do not wash any part of the electrical appliance in the dishwasher.
Thank you for choosing one of our products.
RISQUES D'ÉLECTROCUTION:
VEILIGHEIDSWAARSCHUWINGEN
IPIN ANO TTH INPOTXPHSH:
Byalte ola ta eaptnuata ato tn oukeuaia tnc oikaicns oukeun. EetaoTe Tny oikaikn oukeun via qnuecs aTo n metapopkai baiwtheta ot Exete Aabi ola ta eaptnuata.
H oukeuaia eivai to tLeio aToeKutko eo o TepiTTwn Tou d Oa xpoaiotoiae Tnv oikakn oukeun yia TLOu meyalo xpvikó biatma.
He BCTabIaIe HnKakme npEdMeTb I npope3n dIy BeHTnIaIu.
INHOPMALUINIENPEJITTOB
Hn npa KaNX o6ctoTeIbCTbax He COCKaBnaBae OCTaTK NiuC n PIIITK NcOCTpbIM NpeMeTaM.
UcTka NeuK:
IpoHCTnTe ee BnaXHoM mRKO caFpeTko nIN ry6ko. YbeNTecb, yTO BOa He nonAaet Ha qactN, KOtOpBb EblpaBaTBaHOT TeIIIO. Iocne 3TOBO BcCyUInTe ee.
He onyckai Te neky B Body!
HnKoIa He nCIOJIb3yIte 6eH3nH, pactBOpHTeIN IIN KaKHe-1nbo abpa3nBhie INJ KecTKe YnCTaIe CpeDCTBa PnI Chtke 6bITOBOrO npi60pa.
IopxanyiCTa, He MoTe YacTn 6bITOBORO npnbopa B nocydomooeHou MaunHe.
Cnacnbo 3a Baue DoBepne npn BbIope OndHoro n3 haunx npOyKTOB.
aaii iiaai jai aaiy bai yaiy bai yaiy aaiy aiai
pabll lalai aai 20 ad algill gbc blll gl jil . gbal ayj gaaalcl jgl ybc blll gia . clal jgc 3 qo sall jpa 75 bsl
a a a a a a a a a a
e 100
j
aaii i aai jai jai gie o bai pae no ai .ui jai yil jai all na aebj jell
aill aiee iie gaiy, abaii ciibial no ay yia yia yia yia yia yia
cilllally jlll j 0j j 1uuiy llnna
Lilaiia 1 JuiiLi Li
(3,2J)jawaiall gai jai jai jai jai jai jai
J 1 J 1 J 1 J 1 J 1 J 1 J 1 J 1 J 1 J 1 J 1 J 1 J 1 J 1 J 1 J 1 J 1 J 1 J 1 J 1 J 1 J 1 J 1 J 1 J 1 J 1 J 1 J 1 J 1 J 1 J 1 J 1 J 1 J 1 J
e 1 j 1 j 1 j 1 j 1 j 1 j 1 j 1 j 1 j 1 j 1 j 1 j 1 j 1 j 1 j 1 j 1 j 1 j 1 j 1 j 1 j 1 j 1 j 1 j 1 j 1 j 1 j 1 j 1 j 1 j 1 j 1 j 1 j 1 j
y 1
jll jaiiaial jll jaiy jaiy jaiy jaiy jaiy jaiy jaiy jaiy
julll lall aill lll lll
aal 1 aai jai yjai jai jai
Aoc cui jai
jai jia jia jia jia jia jia jia jia jia jia jia jia jia jia jia jia jia jia jia jia jia jia jia jia jia jia jia jia jia jia jia jia jia jia jia jia jia jia jia jia jia jia jia jia jia jia
Aolaii oai jai jai jai jai jai
Jusly aalall ayillll
Clllglg Cllglg
aalal jai jiall ljjll jia aai all jjll gab
a 15 jj j j
i 1
Aalll clllglll glll lssll jnnn nn nnnn nn nnnnnnnnnnnnnnnnnnnnnnnnnnnnnnnnnnnnnnnnnnnnnnnnnnnnnnnnnnnnnnnnnnnnnnnnnnnnnnnnnnnnnnnnnnnnnnnnnnnnnnnnn
:
a a a a a a a a a a a a a a a a a a a a
j j 1 j 1 j 1 j 1 j 1 j 1 j 1 j 1 j 1 j 1 j 1 j 1 j 1 j 1 j 1 j 1 j 1 j 1 j 1 j 1 j 1 j 1 j 1 j 1 j 1 j 1 j 1 j 1 j 1
:
:()
yjusagablab:1jzulclig
3 200 100 100 100 100 100 100 100 100 100 100 100 100 100
a 1
:J521 pJ 53
j 1
jie 12.
ARIZALARIN BULUNMASI
He no3B0JraBaiTe Ha Iina, KOIto He ca 3a0n3HaTc Tc03u ypei nIIN KOIto He ca YeJIyNbTBaHETo, da I3no13BaT ypeia.
Toba ce oTHac OoBEno 3a Deuata n 3a Xopata C yBpeKdAnna.
CbxaHbAte ypeHa Ha HeoCTbnHn 3a Deca Mecta.
CNEUJHIN 3AEJEKKN IO OTHOHEHNE HA BE3ONACHOCTTA HA TPNIA 3A NILCA
BinHn n3KJIouBaIte ⅢeCEJa CJIeD BCaKO n3NoI3BaHe I npEiN BcAKO nOuHmCTBaHe Ha ypeHa.
Hikora He octabraye eIeKtpoypea 6e3 ha6nHOJHe, aKO IeNcIbTe BKnIOUeH B KOHTa.
YbepeTe ce, Ye 3axpaHbAunr Ka6en Hma Da ce NOBpeDn OT TOnPiHa, I3IbYBaHa ot ypea.
I3no3BaTe eDnHCTBeHO akcecoapn, npeoctabeHH 3aeHc O eNeKtpoypea.
He n3noJI3BaIte rPnla 3a PnI, aKo IIOUaTa 3a roTBeH e noBpeDeHa.
He n3noJI3BaIte eIeKtpOypeDa 6e3 IIOuYaTa 3a roTBeHe.
He mectete ype da doka to pa60tn.
BnHmHHe! Np BpeMe Ha pa6oTa ypebT ce HarpBa CnHIO. OCTaBeTe ypeDa ca ce oxnaDi HapbIHO cnei KaTO e 6nI IN3PON3BaH, PpeDn Da DOKOCBaTe NOBpXHOCTTa My IIN Dpyr HiROBv qactN.
He dokocbaite nloata 3a roTbeH npynte yactn, aK eNektpoyeBbT Bce oue He ce e oxnaan HnablnHO.
IocTaBete IIOUaTa 3a roTBeHe B TOnla BOda, 3a da NOuNCTnte OctaTbCnTe OT XpaHa.
IpeynpexdHne! He n3no3BaTe HnKaBb npenapat 3a MneHe Ha cBdoBe, 3a da noocntte pIoUata 3a roTbeHe - ToM OKeJa IpoNHKe B uynPiTe Ha IIOuata 3a roTBeHe i CnEd TOBa Da 6bDe abcOpBupan OT xpaHata.
IOnHCTe OCTaTbUHTe OT XpHaNo IInOuTa 3a rotBeHe. CneTd TOBa N3nJIaKHeTe OSe BeHNbX C TeaAs BODa N anoNDcyWeTe.
Ako He ycneete da oTcTaHnTe octaTbUte OTo HauHa No To3n HaunH, HanpaBeTe cJeDhoto:
CmecTe 75 r Ma h npax C tpr nIbJnIu BOa. Pa3npedene TcmeTa Bbpy 3aMbpceHnte yactbun Ha IIOUATA 3a rotBeHe. Octabete Da KIncHe 20 MInyTu. POnCTeTe OCTaTbUte OT XpaHa No IIOUata 3a rotBeHe. N3PiakHete OTHOBO IIOUATA 3a rotBeHe C Teuaa BOa I a NocdyWe.
ПиMuKakBn ObctOraTeJIcTba He Tpr6Ba Da I3TpIbTaTe OCTaTbUITE OT XpaHa No ПIOuata 3a rotBeHe C NOMoUta Ha OCTpNpeMTeN.
IouncTbaHe Ha rpnla 3a niu:
TOncTe Tc MeKo BnaxHo napHe PnAT nIc Tb6a. YBepTe ce, Ye Bbpxy HapRbaunTe eIemEn He Kane Boda. HauHakpar noCcyuTe.
He notanayte rnpa 3a nui BbB Boda!
Korato nouchteBaTe enekTpoyeDa, HNKora He n3no13baIe neTpO, pa3TBopntEn nn KaBbTO n da 6nIO TnI abpa3NBn nn CINHn NouchTaAsn npOdykTN.
Moi, He MInTe HIKoA OT cHtne Ha eNeKtpOypeBa BcDomnHa MaunHa.
Blaqopm Bn 3a okazahoto dobepne da n36peTe eINH OT hauNTe npOkyTNI.
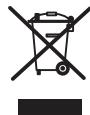
Disposal of old Electrical & Electronic Equipment (Applicable throughout the European Union and other European countries with separate collection programs)
This symbol, found on your product or on its packaging, indicates that this product should not be treated as household waste when you wish to dispose of it. Instead, it should be handed over to an applicable collection point for the recycling of electrical and electronic equipment. By ensuring this product is disposed of correctly, you will help prevent negative consequences to the environment and human health, which could otherwise be caused by inappropriate disposal of this product. The recycling of materials will help to conserve natural resources. For more detailed information about the recycling of this product, please contact your local city office, household waste disposal service or the retail store where you purchased this product.
a a a a a a a a a a a a a a a a a a a a
.
a jia 1 aai iie gaii lga aai ai y gaiy
gale 1
aee aee eae ee eae eae eae eae eae eae eae eae eae eae
gai sale! jy jyj yj yj yj yj yj yj yj yj yj yj yj yj yj yj yj yj yj yj yj yj yj yj yj yj yj yj yj yj yj yj yj yj yj yj yj yj yj yj yj yj yj yj yj
gaii i ci y jil 11 11 11 11 11 11 11 11 11 11 11


- SAFETYWARNINGS
- ELECTRICAL APPLIANCE USAGE:
- RISK OF ELECTRIC SHOCKS:
- VENTILATION:
- INFORMATION AND RECIPE IDEAS
- TIPS:
- RECIPES:
- Pizza dough (dough with yeast)
- Pizza topping: Neapolitan
- Pizza topping: Tomato mozzarella
- BEFORE THE FIRST USE:
- HANDLING:
- Taking the pizza out:
- Finishing baking:
- TROUBLESHOOTING
- CLEANING AND CARE:
- Pizza maker cleaning:
- RISQUES D'ÉLECTROCUTION:
- VEILIGHEIDSWAARSCHUWINGEN
- IPIN ANO TTH INPOTXPHSH:
- INHOPMALUINIENPEJITTOB
- UcTka NeuK:
- ARIZALARIN BULUNMASI
- CNEUJHIN 3AEJEKKN IO OTHOHEHNE HA BE3ONACHOCTTA HA TPNIA 3A NILCA
- IouncTbaHe Ha rpnla 3a niu:
Brand : PALSON
Model : MR PIZZA
Category : Pizza oven