
PLQ 10M - Dehumidifier PUR LINE - Free user manual and instructions
Find the device manual for free PLQ 10M PUR LINE in PDF.
| Product type | Dehumidifier |
| Brand | PUR LINE |
| Model | PLQ 10M |
| Dimensions (L x D x H) | 342 x 245 x 492 mm |
| Weight | 11 kg |
| Power supply | 230 V ~ 50 Hz |
| Dehumidification capacity | 10 L/day at 30°C / 80% RH |
| Tank capacity | 3.6 liters |
| Operating temperature range | 5°C to 35°C |
| Power consumption | 260 W / 1.32 A |
| Refrigerant | R134a |
| Key features | Adjustable humidistat, automatic defrost, permanent drainage option, tank full indicator, automatic shut-off when tank full |
| Maintenance and cleaning | Filter washable with warm water, exterior cleaning with soft cloth dampened with soapy water |
| Safety | Automatic shut-off if tank full or improperly installed, frost protection, do not use below 5°C |
| Spare parts and repairability | Contact customer service via retailer; 2-year warranty |
| General information | Equipped with casters for mobility, carrying handle, filter accessible behind the tank |
Frequently Asked Questions - PLQ 10M PUR LINE
User questions about PLQ 10M PUR LINE
0 question about this device. Answer the ones you know or ask your own.
Ask a new question about this device
Download the instructions for your Dehumidifier in PDF format for free! Find your manual PLQ 10M - PUR LINE and take your electronic device back in hand. On this page are published all the documents necessary for the use of your device. PLQ 10M by PUR LINE.
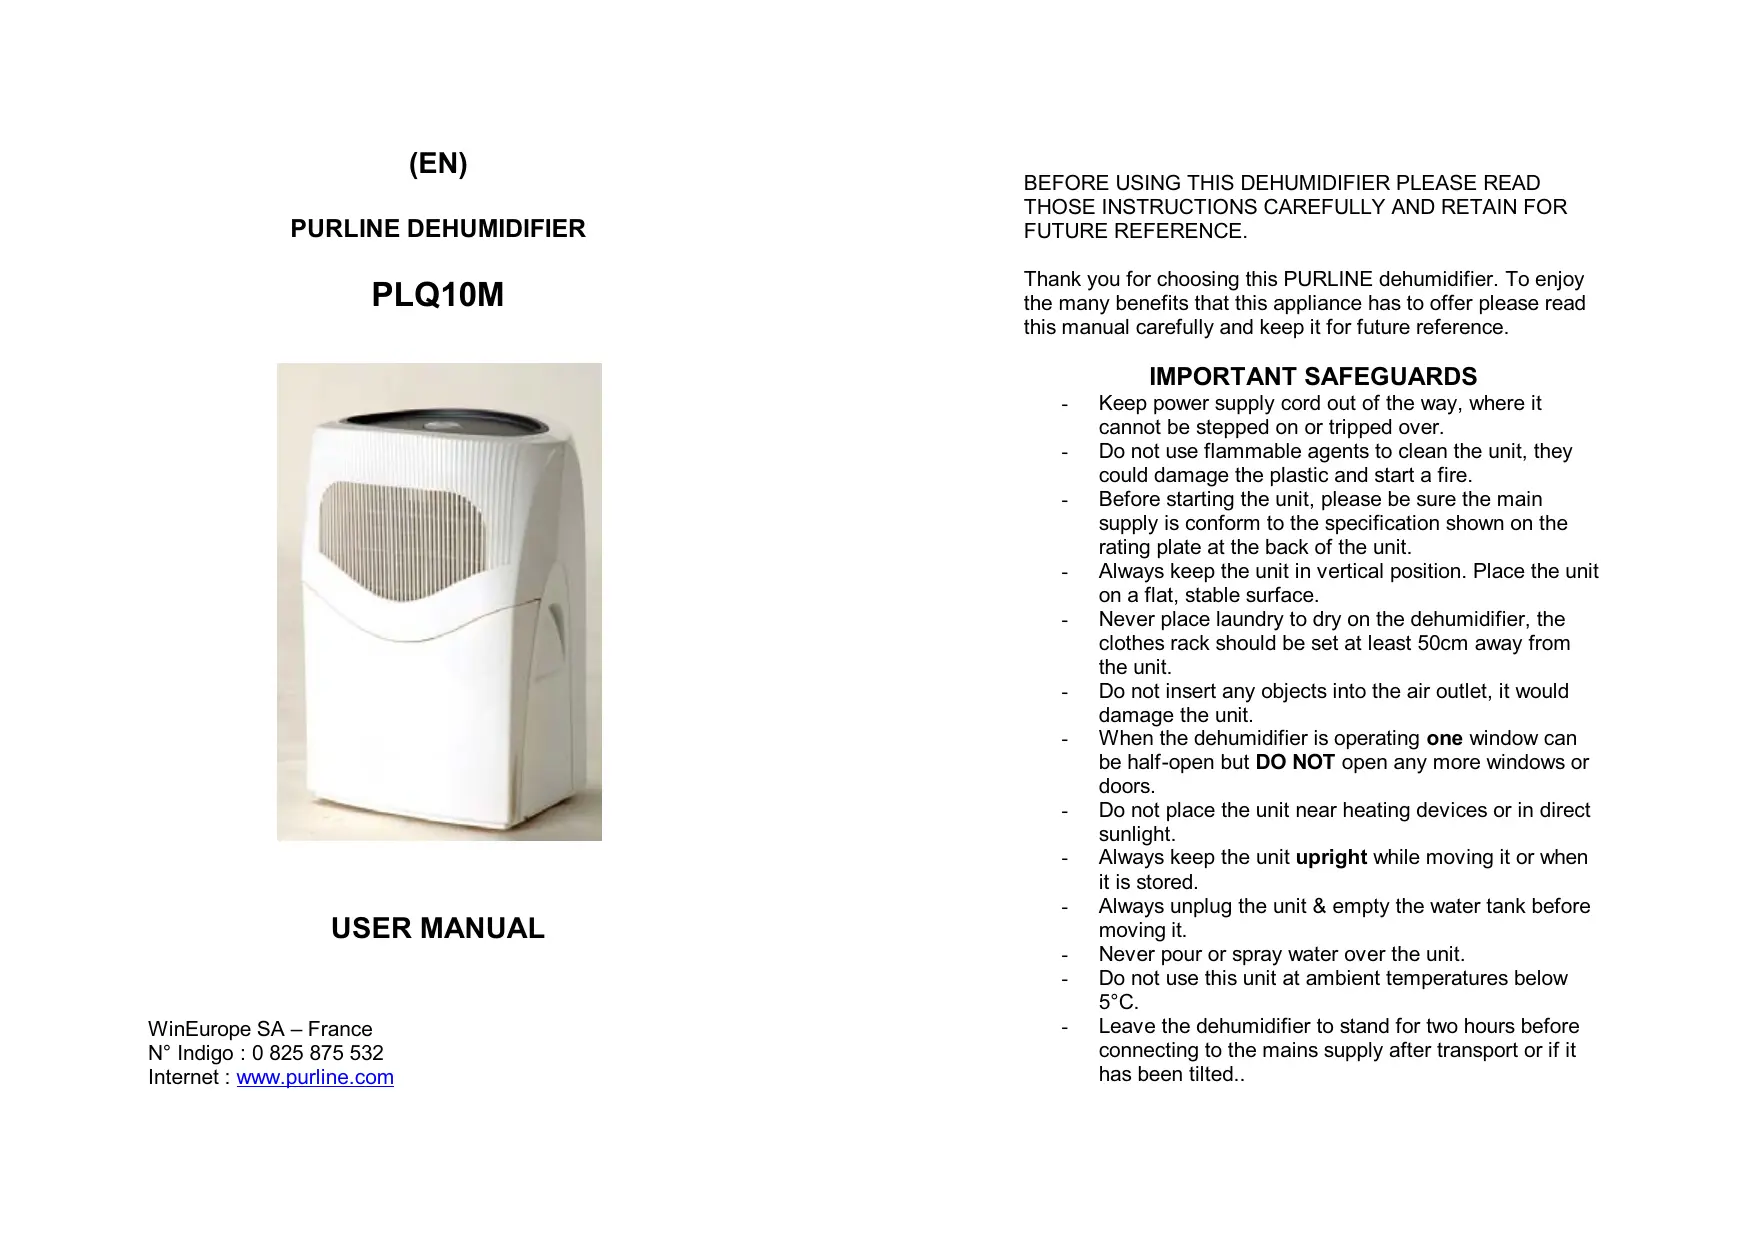
USER MANUAL PLQ 10M PUR LINE
WinEurope SA - France
WinEurope SA - France
Thank you for choosing this PURLINE dehumidifier. To enjoy the many benefits that this appliance has to offer please read this manual carefully and keep it for future reference.
IMPORTANT SAFEGUARDS
- Keep power supply cord out of the way, where it cannot be stepped on or tripped over.
- Do not use flammable agents to clean the unit, they could damage the plastic and start a fire.
- Before starting the unit, please be sure the main supply is conform to the specification shown on the rating plate at the back of the unit.
- Always keep the unit in vertical position. Place the unit on a flat, stable surface.
- Never place laundry to dry on the dehumidifier, the clothes rack should be set at least 50cm away from the unit.
- Do not insert any objects into the air outlet, it would damage the unit.
- When the dehumidifier is operating one window can be half-open but DO NOT open any more windows or doors.
- Do not place the unit near heating devices or in direct sunlight.
- Always keep the unit upright while moving it or when it is stored.
- Always unplug the unit & empty the water tank before moving it.
- Never pour or spray water over the unit.
- Do not use this unit at ambient temperatures below 5^ .
- Leave the dehumidifier to stand for two hours before connecting to the mains supply after transport or if it has been tilted..
If the power cord is damaged, it must be changed by a qualified electrician or the manufacturer to avoid any danger.
HOW IT WORKS
DO YOU KNOW THAT DRY AIR IS WARNING UP FASTER THAN DAMP AIR?
DEHUMIDIFIERS ARE DESIGNED FOR USE IN DAMP
LOCATIONS AND ROOMS WITH HUMIDITY PROBLEMS:
THIS IS WHERE THEY SHOULD BE LOCATED.
As soon as your dehumidifier is « ON » it starts protecting you and your residence from the ill effects of humidity.

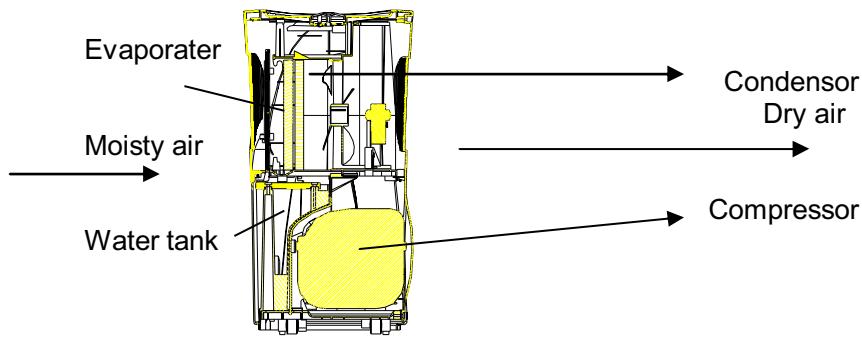
The dehumidifier controls humidity by forcing excess moisture to condense from the air into the unit as it passes over the cooling elements. This condensed water then drains safely into the water tank.
The dried air then passes through a coil where it is slightly warmed end re-enters the room at a slightly elevated temperature: YOU SAVE ENERGY!
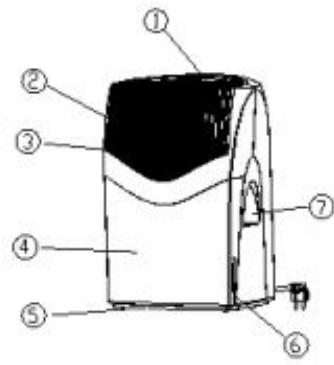
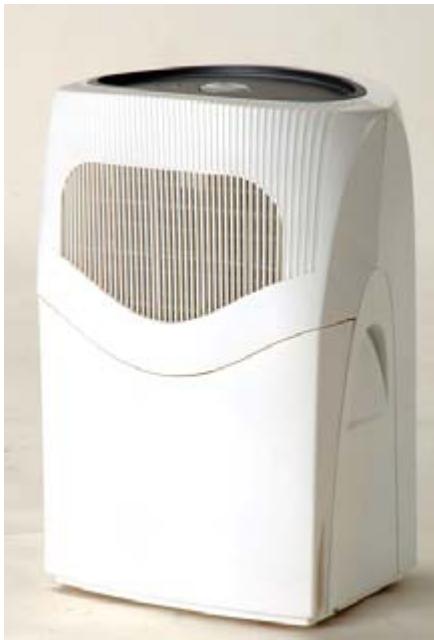
FRONT
- Control panel
- Air inlet
- Filter (inside the unit)
- Water tank
- Caster
- Handle for water tank
- Handle for the unit
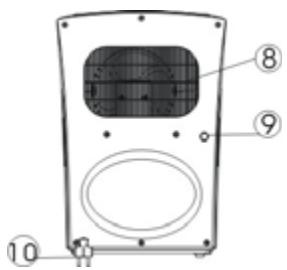
REAR
- Air outlet
- Drain hole for continuous drainage
- Power cord
CONTROL PANEL
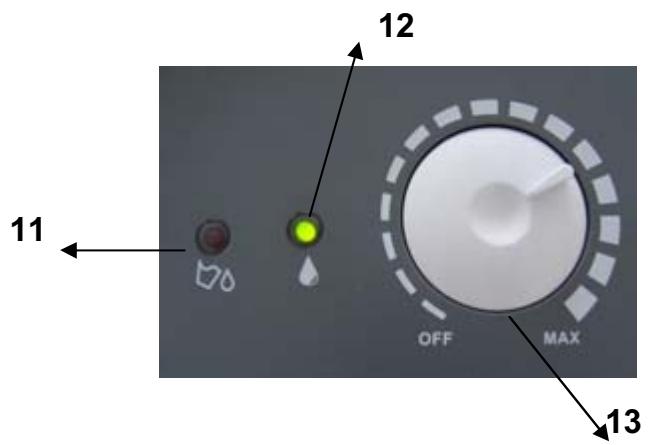
11- Water full indicator
12-Operation indicator
13- On/Off button + humidistat.
Operating instructions
Plug the power cord into a 230V 50Hz grounded wall outlet, then turn the humidistat knob clockwise to start the dehumidifier.
Your dehumidifier will start functioning.
CAUTION: This dehumidifier cannot be used at a room temperature below 5^ .
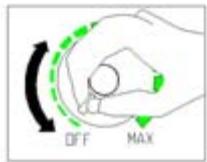
1) This unit is with humidistat. Please set the humidistat (humidity controller) to required humidity level (the intensity of humidity extraction in increased clockwise). For continuous working, set the humidistat to position "MAX".
2) To turn off the unit, turn the humidistat to OFF position.
AUTOMATIC DEFROST
Your dehumidifier is fitted with an automatic defrost system. When ambient temperature decreases to 10^ , the humidity sensitive coils will be covered with frost.
In this case, defrost would be ON and compressor OFF, but the fan is still working.
EMPTYING THE WATER TANK
FIG.4
Disconnect the unit from the wall socket before removing the water tank.
While the water tank is full, the compressor will stop for self-protection and the water full indicator will turn into red.
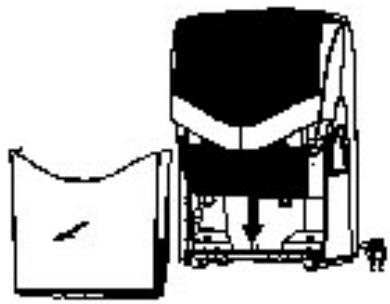
To move the water tank, pull it out squarely from the unit by using the handle at the water tank.
After emptying the water tank, place the water tank into space. Make sure it is properly positioned, in order for the water full sign to go out and your dehumidifier is operating.
Please note in this case, the water tank has not been positioned well, the water full indicator will turn into red.
CONTINUOUS DRAINAGE
PLEASE NOTE: BOTH THE WATER TANK AND THE CONTINUOUS DRAINAGE CANNOT BE USED AT THE SAME TIME.
When the dehumidifier is operated at very high humidity levels, the water tank will require more frequent drainage. In this situation, it may be more convenient to set the unit up for continuous drainage with the following procedures:
Switch off and disconnect the unit from the wall socket before proceeding. You must empty the water tank on a regular basis. The water can be drained continuously by attaching a direct drain hose to the unit (not included with the unit)
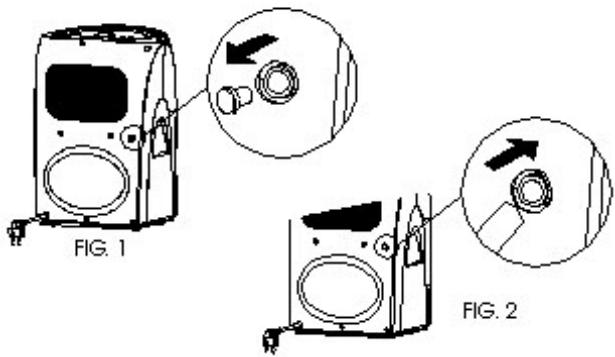
Installing a direct drain:
- Pull out the stopper from the drain hole at the rear of the machine (FIG.1) and connect the drain hole with a water tube of inner diameter 12mm (FIG.2)
NOTE: The water tube is not supplied with the unit.
1 Pull out the water tank. Use the stopper taken from the hole to stick into drain hole B (FIG.3).
2 Ensure the water will always drain away freely and the tube will remain in right place.
Note in very cold weather conditions, precautions should be taken to prevent the water tube from freeing.
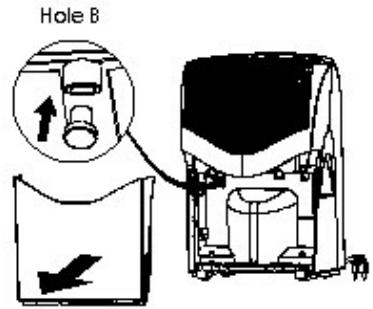
FIG. 3
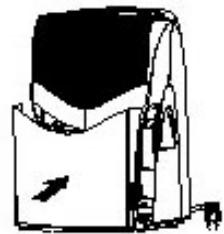
FIG.4
3 Put the water tank back to its position (FIG.4)
The other hose extremity can be directed to a floor drain. The hose must be made of rigid material it should not bend. The hose must be below the continuous drain connector. Be careful not to let the hose extremity get into the drain water.
PLEASE NOTE : when operating the dehumidifier in cool conditions, you must ensure that the hose cannot freeze.
MAINTENANCE
Switch off and disconnect the unit before cleaning.
CLEANING THE UNIT
Always switch off and disconnect the dehumidifier from the wall socket before cleaning. Wipe the unit shell with a soft clean cloth and mild soap. Do not use detergents or abrasives which could damage the plastic.
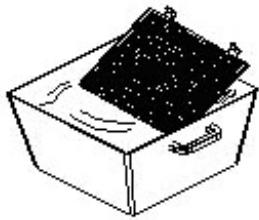
CLEANING THE FILTER
Switch off and disconnect the dehumidifier.
The filter is located behind the water tank (see figure)
- Remove the water tank
- Remove the filter
- Vacuum the filter taking care of not damaging it.
- Replace filter & water tank.
If the filter is particularly dirty, use warm water.
Make sure the filter is completely dry before replacing.
Do not expose the filter to sunlight.
STORAGE
If not use the unit for an extended period of time:
- Please turn the unit off, unplug it.
- Completely empty the water tank & wipe it clean.
- Cover the unit & store where it will not receive direct sunlight.
Pack your unit and the user manual in its original box and store in a cool, well ventilated place.
TROUBLE-SHOOTING
| TROUBLE | PROBABLE CAUSE | SOLUTION |
| Compressor & fan do not run. | No power or incorrect voltage | Check with an electrician. |
| Faulty plug. Short circuit | Check with an electrician. | |
| Fan runs but not compressor. | Defrosting in progress | Wait for end of cycle |
| Allow 3 mn for delayed start. | Normal, will start after 3 minutes. | |
| Ambient temperature too low | Normal, compressor protection | |
| Very noisy unit | Uneven floor | Install unit on a hard level surface |
| Compressor or motor are lost. | Check with SAV | |
| « You can hear running liquid » | Normal :refrigerant is flowing through the coils.. | |
| No or insufficient dehumidification. | Dirty filter | Clean filter. |
| Refrigerant leaking. | Check with SAV | |
| Ambient temperature too low- No humidity to remove | Check temperature & humidity of the room. | |
| Evaporator covered with frost. | Filter too dirty. | Clean filter |
| Ambient temperature too low. | Normal | |
| Overflowing or | Water tank leak | Replace tank |
| leaking water tank | Faulty full tank auto switch | Check with SAV |
PLEASE NOTE
Excessive dampness will quickly be reduced from the air.
However if the location where the unit is operating is extremely damp, you will need a few days or even weeks before you start obtain a comfortable humidity rate.
Condensation on a cold surface is NORMAL. The dehumidifier reduces the air humidity rate and you should notice less condensation on cold windows.
IMPORTANT: IT IS NECESSARY TO WAIT 2 TO 3 MINUTES BEFORE RESTARTING THE UNIT WHEN IT HAS BEEN SHUT OFF. THIS ALLOWS THE REFRIFERATION SYSTEM TO STABILIZE.
Technical specifications
Recommended room temperature : De 5^ à 35^
Dehumidification capacity : 10 I/DAY at
30^ C/80% H.R
Tank capacity : 3.6 litres
Net weight : 11.5 Kg
Dimensions (L x P x H) 342 x 245 x 492mm
Power consumption : 260 W / 1.32A
Input voltage 230V-240V 50 Hz
Réfrigérant R134a
Characteristics prone to change without notice
WARRANTY:
The warranty is valid for 2 years for a "manufacturing fault".
To benefit from the warranty, please return the device to your dealer with POSTAGE PAID along with the document of purchase proof
Discarding worn household devices
The European directive 2002/96/EC pertaining to electrical and electronic waste prohibits such household goods from being discarded with local refuse services. Worn devices must be collected separately to optimize the recovery and recycling rates of the components therein to reduce detrimental effects on the environment and on human health.
The "crossed out rubbish bin" symbol is affixed to all products as a reminder to respect the waste regulations.
(SP)
DESHUMIDIFICADOR PURLINE
PLQ10M
It's also possible to do this by using the formula
WinEurope SA - France
N°Indigo:0825875532
Internet: www.purline.com
WinEurope SA - France
N°Indigo:0825875532
Internet: www.purline.com
VOOR U DE ONTVOCHTIGER VOOR DE EERSTE MAAL GEBRUIKT, RADEN WIJ U AAN DEZE HANDLEIDING AANDACHTIG TE LEZEN EN TE BEWAREN VOOR EVENTUELE RAADPLEGING IN DE TOEKOMST