A LEGRAND 845 27 switch that operates randomly and does not always control the same shutters may be due to several causes. Here are the points to check and possible solutions:
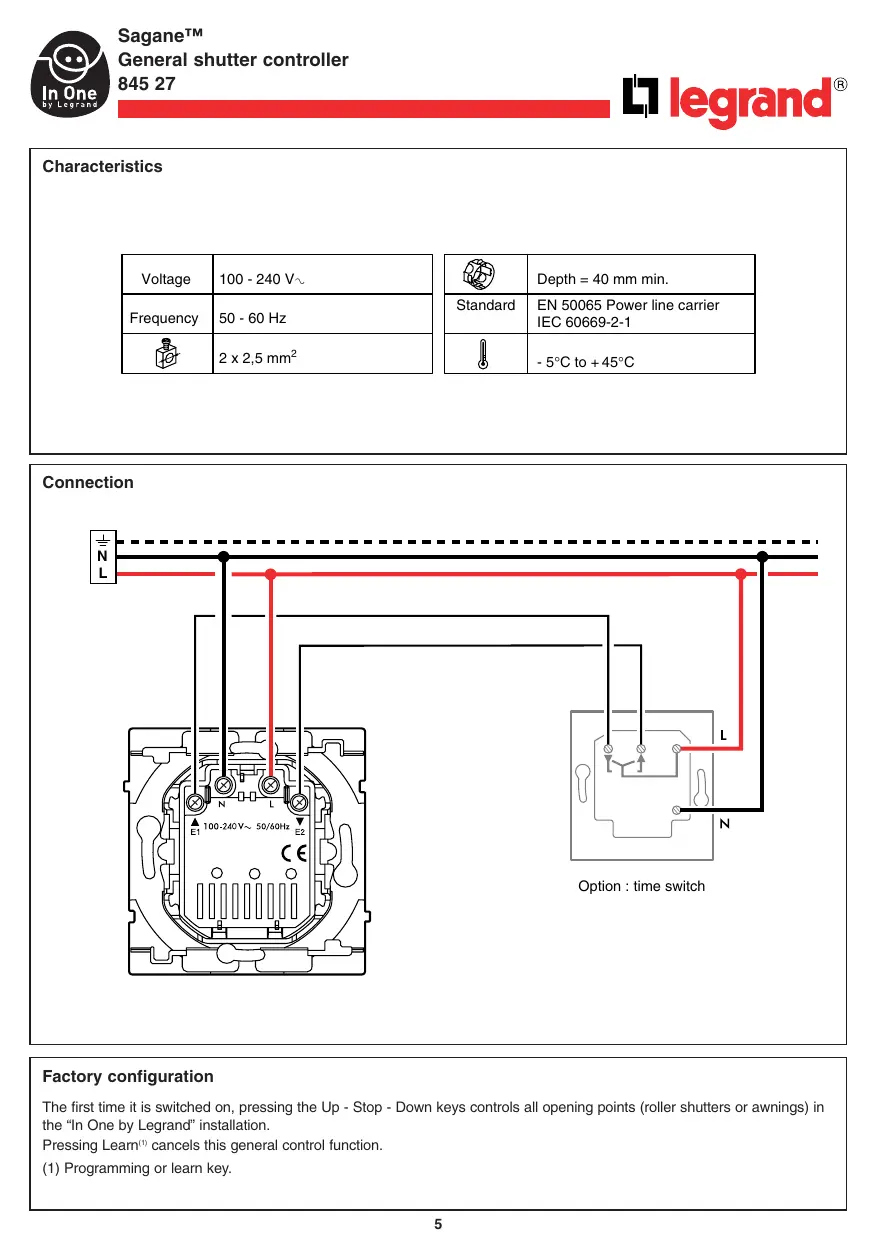
1. Checking electrical connections
Ensure that all connections of the switch and the roller shutters are tight and free of corrosion. Loose or poorly connected wires can cause erratic operation.
2. Checking the shutter controls
Test each shutter individually to see if it responds correctly to the command. This helps identify if the problem comes from a specific shutter or the switch itself.
3. Electrical or electronic interference
Interference from other electronic devices or nearby electrical installations can disrupt the control signal. Try moving away or temporarily turning off other devices to see if the problem persists.
4. Capacity and load supported
Check that the total load of the controlled shutters does not exceed the maximum capacity supported by the LEGRAND 845 27 switch. An overload can lead to random operation.
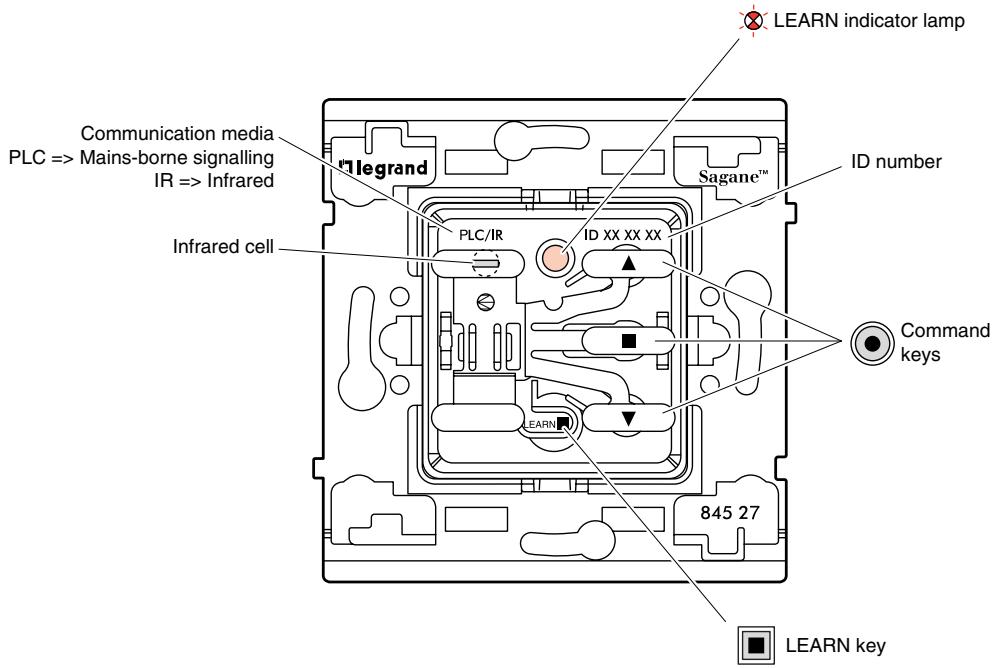
5. Resetting the switch
If the switch has a reset function, perform it to return to factory settings. This can correct configuration errors or temporary bugs.
6. Wear or hardware failure
If after all these checks the problem persists, it is possible that the switch is defective or worn. In this case, replacement or technical intervention may be necessary.
By following these steps, you can diagnose and potentially resolve the random operation issue of your LEGRAND 845 27 switch.