
ML 420 - Dot Matrix Printer OKI - Free user manual and instructions
Find the device manual for free ML 420 OKI in PDF.

| Product type | Dot matrix printer |
| Brand | OKI |
| Model | ML 420 |
| Print technology | Impact dot matrix (needles) |
| Print resolution | Up to 360 x 360 dpi |
| Print speed | Approximately 600 cps (characters per second) in draft mode |
| Paper format | Continuous paper (tractor) and single sheets |
| Interface | Parallel (Centronics), serial (RS-232C), optional OkiLAN 6130 network |
| Dimensions (W x D x H) | Approximately 480 x 370 x 250 mm |
| Weight | Approximately 11 kg |
| Power supply | 220-240 V, 50/60 Hz |
| Power consumption | Approximately 80 W printing, 15 W standby |
| Main functions | Printing forms, labels, slips, reports |
| Maintenance and cleaning | Clean the print head regularly, replace the ink ribbon |
| Safety | Unplug before any intervention, avoid humidity |
| Spare parts and repairability | Print head, ink ribbon, ribbon cartridge, mechanical parts available |
| General information | User manual available in multiple languages, online support |
Frequently Asked Questions - ML 420 OKI
User questions about ML 420 OKI
0 question about this device. Answer the ones you know or ask your own.
Ask a new question about this device
Download the instructions for your Dot Matrix Printer in PDF format for free! Find your manual ML 420 - OKI and take your electronic device back in hand. On this page are published all the documents necessary for the use of your device. ML 420 by OKI.
USER MANUAL ML 420 OKI
OkiLAN 6130 Network Card Installation .... 3
OkiLAN 6130 Network Card Installation
The OkiLAN 6130 Print Server enables Ethernet network users to connect to a network-configured printer. It supports 10/100-megabit networks, TCP/IP Direct Printing and Server-Based Printing.
Note: The OkiLan 6130 can only be used because it is not a parallel cable being connected.
Installing the OkiLAN 6130 Network Card
- Turn off printer power.
- Unplug the power cord.
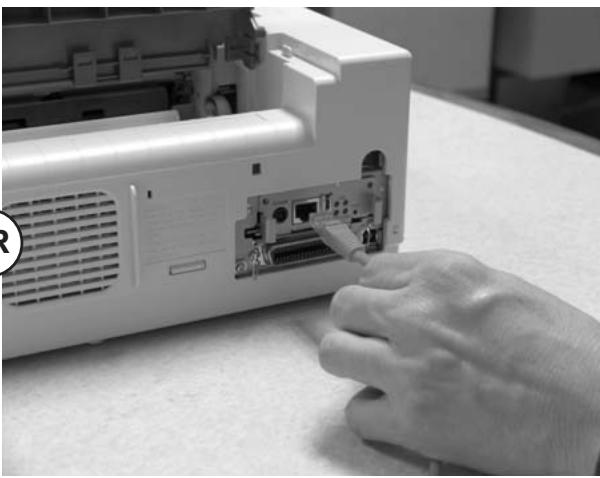
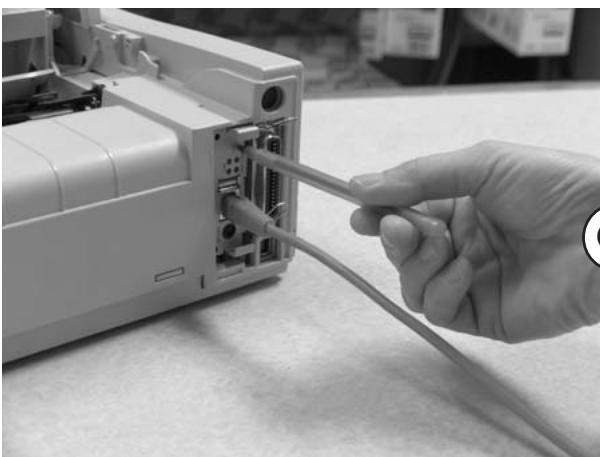
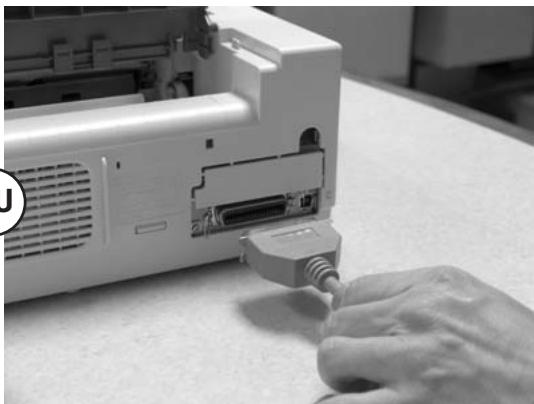
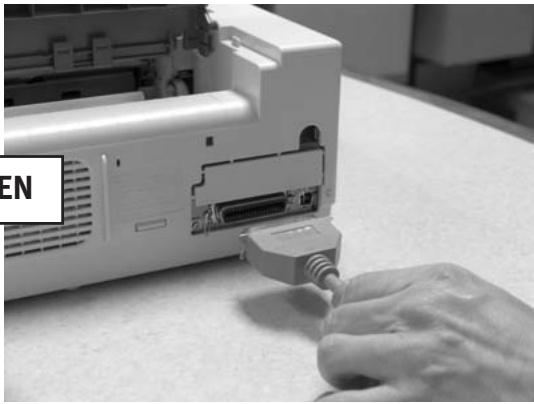
- Detach the interface cable from the rear of the printer.
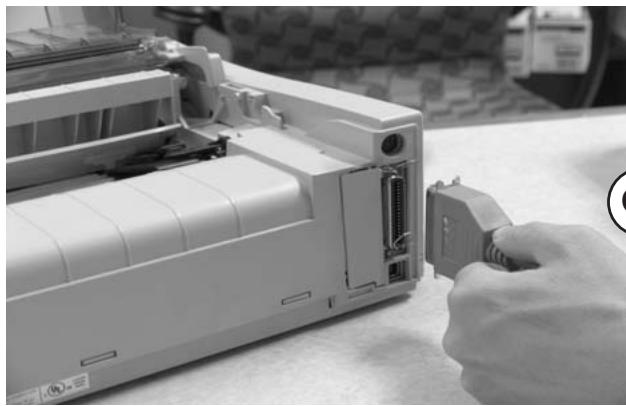
natural_image
Close-up of a hand inserting a plastic component into a white industrial machine casing (no visible text or symbols)OR

natural_image
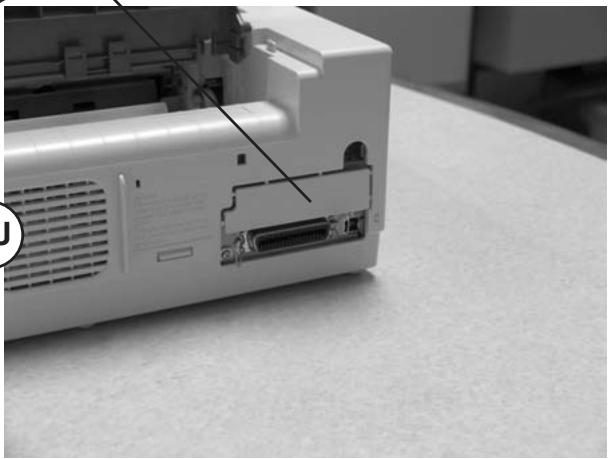
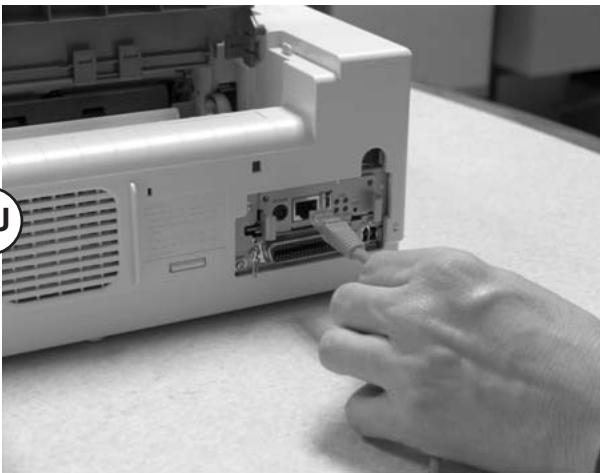
Close-up of a hand inserting a USB into a computer monitor (no visible text or symbols)- Pry off the breakaway panel next to the interface connector with a screwdriver
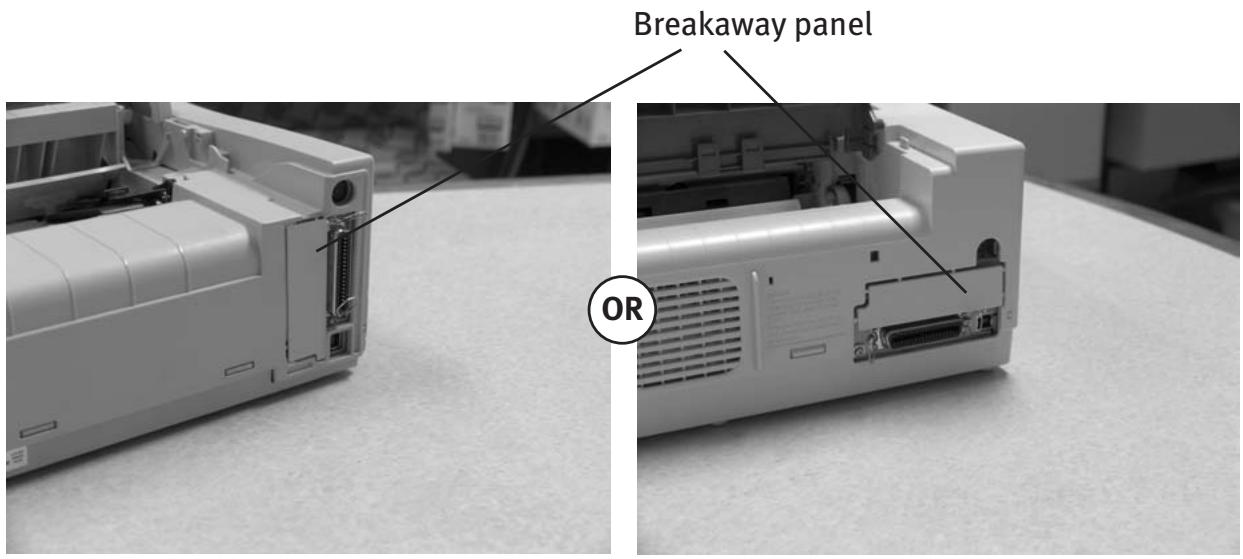
- Insert the OkiLAN 6130 by sliding it along the rails in the recess of the printer, until it is plugged into the socket in the rear of the recess.
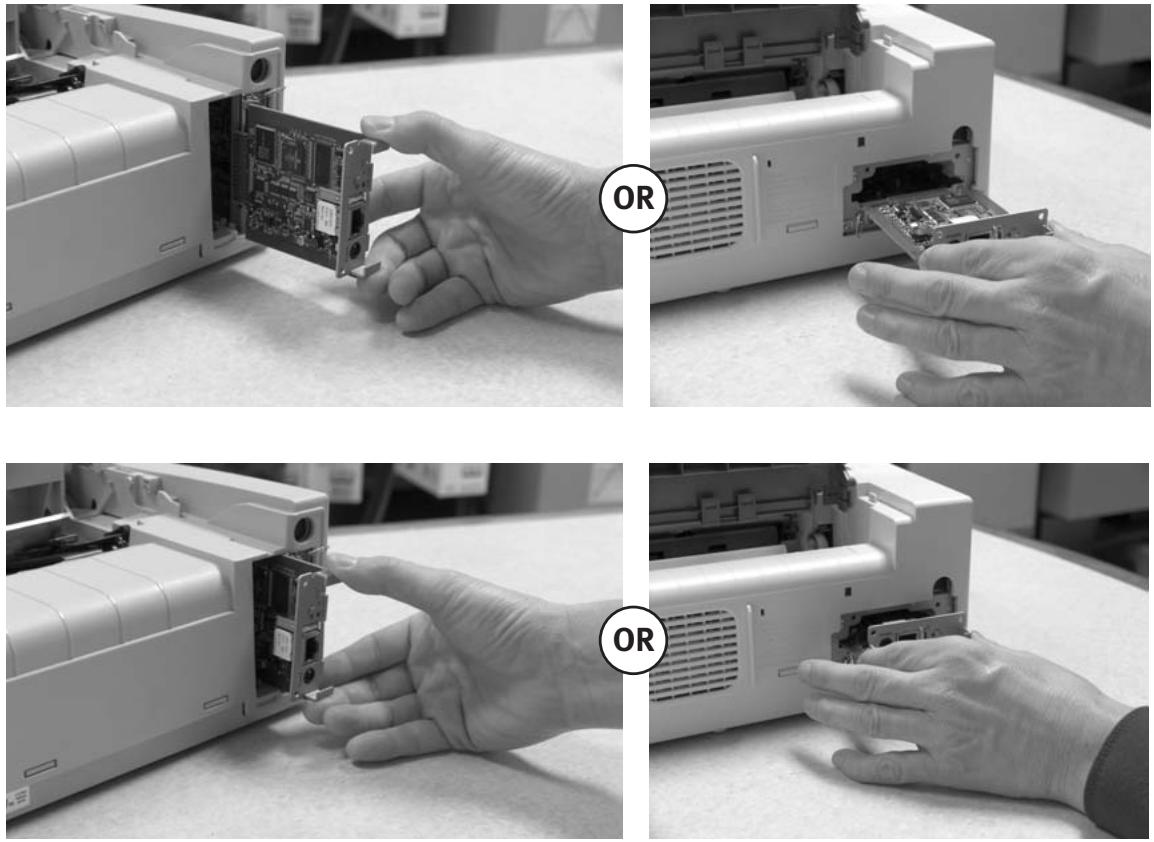
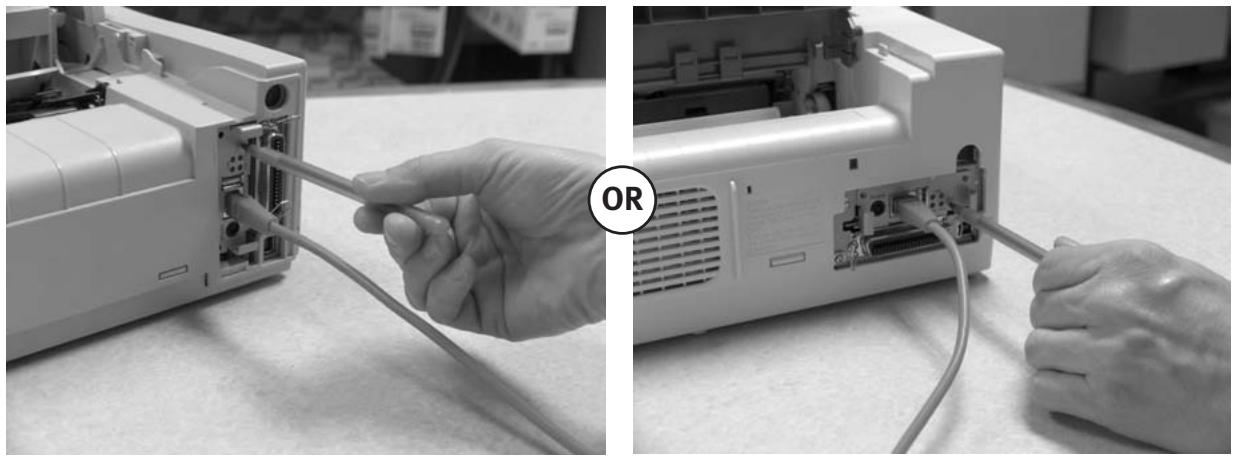
- Attach the 10/100Base-T UTP cable to the receptacle on the back of the OkiLAN 6130. Attach the other end of the cable to the Network.
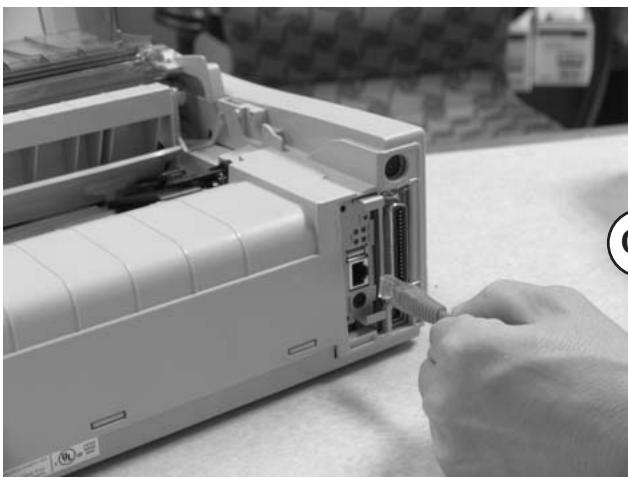
natural_image
Close-up of a hand inserting a cable into a white portable printer casing (no visible text or symbols)OR
natural_image
Close-up of a hand inserting a CD into a portable electronic device (no visible text or symbols)- Plug the power cord into the power outlet (if provided).
Powering On the OkiLAN 6130
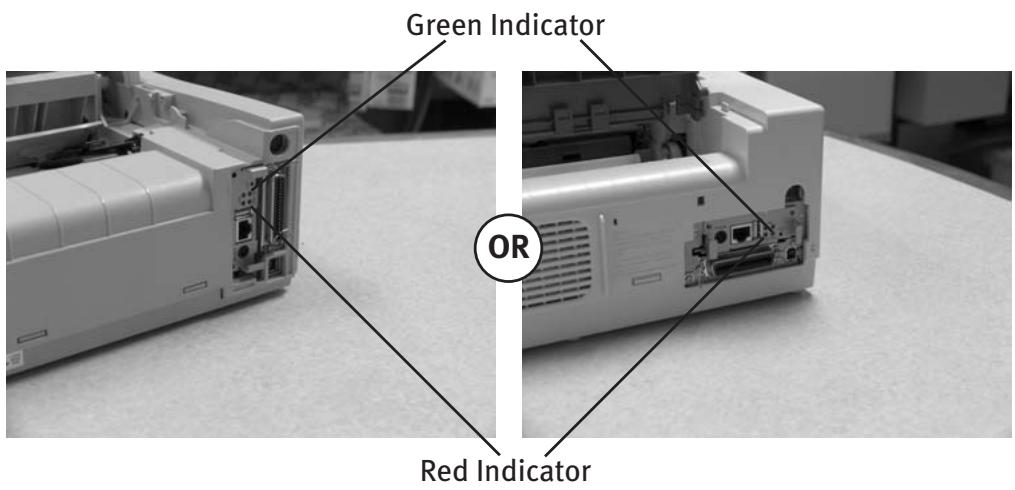
Turn printer power on. The red and green indicators on the OkiLAN 6130 blink during self-test. When self-test completes successfully, the red indicator goes off and the green indicator stays on.
Printing a Configuration Sheet
To print configuration information, press and hold the Test button on the front of the OkiLAN 6130 for five seconds.
natural_image
Two-panel black-and-white photo showing hands connecting cables to a device (no visible text or symbols)Note: By default, the configuration sheet prints in ASCII text.
The content of the configuration sheet depends on your printer and system setup.
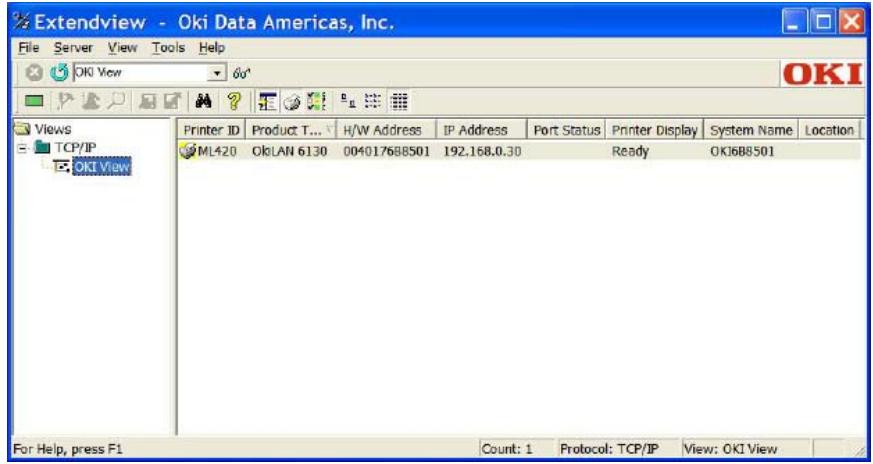
Configuring Your Print Server
Using OKI's ExtendView Utility to Configure Your IP Address
First, download the ExtendView utility from OKI Data's website at http://www.okidata.com – navigate to the page for your specific product, then click on Drivers, then Utilities, to locate the software.
Next, install the ExtendView utility and launch the application.
- In the ExtendView utility, highlight the device you are going to configure.
- Choose the configuration option from the dropdown menu.
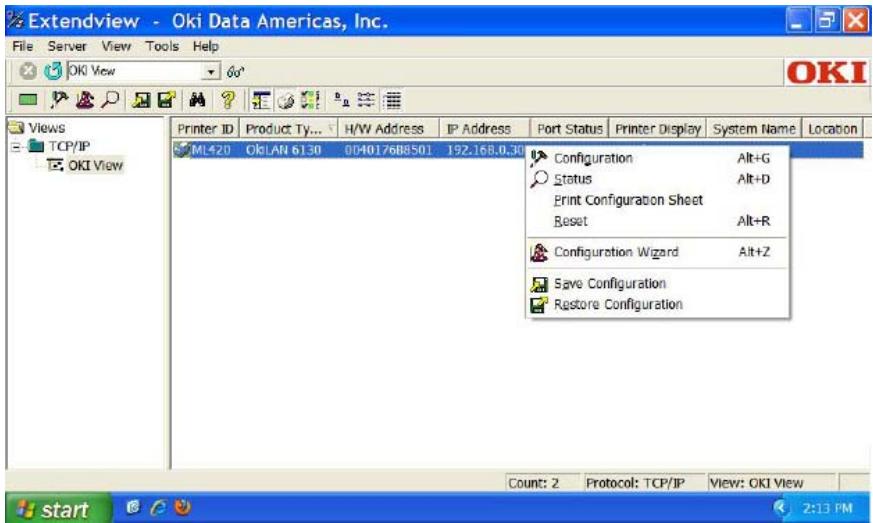
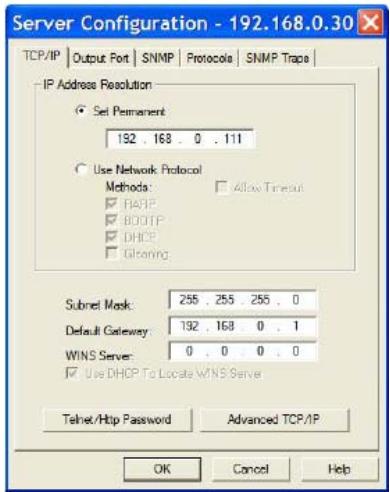
- From the Server Configuration box, click Set Permanent. Then, if you wish to change the IP address, Subnet Mask and Default Gateway, you may do so.
When the desired options have been set, click OK. The Print Server will automatically be reset at this point, and your options will have been saved.
(If you have network configuration questions, please contact your network administrator.)
Proceed to the instructions for Installing Your Driver.
Using Your Print Server's Built-In Web Page to Configure Your IP Address (Alternate Method)
First, open your browser. Then, type the IP address of your Print Server into the browser's address bar. (If the IP address is unknown, you can obtain it by pressing and holding the Test Button on the front of the OkiLAN 6130 for five seconds)

1. Log into the Print Server as Admin. (Username: admin Password: OkiLAN)

2. Select the TCP/IP option from the Network Connection menu to launch the TCP/IP Configuration menu.
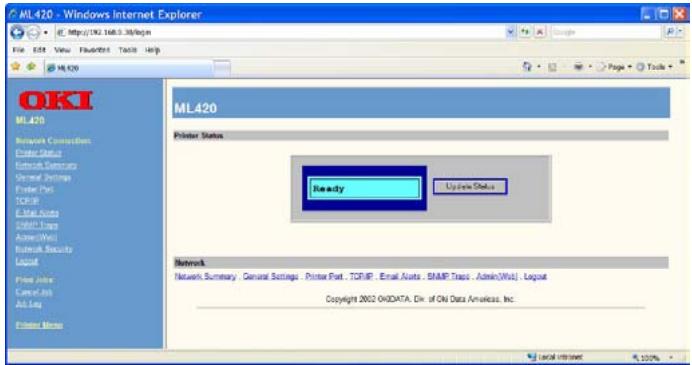

- From the TCP/IP Configuration Menu, click Set Permanent under the IP Address Resolution option. Then, if you wish to change the IP address, Subnet Mask and Default Gateway, you may do so.
When the desired options have been set, click Submit Changes. The Print Server will automatically be reset at this point, and your options will have been saved.
(If you have network configuration questions, please contact your network administrator.)
Proceed to the instructions for Installing Your Driver.
Installing Your Driver
From the CD or OKI Data website - follow the installation instructions.
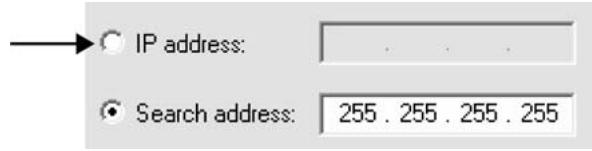
Entering the Printer IP Address
While installing the printer driver for TCP/IP using the CD supplied with your printer.
When you come to the screen requesting the IP Address for the printer, you must select “IP Address” (instead of the default “Search address”) and type in the printer’s IP Address before clicking Next. If you need help, please contact your Network Administrator for the IP Address to use.
LPR
Make sure there are no error conditions in the printer (e.g., paper jam) before you use LPR to discover the printer. The product driver utility is available from OKI Data's website at http://www.okidata.com
Resetting to Factory Defaults
- Turn off the printer.
- Turn on the printer and wait for the print server to boot up (about 30 seconds).
- Press and hold the Test button on the front of the OkiLAN 6130 for 20 seconds. The lights will flash briefly after releasing the button, then the card will reset.
Note: Your printer may look like either example below.
natural_image
Hand inserting cables into a device casing (no visible text or symbols)OR

natural_image
Close-up of hands inserting cables into a portable electronic device (no visible text or symbols)- Release the TEST button.
The print server resets to the factory default settings and reboots.
natural_image
Close-up of a hand inserting a plastic component into a white industrial machine (no visible text or symbols)OU
natural_image
Close-up of a hand inserting a USB into a computer monitor (no visible text or symbols)natural_image
Close-up of a white electronic device casing with internal components and a cable inserted, showing no visible text or symbols.OU
natural_image
Close-up of a white electronic device with an attached port and cable, showing internal components and a DNA tag (no visible text or symbols)natural_image
Close-up of a hand inserting a cable into a white portable printer casing (no visible text or symbols)OU
natural_image
Hand inserting a CD into an open computer monitor (no visible text or labels)natural_image
Two-panel black-and-white photo showing hands connecting cables to an open electronic device (no visible text or symbols)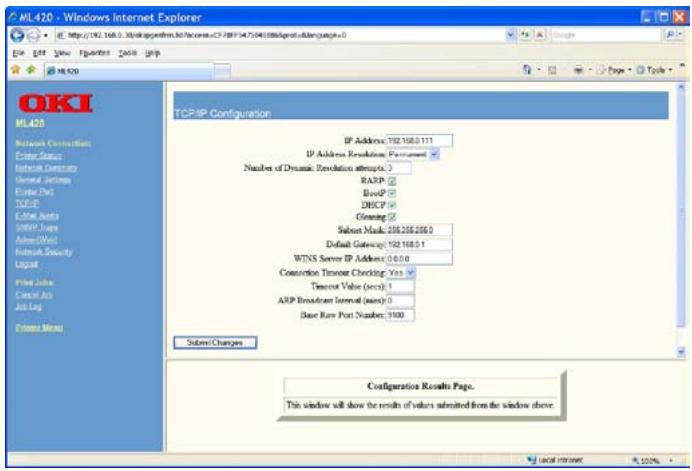
LPR
natural_image
Hand inserting cables into a device casing (no visible text or symbols)OU

natural_image
Close-up of hands inserting cables into a portable electronic device (no visible text or symbols)natural_image
Close-up of a hand inserting a component into a white industrial machine casing (no visible text or symbols)O BIEN
natural_image
Close-up of a hand inserting a USB into a computer monitor (no visible text or symbols)
LPR
natural_image
Hand inserting cables into a device casing (no visible text or symbols)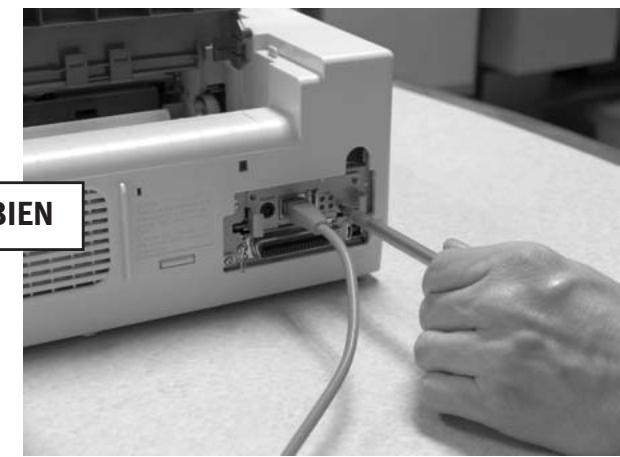
natural_image
Close-up of hands inserting a cable into a computer monitor (no visible text or symbols)natural_image
Close-up of a hand inserting a plastic component into an open air conditioner unit (no visible text or symbols)OU

natural_image
Close-up of a hand inserting a USB into a computer monitor (no visible text or symbols)natural_image
Close-up of a hand inserting a cable into a white industrial machine component (no visible text or symbols)OU

natural_image
Close-up of a hand inserting a CD into a computer monitor (no visible text or labels)natural_image
Two-panel black-and-white photo showing hands connecting cables to an open electronic device (no visible text or symbols)
LPR
natural_image
Hand inserting cables into a device casing (no visible text or symbols)OU

natural_image
Close-up of hands inserting a cable into a computer monitor (no visible text or symbols)- Solte o botão TEST.