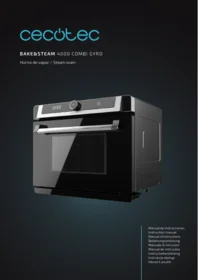
Bakesteam 4000 Combi Gyro - Cooker CECOTEC - Free user manual and instructions
Find the device manual for free Bakesteam 4000 Combi Gyro CECOTEC in PDF.


| Product type | Combi oven with steam, grill and rotisserie (mini oven) |
| Model | Bake&Steam 4000 Combi Gyro |
| Reference | 02219 |
| Power supply | 220-240 V~, 50/60 Hz |
| Power | 2100-2400 W |
| Functions | Steam, Grill, Grill + steam, Diet fryer, Menu, Defrost, Fermentation, Cleaning, Preheat |
| Timer | 1 minute to 2 hours depending on function |
| Temperature range | 30 °C to 230 °C depending on function |
| Cooking levels | 4 inner levels for tray |
| Rotisserie | Included, with rotisserie handle |
| Included accessories | Grill, oven tray, water tank, water tray, rotisserie handle |
| Water tank | Removable, with empty tank warning |
| Child safety | Yes, lock requires holding for 3 seconds |
| Interior light | Yes, with 3-minute timer |
| Display | Screen with icons and countdown |
| Automatic programs | 31 preset recipes |
| Automatic cleaning | 2 modes: descaling (C-1) and cleaning/disinfection (C-2) |
| Automatic shutdown | Sound signal at end of cooking (10 beeps) and "END" display |
| Maintenance | Damp sponge, non-abrasive detergent; never immerse |
| General information | Designed in Spain, manufactured in China |
Frequently Asked Questions - Bakesteam 4000 Combi Gyro CECOTEC
User questions about Bakesteam 4000 Combi Gyro CECOTEC
0 question about this device. Answer the ones you know or ask your own.
Ask a new question about this device
Download the instructions for your Cooker in PDF format for free! Find your manual Bakesteam 4000 Combi Gyro - CECOTEC and take your electronic device back in hand. On this page are published all the documents necessary for the use of your device. Bakesteam 4000 Combi Gyro by CECOTEC.
USER MANUAL Bakesteam 4000 Combi Gyro CECOTEC
Safety instructions 8
-
Parts and components 45
-
Before use 46
-
Operation 46
-
Cleaning and maintenance 51
-
Troubleshooting 52
-
Technical specifications 54
-
Disposal of old electrical and electronic appliances 54
-
Technical support and warranty 55
-
Copyright 55
SOMMAIRE
Before using the appliance, read the following instructions carefully. Keep this instruction manual for future reference or new users.
- When using electrical and electronic appliances, basic precautions must always be followed to reduce the risk of fire, electric shock, and injury.
- Make sure the voltage of your mains supply matches the voltage requirements specified in the rating label of the appliance.
- We recommend that the room where you intend to use the appliance is equipped with a working extractor fan or it is well ventilated.
- Use the device only for the purposes described in this instruction manual. Any other use is not recommended by the manufacturer and could have a detrimental effect on the lifespan of the appliance and/or the safety of the user.
- Unplug the appliance from the mains supply before moving it, carrying out any cleaning or maintenance task, or when not in use.
- Do not operate it outdoors.
-
Check the power cord regularly for visible damage. If the cord is damaged, it must be replaced by the official Technical Support Service of Cecotec in order to avoid any type of danger.
-
Do not twist, bend, pull, or damage the power cord. Protect it from sharp edges and heat sources. Do not allow it to touch hot surfaces. Do not let the cord hang over the edge of the working surface or worktop.
- Do not use extension cords, unless advised by a qualified electrician. Using the wrong type of extension cord could cause damage or injuries to the user.
- Do not use the appliance if its cord, plug, or housing are damaged, nor after it malfunctions or has been dropped or damaged in any way.
- The appliance should not be used in potentially dangerous locations, such as flammable, explosive, chemical-laden, or wet atmospheres.
- Place the appliance on an even, heat-resistant surface. Do not place the device near heat sources, places with high humidity levels, or combustible materials.
- This appliance is not intended to be operated by means of an external timer or separate remote-control system.
- Do not insert or allow fingers or foreign objects to enter any ventilation or exhaust openings, as it could cause an electrical shock or fire.
- Do not touch the interior of the appliance while it is operating.
- This symbol means: warning, hot surface. The temperature of accessible surfaces may be high when the appliance is operating. Be careful not to burn yourself.
- Do not immerse the cord, plug, or any non-removable part of the product in water or any other liquid. Do not expose the electrical connections to water.
- Make sure your hands are dry before handling the plug or switching on the appliance.
-
Do not rest cooking utensils or baking trays on the glass door.
-
Unplug the device from the outlet when it is not in use or when it is being cleaned. Allow it to cool down completely before attaching or removing parts, and before cleaning the appliance.
- Do not leave the device plugged to the mains if unsupervised.
- Do not touch the surface of the device while it is operating, as it will heat up when in use.
- Cleaning and maintenance must be carried out according to this instruction manual to make sure the device operates properly.
- Do not place the device against the wall. Leave a safety distance of 10 cm on the back of the appliance and 10 cm on each side. Do not place any object on top of the appliance when in use.
- During operation, hot steam is released through the air outlet openings. Keep your hands and face at a safety distance from the steam and from the air outlet openings.
- Immediately unplug the device if the device releases black smoke.
- We recommend using of gloves when you touch the trays.
- Do not use the appliance for any use other than the one specified in the manual.
- This product is exclusively designed for household use.
- Do not try to repair the device by yourself.
-
The appliance is not intended to be used by children under the age of 8. It can be used by children over the age of 8, as long as they are given continuous supervision. This appliance can be used by persons with reduced physical, sensory, or mental capabilities or lack of experience and knowledge, as long as they have been given supervision or instruction concerning the use of the appliance in a safe way and understand the hazards involved.
-
Keep this appliance and its power cord out of reach of children under the age of 8.
- Cleaning and maintenance tasks should not be carried out by children.
- Supervise children, so that they do not play with the appliance.
INSTRUCTIONS DE SÉCURITÉ
- This product includes a packaging designed to protect it during transport. Unpack the appliance and keep the original packaging box and other packaging materials in a safe place. It will help prevent any damage if the product needs to be transported in the future. In case the original packaging is disposed of, make sure all packaging materials are recycled accordingly.
- Make sure all parts and components are included and in good conditions. If there is any piece missing or not in good condition, immediately contact the Technical Support Service of Cecotec.
- Clean the tray and other accessories thoroughly with hot water, detergent, and a non-abrasive sponge.
- Keep a distance of at least 110 mm between the power socket and the wall, furniture, etc.
- Clean the interior and the exterior of the oven with a damp cloth and dry it afterwards.
- Place the oven on a stable and flat surface.
3. OPERATION
Tray assembly
Fig. 15.
The oven contains 4 different levels to place the tray on as desired. When inserting it, make sure to keep the protruding part downwards and insert it all the way in. Choose at which level to place the tray depending on the type of food or recipe.
Control panel
Fig. 16.
- On/Off
- Settings/Child Lock
- Start/Pause
On/Off
Upon switching on the device, it will beep and the display will light up. Use the knob to choose the desired programme. Then, press the Start/Pause icon to confirm.
If none of the buttons are used within 5 minutes, the settings will reset and the device will switch to Standby mode again.
Pause
The cooking process can be paused either by pressing the Start/Pause knob or by opening the door directly. If paused by using the Start/Pause knob, press it again to continue cooking. If done by opening the door, simply close it again and the oven will continue operating automatically.
Time and temperature setting
After setting the desired function or programme, turn the knob to set the time. Once time is set, press the knob again to confirm and repeat the process to set the temperature. Then, press the knob to confirm the settings and the programme will start.
Settings
You can change the time and temperature settings while cooking.
The Settings/Child Lock icon will light up when the Grill, Grill & Steam and Air Fryer functions are active. Press the Settings/Child Lock icon, the time icon, and the Start/Pause icon on the knob and they will flash. Turn the knob to set time and temperature, then press the Start/Pause knob to confirm. The Start/Pause knob's light indicator will flash for 5 seconds while settings are being saved.
When selecting the Menu function, the Settings/Child Lock icon will light up. Assess the amount of food and set the time accordingly. Select the desired recipe. Once the Settings/Child Lock icon turns off, the set time will be saved and cannot be changed.
Child lock
Fig. 14.
While any of the modes or programmes are activated and the Settings/Child Lock icon is lit up, press and hold this icon for 3 seconds to activate the Child Lock function. The Child Lock icon will turn on. Press and hold the icon for 3 seconds to cancel the function.
Display
Steam
Fig. 3.
- Select the Steam function to steam food.
- After selecting this mode, the Steam icon and the Start/Pause icon will light up. The default time and temperature are 30 min and 100°C. Press the knob to confirm and enter the Settings function.
- Turn the knob to set the time, from 1 minute to 2 hours. Press the knob to confirm. Turn the knob to set the temperature, from 100 °C or 110 °C. Once the time and temperature are set, press the Start/Pause knob to start operation. The display will show the countdown timer.
Grill
Fig. 4.
- Upon activating this function, the upper and lower heating elements will activate simultaneously. It includes a pre-heating cycle that activates before placing the food in the oven. The default time and temperature are 30 min and 180 °C.
- Turn the knob to set the time, from 1 minute to 2 hours. Press the knob to confirm. Turn the
knob to set the temperature, from 100 °C to 230 °C. Once the time and temperature are set, press the Start/Pause knob to start operation.
- On start-up, the Preheat icon will light up indicating that the preheat cycle has been activated. Once the preheat cycle is over, the Preheat icon will turn off and the appliance will beep 10 times indicating that food can now be stored. The appliance will start operating in Grill function automatically.
Grill and steam
Fig. 5.
- This function combines the grill mode's heating with the steam function, making the food well-cooked and juicy. The default time and temperature are 30 min and 180 °C.
- Turn the knob to set the time, from 1 minute to 2 hours. Press the knob to confirm. Turn the knob to set the temperature, from 120 °C to 230 °C. Once the time and temperature are set, press the Start/Pause knob to start operation.
Air fryer
Fig. 6.
- Upon activating this mode, the rear heating element of the oven activates and food is cooked by convection. The default time and temperature are 30 min and 180 °C.
- Turn the knob to set the time, from 1 minute to 2 hours. Press the knob to confirm. Turn the knob to set the temperature, from 100 °C to 230 °C. Once the time and temperature are set, press the Start/Pause knob to start operation.
- On start-up, the Preheat icon will light up indicating that the preheat cycle has been activated. Once the preheat cycle is over, the Preheat icon will turn off and the appliance will beep 10 times indicating that food can now be stored. The device will automatically start up as an air fryer. The display will show the countdown timer.
Menu
Fig. 7.
- The menu includes 31 recipes.
- When this mode is activated, the display will show "F-01". Turn the knob to choose the desired recipe and press the Start/Pause knob to confirm.
Once the menu is set and the appliance is in operation, the Settings/Child Lock icon will light up. The time and temperature of preset recipes can only be adjusted while this icon is flashing. When the icon stops flashing, the time and temperature can no longer be changed until the programme has finished.
Menu recipes
| Code | Food type | Time (minutes) | Temperature (°C) | Food weight (g) |
| F-01 | Steam vegetables | 16 | 100°C | 600 |
| F-02 | Steamed rice | 50 | 100°C | 200 |
| F-03 | Steamed fish | 20 | 100°C | 600 |
| F-04 | Steamed shrimp | 15 | 100°C | 500 |
| F-05 | Steamed crab | 30 | 100°C | 800 |
| F-06 | Steamed eggs | 18 | 100°C | 300 |
| F-07 | Steamed chicken | 30 | 100°C | 800 |
| F-08 | Steamed papaya | 35 | 100°C | 400 |
| F-09 | Roast chicken | 45 | 230 | 1000 |
| F-10 | Roast beef | 13 | 230 | 600 |
| F-11 | Roast lamb | 35 | 200 | 600 |
| F-12 | Rib roast | 20 | 210 | 500 |
| F-13 | Roast salmon | 22 | 210 | 400 |
| F-14 | Roast chicken leg | 26 | 210 | 750 |
| F-15 | Roast chicken wings | 23 | 210 | 500 |
| F-16 | Baked saury | 20 | 220 | 600 |
| F-17 | Baked potatoes | 18 | 220 | 500 |
| F-18 | Baked shrimp | 15 | 180 | 400 |
| F-19 | Roast sausage | 13 | 200 | |
| F-20 | Roast bacon | 11 | 200 | |
| F-21 | Pizza | 22 | 180 | |
| F-22 | Mini pizza | 18 | 180 | |
| F-23 | Baguette | 16 | 180 | |
| F-24 | Chiffon | 50 | 150 | |
| F-25 | Yogurt cheesecake | 60 | 150 | |
| F-26 | Puff pastry | 32 | 180 | |
| F-27 | Biscuits | 14 | 180 | |
| F-28 | Egg pie | 22 | 180 | |
| F-29 | Toasted almonds | 10 | 140 | |
| F-30 | Toasted nuts | 12 | 160 | |
| F-31 | Yogurt | 480 | 45 |
Note:
These data are approximate and depend on many different factors.
Defrost
Fig. 8.
Upon activating the Defrost function, turn the knob to set the time, from 5 minutes to 2 hours. Press the knob to confirm. Repeat the process to set the temperature, from 50 °C to 60 °C. Once the time and temperature are set, press the Start/Pause knob to start operation. The display will show the countdown timer.
Fermenting
Fig. 9.
- Upon activating the Fermenting function, both its icon and the Start/Pause icon will flash. The default time and temperature are 40 min and 40 °C.
- Turn the knob to set the time, from 5 minutes to 2 hours. Press the knob to confirm. Turn the knob to set the temperature, from 30 °C to 50 °C. Once the time and temperature are set, press the Start/Pause knob to start operation.
Before cleaning it.
Fig. 10.
Upon activating the Cleaning function, both its icon and the Start/Pause icon will flash. Press the knob to confirm and select the cleaning mode: "C-1" or "C-2".
- C-1: Cleans limescale from the steam generator in 50 minutes.
- C-2: Cleans the cavity and disinfects the device. 25 minutes at 100°C.
How to clean limescale in C-1 mode
- When the steam oven's heating system has been used for 100 hours, the system will warn of the need to clean the limescale. The deliming function can also be activated automatically and manually when desired. The Cleaning icon will light up when the function is activated.
- The mixture for deliming (water and deliming agent) must be prepared in a 1:8 ratio. Mix
and pour the mixture into the tank. Make sure that the mixture inside the tank is not below the MIN. mark and does not exceed the MAX. mark.
- 20 minutes before the end of the deliming cycle, the appliance will remind you to take out the water tank, empty the deliming mixture, and refill the tank with clean water. The Cleaning icon will flash and the device will beep. Once the tank is reinstalled, the appliance will resume the cycle. 10 minutes before the end of the deliming cycle, the device will remind you to remove the water tank and refill it with clean water. Once the tank is reinstalled, the device will resume the cycle. When the cycle is completed, the Cleaning icon will light up.
Empty tank warning
Fig. 11.
When the tank runs out of water, the device will stop working, beep 10 times and the Empty Tank icon on the display will flash. When the water tank is refilled, the device will start working again.
Warning
The water tank must be filled every time the oven is going to be used, even when the steam function is off. The oven will not work unless there's water in the tank.
Preheating
Fig. 12.
The Preheat icon will light up while the preheating process is active in one of the above-mentioned modes or functions and will turn off when the oven reaches the optimal temperature.
OK
Fig. 13.
Once a programme or function finishes, the display will show "END", the OK icon will light up, and the device will beep 10 times.
Warning
The interior light will come on for 3 minutes when the oven starts up, when the door is open, or when the knob is turned.
4. CLEANING AND MAINTENANCE
- Disconnect the appliance from the power supply and allow it to cool down before cleaning.
- Always clean the appliance after each use.
- Allow the device and accessories to cool down before disassembling and cleaning it.
Cleaning the exterior housing and the door
- Do not use metallic tools or abrasive products to clean the device exterior. Use a soft, damp cloth to clean the device surface.
- Never immerse the appliance in water or other liquid.
- Do not use sponges, powder products, or abrasive cleaning agents to clean the product.
- Use a damp sponge to clean the product surface. You can use a non-abrasive liquid detergent or a mild spray solution to prevent stains from building up. Apply the cleaning product to the sponge and not to the device surface directly.
- To clean the glass door, use a glass cleaner, or mild detergent and a damp sponge or soft plastic scouring pad. Do not use abrasive products or metallic scouring pads, as they may scratch the surface of the device.
- Clean the control panel with a soft and damp cloth. Apply the cleaning product to the cloth, do not apply it directly to the control panel. Cleaning the control panel with a scouring pad or abrasive products may scratch it.
Interior cleaning
To clean any splashes that may occur during cooking processes, use a soft, damp sponge to wipe the walls. You can use a non-abrasive liquid detergent or a mild spray solution to prevent stains from building up. Apply the cleaning product to the sponge and not the inside directly.
Warning
Extreme caution when cleaning the resistor to avoid damaging it. Allow the device to cool down completely and then carefully rub a soft, damp sponge or cloth along the resistors. Do not use any type of cleaning product or detergent. Allow all surfaces to dry thoroughly before connecting the power cord to the power outlet and turning on the device.
- TROUBLESHOOTING
| Error | Possible cause | Solution |
| E01 | Rear temperature sensor error | Turn off the oven, open the door, and allow it to cool for 10 minutes.If the problem persists, contact the official Technical Support Service of Cecotec |
| E02 | Rear temperature sensor short circuit | Turn off the oven, open the door, and allow it to cool for 10 minutes. If the problem persists, contact the official Technical Support Service of Cecotec |
| E03 | Upper temperature sensor error | Turn off the oven, open the door, and allow it to cool for 10 minutes. If the problem persists, contact the official Technical Support Service of Cecotec |
| E04 | Upper temperature sensor short circuit | Turn off the oven, open the door, and allow it to cool for 10 minutes. If the problem persists, contact the official Technical Support Service of Cecotec |
| E05 | Evaporator's upper sensor error | Contact the Technical Support Service of Cecotec |
| E06 | Evaporator's upper sensor short circuit | Contact the Technical Support Service of Cecotec |
| The display does not turn on. | The device is not properly connected to the power socket. | Unplug and plug it back again. |
| The interior light does not work. | The lightbulb is damaged. Bad connection. | Replace the lightbulb Contact the official Technical Support Service of Cecotec. |
| The fan is broken. | Bad connection. The fan is damaged. | Contact the official Technical Support Service of Cecotec. |
| Buttons do not respond. | The PCB is damaged. The display is damaged. | Contact the official Technical Support Service of Cecotec. |
| No steam | The water tube is blocked. The device is faulty. The water inlet system is damaged. | Contact the official Technical Support Service of Cecotec. |
| The device does not work | The door is not properly closed. Door contact or seal is damaged. | Close the door properly. Make sure the water tank is full and correctly assembled. Contact the official Technical Support Service of Cecotec. |
| Steam escapes through the oven door. | The door is not properly closed. Door contact or seal is damaged. There is too much steam accumulated inside the oven. It is normal. | Close the door properly. Contact the official Technical Support Service of Cecotec. |
6. TECHNICAL SPECIFICATIONS
Model: Bake&Steam 4000 Combi Gyro
Product reference: 02219
2100-2400 W, 220-240 V\~, 50/60 Hz
Made in China | Designed in Spain
7. DISPOSAL OF OLD ELECTRICAL AND ELECTRONIC APPLIANCES
This symbol indicates that, according to the applicable regulations, the product and/or battery must be disposed of separately from household waste. When this product reaches the end of its shelf life, you should dispose of the batteries/accumulators and take them to a collection point designated by the local authorities.
Consumers must contact their local authorities or retailer for information concerning the correct disposal of old appliances and/or their batteries.
Compliance with the above guidelines will help protecting the environment.
8. TECHNICAL SUPPORT AND WARRANTY
Cecotec shall be liable to the end user or consumer for any lack of conformity that exists at the time of delivery of the product under the terms, conditions, and deadlines established by the applicable regulations.
It is recommended that repairs be carried out by qualified personnel.
If at any moment you detect any problem with your product or have any doubt, do not hesitate to contact Cecotec official Technical Support Service at +34 963 210 728.
9. COPYRIGHT
The intellectual property rights over the texts in this manual belong to CECOTEC INNOVACIONES, S.L. All rights reserved. The contents of this publication may not, in whole or in part, be reproduced, stored in a retrieval system, transmitted, or distributed by any means (electronic, mechanical, photocopying, recording or similar) without the prior authorization of CECOTEC INNOVACIONES, S.L.
1. PIÈCES ET COMPOSANTS
Img. 1
Kalk schoonmaken in modus C-1
Fig. / Img. / Rys. / Obr. 1

Fig. / Img. / Rys. / Obr.2

Fig. / Img. / Rys. / Obr.3

Fig. / Img. / Rys. / Obr.4

Fig. / Img. / Rys. / Obr.5

Fig. / Img. / Rys. / Obr.15

Fig. / Img. / Rys. / Obr.16
www.cecotec.es
- SOMMAIRE
- INSTRUCTIONS DE SÉCURITÉ
- OPERATION
- TRAY ASSEMBLY
- CONTROL PANEL
- ON/OFF
- PAUSE
- TIME AND TEMPERATURE SETTING
- SETTINGS
- CHILD LOCK
- DISPLAY
- STEAM
- GRILL
- GRILL AND STEAM
- AIR FRYER
- MENU
- NOTE
- DEFROST
- FERMENTING
- BEFORE CLEANING IT
- HOW TO CLEAN LIMESCALE IN C-1 MODE
- EMPTY TANK WARNING
- WARNING
- PREHEATING
- OK
- CLEANING AND MAINTENANCE
- CLEANING THE EXTERIOR HOUSING AND THE DOOR
- INTERIOR CLEANING
- TECHNICAL SPECIFICATIONS
- DISPOSAL OF OLD ELECTRICAL AND ELECTRONIC APPLIANCES
- TECHNICAL SUPPORT AND WARRANTY
- COPYRIGHT
- PIÈCES ET COMPOSANTS
- KALK SCHOONMAKEN IN MODUS C-1
Brand : CECOTEC
Model : Bakesteam 4000 Combi Gyro
Category : Cooker