
PG6060 - Multifunction mower REMINGTON - Free user manual and instructions
Find the device manual for free PG6060 REMINGTON in PDF.
| Product Type | Multi-function Trimmer |
| Brand | Remington |
| Model | PG6060 |
| Uses | Beard, mustache, sideburns, neck, nose, ears, eyebrows, body |
| Included Accessories | 8 cutting guides, wide trimmer, precision trimmer, mini shaver, nose/ear trimmer, body trimmer, charging stand, AC adapter |
| Power Supply | Rechargeable battery, AC adapter |
| Initial Charging Time | 14-16 hours |
| Full Charge Time | 3.5 hours |
| Runtime (Full Charge) | Up to 110 minutes (depending on use) |
| Quick Charge | 5 min for 5 min use, 30 min for 25 min, etc. |
| Charge Indicator | LED indicator |
| Maintenance | Rinsing with warm water, brushing, oiling blades |
| Warranty | 3 years |
| Safety | Do not use if damaged, do not immerse in water, keep out of reach of children |
| Storage Temperature | 15°C to 35°C |
Frequently Asked Questions - PG6060 REMINGTON
User questions about PG6060 REMINGTON
0 question about this device. Answer the ones you know or ask your own.
Ask a new question about this device
Download the instructions for your Multifunction mower in PDF format for free! Find your manual PG6060 - REMINGTON and take your electronic device back in hand. On this page are published all the documents necessary for the use of your device. PG6060 by REMINGTON.
USER MANUAL PG6060 REMINGTON
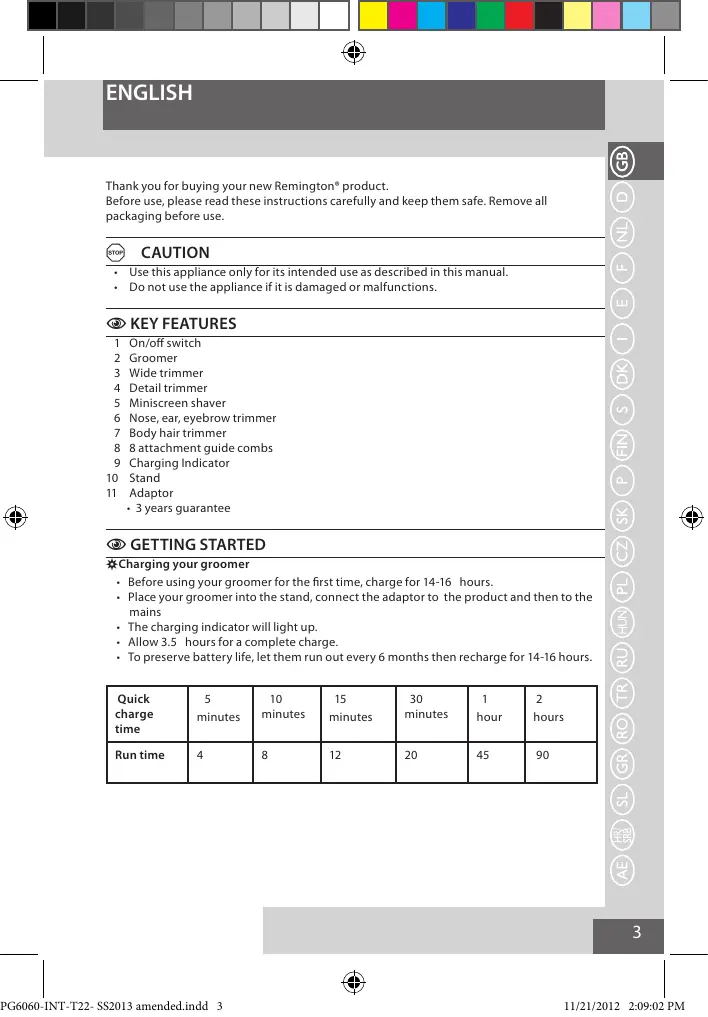
Thank you for buying your new Remington® product.
Before use, please read these instructions carefully and keep them safe. Remove all packaging before use.

CAUTION
- Use this appliance only for its intended use as described in this manual.
- Do not use the appliance if it is damaged or malfunctions.

KEY FEATURES
1 On/off switch
2 Groomer
3 Wide trimmer
4 Detail trimmer
5 Miniscreen shaver
6 Nose, ear, eyebrow trimmer
7 Body hair trimmer
8 8 attachment guide combs
9 Charging Indicator
10 Stand
11 Adaptor
3 years guarantee

GETTING STARTED
Charging your groomer
Before using your groomer for the first time, charge for 14-16 hours.
- Place your groomer into the stand, connect the adaptor to the product and then to the mains
The charging indicator will light up.
- Allow 3.5 hours for a complete charge.
- To preserve battery life, let them run out every 6 months then recharge for 14-16 hours.
| Quick charge time | 5 minutes | 10 minutes | 15 minutes | 30 minutes | 1 hour | 2 hours |
| Run time | 4 | 8 | 12 | 20 | 45 | 90 |
ENGLISH

HOW TO USE
Attaching and removing guide combs
- With the trimmer blade facing away from you, slide the guide comb over the back of the trimmer blade and click into position.
- With the trimmer blade facing away from you, carefully push the guide comb away from the wide head trimmer.
Before you begin
Comb facial hair with a fine comb before you start trimming. Hairs should be dry and without any waxes or lotions before using the groomer.
To thin and taper beards or moustaches
- Attach the wide trimmer blade.
- Place the hair length attachment on the trimmer blade, select the desired length and switch on.
- Start trimming under the chin, following the jawbone line. Work toward the ear and upper beard line using an upward motion.
To Trim edge of beards or moustaches
- Attach the detail trimmer blade.
- Hold groomer with cutting blade facing you.
- Start with edge of beard/moustache line, and with the cutting blades resting lightly against your skin, use slow movements to create a beard/moustache line.
To trim sideburns
- Hold groomer with cutting blade facing you.
- Use a small comb to lift the hairs. Hold the comb at the desired beard or moustache length.
- Move the groomer along the comb to cut the hairs. Use light pressure and well-controlled movements to trim hair.
Trimming the nape of your neck
- Attach the wide trimmer blade.
- Use your fingers to lift the hair at the base of your head up off the neck. Your index finger should be covering the roots of the hairs you are lifting to prevent accidental removal by groomer.
- Using your other hand, hold the groomer to the base of your neck with the cutting unit facing up, and move the groomer up the length of the neck until the unit touches your finger covering the hair roots at the base of your head. Move the unit slowly when performing this operation and to keep the hair roots at the base of your head out of the way of the groomer.
ENGLISH
To remove hair from nose and ear
- Attach nose, ear & eyebrow attachment.
- Insert groomer's cutting unit gently into the nostril or ear.
Gently move the groomer in and out of the nostril or ear and at the same time rotate the groomer. - Avoid inserting the cutting unit more than 6mm into your nostril or ear.
To remove hair from eyebrows
- Attach nose, ear, eyebrow attachment.
Gently guide cutting unit to stray, unwanted hairs along the eyebrow line or protruding from the eyebrow itself. - To remove the hairs completely lower onto the skin and move over desired area.
- Use slow and well-controlled movements.
Tips for best results
Comb your hair in the direction that it grows so that the hairs are at their maximum height and facing in the same direction.
After trimming, lightly go over the trimmed areas with the foil to get a smooth clean finish. Since all hairs do not grow in the same direction, you may want to try different trimming positions (i.e. upwards, downwards or across) for better results.
念 Attaching and removing the trimmer attachments
Note: Always ensure the groomer is switched off before changing any attachments.
- To remove, hold the groomer with one hand and turn the trimmer head anti-clockwise with the other.
- To attach, hold the groomer with on hand and turn the trimmer head clockwise with the other.
Using the detail attachment
- Hold groomer with the surface (back side) of the blade guides against the skin.
- Use motions similar to using a wet blade to provide the closest trim.
Note: The Trim Shave Technology attachment provides a dual purpose solution for stubble or close results without irritation.
- Attach the comb to the detail trimmer making sure to keep the adjustable guard orientated to the large cutting teeth, while covering the small cutting teeth.
- Once guard is in place, you can adjust the height of cut by using the thumb adjustment button on the comb.
Using the miniscreen shaver
- Hold the groomer so the MiniScreen gently touches your face.
- Use short, and well-controlled movements to shave around your beard/moustache. Use your free hand to stretch your skin. This encourages the hair to stand upright, making it easier to shave.
Note: The MiniScreen shaver was designed to shave the detail areas around your beard/ moustache/sideburns. It was not designed to shave your entire face. For a close comfortable shave, guaranteed, use one of Remington's electric shavers.
ENGLISH
Trimming body hair
- Attach Body Hair trimmer attachment head.
- To achieve the desired hair length, change the guide comb by easily sliding it onto one of the three slots on the attachment head. The different slots represent 2.8mm , 5.6mm & 9.6mm hair lengths
- Place the flat top of the trimmer comb against the skin. S slowly slide the trimmer through the hair, in the direction of hair growth.
- Use slow and well-controlled movements.
- If hair builds up in the guide comb during the trimming process, switch the unit off, pull off the guide comb. Brush trimmer / rinse comb.
Removing body hair
To remove the hairs completely,
- Trim the hair down to 1.2mm without attaching the guide comb and then change to the Mini Screen attachment head.
- Hold the shaving head to your skin.
- Stretch your skin with your free hand so hairs stand upright.
- Only apply light pressure on the shaving head whilst shaving.
- Shave against hair growth.

Care for your product to ensure a long lasting performance. We recommend that you clean your groomer after each use.
The easiest and the most hygienic way to clean the groomer is by rinsing the product head after use with warm water.
After each use
- Rinse the accumulated hair from the cutters and shake off excess water. Alternatively, use a brush.
Gently tap on a flat surface to remove hair particles, and brush the remaining hairs away. - Place one or two drops of cutter oil or sewing machine oil on the blades. Turn the clipper on to distribute the oil evenly, wipe off any excess oil.
- Wipe the main unit with a damp cloth and dry immediately. Note: Ensure that the groomer is turned off when applying the oil or rinsing under the tap.
ENGLISH

IMPORTANT SAFETY INSTRUCTIONS
Warning - To reduce the risks of burns, electrocution, fire, or injury to persons:
- Do not leave the appliance unattended while plugged in.
Only set the appliance down on a heat-proof surface. - Make sure the power plug and cord do not get wet.
- Do not plug or unplug the appliance with wet hands.
- Do not use the appliance if it is damaged or malfunctions.
- If the cable is damaged, it must be replaced by the manufacturer, its service agent, or someone similarly qualified, in order to avoid hazard.
- Do not twist or kink the cable, and don't wrap it around the appliance.
- Store the product at a temperature between 15^ and 35^ .
- Do not use accessories or attachments other than those we supply.
- The appliance, including its cord, must not be used, played with, cleaned or maintained by persons under eight years old and should at all times be kept out of their reach.
Use, cleaning or maintenance of the appliance by children over eight or by anyone with a lack of knowledge, experience or with reduced physical, sensory or mental capabilities should only be undertaken after receiving appropriate instruction and under the adequate supervision of a responsible adult to ensure that they do so safely and that the hazards involved are understood and avoided.
- Don't put the appliance in liquid, don't use it near water in a bath-tub, basin or any other vessel, and don't use it outdoors.
- Always remember to turn on the groomer before you insert it into your nose or ear to avoid injury.


ENVIRONMENTAL PROTECTION
To avoid environmental and health problems due to hazardous substances in electrical and electronic goods, appliances marked with this symbol must not be disposed of with assorted municipal waste, but recovered, reused or recycled

ENGLISH

BATTERY REMOVAL
- The battery must be removed from the appliance before it is scrapped.
- The appliance must be disconnected from the supply mains when removing the battery.
- Unplug groomer from the outlet to avoid risk of electrical shock.
- Pry the upper housing from the product with a flat head screwdriver. This will expose the batteries.
- With wire cutters, clip the wires leading to the batteries.
- Remove the batteries from the product. Contact your local authorities for proper disposal.
The battery is to be disposed of safely.

SERVICE AND GUARANTEE
This product has been checked and is free of defects.
We guarantee this product against any defects that are due to faulty material or workmanship for the guarantee period from the original date of consumer purchase.
If the product should become defective within the guarantee period, we will repair any such defect or elect to replace the product or any part of it without charge, provided there is proof of purchase.
This does not mean an extension of the guarantee period.
In the case of a guarantee simply call the Service Centre in your region.
This guarantee is offered over and above your normal statutory rights.
The guarantee shall apply in all countries in which our product was sold via an authorised dealer.
This guarantee does not include damage to the product by accident or misuse, abuse, alteration to the product or use inconsistent with the technical and/or safety instructions required.
This guarantee shall not apply if the product has been dismantled or repaired by a person not authorised by us.
If you call the Service Centre, please have the Model No. to hand, as we won't be able to help you without it.
It's on the rating plate which can be found on the appliance.


DEUTSCH
UW APPARAAT VERZORGEN
TIPS TIL AT OPNA DET BEDSTE RESULTAT
REMOVER O PÉLO CORPORAAL
ASSISTÊNCIA E GARANTIA
TIPY NA NAJLEPSIE VYSLEDKY
→ RADY, JAK OSIAGNAC NAJLEPSZY WYNIK
OCHOBHbIEXAPAKTEPNCTIKN
1 BviknouaTeIb
2 TpyMMep
3 ⅢnpoKn TpnmMep
4 Y3Kn TpmmMep
5БрntBaMiniscreen
6 Tpnmpe npnca, ywe, 6poe
7 Tpmmpe nla ctpnKKn BOLOc Ha TeNe
8 8wt HnpaBnaIoune Haacdkn
9 INHnkaTop 3apya
10 NpOCTaBka
11 PepexoDnK
-ГараNTЯЗ 3 roD

HAUJIOPAOBtI
3APRAKAKPYMMEPA
COBETbI JII IOBbIeHnE ΘΦΦEKTHBHOCTN
PnueeWHTe BONoCbO No HApaBLeHIno POcta, YTO6bI OHN BByTHeYNc BO CIOH NHy I bbl OOnHOBO HApaBLeHb.
Pocne 6pntb npoDntecb no Bbl6pntbM meCTAM foBtro, yTO6bI c6pntb BOONcB hauNCTO. PockOByKHe BCE BOLOCKn paCTY B OJHOM HApBaNBENi, IJIa DOCTNKeHnnyUweero pe3yNbTaTBAbl MoKeTe nonpo6ObaTb 6pntBe n3 pa3hIx nnoJKeHn (t.e., BBepx, Bn3, nonepe).
PNIKPEJIIEHNEI CHRTNE HACADOK TPIMMEPA
EN IYI SONUCU ALMAK ICIN IPUCLARI:
PENTRU A INDEPARTA PARDPE SPRANCENE
VAZNE SIGURNOSNE UPUTE
Upozorenje - kakbiste smanjili rizik od opeklna,udara struje, pozara ili ozljeda osoba:
- Ne ostavlajte uredaj bez nadzora dok je ukopcan.
- Ure'daj postaviti samo na povrsinu otpornu na topliu.
- Uvjerite se da strujni utikač i kabel nisu vlžni.
- Ne uključujte niti isključujte proizvod mokrim rukama
- Nemojte koristiti uredaj ako je oštecen ili neispravan.Ako je kabel oštecen, radi izbjugavanja opasnosti, mora ga zamijeniti proizvodac, ovlasteni servis ili osoba slične stručnosti.
Kabel se ne smije rotirati, presavijati i namotavati oku ureda. - Cuvajte uredaj na temperaturi izmedu 15^ i 35^ .
- Nemojte koristiti dijelove ili dodatke drugih proizvodača.
- Uredaj, ukljucujci kipel, ne smije biti koristen, cisjen ili njegovan od strane osoba mladih od osam godina, niti se njime smju igrati, i treba biti drzan sve vrijeme vany njhovog domasaja. Uporaba, cisjenje ni jenga uredaja od strane djece starjie od 8 gadina ili osaba bez zznaja, iskustva ili smanjenih fizikhin, percepvitnih ili mentalinh spojobnosti bi si trebalo sprovoditi samo nakon odgovarajučih uputa i adekvatnim nadgledjanem odgovarajuče odrase osobe koja ce se pobrinita da oni to cine sugimo ni da me moguce
HRVATSKI JEZIK/SRPSKI JEZIK
buaa aaiiaaae baaaiiie 1y
a 1234567890

3
1234567890
g
ydiolldi ddiolldi
j
a
gall gals
1
gJaeJg,diJIaIbAcBisJgJgJdJI JaiJjduJdJI gJdJI
a aiaaa aaaa aaaa aaaa aaaa
J 1111 1111 111
a
alolai blll jzj jll
gJae gJae Jabe bc JbI Jyag jzj Jaa Jya Jya Jda
- 100000000000000000000000000000000000000
a
jglal jbc bally aol .yulwai yj yuuaa
aalil
biiai jaii
J 1
3
jai jia jia jiu
124 125 126 127
①②
jaiil 1yogos yodj oedla die jaiill gijd kuii
jll jll llll llll llll llll
Aaai jai jia jia jia jia jia jia jia jia jia jia
LgJgJgJgJgJgJgJgJgJgJgJgJgJgJgJgJgJgJgJgJgJgJgJgJgJgJgJgJgJgJgJgJgJgJgJgJgJgJgJgJg
a. g b. a b b. a b
S ADB = S COD + S BDO = S COD + S_ BDO
jlll lai jlllai
e 1
olaiyI wai aia Iga gai led JSoa elaij
a a a a a a a a a a a a a a a a a a a
iilj jisi aalbi jsi aibia ie Jusssll aiis
g c 2015 1
y
Jawy g JcJlall Jw w Jg Jy j Jz Jz Jz Jz Jz Jz Jz Jz Jz
i 1
i 1
J 1 J
y 1
Jr Jn Jn Jn Jn Jn Jn Jn Jn Jn Jn Jn Jn Jn Jn Jn Jn Jn Jn Jn Jn Jn Jn Jn
a 1
J 1 J 1 J 1 J 1 J 1 J 1 J 1 J 1 J 1 J 1 J 1 J 1 J 1 J 1 J 1 J 1 J 1 J 1 J 1 J 1 J 1 J 1 J 1 J 1 J 1 J 1 J 1 J 1 J 1 J 1 J 1 J 1 J 1 J 1 J
.
aabaiia aaiia aaiia aaiia aaiia aaiia aaiia aaiia aaiia aaiia aaiia aaiia aaiia aaiia aaiia aaiia aaiia aaiia aaiia aaiia aaiia aaiia aaiia aaiia aaiia aaiia aaiia aaiia aaiia aaiia aaiia aaiia aaiia aaiia aalaa
3
1.2 Jaiy jaiy jaiy jaiy jaiy jaiy jaiy jaiy jaiy jaiy jaiy jaiy jaiy jaiy jaiy jaiy jaiy jaiy jaiy jaiy jaiy jaiy jaiy jaiy jaiy jaiy jaiy jaiy jaiy jaiy jaiy jaiy
.(Mini Screen)
3
Jus Jus
aaii iiaai
a a a a a a a a a a a a a a a a a a a
aalll aaiy
j 1 j 1 j 1 j 1 j 1 j 1 j 1 j 1 j
i j 1
a e aal no w yll Aaoiui 2 u jilgai
jiaaii jie 1e i j 1 jao jao
Jjai
dai jai jai gai laljai jai jai jai jai jai jai jai jai
i
a+1 2
alall jbiilll aailll lalglslolj
gii 1 j 1 i 1i 1j 1 j 1 j 1 j 1 j 1 j 1 j
Remington® is a Registered Trade Mark of Spectrum Brands, Inc., or one of its subsidiaries
VARTA Consumer Batteries GmbH & Co. KGaA, Alfred-Krupp-Str. 9, 73479 Ellwangen, Germany
www.remington-europe.com
© 2012SBI
- CAUTION
- KEY FEATURES
- GETTING STARTED
- Charging your groomer
- ENGLISH
- HOW TO USE
- Attaching and removing guide combs
- Before you begin
- To thin and taper beards or moustaches
- To Trim edge of beards or moustaches
- To trim sideburns
- Trimming the nape of your neck
- To remove hair from nose and ear
- To remove hair from eyebrows
- Tips for best results
- 念 Attaching and removing the trimmer attachments
- Using the detail attachment
- Using the miniscreen shaver
- Trimming body hair
- Removing body hair
- After each use
- IMPORTANT SAFETY INSTRUCTIONS
- ENVIRONMENTAL PROTECTION
- BATTERY REMOVAL
- SERVICE AND GUARANTEE
- DEUTSCH
- UW APPARAAT VERZORGEN
- TIPS TIL AT OPNA DET BEDSTE RESULTAT
- REMOVER O PÉLO CORPORAAL
- ASSISTÊNCIA E GARANTIA
- TIPY NA NAJLEPSIE VYSLEDKY
- → RADY, JAK OSIAGNAC NAJLEPSZY WYNIK
- OCHOBHbIEXAPAKTEPNCTIKN
- HAUJIOPAOBtI
- 3APRAKAKPYMMEPA
- COBETbI JII IOBbIeHnE ΘΦΦEKTHBHOCTN
- PNIKPEJIIEHNEI CHRTNE HACADOK TPIMMEPA
- EN IYI SONUCU ALMAK ICIN IPUCLARI:
- PENTRU A INDEPARTA PARDPE SPRANCENE
- VAZNE SIGURNOSNE UPUTE
- HRVATSKI JEZIK/SRPSKI JEZIK
- 3
- y
Brand : REMINGTON
Model : PG6060
Category : Multifunction mower