AKS 826 - Food Processor CLATRONIC - Free user manual and instructions
Find the device manual for free AKS 826 CLATRONIC in PDF.
| Brand | CLATRONIC |
| Model | AKS 826 |
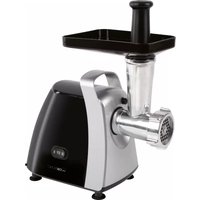
| Product type | Rechargeable stick vacuum cleaner |
| Power supply | Rechargeable battery 14.4 V (12 x NiCd 1.2 V) |
| Charging time | Approximately 16 hours |
| Battery life | Not specified (domestic use) |
| Included accessories | Small brush attachment, large brush attachment, crevice nozzle, floor accessory, suction tubes, shoulder strap |
| Filter type | Removable washable filter (bagless) |
| Dust container capacity | Not specified (removable container) |
| Dimensions (approx.) | Length with tubes: approx. 110 cm, head diameter: approx. 25 cm |
| Weight | Approximately 2.5 kg (lightweight, portable) |
| Wall mount | Yes, with charging cable holder (screws not included) |
| Power | Not specified (sufficient suction for dust and crumbs) |
| Noise level | Not specified |
| Maintenance and cleaning | Clean the exterior with a dry cloth; empty and wash the dust container; wash the filter and let it dry |
| Safety | Unplug before cleaning; do not vacuum liquids; do not use with wet hands; child safety |
| Batteries and recycling | Rechargeable NiCd battery, do not dispose of in household waste, take to a recycling center |
| Warranty | 24 months from date of purchase (receipt required) |
| Spare parts and repairability | Filter, dust container, accessories available; repairs by authorized after-sales service |
| Prohibited uses | Do not vacuum liquids, sharp objects, hot ashes |
Frequently Asked Questions - AKS 826 CLATRONIC
User questions about AKS 826 CLATRONIC
0 question about this device. Answer the ones you know or ask your own.
Ask a new question about this device
Download the instructions for your Food Processor in PDF format for free! Find your manual AKS 826 - CLATRONIC and take your electronic device back in hand. On this page are published all the documents necessary for the use of your device. AKS 826 by CLATRONIC.
USER MANUAL AKS 826 CLATRONIC
Contips:
- Converting to a verb of the past tense.
- Converting to a adjective of the present tense.
- Converting to a pronoun of the present tense.
- Converting to a plural of the second person.
- Converting to a singular of the second person.
- Converting to a perfect or singular of the second person.
- Converting to a perfect or singular of the second person.
- Converting to a perfect or singular of the second person.
General Safety Instructions
- Read the operating instructions carefully before putting the appliance into operation and keep the instructions including the warranty, the receipt and, if possible, the box with the internal packing.
- The appliance is designed exclusively for private use and for the envisaged purpose. This appliance is not fit for commercial use. Do not use it outdoors (except if it is designed to be used outdoors). Keep it away from sources of heat, direct sunlight, humidity (never dip it into any liquid) and sharp edges. Do not use the appliance with wet hands. If the appliance is humid or wet, unplug it immediately. Do not put it in water.
- When cleaning or putting it away, switch off the appliance and always pull out the plug from the socket (pull on the plug, not the cable) if the appliance is not being used and remove the attached accessories.
- Do not operate the machine without supervision. If you should leave the workplace, always switch the machine off or remove the plug from the socket (pull the plug itself, not the lead).
- To protect children from the dangers posed by electrical appliances, make sure that the cable is hanging low and that children do not have access to the appliance.
- Check the appliance and the cable for damage on a regular basis. Do not use the appliance if it is damaged.
- Do not try to repair the appliance on your own. Always contact an authorized technician. To avoid the exposure to danger, always have a faulty cable be replaced only by the manufacturer, by our customer service or by a qualified person and with a cable of the same type.
Use only original spare parts. - Pay careful attention to the following "Special Safety Instructions".
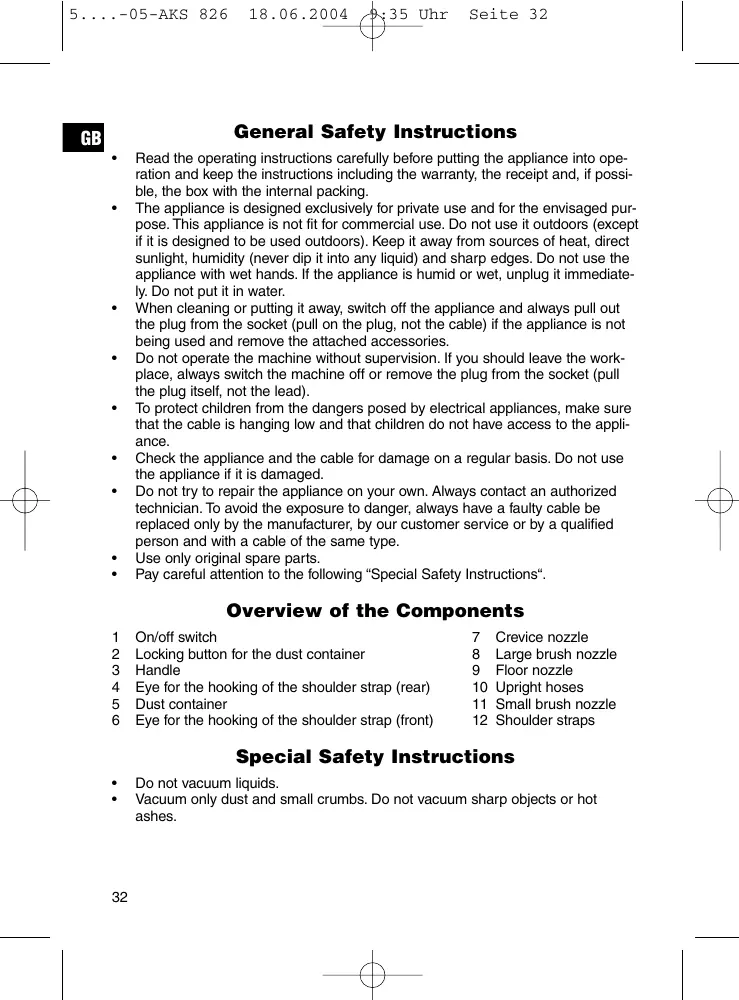
Overview of the Components
1 On/off switch
7 Crevice nozzle
2 Locking button for the dust container
8 Large brush nozzle
3 Handle
9 Floor nozzle
4 Eye for the hooking of the shoulder strap (rear)
10 Upright hoses
5 Dust container
11 Small brush nozzle
6 Eye for the hooking of the shoulder strap (front)
12 Shoulder straps
Special Safety Instructions
- Do not vacuum liquids.
Vacuum only dust and small crumbs. Do not vacuum sharp objects or hot ashes.
Device start-up
GB
Wall Installation
With the help of screws and dowel plugs (not supplied) the mounting can also be attached to the wall.
To do so, please measure the distance between the indentations on the rear.
Beforehand you should ensure that you will not damage any pipe or electric wiring hidden in the wall! Then drill holes at this distance.
Charging the Batteries
Inserting the charging cable in the wall holder
After mounting the wall holder:
- Pass the cable upwards through lower opening of the wall holder.
- Hold the charger so that the rectangular part of the charger is located right in front of the slot.
- Now press the plug straight into the groove and turn it through 90^ . The charger must be connected securely. It must remain in this position and it must not fall out when inserting or pulling off the vacuum.
Insert the AC adapter in a duly installed 230V/50Hz protective contact socket. The charging LED lights up. The charging lasts approx. 16 hours. Once the charging is over, unplug the AC adapter.
Using the Device
Unplug the device and fit on the desired nozzle. To start the vacuuming, press only the On/Off (I/O) switch. Once you have finished or when the batteries are down, connect the vacuum to the charger as described in „Charging the Batteries". Make sure that the plug is inserted.
Nozzles
Small brush nozzle: For the vacuuming of narrow surfaces and corners.
Large brush nozzle: For the vacuuming of large surfaces.
Crevice nozzle: Perfect for vacuuming the interior of cars.
Floor nozzle: For cleaning carpets or smooth surfaces.
Shoulder straps:
Hook the ends of the shoulder strap with the snap-link in the eyes (4 and 6). Make sure that the shoulder straps are not wound up. The length of the shoulder strap can be adjusted with the buckle on the strap by simply pulling one side of the strap. Thanks to its light weight the hand vacuum can be hung without problems and used anywhere.
GB
Cleaning
Always unplug the device before cleaning!
Clean the casing with a dry cloth.
- Since the device has a removable and washable filter, there is no need to buy spare dust bags.
- Release the dust container with the release button (2). Empty the container.
- Remove the dust filter and beat it. After emptying the container several times, it can also be cleaned in water. Dry well once you have finished.
- Fit in the dust container and lock it in place.
Battery Disposal
The device contains rechargeable nickel-cadmium batteries.
- Used batteries and accumulators (rechargeable batteries) should not be disposed of in domestic waste.
These can be returned to a collection point for old batteries or special refuse. Contact your local authority for further information.
This device has been tested according to all relevant current CE guidelines, such as electromagnetic compatibility and low voltage directives, and has been constructed in accordance with the latest safety regulations.
Subject to technical changes without prior notice!
Guarantee
The device supplied by our Company is covered by a 24 month guarantee starting on the date of purchase (receipt).
During the life of the guarantee any fault of the device or its accessories *) ascribable to material or manufacturing defects will be eliminated free of charge by repairing or, at our discretion, by replacing it. The guarantee services do not entail an extension of the life of the guarantee nor do they give rise to any right to a new guarantee!
Proof of the guarantee is provided by the proof of purchase. Without proof of purchase no free replacement or repair will be carried out.
If you wish to make a claim under the guarantee please return the entire machine in the original packaging to your dealer together with the receipt.
*) Damage to accessories does not mean automatic free replacement of the whole machine. In such cases please contact our hotline. Broken glass or breakage of plastic parts are always subject to a charge.
Defects to consumables or parts subject to wearing (e.g. motor pistons, kneading blades, drive shafts, spare remote control, spare toothbrushes, saw blades, etc.) as well as cleaning, maintenance or the replacement of said parts are not covered by the guarantee and hence are to be paid!
The guarantee lapses in case of unauthorized tampering.
After the expiry of the guarantee
After the expiry of the guarantee repairs can be carried by the competent dealer or repair service against the payment of the ensuing costs.