
A20 - Headphones PLANTRONICS - Free user manual and instructions
Find the device manual for free A20 PLANTRONICS in PDF.
| Product Type | Telephone headset amplifier with accessory base |
| Brand | Plantronics |
| Model | A20 |
| Category | Audio headset (amplifier and base) |
| Power | 9 V DC, 500 mA power adapter (Class 2) |
| Adapter input voltage (120 V) | 120 V AC, 60 Hz (ref. 47249-01) |
| Adapter input voltage (220-240 V) | 220-240 V AC, 50 Hz (ref. 47249-02) |
| Main functions | Receive volume, transmit volume, tone, headset/handset selection, mute, visual online indicator, configuration switch (4 positions), EarCons |
| Volume controls | Toggle switch for receive volume, transmit volume, and tone |
| Operating mode | Mode selector (receive, transmit, tone) with auto-return to receive after 10 seconds |
| Mute button | Allows muting the microphone |
| Online indicator | Visual indicator (VEL) to be connected to accessory jack |
| Headset hanger | Removable holder with 3 slots on the base |
| Connectors | Handset jack, power adapter jack, accessory jack, telephone jack, QuickDisconnect |
| Warranty | 2 years (parts and labor) |
| Maintenance and cleaning | Unplug before cleaning; use a damp cloth, no liquid or spray products |
| Safety | Do not use near water, avoid storms, do not disassemble, use only the provided adapter |
| Spare parts and accessories | Cables, adapters, VEL, automatic lift device, headset hanger (references provided) |
| Telephone compatibility | Works with most telephones; configuration switch with 4 positions |
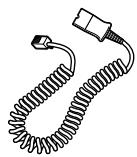
| Customer service | Plantronics Assistance: 1-831-458-7700 (US/Canada) |
Frequently Asked Questions - A20 PLANTRONICS
User questions about A20 PLANTRONICS
0 question about this device. Answer the ones you know or ask your own.
Ask a new question about this device
Download the instructions for your Headphones in PDF format for free! Find your manual A20 - PLANTRONICS and take your electronic device back in hand. On this page are published all the documents necessary for the use of your device. A20 by PLANTRONICS.
USER MANUAL A20 PLANTRONICS
© 2001 Plantronics Inc. All rights reserved. Plantronics, the logo design, and the Plantronics and logo design combined are registered trademarks of Plantronics Inc. Patents
U.S. 5,259,780 and 6,297,462 and Patent Pending Printed in the U.S.A. 46828-01 (12-01)
www.plantronics.com

PLANTRONICS
World Leader in Communications Headsets
Telephone Headset Amplifier and Accessory Deck
Model A20
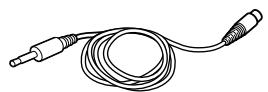
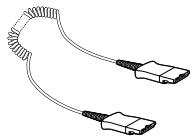
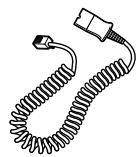
1 Amplifier to QuickDisconnect™ Coil Cable (P/N 26716-01)
Volume Rocker Switch Increase
Volume Rocker Switch Decrease
4 Mode Selector
Volume Indicator
6 Mute Bar
Headset/Handset Selector Bar
8 Listen Volume Indicator
9 Speak Volume Indicator
10 Tone Indicator
Rear
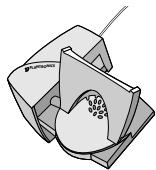
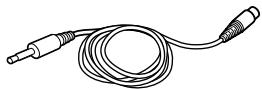
11 Amplifier to Telephone Cable (P/N 40974-01)
12 Configuration Dial
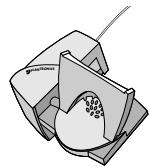
13 Accessory Deck
14 AC Power Supply (P/N 47249-01 120V) (P/N 47249-02 220V - 240V)
15 On Line Indicator (OLI) (P/N 46657-01)
Handset Cable Jack
17 Headset Holder (P/N 46336-01)
18 AC Adapter Jack
19 Accessory Jack
Telephone Jack
21 Amplifier


WELCOME
Thank you for selecting the A20 Telephone Headset Amplifier and Accessory Deck from Plantronics. This User Guide will help you install your Headset Amplifier and learn its basic operation. The Headset is described in a separate Guide which should be read prior to its use.
IMPORTANT SAFETY INSTRUCTIONS
When using your telephone equipment, basic safety precautions should always be followed to reduce the risk of fire, electric shock, and injury to persons, including the following:
- Read and understand all instructions.
- Follow all warnings and instructions marked on the product. The symbol identifies and alerts the user to the presence of important operating and service instructions.
- Unplug this product from the wall outlet before cleaning. Do not use liquid cleaners or aerosol cleaners. Use a damp cloth for cleaning.
- Do not locate product near water, for example, near a bathtub, wash bowl, kitchen sink, or laundry tub, in a wet basement or near a swimming pool. Never spill liquid of any kind on the product.
- Do not place this product on an unstable cart, stand or table. The product may fall, causing serious damage to the product.
- This product should never be placed near or over a radiator or heat register.
IMPORTANT SAFETY INSTRUCTIONS
- This product is intended to be used only with a Plantronics supplied Class 2 Direct Plug-In Power Unit rated 9VDC 500mA.
Plantronics Part No. 47249-01 rated at an input voltage of 120 VAC, 60Hz and an output voltage of 9VDC at 500mA .
Plantronics Part No. 47249-02 rated at an input voltage of 220 VAC - 240 VAC, 50 Hz and an output voltage of 9VDC at 500mA.
- Do not allow anything to rest on the telephone connection cord. Do not locate this product where the cord will be abused by persons walking on it.
- Do not overload outlets and extension cords as this can result in the risk of fire or electric shock.
- To reduce the risk of electric shock, do not disassemble this product, but take it to qualified service personnel when service or repair work is required.
- Avoid using telephone equipment during an electrical storm. There may be a remote risk of electric shock from lightning.
- Do not use the telephone equipment to report a gas leak in the vicinity of the leak.
SAVE THESE INSTRUCTIONS
SAVE THESE INSTRUCTIONS
IMPORTANT SAFETY INSTRUCTIONS
- Unplug this product from the wall outlet and refer servicing to qualified service personnel under the following conditions:
a) When the power supply cord or plug is damaged or frayed.
b) If liquid has been spilled into the product.
c) If the product has been exposed to rain or water.
d) If the product does not operate normally by following the operating instructions. Adjust only those controls that are covered by the operating instructions because improper adjustments of other controls may result in damage and will often require extensive work by a qualified technician to restore the product to normal operation.
e) If the product has been dropped or the base unit has been damaged.
f) If the product exhibits a distinct change in performance.
- This product requires AC power in order to operate. In order to have phone service during a power outage, have another telephone available that is powered only by the telephone line.
- Keep all product cords and cables away from operating machinery.
SAVE THESE INSTRUCTIONS
STEP1
SETUP
Take all the Telephone Headset Amplifier components out of the box and place on a clean surface near the telephone to be converted.
CABLING CONNECTIONS
Arrange components as shown in the lower diagram on page ii.
Make all the connections as shown.
Remove the handset cord from the telephone and plug it into the Handset Jack.
Connect one end of the Short Cable to the A20 Telephone Line Jack.
Connect the AC Power Adapter to the AC Power Adapter Jack and a wall outlet.
COMPONENT ASSEMBLY
The Telephone Headset Amplifier 21 and Accessory Deck 13 are connected by snapping in the two plastic dovetail connecting arms on the Amplifier into the top of the spring loaded slots on the front of the Accessory Deck.
With the Accessory Deck Cover removed, organize all related cabling by pressing the cables into the moulded guides.
Replace the Accessory Deck Cover and place the telephone on the Deck.
Connect the other end of the Short Cable to your telephone's handset line jack.
Push the Headset Holder into one of the positions shown.
STEP1
ON LINE INDICATOR ASSEMBLY
The Amplifier and Accessory Deck Package includes an On Line Indicator (OLI) to visually notify co-workers you are talking on the telephone.
Select a position where the OLI can be placed-on your desk, on top of a computer monitor, or mounted on the wall.
HEADSET HOLDER OPTIONS
Use the Headset Holder to protect your Headset and reduce desk clutter. To provide maximum flexibility, the Accessory Deck is equipped with three locations around the perimeter for headset stand mounting. Select the desired location and fit the headset stand into the mounting slots on the Accessory Deck.
STEP 2
PLACING A CALL
With the Headset in position, place the Telephone Handset off-hook.
If you do not hear a dial tone, press the Headset/Handset Selector Bar. Indicator lights will automatically display. If indicator lights are displayed and you still do not hear a dial tone, you may need to adjust the Configuration Setting Dial (see page 10).
Dial a co-worker to test connections and loudness settings.
If the Listen Volume (how others sound to you) is too loud or too low, press the Mode Selector to highlight Listen Volume and then adjust Volume Rocker Switch up or down to increase or decrease volume.
If the Speak Volume (how you sound to others) is too loud or too low, press the Mode Selector to highlight Speak Volume and then adjust Volume Rocker Switch up or down to increase or decrease volume.
STEP3
RECEIVING A CALL
With the Headset in position, when your telephone notifies you of an incoming call, place the Handset off-hook. Press Headset/Handset Selector Bar once to display indicator lights and talk normally. Note: If the Amplifier is left in the Headset/Handset mode, simply place the Handset off-hook to answer the call.
The optional Auto Lifter (see Accessories Section) simplifies receiving a call by automatically lifting the handset when the Headset/Handset Selector Bar is pressed.

STEP4
ADJUSTING VOLUME
INCOMING VOLUME
Select Listen Volume by pressing the Mode Selector. Adjust the in-coming sound level with the Volume Rocker Switch up 已 to increase, down 已 v to decrease.
OUTGOING VOLUME
Select Speak Volume by pressing the Mode Selector. Adjust the out-going sound level with the Volume Rocker Switch up 2 to increase, down 3 to decrease.
TONE LEVEL
Select Tone by pressing the Mode Selector 4.
V increases treble and increases bass to the user's ear.
Select a level (bass or treble) that is comfortable for you by adjusting the Volume Rocker Switch 2 3.
MODE CONTROL
To scroll between Listen, Speak and Tone modes, simply depress the mode selector until you are in the desired mode. The LED on the display provides a visual indication of which mode is active.
The default mode is Listen, so if the mode selector is inactive for 10 seconds the unit will return to the default or Listen mode.
CONFIGURATION SETTING
The electronic configuration of telephone systems can vary. You can optimise the performance of your Amplifier by stepping through the four configuration settings. The Configuration Dial is located on the right side of the Amplifier behind the Handset Jack.
Place a call to a co-worker and while speaking turn the Configuration Dial 12 clockwise until you achieve the best sound. A paper clip can be used to make turning the compatibility dial easier.
Experimenting with these four settings will not harm the amplifier or your telephone.
EarCons AUDIBLE CUES
Your Amplifier provides both visual and audio feedback for all operator adjustments. EarCons provide audio feedback in the form of different toned beeping sounds for different functions. Double beeps indicate the ends and mid point ranges of each function.
The intensity of the EarCon Audible Cue can be increased, lowered, or turned off (Three levels plus Off).
Simply hold down the Mute Bar then depress the Volume Rocker Switch (v decreases volume or turns off EarCon; increases EarCon Volume).
Even though the user hears the EarCon, the calling party does not.


TROUBLESHOOTING
I CANNOT HEAR A DIAL TONE
Press the Headset/Handset Bar.
Check that all connections are correct and firmly in place.
Ensure Headset is centred on your ear.
Adjust Configuration Dial 2 Setting (see page 10).
I PLUGGED EVERYTHING IN BUT THE LIGHTS WON'T COME ON
Plug the AC adapter into another wall outlet or test the outlet using a lamp.
Press the Headset/Handset bar at the front of the adapter to make sure adapter is in headset mode.
THE LIGHTS ARE ON BUT I CAN'T HEAR ANYTHING WHEN I LIFT THE HANDSET
Turn the Configuration Dial on the left-hand side of the adapter clockwise through each of the four positions until you hear dial tone.
Check that all the cables are completely plugged in and in the correct jack.
Press the purple mode button and listen for a musical beep. If you don't hear these musical beeps there could be something wrong with the headset or adapter-call 1-831-458-7700.
I HEAR A DIAL TONE WHEN I LIFT THE HANDSET BUT THERE'S ALSO A RASPING NOISE
Turn the Configuration Dial on the left hand side of the adapter clockwise to the next setting. (There are four settings.)
TROUBLESHOOTING
THERE SEEMS TO BE MORE THAN ONE CONFIGURATION POSITION THAT I CAN HEAR A DIAL TONE IN
Use the position that either sounds best to you or the person you call. If both positions are the same then use the one you're currently in—they are both valid.
I TRIED ALL FOUR POSITIONS ON THE CONFIGURATION DIAL AND CANNOT HEAR A DIAL TONE IN ANY
Check that all the cables are fully connected and in their correct jacks.
You may have an incompatible phone. Call 1-831-458-7700 for customer support.
I'VE TRIED ALL POSITIONS SEVERAL TIMES AND IT USED TO WORK IN POSITION 1 BUT NOW IT DOESN'T WORK AT ALL
Try unplugging the power cord for 2 seconds, reconnect and try again.
EVERYTHING WORKS OK WITH THE HEADSET BUT THE ON LINE INDICATOR DOESN'T LIGHT UP
Check that the 3.5mm stereo plug is fully inserted into the jack at the rear of the amplifier.
CALLERS CANNOT HEAR MY VOICE
Make sure headset voice boom is positioned near your mouth.
Adjust Speak Volume (see page 9).
Adjust Configuration Setting (see page 10).
TROUBLESHOOTING
CALLERS STILL CANNOT HEAR MY VOICE OR MY VOICE IS TOO LOUD
Every Amplifier comes equipped with an Auto Detection feature that enables the unit to automatically detect the type of telephone it is connected to. Under rare circumstances, the Amplifier falsely detects the type of telephone it is connected to (the caller may sound too loud or not loud enough). In this situation the Speak Volume Control does not provide the volume range to correct the problem. This can be easily corrected by entering the "Speak Volume Override Mode".
To enter the "Speak Volume Override Mode", hold down the Mute and Mode Selectors simultaneously (the Speak Volume LED will start flashing) and release them. Adjust the Volume Rocker Switch up or down to increase or decrease the Speak Volume, through the three modes: low, normal and high.
RESET AMPLIFIER TO FACTORY DEFAULT SETTINGS
When the Amplifier is being used with a new phone, you may need to reset it to the factory default settings. First depress the Mute Bar ⑥ then the Headset/Handset Selector Bar ⑦ and the Mode Selector button and hold them until all the LEDs flash. Release your hold and the Amplifier has been reset to the factory default settings.
This method does not reset the Configuration Dial, that must be done manually. Using a paper clip to turn the Dial will allow you to feel when it passes through the four-detent positions.
PLANTRONICS HELP DESK
The Plantronics Help Desk is ready to assist you! Dial 1-831-458-7700 (Prompt 1, then 2), Monday through Friday 8:00 a.m. to 5:00 p.m. Pacific Standard Time; FAX Plantronics at 1.831.425. 8654; visit our website at www.plantronics.com; or contact your local distributor.
SUPPLIES AND ACCESSORIES
Auto Lifter (P/N 60961-01)
Reduces the steps necessary to answer a call by automatically placing the handset off-hook when the Handset/Headset is pressed.
OLI Extension Cord (P/N 46429-01) Allows placement of OLI further from amplifier.
Lightweight Amplifier to QD Cord (P/N 40702-01) Reduces headset weight and desk clutter.
Lightweight Extension Cord (P/N 40711-01) Increase mobility in your work area; let's you stay on the line while moving away from the amplifier.
INFORMATION ON SUPPLIES AND ACCESSORIES
Contact your local distributor or visit our website at www.plantronics.com. See also Diagram Key for additional part numbers.
INDUSTRY CANADA NOTICE
This Class B digital apparatus complies with Canada ICES003.
Notice: The Industry Canada label identifies certified equipment. This certification means that the equipment meets certain telecommunications network protective, operational and safety requirements. The Department does not guarantee the equipment will operate to the users satisfaction.
Before installing this equipment, users should ensure that it is permissible to be connected to the facilities of the local telecommunications company. The equipment must also be installed using an acceptable method of connection. In some cases, the company's inside wiring associated with a single line individual service may be extended by means of a certified connector assembly (telephone extension cord). The customer should be aware that compliance with the above conditions may not prevent degradation of service in some situations.
Repairs to certified equipment should be made by an authorized Canadian maintenance facility designated by the supplier. Any repairs or alterations made by the user to this equipment, or equipment malfunctions, may give the telecommunications company cause to request the user to disconnect the equipment.
Users should ensure for their own protection that the electrical ground connections of the power utility, telephone lines and internal metallic water pipe system, if present, are connected together. This precaution may be particularly important in rural areas.
Caution: Users should not attempt to make such connections themselves, but should contact the appropriate electric inspection authority, or electrician, as appropriate.
Notice: The Ringer Equivalence Number (REN) assigned to each terminal device provides and indication of the maximum number of terminals allowed to be connected to a telephone interface. The termination on an interface may consist of any combination of devices subject only to the requirement that the sum of the Ringer Equivalence Numbers of all devices does not exceed 5.
See label on unit for REN No., as applicable.
WARRANTY AND SERVICE
The following warranty and service information applies only to the U.S. and Canada. For information in other countries, please contact your local distributor.
Limited Warranty
Plantronics, Inc. ("Plantronics") warrants to the original consumer purchaser that, except for limitations and exclusions set forth below, this product shall be free from defects in materials and workmanship for a period of two (2) years from the date of original retail purchase ("Warranty Period"). The obligation of Plantronics under this warranty shall be limited to repair or replacement, at Plantronics' option, without charge, of any part or unit that proves to be defective in material or workmanship during the Warranty Period.
Exclusions From Warranty
This Warranty applies only to defects in factory materials and factory workmanship. Any condition caused by accident, abuse, misuse or improper operation, violation of instructions furnished by Plantronics, destruction or alteration, improper electrical voltages or currents, or repair or maintenance attempted by anyone other than Plantronics or an authorised service centre, is not a defect covered by this Warranty. In such cases, Plantronics may charge you for materials and labour, even during the warranty period. Parts subject to wear and tear in normal usage are not covered by the Warranty.
Implied Warranties
Under state law, you may be entitled to the benefit of certain implied warranties. THESE IMPLIED WARRANTYES WILL CONTINUE IN FORCE ONLY DURING THE WARRANTY PERIOD. Some states do allow limitations on how long an implied warranty lasts, so the above limitation may not apply to you.
Incidental or Consequential Damages
NEITHER PLANTRONICS NOR YOUR RETAIL DEALER OR SELLING DISTRIBUTORS HAS ANY RESPONSIBILITY FOR ANY INCIDENTAL OR CONSEQUENTIAL DAMAGES INCLUDING WITHOUT LIMITATION, COMMERCIAL LOSS OR PROFIT, OR FOR ANY INCIDENTAL EXPENSES, EXPENSES, LOSS OF TIME, OR INCONVENIENCE. Some states do not allow exclusion or limitation of incidental or consequential damage, so the above limitation or exclusion may not apply to you.
Other Legal Rights
This Warranty gives you specific legal rights and you may also have other rights which vary from state to state.
WARRANTY AND SERVICE
How to Obtain Warranty Repairs
To obtain in or out of warranty service, please prepay shipment and return the unit to the appropriate facility listed below:
IN THE UNITED STATES
Plantronics Service Centre
345 Encinal Street
Santa Cruz, CA 95060
Tel. 1.831.458.7700
1.800.544.4660
Fax 1.800.279.0162
IN CANADA (ONLY)
Plantronics Service Centre
1455 Pitfield Boulevard
Saint-Laurent, Quebec H4S 1G3
Tel. 1.800.540.8363
1.514.956.8363
Fax 1.514.956.1825
Please use the original container, or pack the unit(s) in a sturdy carton with sufficient packing material to prevent damage. Include the following information:
- A proof-of-purchase indicating model number and date of purchase.
- Bill-to address
- Ship-to address
- Number and description of units shipped
- Name and telephone number of person to call, should contact be necessary
- Reason for return and description of the problem
Damage occurring during shipment is deemed the responsibility of the carrier, and claims should be made directly with the carrier.
The name Plantronics, the Plantronics logo and SoundGuard are registered trademarks of Plantronics, Inc.
Vista, Quick Disconnect, Call Clarity, and SoundGuard Plus are trademarks of Plantronics, Inc.
BIENVENUE
Plantronics Service Centre Plantronics Service Centre
345 Encinal Street 1455 Pitfield Boulevard
Santa Cruz, CA 95060 Saint-Laurent, Quebec H4S 1G3
Tél. 1.800.544.4660 Tél. 1.800.540.8363
1.831.458.7700 1.514.956.8363
Fax 1.800.279.0162 Fax 1.514.956.1825
Ensure Headset is centered on your ear.
T 1 T 1 T 1 T 1 T 1 T 1 T 1 T 1 T 1 T 1 T 1 T 1 T 1 T 1 T 1 T 1 T 1 T 1 T 1 T 1 T 1 T 1 T 1 T 1 T 1 T 1 T 1 T 1 T 1 T 1 T 1 T 1 T 1 T 1 T
E
iiIiJitAraLek其LfE F#T]F#T]F#T]F#T]F#T]F#T]F#T]F#T]F#T]F#T]F#T]F#T]F#T]F#T]F#T]F#T]F#T]F#T]F#T]F#T]F#T]F#T]F#T]F#T]F#T]F#T]
T 16
A0 20 10
AC 18
F F
DAI 10. 100 H3 T 100 H3 T/0 100 H3 T 100 H3 T/0 H3 T/0 H3 T/0 H3 T/0 H3 T/0 H3 T/0 H3 T/0 H3 T/0 H3 T/0 H3 T/0 H3 T/0 H3 T/0 H3 T/0 H3 T/0 H3 T/0 H3 T/0 H3 T/0 H3 T/0 H3 T/0 H3 T/0 H3 T /0 H3 T /0 H3 T /0 H3 T /0 H3 T /0 H3 T /0 H3 T /0 H3 T /0 H3 T /0 H3 T /0 H3 T /0 H3 T /0 H3 T /0 H3 T /0 H3 T /0 H3 T /0 H3 T /0 H3 T /0 H3 T /0 H3 T /0 H3 T/0 H3 T/0 H3 T/0 H3 T/0 H3 T/0 H3 T/0 H3 T/0 H3 T/0 H3 T/0 H3 T/0 H3 T/0 H3 T/0 H3 T/0 H3 T/0 H3 T/0 H3 T/0 H3 T/0 H3 T/0 H3 T/0 H3 T/T 12
T 12
T 12
T 12
云载云援] 1
Mo du Te Ie brel of pI rge to hJrH JH H JH JH JH JH JH JH JH JH JH JH JH JH JH JH JH JH JH JH JH JH JH JH JH JH JH JH JH JH JH JH JH JH JH JH JH JH JH JH JH JH JH JH JH JH JH JH JH JH JH JH JI.
君子樂歌云贝德云韵云上乐之歌云韵云歌云韵云歌云韵云歌云韵云歌云韵云歌云韵云歌云韵云歌云韵云歌云韵云歌云韵云歌云韵云歌云韵云歌云韵云歌云韵云歌云韵云歌云韵云歌云韵云歌云韵云歌云韵云歌云韵云歌云韵云歌云韵云歌云韵云歌云韵云歌云韵云歌云韵
3.5mm STeReO pIeRgRcHmP HnHnHnHnHnHnHnHnHnHnHnHnHnHnHnHnHnHnHnHnHnHnHnHnHnHnHnHnHnHnHnHnHnHnHnHnHnHnHnHnHnHnHnHnHnHnHnHnHnHnHn H nJi Jnnnnnnnnnnnnnnnnnnnnnnnnnnnnnnnnnnnnnnnnnnnnnnnnnnnnnnnnnnnnnnnnnnnnnnnnnnnnnnnnnnnnnnnnnnnnnnnnnnnnnnnnnnnnnnnnnnnnnnnnnnnnnn
前会进人
海德三电贝 云 厂 1
通化 财言 五 厂
Plantronics 1.831.458.7700 (Prompt 1 then 2) 1.831.425.8654 Plantronics 1.831.425.8654
京
哉 12 1 RI FTe(P/N60961-01)
合少用/海三电则 谓来 时合少用
云云 云
OU 10.5.3.3.3.3.3.3.3.3.3.3.3.3.3.3.3.3.3.3.3.3.3.3.3.3.3.3.3.3.3.3.3.3.3.3.3.3.3.3.3.3.3.3.3.3.3.3.3.3.3.3.
OLI将印表》
H L R A F QD H K D (P/N 40702-01)
德德德的
T L R A O H K O D (P/N 40711-01)
- Telephone Headset Amplifier and Accessory Deck
- Rear
- WELCOME
- IMPORTANT SAFETY INSTRUCTIONS
- SAVE THESE INSTRUCTIONS
- STEP1
- SETUP
- CABLING CONNECTIONS
- COMPONENT ASSEMBLY
- ON LINE INDICATOR ASSEMBLY
- HEADSET HOLDER OPTIONS
- STEP 2
- PLACING A CALL
- STEP3
- RECEIVING A CALL
- STEP4
- ADJUSTING VOLUME
- INCOMING VOLUME
- OUTGOING VOLUME
- TONE LEVEL
- MODE CONTROL
- CONFIGURATION SETTING
- EarCons AUDIBLE CUES
- TROUBLESHOOTING
- I CANNOT HEAR A DIAL TONE
- I PLUGGED EVERYTHING IN BUT THE LIGHTS WON'T COME ON
- THE LIGHTS ARE ON BUT I CAN'T HEAR ANYTHING WHEN I LIFT THE HANDSET
- I HEAR A DIAL TONE WHEN I LIFT THE HANDSET BUT THERE'S ALSO A RASPING NOISE
- THERE SEEMS TO BE MORE THAN ONE CONFIGURATION POSITION THAT I CAN HEAR A DIAL TONE IN
- I TRIED ALL FOUR POSITIONS ON THE CONFIGURATION DIAL AND CANNOT HEAR A DIAL TONE IN ANY
- I'VE TRIED ALL POSITIONS SEVERAL TIMES AND IT USED TO WORK IN POSITION 1 BUT NOW IT DOESN'T WORK AT ALL
- EVERYTHING WORKS OK WITH THE HEADSET BUT THE ON LINE INDICATOR DOESN'T LIGHT UP
- CALLERS CANNOT HEAR MY VOICE
- CALLERS STILL CANNOT HEAR MY VOICE OR MY VOICE IS TOO LOUD
- RESET AMPLIFIER TO FACTORY DEFAULT SETTINGS
- PLANTRONICS HELP DESK
- SUPPLIES AND ACCESSORIES
- INFORMATION ON SUPPLIES AND ACCESSORIES
- INDUSTRY CANADA NOTICE
- WARRANTY AND SERVICE
- Limited Warranty
- Exclusions From Warranty
- Implied Warranties
- Incidental or Consequential Damages
- Other Legal Rights
- How to Obtain Warranty Repairs
- IN THE UNITED STATES
- Plantronics Service Centre
- Encinal Street
- Santa Cruz, CA 95060
- Tel. 1.831.458.7700
- 1.800.544.4660
- Fax 1.800.279.0162
- IN CANADA (ONLY)
- Pitfield Boulevard
- Saint-Laurent, Quebec H4S 1G3
- Tel. 1.800.540.8363
- 1.514.956.8363
- Fax 1.514.956.1825
- BIENVENUE
- E
- F F
- 前会进人
- 京
Brand : PLANTRONICS
Model : A20
Category : Headphones