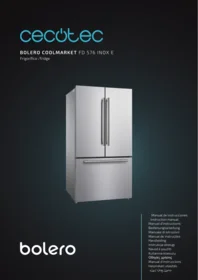
Bolero Coolmarket Fd 579 E - Refrigerator CECOTEC - Free user manual and instructions
Find the device manual for free Bolero Coolmarket Fd 579 E CECOTEC in PDF.


| Brand | Cecotec |
| Model | Bolero Coolmarket Fd 579 E |
| Product type | Refrigerator freezer (combined) |
| Dimensions (H x W x D) | 1850 x 595 x 600 mm |
| Net weight | 68 kg |
| Total volume | 310 L |
| Refrigerator volume | 220 L |
| Freezer volume | 90 L |
| Climate class | N/ST |
| Energy class | F |
| Annual energy consumption | 240 kWh |
| Noise level | 42 dB(A) |
| Main functions | Electronic temperature control, interior LED lighting, tempered glass shelves, vegetable drawer, freezer compartment with bins |
| Defrost type | Manual (freezer) / automatic (refrigerator) |
| Maintenance and cleaning | Unplug before cleaning, use a damp cloth, do not use abrasives |
| Safety | Child lock (depending on model), CE compliance |
| Spare parts and repairability | Available on Cecotec website, standard replacement parts |
| General information | User manual included, available as PDF download |
Frequently Asked Questions - Bolero Coolmarket Fd 579 E CECOTEC
User questions about Bolero Coolmarket Fd 579 E CECOTEC
0 question about this device. Answer the ones you know or ask your own.
Ask a new question about this device
Download the instructions for your Refrigerator in PDF format for free! Find your manual Bolero Coolmarket Fd 579 E - CECOTEC and take your electronic device back in hand. On this page are published all the documents necessary for the use of your device. Bolero Coolmarket Fd 579 E by CECOTEC.
USER MANUAL Bolero Coolmarket Fd 579 E CECOTEC
bolero
- Parts and components 26
- Before use 26
- Installation 27
- Operation 29
- Food storage instructions 33
- Cleaning and maintenance 37
- Troubleshooting 40
- Recycling of electrical and electronic equipment 44
- Copyright 44
- Simplified Declaration of Conformity 44
SOMMAIRE
EU01_109138 Bolero CoolMarket FD 576 Inox E
EN • The coding in this manual is generic and applies to all code variants of the appliance.
A. Refrigerator compartment
1. Door shelf
2. Tray
3. Crisper drawers
4. Wide crisper drawer
5. Control panel
B. Freezer compartment
- Freezer compartment drawer
NOTE:
- The graphics in this manual are schematic representations and may not exactly match the product.
- To improve quality, our products are constantly updated and their appearance and specifications may change.
- To ensure the most efficient use of energy, keep all internal elements, such as trays, drawers, shelves, etc., in the position indicated in this manual.
2. BEFORE USE
- This appliance comes in a packaging designed to protect it during transport. Take the appliance out of its box and remove all packaging materials. You can keep the original box and other packaging materials in a safe place to prevent damage to the appliance if you need to transport it in the future. If you wish to dispose of the original packaging, make sure all items are recycled properly.
- Check that all parts and components are included and in good condition. If any of them are missing or damaged, please contact Cecotec's Official Technical Support Service immediately.
Box content
- Refrigerator
- Instruction manual
- Do not remove the product's serial number in order to keep proper traceability if technical assistance is required.
3. INSTALLATION
3.1. Transport
- Do not transport the equipment horizontally or by resting it on the floor.
- Do not hold it by the door or by internal handles or accessories.
- It must be transported by lifting it by the lower part.
- Transport should never be performed by a single person; at least two people are required to lift and move the device safely.
3.2. Location
- Figure 2 shows the equipment dimensions and space requirements for installation (All dimensions in mm).
NOTE: The figures above are a guide for installation. The actual dimensions of the appliance may vary slightly. - After removing the packaging, the protective foam on the bottom and the adhesive tape securing the interior elements, clean the outside of the refrigerator thoroughly with a soft, dry cloth and the inside with a cloth dampened with lukewarm water (neutral soap may be used). Then, dry the appliance thoroughly.
- The location you choose to install the appliance must be well ventilated. Do not place the refrigerator in a narrow recess or near heat sources such as a hob, avoid direct sunlight to ensure cooling and freezing performance and save on energy consumption. Do not place the appliance in a damp place to avoid rust or loss of power.
Note: The amount of refrigerant used by the appliance is specified on the rating plate.
- For efficient operation, adequate air circulation is necessary, since during operation, the appliance gives off heat, therefore, at least 30 cm of free space should be left at the top and 10 cm on both sides and at the rear. (Fig. 3).
- Place the appliance on a solid, flat floor to keep it stable, otherwise vibrations and noises will occur. Placing the appliance on soft, uneven or unstable surfaces such as carpets, straw or polyvinyl chloride mats, etc., may reduce the efficiency of the refrigerator, increase the risk of malfunction and potentially cause damage to the appliance or its surroundings.
- The place where the appliance is installed must be well ventilated. Do not cover or block the air grille on the rear cover plate of the compressor.
- The equipment should be kept away from humid places where water is present. Water should be removed from any surface of the appliance as soon as possible with a soft cloth. This will help prevent rust and help your appliance operate at maximum efficiency.
- WARNING: Do not hold on to the door or interior fittings to move the appliance. This could cause it to fall and cause serious injury.
WARNING: Do not hold on to the door or interior fittings to move the appliance. This could cause it to fall and cause serious injury.

3.3. Levelling
- The device must be well leveled to avoid vibrations.
- If necessary, adjust the two front leveling feet to compensate for the unevenness of the floor.
- The leveling feet can be easily rotated using a wrench (not included) or by hand.
- Both adjustable feet and rear wheels* must touch the floor to prevent the refrigerator from moving, vibrating, or rattling.
*Not available on all models. - Adjust the legs counterclockwise to keep them further off the ground and then gently push the equipment to move it. (Fig. 4).
3.4. Placing the shelves
- To disassemble the door shelves first hold both sides of the shelf with your hands. Push it from the unguided side inward, as shown in figure 5. Push until the edge of the shelf separates from the groove.
Fig. 5 key:
1.- Door shelf guide
2.- Door bracket
3.- Shelf - To install the door shelves first hold both sides of the shelf with your hands. Install the buckle on the guide side first. Then, push the other side slightly inwards, the guide will snap into place and the door shelf will be installed. Make sure it is installed correctly before use.
3.5. Replacement of lighting source
- Any replacement or maintenance of the lamp must be carried out by Cecotec's Official Technical Support Service or a similar qualified professional.
- This appliance features an F rating energy efficient light source.
3.6. Preparation
- Once the appliance is properly installed and cleaned, do not turn it on immediately, wait 4 to 6 hours before operating. This will ensure that the refrigerant is fully stabilized and that the compressor oil is properly seated, ensuring maximum cooling capacity while avoiding possible damage.
3.7. Refrigerator relocation
- If you need to move the device from one location to another, follow the steps below:
1.- Remove all items and unplug the appliance.
2.- Disconnect the plug and fix it together with the power cord at the back or top of the appliance.
3.- Tape all parts, accessories and the door to prevent them from falling off when moving the unit.
4.- The transport of the device must be carried out carefully by two or more persons. When transporting the device over long distances, keep it in an upright position.
NOTES:
This refrigerator must be installed separately and cannot be built-in. Otherwise, it will cause problems, such as reduced performance and reduced lifetime of the device. In addition, the warranty will be voided.
The refrigeration and freezing speed of the appliance depends on the amount of food stored and the ambient temperature. If too many room temperature foods are introduced at the same time, the temperature should be reduced.
Large foods should be divided into small pieces for freezing, otherwise they may deteriorate.
➢ Check that all accessories are properly in place before connecting the equipment and inserting the food.

If the appliance is installed in a wet place, be sure to check if the earthed cable and the circuit breaker are working normally. If vibration noises occur due to contact of the appliance with the wall or if the wall becomes discoloured due to air convection around the compressor, keep the appliance further away from the wall. This appliance may cause interference in mobile phones, landline phones, radio receivers, or televisions near the refrigerator, so in this case, keep the appliance as far away from these objects as possible.
4. OPERATION
4.1. Refrigerator connection
- Plug the power cord into the outlet.
- IMPORTANT: Check that the voltage and electrical frequency match the data indicated on the nameplate of the refrigerator.
- The compressor will start and the refrigerant gas will begin to flow through the piping, this will produce a soft humming sound. This indicates that the device is switched on.
- If the device makes unusual noises, check that it is level and stable and remove any objects that may be on top of it.
- When first switched on, the display will show the default temperature values.
- The initial default temperatures are as follows:
+4°C in the refrigerator compartment*. - -18°C in the freezer compartment*.
*These values may vary depending on the refrigerator model. -
The backlighting of the display icons will be activated.
-
If you do not touch any touch icon and the doors are closed, the backlighting will turn off after 60 seconds.
- The control panel consists of two areas for displaying the temperature and one area for displaying the different modes and functions.
4.2. Control panel
- Figure 6 shows the control panel.
Fig. 6 key:
1.- Refrigerator compartment temperature display
2.- Freezer compartment temperature display
3.- Fast Cooling function indicator light
4.- Smart mode indicator light
5.- Touch icon for selecting the refrigerator compartment temperature.
6.- Freezer compartment temperature selection touch icon
7.- Fast Freezing function indicator light
8.- "MODE" operating mode selection touch icon

The actual control panel may vary from one refrigerator model to another.
4.3. Temperature settings
Temperature ranges set:
1.- Refrigerator compartment temperature range: 2\~8 °C (default value: 4°C)* 2.- 8 °C (default value: 4°C)* 2.- 8 °C (default value: 4°C)* 3.
Freezer compartment temperature range: -23\~-15 °C (default value: -18°C)* 2.- Freezer compartment temperature range: -23\~-15 °C (default value: -18°C)* 3.
*These values may vary depending on the refrigerator model.
- The first time the appliance is turned on, set the temperature of the refrigerator compartment to 3^ C.
- Let the appliance run idle (without introducing food) for at least 4 hours to allow the compartment to cool to the proper temperature. If food is introduced before the appliance has cooled down completely, it may spoil.
- Once the appliance has cooled down completely, insert the food and set the desired temperature.
NOTE: In summer, when the temperature is high, food may take longer to cool completely (try to open the door as rarely as possible). - To adjust the temperature in each compartment, press its corresponding touch icon (5 and 6 on the control panel).
4.4. Fast Cooling function
- To activate this function, press the "MODE" operating mode selection touch icon (8) until the "Fast Cooling" icon (3) is illuminated.
- This function adjusts the temperature to 2^ C in the refrigerator compartment, ensuring rapid temperature reduction when storing large quantities of hot food or food at room temperature.
- The function will remain active for 2 hours and 30 minutes. The device will then return to its original configuration.
- Both the "Fast Cooling" and "Fast Freezing" functions can operate simultaneously.
- To deactivate this function, press the "MODE" operating mode selection touch icon (8) until the "Fast Cooling" icon (3) goes out.
4.5. Fast Freezing function
- To activate this function, press the "MODE" operating mode selection touch icon (8) until the "Fast Freezing" icon (7) is illuminated.
- This function quickly reduces the temperature when storing large quantities of hot or room temperature food in the freezer compartment.
- The function will remain active for 24 hours or until the temperature reaches -28^ . The device will then return to its original configuration.
- Both the "Fast Cooling" and "Fast Freezing" functions can operate simultaneously.
- To deactivate this function, press the "MODE" operating mode selection touch icon (8) until the "Fast Freezing" icon (7) goes out.
NOTE: The "Fast Freezing" function is designed to preserve the nutritional value of the food in the freezer compartment. It allows to freeze them in a minimum time. If a large quantity of food is frozen at the same time, it is recommended to activate this function. This increases the freezing speed, which effectively preserves food nutrients and facilitates storage.
4.6. Smart mode
- Use this mode if the refrigerator will not be used for a long period of time. You should remove most of the contents of the refrigerator compartment and leave the contents of the freezer compartment.
- This mode automatically adjusts the refrigerator compartment temperature to 5°C and the freezer compartment temperature to -18°C.
- To activate the "Smart" mode, press the "MODE" operating mode selection touch icon (8) until the "Smart" mode icon (4) is illuminated.
- To deactivate the "Smart" mode, press the "MODE" operating mode selection touch icon (8) until the "Smart" mode icon (4) turns off.
4.7. Memory function
- If there is a power failure, the current operating status will be locked. Once the power supply is restored, operation will continue as configured prior to the outage.
* Availability according to model.
4.8. Error codes
- If a fault occurs in the appliance, the control panel display will show its associated error code.
- Even if the device was capable of cold storage with these malfunctions, it is recommended to contact the Cecotec Technical Assistance Service as soon as possible.
| Error code | Fault description |
| ER rS fS | Refrigerator compartment temperature sensor fault |
| ER ds | Refrigerator compartment defrost temperature sensor fault |
| ER CO | Electronic board (PCB) communication error |
| ER rH | Room temperature sensor fault |
| ER FF | Freezer compartment fan error |
| ER CF | Condensation fan error |
| ER dH | Defrost timeout error |
NOTE: If any other error code appears, turn off the appliance and contact Cecotec's Official Technical Support Service.
4.9. Switching the refrigerator compartment on and off\*
- Press and hold the refrigerator compartment temperature touch icon (5) for 5 to 10 seconds to switch the refrigerator compartment on or off.
- When switching off, the refrigerator compartment temperature display will turn off and the refrigerator compartment will disconnect.
- When the refrigerator compartment is disconnected, press and hold the icon again for 5 to 10 seconds to reconnect it.
*Only available on certain refrigerator models.
5. FOOD STORAGE INSTRUCTIONS
5.1. Freezer compartment
- The freezer compartment is designed for low temperature freezing of food, long-term
storage of frozen food and ice cubes. - Pay attention to the ratings according to the number of stars in the freezer compartment and the resulting storage periods for frozen foods.
- Do not store fresh and frozen foods side by side. Frozen foods may thaw.
- When freezing large quantities of fresh foods, such as meat or fish, divide them into several small pieces before storing so that they can be quickly frozen and easily removed.
- Do not store poisonous or dangerous substances in the freezer compartment. Your freezer is designed to store only edible products.
- There should always be some space between the food inside to allow air to circulate.
- Food should be kept in airtight containers to avoid drying out or giving off odours.
- Let hot food cool down to room temperature before putting it in the freezer compartment.
- Reducing the frequency of door opening can reduce electricity consumption.
- Do not open the door frequently or leave it open longer than necessary.
- If the room temperature is high, the selected temperature is also low and the freezer compartment is full, the compressor may run continuously, causing frost or ice formation on the evaporator. If this happens, increase the freezer temperature.
- Ensure good ventilation.
- Before freezing, wrap and seal fresh food with aluminium foil, film, freezer bags, airtight containers, etc.
- It is advisable to label and date all frozen foods. This will help to identify foods and to know when they should be used before they spoil.
- Observe the storage times recommended by food suppliers.
- Food must be fresh when you freeze it (especially fruit and vegetables).
- Do not freeze bottles or cans containing liquids, particularly carbonated drinks, as they may explode during freezing.
- Do not put hot food in the freezer compartment. Cool them to room temperature before placing them.
- Do not use ice cubes or eat ice cream or popsicles immediately after removing them from the freezer.
- Do not refreeze thawed food. If the food has thawed, cook it, allow it to cool and then freeze it.
- Consume thawed food immediately.
- Too low a temperature setting may shorten the service life of the freezer compartment.
- The entire freezer compartment is suitable for the storage of frozen food products.
- Leave enough space around the food to allow air to circulate freely.
-
For proper storage, refer to the label on the food package.
-
It is important to wrap the food in such a way as to prevent water from entering.
- Before storing food, make sure that the packaging is not damaged as the food may deteriorate. If the container is swollen or damp, it may not have been stored under optimal conditions.
- To limit the defrosting process, place frozen food immediately in the freezer after purchase.
- If food has thawed, even partially, do not refreeze it. Consume them as soon as possible.
- In the event of a prolonged power failure or equipment breakdown, remove stored frozen foods and check if they are still edible. Then store them in a sufficiently cool place or in another freezer.
- To thaw foods, remove them from the freezer and let them thaw at room temperature or in the refrigerator compartment. For quick defrosting, you can use the microwave defrost function.
- If you only want to thaw part of a package, remove the portion you need and immediately close the rest. This will prevent freezer burn and reduce icing of the remaining food.
- ATTENTION: Storing too much food during operation after initial connection may adversely affect the freezing effect.
- IMPORTANT: Prolonged storage at inadequate freezing temperatures can cause loss of quality or spoilage of food and may even cause food poisoning. The minimum temperature in most cases should be -18°C or lower.
- Observe the expiry date and the storage instructions on the package. The following table shows approximate storage time (Note: these times depend on many factors):
| Food item | Storage time (months) |
| Bread | 3 |
| Fruit (except citrus) | 6-12 |
| Vegetables | 8-10 |
| Meatless leftovers | 1-2 |
| Daily food | |
| Butter | 6-9 |
| Mild cheese (e.g. mozzarella) | 3-4 |
| Strong cheese (e.g. parmesan, cheddar) | 6 |
| Fish and seafood | |
| Oily fish (e.g. salmon, mackerel) | 2-3 |
| White fish (e.g. cod, sole) | 4-6 |
| Shrimp | 12 |
| Shelled clams and mussels | 3-4 |
| Cooked fish | 1-2 |
| Meat | |
| Poultry | 9-12 |
| Beef | 6-12 |
| Pork | 4-6 |
| Lamb | 6-9 |
| Sausages | 1-2 |
| Ham | 1-2 |
| Leftovers with meat | 2-3 |
- The following foods are suitable for freezing: cakes, pastries, fish, seafood, meat, game, poultry, vegetables, fruit, aromatic herbs, shelled eggs, dairy products such as cheese and butter, prepared dishes and leftovers such as soups, stews, cooked meat and fish, potato dishes, soufflés and desserts.
- The following foods are not suitable for freezing: vegetables that are usually eaten raw, such as lettuce or radishes, shell eggs, grapes, apples, whole apples, pears and peaches, hard-boiled eggs, yoghurt, sour milk, sour cream and mayonnaise.
5.2. Refrigerator compartment
- The refrigerator compartment is to be used primarily for storing food that will be consumed within a short time.
- Do not store poisonous or dangerous substances in the refrigerator compartment. Your refrigerator has been designed to store only edible products.
- To reduce moisture and subsequent ice buildup, never put liquids in an unsealed container. The scales tend to concentrate in the cooler areas of the evaporator. Storing liquids uncapped means more frequent thawing.
- Never place hot food in the refrigerator compartment. They should first be cooled to room temperature and then placed in such a way as to ensure adequate air circulation inside.
-
Food and containers should not touch the rear wall of the refrigerator compartment, as they may freeze.
-
Do not open the door too often.
- Dairy products and eggs: Store them in the refrigerator compartment and consume them before their expiration date.
- Butter can be spoiled by other strong-smelling foods, so it is best to store it in an airtight container.
- Red meat: Place fresh red meat in a dish and cover it loosely with cling film or aluminum foil. Store cooked and raw meat in separate dishes, this will prevent the juice from the raw meat from contaminating the cooked product.
- Chicken and poultry: Fresh whole poultry should be rinsed inside and out with cold clean water, dried and placed on a plate. Cover lightly with cling film or aluminum foil. Poultry pieces should also be stored in this manner. Whole poultry should never be stuffed until just before cooking, as food poisoning may occur.
- Fish and seafood: Whole fish should be consumed the same day they are purchased. Until use, refrigerate in a dish lightly covered with cling film or aluminum foil. If storing overnight or longer, take special care to select very fresh fish. The whole fish should be rinsed with cold water to remove loose scales and dirt and then dried with paper towels. Place whole fish in an airtight plastic bag. Keep seafood refrigerated at all times. Consume in 1 or 2 days.
- Precooked foods and leftovers: Store them in suitable containers with lids so that they do not dry out. Keep for 1 to 2 days only. Reheat leftovers only once and until they are heated through.
- Crisper drawer: It is the most optimal place to store fresh fruits and vegetables. Be careful not to store the following foods at temperatures below 6°C for prolonged periods: citrus fruits, melons, pineapple, papaya, curry, passion fruit, cucumber, peppers and tomatoes. At low temperatures, undesirable changes will occur, such as pulp softening and browning or accelerated decomposition. Do not store avocados (until ripe), bananas or mangoes.
| Food item | Storage place in the refrigerator compartment* |
| Butter, cheese | Upper door shelf |
| Eggs | Shelf |
| Fruits, vegetables, salads | Crisper drawer |
| Meat, sauces, milk, cheese | Lower area (lower tray) |
| Dairy products, canned foods | Upper area or door shelf |
| Drinks, bottles | Door shelf |
*Location may change depending on refrigerator model.
Avoid direct contact of stored food, especially greasy food, with the interior wall covering. If the interior shows oil or grease stains, clean it immediately to avoid prolonged contact with the coating, as this can lead to corrosion and cracking.
5.3. Energy saving recommendations:
- Close the door carefully and make sure that it is completely closed after use, otherwise the freezer will consume more energy and more ice will form.
- Do not place the freezer near stoves, radiators or other heat sources. If the ambient temperature is high, the compressor will run more frequently and longer, resulting in higher energy consumption.
- Ensure that there is sufficient ventilation at the base, sides and rear of the unit.
- The arrangement of drawers, shelves and trays as shown in the product overview provides the most efficient use of energy and should be maintained as much as possible.
- To obtain more storage space, e.g. for large refrigerated or frozen products, you can remove the central drawers and accessories. The top and bottom drawers and accessories should be removed at the end, if necessary. (IMPORTANT: the number of accessories depends on the refrigerator model).
- Arrange the interior space uniformly to contribute to optimal energy use.
- Let hot food items to cool before placing them inside. This will increase energy efficiency.
- Allow frozen foods to defrost in the refrigerator compartment. Chilling frozen food reduces energy consumption in the refrigerator compartment
- Open the door only as far as necessary to minimize cold loss. Opening the door promptly and closing it properly reduces energy consumption.
- Set the temperature no colder than necessary to contribute to optimal energy use.
- The door seals must be in perfect condition in order for the doors to close properly.
Freezer compartment:
- Prepare the fresh food you want to freeze in small portions to ensure rapid freezing.
- Wrap all food in aluminium foil or plastic freezer bags and make sure to remove air.
6. CLEANING AND MAINTENANCE

Before cleaning the appliance, disconnect it from the mains. Wait at least 5 minutes before restarting, as frequent starting may damage the compressor. Do not touch the plug with wet hands; doing so may result in electric shock. Avoid spilling water on the appliance, so that it does not rust or cause an accident.
6.1 Cleaning the interior and exterior
- Do not use mechanical devices or other means to accelerate the defrosting process, other than those recommended in this instruction manual.
- Food residues can produce unpleasant odours, so you should clean the interior of the appliance on a regular basis.
- Use a soft cloth or sponge to clean the inside of the product. You can use two tablespoons of baking soda and one liter of warm water. Then rinse with clean water and dry thoroughly. After cleaning, open the door and allow it to air dry before turning it on.
- For hard-to-reach areas, such as corners, a soft-bristled cloth or brush is recommended to ensure that contaminants and bacteria do not accumulate.
- Clean the dust that accumulates on the rear panel frequently to avoid fire hazards as well as increased power consumption. It is recommended at least once a year.
- If you have used mild soap, be sure to rinse it with clean water. Next, dry it with a dry cloth.
- Do not use any abrasive materials or corrosive products to clean the unit, hard or wire brushes, organic solvents (alcohol, acetone, benzene, isoamyl acetate, etc.), boiling water, acidic or alkaline products, as they may damage the surface or the interior and deform or damage plastic parts.
- Clean the exterior surface with a soft cloth dampened with soapy water, neutral detergent, etc., and then wipe dry.
- Check the door gasket regularly to ensure that there is no debris. Clean the gasket with a soft cloth lightly dampened with soapy water or diluted mild soap. Carefully dry the door seal.
- Do not rinse directly with water or other liquids during cleaning to avoid short circuits or affecting the electrical insulation.
- Do not spray or sprinkle water on the outside or inside of the device.
- Do not use mechanical means, such as dryers, to dry the interior.
- It is recommended that the refrigerator be operated continuously after start-up. As a general rule, its operation should not be interrupted, otherwise its service life could be affected.
6.2 Interruption of use of the appliance for a long period of time
If the appliance is not to be used for several months, first switch it off and disconnect the plug from the mains socket.
Remove all the food.
- Clean and dry the interior completely. To avoid mould or unpleasant odours, leave the door slightly open.
- Store the appliance in a ventilated and dry place, away from heat sources; place the appliance carefully and do not place heavy objects on it.
- Keep the appliance out of the reach of children, so that they do not play with it.
6.3 Power failure or cooling system fault
- Generally, a brief power failure does not significantly affect the temperature of the refrigerator.
-
If the appliance stops working for a prolonged period of time, food may spoil.
-
Try to open the appliance door as little as possible, this way you will be able to preserve the food in good condition for a while.
- If you know that a power cut is going to occur in advance:
- Select the lowest temperature in advance or activate the "Fast Freezing" function. Do not introduce new food. Adjust the temperature back to the original setting when power is restored.

Note: It is best not to interrupt the operation of the appliance; this could affect its lifespan. If the ambient temperature is too low during shutdown, the remaining water in the system may freeze.
6.4 Defrosting
- Although your appliance defrosts automatically, over time, a layer of frost may form on the inside walls of the freezer compartment if the door is opened frequently or kept open too long. If the frost is too thick, choose a time when there is little food and proceed as follows:
1.- Disconnect the appliance from the mains.
2.- Remove food and all interior accessories, leave the doors open. Ventilate the room well to speed up the defrosting process.
3.- After defrosting is complete, clean the freezer compartment as described above.
4.- Dry the interior thoroughly before reinserting the accessories and foodstuffs.

!CAUTION! Do not use sharp objects to remove frost from the freezer compartment. Do not reconnect the appliance to the mains until the interior is completely dry.
6.5 Cleaning door shelves
- Disassemble the shelves as explained in section 3.4 of this manual.
- After washing the shelf with warm water, dry it thoroughly and return it to its original position.
6.6 Cleaning of the trays
- You can remove the trays from their guides for cleaning.
- Clean the trays with lukewarm water and replace them once they are thoroughly dry.
6.7 Cleaning of refrigerator compartment drawers
- Remove the contents of the drawer.
- Grasp the drawer handle (if any) and pull it all the way out as far as it will go.
- Lift the drawer and remove it by pulling it out
- Clean the drawer with lukewarm water and replace it once it is completely dry.

WARNING! Due to technical changes and different models, some of the illustrations or indications in this manual may differ from those of your refrigerator model.
6.8 Safety check after maintenance
- Check that the power cable is not broken or damaged.
- Check that the plug is correctly inserted into the socket.
- Check that the plug does not overheat.

Note: If the power cord and plug are damaged or dusty, electric shock and fire may occur. If there is any malfunction, disconnect the power cable and contact the official Cecotec Technical Support Service.
7. TROUBLESHOOTING
For the following minor malfunctions, please try to solve the problem yourself before contacting the official Cecotec Technical Support Service.
| Fault | Possible causes | Possible solutions |
| The appliance does not work. | The appliance is not plugged into the mains. | Unplug the cable and plug it in again. |
| Circuit breakers or fuses are damaged.There is no electricity. | Check the electrical panel of your electrical installation | |
| The light does not work. | The appliance is not connected to the mains | Plug the device in |
| The lamp is burned out | The lamp must be replaced by Cecotec's Official Technical Support Service or a qualified technician. | |
| Fruits and vegetables are frozen | Are they placed at the rear of the refrigerator compartment? The area near the rear wall is where the temperature is lowest. | Do not place food that can easily freeze in the back of the refrigerator compartment.Store fruits and vegetables in their corresponding drawer. |
| Refrigerator/freezer cools down too much | The temperature control is not set correctly | Set a higher temperature |
| The appliance makes noise | The appliance is not stable. | Place the freezer on a level surface. |
| The appliance touches the wall. | Move the appliance away from the wall. |
| The appliance has low cooling efficiency. | The food inside is hot or there is too much food. | Introduce food in the appliance when it is at room temperature. |
| You open the door too often. | Keep the door closed. | |
| Something is caught in the door gasket. | Remove the object obstructing the door gasket. | |
| The appliance receives direct sunlight or is close to a heat source. | Remove the appliance from the heat source. | |
| The place where the appliance is placed is not well ventilated. | Ventilate the room. | |
| The selected temperature is too high. | Adjust the temperature. | |
| The appliance gives off unpleasant odours. | There is spoiled food inside. | Dispose of food which is spoiled. Clean the interior of the appliance. |
| There is food with a strong odour inside. | Pack the strong smelling foods. | |
| Compressor runs for a long time | High ambient temperature results in long operating time | This is normal |
| Too many foods are introduced at the same time | Do not put in too much food at the same time | |
| Food is introduced while still hot | Wait for the food to cool before putting it in the freezer. | |
| The door is opened too often | Open the door only when it is absolutely necessary | |
| The layer of frost on the inside is too thick | Needs defrosting | |
| The door does not close properly | Some object jams the door | There is too much food or it is not placed in the correct way. |
| There is too much food in storage | Do not overload the refrigerator with food | |
| Door seal is deformed. | Heat the gasket with an electric dryer or hot water, then let it cool and replace it. If the problem persists, contact Cecotec's Official Technical Support Service | |
| The external part is hot | When the unit is in operation, the heat is dissipated to the outside through the metal tubes inside the unit | It is normal for the outside temperature to be higher. |
| Higher ambient temperature in summer causes an increase in the outside temperature | Increase the heat dissipation space or place the unit in a cooler, more ventilated location. | |
| Transverse or vertical spacers are hot | Inside the separators there are metal tubes and the heat released by the tubes prevents condensation. | This is normal |
| Condensation forms on the outside | Condensation may form when the humidity in the room is high or during the rainy season. | This is normal. Wipe off condensation with a dry cloth |
| Condensation forms inside the refrigerator compartment | Refrigerator compartment maintains high humidity to keep vegetables and other foods fresh | Wipe off condensation with a dry cloth |
| The humidity in the room is too high and the appliance doors have been opened frequently | Do not open the doors too often or keep them open for too long. | |
| The door gasket is not maintaining airtightness | Check door seal | |
| It is difficult to open the door | The difference in air pressure between the inside and outside of the freezer can sometimes make it difficult to open the door. | Wait a few moments and then try to open the door slowly. |
| Frost around the ventilation louvers | The door is not closed properly | Make sure that food does not block the door. |
| Door gasket not tightened correctly | Check the door gasket |
| Actual temperature differs from set temperature | When hot foods are introduced, the temperature will temporarily rise. | This is normal |
| After setting a new temperature, it will take some time to reach the new temperature. | Wait for some time before checking the actual temperature. | |
| After temperature stabilization, the actual temperatures at the different points in the compartments vary, with an approximate deviation of ± 3^ . |

Note: If none of these situations match your problem, do not attempt to disassemble or repair the appliance yourself. All repairs must be carried out by qualified
personnel. Contact Cecotec's Official Technical Support Service. Repairs must be
carried out by an authorised technician and only original spare parts must be used.
When the appliance is not to be used for a long period of time, disconnect it from the mains, remove all food and clean it. Leave the door ajar to avoid unpleasant odours.
These instructions are intended for qualified technicians, do not attempt to carry them out if you do not have the necessary training and knowledge, as any damage caused by an incorrect repair will void the warranty.
Unauthorised self-maintenance or maintenance will affect the safe use of the product and the application of the warranty policy.
NOTE:
- Certain noises may be heard during normal use, which do not affect its correct operation.
- Noises that can be easily avoided:
Noise caused by an uneven appliance: adjust the position with the adjustable front feet (not available on all models).
Noise caused by rubbing against an adjacent piece of furniture or cabinet: move the appliance away.
➢ Creaking in drawers or shelves: remove and replace them.
➢ Sounds of bottles clinking: separate the bottles.
- The noises heard during normal use are mainly due to the operation of the compressor (ignition) and the refrigeration system (thermal expansion and contraction caused by the flow of refrigerant).
- When operating the appliance for the first time, it will run at high speed to cool quickly and the compressor noise may seem louder. When the internal temperature drops below a certain level, the noise will decrease.
ENGLISH
- When starting or terminating compressor operation, expanding or contracting various parts, operating various control devices, or changing the temperature inside the chiller, normal sounds will be heard.
- △ During operation, the external temperature of the compressor is above 80°C. Do not touch it, as this could cause serious injury.
- If the ambient temperature is too high, the compressor start-up time may be prolonged. This is a normal phenomenon.
8. RECYCLING OF ELECTRICAL AND ELECTRONIC EQUIPMENT
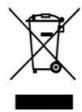
This symbol indicates that, according to the applicable regulations, the product and/or batteries must be disposed of separately from household waste. When this product reaches the end of its service life, you must remove the batteries/accumulators and take it to a collection point designated by local authorities.
For detailed information on how to properly dispose of electrical and electronic equipment and/or the corresponding batteries, consumers
should contact their local authorities.
Compliance with the above guidelines will help to protect the environment.
9. COPYRIGHT
The intellectual property rights over the texts in this manual belong to CECOTEC INNOVACIONES, S.L. All rights reserved. The content of this publication may not, either in part or in its entirety, be reproduced, stored in a retrieval system, transmitted or distributed by any means (electronic, mechanical, photocopying, recording or similar) without prior authorisation from CECOTEC INNOVACIONES, S.L.
10. SIMPLIFIED DECLARATION OF CONFORMITY

Cecotec Innovaciones hereby declares that this appliance complies with the essential requirements and other relevant provisions of the regulations applicable in the European Union. This appliance has been designed, manufactured and tested in compliance with required safety and quality standards. The full text of the EU Declaration of Conformity can be found on the following website: https://cecotec.
es/es/information/declaration-of-conformity
1. PIÈCES ET COMPOSANTS
Img. 1
it/information/declaration-of-conformity
1. PEÇAS E COMPONENTES
Fig. 1
A. Compartimento frigorífico
1. Prateleira da porta
2. Bandeja
3. Caixas para frutas e legumes
4. Gaveta larga para frutas e legumes
5. Painel de controlo
B. Compartimento congelador
6. Gaveta do compartimento do congelador
NOTAS:
https://cecotec.pt/pt/information/declaration-of-conformity
1. ONDERDELEN EN COMPONENTEN
Afbeelding 1
A. Koelvak
7. PROBLEEMOPLOSSING
https://cecotec.es/es/information/declaration-of-conformity
1. CZĘŚCI I KOMPONENTY
Rys. 1
4.6. Mode "Smart" (Intelligent)

- SOMMAIRE
- NOTE:
- BEFORE USE
- Box content
- INSTALLATION
- Transport
- Location
- Levelling
- Placing the shelves
- Replacement of lighting source
- Preparation
- Refrigerator relocation
- NOTES:
- OPERATION
- Refrigerator connection
- Control panel
- Temperature settings
- Temperature ranges set:
- Fast Cooling function
- Fast Freezing function
- Smart mode
- Memory function
- Error codes
- Switching the refrigerator compartment on and off\*
- FOOD STORAGE INSTRUCTIONS
- Freezer compartment
- Refrigerator compartment
- Energy saving recommendations:
- Freezer compartment:
- CLEANING AND MAINTENANCE
- Cleaning the interior and exterior
- Interruption of use of the appliance for a long period of time
- Power failure or cooling system fault
- Defrosting
- Cleaning door shelves
- Cleaning of the trays
- Cleaning of refrigerator compartment drawers
- Safety check after maintenance
- TROUBLESHOOTING
- ENGLISH
- RECYCLING OF ELECTRICAL AND ELECTRONIC EQUIPMENT
- COPYRIGHT
- SIMPLIFIED DECLARATION OF CONFORMITY
- PIÈCES ET COMPOSANTS
- PEÇAS E COMPONENTES
- Fig. 1
- NOTAS:
- ONDERDELEN EN COMPONENTEN
- Afbeelding 1
- PROBLEEMOPLOSSING
- CZĘŚCI I KOMPONENTY
- Rys. 1
- Mode "Smart" (Intelligent)
Brand : CECOTEC
Model : Bolero Coolmarket Fd 579 E
Category : Refrigerator