KH 3145 ELECTRIC TACKER - Power Tools PARKSIDE - Free user manual and instructions
Find the device manual for free KH 3145 ELECTRIC TACKER PARKSIDE in PDF.

| Product type | Electric stapler |
| Brand | PARKSIDE |
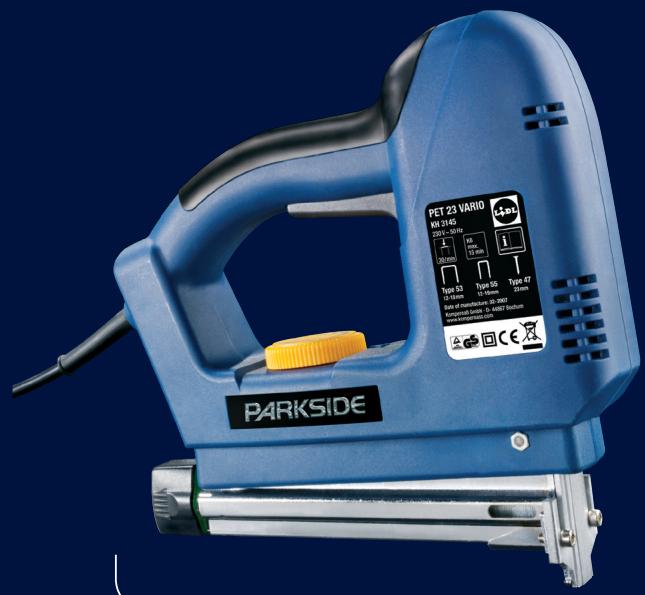
| Model | KH 3145 (PET 23 VARIO) |
| Power supply | 230 V ~ 50 Hz |
| Striking frequency | 30 strokes/min |
| Continuous operating time | 15 min max. |
| Protection class | II (double insulation) |
| Sound pressure level (LpA) | 95 dB(A) |
| Sound power level (LwA) | 108 dB(A) |
| Vibration | 5.58 m/s² |
| Compatible staple types | Type 53 (fine wire), Type 55 (narrow crown), Type 47 (nails) |
| Staple/nail lengths | 12, 14, 16, 18, 19 mm (type 53/55); 23 mm (type 47) |
| Impact force adjustment | 7 levels (1 = low, 7 = high) |
| Magazine loading | Sliding magazine, front loading |
| Maintenance | Maintenance-free; clean with a dry cloth |
| Intended use | Domestic, for softwood, hardwood, particle board, plywood |
| Operating environment | Dry rooms only |
| Safety equipment | Safety glasses recommended, disconnect before maintenance |
| Included accessories | Hex key, instruction manual, safety booklet |
| Repairability | Contact customer service; do not open yourself |
| Warranty | See provided warranty documentation |
Frequently Asked Questions - KH 3145 ELECTRIC TACKER PARKSIDE
User questions about KH 3145 ELECTRIC TACKER PARKSIDE
0 question about this device. Answer the ones you know or ask your own.
Ask a new question about this device
Download the instructions for your Power Tools in PDF format for free! Find your manual KH 3145 ELECTRIC TACKER - PARKSIDE and take your electronic device back in hand. On this page are published all the documents necessary for the use of your device. KH 3145 ELECTRIC TACKER by PARKSIDE.
USER MANUAL KH 3145 ELECTRIC TACKER PARKSIDE
Operation and Safety Notes
C E
Operation and Safety Notes
| Before reading, unfold the page containing the illustrations and familiarise yourself with all functions of the device. | |||
| The following icons/symbols are used in this instruction manual: | |||
| 1 | Read instruction manual! | V~ | Voltage |
| ! | Observe caution and safety notes! | Wear safety goggles! | |
| 4 | Caution – electric shock! Dangerous electric current – danger to life! | Proper procedure and handling! | |
| Protection category II power tool; double insulated | |||
Introduction
For your safety.
Proper use 6
Features and equipment.. 6
Included items.. 6
Technical information.. 6
Staples/nails. 6
Safety
Specific safety advice for this tool . 7
Operation
Loading the magazine.. 8
Setting the impact force. 8
Switching on and off.. 8
Stapling. 8
Tool storage.. 9
Rectifying faults.. 9
Maintenance and cleaning.. 9
Disposal
Information
Servicing.. Page 10
Manufacturer's declaration of conformity . 10
Electric tacker PET 23 VARIO
Introduction
For your safety

Please make sure that you familiarise yourself fully with the way the product works before you use it for the first
time and that you understand how properly to handle electrical power tools. Further details can be found in the operating instructions. In addition to the above, you must also strictly observe the general safety advice contained in the accompanying booklet. Use the product only as described and for the indicated purposes. Keep these instructions in a safe place. If you pass the product on to anyone else, please ensure that you also pass on all the documentation.
Proper use
The electric tacker is suitable for domestic use only and is intended exclusively for stapling cardboard, insulation, leather, cloth (textile or natural fibres) or similar materials on to hardwood, softwood, chipboard or similar plywood-type materials. The required power supply is a 230V 50Hz mains circuit (fitted with a maximum 16A fuse or trip). The device is suitable for use in dry rooms only. Any improper use gives rise to serious danger of accident and invalidates the guarantee.
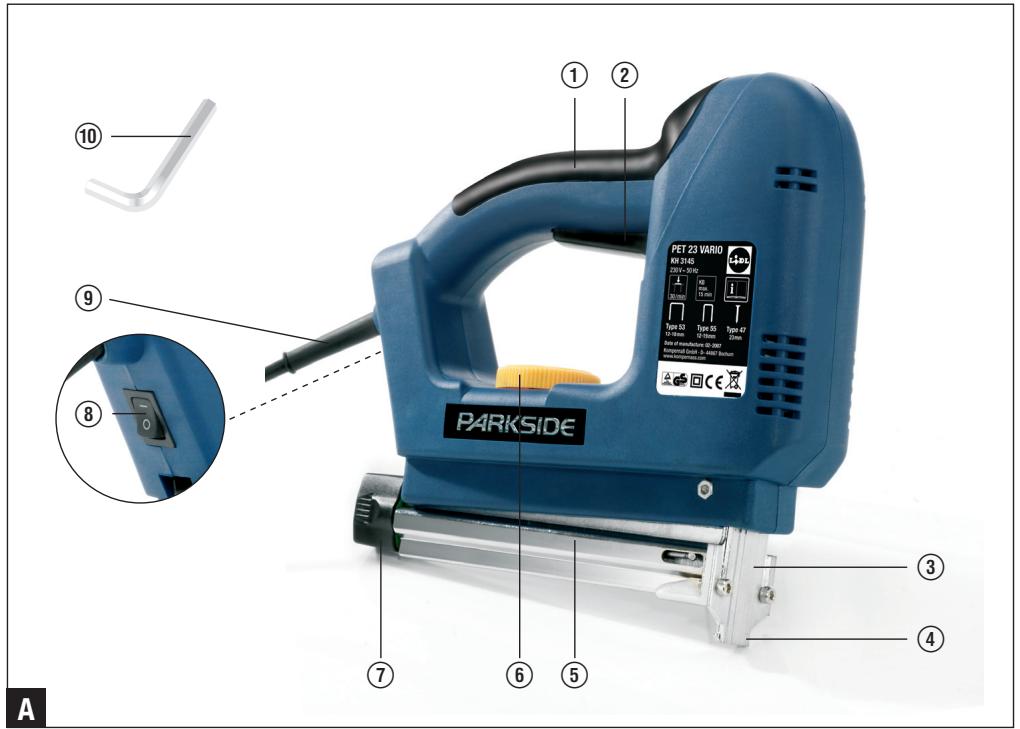
Features and equipment
(See Fig. A)
① Hand grip
② Trigger
③ Front plate
④ Nose
⑤ Magazine
⑥ Variable impact force controller
⑦ Magazine slider
⑧ On/off switch
(9) Mains lead
Hexagonal socket screw key
■ Included items
1 Electric tacker PET 23 Vario
Light wire staples: type 53
Narrow-backed staples: type 55
Nails: type 47
1 Hexagonal socket screw key
1 Operating instructions
1 Booklet "General safety advice"
1 Booklet "Guarantee and service"
Technical information
Nominal voltage:
Impact cycles:
230V 50Hz

30/min
Short-term
operation time (KB):

max. 15 min
Protection class:
Sound pressure level (A): 95,0 dB(A)
Sound pressure level (C): 105,0 dB(C)
Sound power level: 108,0 dB(A)
Vibrations: 5,58m / s^2
Staples/nails
Note: The precision components of the device are designed to use the following standard, widely available staples and nails.
| Type | mm |
| 55 | 12, 14, 16, 18, 19 |
| 53 | 12, 14, 18 |
| 47 | 23 |
The following information shall be considered as recommendatory only. Determine for yourself by practical tests the best staple or nail type and the optimum impact force setting for your substrate.
| Staple/nail type | Length (mm) | Recommended impact force setting for: | |||
| Hardwood(e.g. oak or beech) | Softwood(e.g. spruce or pine) | Chipboard/MDF board | Plywood(e.g. wood core plywood) | ||
| →|11,4 mm← | 12 | 5-6 | 1-4 | 4-6 | 5-6 |
| 14 | 6 | 2-5 | 5-6 | 6 | |
| 18 | 6-7 | 4-6 | 6-7 | 6-7 | |
| Type 53 | |||||
| →|6 mm← | 12 | 5-6 | 3-5 | 2-5 | 2-5 |
| 14 | 5-6 | 3-5 | 3-5 | 3-5 | |
| 16 | 6-7 | 5 | 4-5 | 4-5 | |
| 18 | 7 | 5 | 4-6 | 4-6 | |
| 19 | 7 | 6 | 5-7 | 5-7 | |
| Type 55 | |||||
| →|L← | 23 | 7 | 6 | 6-7 | 6-7 |
| Type 47 | |||||
Safety

Specific safety advice for this tool
Ensure that the tool is always used in accordance with the operating instructions and only by persons over 18 years of age.

Keep children away from the tool.
Store the tool indoors in an enclosed, dry place where it cannot be
reached by children.

To avoid danger to life from electric shock:
Frequently check the condition of the tool, mains lead and plug. Do not use the tool if these types
of parts are damaged. Never open up the tool. Always have any repairs carried out or replacement parts fitted at the service centre or by an electrical equipment repair specialist.
A damaged tool, mains lead or plug presents a serious danger to life from electric shock.
Check before connecting the tool to the mains that the electricity supply circuit is 230V 50Hz and is fitted with a max. 16 amp fuse or trip. Otherwise there is a danger to life from electric shock.
- Disconnect the mains lead from the mains supply ⑨ in the event of malfunction, fault rectification, maintenance or cleaning.
Only use the tool if the mains lead ⑨ is undamaged. A damaged mains lead presents a danger to life from electric shock. Have repairs to the mains lead carried out only by an electrician or at the relevant service centre.
Always guide the mains lead 9 away from behind the hand grip ① to the rear of the tool.
Do not use the tool to fix electrical cabling in place.

Attention! To avoid the risk of injury!
Ensure that staples and nails cannot strike people or animals.
Protect your eyes. Wear protective glasses. This also applies to people who may be helping with the work by supporting or holding the workpiece.
Before you start to use the tool, check that it is in perfect condition.
Make sure the tool is switched off before you load the magazine ⑤. To do this set the On/off switch ⑧ to position "0".

To work safely!
Before undertaking any type of work with the tacker make sure that materials and workpieces are safely held in position. If necessary have a second person on hand to support or hold the items steady. Protect the tool from moisture.
Do not use the tool on moist or wet materials.
If you have finished using the tool or are taking a prolonged break from your work disconnect the mains lead ⑨ from the mains.
Operation
Loading the magazine
Use only fine wire staples (type 53), narrow-backed staples (type 55) or nails (type 47)!
Press the magazine slider ⑦ in the direction of the magazine ⑤ and guide it upwards.
Pull the magazine slider ⑦ completely out of the magazine ⑤
□ If necessary remove any staples or nails of the wrong type from the magazine ⑤.
- Slide the correct staples or nails into the magazine ⑤.
Look at the depiction on the magazine slider ⑦ for how to insert the staples or nails correctly.
Push the magazine slider ⑦ into the magazine ⑤ until it meets the stop.
Then press the magazine slider ⑦ downwards until it has definitely engaged.
Setting the impact force
① A tip!
Select the lowest impact force required for stapling.
You can set the impact force at any value between "1" (lowest impact force) and "7" (highest impact force) using the impact force controller ⑥.
Switching on and off
Attention!
Connect the tool to the mains only when it is switched off. To do this set the On/off switch ⑨ to position "0".
To switch on
Set the On/off switch ⑧ to position "1" (see Fig. A).
To switch off
Set the On/off switch ⑧ to position "0".
Blow count: 30/min
The Electric Tacker PET 23 VARIO is designed for 30 blows per minute.
Continuous Operating Time: KB max. 15 min
The Electric Tacker PET 23 VARIO is designed for 15 minutes of continuous operation at the maximum blow count. Allow the appliance to cool down sufficiently after such a tasking.
Stapling
Switch on the tool.
Press the nose ④ on the spot where you wish to staple.
Press the trigger ②.
Adjust the impact force to suit the materials, staples or nails.
Redriving:
Use this function if you discover that some alreadydriven staples or nails have not ended up flush in
a particularly hard substrate. Redriving must be carried out directly at each staple or nail. If you do not lift the nose ④ when doing this then no further staple or nail will be loaded into the driving position.
Drive the required staple or nail and press the nose piece ④ once more on to the next rediving position.
Press the trigger ② as often as necessary until the staple or nail is flush with the substrate.
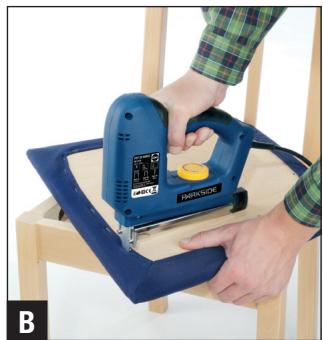
Examples of use:
Fastening a covering to the seat of a chair (see Fig. B).
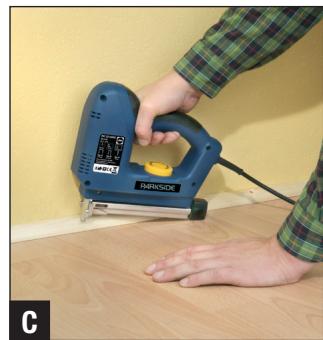
Fixing a skirting at the joint between the wall and floor covering (see Fig. C).
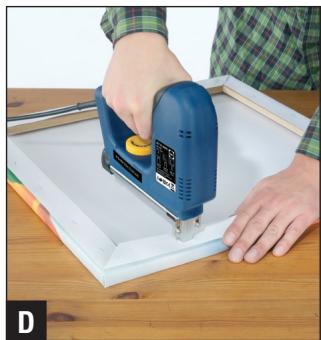
Stretching and stapling a canvas to a frame (see Fig. D).
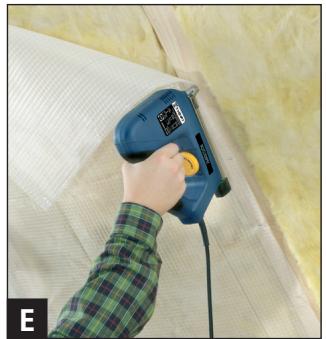
□ Attaching a protective film to insulation material when installing thermal insulation (see Fig. E).
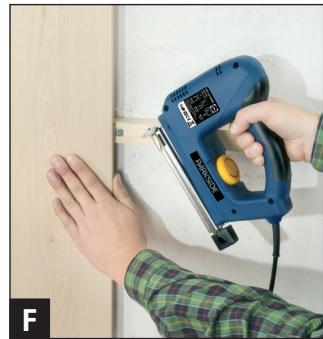
□ Attaching fixings for components in a wall cladding system (see Fig. F).
Tool storage
If you are not going to use the tool for a while disconnect the mains lead ⑨ from the mains.
- Keep the tool safe from unauthorised use.
- Keep staples and nails in secure containers.
Rectifying faults
Attention!
If you are going to rectify faults disconnect the mains lead ⑨ from the mains.
Fault
Cause
Remedy
The tool does not work properly.
A staple or nail is blocking the tool.
Open the magazine slider ⑦ . This should release the pretension. Take off the front plate ③ with the hexagonal socket screw key ⑩ Remove the staple or nail.
A staple or nail has been incorrectly driven into the material.
- Remove the incorrectly driven staple or nail with pincers or pointed pliers.
Select suitable staples or nails.
- Set the required impact force that will correctly drive the staples or nails.
The tool is defective.
Contact the service centre (see guarantee documentation).
■ Maintenance and cleaning
Attention!
Before carrying out maintenance or cleaning disconnect the mains lead ⑨ from the mains supply.
The electric tacker is designed to be maintenance-free.
Clean the tool frequently, ideally after each use using a dry, fluff-free cloth. Never use water or cleaning agent.
Disposal

The packaging is wholly composed of environmentally-friendly materials that can be disposed of at a local recycling centre.

Do not dispose of electrical tools with the household rubbish!
In accordance with European Directive 2002/96/EC about waste electrical and electronic equipment and its transposition into national legislation, worn out electric tools must be collected separately and taken for environmentally compatible recycling.
Contact your local refuse disposal authority for more details of how to dispose of your worn out electrical tools.
Information
Servicing
The service centre for your country is shown in the guarantee documentation.
Attention!
Through poor conditions of the electrical MAINS, shortly voltage drops can appear when starting the EQUIPMENT. This can influence other equipment (eg. Blinking of a lamp). If the MAINS-IMPEDANCE Zmax < 0.381 OHM, such disturbances are not expected. (In case of need, you may contact you local supply authority for further information.)
Manufacturer's declaration of conformity
We, Komperna GmbH, Burgstr. 21, D-44867 Bochum, Germany, declare that this product complies with the following EU directives:
Machinery Directive (98/37/EC)
EU Low Voltage Directive (73/23/EEC) (93/68/EEC)
Electromagnetic compatibility (89/336/EEC)
Applicable harmonized standards
EN50144-1:1998+A1+A2
EN50144-2-16:2003
EN55014-1:2000+A1+A2
EN55014-2:1997+A1
EN61000-3-2:2000+A2
EN61000-3-11:2000
ROHS Directive 2002/95/EEC
Description of the product:
Parkside Electric tacker PET 23
Bochum, 30.04.2006

Hans Kompernaβ
- Managing Director -
We reserve the right to make technical modifications in the course of further development.