WIRELESS KIT 108MBPS - Wireless Network Kit TOPCOM - Free user manual and instructions
Find the device manual for free WIRELESS KIT 108MBPS TOPCOM in PDF.

User questions about WIRELESS KIT 108MBPS TOPCOM
0 question about this device. Answer the ones you know or ask your own.
Ask a new question about this device
Download the instructions for your Wireless Network Kit in PDF format for free! Find your manual WIRELESS KIT 108MBPS - TOPCOM and take your electronic device back in hand. On this page are published all the documents necessary for the use of your device. WIRELESS KIT 108MBPS by TOPCOM.
USER MANUAL WIRELESS KIT 108MBPS TOPCOM
This product is in compliance with the essential requirements and other relevant provisions of the R&TTE directive 1999/5/EC. The Declaration of conformity can be found on :
http://www.topcom.net/support/cedeclarations.php
FOR USE IN:
BELGIUM, HOLLAND, GERMANY, SWEDEN, DENMARK, NORWAY, FINLAND, SPAIN, ITALY, PORTUGAL, GREECE, TURKEY
ROUTER
1 The connection panel and LED's

-
POWER : The power port is to connect the 5V DC power adapter.
-
The power LED on the front panel will go ON when the power adapter is connected.
-
WAN : The WAN Ethernet port is to connect your ASDL/Cable modem.
- The WAN LED will go ON if the network Ethernet cable is properly connected.
- Ports 1-4 : This is to connect up to 4 pc's or other network devices.
- The LAN LED's will indicate the connection status.
- Reset Button : To load default settings, press the reset button and hold it for 5 6 seconds. It will load the factory default settings for the device. Do not press the reset button unless you want to clear the current settings.
- The STATUS LED and WLAN LED in the front panel will blink during normal operation.
2 Configuring the PC to connect to the wireless router

- The routers default IP address is : 192.168.1.1
DHCP server is ON
By default, your (Wireless) network adapter in the computer will be configured as DHCP-client : Obtain an IP address automatically.
These settings should be verified :
- Click Start button, then select the Control Panel
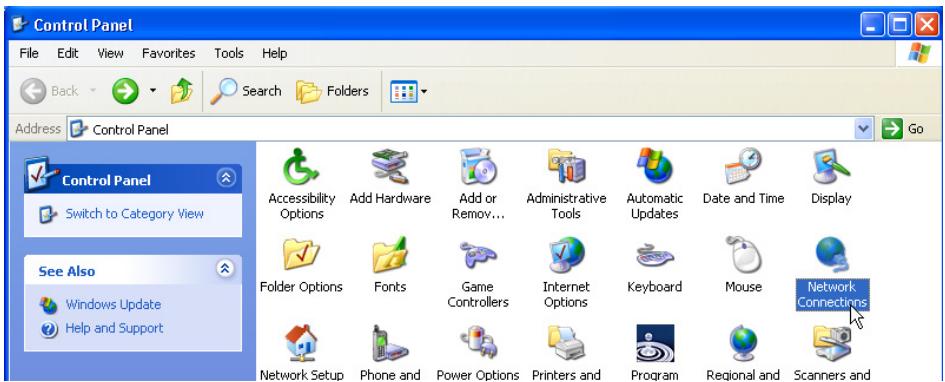
- Double-click the Network Connections Icon
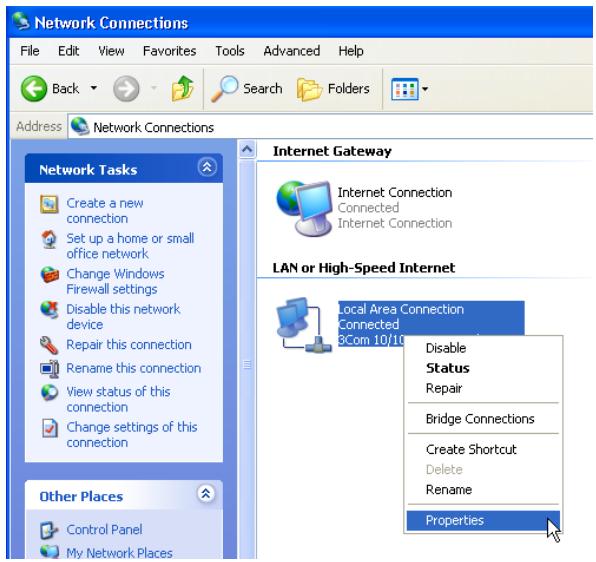
- Click the right mouse key on your connected network adapter and select Properties.
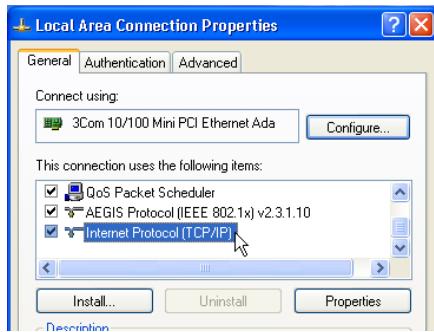
- Double-click the Internet Protocol (TCP/IP).
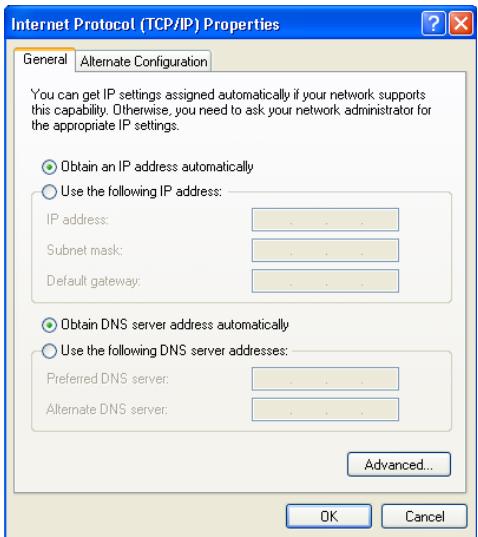
Set the IP and DNS options as in screen above (DHCP client):
- Obtain an IP address automatically
-
Obtain DNS server address automatically
-
Click OK to confirm.
Advanced users can manually configure the computers IP address, gateway and DNS settings.
3 Verify your PC's IP configuration
As the connected computers are configured as DHCP-client, the router will provide an IP address to the computer when it is connected properly to one of the LAN ports (or Wireless by use of a wireless adapter).
To check if your computer received a LAN IP address, you can use the Windows utility.
This verification is only required in case you have problems to get connected to the router.
WINIPCFG (for windows 95/98)
Click the Start button, select Run and type winipcfg. In the example below this computer has a IP address of 192.168.1.100 and the default gateway is 192.168.1.1. The default gateway should be the broadband router IP address.
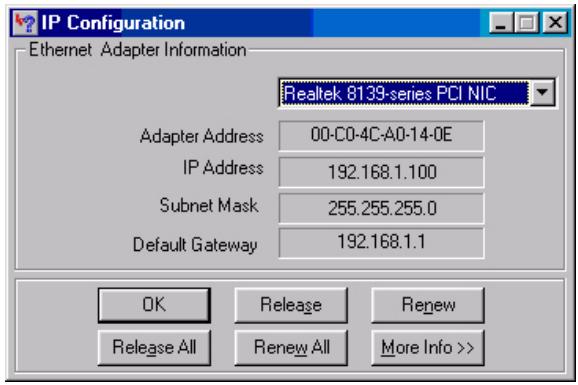

You can also type winipcfg in the DOS command.
- IPCONFIG (for windows 2000/NT)
Click the Start button, select Run and type cmd. Now the DOS screen will open. In the DOS command type IPCONFIG and press Enter. Your PC IP information will be displayed as shown below.
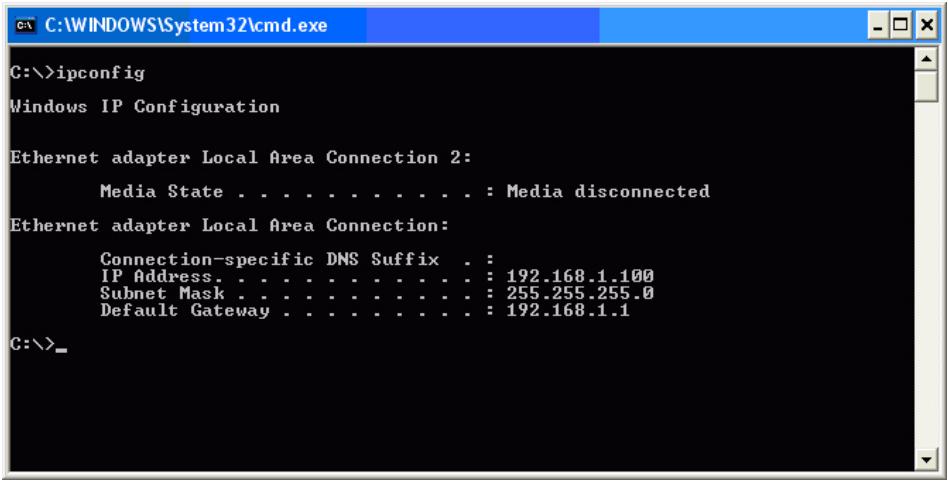
If no valid IP address is shown, type IPCONFIG / RENEW to renew the IP address, gateway and DNS.
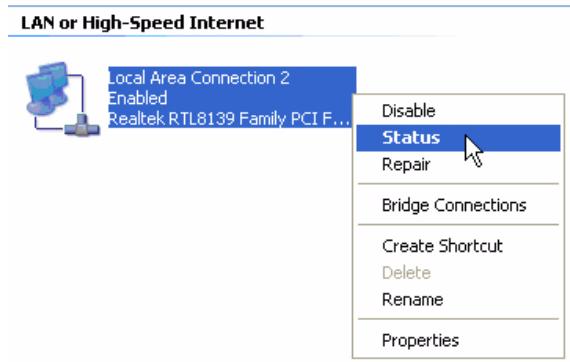
Windows XP
In the Control Panel, click the right mouse key on your network adapter and select Status.
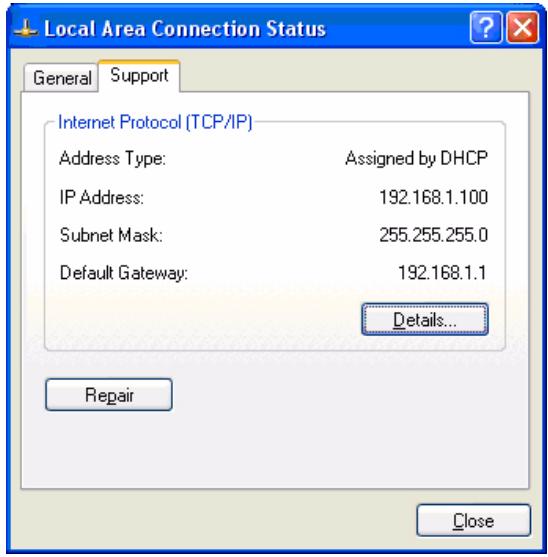
The Support screen will display the IP information.
4 Setup the Broadband Router
When your PC has a valid IP address, you should be able to go to the router setup web page. By default, the router will provide an IP address in the range of 192.168.1.100 ... 192.168.1.199.
Open the Internet Explorer and go to address : 192.168.1.1

Now the login screen will appear.
- Enter the username and password.
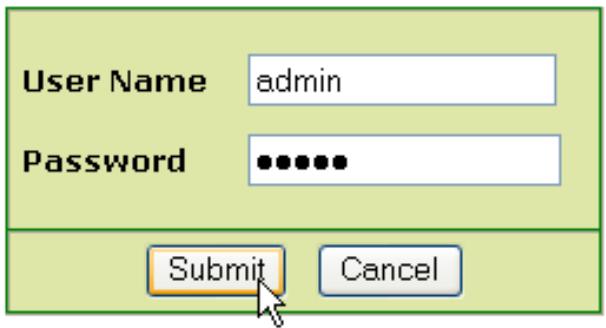
- By default the username is admin and the password is admin.
Now you enter the web management of your Wireless Broadband Router.
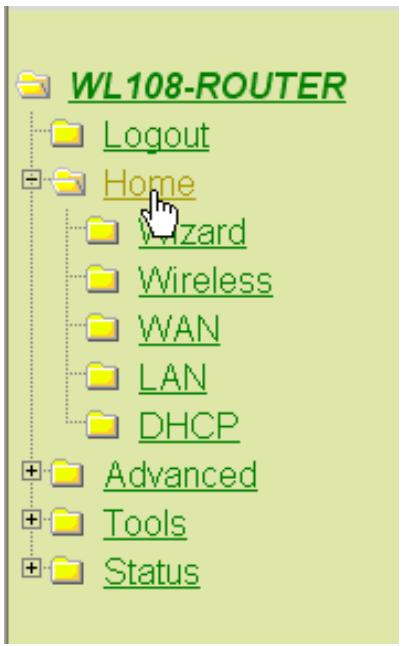
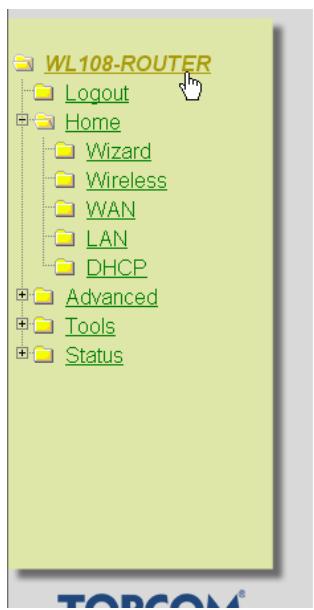
- Open the Home menu
Setup Wizard
The WL108-ROUTER is a Wireless Broadband Router ideal for home networking and small business networking. The Setup Wizard will guide you to configure the WL108-ROUTER to connect to your ISP (Internet Service Provider). The WL108-ROUTER's easy setup will allow you to have Internet access within minutes. Please follow the setup wizard step by step to configure the WL108-ROUTER.

- Click Run Wizard to start the quick setup.
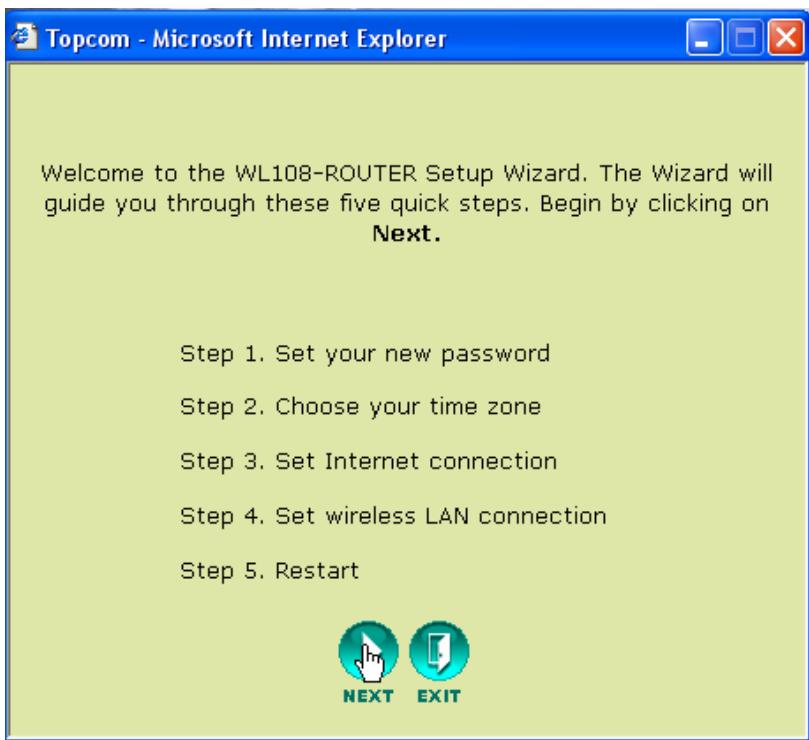
- Click Next to proceed.
Set Password
- Change the password to access the router settings.
Enter the Password (twice).
You can keep the default password "admin" if you don't change anything.
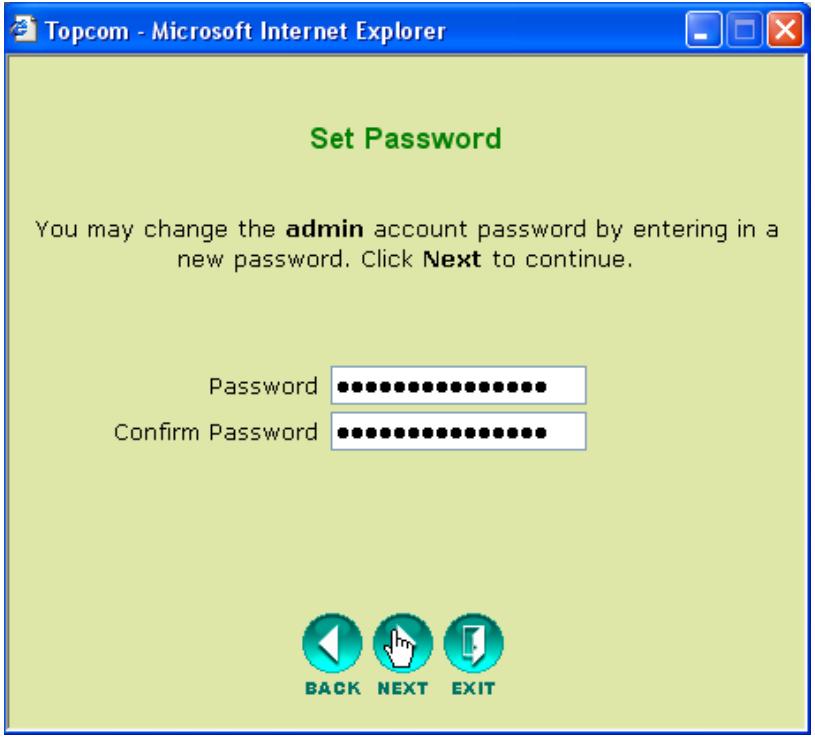
- Click Next to proceed.
Choose time zone
- Select your Time Zone.
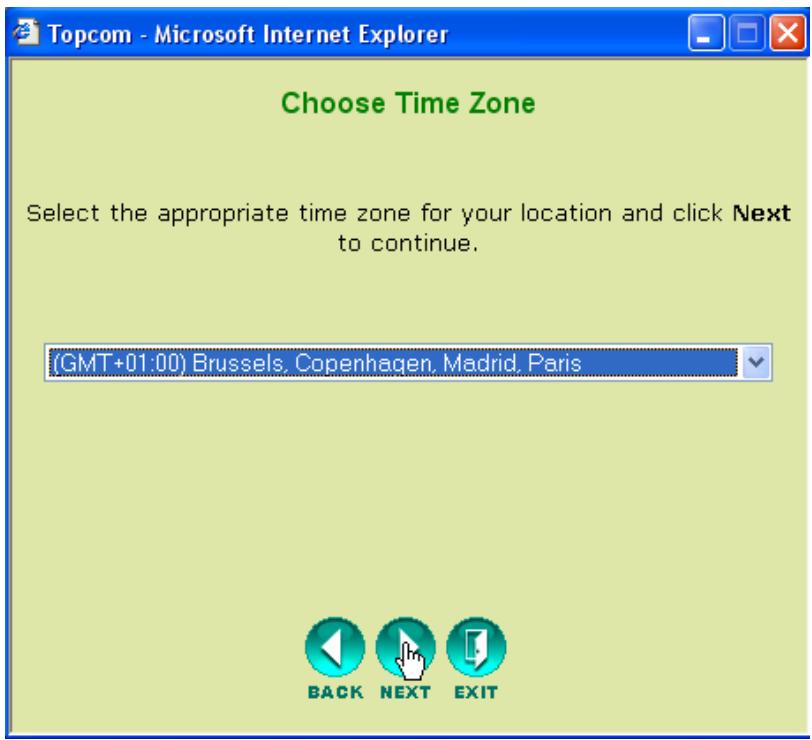
- Click Next to proceed.
Connection Type (Auto Detect)
- Select your Internet Connection Type

- Click Next to proceed.
Dynamic IP Address :
This kind of connection is mostly used when the router is connected to a cable modem. Some ISP's will log the MAC address of your computer that was last connected to the Cable Modem. In this case, please make sure that you configure the router with this computer and select Clone MAC address.
In some cases, it is necessary to disconnect your computer from your cable router for at least 12 hours before the cable modem will accept the connection of another device such as a router.
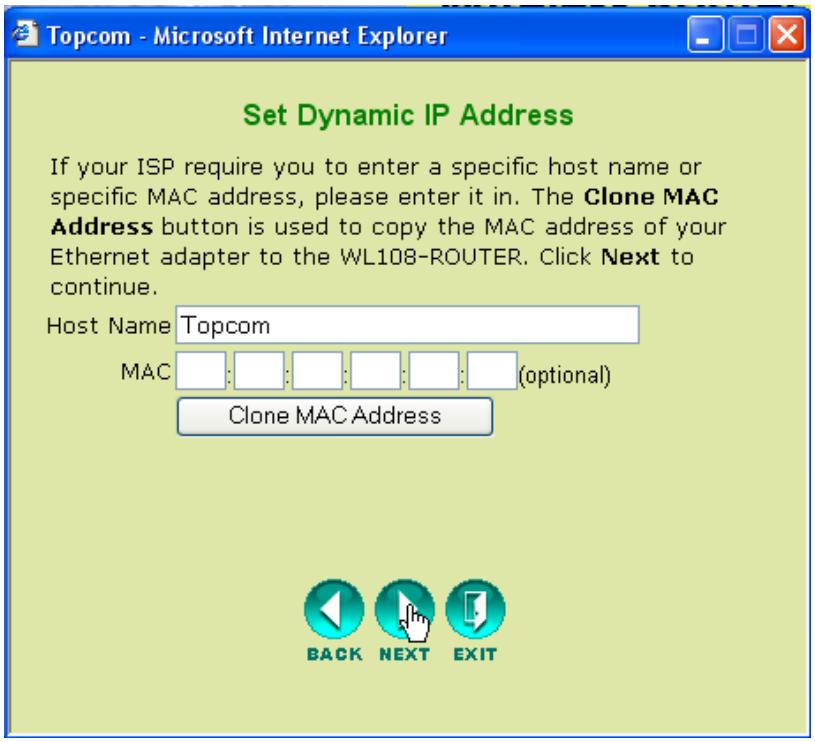
- Click Next to proceed.
Static IP Address :
Used for Static IP Address connections. Used for connection behind a Cable Modem or a DSL bridge.
This connection type is only for users who have requested a static IP address at the ISP.

- Click Next to proceed.
- PPPoE:
This connection type is mostly used in case the router is connected behind a DSL bridge. Please enter the PPPoE User Name, Password (twice) and Service Name. Normally it is not necessary to enter the Service Name. You could enter your ISP's name in this field.
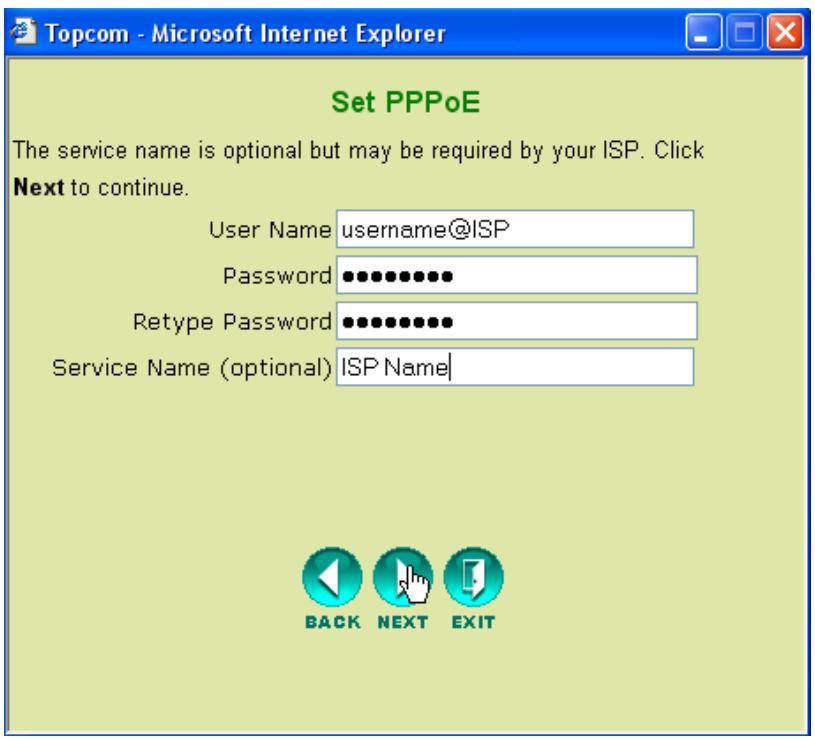
- Click Next to proceed.
PPTP:
Some cable providers use the PPTP protocol to get connected to the Internet. Please enter all the fields. This information will be provided by your ISP.
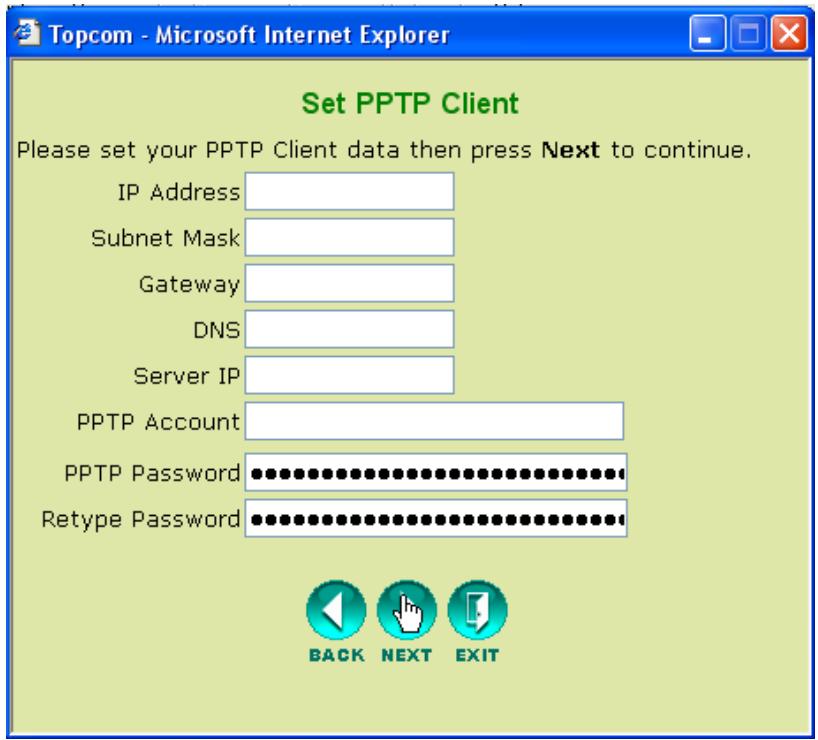
- Click Next to proceed.
L2TP:
Some cable providers use the L2TP protocol to get connected to the Internet. Please enter all the fields. This information will be provided by your ISP.
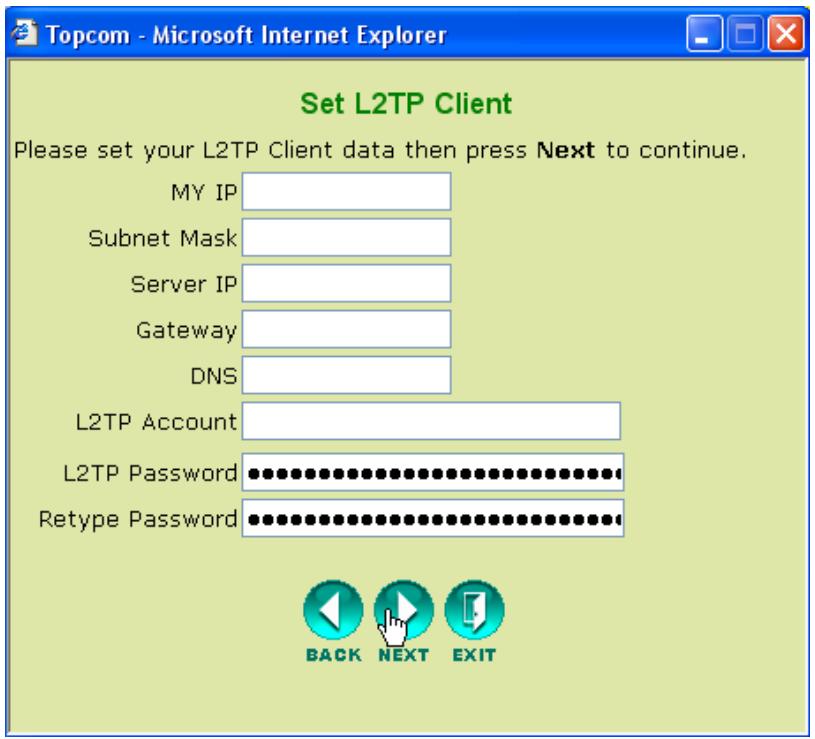
- Click Next to proceed.
Wireless Settings
Now the Wireless setup screen will appear :
- Please enter the Wireless Network name (SSID). By default it will be Topcom.
- Also select a channel (channel 6 by default)
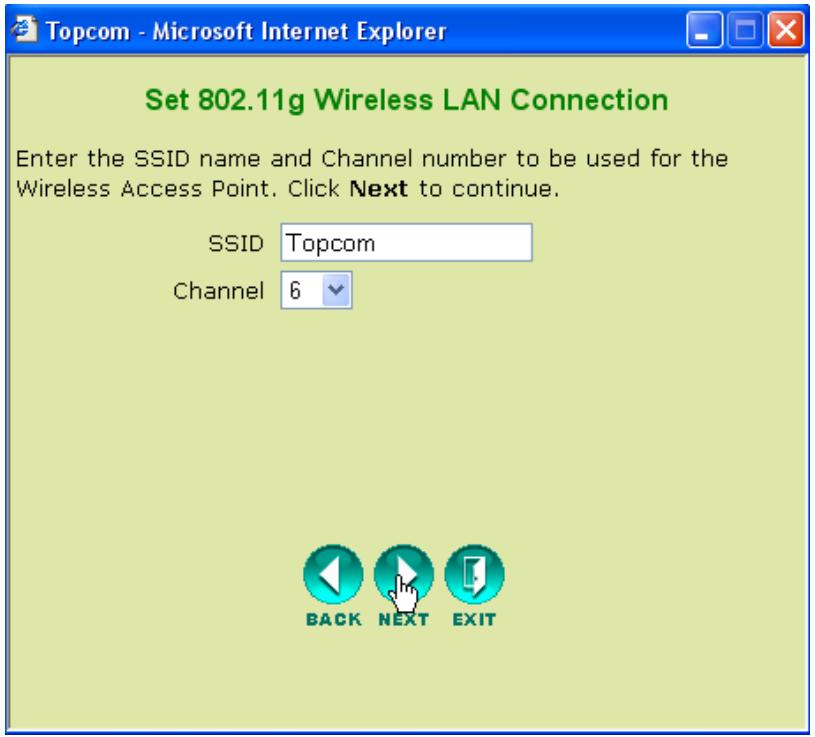
- Click Next to proceed.
Wireless Encryption
In this wizard, you have the option to enable WEP encryption. Topcom strongly recommends to enable encryption. This is the only way to prevent that unwanted users access your wireless network.
If you want to use WPA / WPA-PSK encryption, you should access the Wireless section in the menu to set it up, after you have finished this wizard.
- Select WEP to activate WEP encryption
- Select the WEP Encryption type : 64 bit or 128 bit.
-
Enter the WEP key :
-
10 hex digits for 64 bit encryption
- 26 hex digits for 128 bit encryption
HEX digits to be used : 0..1..2....9
a..b..c....f
A..B...C...F
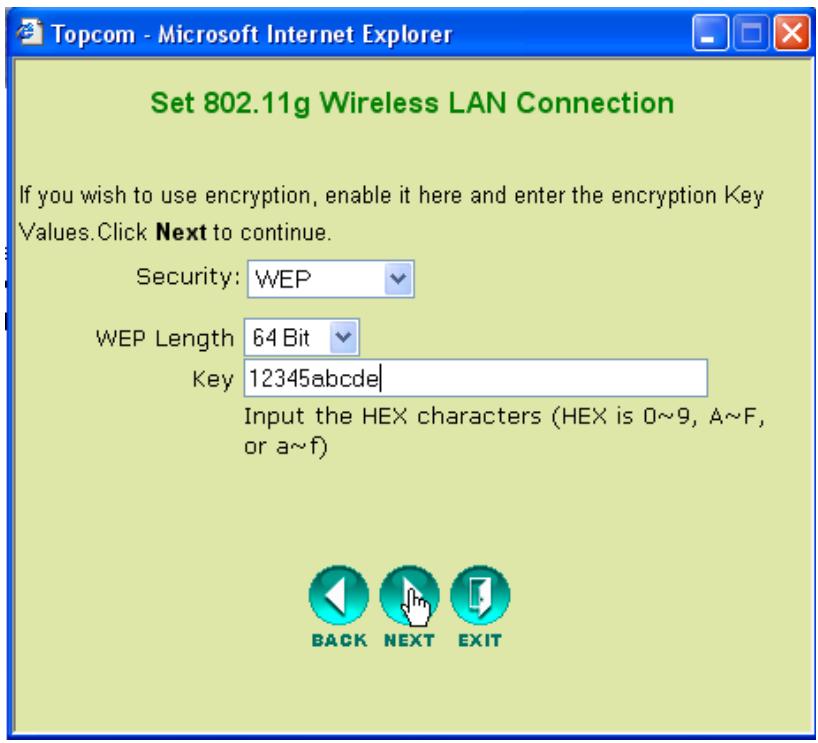
- Click Next to proceed.
Restart
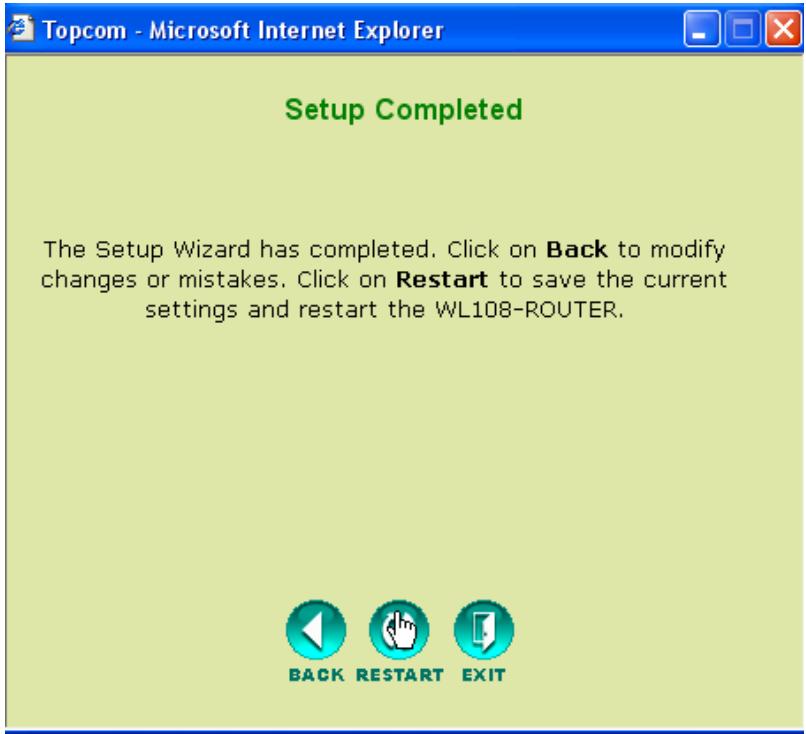
- Click Restart to restart the router.
The Router will restart now. Please wait for following screen to appear :
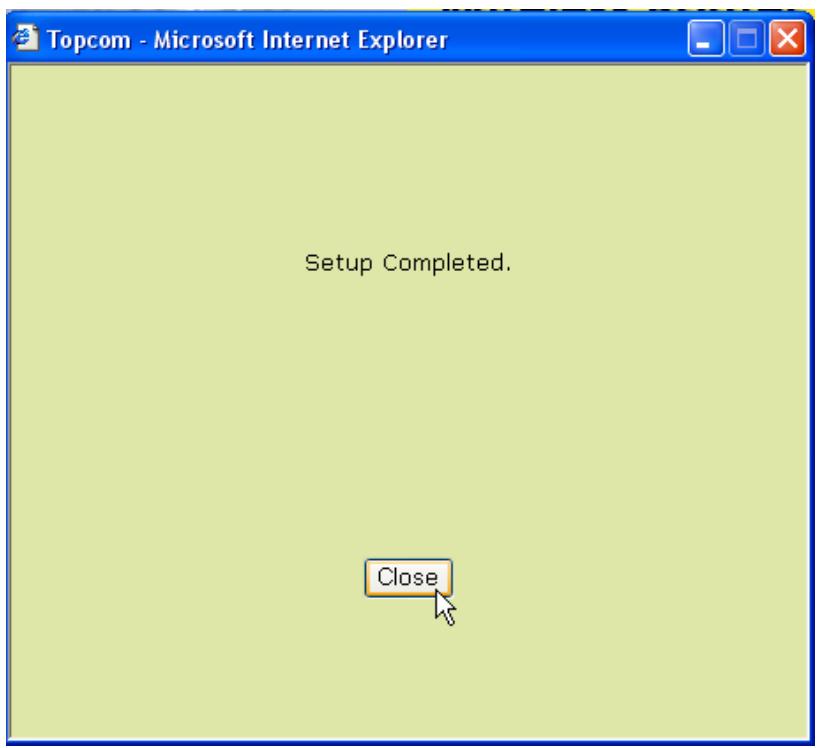
- Click Close
5 Check the connection status
Click WL108-ROUTER in the menu to show the device information screen:
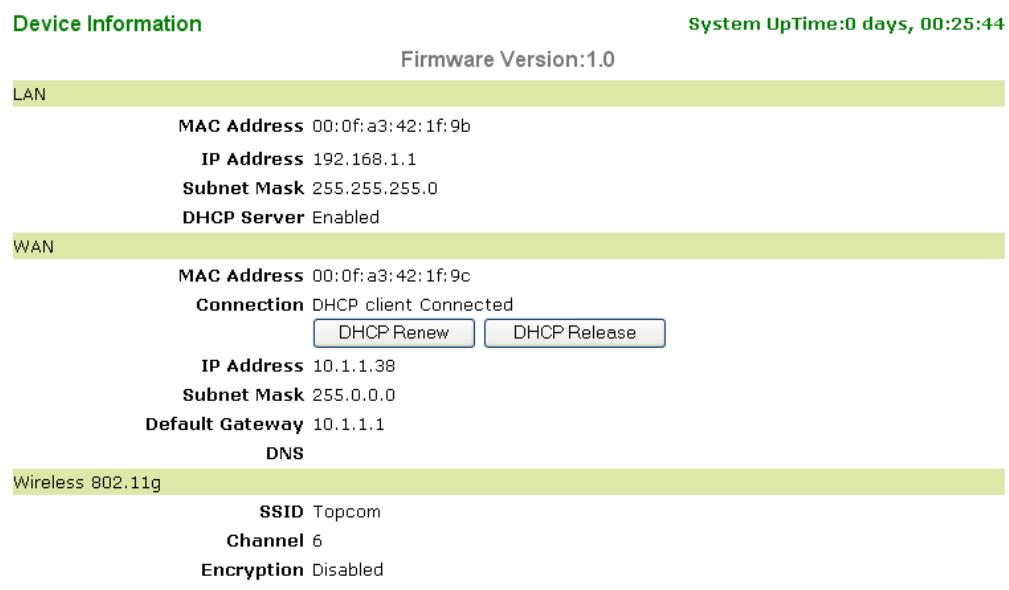
In the WAN section you can see the WAN IP address.
In the Wireless section you will see the configured SSID, channel and Encryption type.
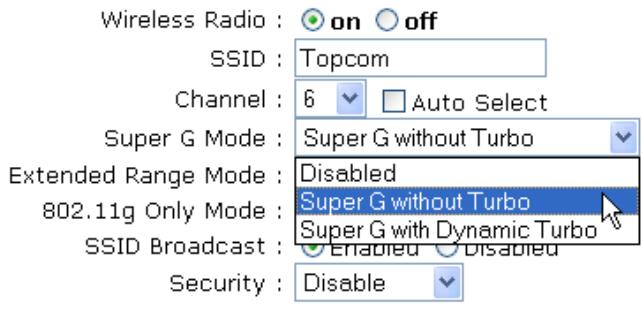
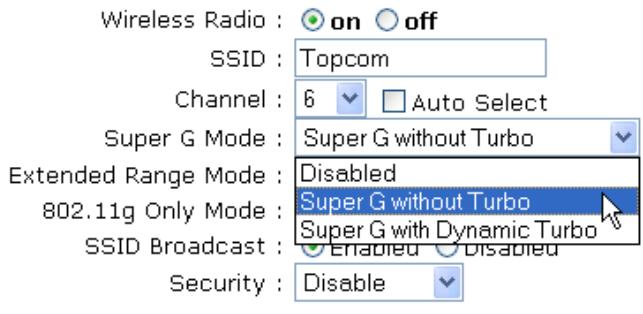
6 Super G settings
The Wireless broadband router has a IEEE 802.11g access point on board. The wireless speed of a standard IEEE802.11g product is 54Mbps.
In the Advanced menu, the performance of the Wireless LAN can be configured in Super G mode (108 Mbps).
Open the Home menu and select Wireless
Wireless Settings
These are the wireless settings for the AP (Access Point) Portion.
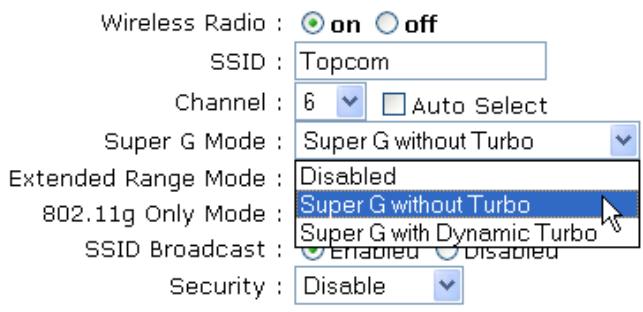
- Super G with Dynamic Turbo mode only operates in Channel 6.

SuperG with Dynamic Turbo will provide the fastest wireless speed.
- Click Apply
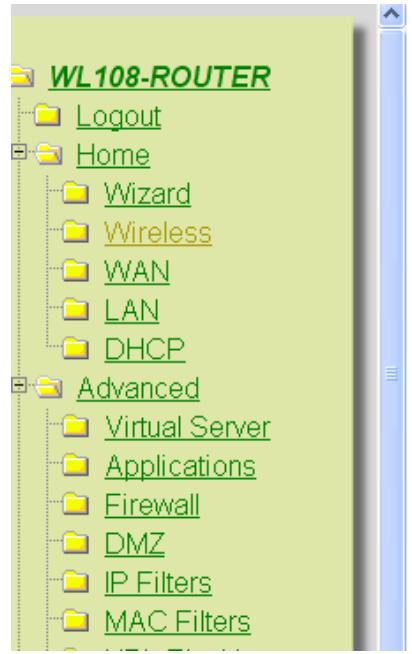
7 Other settings
For other settings, please go to the full userguide on the provided CD.
8 Firmware update
When a new firmware is released, it will be published on the Topcom website (www.topcom.net) in the support downloads section.
Please download the image and go to Tools in the router menu. Now select the Firmware page.
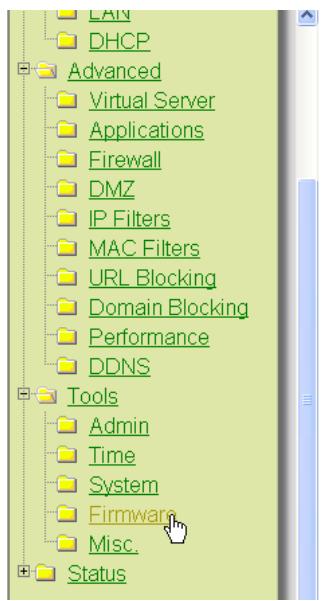
Firmware Upgrade
To upgrade the firmware, locate the upgrade file on the local hard drive with the Browse button. Once you have found the file to be used, click the APPLY button below to start the firmware upgrade.
Current Firmware Version: 1.0


- Click Browse to select the downloaded firmware image and click the Apply key.
USB
1 System Requirements
- Windows 2000 and XP operating systems
PC with Pentium III 600MHz system or above is recommended - USB connection ( USB 2.0 recommended ! )
One CD-ROM drive
2 Installation
2.1 Utility Installation
- Before you insert the Wireless USB stick into your computer, please install the Software first.

All the snapped images of installation mentioned in this manual are based on Windows XP. For other windows operating system, all the procedures are the same but the screens are not exactly the same.
- Turn on the computer. Insert the CD into the CD-ROM Drive. The Autorun screen will automatically appear:
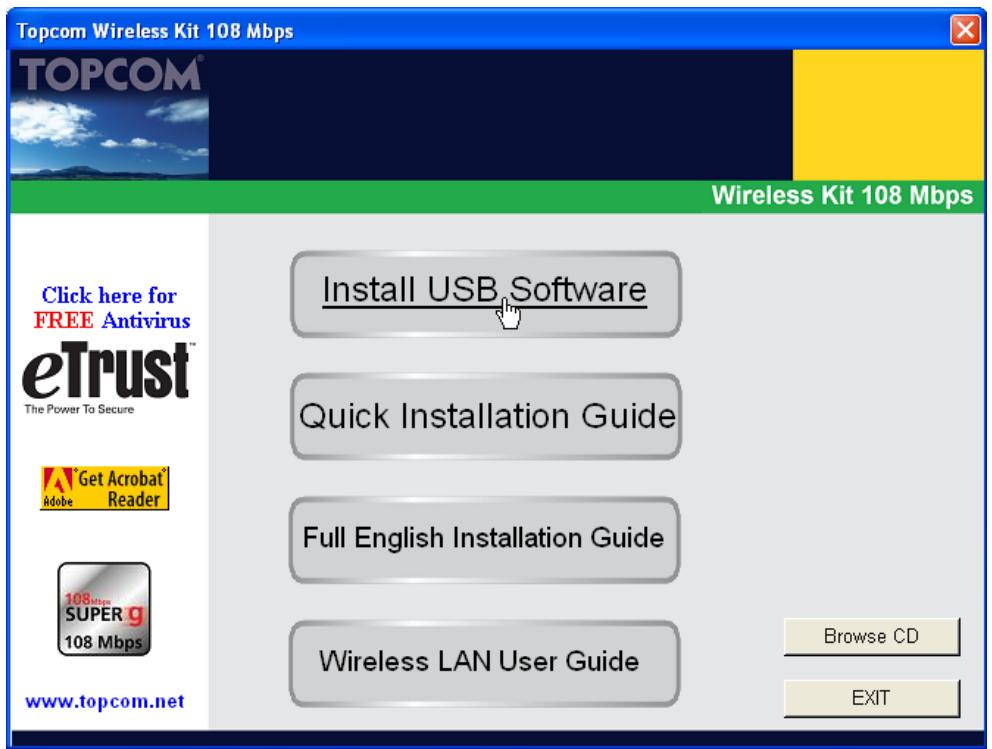
- Please click "Install USB Software".
3. The InstallShield Wizard will automatically start.
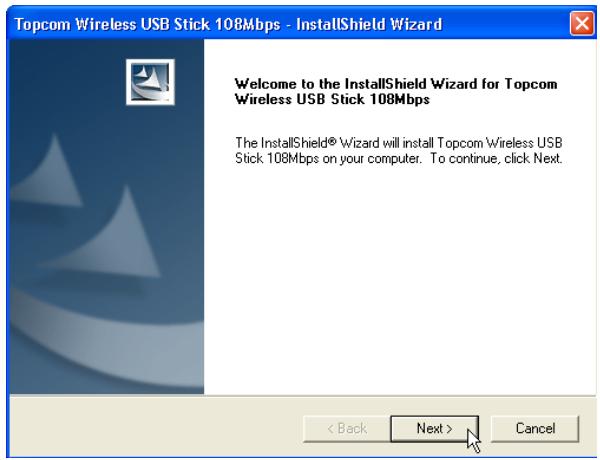
- Please click "Next" to continue.
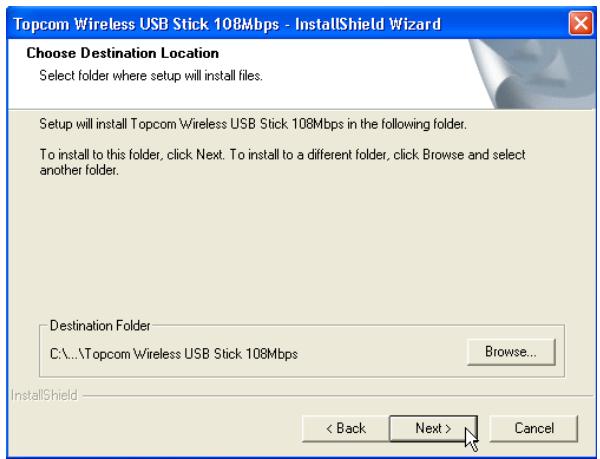
- Please click "Next" to continue.
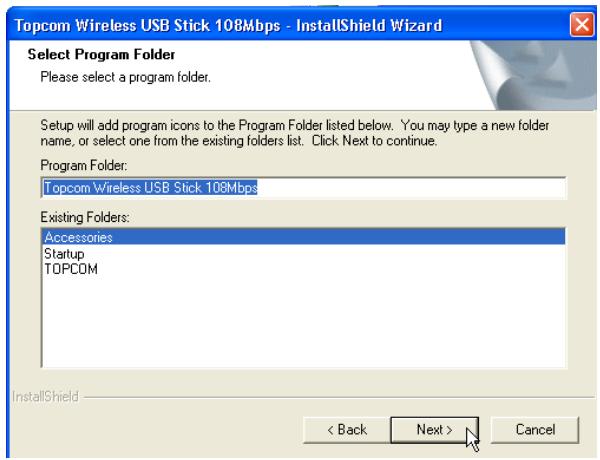
- Please click "Next" to continue.
During the installation next screen will appear :
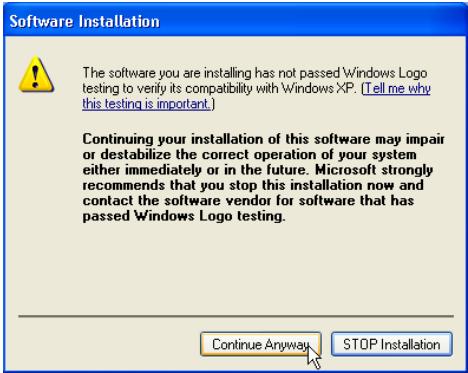
- Please click "Continue Anyway" to continue.
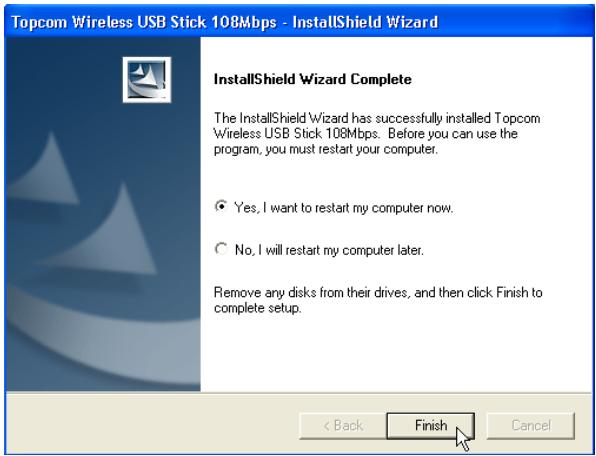
- When the software is installed, please click "Finish" to reboot.
2.2 Driver Installation
When the computer has rebooted, plug in the Wireless USB Stick in your USB connection. The hardware will be automatically detected.
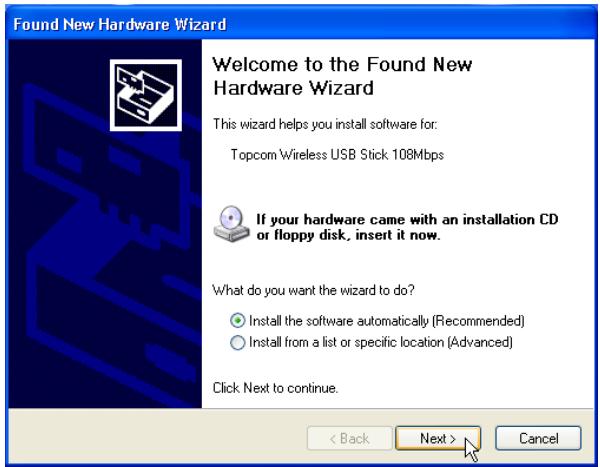
- Please select the first option and click "Next". (Install the software automatically)
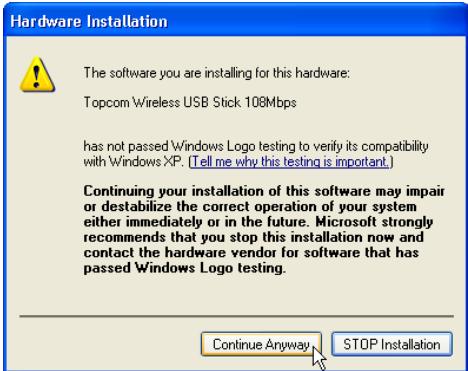
- Please click "Continue Anyway"
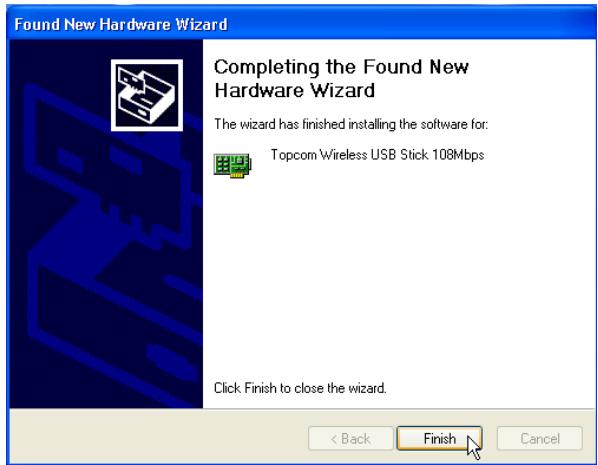
- Please click "Finish"
Once the installation is successful, the utility icon launch the utility, just double click the icon.

will show up in your Systray. To
3 Configuration
3.1 Getting connected
Double-click the icon to open the utility.

By default, the utility will automatically link with the Wireless Router if you haven't changed the default SSID "Topcom" and encryption in the Wireless Router yet.
Topcom strongly recommends to change the Wireless Router's default SSID and to enable encryption to prevent that unwanted users access your wireless network.
Case 1:
If the Wireless Router settings have not been changed, the Wireless USB Stick will automatically connect to the Wireless Router.
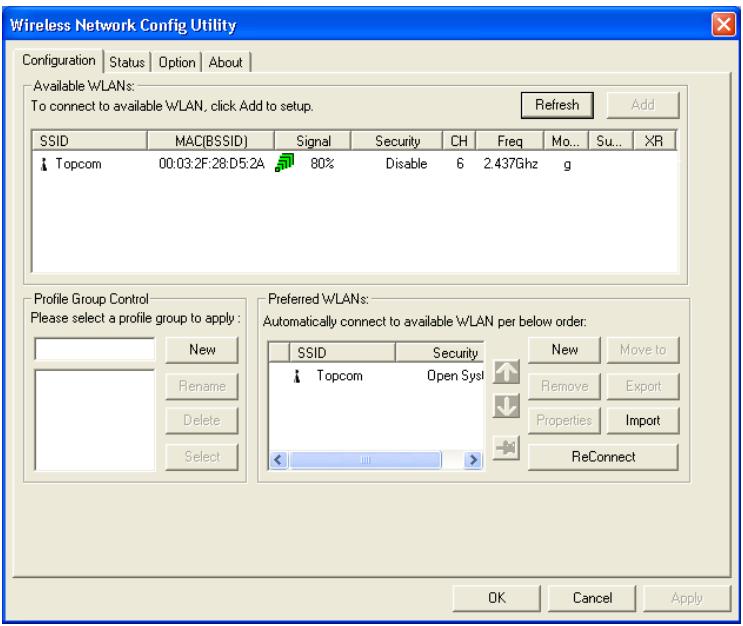
The icon in the stray will change to . This indicates a successful wireless connection between the Wireless Router and your computer.
The symbol in front of the SSID also indicates a successful connection with the Wireless Router.
Case 2 :
If you have changed the Wireless Router's SSID and if you have set the wireless encryption as recommended, you will be able to see the SSID in the "Available WLAN's" screen.
If the SSID is not shown, click "Refresh" to search again.
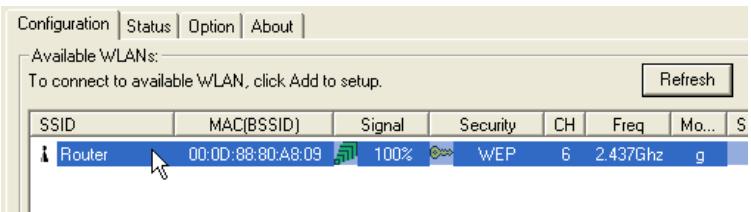
In the example below, the SSID of the Wireless Router is : "Router" and the WEP Encryption is enabled.
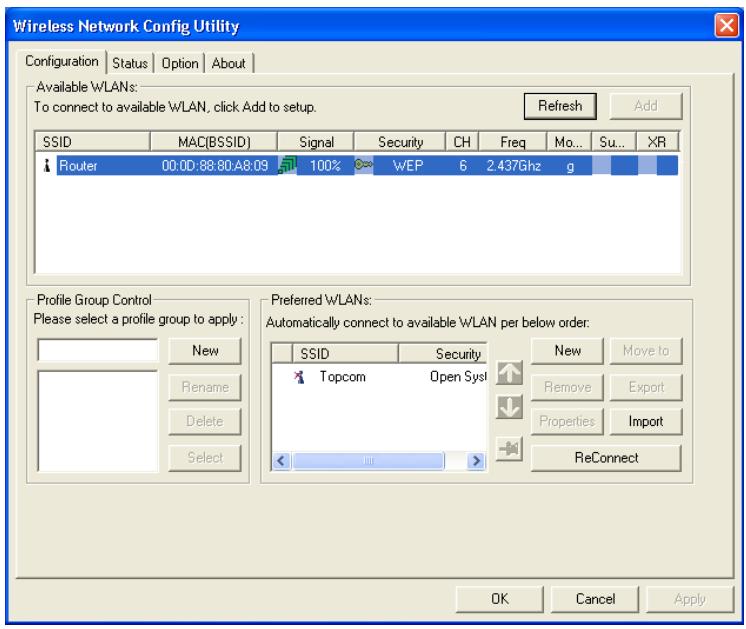
Your Wireless Router should be visible. If encryption is used, a small key and the encryption type will be visible. In this example WEP is used.
- Double-click your Wireless Routers SSID to get connected.
Next screen will appear:
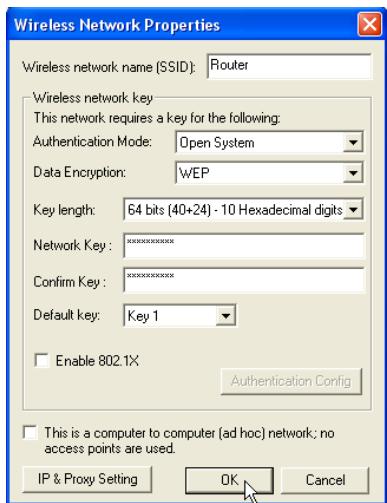
- If encryption is enabled in the Wireless Router, you will need to enter the encryption key. In case of WEP, the utility will auto detect the Authentication mode and Key Lenght. Please enter the key in the Network Key field and confirm in the Confirm Key field. (In the example above 64bit WEP encryption is used.)
Please make sure that you enter exactly the same key as the one you have entered into your wireless router!
-
64bit WEP key : 10 digits
128bit WEP key : 26 digits -
For WEP, following digits can be used :
0,1,2,3,4,5,6,7,8,9 / a,b,c,d,e,f / A,B,C,D,E,F
- Click OK to confirm.

- Click Apply to get connected.
If the connection is successful, the icon in the stray will change to
The symbol in front of the SSID also indicates a successful connection with the Wireless Router.
3.2 Connection Status
Select the Status screen in the utility.
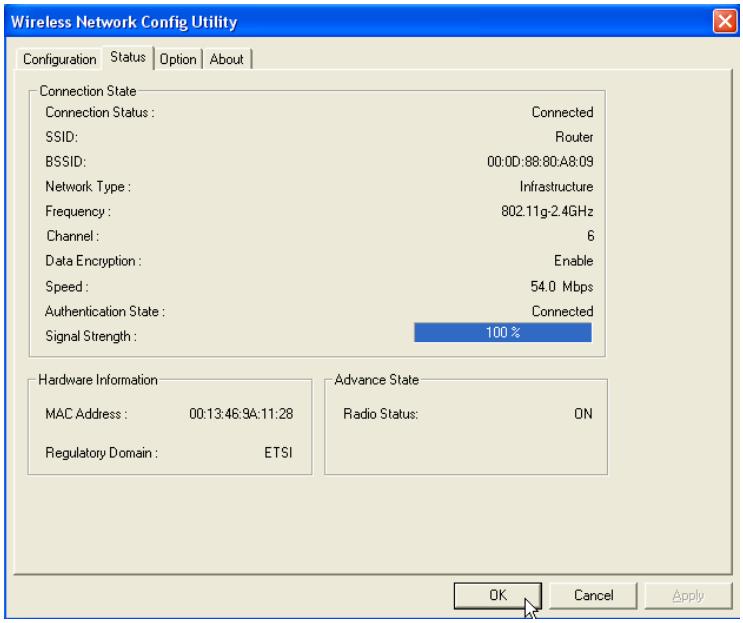
This screen will show you all information about the wireless connection to your Wireless Router.
4 Topcom warranty
4.1 Warranty period
The Topcom units have a 24-month warranty period. The warranty period starts on the day the new unit is purchased. The warranty on batteries is limited to 6 months after purchase. Consumables or defects causing a negligible effect on operation or value of the equipment are not covered.
The warranty has to be proven by presentation of the original purchase receipt, on which the date of purchase and the unit-model are indicated.
4.2 Warranty handling
A faulty unit needs to be returned to a Topcom service centre including a valid purchase note. If the unit develops a fault during the warranty period, Topcom or its officially appointed service centre will repair any defects caused by material or manufacturing faults free of charge.
Topcom will at its discretion fulfil its warranty obligations by either repairing or exchanging the faulty units or parts of the faulty units. In case of replacement, colour and model can be different from the original purchased unit.
The initial purchase date shall determine the start of the warranty period. The warranty period is not extended if the unit is exchanged or repaired by Topcom or its appointed service centres.
4.3 Warranty exclusions
Damage or defects caused by incorrect treatment or operation and damage resulting from use of non-original parts or accessories not recommended by Topcom are not covered by the warranty.
Topcom cordless phones are designed to work with rechargeable batteries only. The damage caused by the use of non-rechargeable batteries is not covered under warranty. The warranty does not cover damage caused by outside factors, such as lightning, water and fire, nor any damage caused during transportation.
No warranty can be claimed if the serial number on the units has been changed, removed or rendered illegible.
Any warranty claims will be invalid if the unit has been repaired, altered or modified by the buyer or by unqualified, non-officially appointed Topcom service centres.
5 Disposal of the device (environment)
At the end of the product lifecycle, you should not throw this product into the normal household garbage but bring the product to a collection point for the recycling of electrical and electronic equipments. The symbol on the product, user guide and/or box indicate this.
Some of the product materials can be re-used if you bring them to a recycling point. By reusing some parts or raw materials from used products you make an important contribution to the protection of the environment.
Please contact your local authorities in case you need more information on the collection points in your area.

The CE symbol indicates that the unit complies with the essential requirements of the R&TTE directive.
ROUTER
The WL108-ROUTER is a Wireless Broadband Router ideal for home networking and small business networking. The Setup Wizard will guide you to configure the WL108-ROUTER to connect to your ISP (Internet Service Provider). The WL108-ROUTER's easy setup will allow you to have Internet access within minutes. Please follow the setup wizard step by step to configure the WL108-ROUTER.

These are the wireless settings for the AP (Access Point) Portion.
- Super G with Dynamic Turbo mode only operates in Channel 6.

To upgrade the firmware, locate the upgrade file on the local hard drive with the Browse button. Once you have found the file to be used, click the APPLY button below to start the firmware upgrade.
Current Firmware Version: 1.0

- Klik op Browse om de gedownloade firmware te selecteren en klik op Apply.
USB
The WL108-ROUTER is a Wireless Broadband Router ideal for home networking and small business networking. The Setup Wizard will guide you to configure the WL108-ROUTER to connect to your ISP (Internet Service Provider). The WL108-ROUTER's easy setup will allow you to have Internet access within minutes. Please follow the setup wizard step by step to configure the WL108-ROUTER.

Dynamic IP Address :
These are the wireless settings for the AP (Access Point) Portion.

- Super G with Dynamic Turbo mode only operates in Channel 6.

To upgrade the firmware, locate the upgrade file on the local hard drive with the Browse button. Once you have found the file to be used, click the APPLY button below to start the firmware upgrade.
Current Firmware Version: 1.0

The WL108-ROUTER is a Wireless Broadband Router ideal for home networking and small business networking. The Setup Wizard will guide you to configure the WL108-ROUTER to connect to your ISP (Internet Service Provider). The WL108-ROUTER's easy setup will allow you to have Internet access within minutes. Please follow the setup wizard step by step to configure the WL108-ROUTER.

These are the wireless settings for the AP (Access Point) Portion.
- Super G with Dynamic Turbo mode only operates in Channel 6.

To upgrade the firmware, locate the upgrade file on the local hard drive with the Browse button. Once you have found the file to be used, click the APPLY button below to start the firmware upgrade.
Current Firmware Version: 1.0

visit our website www.topcom.net