E773XDE - Epilator BABYLISS - Free user manual and instructions
Find the device manual for free E773XDE BABYLISS in PDF.
| Product type | Trimmer (hair removal category) |
| Brand | Babyliss |
| Model | E773XDE |
| Power supply | Mains (transformer 3.0 V / 1000 mA) or rechargeable Ni-MH battery |
| Battery life | 30 minutes after full charge |
| Initial charge time | 16 hours before first use |
| Number of cutting lengths | 22 (from 3 to 18 mm and from 21 to 36 mm, in 1.5 mm steps) |
| Precision guide | 5 positions from 0.5 to 2.5 mm |
| Special functions | Turbo, thinning, Smart Adjusting System |
| Blade type | Moving blade: chrome-molybdenum stainless steel (CMS) with 3D sharpening; fixed blade: titanium coating |
| Blade lubrication | Self-lubricating with refillable reservoir pad with BaByliss oil |
| Maintenance | Removable blades for brush cleaning; rinsing possible under water for nose/ears (do not immerse) |
| Safety | Use only the supplied transformer; do not use in the shower or bath |
| Spare parts | Replacement blades available |
| Included accessories | Cutting guides, precision guide, cleaning brush, comb, transformer |
Frequently Asked Questions - E773XDE BABYLISS
User questions about E773XDE BABYLISS
0 question about this device. Answer the ones you know or ask your own.
Ask a new question about this device
Download the instructions for your Epilator in PDF format for free! Find your manual E773XDE - BABYLISS and take your electronic device back in hand. On this page are published all the documents necessary for the use of your device. E773XDE by BABYLISS.
USER MANUAL E773XDE BABYLISS
- 2 cutting guides for 22 lenghts (from 3 to 18mm and from 21 to 36mm , in 1.5mm steps)
2.1 precision guide 5 positions (0.5 to 2.5mm
3.Blades:
Moveableblade:
- Sharpened using 3D etching process: for an exceptionally sharp cutting edge.
-CMS (Chrome-Molybdenum-Stainless Steel): ultra-hardwearing and 100% stainless steel blade.
Fixed Blade:
- Titanium coating: for longer life.
These two technologies provide perfect surface condition and their combination is optimal for reducing the friction coefficient. - Thinning function
- Turbo function
- ON/OFF switch
- Cutting length control knob
- Lateral display of selected length
- Charging indicator light
- Plug for use on the mains and for charging
- Cleaning brush and comb
IMPORTANT INFORMATION REGARDING THE NI-MH BATTERIES OF THIS UNIT
To obtain and maintain the longest battery autonomy possible, allow it to charge for 16 hours before using it for the first time and then approximately every three months. Full autonomy of the unit will only be obtained after three complete recharge cycles.
CHARGING THE CLIPPER
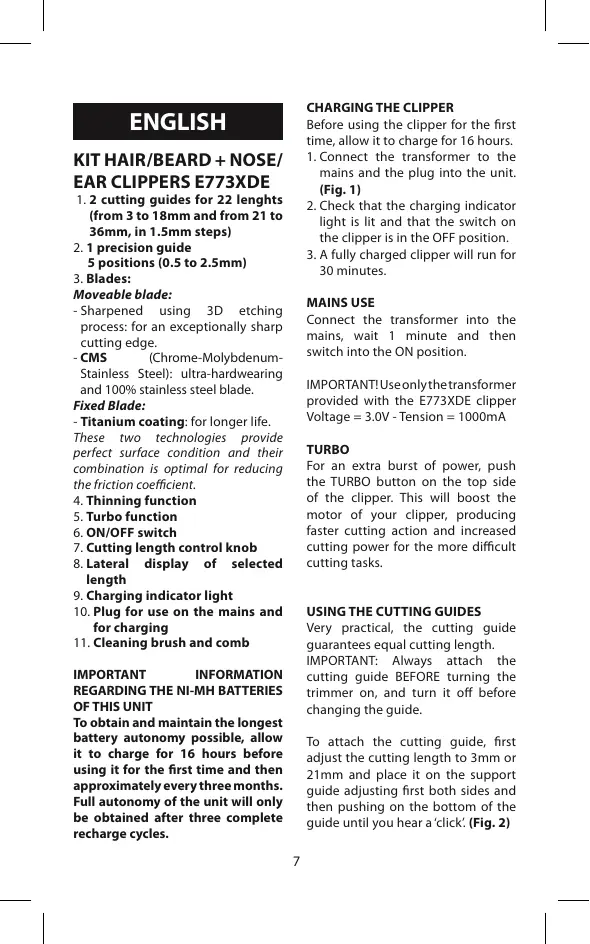
Before using the clipper for the first time, allow it to charge for 16 hours.
- Connect the transformer to the mains and the plug into the unit. (Fig. 1)
- Check that the charging indicator light is lit and that the switch on the clipper is in the OFF position.
- A fully charged clipper will run for 30 minutes.
MAINS USE
Connect the transformer into the mains, wait 1 minute and then switch into the ON position.
IMPORTANT! Useonlythetransformer provided with the E773XDE clipper Voltage = 3.0V - Tension = 1000mA
TURBO
For an extra burst of power, push the TURBO button on the top side of the clipper. This will boost the motor of your clipper, producing faster cutting action and increased cutting power for the more difficult cutting tasks.
USING THE CUTTING GUIDES
Very practical, the cutting guide guarantees equal cutting length.
IMPORTANT: Always attach the cutting guide BEFORE turning the trimmer on, and turn it off before changing the guide.
To attach the cutting guide, first adjust the cutting length to 3mm or 21mm and place it on the support guide adjusting first both sides and then pushing on the bottom of the guide until you hear a 'click' (Fig. 2)
To remove the cutting guide, first adjust the cutting length to 3mm or 21mm and push the guide out of the support lifting it up with your thumb. (Fig. 3)
NOTE: The precision guide must be placed like the cutting guides but it is adjusted manually and independently of the grooved wheel.
TURNING ON AND USING
To adjust the clipper's cutting length, turn the grooved wheel (8) up or down.
The selected length is displayed on the right or left side of the clipper.
Switch the ON/OFF button.
You can change the cutting length at any time.
Thanks to the SMART ADJUSTING SYSTEM, the length of the cut is maintained even if the angle of the clipper varies, so it guarantees precise result.
CUTTING TECHNIQUES AND ADVICE FROM THE EXPerts
- Use the clipper on clean, dry hair.
- To familiarize yourself with the clipper, begin with the cutting guide for a longer cut, then, if you want a shorter cut, adjust it by pushing the knob. You will soon know the lengths of each guide and each position.
- Always move the clipper against the direction of hair growth.
-
Begin at the nape. Place the guide on the scalp and move the clipper toward the crown of your head. Move your clipper slowly, pointing the teeth of the guide slightly upward. Keep the clipper in contact with your head at all times. (Fig. 4)
-
For the crown of the head, move from front to back, that is, from your forehead to the crown of your head.
- For the finishing touches, that is, around the nape and sideburns, use the clipper without a cutting guide. Turn your clipper over and move it from top to bottom. (Fig. 5)
- If you want a length greater than 30 mm, or if you are experienced, you can create 'comb' or 'finger' cuts:
- Work without a cutting guide.
- Take up a small section of hair with a comb or in your fingers.
-Move the comb or your fingers along the section of hair to the desired length. - Cut your hair along the comb or your fingers.
- Remove the cut hair using a comb and check the evenness of the cut regularly. (Fig. 6)
Using the thinning guide
Switch the clipper to the 'THIN' position. The thinning guide is in front of the blades.
This technique allows you to thin out hair to make styling easier.
The technique is particularly good for the crown of the head where hair is usually thicker.
To thin you hair, take a section of hair (rest your little and ring fingers on your scalp, using the middle and index fingers to set the length), hold 1 to 2cm below the cutting length. Then, using the clipper, cut the section of hair steeply and at an angle to create a saw-toothed 'edge'.
MAINTENANCE
Remove the cutting guide after each use.
Cleaning the clipper blades regularly will maintain their optimal performance.
Removable blades
To make cleaning easier, the BaByliss clipper blades can be removed. Make sure the clipper is turned off. Hold the clipper with the blades pointing up and remove them by pressing the top of the blade. (Fig. 7)
Brush the blades using the cleaning brush to remove any hair.
Self-lubricating blades
The blades of your clipper have a reservoir pad that dispenses the amount of oil necessary for your clipper to operate properly, every time. It is nevertheless recommended that you occasionally refill, when you notice the clipper isn't performing as well.
Remove the blades as described above.
Carefully squeeze a few drops of BaByliss oil onto the pad. (Fig. 8)
Then put the blades back on the clipper.
BaByliss oil is specially formulated for clippers, it will not evaporate or slow the blades down.
You can get new blades when these are worn or damaged.
TO OPERATE NOSE AND EAR TRIMMER
-
To insert battery, remove compartment cover by turning bottom section of trimmer to the left, then pulling straight down. Insert one AA alkaline battery, positive end up (Fig. 9). If you are not going to use the unit for a long period of time, or if the battery is dead, remove the battery from the unit. This will increase the life of your trimmer.
-
After inserting battery, close battery compartment and turn unit to ON position (I).
To eliminate undesirable nose and ear hairs
Gently insert trimmer head into the ear or nose and cut the hairs.
MAINTENANCE
Turn unit to OFF (0) position.Remove top housing by turning the top of the trimmer to the right and lifting up (Fig. 10). Remove hair(s) accumulated on the blades after each use. Rinse trimmer blade under water without immersing the head as shown (Fig. 11).
Allow to dry. Ensure that the cutting blade remains centered. Then reassemble and turn to the left until arrows line up.
Do not use the appliance in the shower or in the bath.
DEUTSCH
SET SCHERGERÄTE HAAR/BART + NASE/ OHREN E773XDE
ACCENSIONE DEL RASIOI NASO/ ORECHIE
Fjern trimmeren after drug.
En optimal ydeevne opnas ved regelmaessig vegilhodelse af harklipperens skar.
Aftagelige skær
For at lette rengoringen kan skaerene til BaByllss harkkipperen afmonteres. Check, at der er slukket for harkkipperen.
Hold harklipperen med skareene op- efter og frigor dem ved at trykke pa det overste of skareene.(Fig.7)
Natae to koupi ON/OFF.
Mnoipeite va aalaeTe to uoc konic ooiadnote otuiy.
Xapn 0to SuotmaSMARTADJUSTINGSYSTEM,touoctocnkncnou exei emayei diatnpieitra otaepo onoiabntote kiv eiv n yuvia klanc tnc koueutikmc uynavcn kaiac yyyuataev anotetelaoua me akpibeta.
TEXIKIKEZ KONHZE KAI SYMBOYAEZ TOYEIAIKOY
XpnoiopoioeiTe Tnv Koupeutikn uXavn oalai kaoa ka oteyva.
Tia va Ecoikieiwtheta je tn unxavn, umopeiteva apxotee me tov onny KOnnc yia Jakuptepo uinkoc kai Katoniv, eav thee va eiwoete to uinkoc, umopeiteva metakivnoTe To kouanipoc ta nauv npoc ta katw. Plou pyjyopa 0a Ecoikieiwtheta ie to uinkoc konnc kaOe obnyou kai kae theoanc.
-Metakivite naVt aNv koupeutikn oac mXavn npoc tnv avtiBtN KAteBuvon e autn nov oupupovu tv auaia.
Apixcete ano tov auexva.TonotheTete To odnyo navw otic trixec KAI KATEuOUVETe Tnv KOUPEUTIKn OAC mXavn poc Tnv kOpUpn Tou KEpaiaou. Tnv metakivee apya KAI ME TA "dovria"TOU odnyou v Exouy KATEuBuvon npoc ta naWu. Opvxtie n KOUPEUTIK mXavn va Bpioketai oevx'n eAipn Me TO KEpaai.(Euk.4)
Tia ta maalia tnc kopugn tou kepaiou, meakivee ano ta unpoota npoc ta niaw, dnlaon ano to mturo npoc tvn kopugn tou kepaiou.
Tia ta TEAEiUaTa, yia napadeiyua To nepiypaa oTo avxéva, xpaonuotoie Tny koupeutikn unxavn Xupic onyoknC. Tupicete tny koupeutikn oac kai me-takveite ano enavw npoc ta katw. (Euk.5)
-Eav enithetaite to nKoc va eiva meyauTepe ano ta 30mm n eva theva kaVete doKun, mOperte va koupeuteite ne "tn XtEva" n ta daxtuva":
- ouaueuεxwpiocnoπnC.
- Piaovetmuikon Toupa aaiawu tynxteva n tnv mavet avaeoa ta odxtula.
-Metakiveite Tn tEvna n Ta oaytua kata mukoc tcuovac mejxva pxtaeote OTO mukoc NOU eithoueite.
-KoBete Ta maAia kata mKoc TcXTeVAC nTwv dxtuWv.
- MaEvETe ME Tn XTeva Ta KouMeVA mAlia kai Ta NTATE, ELeYyOvTAC TAKtika EAV To KoPeJa Eivai OoiOJOppo. (Euk.6)
XpOan Tou obnyou yia tnv apaiOn twu aalwov
BAKHNAHΦOPMAUHA KACAOUCA BATAPEEK NI-MH DAHHOTO ANINAPATA
TtO6bI DoCTuHb NpeoOxApaHnB kAKMOxHO 60bnSyUO aBOTHOMIO 6aTaapeek, nepeD nepBbIM npImeHemH ennpata OoctBaTe erO Ha 3apJKe B TeueHne 16 lacOB n NobToPjTe 3Ty opeauHIO np6n3ntelBo KaKdIbe 3 Meca. POnnaB aBOTHOMN annapata 6ydet DOCTuHHTa TOnkO nocLe 3 ZIKNOB pONHO 3apJKn.
KAK 3APRdntb MAWHKU
PnEke, yem nepBb pa3 BocNob-3ObaTbCA MaunHKnO, eCneJyET 3a-paTbB Tuehenhe 16 yaoc.
1.ПоклковITEТрансбогматОк сети И BCTBbTe WtblpeK B annapat.(Pnc.1)
2.Y6eIntecb B TOM, YTO daTnK 3a-pdKn 3aQOpencn, n YTO nepeKIOu-ateB MaunHn HaxoJTCB N oLoJKeHN OFF (bblKn.)
3.ПОПНOCТБОЗAPRЯЖЕнHAМАИNH-kaMOKETpa60TaBbTeUeHHe 30 MUNHT.
PABOTA OT CETN
BKnUHTe MaunHky B cTbe, noOJxDHTe 1 MNHTy N oontabte nepeKknOaTeB N bONooHeNc ON (bnK.)
OBPATITE BHIMAHNE! Cneyet NoIb3ObaTbcr NCKIIOHTeBHO TpacHcOpMaTopOM, BXOJaUMM B
KOMIJIeKT NOCTaBKN MaSHINKN E773XDE HanpJzHeNe = 3,0V - Cnla ToKa = 1000mA
TYP60
Tc06bpe3KO yBelenuNTb MoUHocTb CTPNKKN, Bbl MOKeTe BOcONb3O-BaTbCByfynKUneI Tpy6o), HnKaB h KOnKny TURBO).DoctnHyto TaKIM Oba3oM yBelenueHne MoHOCHTN KOKOPCTMaWnHKNn PO3BOJNT Bam PNOJOLXnTb CTPNKKy DaJke HA cAmbTyTPdHbIx uYacTkA.
KAKIIOJIb3OBATbCRAHANPABIAIOUIMM
HapanaJIIOUIOmeIaIITcPNIKII OeHb npaKTNUHb, OHn rapaHTnpyOT paHbHOmEPHyO dnnHy cTPNKII.
OBPATITEBHIMAHINE:HaanpabIIOuOIIeIaTcPnKkN CneJeY eCTaHABINBaTb Ha MaunHKy ITO TOT, KaK BKLIOUHTbe ee;IJIa3AmHebl HappanBIAIOUIeH Na Dpyryu CneJeY eTKIOUHTb MaunHKy.
Ipepe TEm, KaK yCTaHOBnTb HaprabLIOUOyU,OTperpyNpRyIte DInHny CTpIKKNI Ha 3MM NLI Na 21 MM;ycTAHOBnTE HaprabLIOUOyU Ha onOpHyDyKKU, pReDbAPntBHo OTperpyNpRyIte Oebe NOMeHHeBb CTOPOHbI h 3aTeM 3aueEKNHTe HNKHOu cAteb HaprabLIOUoien (Pnc.2)
TtO6bI CHaTb HnPaBnIOUyO, Cha
yana Otperynpyte DnHy CTpnK
KN Ha 3 MM INH Na 21 MM; 3aTeM OT
coeHNHTe HnPaBnIOUyO TO
ONOPHO DyKKN, OToJekHy BEE B
HnIXHe Nacti 60JIbHM nAebcEM.
(Pnc.3)
BHVMAHVE! Hanpabnlouaq dna BOOdky UcTaHAbNMaebTcH Ma MauHkY TOUHO TAKKe KaK N HapabJLOUne dny DInHbCTPnKKn, Ho perynpuTcBpyHuNIO He3aBNCMO OT KOnEeKNa perynpoBKn DnHb CTpnKKn.
KaK nonb3ObaTbCra HacaKoJ dJa 0nnpOBKn BONOC
PteKEnIOnHeMaINHky B nonoJxHeNcTTHIN.Hacadka dny fInnpOBKN HaxOHTCnpeepJe3BnAMn.
ФИПЮВКА -ЗТОТAKAТEXHINKA СТРЖКИ, KOTOPAД NO3BOJNET умени.TTOJIIMNY ПЯДЕМ пддд IM JERKOSTД ДУ OБЛERЧ н.YКЛАДКИ BONOC.
OHa npImeHReTcB OCHOBOM Ha BepxUshke rOnoBblrE BONoCbl o6bIHOruJe.
Длгфнлровь 3хьВатипгдь BOONТалыdAMи(МИЗИЧИ NGБИ MЯньий палец onnpaIOTса на rolOB у,уka3atelbни и срдни палец пордөрдөрдөлт ДИNHСТРЖК)н HA 1-2 CM NINGKжenaEMOДПINь. 3atem norgpy3ITE МAsHINKHy HAMCKO COK B OTÖбанHуОprД,чTOБь PONyUHTь СтпЖКВ БФОМE «3Y 6BEB ПИБL».
yXoI
Pocne KaJdoI npImeHnI CHMaJIteMaIINHKe peryIaTOp dInHbI CTpKNK.
PeryurnbpHy bYxOd 3a ne3BvMMAuMHNKI NO3OBNIOT NOIDePkaTb eE BCOCTORHN ONTImMaJIbHOrO fHyKUNOHIOPOBAHIN.
CbeMbIeJ38u
TcOb6oIbOeNHTyXOa3MaMunHKo,Ha anapateΦnMpBaByllss UCTaOHOBHe bCEmHbIeJe3BvIa.
Y6eInTeCBbTom,HTOMaMunHkaBblKIOueHa.ДePknTeMaunHky,Ha npabnIe3BnBBeP,INCHmITe nX,HAKBaHkpaJIe3Bn.
(Pnc.7)
TOnHCTNTEJe3BnC NOMOUIBOIeToUcky,HTO6bYdAaNTb C HNX BONOCbl.
Camocma3bibaouuece ne38u
Ha ne3Bnx Bawae MaunHnky ctaHOBHe p3eepByap-tAMNoH, KOTOpbIy Bbldienet KOJIueCTBO MaCna, HeNO6xoJIMOe JIry HOPMaIbHoro YHKUMOHPOBaHnMaWuHNKn Ppi KaKJOM ee IcNOJb3OBAHN. Tem HeMeHee, KAK TbKO Bbl NoyCUBCTYe, YTO BaHa MaunHka HaunHaet p6oTAtb XyKe, MblpeKOMEnyEM Bam Do6abNtMbacNa Bpe3epByap.
CHIMMITE ne3Bn, KaK onncahOBblie.
Akkypatho KaNHte Ha TamIOH HeCKONbKO KanEnb MaCna MapKn BaByliss. (Pnc.8)
3aTeM BHObB yCTaHOBtNeJe3BnHa MaunHky.
OpMyna Macna MapKn BaByliss pa3pa6botaHa CneuMaIbHO nla MaIshOK; OHO He NcpaneTcN I He 3aTOPMaKJBVAET Ne3BIV.
KoJda N3BmI M3HocTcN ININ NOBpeTcA, BO3MOxHO pInObpcTe 3anaChIbeN3BnIa
BKLIQUEHNE MAUINHKN IJRA CTPIXKKN BOJIOCKOB B HOCY/ HA YJAX
- 706bbl BCTaBnTb 6aTapeKy, chmMte 3aunThb KOanuQoK, NOBepHy HnKHOIO qAcTb MaUnHKn BBeBO n 3aTeM NotaHyB ee BHN3. BCTabBeIeNoOpHuO 6aTapeKy
Tnna AA, noIooJnteBbHm noIIOCOM BVEpX (Pnc.9).Ecnn Bbl npoDOnKInTeBHOe BpEMr He noIb3yeteCb annapatom nn necn 6BaateJa cena, nBbLeKeNTe ee n3 MaunHHKn. 3To npOJInt cpoK ee Cnyk6bl.
- BctabnB 6aTapeKky, noCTaBte Ha MecTo 3aunTHbI KOJIauOcIK bKIIouHte MaUNHKy, HaxKaB Ha KhoNk ON.
Ttobby ydaNtB nnHne BOLockn B Hocy nHa yuaX
AkkupaTHO BBeDnTe CtpnyuIyro IOKBY MaIIHmKn B Ho3dIpy Nnn B CNyXOB0 KaHn IN opeKbTe BONCKN.
yXoI
NocTbTe nepeKlIOuATEnb B noLoJXeHMe BBkIIOeHO. CmHIMTe BepXnIOo TaCb tAnnpata, NOBepHyB ee Bnpabo NnotaHyB BBePx (Pnc.10).YdaJaTe HakONPiBUnSeCa Ha Ne3BnX BOLOCKn NocNe KaJdoRo IOnlb3OBAHnmaUHNKO. ONoLCHnTe Le3BnB YoDo, He norpyXa B Body cTprnyuTo rOBOky (Pnc.11).
IpocuynteJe3Bn. Y6eJntecb B TOM, YTO OHN OCTaOTc pa3MeueHHBMN YeTKO NO CEHTpy, N 3aTEM BHOBb yCTaHOBNTe BepxHIO YoCTb MaunHNK, NOBEPHyB ee BNEBO Do TEX NOP, NOKA CTpeJIKN He COBmCTTcR.
He nolbyntecb annapaTOM B BaH- HnIIN NOI dywem.