
BG-HM 40 - Electric mower EINHELL - Free user manual and instructions
Find the device manual for free BG-HM 40 EINHELL in PDF.

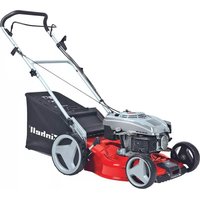
| Product type | Manual reel mower (cylinder mower) |
| Brand | EINHELL |
| Model | BG-HM 40 |
| Cutting width | 40 cm |
| Cutting height | 15 - 35 mm, adjustable in 4 levels |
| Cutting mechanism | Rotating blade cylinder with adjustable bed knife |
| Power type | Manual (push) |
| Collection basket | Grass catcher bag with support strap |
| Weight | Approx. 10 kg |
| Chassis material | Steel |
| Handlebar | Multi-part handlebar, removable for storage |
| Wheels | 2 wheels |
| Bed knife adjustment | Yes, via adjustment nuts on both sides |
| Intended use | Private lawns, domestic gardens |
| Maintenance | Clean with a brush after use; lubricate moving parts |
| Storage | In a dry place, out of reach of children |
| Spare parts | Available via ISC GmbH (see www.isc-gmbh.info) |
| Warranty | 2 years from date of purchase |
| Maximum cut length | Up to 10 cm of grass |
| Safety | Safety distance: keep hands/feet away from blades; do not use on steep slopes |
Frequently Asked Questions - BG-HM 40 EINHELL
User questions about BG-HM 40 EINHELL
0 question about this device. Answer the ones you know or ask your own.
Ask a new question about this device
Download the instructions for your Electric mower in PDF format for free! Find your manual BG-HM 40 - EINHELL and take your electronic device back in hand. On this page are published all the documents necessary for the use of your device. BG-HM 40 by EINHELL.
USER MANUAL BG-HM 40 EINHELL
When using the equipment, a few safety precautions must be observed to avoid injuries and damage. Please read the complete operating instructions and safety regulations with due care. Keep this manual in a safe place so that the information is available at all times. If you give the equipment to any other person, hand over these operating instructions and safety regulations as well. We cannot accept any liability for damage or accidents which arise due to a failure to follow these instructions and the safety instructions.
1. Note
- Before you operate this hand mower, thoroughly read through the following safety regulations as well as the operating instructions.
- Never allow children or other persons who are not familiar with the operating instructions to use the mower. Contact your local governmental agency for information regarding minimum age requirements for the user.
- Never mow in the direct vicinity of persons - especially children - or animals.
- Always keep in mind that the operator or user of the equipment is responsible for accidents involving other persons and/or their property.
- Always wear sturdy, non-slip footwear and long trousers when mowing. Never mow barefoot or in sandals.
- Check the grounds on which the machine will be used and remove all objects that could be caught up and violently flung out of the chute.
- Prior to using the mower, visually inspect it to ensure that the cutting tools, mounting bolts and the entire cutting apparatus are in good working order (i.e. not worn out or damaged).
- Only mow in broad daylight or in well-lit conditions.
- Always maintain good footing on inclines.
- Operate the machine at a walking pace only.
- Always mow across hills i.e. never straight up or straight down.
- Always be extra careful when turning the mower around and when pulling it towards you.
- Do not mow on overly steep inclines.
- Familiarize yourself with the operator controls and proper operation of the equipment.
-
Improper operation of the hand mower can lead to serious injuries.
-
Note that the cutting unit rotates at high speed and with great centrifugal force, which can lead to serious injury if direct contact is made. Always ensure that a safe distance (provided by the length of the long handles) is maintained between the user and the cutting unit.
- Never move your hands or feet toward or under any rotating parts.
- This equipment is not designed to be used by people (including children) with limited physical, sensory or mental capacities or those with no experience and/or knowledge unless they are supervised by a person who is responsible for their safety or they have received instructions from such a person in how to use the equipment safely. Children must always be supervised in order to ensure that they do not play with the equipment.
CAUTION: Read all safety regulations and instructions.
Any failures made in following the safety regulations and instructions may result in an electric shock, fire and/or serious injury.
Keep all safety regulations and instructions in a safe place for future use.
2. Layout (Fig. 1)
- Push bar
- Mowing spindle
- Wheel
- Housing
- Guide roller
- Grass basket
- Holding belt
3. Items supplied (Fig. 2)
- Hand mower (ready-assembled)
- Push bar top section
- Push bar extension (2-piece)
- Push bar bottom section A
- Push bar bottom section B
- Bar frame
- Grass box with holding belt
- Screw M6 x 30 (6x)
- Screw M6 x 25 (2x)
- Hex nut M6
4. Intended use
The hand mower is designed for cutting grass.
It is intended for private use, i.e. for use in home and gardening environments. Private use here refers to the maintenance of small-scale, residential areas and does not include public facilities, sporting halls, or agricultural/forestry applications.
Important. Due to the high risk of bodily injury to the user, the hand mower may not be used to cut scaling vegetation, planted roofs, or balcony-grown grass.
The equipment may only be used for the tasks it is designed to handle. Any other use is deemed to be a case of misuse. The user / operator and not the manufacturer will be liable for any damage or injuries of any kind caused as a result of this.
Please note that our equipment has not been designed for use in commercial, trade or industrial applications. Our warranty will be voided if the equipment is used in commercial, trade or industrial businesses or for equivalent purposes.
5. Assembly
5.1 Mower assembly
Fig. 3: Screw the push bar top section (12) to the two push bar extensions (13). Use the two screws M6x25 (19) and two hexagonal nuts M6 (20) for this purpose.
Fig. 4: Screw push bar bottom section A (14), push bar bottom section B (15) and the two push bar extensions (13) together. Use six screws M6x30 (18) and hexagonal nuts M6 (20) for this purpose.
Fig. 5: First attach one push bar bottom section to the mower, then press the push bar together slightly and attach the other side.
5.2 Grass box assembly (Fig. 6 / 7)
A. Push the bar frame into the grass box tube.
B. Snap the side fastening lugs on the grass box over the bar frame.
C. Snap the bottom fastening lug on the grass box over the bar frame.
6. Adjusting the cutting height (Fig. 8)
Four different cutting heights can be set between a range of 15 - 35mm . To do so, pull the spring-loaded bolts (A) on both sides of out and then engage them in the required holes.
7. Adjusting the counter blade (Fig. 9)
Note: The counter blade (B) is only be adjusted before using the machine for the first time or if the blades on the mower spindle are worn.
Undo the adjusting nuts (C) (10 mm) on both sides and adjust the counter blade to the required position. The counter blade (B) is correctly adjusted if a piece of paper placed between the blades on the mowing spindle and the counter blade is cut if you turn one of the wheels forwards by hand.
8. Attaching the grass box
Attach the assembled grass box to the roller. The grass box must also be secured to the push bar using the belt supplied (see Fig. 1).
9. Operation
The hand mower can cut grass up to approx. 10 cm in length. If you want your lawn to have a neat, trimmed look to it, however, you must consistently keep it cut down to a more manageable height. When starting the mowing session (and when mowing over freshly laid sod), it is advisable to set the cutting height relatively high, then gradually work your way down. For a well-groomed look, the cutting height should be set to approx. 2.5 cm. For optimum results, mow your lawn on a weekly basis. Grass blades grow thicker, faster, and are more resilient when their stems are consistently kept short (unless you live in very dry conditions and do not frequently water). Always mow the lawn when it is reasonable dry. In order to ensure that your lawn has a clean, even look to it when you're finished, mow in fairly straight paths at walking pace. The cutting swaths should always overlap each other by a few centimeters in order to avoid unsightly strips of grass.
GB
10. Maintenance and storage
- Clean the machine with a brush or rag after each use.
- Store the machine in a location that is dry and not accessible by children.
- Ensure that all mounting components (i.e. screws, bolts, nuts etc.) are always tightened so that the machine can be safely operated at all times.
- Replace excessively worn or damaged parts immediately.
- In order to ensure that you enjoy your scarifier for many years to come, all screwed parts, as well as the wheels and axles, should be cleaned and lubricated.
- Keeping your hand mower in good condition not only ensures a long lifespan and high performance, but also enables the machine to thoroughly cut your grass with minimal effort.
- The blade on the mower spindle is subject to more wear and tear than any other component of the unit. Check the condition of the blade on the mowing spindle at regular intervals and make sure that it is tightly fastened.
11. Packaging
The equipment is supplied in packaging to prevent it from being damaged in transit. The raw materials in this packaging can be reused or recycled.
12. Ordering spare parts
Please provide the following information on all orders for spare parts:
Model/type of the equipment
- Article number of the equipment
ID number of the equipment
- Spare part number of the required spare part
For our latest prices and information please go to www.isc-gmbh.info
Attention!
WAARSCHUWING! Lees alle
The reprinting or reproduction by any other means, in whole or in part, of documentation and papers accompanying products is permitted only with the express consent of ISC GmbH.
F
All of our products undergo strict quality checks to ensure that they reach you in perfect condition. In the unlikely event that your device develops a fault, please contact our service department at the address shown on this guarantee card. Of course, if you would prefer to call us then we are also happy to offer our assistance under the service number printed below. Please note the following terms under which guarantee claims can be made:
- These guarantee terms cover additional guarantee rights and do not affect your statutory warranty rights. We do not charge you for this guarantee.
- Our guarantee only covers problems caused by material or manufacturing defects, and it is restricted to the rectification of these defects or replacement of the device. Please note that our devices have not been designed for use in commercial, trade or industrial applications. Consequently, the guarantee is invalidated if the equipment is used in commercial, trade or industrial applications or for other equivalent activities. The following are also excluded from our guarantee: compensation for transport damage, damage caused by failure to comply with the installation/assembly instructions or damage caused by unprofessional installation, failure to comply with the operating instructions (e.g. connection to the wrong mains voltage or current type), misuse or inappropriate use (such as overloading of the device or use of non-approved tools or accessories), failure to comply with the maintenance and safety regulations, ingress of foreign bodies into the device (e.g. sand, stones or dust), effects of force or external influences (e.g. damage caused by the device being dropped) and normal wear resulting from proper operation of the device.
The guarantee is rendered null and void if any attempt is made to tamper with the device. - The guarantee is valid for a period of 2 years starting from the purchase date of the device. Guarantee claims should be submitted before the end of the guarantee period within two weeks of the defect being noticed. No guarantee claims will be accepted after the end of the guarantee period. The original guarantee period remains applicable to the device even if repairs are carried out or parts are replaced. In such cases, the work performed or parts fitted will not result in an extension of the guarantee period, and no new guarantee will become active for the work performed or parts fitted. This also applies when an on-site service is used.
- In order to assert your guarantee claim, please send your defective device postage-free to the address shown below. Please enclose either the original or a copy of your sales receipt or another dated proof of purchase. Please keep your sales receipt in a safe place, as it is your proof of purchase. It would help us if you could describe the nature of the problem in as much detail as possible. If the defect is covered by our guarantee then your device will either be repaired immediately and returned to you, or we will send you a new device.
Of course, we are also happy offer a chargeable repair service for any defects which are not covered by the scope of this guarantee or for units which are no longer covered. To take advantage of this service, please send the device to our service address.
F BULLETIN DE GARANTIE
Chere Clients, Cher Client


- Note
- CAUTION: Read all safety regulations and instructions.
- Layout (Fig. 1)
- Items supplied (Fig. 2)
- Intended use
- Assembly
- Mower assembly
- Grass box assembly (Fig. 6 / 7)
- Adjusting the cutting height (Fig. 8)
- Adjusting the counter blade (Fig. 9)
- Attaching the grass box
- Operation
- GB
- Maintenance and storage
- Packaging
- Ordering spare parts
- Attention!
- WAARSCHUWING! Lees alle
- F BULLETIN DE GARANTIE
- Chere Clients, Cher Client
Brand : EINHELL
Model : BG-HM 40
Category : Electric mower