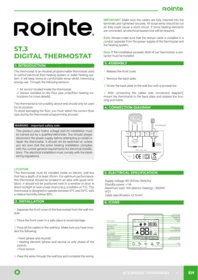
ST3 EXT DIG complet - Electric heater ROINTE - Free user manual and instructions
Find the device manual for free ST3 EXT DIG complet ROINTE in PDF.


| Product type | Digital electric radiator |
| Brand | ROINTE |
| Model | Rointe ST3 EXT DIG complete |
| Dimensions (H x W x D) | 600 x 500 x 100 mm |
| Weight | 10 kg |
| Power supply | 230 V ~ 50 Hz |
| Power | 1500 W |
| Heating type | Convection and radiation (inertia) |
| Thermostat | Digital with weekly programming |
| Functions | Comfort mode, eco, frost protection, 24/7 programming, open window detection |
| Protection class | IP24 (splash-proof) |
| Installation | Wall-mounted (fixings provided) |
| Maintenance | Clean with a soft dry cloth; do not use abrasive products |
| Safety | Automatic shutdown in case of overheating, child safety, double insulation |
| Spare parts | Available on the ROINTE website; repairability guaranteed |
| Warranty | 2 years |
| Compliance | CE, RoHS |
Frequently Asked Questions - ST3 EXT DIG complet ROINTE
User questions about ST3 EXT DIG complet ROINTE
0 question about this device. Answer the ones you know or ask your own.
Ask a new question about this device
Download the instructions for your Electric heater in PDF format for free! Find your manual ST3 EXT DIG complet - ROINTE and take your electronic device back in hand. On this page are published all the documents necessary for the use of your device. ST3 EXT DIG complet by ROINTE.
USER MANUAL ST3 EXT DIG complet ROINTE
The thermostat is an intuitive programmable thermostat used to control electrical floor heating system or water heating system. It will keep home at comfortable temp whilst minimizing energy use. Through the following sensors:
- Air sensor located inside the thermostat.
- Sensor installed on the floor (see underfloor heating instructions for more details).
This thermostat is not a safety device and should only be used for its purpose.
To avoid damaging the floor, you must select the correct floor type during the thermostat programming process.
WARNING - important safety note.
This product uses mains voltage and its installation must be carried out by a qualified electrician. You should always disconnect the power supply before attempting to install or repair the thermostat. It should not be switched on unless you are sure that the entire heating installation complies with the current general requirements for electrical installations. The electrical installation must comply with the latest wiring regulations.
LOCATION
This thermostat must be installed inside an electric wall box that has a depth of at least 35mm. For optimum performance, this thermostat should be located in an area with good ventilation. It should not be positioned next to a window or door, in direct sunlight or near a heat source (e.g. a radiator or TV). This thermostat is designed to operate between 0°C and 55°C, with a relative humidity below 80%.
2. INSTALLATION
- Separate the front cover of the thermostat from the wall module.
- Place the front cover in a safe place to avoid damage.
-
Pass all the cables to the wall box. Make sure you have included the following:
-
Feed (phase and neutral).
- Heating element (phase and neutral or only phase of the switch).
-
Floor sensor.
-
Pass the wires through the wall box and complete the wiring.
IMPORTANT: Make sure the cables are fully inserted into the terminals and tightened securely. All loose wires should be cut as they could cause a short circuit. If more heating elements are connected, an electrical bypass box will be required.
Note: Always make sure that the sensor cable is installed in a conduit separate from the power supply of the thermostat and the heating system.
Note: If the installation exceeds 3600 W per thermostat, a contactor must be installed.
3. ASSEMBLY
- Release the front cover.
- Remove the back plate.
- Screw the back plate to the wall box with a screwdriver.
- After connecting the cables (see connection diagram), mount the thermostat to the back plate and replace the housing and frame.
4. CONNECTION DIAGRAM

5. ELECTRICAL SPECIFICATION
· Supply voltage: 85-265Vac 50/60Hz
- Standby power: <1W
· Maximum load: 16A (electric heating) / 3600W
· IP21
· Cable specification: ≤2.5mm ^4
6. ICONS

7. FUNCTIONS
CONFIGURATION
01. On/Off
- Press ○ to turn On/Off.
Note: When frost protection is active, the thermostat will maintain the frost protection temp when it is Off.
02. Temporary Override Temperature
- The temporary override temp is only valid at the current event and it will not be saved. On the actual temp interface, press to set temporary override temp.
*Press ○ to confirm and back to confirm and back to the actual temp interface.
03. Key-Lock
- Lock all keys to prevent the settings from being changed. On the actual temp interface, press and hold for 3 seconds to lock or unlock all the keys.
04. Set the Time
- On the actual temp interface, press ○ then the ⏻ will flash.
- Press ○ to enter day setting.
- Press △▽ to set day.
- Press ○ to enter hour setting.
- Press △▽ to set hour.
- Press ○ to enter minute setting.
- Press △▽ to set minute.
- Press ○ to confirm and back to the day setting interface.
- Press twice to back to the actual temp interface.
05. Holiday Mode
- In Holliday Mode, the thermostat will maintain the set temp until the holiday time ends. On the actual temp interface, press ○ then the Ⓞ will flash.
- Press △▽ to select HOLIDAY.
- Press ○ to enter holiday days setting.
- Press △▽ tto set holiday days.
- Press ○ to enter temp setting.
- Press △▽ tto set temp.
- Press ○ to confirm and back to the actual temp interface.
*Set the holiday days to zero or double press ⏻ to cancel Holiday Mode.
06. Hold Mode
- In Hold Mode, the thermostat will hold the set temp until you cancel this mode. On the actual temp interface, press ○ then the ⏻ will flash.
- Press △▽ to select HOLD
- Pressto ○ enter ON/OFF setting.
- Press △▽ to set Hold ON.
- Press ○ to enter temp setting.
- Press △▽ to set temp.
- Press ○ to confirm and back to the actual temp interface.
*Set the holiday days to zero or double press ⏻ to cancel Hold Mode.
07. Edit Setting
- Edit Setting can set and change the parameters. If you don't choose Holiday Mode or Hold Mode. The thermostat runs according to the parameters of Edit.
- On the actual temp interface, press ○ then the ⏻ will flash.
- Press △▽ to select EDIT
- Press ○ to enter day selection of Edit setting.
- Press △▽ to select day.
- Press ○ to enter the event selection of the day.
- Press to select a event.
- Press ○ to select event's starting time.
- Press to set the hour of starting time.
- Press ○ to enter the minute setting.
- Press to set the minute of starting time.
- Press ○ to enter the temp setting.
- Press to set the temp.
- Press ○ to confirm and back to the event selection of the day.
*Press ⇌ sometimes or double press ⏻ to back to the actual temp interface.
DEFAULT PARAMETERS
| DAY | WAKE | LEAVE | BACK | SLEEP | ||||
| Mon-Fri | 07:00 | 22.0°C | 08:30 | 19.0°C | 17:00 | 22.0°C | 22:00 | 19.0°C |
| Sat-San | 08:00 | 22.0°C | 08:30 | 22.0°C | 17:00 | 22.0°C | 22:00 | 19.0°C |
08. Advanced Setting
The thermostat provides advanced settings to suit various special situation. These are normally set by technicians during initial installation. On the actual temp interface, press ○ then the ⏻ will flash. Press to △▼ select SETUP.
*Press ○ to enter advanced setting.
Each setting can be accessed by pressing ○ and parameters adjusted by pressing △▽.
| N° | NAME | DEFAULT | RANGE |
| 1 | Room temp calibration | 0.0°C | -5.0°C a 5.0°C |
| 2 | Floor temp calibration | 0.0°C | -5.0°C a 5.0°C |
| 3 | Anti-frozen function | ON | OF(OFF)ON |
| 4 | Anti-frozen temp | 5.0°C | 5.0°C -- 15.0°C |
| 5 | Sensor selection | 01: Floor Sensor | 00: Room Sensor01: Floor Sensor02: Both Sensor |
| 6 | Floor temp limit | 30.0°C | 20.0°C a 50.0°C |
| 7 | Temp unit | 00: °C | 00: °C01: °F |
| 8 | Output delay | 00:00s | 00: 00s01: 30s02: 60s03: 90s |
| 9 | Temp deviation | 01: 1.0 °C | 00: 5.0°C01: 1°C02: 2°C03: 3°C |
| 10 | Reverse output | 00: OFF | 00: OFF01: ON |
| 11 | Schedule | 01: 5+1+1 | 00: 701: 5+1+1 |
| 12 | Adaptive function | 00: OFF | 00: OFF01: ON |
| 13 | Reset | 00: NO | 00: NO01: YES |
- Room temp calibration: Calibrate the temp detected by room sensor.
- Floor temp calibration: Calibrate the temp detected by floor sensor.
3 & 4. Anti-frozen function: This option allows you to bring warmth to your plant and pet with a lower temp. displays when you turn off the thermostat. In hydronic heating systems, it will keep away from freezing.
5. Sensor selection:
· 00 Room sensor: Run by room sensor.
· 01 Floor sensor: Run by floor sensor.
· 03 Both sensors: Run by room sensor with floor temp limit.
-
Floor temp limit: If you choose both sensors, the floor temp limit must be set to protect the floor.
-
Temp unit: °C and °F can be selected.
-
Output delay: This option helps you avoid inadvertent operation on heating.
-
Temp deviation: The deviation is 1^ C. The thermostat starts to work when the actual temp is 1^ C lower than the set temp and stops working when the actual temp is 1^ C higher than the set temp.
-
Reverse output: This function works for the cooling system. When the temp is 1^ C higher than set temp, the thermostat will disconnect the cooling system. otherwise, it will connect the cooling system.
-
Schedule: Select a weekly schedule for the Edit. There are 2 options:
· 7: Each day from Mon to Sun can be set individually.
- 5+1+1: 5 days from Mon to Fri have the same events, Sat and Sun can be set individually.
-
Adaptive function: After several days of installation and use, the Adaptive function ensures that the required temp has already been reached when the next event begins.
-
Reset: All parameters are restored to default values.
8. TROUBLESHOOTING
· E1: Room sensor error.
E2: Floor sensor error.
9. DIMENSIONS (mm)


10. GUARANTEE
Rointe® Guarantee
Rointe® guarantees this product will be free from defects in workmanship or materials, under normal use and service, for a period of three (3) years from the date of purchase by the consumer. If during the guarantee period the product is determined to be defective, Rointe® will assume responsibility for repair or replacement.
If the product is defective, please:
- Return it, with a sales invoice or other dated proof of purchase, to the place from which it was purchased.
- Contact Rointe®, who will determine if the product should be returned or replaced.
This guarantee does not cover the costs of removal or reinstallation, and will not apply if Rointe® demonstrates that the defect or malfunction was caused by damage occurred whilst in the possession of the end user, by not following the installation or instructions in this manual or during installation.
The sole responsibility of Rointe® will be to repair or replace the product within the terms set forth above.
Limitations of Liability
Rointe® will not be responsible for any loss or damage of any kind, including consequences that result, directly or indirectly, from any breach of any warranty, express or implied, or any other fault of this product.
This guarantee is the only one expressed by Rointe® on this product. The duration of any implied guarantee, including guarantees of merchantability and fitness for a particular purpose, is hereby limited to the three years duration of this guarantee as stated above.
This Guarantee does not affect your statutory rights.
Please register your product at: www.rointe.co.uk www.rointe.ie
Rointe®
ST.3
TERMOSTATO DIGITAL
1. INTRODUCIÓN
Please register your product at:
www.rointe.com
Rointe®
ST.3
DIGITALE THERMOSTAAT
1. INLEIDING



- WARNING - important safety note.
- LOCATION
- INSTALLATION
- ASSEMBLY
- CONNECTION DIAGRAM
- ELECTRICAL SPECIFICATION
- ICONS
- FUNCTIONS
- CONFIGURATION
- On/Off
- Temporary Override Temperature
- Key-Lock
- Set the Time
- Holiday Mode
- Hold Mode
- Edit Setting
- Advanced Setting
- Sensor selection:
- TROUBLESHOOTING
- DIMENSIONS (mm)
- GUARANTEE
- Rointe® Guarantee
- Limitations of Liability
- Rointe®
- ST.3
- TERMOSTATO DIGITAL
- INTRODUCIÓN
- DIGITALE THERMOSTAAT
- INLEIDING
Brand : ROINTE
Model : ST3 EXT DIG complet
Category : Electric heater