
EVOKE C-D4 - Alarm clock radio PURE - Free user manual and instructions
Find the device manual for free EVOKE C-D4 PURE in PDF.
| Product Type | Clock Radio |
| Brand | PURE |
| Model | EVOKE C-D4 |
| Dimensions (H x W x D) | 136 mm x 210 mm x 223 mm |
| Weight | 2.8 kg |
| Power supply | DC 18V, 1.3A power adapter (model GPE248-180133-Z) |
| Power consumption | Adapter input 100-240V AC, 50/60 Hz |
| Radio types | DAB/DAB+ and FM (87.5-108 MHz) |
| CD player | Compatible CD, CD-R, CD-RW; random play and repeat |
| Bluetooth | Yes, A2DP; range approx. 10 m |
| Auxiliary input | 3.5 mm mini-jack socket |
| Headphone output | 3.5 mm mini-jack socket |
| Speaker | 3-inch full range |
| Presets | 10 for DAB and 10 for FM |
| Alarm function | 2 alarms with selectable source (DAB, FM, buzzer, CD) and snooze |
| Sleep timer | 15 to 60 minutes |
| Display | Backlit LCD with station info, time, date, volume |
| Dynamic Range Control (DRC) | Available in DAB mode |
| Equalizer | 6 presets (Flat, Rock, Pop, Classic, Jazz, Speech) + custom |
| Room equalizer | 2 modes (EQ1 living/bedroom, EQ2 kitchen/conservatory) |
| Sound power amplification | Yes, to improve listening at low volume |
| Interface languages | French, English, German, Italian, Spanish |
| Safety | Do not expose to water or heat sources; use only supplied adapter |
| Maintenance | Clean with a dry cloth; do not use chemicals |
| Spare parts | Power adapter model GPE248-180133-Z; CR2032 coin cell for remote |
| Repairability | Consult support.pure.com for updates and assistance |
| Warranty | 3 years from date of purchase |
Frequently Asked Questions - EVOKE C-D4 PURE
User questions about EVOKE C-D4 PURE
0 question about this device. Answer the ones you know or ask your own.
Ask a new question about this device
Download the instructions for your Alarm clock radio in PDF format for free! Find your manual EVOKE C-D4 - PURE and take your electronic device back in hand. On this page are published all the documents necessary for the use of your device. EVOKE C-D4 by PURE.
USER MANUAL EVOKE C-D4 PURE
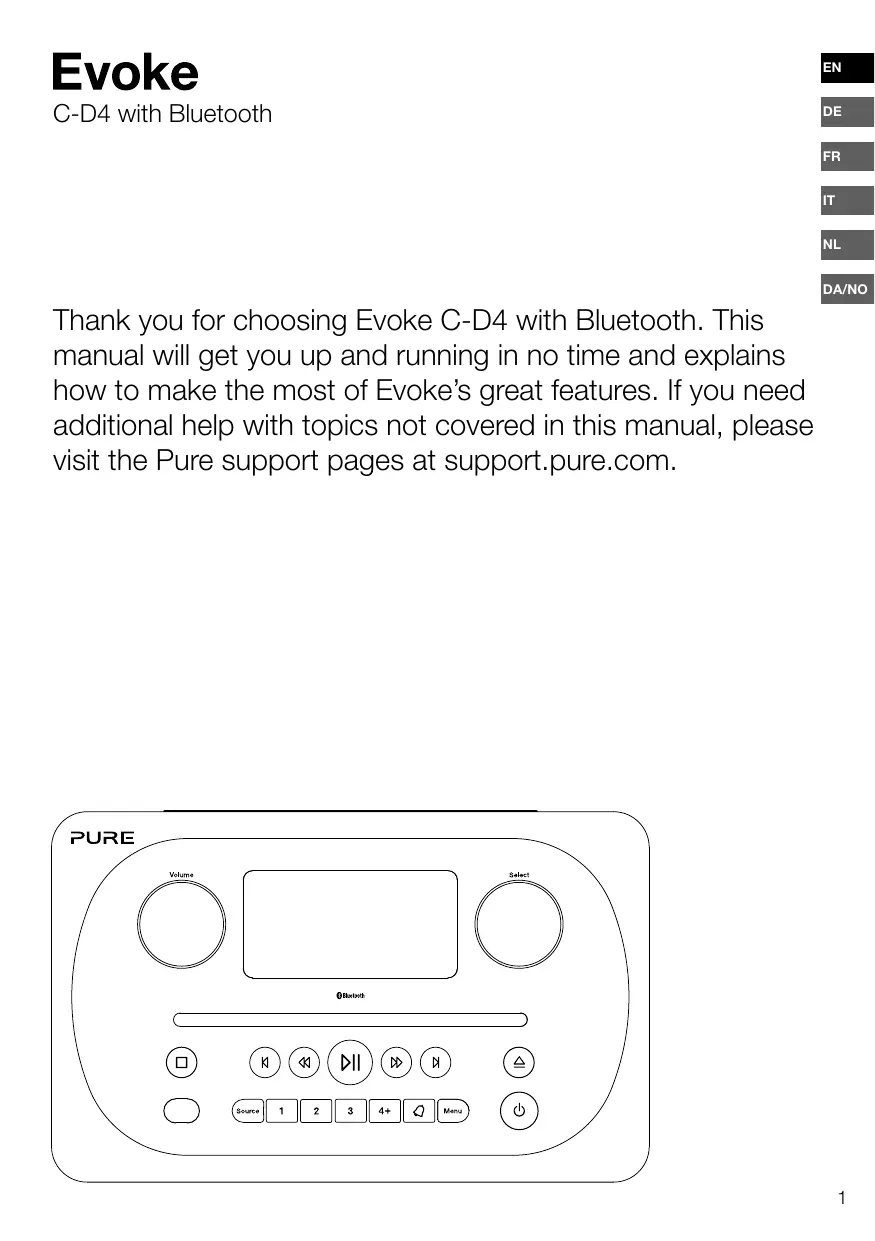
Thank you for choosing Evoke C-D4 with Bluetooth. This manual will get you up and running in no time and explains how to make the most of Evoke's great features. If you need additional help with topics not covered in this manual, please visit the Pure support pages at support.pure.com.
Safety instructions
- Read these instructions - All the safety and operating instructions should be read before this product is used.
- Keep these instructions – The safety and operating instructions should be retained for future reference.
- Heed all warnings - All warnings on the appliance and in the operating instructions should be adhered to.
- Follow all instructions - All operating and use instructions should be followed.
- WARNING: Do not use the included power supply (with model number GPE248-180133-Z) to power up another apparatus as this may cause damage.
- Use only power supplies listed in the user manual/user instructions (supplied by Pure with model number GPE248-180133-Z).
- Fit the mains adapter to an easily accessible socket, located near the radio and ONLY use the mains power adapter supplied.
- WARNING: To reduce the risk of fire or electric shock, do not expose this apparatus to rain or moisture. The apparatus shall not be exposed to dripping or splashing and objects filled with liquids, such as vases, shall not be placed on apparatus.
- CAUTION: Danger of explosion if the battery in the remote control is incorrectly replaced. Replace only with the same or equivalent type.
- WARNING: The battery (battery or batteries or battery pack) in the remote control shall not be exposed to excessive heat such as sunshine, fire or similar.
- Attention should be drawn to the environmental aspects of battery disposal.
- WARNING: The direct plug-in adapter is used as a disconnect device, the disconnect device shall remain readily operable and accessible.
- Keep the radio away from heat sources such as radiators, heaters or other appliances that produce heat.
- Do not expose the unit to direct sunlight.
- Do not use the radio near water.
- Avoid objects or liquids getting into the radio.
- Do not remove screws from or open the radio casing.
- Should not be immersed in water, used in shower or bathroom if plugged into the mains.
- The mark label is on the exterior of the bottom of the apparatus.
- The equipment's ventilation should not be impeded by covering the ventilation openings with items such as newspaper, tablecloths, curtains etc.
- No naked flame sources, such as lighted candles, should be placed on the apparatus.
- Only use the apparatus in places that have a moderate temperature.
- The adapter plug is used as the disconnect device, the disconnect device shall remain readily operable.

WARNING
DO NOT INGEST BATTERY, CHEMICAL BURN HAZARD
The remote control supplied with this product contains a coin/button cell battery. If the coin/button cell battery is swallowed, it can cause severe internal burns in just 2 hours and can lead to death.
Keep new and used batteries away from children. If the battery compartment does not close securely, stop using the product and keep it away from children. If you think batteries may have been swallowed or placed inside any part of the body, seek immediate medical attention.
Contents
4 Introduction
4 Front panel
5 Rear connectors
5 Remote control
6 Display
7 Changing the information shown on screen
8 Getting started
8 Quick start
9 Changing digital radio stations
9 Changing FM radio stations
10 Storing and selecting presets
10 To quick-store a station to a preset button (1-3)
10 To store a station to the preset list (4-10)
10 To recall a preset when listening to digital radio or FM radio
11 Playing a CD
11 Inserting a CD
11 Playing a track
11 Shuffling tracks
11 Repeating tracks
11 Ejecting a CD
12 Streaming using Bluetooth
13 Using the auxiliary input
14 Alarms and timers
14 Setting an alarm
14 Cancelling a sounding alarm
15 Snoozing a sounding alarm
15 Setting the sleep timer
16 Options and settings
16 Digital radio settings
17 FM radio settings
18 System settings
21 Technical specifications
Introduction
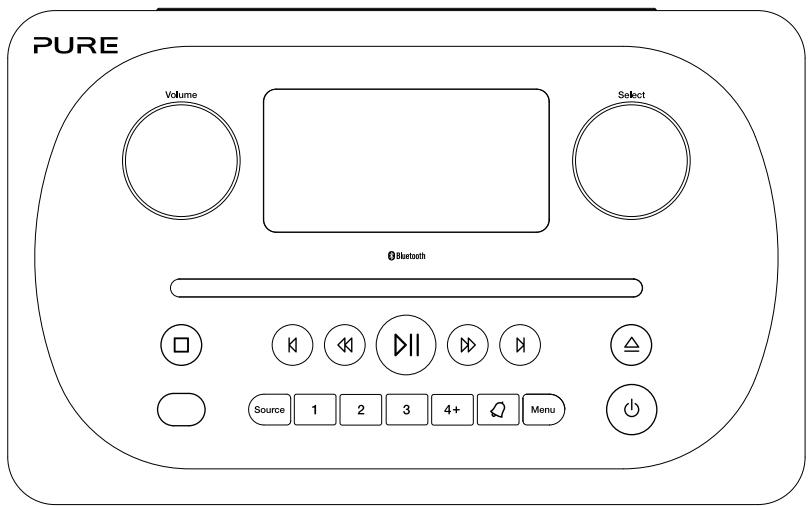
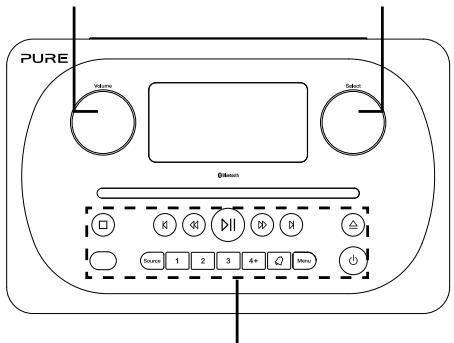
Front panel
Volume dial Adjust and mute volume (see page 7).
Select dial
Turn and press to browse and select radio stations (see page 9), select and adjust menu options.
Front panel buttons
See below for more information.
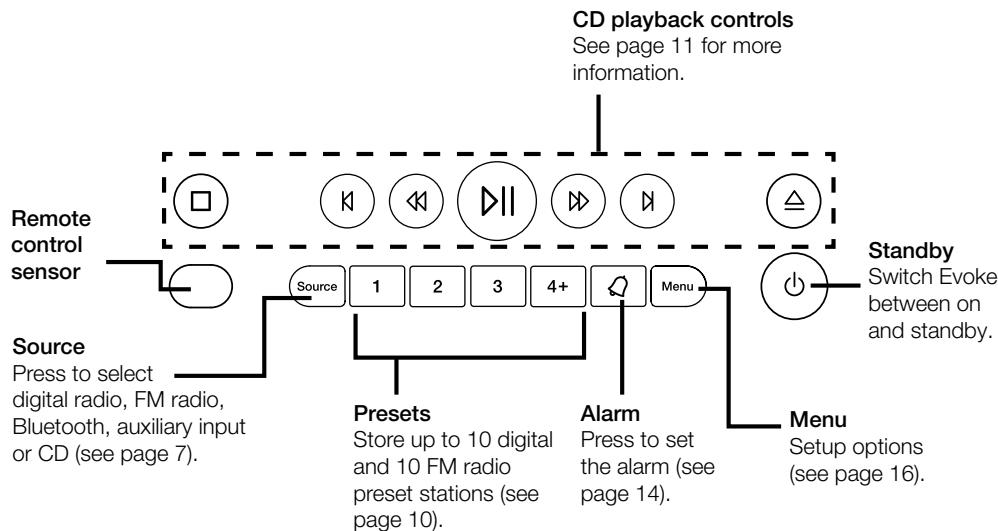
Front panel buttons
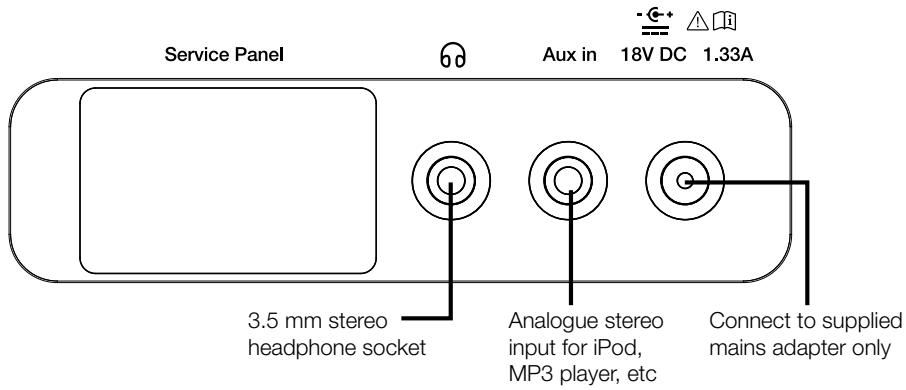
Rear connectors

Remote control
Display
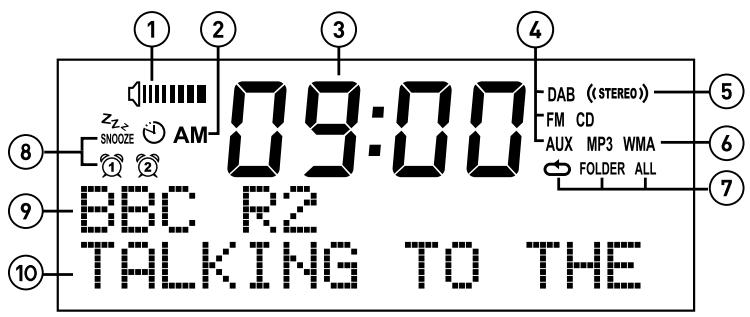
- Volume indicator.
- AM/PM indicator.
- Displays current time.
- Source indicator (DAB indicates digital radio, FM indicates FM radio, AUX indicates auxiliary input, CD).
- Stereo indicator.
- MP3 indicates that you've loaded a CD that contains MP3 files, WMA indicates that Windows Media Audio information is available for a CD that contains MP3 files.
- CD repeat icons ( : Repeat the track that's currently playing, FOLDER: Repeat the tracks in the current folder, ALL:Repeat the whole CD (see page 11 for more information)).
- Alarm, sleep and snooze indicators (see page 14).
- Displays the name of the radio station or if listening to a CD, displays the track number and elapsed time (see page 11).
- Displays date, scrolling text, settings and station information. If listening to MP3s on a CD, displays the name of the MP3 file.
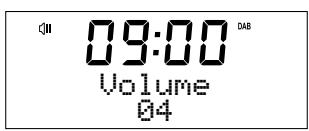
Adjusting and muting the volume
Turn the Volume dial or press the Volume buttons on the remote to increase or decrease the volume. Press the Volume dial or press the Mute button on the remote to mute.
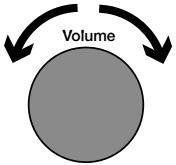
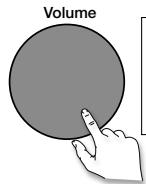
Note: Evoke will automatically go into standby if left in mute for 30 minutes.
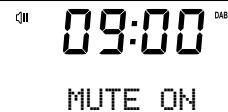
Changing source
Use the Source button to choose between digital radio, FM radio, auxiliary input, Bluetooth or CD.

Changing the information shown on screen
When listening to a digital radio station, FM radio station or you are streaming a track from your Bluetooth device, you can change the information that is displayed on Evoke's screen. When listening to an MP3 on a CD, Evoke displays information about the track.
Digital radio
When listening to digital radio, press the Select dial to toggle the information displayed on Evoke's screen between 'Scrolling text', 'Signal strength', 'Programme type', 'Ensemble', 'Frequency', 'Signal error', 'Bitrate', 'Time' or 'Date'.
FM radio
When listening to FM radio, press the Select dial to toggle the information displayed on Evoke's screen between 'Scrolling text', 'Programme type', 'Date' or 'Frequency'.
Bluetooth
When streaming a track from your Bluetooth device to Evoke, press the Select dial to toggle the information displayed on Evoke's screen between 'Track title', 'Album name', 'Artist name', 'Stream format' or 'Play time'.
Getting started
Quick start
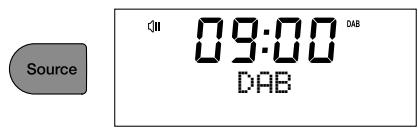
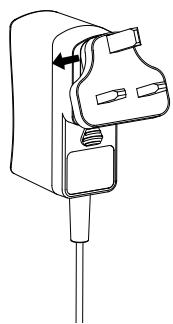
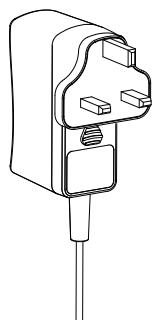
1 Fit the correct pin connector to the supplied mains power adapter.
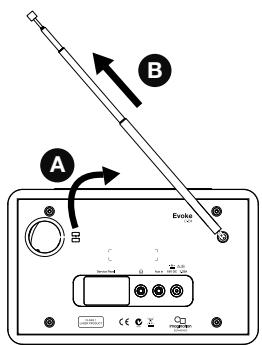
2 Unclip the aerial and fully extend it (steps A and B).
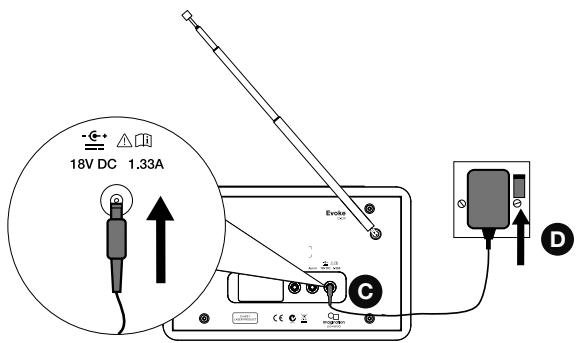
- Insert the jack of the supplied mains adapter into the socket on the rear of the radio (C).
- Plug the mains adapter into the mains supply (D).
3 Wait for your radio to complete an Autotune and find all available digital stations. When the Autotune is complete, a station will start playing.

Changing digital radio stations
Using the front panel controls
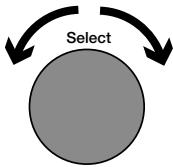
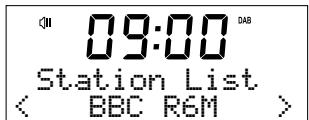
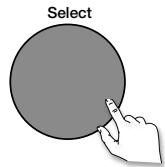
Turn the Select dial left or right to browse through the list of available digital stations. Push the Select dial to change the station.
Using the remote control
- Press the < or > button on the remote to browse through the list of available digital stations.
- Press the Select button to change the station.
Changing FM radio stations
Seek tuning
Press the Select dial or the or buttons on the front panel to seek to the next or previous FM radio station that has a strong signal. If you are using the remote control press the or buttons on the remote control to seek to the next or previous station.
Manual tuning
Turn the Select dial right or left or press the or buttons on the front panel to step up or down 0.05 MHz. If you are using the remote control press the < or > buttons to step up or down 0.05 MHz.
Storing and selecting presets
Evoke lets you store up to 10 digital and 10 FM radio stations for quick access.
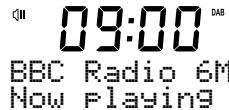
| 09:00 DAB BBC Radio 6M Now Playing |
| 09:00 DAB BBC Radio 6M Preset 3 store |
| 09:00 Save to Preset (05) |
| 09:00 D8 BBC Radio 5L Preset 5 store |
| 09:00 Preset Recall (05) |
| 09:00 BBC Radio 5L Connecting |
To quick-store a station to a preset button (1-3)
Tune to the digital or FM radio station you want to store. Press and hold one of the numbered Preset buttons (1-3) for two seconds until you see a message to confirm that the preset has been stored on the bottom line.
To store a station to the preset list (4-10)
- Tune to the digital radio or FM radio station you want to store.
- Hold the 4+ button to view the numerical list of stored presets, then turn and press the Select dial or use the
- Press the Select dial or the Select button on the remote control to store the preset.
To recall a preset when listening to digital radio or FM radio
- To tune to Presets 1 to 3, press the corresponding numbered button on the front panel or on the remote control (1 to 3).
- To access presets 4 to 10 on the front panel press the 4+ button, turn the Select dial right or left to scroll through the list of presets, then push and release the Select dial to tune to the selected preset. To access presets 4 to 10 using the remote control, press and release the 4+ button and use the
Inserting a CD
Insert your CD label side up. When you first insert a CD, Evoke displays 'Reading' for a few seconds while the CD loads. After a few seconds, your CD will start to play automatically.
Playing a track
During audio CD playback, Evoke's display shows the track number and the amount of time the track has been playing. The second line of the display will show the file name if available.

Playback controls
You can use the following controls on the front panel or remote control to control CD playback:
Press to pause the track that is currently playing. If you have paused a track, press to resume playback.
Press to play the previous track.
Press to skip to the next track.
Press and hold to rewind the track that is currently playing.
Press and hold to fast forward the track that is currently playing.
Press to stop the CD.
Shuffling tracks
You can use the 'CD: Random' setting on Evoke to listen to shuffle the tracks on your CD. To change the 'CD: Random' setting:
- Press the Menu button and turn and press the Select dial or use the
- Turn and press the Select dial or use the
- Turn and press the Select dial or use the
Repeating tracks
You can use the 'CD: Repeat' setting on Evoke to repeat the track that is currently playing or the entire CD. To change the 'CD: Repeat' setting:
- Press the Menu button and turn and press Select dial or use the
- Turn and press the Select dial or use the
- Turn and press the Select dial or use the
One: Select this option if you want to repeat the track that is currently playing.
All: Select this option if you want to repeat the entire CD.
Off: Select this option if you don't want to repeat any tracks or the entire CD.
Dir: If you have multiple folders on your CD you can select this option to repeat the tracks stored in the folder.
Ejecting a CD
Press the button. Wait until Evoke displays 'Eject' and remove the CD.
Streaming using Bluetooth
You can use Bluetooth to stream any audio from your phone or tablet to Evoke.
Pairing a mobile device with Evoke
Before you can stream audio to Evoke, you will need to pair your phone or tablet with Evoke.
Note: Bluetooth pairing varies on different mobile devices. See your phone or tablet manual for specific information.
- Press the Source button to switch to Bluetooth. Evoke will show 'Bluetooth discoverable' on the display.
- Enable Bluetooth on your mobile device.
- On your mobile device, select the option to add a new Bluetooth device. On some mobile devices you may need to select the search or scan option.
- Start the pairing process on your mobile device. Do this by selecting 'Evoke C-D4' from the list of available devices that appear on the your phone or tablet's screen. If your phone or tablet asks you to enter a key, enter '0000'.
If Evoke has paired to your phone or tablet successfully, Evoke will display 'BT connected: (Bluetooth device name)'.
Disconnecting a mobile device from Evoke
You can only have one phone or tablet connected to Evoke via Bluetooth at any one time. If your mobile device goes out of Evoke's Bluetooth range (this is usually around 10m (30ft)) the mobile device's Bluetooth connection is disconnected automatically. To manually disconnect your mobile device from Evoke, you will need to disconnect from the Bluetooth settings page on your mobile device (see your mobile device's manual for more information).
Using the auxiliary input
You can use Evoke's auxiliary input to play any music from your phone or tablet through Evoke.
Connecting an auxiliary device to Evoke
Connect the line out or headphone socket of your auxiliary device to the Aux In socket on your Evoke using a suitable cable.
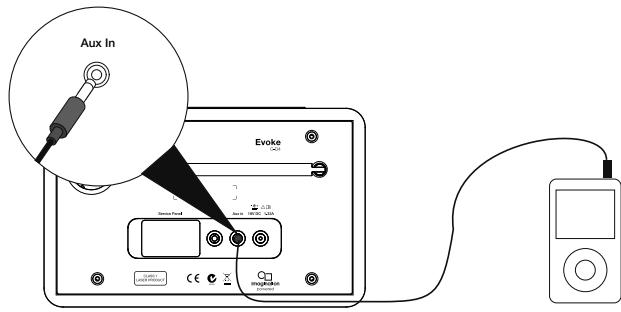
Selecting the auxiliary input
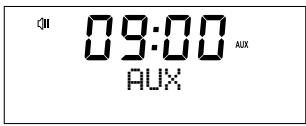
- Press the Source button to switch to auxiliary input (AUX).
- On your auxiliary device, select the content that you want to listen to on Evoke.
Evoke will start to play the content that you selected on your auxiliary device.

Alarms and timers
09:00 D48
09:00 DAB
09:00 048
09:00 048
09:00 048
09:00 048
Setting an alarm
Evoke has two alarms which can switch the radio on and tune to a digital or FM radio station, play a CD or sound an alarm tone.
- Press the button.
- Turn and press the Select dial to select 'Alarm 1' or 'Alarm 2'.
- Turn the Select dial to scroll through each alarm setting. If you want to change a setting, press the Select dial. You can set the following alarm options:
Set alarm: Turn and press the Select dial to turn the alarm 'On' or 'Off'.
Set time: Turn and press the Select dial to adjust the hour of the alarm. Note: If you have set your Evoke to use the 12 hour time format, make sure that you select the 'AM' or 'PM' version of the hour before pressing the Select dial. Repeat to set the minutes of the alarm.
Set source: Turn and press the Select dial to choose between 'DAB', 'FM', 'Tone' or 'CD'. Note: If you select 'CD' as the alarm source and there is no CD in Evoke when the alarm sounds, the 'Tone' will sound instead.
Set station: If you have set your alarm to tune into a digital or FM radio station, turn and press the Select dial to choose between the last radio station you were listening to or one of the stations in your preset list.
Set repeat: Turn and press the Select dial to choose when you want the alarm to repeat. The available options are 'Once', 'Daily', 'Weekdays' or 'Weekends'.
Set volume: Turn and press the Select dial to set the volume of Evoke when the alarm sounds.
Save: Turn and press the Select dial to save the alarm.
Evoke's display will show the 1 or 2 icon to show that the alarm has been set.
Cancelling a sounding alarm
To cancel a sounding alarm, press any button except the Select dial. If you press the Standby button during a sounding alarm, Evoke will enter standby.

09:00
BBC Radio 6M
9 minutes zzz
Snoozing a sounding alarm
To snooze a sounding alarm, press the Select dial. Evoke's display will show the z_SNOOZ icon and a countdown timer to show how long the alarm will snooze for. By default, Evoke snoozes an alarm for 10 minutes. To change the default snooze time see page 20.
Setting the sleep timer
Evoke has a sleep timer that switches your Evoke into standby after a set time period. To set the sleep timer:
- Press the Menu button.
- Turn and press the Select dial or use the
- Turn the Select dial or use the
Evoke's display will show the icon when the sleep timer is active.
Options and settings
Digital radio settings
Note: You can only see the digital radio settings when you have selected 'DAB' as the radio source.
Autotune
You can use the autotune function to automatically scan for new digital radio stations and remove inactive ones.
To carry out an autotune:
- Press the Menu button.
- Turn and press the Select dial or use the
- Turn and press the Select dial or use the
When the autotune has finished, Evoke will tune to the last station that you were listening to. If the last station you were listening to is no longer available, Evoke will tune into the first station in the alphabetical list.
Changing the digital radio station order
To change the order that Evoke displays digital radio stations in:
- Press the Menu button.
- Turn and press the Select dial or use the
- Turn and press the Select dial or use the
- Turn and press the Select dial or use the
Alphanumeric: Choose this option to display digital radio stations in alphanumeric order.
Ensemble: Choose this option to list stations in groups according to their multiplex. Multiplexes or ensembles are groups of stations owned and broadcast by a single operator.
Manual tuning
To manually tune Evoke to a digital radio station that broadcasts on DAB Band III.
- Press the Menu button.
- Turn and press the Select dial or use the
- Turn and press the Select dial or use the
- Turn and press the Select dial or use the
- Press the Menu button to return to the main menu.
Dynamic range control
Dynamic Range Control (DRC) is used to make quieter sounds in a digital radio broadcast easier to hear at low volume or in a noisy environment. Check with the broadcasters to find out if they use DRC.
To change the DRC settings:
- Press the Menu button.
- Turn and press the Select dial or use the
- Turn and press the Select dial or use the
- Turn and press the Select dial or use the
DRC High: Applies maximum compression to the DRC level.
DRC Low: Applies reduced compression to the DRC level.
DRC Off: Removes DRC compression.
Removing inactive digital radio stations from the station list
- Press the Menu button.
- Turn and press the Select dial or use the
- Turn and press the Select dial or use the
- Turn and press the Select dial or use the
Evoke will remove all inactive stations from the station list.
FM radio settings
Note: You can only see the FM radio settings when you have selected 'FM' as the radio source.
FM stereo option
You can choose between the 'Stereo Allowed' or 'Forced Mono' reception setting when listening to FM radio. Mono may improve clarity where stereo signals are weak.
To change between Stereo or Mono reception:
- Press the Menu button.
- Turn and press the Select dial or use the
- Turn and press the Select dial or use the
- Turn and press the Select dial or use the
FM scanning mode
You can choose whether Evoke automatically stops at the next available FM station or the next available FM station with a strong signal when scanning for an FM station. To change the FM scan setting:
- Press the Menu button.
- Turn and press the Select dial or use the
- Turn and press the Select dial or use the
- Turn and press the Select dial or use the
All Stations: Choose this option to change the scan setting to automatically stop at the next available FM station.
Strong Station: Choose this option to change the scan setting to automatically stop at the next available FM station with a strong signal.
System settings
Carrying out a factory reset
Resetting your Evoke removes all presets, stored stations, alarms and resets all other options to default settings.
- Press the Menu button.
- Turn and press the Select dial to choose 'Settings'.
- Turn and press the Select dial to choose 'Factory reset'.
- Turn and press the Select dial to select 'Yes' to reset Evoke to factory settings. Select 'No' if you do not want to reset your Evoke to factory settings.
Displaying the firmware version
To display the firmware version:
- Press the Menu button.
- Turn and press the Select dial to choose 'Settings'.
- Turn and press the Select dial to choose 'Firmware'.
- Turn and press the Select dial to display the 'DAB' or 'MCU' firmware version.
Changing your preferred language
You can select the language that your Evoke uses for menus and options.
- Press the Menu button.
- Turn and press the Select dial to choose 'Settings'.
- Turn and press the Select dial to choose 'Language'.
- Turn and press the Select dial to select a menu language from 'English', 'François' (French), 'Deutsch' (German), 'Italiano' (Italian), or 'Espanol' (Spanish).
Updating Evoke's firmware
Firmware updates for your Evoke may be made available in the future. If you register your product and include a valid e-mail address you will receive notification of firmware updates and information on how to update the firmware for your Evoke (register at account.pure.com). Alternatively, visit http://support.pure.com at any time to check for available firmware updates.
Changing the display brightness level
You can adjust the brightness of the display for when Evoke is switched on and in standby. To change the brightness level:
- Press the Menu button.
- Turn and press the Select dial or use the
- Turn and press the Select dial or use the
- Turn the Select dial or use the < > buttons on the remote control to vary the brightness level between 1 (dim) and 5 (bright) and push the Select dial or press the Select button on the remote control to confirm your preferred setting.
Setting the time and date
The time and date on Evoke are automatically set by the digital radio signal. If the time or date does not update automatically, you can manually set it using this option.
Note: Any time or date updates received by a digital broadcast will override manual settings.
Time and date synchronization options
You can synchronize the time and date on Evoke using either the FM or digital radio signal or you can choose to synchronize the time using both signals.
To specify the clock synchronization options:
- Press the Menu button.
- Turn and press the Select dial or use the
- Turn and press the Select dial to choose between the 'DAB', 'FM' and 'Both' clock synchronization options.
Setting the time and date manually
- Press the Menu button.
- Turn and press the Select dial or use the
- Turn and press the Select dial or use the
- Turn and press the Select dial or use the
- Turn and press the Select dial or use the
Changing the time format
- Press the Menu button.
- Turn and press the Select dial or use the
- Turn and press the Select dial or use the
Changing the alarm snooze time
- Press the Menu button.
- Turn and press the Select dial or use the
- Turn and press the Select dial to change the snooze time between 1 and 10 minutes.
Choosing an equalisation setting
Evoke includes six equalisation audio presets and also includes a loudness setting to help improve your listening experience when listening to Evoke at a low volume.
Using a predefined equalisation setting
To use a predefined equaliser setting on Evoke:
- Press the Menu button.
- Turn and press the Select dial or use the
- Turn and press the Select dial or use the
Creating a custom equalisation setting
Setting the bass and treble manually
- Press the Menu button.
- Turn and press the Select dial or use the
- Turn and press the Select dial or use the
- Turn and press the Select dial or use the
Switching on Evoke's loudness setting
If listening to Evoke at low volume, you can use the loudness setting to improve your listening experience. To switch the loudness setting on or off:
- Press the Menu button.
- Turn and press the Select dial or use the
- Turn and press the Select dial or use the
- Turn and press the Select dial or use the
Choosing a room equalisation setting
Evoke includes two predefined room equalisation settings that lets you optimise your listening experience based on the type of room you have placed Evoke in.
Changing the room equalisation setting
To change the room equaliser setting on Evoke:
- Press the Menu button.
- Turn and press the Select dial or use the
- Turn and press the Select dial or use the
EQ1: Choose this option for detailed, clear audio, which is ideal for places like lounges and bedrooms.
EQ2: Choose this option for a slightly softer audio response, which suits places with harder materials and surfaces like kitchens and conservatories.
Technical specifications
| Radio | Digital and FM radio |
| Frequencies | DAB/DAB+, FM radio 87.5-108 MHz |
| CD player | CD-R and CD-RW playback compatible. Multiple playback modes (repeat, random, etc.). |
| Bluetooth | A2DP support |
| Speaker | 3" wide range speaker |
| Inputs | 18V DC power adapter socket (230V supplied), 3.5mm stereo Aux In for auxiliary devices |
| Outputs | 3.5mm stereo headphone |
| Presents | 10 digital radio and 10 FM radio presets |
| Mains power adapter | Adapter: Input AC 100 - 240 V~,50/60 Hz; Output DC 18V — — , 1.3 A; Main unit: DC 18V — — , 1.3 A |
| Dimensions | 136mm high x 210mm wide x 223mm deep |
| Weight | 2.8 kg |
| Aerial | Captive telescopic aerial |
| Approvals | CE marked. Hereby, Pure, declares that this Band II LPD device is in compliance with the essential requirements and other relevant provisions of Directive 1999/5/EC. The Declaration of Conformity may be consulted at http://www.pure.com/about/r-tte-doc. ETSI EN 300 401 compliant. |
Correct disposal of this product

This marking indicates that this product should not be disposed with other household waste throughout the EU. To prevent possible harm to the environment or human health from uncontrolled waste disposal, recycle it responsibly to promote the sustainable reuse of material resources. To return your used device, please use the return and collection system or contact the retailer where the product was purchased. They can take this product for environmental safe recycling.
Copyright
Copyright 2015 by Imagination Technologies Limited. All rights reserved. No part of this publication may be copied or distributed, transmitted, transcribed, stored in a retrieval system, or translated into any human or computer language, in any form or by any means, electronic, mechanical, magnetic, manual or otherwise, or disclosed to third parties without the express written permission of Imagination Technologies Limited.
Trademarks
Evoke C-D4 with Bluetooth, Pure, the Pure logo, Imagination Technologies, and the Imagination Technologies logo are trademarks or registered trademarks of Imagination Technologies Limited. All other product names are trademarks of their respective companies. Version 1 November 2015.
Warranty Information
Imagination Technologies Limited warrants to the end user that this product will be free from defects in materials and workmanship in the course of normal use for a period of three years from the date of purchase. This guarantee covers breakdowns due to manufacturing or design faults; it does not apply in cases such as accidental damage, however caused, wear and tear, negligence, adjustment, modification or repair not authorised by us. Please visit account.pure.com to register your product with us. Should you have a problem with your unit please contact your supplier or contact Pure Support at the address shown on the rear of this manual.
Disclaimer
Imagination Technologies Limited makes no representation or warranties with respect to the content of this document and specifically disclaims any implied warranties of merchantability or fitness for any particular purpose. Further, Imagination Technologies Limited reserves the right to revise this publication and to make changes in it from time to time without obligation of Imagination Technologies Limited to notify any person or organisation of such revisions or changes.
Version 1. November 2015.
Garantiererklarung
Dynamic Range Control
Dynamic Range Control
Imagination Technologies Limited
Home Park Estate
Kings Langley
Herts,WD4 8LZ
United Kingdom
http://support.pure.com
Pure
- Safety instructions
- WARNING
- DO NOT INGEST BATTERY, CHEMICAL BURN HAZARD
- Contents
- Introduction
- Getting started
- Changing digital radio stations
- Changing FM radio stations
- Storing and selecting presets
- Playing a CD
- Streaming using Bluetooth
- Using the auxiliary input
- Alarms and timers
- Options and settings
- Technical specifications
- Introduction
- Front panel
- Front panel buttons
- Display
- Adjusting and muting the volume
- Changing source
- Changing the information shown on screen
- Digital radio
- FM radio
- Bluetooth
- Getting started
- Quick start
- Changing digital radio stations
- Using the front panel controls
- Using the remote control
- Changing FM radio stations
- Seek tuning
- Manual tuning
- Storing and selecting presets
- To quick-store a station to a preset button (1-3)
- To store a station to the preset list (4-10)
- To recall a preset when listening to digital radio or FM radio
- Inserting a CD
- Playing a track
- Playback controls
- Shuffling tracks
- Repeating tracks
- Ejecting a CD
- Streaming using Bluetooth
- Pairing a mobile device with Evoke
- Disconnecting a mobile device from Evoke
- Using the auxiliary input
- Connecting an auxiliary device to Evoke
- Selecting the auxiliary input
- Alarms and timers
- Setting an alarm
- Cancelling a sounding alarm
- 09:00
- Snoozing a sounding alarm
- Setting the sleep timer
- Options and settings
- Digital radio settings
- Autotune
- Changing the digital radio station order
- Dynamic range control
- Removing inactive digital radio stations from the station list
- FM radio settings
- FM stereo option
- FM scanning mode
- System settings
- Carrying out a factory reset
- Displaying the firmware version
- Changing your preferred language
- Updating Evoke's firmware
- Changing the display brightness level
- Setting the time and date
- Time and date synchronization options
- Setting the time and date manually
- Changing the time format
- Changing the alarm snooze time
- Choosing an equalisation setting
- Using a predefined equalisation setting
- Creating a custom equalisation setting
- Setting the bass and treble manually
- Switching on Evoke's loudness setting
- Choosing a room equalisation setting
- Changing the room equalisation setting
- Technical specifications
- Correct disposal of this product
- Copyright
- Trademarks
- Warranty Information
- Disclaimer
- Garantiererklarung
- Pure
Brand : PURE
Model : EVOKE C-D4
Category : Alarm clock radio