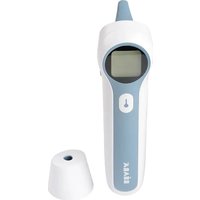
EXACTO - Medical thermometer BEABA - Free user manual and instructions
Find the device manual for free EXACTO BEABA in PDF.
User questions about EXACTO BEABA
0 question about this device. Answer the ones you know or ask your own.
Ask a new question about this device
Download the instructions for your Medical thermometer in PDF format for free! Find your manual EXACTO - BEABA and take your electronic device back in hand. On this page are published all the documents necessary for the use of your device. EXACTO by BEABA.
USER MANUAL EXACTO BEABA
THERMOMÉTRA AURICULAIRE & FRONTAL
OOR- EN HOOFDTHERMOMETER
OHR- UND STIRNTHERMOMETER
EAR FOREHEAD THERMOMETER
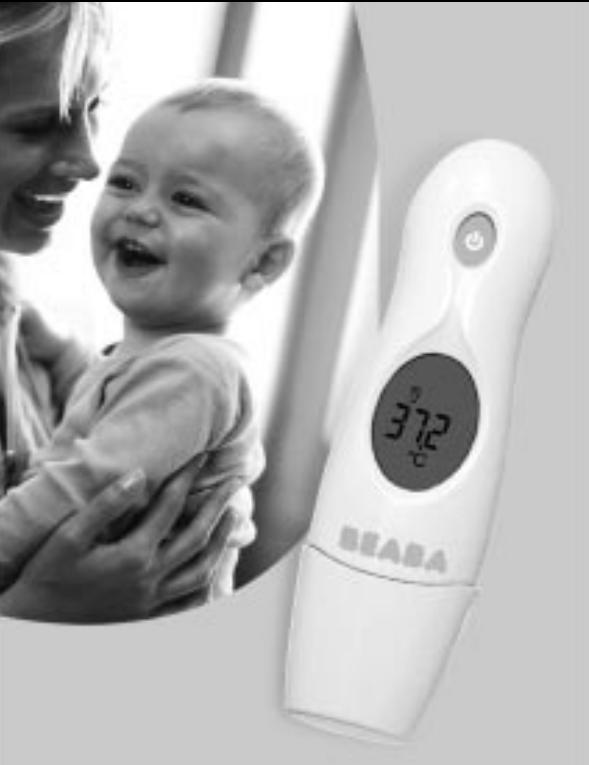
First of all, thank you for choosing the Exacto Ear and Forehead thermometer.
It is a high-technology medical thermometer mainly intended for measuring the temperature of the human body via infra-red rays emitted by the surface of the skin and by the ear-drum.
It may be used:
- to measure ear temperature on the ear-drum
- to measure the temperature on the forehead
to measure ambient temperature
to display the time
Readings are displayed almost immediately.
Practical and economical, its watertight probe is easy to clean and does not require a probe hood.
Fast and reliable, it gives an accurate temperature reading.
Simple to use: just remove the probe cover to change from forehead reading to ear reading.
Caution:
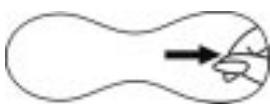
Before first use please take off the plastic strip witch insure the battery protection. See picture bellow.
Definition of symbols
8888
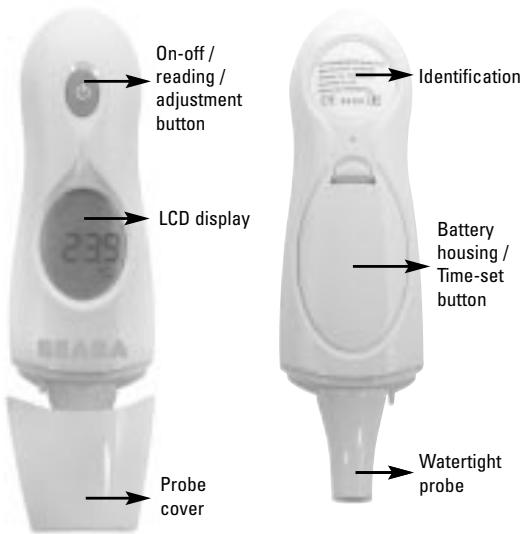
Display

Reading in progress

Ear reading

Forehead reading

Temperature scale
Celsius

Temperature scale
Fahrenheit

Clock

Low Battery

Display the last reading taken
The first time you use the thermometer or when you change the battery, you can, if you wish, set the clock and choose the temperature reading scale, ^ C (Celsius) or ^ F (Fahrenheit)
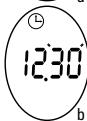
1) Setting the clock
- Open the battery housing
- Press the black button once: the hours will flash (1a)
- Set the hours using the button on the front face of the thermometer
- Press the black button once: the minutes will flash (1b)
- Set the minutes using the button on the front face of the thermometer
- Press the black button once to end the time-set operation (1c).
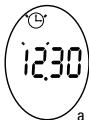
Figure 1
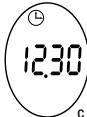
If you do not set the clock, this does not prevent the thermometer from operating.
Only the Clock / Ambient T^ functions will not be available
2) Displays
There are two display modes:
Mode Clock / Ambient T° (figure 2)
The screen alternately displays the time and the ambient temperature.
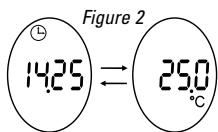
This mode is only available if the clock has been set.
If not, at the end of each reading, the thermometer will display the measured T^ for 30 seconds, then "OFF" before switching off.
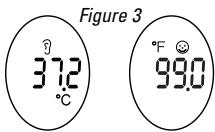
- Taking the temperature mode (figure 3)
In the left-hand example, the screen displays the ear temperature in ^ Celsius.
In the right-hand example, the screen displays the forehead temperature in ^ Fahrenheit
3) Choice of ^ C / ^ F scale
From Clock / Ambient T^ mode, briefly press the button on the front of the thermometer three times in quick succession.
The scale changes from ^ C to ^ F or ^ F to ^ C and the thermometer emits 2 "beeps"
The screen shows the last reading recorded for about 30 seconds. The thermometer is ready to take a forehead reading (with the probe cover) or ear reading (without the probe cover)
At the end of the 30 seconds the thermometer beeps once, then goes into Clock / Ambient T^ mode.
Taking the temperature
1) Moving from one mode to the other
To move from Forehead T^ mode to Ear T^ mode, simply remove the cover.
To move from Ear T^ mode to Forehead T^ mode, simply replace the cover.
2) Taking the forehead temperature
We recommend that you wipe the forehead with a paper tissue or piece of kitchen roll before taking the reading.
- Make sure that the probe cover is in the right position.
From Clock / Ambient T° mode, press once on - The thermometer then displays all the symbols (4a) then the last reading recorded (4b) then emits 2 "beeps". It is now ready to take a reading (4c).
- Place the probe cover on a temple
- Press the button and keep it pressed down throughout the reading
- Keeping the probe cover in contact with the skin, sweep it across the forehead from one temple to the other for 2 or 3 seconds (4d).
- Release the button ; the thermometer emits 1 "beep" and the temperature reading is displayed for about 30 seconds.
- At the end of the 30 seconds the thermometer emits 1 "beep" and displays "OFF" before returning to Clock / Ambient T^ mode. (It displays "OFF" and switches off if the clock has not been set.)

Figure 4
3) Taking the ear temperature
- Make sure that the probe cover has been removed.
From Clock / Ambient T° mode, press once on - The thermometer then displays all the symbols (5a) then the last
reading recorded (5b) then emits 2 "beeps". It is now ready to take a reading (5c).
- Place the probe in the ear of your choice
- Press the button and keep it pressed down as you rotate the probe inside the ear canal until the thermometer emits 1 "beep" signifying the end of the reading (5d).
- La temperature recorded is then displayed for about 30 seconds.
- At the end of the 30 seconds the thermometer emits 1 "beep" and displays "OFF" before returning to Clock / Ambient T^ mode. (It displays "OFF" and switches off if the clock has not been set.
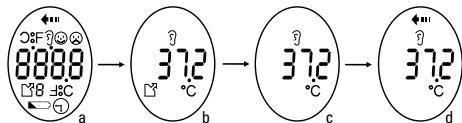
Figure 5
4) Measuring the temperature of a liquid
We recommend that you use the "Ear reading" configuration, i.e. remove the probe cover, to measure the T^0 of a liquid (see 3).
Do not in any case place the probe in the liquid; the reading is taken on the surface of the liquid.
Note: The reading taken on the forehead is slightly less accurate that the ear reading as it is more sensitive to perspiration, sebum, activity and ambient T^ . It nevertheless gives an excellent indication.
The reading taken on the forehead is identical in absolute terms to the one taken in the ear.
In practice, for certain individuals and in certain circumstances, the reading taken on the forehead may be 0.2 to 0.3^ lower than the ear T^ .
Average temperatures:
| Forehead T° | Ear T° | Rectal T° | Mouth T° | Armpit T° |
| 36.1 °C | 36.4 °C | 37.0 °C | 36.6 °C | 36.1 °C |
Recommendations
This thermometer has been designed to take temperatures only in ideal conditions.
When taking ear or forehead readings, the thermometer may detect that conditions are not ideal.
The symbol corresponding to the reading mode (ear or forehead) will then flash (6a or 6b) and the thermometer will emit short, rapid "beeps".
Press the button to interrupt the reading; do not try to take another reading as long as the phenomenon persists.
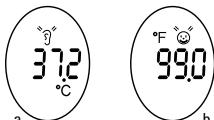
Figure 6
Low battery
The battery symbol appears at the bottom of the screen as soon as the battery starts to show signs of weakness (7).
When this happens, you should replace the battery as soon as possible; however, the thermometer will continue to operate for some time.
When the battery reaches its lowest level, the battery symbol flashes, the "LO" display appears and beeps are emitted (8).
The thermometer is then unable to take any more readings.
Press the button to switch of the thermometer, then replace the battery.
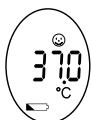
Figure 7
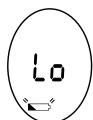
Figure 8
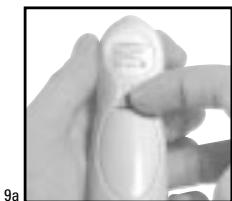
- Use your fingernail to lower the flap locking the battery housing cover in place (9a).
- With a non-metallic object, push back the plate holding the battery in its housing.
- Remove the battery.
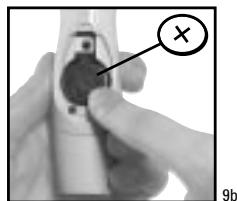
- Insert a Lithium CR 2032 3-volt battery into the housing, with the + pole at the top
- Press the battery to lock it in place (9b).
- Replace the battery housing cover.
- Set the clock as described on page 4.
Your thermometer is designed to measure temperatures between 0^ and 50^ .
- If the temperature to be measured is lower than this band, the symbol "LO" will appear.
If the temperature to be measured is higher than this band, the symbol "HI" will appear.
Depending on whether the thermometer is operating in forehead reading or ear reading mode, the following symbols may appear. (10)
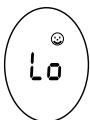
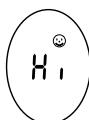

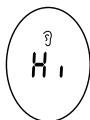
Figure 10
Usage precautions
- Your thermometer probe is watertight and may be cleaned with a disinfectant wipe or cotton wool soaked in alcohol.
- The body of the thermometer is not watertight; do not place it in a liquid, use a clean, dry tissue.
- Do not expose the thermometer to extreme temperatures for long periods, e.g. in the sun, in a car.
- Avoid violent impacts and do not drop the product
- Avoid direct contact between fingers and the tip of the probe
- Do not try to dismantle the thermometer
- The thermometer has been designed to be used without a probe hood; it is pointless to use a probe hood.
- Keep the probe clean; grease and ear-wax can affect the results of infra-red measurements.
- Do not take readings less than half an hour after a meal, exercise, a bath or a period spent in a particularly hot or cold environment.
- Leave an interval of at least 1 minute between readings, otherwise slight variations may occur.
- An individual's body temperature corresponds to an average value. There is no absolute standard for body temperature. The best way to proceed is to measure your temperature during a normal period and use this average reading as a benchmark against which to judge your fever.
- When the ambient temperature is outside the optimum operating temperature band of between 16^ and 40^ , an error measge "Err" appears (11)
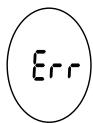
Figure 11
Technical Features
| Model Characteristics | FDIR-V1 |
| Reading band | 32°C ~ 42,9°C |
| Precision | +/- 0.3 °C for temperatures between 35,5°C and 42°C+/- 0.4 °C for temperatures lower than 35.5°C or higher than 42°C |
| Resolution | 0.1°C / 0.1°F |
| Operating Conditions | Temperature between 10°C and 40°CWith relative humidity below 95% |
| Storage Conditions | Temperature between -20°C and 50°CWith relative humidity below 95% |
| Battery | 1 x 3-Volt CR 2032 button battery |
| Other features | • Tests main functions on start-up.• Displays the highest temperature detected during measurement.• Shows battery level• Watertight probe does not require a probe hood• Complies with the following standards: o EN 12470-5: 2000 o ASTM E 1965 -98 o EN 980: 2003 o IEC / EN 60601-1 o IEC / EN 60601-1-2 o ISO 14971:2000 • CE 0123 |