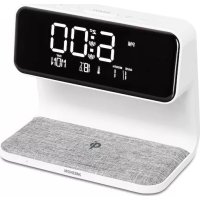
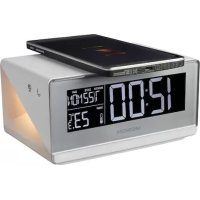
MD 82157 - Alarm clock radio MEDION - Free user manual and instructions
Find the device manual for free MD 82157 MEDION in PDF.

| Product type | Multi-band clock radio with dual alarm |
| Brand | MEDION |
| Model | MD 82157 |
| Mains power supply | 230 V ~ 50 Hz via A400-75 adapter (7.5 V / 400 mA) |
| Battery power | 4 AA/LR6 1.5 V batteries (not included) |
| Frequency bands | FM (87.0–109.0 MHz), SW (5.85–17.9 MHz), MW (522–1656 kHz), LW (144–299 kHz) |
| Display | Digital clock with date, time zone and world time |
| Alarm function | Two independent alarms with choice of radio wake-up or buzzer |
| Snooze | Adjustable alarm repeat delay from 1 to 59 minutes |
| Sleep timer | Automatic radio shut-off up to 90 minutes |
| Countdown timer | Up to 99 min 59 sec, 6 programmable memory slots |
| Stopwatch | Up to 39 min 59 sec |
| Station memory | Up to 90 FM, 150 SW, 60 MW, 30 LW |
| Tuning | PLL with automatic search and fine tuning |
| Bass function | Bass Booster enable/disable |
| Antenna | Telescopic for FM/SW, built-in ferrite for MW/LW |
| Headphone output | 3.5 mm jack socket |
| Dimensions (approx.) | 200 x 120 x 80 mm |
| Weight (approx.) | 500 g |
| Maintenance | Soft dry cloth, unplug before cleaning |
| Safety | Do not expose to water, do not open the casing, use original adapter |
| Repairability | Entrust to a professional, no user repair |
| Included accessories | Power adapter, earphones, carry case |
Frequently Asked Questions - MD 82157 MEDION
User questions about MD 82157 MEDION
0 question about this device. Answer the ones you know or ask your own.
Ask a new question about this device
Download the instructions for your Alarm clock radio in PDF format for free! Find your manual MD 82157 - MEDION and take your electronic device back in hand. On this page are published all the documents necessary for the use of your device. MD 82157 by MEDION.
USER MANUAL MD 82157 MEDION
Las functions de Fecha y horaSEOSEOSEOSEOSEOSEOSEOSEOSEOSEOSEOSEOSEOSEOSEOSEOSEOSEOSEOSEOSEOSEOSEOSEOSEOSEOSEOSEOSEOSEOSEOSEOSEOSEOSEOSEOSEOSEOSEOSEOSEOSEOSEOSEOSEOSEOSEOSEOSEOSEOSEOSEOSEOSEOSEOSEOSEOSEOSEOSEOSEOSEOSEOSEOSEOSEOSEOSEOSEOSEOSEOSEOSEOSEOSEOSEOSEOSEOSEOSEOSEOSEOSEOSEOSEOSEOSEOSEOSEOSEOSEOSEOSEOSEOSEOSEOSEOSEOSEOSEO SEO SEO SEO SEO SEO SEO SEO SEO SEO SEO SEO SEO SEO SEO SEO SEO SEO SEO SEO SEO SEO SEO SEO SEO SEO SEO SEO SEO SEO SEO SEO SEO SEO SEO SEO SEO SEO SEO SEO SEO SEO SEO SEO SEO SEO SEO SEO SEO SEO SEO SEO SEO SEO SEO SEO SEO SEO SEO SEO SEO SEO SEO SEO SEO SEO SEO SEO SEO SEO SEO SEO SEO SEO SEO SEO SEO SEO SEO SEO SEO SEO SEO SEO SEO SEO SEO SEO SEO SEO SEO SEO SEO SEO SEO SEO SEO SEO SEO SEO SEO

MW (onda media): 522 - 1656 kHz
En USA 520 - 1710 kHz
LW (onda larga): 144 -299 kHz
Toma de auriculas:
3.5 mm clavija jack
Safety Instructions About this manual 8
Electrical devices require special caution 8
Setting the product up safely 9
Keep the mains connections accessible 9
Do not carry out any repairs 9
In Case of Malfunctions 9
Thunderstorms 9
Using Batteries carefully 10
Cleaning the unit 10
What is a PLL Tuner? 10
Start-Up 10
Unpacking the unit 10
Check the contents of the box 11
AC Adapter 11
Mains and battery operation 11
Inserting the batteries 12
How to handle the batteries. 12
Connecting the earphones 13
General functions 13
Key lock 13
Display backlight 14
Base 14
Timefunctions 15
Time, date, time zone and world time. 15
Setting the time 16
Setting the date 16
Summer time adjustment. 17
Displaying the world time 17
Set the Special Date Alert "SDA" 17
Setting the time zone 17
Display Mode 19
Alarm function 20
Setting the alarm time 20
Activating the waking time 20
Wake up interrupt 21
To switch-off the waking function 21
Timer setting 21
The Countdown Timer setting 22
Set the countdown and store 22
Activate the down count timer 23
Radio mode 24
Switching on/volume control 24
Switching off 24
Snoopze function 24
Tuning a station 24
Tuning the MW Band 25
Fine Tuning 26
Antenna 26
FM and SW. 26
MW and LW. 26
Bass Setting 26
Memory functions 27
Pre-setting stations 27
Selecting a station from the memory 28
Scanning the memory places 28
Disposal 29
Packing 29
Device 29
Batteries 29
Technical Specifications 29
Receiver unit 29
Mains operation 29
Battery operation 30
Safety Instructions About this manual

Please observe the following safety instructions carefully before putting the unit into operation. Take note of the warnings on the unit and in this manual. Always keep the instruction manual near at hand. If you sell or pass on the product, make sure to include this manual together with the unit.
Electrical devices require special caution
The appliance is not intended for use by young children or infirm persons without supervision.
Swallowing batteries may be fatal. If a battery has been swallowed, consult a doctor immediately.
Also, keep the plastic packaging out of reach for children to avoid danger of suffocation.
Children should be supervised in order to ensure that they do not play with the device. This device is not intended to be used by individuals with limited physical, sensory or intellectual abilities or limited experience, and/or a lack of knowledge (including children), unless they are being supervised by an individual responsible for their safety or receive instructions from them concerning how the device must be used.
Setting the product up safely
Always make sure that
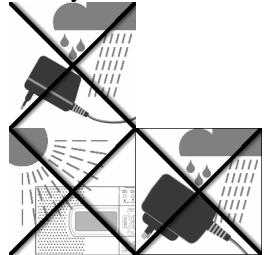
- the AC adapter never comes into contact with water while operating, not even with dripping or splashing water;
the unit is not exposed to strong sunlight for long time; - no open fire sources, such as candles, are placed on or in the immediate vicinity of the unit.
you do not cover the ventilation slots, so that sufficient ventilation will always be guaranteed.
The device is not designed for operation in rooms with high relative air humidity.
Keep the mains connections accessible
Connect the mains plug power unit only to an easily accessible power outlet (230V 50Hz) close to the unit. In case the unit has to be disconnected quickly, the plug has to be within easy reach. In order to avoid tripping, do not use an extension cord.
Do not carry out any repairs

If the AC adapter, the connecting cable or the device is damaged, immediately disconnect the AC adapter from the power outlet and contact the customer service.
In Case of Malfunctions
Under no circumstances attempt to open and/or repair the mains plug adapter yourself. There is danger of electric shock! Refer all servicing to our Service Centre or to another qualified workshop.
Thunderstorms
When absent for a long period of time or during a thunderstorm, pull out the AC adapter.
Using Batteries carefully
Empty batteries do not qualify as household refuse.
The batteries must be disposed of at a designated disposal/recycle point.
Never charge Batteries again. Danger of explosion!
Keep Batteries away from Children, do not throw into fire, don't short circuit ore take them apart!
Pay attention to the right polarity with insertion.
Keep the Battery and Device contacts clear.
Cleaning the unit
Before cleaning, always disconnect the AC adapter.
Use a soft dry cloth for cleaning. Do not apply chemical solvents or cleaning agents, as they may damage the surface and/or labelling of the device.
What is a PLL Tuner?
A PLL tuner (phase locked loop) served to itself, to the production of a stable receipt frequency, the help of a quartz. The PLL tuner allows exact selecting and storing away a transmitter frequency, he creates therefore a staying same quality with the receipt of radio stations.
Start-Up
Unpacking the unit
Remove all packaging material.

ATTENTION!
To avoid danger of suffocation, do not let young children play with plastic packaging!
Always make sure that
- the AC adapter never comes into contact with water, not even dripping or splashing water;
the device is not exposed to direct strong sunlight for a long time.
Check the contents of the box
Make sure during unpacking that the following items are included:
World receiver radio
AC adapter
- Earphones
Pouch
Carrier Bag
AC Adapter
- Connect the plug of the AC adapter unit to the 7.5V DC jack on the side of the receiver.
Connect the mains plug power unit to an easily accessible power outlet.

Do not use any adapter other than the provided AC adapter model A400-75, because other adapters could damage the receiver or the power unit.
When the receiver is connected, the clock starts with 0:00 00.
Mains and battery operation
When you disconnect the receiver from the mains, any settings you have made (time, alarm wake-up time, preset radio stations) are lost. If you want to keep the settings, first insert batteries (see below), and disconnect the receiver from the mains afterwards.
Inserting the batteries
Instead of the mains, you can also operate the receiver on batteries (not included in delivery). You need four 1.5 V batteries, size AA LR6.
- Open the battery compartment on the rear of the receiver by pushing the lid downwards.
Insert the four battery cells into the compartment, observing correct polarity (the minus pole must touch the spring - see the illustration)
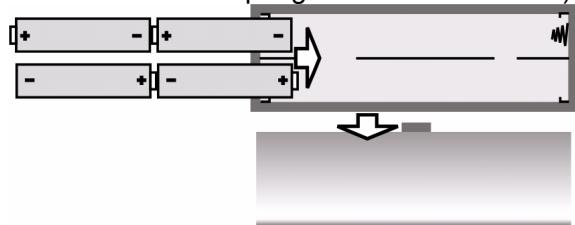
Push the lid back onto the battery compartment.
The battery symbol starts flashing when the batteries become too weak.
How to handle the batteries
Take the batteries out of the receiver when you operate it again on the mains.
Always replace all four batteries at the same time; never mix old and new batteries.
Connecting the earphones
The connector for the earphones or headphones is located on the left side of the receiver.
Connect the provided or other ear- or headphones to the 3.5mm jack plug. This automatically switches the loudspeaker off.

Important!
Excessive volume when using earphones and headphones may lead to hearing damage and/or the loss of hearing.
Set the volume to the lowest level before the playback.
Start the playback and increase the volume to the level that is comfortable for you.

It may cause damage to the hearing of the listener if a device is operated through headphones with increased volume for a longer period.
General functions
Key lock
To set the key lock, press the MEM Button for 3 sec, to prevent changes of the settings by unintentional actuation of the keys. The display shows: KEYLOCK.
Press the MEM Button for 3 sec again, to disable the Key lock. The display KEYLOCK vanished.

Display backlight
Press any key, to activate the Display backlight. The display will be lighted up for 10 seconds.

If the Key lock is active, the display lightning can be activated by pressing the SNOOZE Button.
Base
You can fold out the stand on the rear of the receiver to make it stand more securely.

Timefunctions
The time functions can be set regardless of whether the radio is switched off or on. At start-up the receiver starts with the pre-set time "0:00 00".

The settings are lost when the receiver is disconnected from the mains.
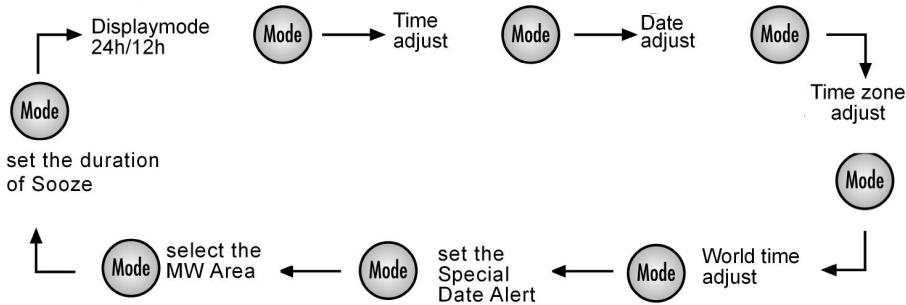
Time, date, time zone and world time
You can successively set the time, date and time zone via the MODE key, and interrogate the world time. When the MODE key is pressed, the function which is desired to be set flashes for approx. 15 seconds.
During this time, make the settings using the UP ▲▲/DOWN▼▼ key.
MODE 1 x : Time
MODE 2 x : Date
- MODE 3 x : Time zone (“Local City”)
MODE 4 x : World time
- MODE 5 x : set Special Date Alert (SDA ^a )
MODE 6 x : select MW Area
MODE 7 x : set the duration of Snooze
- MODE 8 x : set the 12/24 display mode.
To confirm a setting, just wait until the display does no longer flash (the display switches back to clock display) or press MODE to go to the next function.
Display settings:
Setting the time
Press MODE once. The currently set time (0:00 00 at start-up) flashes in the display.
Press the Mode Button. In the display flashes the opposed time (by the introduction 0:00 00).
Press UP▲▲ or DOWN▼▼, to change the time display forwards or backwards in steps of one minute. Hold one of the keys down for a few seconds for quick time adjustment forwards or backwards in steps of ten minutes.

Set the clock without summer time adjustment. If a summer time correction is necessary, it can be set together with the time zone setting (see below).
Setting the date
Press MODE again, or twice from the beginning. The currently set date (01:01:08 at start-up) flashes in the display.
Press UP or DOWN to change the date forwards or backwards in one day steps. Hold one of the keys down for a few seconds to change the date forwards or backwards in steps of ten days.
SU = Sunnday
Mo = Monday
Tu = Tuesday
We = Wednesday
Th = Thursday
F_r = Friday
Sa = Saturday
The display for the days of the week will also run automatically. The day of the week is displayed with two letters for the English names of the days of the week.

The built-in calendar extends from 2000 to 2099.
Summer time adjustment
SNOOZE|Sleep Timer Stop Watch|Count Down Timer Start/Stop
While the time zone display is still flashing, press the SNOOZE/SLEEP TIMER key. The Summer time symbol appears in the display.
Displaying the world time
Press the MODE key once again or four times from the beginning, to see the world time (GMT). The flashing city symbol for the corresponding time zone appears.
Press UP or DOWN to set the next or previous time zone.
Set the Special Date Alert "SDA"
Press MODE when the Unit stays in "SDA" mode.
The "SDA" goes flashing.
Press UP ore DOWN to set the special Date.
Press SNOOZE/SLEEP TIMER to ignore the year.
Press MODE once to confirm the current setting and it switches to select the area for MW.
Press other key to start its corresponding function.
- When no key has been pressed for 10 seconds, the current setting is confirmed and it switches to auto-run mode automatically.
Setting the time zone
Press the MODE key again, or three times from the beginning. The current time zone flashes in the display as abbreviation for the corresponding city (UTC for Universal Time Code at start-up); the time display disappears.
Press UP or DOWN to set the next or previous time zone.
The following table gives an overview of the city name abbreviations for the time zones, and the time adjustment.
| Abbrev. | Diff. to GMT | City | Abbrev. | Diff. to GMT | City |
| LON | 0:00 | London | UTC | 0:00 | Universal Time Code |
| MUN | + 1:00 | Munich/Germany | BUE | - 3:00 | Buenos Aires/Argentina |
| CAI | + 2:00 | Cairo/Egypt | CCS | - 4:00 | Caracas |
| MOW | + 3:00 | Moscow | YUL | - 5:00 | Montreal/Canada |
| DXB | + 4:00 | Dubai | NYC | - 5:00 | New York/USA |
| KHI | + 5:00 | Karachi | YYZ | - 5:00 | Toronto/Canada |
| DAC | + 6:00 | Dhakar/Bangladesh | MEX | - 6:00 | Mexico |
| BKK | + 7:00 | Bangkok | CHI | - 6:00 | Chicago/USA |
| HKG | + 8:00 | Hong Kong | DEN | - 7:00 | Denver/USA |
| TYO | + 9:00 | Tokyo | YVR | - 8:00 | Vancouver Canada |
| SYD | + 10:00 | Sydney/Australia | LAX | - 8:00 | Los Angeles/USA |
| NOU | + 11:00 | Numea/New Caledonia | ANC | - 9:00 | Anchorage/USA |
| AKL | +12:00 | Auckland/New Zealand | HNL | - 12:00 | Honolulu/USA |
Display Mode
You can choose which data are indicated in the display if the radio is switched off.
With the system stay in clock display mode and the Radio is OFF, press FINE once. The time section and day flag are all cleared.

With the current mode of display is shown by the icon "Clock", "Date" and "Local".
| Mode of display | LCD |
| Clock only | "CLOCK" goes solid only |
| Clock + Local | "CLOCK" + „LOCAL“ go solid |
| Clock + Date | "CLOCK" + „DATE“ go sold |
| Clock + Date + Local | "CLOCK" + ”DATE“ + “LOCAL“ go solid |
Alarm function
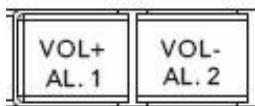
The world receiver provides two independent wake-up times ALARM 1 and ALARM 2.
- For each one you can set and whether you want to be waked up by a buzzer or by the radio.
- Whether the unit should wake you only on Monday to Friday or only on Saturday and Sunday;
Setting the alarm time
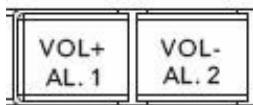
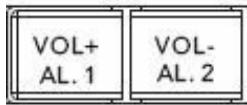
Press ALARM 1 or ALARM 2. The currently set waking time flashes for about ten seconds in the display (at start-up: 0:00 AL1 or AL2) together with the days of the week (abbreviations of the English names of the days, see above).
While the time is still flashing, press UP▲▲ or DOWN to change the waking time to earlier or later in steps of one minute. Hold one of the keys down for a few seconds for quick waking time adjustment forwards or backwards in steps of ten minutes.
SNOOZE|Sleep Timer Stop Watch|Count Down Timer Start/Stop
Press the SNOOZE/SLEEP TIMER key for switching between the two waking programs: For waking every day (Mo Tu We Th Fr SA SU).
Only on workdays (Mo Tu We Th Fr) or only on Saturday and Sunday (SA SU).
To choose the selected day, press the SNOOZE/SLEEP TIMER button.
Activating the waking time
- When the waking time has been set, you can activate the alarm clock function by pressing ALARM 1 or ALARM 2. In the display RAD① or RAD② appears for the reveille by the radiofunction, ALM① or ALM② for the reveille with the alarm tone.

Note that the station must be tuned in (see below) so that the radio can wake you up.
Press ALARM 1 or ALARM 2 a second time to switch to waking with the buzzer, to interrupt the waking function.
Wake up interrupt
SNOOZE|Sleep Timer Stop Watch|Count Down Timer Start/Stop
Press the SNOOZE/SLEEP TIMER key to interrupt the waking function for about ten minutes.
To switch-off the waking function
Alarm Setting
Press ALARM 1 or ALARM 2 as many times as necessary to make the alarm symbols RAD^① or RAD^② in the display disappear.
Timer setting
Make sure that the Radio is switched off.
SNOOZE|Sleep Timer Stop Watch|Count Down Timer Start/Stop
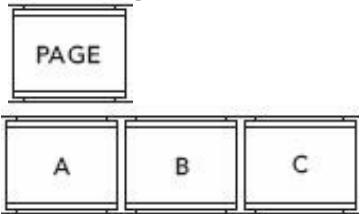
PAGE
Press and hold PAGE for 2 seconds, the display shows 0.00. 0u^
Press SNOOZE/SLEEP TIMER once, to start, the timer's max. value is 39 minutes and 59 seconds.
Press SNOOZE/SLEEP TIMER again to pause.
Press SNOOZE/SLEEP TIMER again, to continue the counting.
Press and hold SNOOZE/SLEEP TIMER to clear the timer.
Press PAGE to leave the timer.
The Countdown Timer setting
Make sure that the Radio is switched off.
Set the countdown and store
You can set up to 6 different Countdown timer.
Press and hold VIEW to enter the timer preset setting mode, displays shows "d 00.00"
Press DOWN · or UP▲▲ to adjust the down count value to the time you want (the max value for the countdown timer is 99 minutes und 59 seconds).


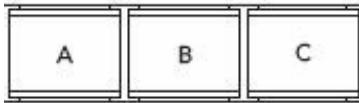
- Then press the MEM key to store the selected Countdown. MEM starts flashing in the display. Press preset keys to store the time into which memory you want (A, B, C) Press MEM to store the timer.
Press SNOOZE/SLEEP TIMER to start or suspend the countdown timer.
Press VIEW again to exit the down-count timer preset setting mode.
Activate the down count timer
SNOOZE|Sleep Timer Stop Watch|Count Down Timer Start/Stop
Press and hold VIEW for 2 seconds displays shows "d 00.00".
Choose the stored timer, by pressing A, B, C.
to recall the preset memory.
Press SNOOZE/SLEEP TIMER to start to down counting, press SNOOZE/SLEEP TIMER again to pause.
- When the time down counts to 00.00, an "Alert" will be heard for one minute.

Press VIEW to stop the timer and leave the Countdown menu.
Radio mode
Switching on/volume control

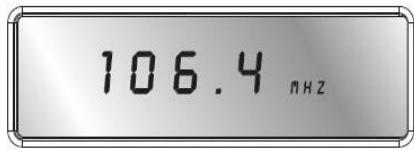
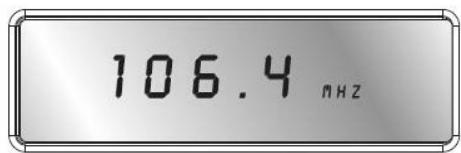
Press the key to switch the radio on. The display will show the currently tuned frequency and frequency band.
Adjust the volume using the VOLUME :
-VOL - : less volume;
-VOL +: more volume.
Switching off
- Switch the radio off by pressing the ( ) key. The display again shows the clock time.
Snoopze function
Alternatively you can activate the snooze function by switching the radio off. You can set up to 90 minutes in steps of ten minutes as that time after which you want the radio to switch off automatically.
SNOOZE|Sleep Timer
Stop Watch|Count Down Timer Start/Stop
Press SNOOZE/SLEEP TIMER. 90 (for 90 minutes) appear in the display.
Press SNOOZE/SLEEP TIMER again to reduce the snooze time in ten minute steps.
Either choose a snooze time (the snooze symbol remains visible) or continue pressing SNOOZE/SLEEPTIMER as many times as necessary until OFF appears in the display. The radio is now switched off.
Tuning a station
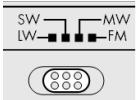
- Use the band selector switch to select the desired frequency band (FM, MW, LW or SW). The corresponding abbreviation appears in the display.
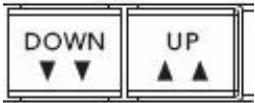
Now tune the receiver to the desired frequency using the UP▲▲ and DOWN keys.
To start the automatic scan, hold UP▲▲ or DOWN▼▼ pressed for about three seconds.
The automatic scan starts when you release UP or DOWN after about three seconds. The automatic scan run stops when a station with sufficient signal strength is found.
Tuning the MW Band
Press the MODE key six times, and select the band with the UP and DOWN key.
| Band | Freq. Step. | Freq. Range |
| FM | 100 kHz | 87.0 - 109.0 MHz |
| SW | 5 kHz | 5.85 - 17.9 MHz |
| LW | 1 kHz | 144 - 299 kHz |
Frequency Stepp MW Band:
| Country | Freq. Step. | Freq. Range |
| America | 10 kHz | 520 - 1710 kHz |
| Europe | 9 kHz | 522 - 1656 kHz |
Fine Tuning
Tune the receiver to the station which you want to recive.

The PLL tuner passes through the band in 50kHz steps in the FM range. However, it moves in 1kHz steps in the SW and MW ranges.

Press during the transmitter search the key FINE. In the display appears the announcement FINE.
Press UP▲/DOWN▼ once to change the receiving frequency up/down by 1 micro step.
Press FINE again to return to the normal tuning.
This function is not available in the LW frequency response.
Antenna
FM and SW
The pivoting telescopic antenna on the receiver is suitable for the FM and SW band.
- Pull out the aerial to its full extension and direct it so that you obtain the best possible reception.
MW and LW
The telescopic antenna has no effect in the MW and LW band. In this frequency range, the device receives the stations via a built-in ferrite antenna.
Turn the receiver for best possible reception.
Bass Setting
- When the radio is ON, press BASS to activate the bass. "BAS ON" will be shown for 3 seconds, then it will disappear automatically and the frequency will be shown again.
Press the BASS key again to disable the function.
Memory functions
Pre-setting stations


The world receiver has a memory for each frequency band. 150 memories for SW, 90 memories for FM, 60 memories for MW, 30 memories for LW.
Tune the receiver to the station which is to be preset (see above).
Press MEM. MEM starts to flash in the display.
- Select the desired preset place with the preset keys A, B, C. Press the selected key once for the preset memories A, B, C or twice in short succession for the preset memories A1.
Press MEM again to preset the station in the memory. The selected preset memory place is shown in the display with the suffix MEM.
The settings are lost when the receiver is disconnected from the mains.
Selecting a station from the memory
To select a station directly from the memory, switch to the corresponding frequency band and press the memory keys A, B or C once for the preset memory A to C or twice for the preset memory.
Scanning the memory places

Press the key VIEW to run through the preset stations in the selected frequency band. All preset stations will be heard successively for about 5 seconds each.
Press VIEW again to stop the scanning.
Disposal

Packing
Your PLL Receiver Radio is packaged to protect it from transport damage. Packages are raw materials and thus can be when returned to the raw materials

Device
At the end of its life cycle, never dispose off your PLL Receiver Radio in the normal household garbage. Ask your shire council for options on disposing of the appliance properly and in an environmentally friendly way.

Batteries
Do not dispose off used batteries with normal household waste. Batteries should be disposed off at special collection points as they contain harmful substances.
Technical Specifications
Receiver unit
Radio frequencies
FM : 87.0 -109 MHz
SW: 5.85-17.9MHz
MW for Europe: 522 - 1656 KHz
MW for USA 520 - 1710 KHz
LW: 144-299KHz
Earphone / headphones connector:
3.5 mm jack plug
Mains operation
AC adapter, model:
Mains input voltage:
Output voltage:
A400-75
AC 230V 50Hz
DC 7.5 V = 400 mA

Battery operation
Required batteries: 4 × 1.5 ~V alkaline batteries, size AA LR6.
(not included in the delivery)
Subject to technical modifications!