MODE D'EMPLOI MD 82157 MEDION
Resumen:
1) Antena telescópica
2) SNOOZE/SLEEP TIMER: Repeticion de la alarma
3) RADIO ON/OFF: Apagar la radio
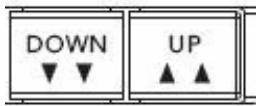
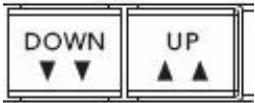
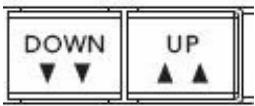
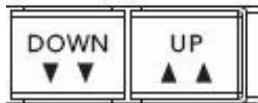
4) UP/DOWN: Búsquerda automática de emisoras
5) FINE: Sintonización exacta de emisoras
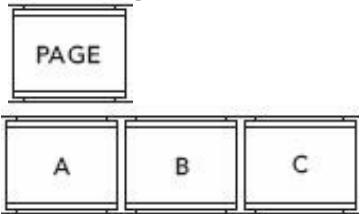
6) PAGE: Posicion de memoria
7) VIEW: Mostrar las emisoras memorizadas
8) MEM: Confirmar la selección
9) Altavoz
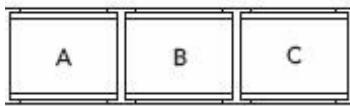
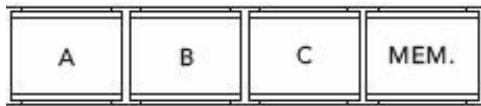
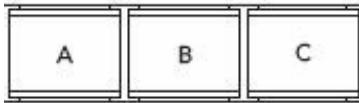
10) A, B, C Posiciones de memoria
11) BASS Función bajo
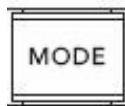
12) MODE: SeLECTIONARajustes
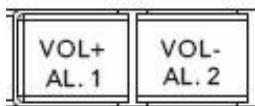
13) VOLUME Ajuste del volumen
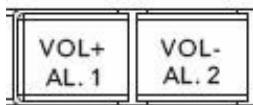
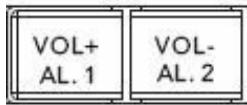
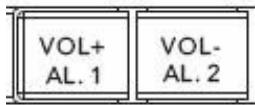
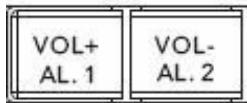
ALARM1 / 2 Ajustar la hora de la alarma
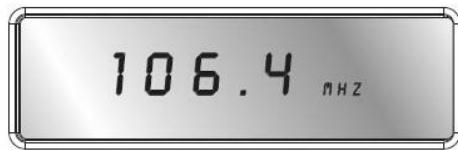
14) Pantella
15) Calidad de recepción de la alarma
16) Conexión para los auricULARs
17) Conection para el adaptor de red
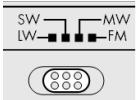
18) Selección de la banda de Frequencia
Advertencias de seguridad Acerca de las presentes instrucciones...... 8
No permita que los niños toquen aparatos electricos 8
Condieones del entorno. 9
Mantenga la toma de corriente accesible 9
Nunca efectue Ustedismo la reparacion del aparato 9
En caso de problemas de funciona.. 9
Tormenta 10
Utilizar las pilas 10
Limpiar el aparato 10
Que es un sintonizador PLL? 11
Puesta en funciona 11
Desembalar el aparato 11
Compruebe el volumen de suministro 11
Conexión a la red 12
Alimentacion através del red y con pilas 12
Colocacion de las pilas 12
Utilizacion de las pilas 13
Conexión de los auriculares 13
Funciones generales 14
Bloqueo de las teclas 14
Illuminación de la pantalla 14
Pie de positionalmente 14
Funciones de feca y hora 15
Hora, fecha, franja horaria y tiempo universal 15
Ajustar la hora 16
Ajuste de la Fecha 16
Ajuste de la zona horaria 17
Horario de verano 19
Indicación de la hora local 19
Alarma de fecha especial 19
Selección del modo de presentación 20
FunciOn descentador 21
Ajustar la hora de la alarma 21
Activar la hora del descentador 21
Interrumpir el descentador 22
Ajustar la repetition de la alarma 22
Desactivar la funciona descentador 22
Funciocronometro 23
FunciOn de conta atras 24
Ajustar y memorizar la cuentatones 24
Acceder a la funciona deIELDa atras y activarla 24
Radio 26
Conexión/Volumen 26
Desconexión/Función temporizador 26
Funcion temporizador 26
Sintonizacion de las emisoras 27
Ajuste de la banda MW 27
Sintonizacion exacta de emisoras 28
Antenna 28
FM y SW 28
MW y LW. 28
Funcion Bajos 29
Funciones de memorizacion 29
Memoración de emisoras 29
Seleccionar una emisora memorizada 30
Realizar la boesqueada automatica de emisoras 30
Acceder a los espacios de memoria 30
Eliminación 31
Embalaje 31
Aparato 31
Pilas. 31
Especificaiones技术icas 31
Aparato 31
Alimentacion por red. 31
Alimentacion con pilas 32
Advertencias de seguridad Acerca de las presentes instrucciones

Antes de la puesta en marcha del aparato, lea atentamente las presentes advertencies de seguridad. Preste atencion a las advertencies detalladas en las instrucciones de funcionaimiento. Mantenga siempre a su alcance las instrucciones de funcionaimiento. Si vende o cede el aparato a另一边 persona,
entreguele sin falta también las presentesindicaciones.
No permita que los niños toquen aparatos electricos
No deje los aparatos electricos al alcance de niñosPEGueños sin vigilancia. Las pilas y las baterias peuvent representar un peligro de muerte si se tragan. Mantenga porarlo el aparato y las pilas fuera del alcance de los niñosPEGueños. En caso de ingestiOn accidental de una pila hay que avisar inmediamente a un medico.Mantenga también aleados de los niñoslos embalajes.Existe el peligro de asfixia.Los niños deben ser vigilados para asegurar que no juegeun con al aparato. Este aparato no está destinado para personas (icluidos niños) con limitaciones en sus capacities fscias, sensoriales o mentales o sin experiencia o con poco conoci,iento sobre suutilizacion,excepto si son controladas por una persona responsable de suseguidao o si reciben instrucciones sobre al uso del aparato.
Condiciones del entorno
Preste atencion a
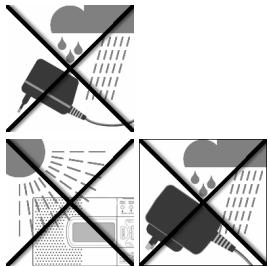
que durante el funciona del aparato la fuente de alimentacion nunca entre en contacto con agua, gotas de agua o salpicaduras. que no secoloquen recipientes llenos de agua (p.ej., jarrones) sobre la fuente de alimentacion que el aparato no está expuesto a la luz solar directa durante un prolongado intervalo de tiempo.
No colocar fuentes de fuego (p. ej., velas encendidas) encima o cerca del equipo que quede garantizada una suficiente ventilacion del aparato
Mantenga la toma de corriente accesible
Conecte el adaptor de red solo a una toma de corriente bien accesible (230 V ~ 50 Hz) que se incluye cerca del lugar de emplazimiento. Para que el aparato pueda disconnectarse rápidamente de la corriente, el enchufe debe permanecer accesible.
Nunca efectue Ustedismo la reparacion del aparato
En caso de desperfectos en el adaptorador de red, en la toma de corriente o en el aparato, desenchoefelo inmediamente.
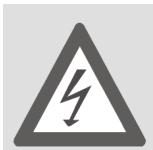
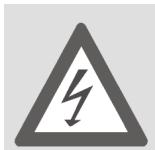
No intente en ningocen caso abrir o arreglar usted mesmo el aparato o el adaptorador de red. iExiste el peligro de recibir una descarga electrica! En caso de mal funciona del aparato, dirjase a nuestro service de reparacion o a otro taller
especializzato.
En caso de problemas de funcionaimiento
Si el aparatoomba problemas de funcionaimiento es posible que se haya producido una descarga electroestárica. En tal caso desconecte el adaptorador de red de la toma de corriente y extraiga las pilas. A continuaccion vuela aponer las pilas y vuela a enchufar el aparato a la toma de corriente. De ese modo se reinicializa el aparato.
Tormenta
En caso de ausencia prolongada o de tormenta, desconecte el adaptor de alimentacion de la red electrica.
Utilizar las pilas
'No recargue nunca las pilas! 'Peligro de explosión!
Mantenga las pilas alejadas de los niños, no las tire al fuego, ni las ponga en cortocircuito o las abra.
Al colocarlas, preste atencion a la polaridad correcta.
Antes de colocarlas, limpie los contactos de las pilas y del aparato, en caso de que seanecessary.
jRetire inmediamente las pilas descargadas del aparato! jAlto peligro de derrame!
Sustituya tiempo todas las pilas al mismo tiempo.
Coloque solamente pilas del mesmo tipo; no utilisetipsodiferentes o pilas新品as y usadas juntas.
jNo exponga las pilas a conditiones extremas, p. ej., no las ponga sobre radiadores! jAlto peligro de derrame!
En caso de no observancia, las pilas peuvent descargarse més allá de su tensión final y detramarse. Retire inmediamente las pilas para estar daños.
Evite el contacto con la piel, los ojos y las mucosas. En caso de contacto con el acido de las pilas, enjuague inmediamente las zonas afectadas con abundante agua limpia yakra a un medico.
En caso de que no se usa el aparato durante un tiempo prolongado, retire las pilas.
Asegōrese de desconectar el aparato antes de su uso.
Limpiar el aparato
Antes de limpiar el equipo, desconectelo de la red. Para limpiarlo, emplee un paño seco y suave. Eviteemploi detergentes qu'micos y productos de limpieza,=peso que podrieran dañar las superficies y las inscripiones del aparato.
¿Qué es un sintonizador PLL?
Un sintonizador PLL (Phase locked loop) se sirve de latips de un guarzo para Obtener una fecuencia de recepcion estable. El sintonizador PLL facilita la seleccion y memorizacion exacta de una fecuencia de emision, o sea, create de es meo una calidad constante durante la recepcion de emisiones de radio.
Puesta en funciona
Desembalar el aparato
Retire todos los materiales de embalaje.

Atencion!
Np permitted that los niños peque jue juguen con el plástico.
jExiste privilego de asfixia!
Preste atencion a
- que durante el funciona el aparato el adaptorador de red nunca entre en contacto con agua, gotas de agua o salpicaduras;
- que el aparato no está expuesto a la luz solar directa y fuerte durante un prolongado intervalo de tiempo.
Compruebe el volumen de suministro
Cuando descambale la caja, asegúrese de que está incluidos los siguientes articículos:
Receptor universal
- Bolsa
Adaptador de red
- Auriculares
- Instruetiones de functiәnmentoy documents de garantía
Conexión a la red
- Conecte la clavija del adaptor de red al enchufe DC-7.5V en el lateral del aparato.
- Conecte el adaptor de red con una toma de corriente cercana. Para evaporar que algoien tropiece con ellos, no utilise cables de prolongacion.
No utilise ningún或其他 adaptador que no sea el suministrado, modelos A400-75, bajo que de lo contrario podr'an dañarse el aparato o el adaptador.
Cuando conecte el aparato, el reloj indicar o:00 00.
Alimentación a工程技术 de la red y con pilas
Si desenchufa el aparato de la toma de corriente, perdaré los ajustes que haya realizado (hora, alarma, emisoras de radio). Si deseñamantener dichos ajustes, inserte primero las pilas (ver más abajo) antes de desenchufar el aparato de la toma de corriente.
Colocacion de las pilas
El aparato también funciona con pilas (no incluidas en el volumen de suministro).
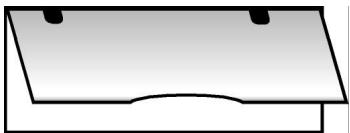
Se necesitan cuatro pilas Mignon de 1.5 V,ullan AA, LR6. Abra el compartmento para pilas en la parte posterior del aparato empujando la tapa hacía abajo.
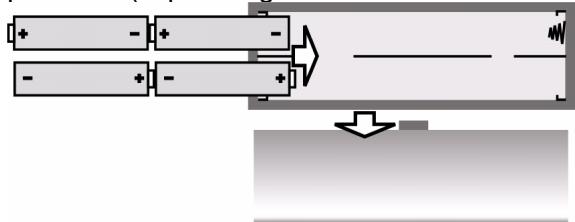
- Inserte las quatre pilas en el compartmento teniendo enIELDuna su polaridad (el polo negativo deben estar encontacto con el muelle)
Vuelva a colocar en su situ lo tapa de las pilas.
- Cuando las pilas se hayan gastado, parpadeará el símbolo correspondienteen la pantalla del aparato.
Utilización de las pilas
Si vuelve a conectar el aparato a la red electrica, extraiga las pilas.
- Cuando cambie las pilas, cámbielas todas: no mezcle pilas cuales y viejas.
Conexión de los auriculares
En la parte lateral izquierda del aparato se encuesta la toma para auriculars.
- ConecteAquí los auriculares incluidos en el volumen de suministro u otros auriculares con una clavija de 3.5mm
Los altavoces se desconectarán automatistically.

Atencion:
El excesso de presin en el caso de uso de casos da auduciom y de audifonos puede provocar daños en el sistemas audititico y/o la perdida de la capacité da audicina. Antes de la reproduccion, ajuste al nivel de volumen de sonido en su valor mós bajo nicie la reproduccion y aumento la media del volumen hastaURTAR a un nivel que le resulte comaado.

Antes de conectar uno aericulas, ponga el volumen al m'nimo.
Si utilizes un aparato mucho tiempo con un nivel alto de volumen de sonido con los cascos de audición, pueda sufrir daños en el sistema auditivo.
Funciones generales
Bloqueo de las teclas
▶ Pulse la tecla MEM y manténgala pulsada durante aprox. 3segundos,para evitar que se modifiquean accidentalmente los ajustes al pulsar sin querer una de las teclas del aparato. En pantalla aparece la indicacion KEYLOCK.
Vuelva a pulsar la tecla MEM y manténgala pulsada durante aprox. 3segundos, para desactivar el bloqueo de las teclas. La indicación KEYLOCK desaparecerá de la pantalla.

Illuminación de la pantalla
▶ Pulse cadaquier tecla para iluminar la pantalla. La pantalla permanece iluminada durante aprox. 10segundos.

Si el bloqueo de las teclas está activado, la pantalla sólo se illumina al pulsar la tecla SNOOZE.
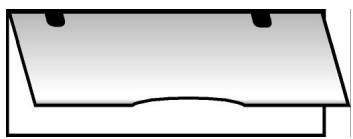
Pie de posicionamento
Despliegue el pie de posicionamento que se Halla en la parte trasera del aparato para colocarlo en una posicion más estarble.
Funciones de Fecha y hora
Las functions de Fecha y horaSEOSEOSEOSEOSEOSEOSEOSEOSEOSEOSEOSEOSEOSEOSEOSEOSEOSEOSEOSEOSEOSEOSEOSEOSEOSEOSEOSEOSEOSEOSEOSEOSEOSEOSEOSEOSEOSEOSEOSEOSEOSEOSEOSEOSEOSEOSEOSEOSEOSEOSEOSEOSEOSEOSEOSEOSEOSEOSEOSEOSEOSEOSEOSEOSEOSEOSEOSEOSEOSEOSEOSEOSEOSEOSEOSEOSEOSEOSEOSEOSEOSEOSEOSEOSEOSEOSEOSEOSEOSEOSEOSEOSEOSEOSEOSEOSEOSEOSEOSEO SEO SEO SEO SEO SEO SEO SEO SEO SEO SEO SEO SEO SEO SEO SEO SEO SEO SEO SEO SEO SEO SEO SEO SEO SEO SEO SEO SEO SEO SEO SEO SEO SEO SEO SEO SEO SEO SEO SEO SEO SEO SEO SEO SEO SEO SEO SEO SEO SEO SEO SEO SEO SEO SEO SEO SEO SEO SEO SEO SEO SEO SEO SEO SEO SEO SEO SEO SEO SEO SEO SEO SEO SEO SEO SEO SEO SEO SEO SEO SEO SEO SEO SEO SEO SEO SEO SEO SEO SEO SEO SEO SEO SEO SEO SEO SEO SEO SEO SEO SEO

Al desenchufar el aparato de la toma de corriente, se perduran los ajustes efectuados.
Hora, Fecha, franja horaria y tiempo universal
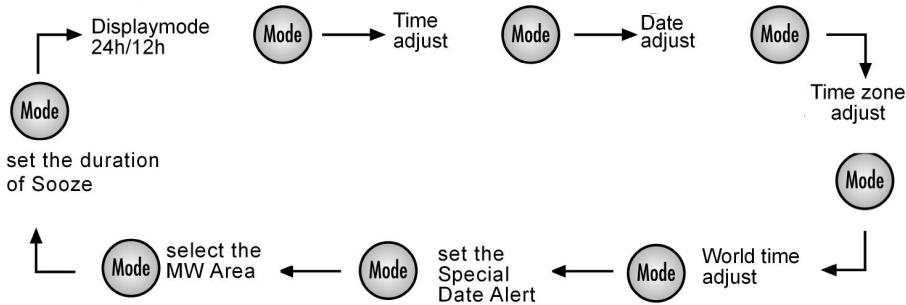
Con sólo pulsar la tecla MODE pourrait ajustar la hora, la Fecha, la franja horaria y consultar la hora local. Cuando pulse MODE, la funciona a ajustar parpadeará durante aprox. 15segundos. Realice el correspondiente ajuste durante ese intervalo de tiempo con la tecla UP ▲ ▲ /DOWN▼▼.
Con sólo pulsar la tecla MODE pourrait ajustar la hora, la Fecha, la franja horaria y.consultar la hora local.
- Si pulsa MODE 1 x: Hora
- Si pulsa MODE 2 x: Fecha
- Si pulsa MODE 3 x: Franja horaria ("Local City")
- Si pulsa MODE 4 x: Hora local
- Si pulsa MODE 5 x: Alarma de fecha especial
- Si pulsa MODE 6 x: Ajustar la zona de recepción para onda media.
- Si pulsa MODE 7 x: Ajustar la repeticin de la alarma
- Si pulsa MODE 8 x Bombie entre los indicativos de 12 horas y de 24 horas.
Para almacenar el ajuste realizado, slo tiene que esperar hasta que la indicación deje de parpadear (la pantalla regresará al indicator de hora) o pulse MODE para acceder a lasuma的功能.

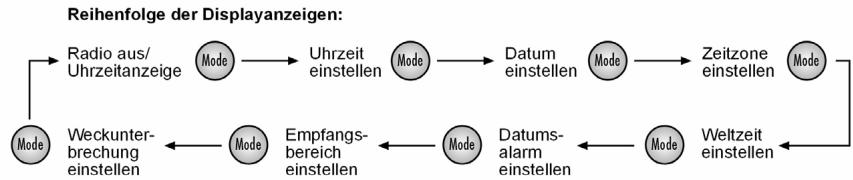
Sequência das indentações de visor:
Ajustar la hora
▶ Pulse MODE una vez. En la pantalla parpadeará la hora ajustada (con lapellasta en funciona bajo 0:00 00).
▶ Pulse UP ▲▲ DOWN▼▼, para hacer avanzar o retroceder la hora en pasos de horas. Mantenga pulsada una de las dos teclas durante unosegundos, para hacer avanzar o retroceder el tiempo a mayor velocidad, en intervalos de diez horas.

Ajuste la hora sin considerar el horario de verano. El horario de verano puede configurarse durante el ajuste de las zonas horarias (ver más abajo).
Ajuste de la Fecha
▶ Pulse otra vez o dos veces la tecla MODE. En la pantalla parpadeará la Fecha ajustada (con la puesta en funciona bajo "1.01.08").
▶ Pulse UP ▲ ▲ DOWN ▼▼, para avanzar o retroceder en lacke. Mantenga pulsada una de las teclas durante unoicosometimes para hacer avanzar o retroceder lacke en intervals de diez d'as.
Indicación da los días e lamania:
Su = domingo
Mo = lunes
Tu = martes
We = miécoles
Th=jueves
F_r = viernes
Sa = sabado
Laindraciónde losd'as de la semana aparece automatistically.Los d'as de la semana se indican con las dos primeras letras de sus nombres en inglés.

El calendario incluido va del 2000 hasta el 2099.
Ajuste de la zona horaria
▶ Pulse或其他 vez o tres veces la tecla MODE. En la pantalla parpadea la zona horaria ajustadaindicando la abreviatura de la ciudad correspondiente a esta zona (en la primera puesta en función del aparato aparece UTC); la indicacion horaria desaparece.
▶ Pulse UP ▲▲DOWN▼▼, para avanzar o retroceder hacer la zona horaria asigniente o anterior.
Lasuma tabla muesra las abreviaturas de las ciencias para cada zona horaria y la diferencia respecto a la hora CET (Central European Time).
| Abbrev. | Diff. to GMT | City | Abbrev. | Diff. to GMT | City |
| LON | 0:00 | London | CET | 0:00 | Central European Time |
| MUN | + 1:00 | Munich | BUE | - 3:00 | Buenos Aires /Argentina |
| CAI | + 2:00 | Cairo | CCS | - 4:00 | Karacas |
| MOW | + 3:00 | Moscow | YUL | - 5:00 | Montreal /Canada |
| DXB | + 4:00 | Dubai | NYC | - 5:00 | New York /USA |
| KHI | + 5:00 | Karachi | YYZ | - 5:00 | Toronto /Canada |
| DAC | + 6:00 | Dhakar | MEX | - 6:00 | Mexico |
| BKK | + 7:00 | Bangkok | CHI | - 6:00 | Chicago /USA |
| HKG | + 8:00 | Hong Kong | DEN | - 7:00 | Denver/USA |
| TYO | + 9:00 | Tokyo | YVR | - 8:00 | Vancouver/ Canada |
| SYD | + 10:00 | Sydney | LAX | - 8:00 | Los Angeles /USA |
| NOU | + 11:00 | Numea | ANC | - 9:00 | Anchorage/ USA |
| AKL | +12:00 | Auckland | HNL | - 12:00 | Honolulu /USA |
Horario de verano
SNOOZE|Sleep Timer Stop Watch|Count Down Timer Start/Stop
▶ Pulse la tecla SNOOZE cuando parpadea acen la indicacion para la franca hora. En pantalla aparecerá el s'mbolo correspondiente al horario de verano.
Indicación de la hora local
Vuelva a pulsar o pulse cuales vaces MODE, para que aparezca la hora local. Parpadeará la abreviatura de la ciudad con la indicación horaria correspondiente.
▶ Pulse UP▲▲DOWN▼▼, para avanzar o retroceder hacer la zona horaria asignUE O anterior.
Alarma de Fecha especial
▶ Pulse la tecla MODE por quinta vez paraaabstarlaalarma de fecha especial. En pantalla parpadea la indicacion de la fecha SDA.
▶ Pulse UP ▲▲ DOWN▼▼, para ajustar la Fecha en la que desea que suene la alarma.
▶ Pulse la tecla SNOOZE para ignorar la introduccion del año; de este modo laalarma suena cada ano.
Apague la alarma pulsandorialquier tecla.
Selección del modo depresentation
Puede selectionar la informacion que quiera ver en pantalla cuando la radio este apagada.
En pantalla aparece el símbolo que indica el modo correspondiente:
CLOCK= hora
DATE= fecha
LOCAL=hora local de meridiano

Selección el modo indicator pulsando repetidas vezes la tecla FINE de acuerdo con el siguientes cuadro:
| Símbolo en pantalla | modo indicator |
| CLOCK | sólo se indica la hora |
| CLOCK + DATE | se indican la hora y la Fecha |
| CLOCK + LOCAL | se indican la hora y la hora local del meridiano |
| CLOCK + DATE + LOCAL | se indican la hora, laecha y la hora local del meridiano |
Función descentador
La Radio Multibanda pone a su disposicion dos alarmas totalmente independentes: ALARM 1 y ALARM 2. En ambas可以选择 ustad ajustar los siguientes parámetros:
si el aparatoDebe despertarle cada d'a de la/semana o cenicamente de lunes a viernes;
si debe despertarle con el tono de alarma o con la radio.
Ajustar la hora de la alarma
▶ Pulse ALARM 1 (ALARM 2). En la pantalla parpadeará durante uno diez segundos la hora ajustada del descentador (cuando el aparato se pone en configuracionopleparece0:00AL1(AL2) y la indicacion de los d'as de la coma nana (abreviaturas de los d'as en ingles; ver mas arriba).
- Mientras la indicación parpadea, pulse UP▲▲ DOWN▼▼, para hacer avanzar o retroceder la hora del descentador en intervalos de Minutes. Mantenga pulsada una de las teclas durante unoicos节能环保, para hacer avanzar o retroceder la hora en unidades de diezcretivos.
SNOOZE|Sleep Timer Stop Watch|Count Down Timer Start/Stop
▶ Pulse la tecla SNOOZE/SLEEP TIMER para selectionar uno de los differentes programas del descentador: que el descentador suene todos los d'as (Su Mo Tu We Th Fr SA), s—lo de lunes a viernes (Mo Tu We Th Fr), s—lo en fin de/semana (SU SA).
Se ajusta la functi—n de alarma para un solo d'a, pulsando la tecla SNOOZE ymantenerla pulsada durante 1 - 2 segundos. En la pantalla aparecerá el d'a de la linea seleccionado (en el momento de lapellaa en funciona "MO").
- Ahora pulse varias vezes la tecla SNOOZE/SLEEP TIMER paraaabustar el d'a de la hora deseado.
Activar la hora del descentador
- Cuando haya ajustado la hora del descentrador, active la alarma pulsando de nuevo ALARM 1 (ALARM 2). En pantalla aparece RAD o RAD para indicar que sera descentrado por una sinton'a de radio.
Por favor,onga en cuenta queiene que haber sintonizado una
emisora (ver más abajo) para poder ser descentrado por la radio.
Vuelva a pulsar ALARM 1 (ALARM 2) una segunda vez, si desea ser descentado con un tono de alarma.
En la Appalacha aparecerá ALM (ALM)
Interrumpir el descentador
SNOOZE|Sleep Timer
Stop Watch|Count Down Timer Start/Stop
▶ Pulse la tecla SNOOZE/LSEEP TIMER, para interruprir durante neuecretivos la direccion descentador.
Ajustar la repeticción de la alarma
Pulse 7 vezes la tecla MODE; en pantalla aparece la repeticón de alarma ajustada (en la puesta en función "SNO 10").
Con las teclas UP▲▲ y DOWN▼▼ puede ajustar la repeticción de alarma entre 1 y 59 horas.
Desactivar la funciona descentador
Alarm Setting
▶ Pulse ALARM 1 o ALARM 2 varias vezes hasta que los@simbolos de alarma RAD o RAD desaparezcan de la pantalla.
Función cronómetro
La funciona cronómetrosolemente está disponible cuando la_radio está apagada.
SNOOZE|Sleep Timer
Stop Watch|Count Down Timer Start/Stop
PAGE
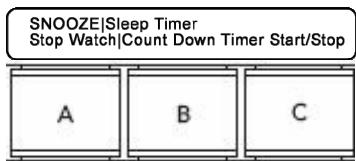
Pulse y mantenga pulsada la tecla PAGE durante aprox. 2 seg.; en la pantalla aparecerá 0.00.0 u.
Pulse la tecla SNOOZE/LSEEP TIMER para iniciar el cronómetro. La duración máximo cronometrable son 39 horas y 59segundos. Si el cronómetro sobrepasa el tiempo máximo, en la pantalla aparece y parpadea;nuevamente la indicación 39.59.0 u.
Durante el cronometraje se pueda interruptir el本身就是 pulsando la tecla SNOOZE/SLEEP TIMER.
SNOOZE|Sleep Timer
Stop Watch|Count Down Timer Start/Stop
PAGE
Al volver a pulsar la tecla SNOOZE/SLEEP TIMER el cronometraje sigue. Mantenga pulsada la tecla SNOOZE/SLEEP TIMER para restablecer el cronómetro.
Al pulsar la tecla PAGE se abandona el cronómetro.
Función deIELDa特斯拉
La funciona deIELDa atras solamente está disponible cuando la radio está apagada.
Ajustar y memorizar la cuentatones
▶ Pulse la tecla VIEW y manténgala pulsada durante aprox. 2 seg.; en la pantalla aparecerá la indicación d00.00.
La cuenta atrás puede contar desde 99minutos y59segundos.
Pulse la tecla UP y DOWN para ajustar la hora deseada.

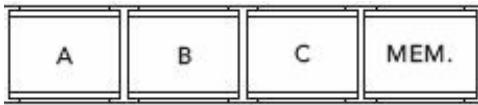
▶ Pulse la tecla MEM, para poder memorizar la hora ajustada; en la pantalla aparecerá la indicación de memoria MEM. Seleectione con la tecla A,B,C una posicón de memoria; al pulsar la tecla de memoria correspondiente se memoriza la hora en esta posicón de memoria.
▶ Pulse la tecla SNOOZE/SLEEP TIMER para,iniciar la cuenta除外
Al volver a pulsar la tecla VIEW se abandona el modo de cuenta atrás.
▶ Pulse la tecla VIEW y manténgala pulsada durante aprox. 2 seg.; en la pantalla aparecerá la indicación d00.00..
- Selección la cuenta atrás memorizada deseada mediante las teclas de memoria A, B, C.
▶ Pulse la tecla SNOOZE/SLEEP TIMER para,iniciar la cuenta atras. Al volver a pulsar la tecla SNOOZE/SLEEP TIMER la cuenta atras se interrupme.
Cuando la cuenta atrás ajustada llega a cero, sonará una señal de alarmadurante un minuto.

▶ Pulse la tecla VIEW para interruptir la cuenta atrás o abandonar el modo deckeatatras.
Radio
Conexión/Volumen

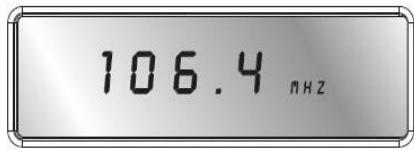
▶ Pulse la tecla (↓), para encender la radio. En pantalla aparecerá brevementeactualmente y su banda de Frequencia.
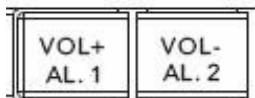
Ajuste el volumen pulsando las teclas VOLUME:
- TECLA VOL - : bajo el volumen;
- TECLA VOL + : subir el volumen.
Desconexión/Función temporizador
Para apagar la radio pulse la tecla En pantalla aparece de nuevo la indicacion de la hora.
Función temporizador
Mediate la tecla SNOOZE/SLEEP TIMER también puede hacer la funciona temporizador. Puedeaabstar el temporizador en unidades de diez horas y hasta un total de 90 instantos, para que, transcurrido el tiempo indicado, la radio se apague automatistically.
SNOOZE|Sleep Timer Stop Watch|Count Down Timer Start/Stop
Vuelva a pulsar SNOOZE/SLEEP TIMER. Aparecerá el s'mbolo de la funciona temporizador y 90 (para indicar 90关键时刻).
Vuelva a pulsar de nuevo SNOOZE/SLEEP TIMER, para reducir el intervalo del temporizador en unidades de diez horas.
- Selección lacantidad de horas en el temporizador (el símbolo del temporizador —— signe enpellata) o siga pulsado SNOOZE/SLEEP TIMER, hasta que aparezca OFF enpellata. La radio se habrá apagado.
Sintonización de las emisoras

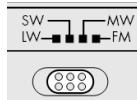
- Mediente el correspondiente selectionador de banda selección la banda de Frequencia deseada (FM, AM, LW o SW). En pantalla aparecerá la abreviatura correspondiente.

Ajuste mediante las teclas UP ▲ ▲ o DOWN ▼ ▼ la Frequencia de recepción deseada.
Si mantiene pulsada la tecla UP o DOWN durante aproximamente tres segundos, se inicia la boesqueda automsharp.
La búsqueada se detendra tan antes como encontrar una emisora con suficiente potencia de emisión.
Ajuste de la banda MW
Puesto que los sistemas de emisión de radio son distinctos segcen el pa's, deben a efectuar un ajuste mediante la seleccion de la zona de recepcion. Pulse seis vezes la tecla MODE y seleccione la zona de recepcion correspondiente mediante las teclas UP o DOWN ,ngen la tabla.),
| Tipo de modulación | Intervalos de Frequencias | Zona de banda |
| FM | 100 kHz | 87.0 -109.0 kHz |
| SW | 5 kHz | 5.85 -17.9 MHz |
| LW | 1 KHz | 144 - 299 kHz |
Intervalos de la banda MW:
| Region | Intervalos de Frequencias | Zona de banda |
| América | 10 kHz | 520 -1710 kHz |
| Europa | 9 kHz | 522 -1656 kHz |
Sintonización exacta de emisoras
Si no se pueda encontrar de forma exacta una emisora se pueda melhorar la recepción mediante una sintonización exacta.

En el camino de la FM, el sintonizador de la banda se mueve en tramos de 50 kHz. En SW y en MW, los tramos son de 1 kHz.

- Durante la búsqueada de emisoras pulse la tecla FINE; en la pantalla aparecerá la indicación FINE.
- Ahora ajuste mediante las teclas UP ▲ ▲ o DOWN ↓ ↓ la Frequencia de recepción deseada con intervalos medios de Frequencia.
Al pulsar-Newamente la tecla Fine se vuye a abandonar la sintonizacion exacta de emisoras.
Esta función no está disponible en la gama de Frequencia de onda larga.
Antena
FM y SW
La antenna telescópica orientable del aparato es efectiva para las bandas de Frequencia FM y SW.
Extienda la antenna en su totalidad y orientela hasta Obtener la mejor recepción.
MW y LW
La antenna telescópica no tiene ningún efecto para la Reception de las bandas de Frequencia MW y LW. En dichas bandas de Frequencia la radio recibe la emisión mediante la antenna de ferrita que hay en su interior.
Mueva todo el aparato hasta Obtener la mejor recepcion.
Función Bajos
El aparato dispone de una función "Bass Booster" para reforzar los bajos. Pulse durante el funcionaimiento del aparato la tecla BASS. Aparecerá en pantalla el mensaje"ON BAS".
Para poder fin a la funciona, pulse de nuevo la tecla BASS y aparecerá enpella el mensaje "OFF BAS".
Funciones de memorización
Memoración de emisoras


La Radio Multibanda puede memorizar 90 emisoras en cada una de las bandas de fecuencia FM; 150 emisoras en la banda de fecuencia SW; y 30 emisoras en la fecuencia LW y 60 emisoras en la fecuencia MW.
Para las bandas de Frequencia FM, SW y AM los espacios de memoria han sido organizados en páginas ("Pages") con 10 espacios de memoria cada una. Para memoriar una emisora, proceda de lasuma forma:
Ajuste la emisora que desea memorizar (ver más arriba).
▶ Pulse la tecla MEM. En pantalla aparecerá la página [PAGE] y el espacio de memoria [MEM].
Mediente la tecla PAGE, selección la párgina deseada (no es possible en la banda de Frequencia OL) y con las teclas A 0,-C 9, selección un espacio de memoria. En pantalla aparecerán ambasindicaciones:la párgina y el espacio de memoria.
Vuelva a pulsar MEM para memorizar la emisora.
Selecciónar una emisora memorizada

- Para seleccionar directamente una emisora memorizada, pulse la tecla PAGE repetidas vezes hasta que en pantalla aparezca la頁a眼看 a continuacion pulse las teclas A, B, C para seleccionar el espacio de memoria.
Realizar la búsqueada automática de emisoras
Su radio multibanda puede explorar las Frequencias de una banda y guardar las emisoras relacionadas en la memoria. Para activar esta boesqueada automatica de emisoras (Automatic Memory Scan / AMS), proceda como sigue:
▶ Pulse la tecla MEM una vez.
▶ Pulse la tecla VIEW y mantZngala pulsada durante aprox.1 segundo. La radio multibanda explora todas las Frequencias y memoriza las emisoras(PC)idades.
Acceder a los espacios de memoria

▶ Pulse la tecla VIEW, para acceder a todas las emisoras memorizadas de la banda de Frequencia seleccionada. Escuchará sucesivamente cada una de las emisoras memorizadas durante aproximamente cinco segundos.
▶ Pulserialquier teclaparainterrumpir la buesque de emisoras.
Eliminación

Embalaje
Su receptor universal está embalado para protegerlo contra eventuales días durante el transporte. Los embalajes son materiaias primas y porarlo son reutilizables o aptos para ser devueltos al ciclo de reciclaje de materiaias primas.

Aparato
No tire bajo ningún concepto el receptor universal al final de su vida oétil a la basura domŽstica normal. Consulte en su ayuntimiento o autoridad local la posibiliad de una eliminación apropriada y respetuosa con el medio ambiente.

Pilas
No tire las pilas usadas a la basura domestica. Las pilas deben ser depositadas en un punto de recogida para pilas usadas.
Especificaciones技术水平
Aparato
Frecuencia de radio
FM (frecuencia modulada): 87.0 - 109.0 MHz
SW (onda corta): 5.85 -17.9 MHz
MW (onda media): 522 - 1656 kHz
En USA 520 - 1710 kHz
LW (onda larga): 144 -299 kHz
Toma de auriculas:
3.5 mm clavija jack
Alimentación por red
Adaptador de red;modelo: A 400-75
Tensón de entrada/red: 230 V ~ 50 Hz
Tensión de salute: 7.5 V --- 400 mA

Alimentación con pilas
Pilas necessities:
4 x 1.5 V pilas Mignon, tímaño AA, LR6.
(no incluidas en el volumen de suministro)
Las specifications sociales estan susjetas a cambios sin previo aviso!

Overview
1) Telescopic Antenna
2) SNOOZE/Sleep Timer Wake up interrupt
3) RADIO ON/OFF Switch the Radio on / off
4) UP/DOWN: Frequency tuning
5) FINE: Fine tuning
6) PAGE: Memory
7) VIEW: Show stored stations
8) MEM Confirm selection
9) Loudspeaker
10) A,B,C: Memory pages
11) BASS Activate/deactivate the Bass Booster
12) MODE:: Choose a setting
13) VOLUME: Change Volume
Alarm 1/2 Set Timer
14) Display
15) ATT Control Reception sensitivity of SW Band
16) Connector for the Earphone
17) Connector for the AC Adapter
18) Band selector
Table of content
Overview 5
Table of content 6
Safety Instructions About this manual 8
Electrical devices require special caution 8
Setting the product up safely 9
Keep the mains connections accessible 9
Do not carry out any repairs 9
In Case of Malfunctions 9
Thunderstorms 9
Using Batteries carefully 10
Cleaning the unit 10
What is a PLL Tuner? 10
Start-Up 10
Unpacking the unit 10
Check the contents of the box 11
AC Adapter 11
Mains and battery operation 11
Inserting the batteries 12
How to handle the batteries. 12
Connecting the earphones 13
General functions 13
Key lock 13
Display backlight 14
Base 14
Timefunctions 15
Time, date, time zone and world time. 15
Setting the time 16
Setting the date 16
Summer time adjustment. 17
Displaying the world time 17
Set the Special Date Alert "SDA" 17
Setting the time zone 17
Display Mode 19
Alarm function 20
Setting the alarm time 20
Activating the waking time 20
Wake up interrupt 21
To switch-off the waking function 21
Timer setting 21
The Countdown Timer setting 22
Set the countdown and store 22
Activate the down count timer 23
Radio mode 24
Switching on/volume control 24
Switching off 24
Snoopze function 24
Tuning a station 24
Tuning the MW Band 25
Fine Tuning 26
Antenna 26
FM and SW. 26
MW and LW. 26
Bass Setting 26
Memory functions 27
Pre-setting stations 27
Selecting a station from the memory 28
Scanning the memory places 28
Disposal 29
Packing 29
Device 29
Batteries 29
Technical Specifications 29
Receiver unit 29
Mains operation 29
Battery operation 30
Safety Instructions About this manual

Please observe the following safety instructions carefully before putting the unit into operation. Take note of the warnings on the unit and in this manual. Always keep the instruction manual near at hand. If you sell or pass on the product, make sure to include this manual together with the unit.
Electrical devices require special caution
The appliance is not intended for use by young children or infirm persons without supervision.
Swallowing batteries may be fatal. If a battery has been swallowed, consult a doctor immediately.
Also, keep the plastic packaging out of reach for children to avoid danger of suffocation.
Children should be supervised in order to ensure that they do not play with the device. This device is not intended to be used by individuals with limited physical, sensory or intellectual abilities or limited experience, and/or a lack of knowledge (including children), unless they are being supervised by an individual responsible for their safety or receive instructions from them concerning how the device must be used.
Setting the product up safely
Always make sure that
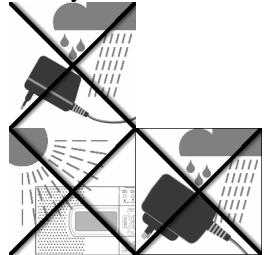
- the AC adapter never comes into contact with water while operating, not even with dripping or splashing water;
the unit is not exposed to strong sunlight for long time;
- no open fire sources, such as candles, are placed on or in the immediate vicinity of the unit.
you do not cover the ventilation slots, so that sufficient ventilation will always be guaranteed.
The device is not designed for operation in rooms with high relative air humidity.
Keep the mains connections accessible
Connect the mains plug power unit only to an easily accessible power outlet (230V 50Hz) close to the unit. In case the unit has to be disconnected quickly, the plug has to be within easy reach. In order to avoid tripping, do not use an extension cord.
Do not carry out any repairs
If the AC adapter, the connecting cable or the device is damaged, immediately disconnect the AC adapter from the power outlet and contact the customer service.
In Case of Malfunctions
Under no circumstances attempt to open and/or repair the mains plug adapter yourself. There is danger of electric shock! Refer all servicing to our Service Centre or to another qualified workshop.
Thunderstorms
When absent for a long period of time or during a thunderstorm, pull out the AC adapter.
Using Batteries carefully
Empty batteries do not qualify as household refuse.
The batteries must be disposed of at a designated disposal/recycle point.
Never charge Batteries again. Danger of explosion!
Keep Batteries away from Children, do not throw into fire, don't short circuit ore take them apart!
Pay attention to the right polarity with insertion.
Keep the Battery and Device contacts clear.
Cleaning the unit
Before cleaning, always disconnect the AC adapter.
Use a soft dry cloth for cleaning. Do not apply chemical solvents or cleaning agents, as they may damage the surface and/or labelling of the device.
What is a PLL Tuner?
A PLL tuner (phase locked loop) served to itself, to the production of a stable receipt frequency, the help of a quartz. The PLL tuner allows exact selecting and storing away a transmitter frequency, he creates therefore a staying same quality with the receipt of radio stations.
Start-Up
Unpacking the unit
Remove all packaging material.

ATTENTION!
To avoid danger of suffocation, do not let young children play with plastic packaging!
Always make sure that
- the AC adapter never comes into contact with water, not even dripping or splashing water;
the device is not exposed to direct strong sunlight for a long time.
Check the contents of the box
Make sure during unpacking that the following items are included:
World receiver radio
AC adapter
- Earphones
Pouch
Carrier Bag
AC Adapter
- Connect the plug of the AC adapter unit to the 7.5V DC jack on the side of the receiver.
Connect the mains plug power unit to an easily accessible power outlet.

Do not use any adapter other than the provided AC adapter model A400-75, because other adapters could damage the receiver or the power unit.
When the receiver is connected, the clock starts with 0:00 00.
Mains and battery operation
When you disconnect the receiver from the mains, any settings you have made (time, alarm wake-up time, preset radio stations) are lost. If you want to keep the settings, first insert batteries (see below), and disconnect the receiver from the mains afterwards.
Inserting the batteries
Instead of the mains, you can also operate the receiver on batteries (not included in delivery). You need four 1.5 V batteries, size AA LR6.
- Open the battery compartment on the rear of the receiver by pushing the lid downwards.
Insert the four battery cells into the compartment, observing correct polarity (the minus pole must touch the spring - see the illustration)

Push the lid back onto the battery compartment.
The battery symbol starts flashing when the batteries become too weak.
How to handle the batteries
Take the batteries out of the receiver when you operate it again on the mains.
Always replace all four batteries at the same time; never mix old and new batteries.
Connecting the earphones
The connector for the earphones or headphones is located on the left side of the receiver.
Connect the provided or other ear- or headphones to the 3.5mm jack plug. This automatically switches the loudspeaker off.

Important!
Excessive volume when using earphones and headphones may lead to hearing damage and/or the loss of hearing.
Set the volume to the lowest level before the playback.
Start the playback and increase the volume to the level that is comfortable for you.

It may cause damage to the hearing of the listener if a device is operated through headphones with increased volume for a longer period.
General functions
Key lock
To set the key lock, press the MEM Button for 3 sec, to prevent changes of the settings by unintentional actuation of the keys. The display shows: KEYLOCK.
Press the MEM Button for 3 sec again, to disable the Key lock. The display KEYLOCK vanished.

Display backlight
Press any key, to activate the Display backlight. The display will be lighted up for 10 seconds.

If the Key lock is active, the display lightning can be activated by pressing the SNOOZE Button.
Base
You can fold out the stand on the rear of the receiver to make it stand more securely.
Timefunctions
The time functions can be set regardless of whether the radio is switched off or on. At start-up the receiver starts with the pre-set time "0:00 00".

The settings are lost when the receiver is disconnected from the mains.
Time, date, time zone and world time
You can successively set the time, date and time zone via the MODE key, and interrogate the world time. When the MODE key is pressed, the function which is desired to be set flashes for approx. 15 seconds.
During this time, make the settings using the UP ▲▲/DOWN▼▼ key.
MODE 1 x : Time
MODE 2 x : Date
- MODE 3 x : Time zone (“Local City”)
MODE 4 x : World time
- MODE 5 x : set Special Date Alert (SDA ^a )
MODE 6 x : select MW Area
MODE 7 x : set the duration of Snooze
- MODE 8 x : set the 12/24 display mode.
To confirm a setting, just wait until the display does no longer flash (the display switches back to clock display) or press MODE to go to the next function.
Display settings:
Setting the time
Press MODE once. The currently set time (0:00 00 at start-up) flashes in the display.
Press the Mode Button. In the display flashes the opposed time (by the introduction 0:00 00).
Press UP▲▲ or DOWN▼▼, to change the time display forwards or backwards in steps of one minute. Hold one of the keys down for a few seconds for quick time adjustment forwards or backwards in steps of ten minutes.

Set the clock without summer time adjustment. If a summer time correction is necessary, it can be set together with the time zone setting (see below).
Setting the date
Press MODE again, or twice from the beginning. The currently set date (01:01:08 at start-up) flashes in the display.
Press UP or DOWN to change the date forwards or backwards in one day steps. Hold one of the keys down for a few seconds to change the date forwards or backwards in steps of ten days.
SU = Sunnday
Mo = Monday
Tu = Tuesday
We = Wednesday
Th = Thursday
F_r = Friday
Sa = Saturday
The display for the days of the week will also run automatically. The day of the week is displayed with two letters for the English names of the days of the week.

The built-in calendar extends from 2000 to 2099.
Summer time adjustment
SNOOZE|Sleep Timer Stop Watch|Count Down Timer Start/Stop
While the time zone display is still flashing, press the SNOOZE/SLEEP TIMER key. The Summer time symbol appears in the display.
Displaying the world time
Press the MODE key once again or four times from the beginning, to see the world time (GMT). The flashing city symbol for the corresponding time zone appears.
Press UP or DOWN to set the next or previous time zone.
Set the Special Date Alert "SDA"
Press MODE when the Unit stays in "SDA" mode.
The "SDA" goes flashing.
Press UP ore DOWN to set the special Date.
Press SNOOZE/SLEEP TIMER to ignore the year.
Press MODE once to confirm the current setting and it switches to select the area for MW.
Press other key to start its corresponding function.
- When no key has been pressed for 10 seconds, the current setting is confirmed and it switches to auto-run mode automatically.
Setting the time zone
Press the MODE key again, or three times from the beginning. The current time zone flashes in the display as abbreviation for the corresponding city (UTC for Universal Time Code at start-up); the time display disappears.
Press UP or DOWN to set the next or previous time zone.
The following table gives an overview of the city name abbreviations for the time zones, and the time adjustment.
| Abbrev. | Diff. to GMT | City | Abbrev. | Diff. to GMT | City |
| LON | 0:00 | London | UTC | 0:00 | Universal Time Code |
| MUN | + 1:00 | Munich/Germany | BUE | - 3:00 | Buenos Aires/Argentina |
| CAI | + 2:00 | Cairo/Egypt | CCS | - 4:00 | Caracas |
| MOW | + 3:00 | Moscow | YUL | - 5:00 | Montreal/Canada |
| DXB | + 4:00 | Dubai | NYC | - 5:00 | New York/USA |
| KHI | + 5:00 | Karachi | YYZ | - 5:00 | Toronto/Canada |
| DAC | + 6:00 | Dhakar/Bangladesh | MEX | - 6:00 | Mexico |
| BKK | + 7:00 | Bangkok | CHI | - 6:00 | Chicago/USA |
| HKG | + 8:00 | Hong Kong | DEN | - 7:00 | Denver/USA |
| TYO | + 9:00 | Tokyo | YVR | - 8:00 | Vancouver Canada |
| SYD | + 10:00 | Sydney/Australia | LAX | - 8:00 | Los Angeles/USA |
| NOU | + 11:00 | Numea/New Caledonia | ANC | - 9:00 | Anchorage/USA |
| AKL | +12:00 | Auckland/New Zealand | HNL | - 12:00 | Honolulu/USA |
Display Mode
You can choose which data are indicated in the display if the radio is switched off.
With the system stay in clock display mode and the Radio is OFF, press FINE once. The time section and day flag are all cleared.

With the current mode of display is shown by the icon "Clock", "Date" and "Local".
| Mode of display | LCD |
| Clock only | "CLOCK" goes solid only |
| Clock + Local | "CLOCK" + „LOCAL“ go solid |
| Clock + Date | "CLOCK" + „DATE“ go sold |
| Clock + Date + Local | "CLOCK" + ”DATE“ + “LOCAL“ go solid |
Alarm function
The world receiver provides two independent wake-up times ALARM 1 and ALARM 2.
- For each one you can set and whether you want to be waked up by a buzzer or by the radio.
- Whether the unit should wake you only on Monday to Friday or only on Saturday and Sunday;
Setting the alarm time
Press ALARM 1 or ALARM 2. The currently set waking time flashes for about ten seconds in the display (at start-up: 0:00 AL1 or AL2) together with the days of the week (abbreviations of the English names of the days, see above).
While the time is still flashing, press UP▲▲ or DOWN to change the waking time to earlier or later in steps of one minute. Hold one of the keys down for a few seconds for quick waking time adjustment forwards or backwards in steps of ten minutes.
SNOOZE|Sleep Timer Stop Watch|Count Down Timer Start/Stop
Press the SNOOZE/SLEEP TIMER key for switching between the two waking programs: For waking every day (Mo Tu We Th Fr SA SU).
Only on workdays (Mo Tu We Th Fr) or only on Saturday and Sunday (SA SU).
To choose the selected day, press the SNOOZE/SLEEP TIMER button.
Activating the waking time
- When the waking time has been set, you can activate the alarm clock function by pressing ALARM 1 or ALARM 2. In the display RAD① or RAD② appears for the reveille by the radiofunction, ALM① or ALM② for the reveille with the alarm tone.

Note that the station must be tuned in (see below) so that the radio can wake you up.
Press ALARM 1 or ALARM 2 a second time to switch to waking with the buzzer, to interrupt the waking function.
Wake up interrupt
SNOOZE|Sleep Timer Stop Watch|Count Down Timer Start/Stop
Press the SNOOZE/SLEEP TIMER key to interrupt the waking function for about ten minutes.
To switch-off the waking function
Alarm Setting
Press ALARM 1 or ALARM 2 as many times as necessary to make the alarm symbols RAD^① or RAD^② in the display disappear.
Timer setting
Make sure that the Radio is switched off.
SNOOZE|Sleep Timer Stop Watch|Count Down Timer Start/Stop
PAGE
Press and hold PAGE for 2 seconds, the display shows 0.00. 0u^
Press SNOOZE/SLEEP TIMER once, to start, the timer's max. value is 39 minutes and 59 seconds.
Press SNOOZE/SLEEP TIMER again to pause.
Press SNOOZE/SLEEP TIMER again, to continue the counting.
Press and hold SNOOZE/SLEEP TIMER to clear the timer.
Press PAGE to leave the timer.
The Countdown Timer setting
Make sure that the Radio is switched off.
Set the countdown and store
You can set up to 6 different Countdown timer.
Press and hold VIEW to enter the timer preset setting mode, displays shows "d 00.00"
Press DOWN · or UP▲▲ to adjust the down count value to the time you want (the max value for the countdown timer is 99 minutes und 59 seconds).

- Then press the MEM key to store the selected Countdown. MEM starts flashing in the display. Press preset keys to store the time into which memory you want (A, B, C) Press MEM to store the timer.
Press SNOOZE/SLEEP TIMER to start or suspend the countdown timer.
Press VIEW again to exit the down-count timer preset setting mode.
Activate the down count timer
SNOOZE|Sleep Timer Stop Watch|Count Down Timer Start/Stop
Press and hold VIEW for 2 seconds displays shows "d 00.00".
Choose the stored timer, by pressing A, B, C.
to recall the preset memory.
Press SNOOZE/SLEEP TIMER to start to down counting, press SNOOZE/SLEEP TIMER again to pause.
- When the time down counts to 00.00, an "Alert" will be heard for one minute.

Press VIEW to stop the timer and leave the Countdown menu.
Radio mode
Switching on/volume control

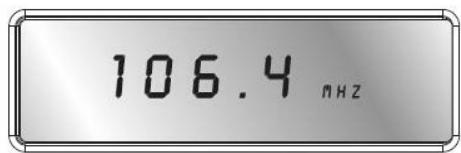
Press the key to switch the radio on. The display will show the currently tuned frequency and frequency band.
Adjust the volume using the VOLUME :
-VOL - : less volume;
-VOL +: more volume.
Switching off
- Switch the radio off by pressing the ( ) key. The display again shows the clock time.
Snoopze function
Alternatively you can activate the snooze function by switching the radio off. You can set up to 90 minutes in steps of ten minutes as that time after which you want the radio to switch off automatically.
SNOOZE|Sleep Timer
Stop Watch|Count Down Timer Start/Stop
Press SNOOZE/SLEEP TIMER. 90 (for 90 minutes) appear in the display.
Press SNOOZE/SLEEP TIMER again to reduce the snooze time in ten minute steps.
Either choose a snooze time (the snooze symbol remains visible) or continue pressing SNOOZE/SLEEPTIMER as many times as necessary until OFF appears in the display. The radio is now switched off.
Tuning a station
- Use the band selector switch to select the desired frequency band (FM, MW, LW or SW). The corresponding abbreviation appears in the display.
Now tune the receiver to the desired frequency using the UP▲▲ and DOWN keys.
To start the automatic scan, hold UP▲▲ or DOWN▼▼ pressed for about three seconds.
The automatic scan starts when you release UP or DOWN after about three seconds. The automatic scan run stops when a station with sufficient signal strength is found.
Tuning the MW Band
Press the MODE key six times, and select the band with the UP and DOWN key.
| Band | Freq. Step. | Freq. Range |
| FM | 100 kHz | 87.0 - 109.0 MHz |
| SW | 5 kHz | 5.85 - 17.9 MHz |
| LW | 1 kHz | 144 - 299 kHz |
Frequency Stepp MW Band:
| Country | Freq. Step. | Freq. Range |
| America | 10 kHz | 520 - 1710 kHz |
| Europe | 9 kHz | 522 - 1656 kHz |
Fine Tuning
Tune the receiver to the station which you want to recive.

The PLL tuner passes through the band in 50kHz steps in the FM range. However, it moves in 1kHz steps in the SW and MW ranges.

Press during the transmitter search the key FINE. In the display appears the announcement FINE.
Press UP▲/DOWN▼ once to change the receiving frequency up/down by 1 micro step.
Press FINE again to return to the normal tuning.
This function is not available in the LW frequency response.
Antenna
FM and SW
The pivoting telescopic antenna on the receiver is suitable for the FM and SW band.
- Pull out the aerial to its full extension and direct it so that you obtain the best possible reception.
MW and LW
The telescopic antenna has no effect in the MW and LW band. In this frequency range, the device receives the stations via a built-in ferrite antenna.
Turn the receiver for best possible reception.
Bass Setting
- When the radio is ON, press BASS to activate the bass. "BAS ON" will be shown for 3 seconds, then it will disappear automatically and the frequency will be shown again.
Press the BASS key again to disable the function.
Memory functions
Pre-setting stations


The world receiver has a memory for each frequency band. 150 memories for SW, 90 memories for FM, 60 memories for MW, 30 memories for LW.
Tune the receiver to the station which is to be preset (see above).
Press MEM. MEM starts to flash in the display.
- Select the desired preset place with the preset keys A, B, C. Press the selected key once for the preset memories A, B, C or twice in short succession for the preset memories A1.
Press MEM again to preset the station in the memory. The selected preset memory place is shown in the display with the suffix MEM.
The settings are lost when the receiver is disconnected from the mains.
Selecting a station from the memory
To select a station directly from the memory, switch to the corresponding frequency band and press the memory keys A, B or C once for the preset memory A to C or twice for the preset memory.
Scanning the memory places

Press the key VIEW to run through the preset stations in the selected frequency band. All preset stations will be heard successively for about 5 seconds each.
Press VIEW again to stop the scanning.
Disposal

Packing
Your PLL Receiver Radio is packaged to protect it from transport damage. Packages are raw materials and thus can be when returned to the raw materials

Device
At the end of its life cycle, never dispose off your PLL Receiver Radio in the normal household garbage. Ask your shire council for options on disposing of the appliance properly and in an environmentally friendly way.

Batteries
Do not dispose off used batteries with normal household waste. Batteries should be disposed off at special collection points as they contain harmful substances.
Technical Specifications
Receiver unit
Radio frequencies
FM : 87.0 -109 MHz
SW: 5.85-17.9MHz
MW for Europe: 522 - 1656 KHz
MW for USA 520 - 1710 KHz
LW: 144-299KHz
Earphone / headphones connector:
3.5 mm jack plug
Mains operation
AC adapter, model:
Mains input voltage:
Output voltage:
A400-75
AC 230V 50Hz
DC 7.5 V = 400 mA

Battery operation
Required batteries: 4 × 1.5 ~V alkaline batteries, size AA LR6.
(not included in the delivery)
Subject to technical modifications!

Geräteübersicht:
1) Teleskopantenne
2) SNOOZE/SLEEP TIMER: Weckunterbrechung
3) RADIO ON/OFF: Radio ein-/ausschalten
4) UP/DOWN Frequenzwahltasten
5) FINE: Senderfeinabstimmung
6) PAGE: Speicherplatz
7) VIEW: Gespeicherte Sender anzeigen
8) MEM: Auswahl bestätigen
9) Lautsprecher
10) A,B,C: Speicherplatz
11) BASS Bass Veränder
12) MODE: Einstellungen wahlen
13) VOLUME: Lautstärke einstellen
Alarm 1/2 weckzeit einstellen
14) Display
15) Empfangsqualität für Kurzwellensender
16) Anschluss für Ohr-/Kopfhörer
17) Anschlus für Steckernetzteil
18) Frequenzbandwahl
Inhaltsverzeichnis
Inhaltsverzeichnis 5
Sicherheitshinweise 8
Zudieser Anleitung 8
Elektrische Geräte nicht in Kinderhände 8
Umgebungsbedingungen 9
Netzanschlusszuganglichlassen 9
Niemals selbst reparieren 9
Im Falle von Funktionstörungen 9
Gewitter 9
Batterien safer verwenden 10
Das Gerät reinigen 10
WasisteinPLL-Tuner? 11
Inbetriebnahme 11
Gerat auspacken 11
Lieferumfang prufen 11
Netzanschluss 12
Netz- und Batteriebetrieb 12
Batterien einlagen 12
Umgang mit Batterien 13
Ohrhörer anschließen 13
Allgemeine Funktionen 14
Tastensperre 14
Displaybeleuchtung 14
StandfuB 14
Zeitfunktionen 15
Uhrzeit, Datum, Zeitzone und Weltzeit. 15
Datum einstellen 16
Zeitzone einstellen 16
Sommerzeitversatz 18
Weltzeit anzeigen 18
Spezieller Datumsalarm (^n,SDA^u) 18
Anzeigemodus wahlen 19
Weckfunktion 20
Weckzeit einstellen 20
Weckzeit aktivieren 20
Wecken unterbrechen 21
Weckunterbrechung einstellen 21
Weckfunktion ausschalten 21
Stoppuhr Funktion 22
Countdown-Funktion 22
Countdown einstellen und speichern 22
Countdown-Funktion aufrufen und aktivieren 23
Radiobetrieb 24
Einschalten/Lautstärke 24
Ausschalten/Schlummerfungtion 24
Schlumberffunktion 24
Sender einstellen 25
MW-Bereich einstellen 25
Senderfeinabstimmung 26
Antenne 26
FM und SW. 26
MW und LW. 26
Bass Funktion 27
Speicherfunktionen 27
Sender speichern 27
Gespeicherten Sender auswahlen 28
Automatischer Sendesuchlauf durchführten 28
Speicherplätze abrufen 28
Entsorgung 29
Verpackung 29
Gerat. 29
Batterien 29
Technische Daten 29
Gerat 29
Netzbetrieb 29
Batteriebetrieb 30
Sicherheitshinweise
Zu dieser Anleitung

Lesen Sie vor Inbetriebnahme die Sicherheitshinweise aufmerksam durch. Beachachten Sie die Warnungen in der Bedienungsanleitung.
Bewahren Sie die Bedienungsanleitung immer in Reichweite auf. Wenn Sie das Gerät verkaufen oder weitergeben, händigen Sie unbedingt auch diese Anleitung aus.
Elektrische Geräte nicht in Kinderhände
Batterien/Akkus können bei Verschlucken lebensgefährlich sein. Bewahren Sie deshalb das Gerät und die Batterien für Kleinkinder unerreichbar auf. Werde eine Batterie verschlucht, muss sofort medizinische Hilfe in Anspruch genommen werden.
Setzen Sie Batterien niemals übermäßig Wärme wie durch Sonnenschein, Feuer oder dergleichen aus.
Halten Sie auch die Verpackungen von Kindern fern. Es besteht Erstickungsgefahr. Kinder sollen beaufsichtigt werden um sicherzustellen, dass sie nicht mit dem Gerät spielten. Dieses Gerät ist nicht davon bestimmt, durch Personen ( einschließlich Kinder ) mit eingeschränkten physischen, sensorischen, oder geistigen Fähigkeiten oder mangels Erfahrung und/oder mangels Wissen benutzt zu werden, es sei dess, sie werden durch eine für ihre Sicherheit zuständige Person beaufsichtigt oder erhielten von Ihnen Anweisungen, wie das Gerät zu benutzen ist.
Um Stolperfallen zu vermeiden, sollen Sie keine Verlängerungskabel verwenden.
Umgebungsbedingungen
Achten Sie darauf, dass
das Netzteil beim Betrieb niemals mit Wasser, auch nicht Tropf Wasser oder Spritzwasser, oder anderen Flüssigkeiten in Kontakt kommt.
- keine mit Flüssigkeit befüllten Gefäße (z. B. Vasen) auf dem Netzeil abgestellt werden.
- kein starkes, direktes Sonnenlicht für längerere Zeit auf das Gerät fällt.
- keine offenen Brandquellen (z. B. brennende Kerzen) auf, oder in der unmittelbaren Höhe des Geräts stehen.
- immer eine ausreichende Belüftung des Geräts gewährleistet ist.
Netzanschluss zugänglich halten
Schlieben Sie das Steckernetzteil nur an eine gut erreichbare Steckdose (230 V ~ 50 Hz) an, die sich in der Höhe des Aufstellorts befindet. Für den Fall, dass Sie das Gerät schnell vom Netznehmen,müssen,muss die Steckdose frei zugänglich sein.
Niemals selbst reparieren
Wenn die Anschlussleitung these Gerätes beschädigt wird, muss sie durch den Hersteller oder seinen Kundendienst oder eine ähnlich qualifizierte Person ersetzt werden, um Gefährdungen zu vermeiden.
Im Falle von Funktionsstörungen
Sollte das Gerät Funktionstörungen zeigen, kann es sein, dass eine elektrostatische Entladungstattgefunden hat. Nehmen Sie in thisem Fall das Steckernetzteil vom Netz undnehmen Sie die Batterien hereus. Legen Sie dann die Batterien wieder ein undIPHemen Sie das Gerät wieder ans Netz. Das Gerät wird auf diese Weise zurückgesetzt.
Gewitter
Bei längerer Abwesenheit oder Gewitterziehen Sie das Steckernetzteil aus der Steckdose.
Batterien sicher verwenden
Batterien niemals wieder aufladen! Explosionsgefahr!
Batterien von Kindern fernhalten, nicht ins Feuer werfen, kurzschließen oder auseinandernehmen.
Beim Einlagen auf die richtige Polarität achten.
Batterie- und Gerätekontakte vor dem Einlagen bei Bedarf reinigen.
Erschöpfte Batterien umgehend aus dem Gerät entfernen! Erhöhte Auslaufgefahr!
Immer alle Batterien gleichzeitig austauschen.
Nur Batterien des gleichen Typs einsetzen, keine unterschiedlichen Typen oder gebrauchte und neue Batterien mit einander verwenden.
Batterien keinen extremen Bedingungen aussetzen, z. B. auf Heizkörpern! Erhöhte Auslaufgefahr!
Bei Nichtbeachtung konnen Batterien über ihre Endspannung hinaus entladen werden und auslaufen. Batterien sofort entfern, um Schäden zu vermeiden.
Kontakt mit Haut, Augen und Schleimhäuten vermeiden. Bei Kontakt mit Batteriesäure die betroffenen Stellen sofort mit reichlich klarem Wasser spulen und umgehend einen Arzt aufsuchen.
Bei längerer Nichtbenutzung entfernen Sieitte die Batterien aus dem Gerat.
Schalten Sie das Gerät nach dem Gebrauch aus.
Das Gerät reinigen
Vor der Reinigungziehen Sie das Steckernetzteil aus der Steckdose. Für die Reinigung verwenden Sie ein trockenes, weiches Tuch. Vermeiden Sie chemische Lösungs- und Reinigungsmittel, weil diese die Oberfläche und/oder Beschriften des Gerätes beschädigten können.
Was ist ein PLL-Tuner?
Ein PLL-Tuner (Phase locked loop) bedient sich, zur Erzeugung einer stabilen Empfangsfrequency, der Hilfe eines Quarzes. Der PLL-Tuner erhögt das exakte Anwahlen und Abspeichern einer Sendefrequency, er schafft damit eine gleich bleibende Qualität beim Empfang von Radiosenden.
Inbetriebnahme
Gerät auspacken
Entfernen Sie sãmtliches Verpackungsmaterial.

ACHTUNG!
Lassen Sie keine Kinder nicht mit Folie speiten. Es besteht Erstickungsgefahr!
Achten Sie darauf, dass
- das Steckernetzteil nicht mit Wasser, auch nicht Tropf- oder Spritzwasser, oder mit anderen Flüssigkeiten in Kontakt kommt;
- kein direktes, starkes Sonnenlicht für längerere Zeit auf das Gerät fällt.
Lieferumfang prüfen
Vergewissern Sie sich beim Auspacken, dass folgende Teile mitgeliefert wurden:
- Weltempfänger
- Steckernetzteil
- Ohrhörer
Trageschlaufe
Tragetasche
Netzanschluss
Schlieben Sie den Gerästecker des Netzeils an die DC-7.5V-Buchse an der Geräteseite an.
Verbinden Sie das Steckernetzteil mit einer gut erreichbaren Steckdose. Um Stolperfallen zu vermeiden, betreiben Sie das Gerät nicht mit Verlängerungskabel.

Benutzen Sie keinen anderen Adapter als das mitgelieferte Steckernetzteil Modell A 400-75, da dies zu Schaden am Gerät oder am Netzeil führen kann.
Beim Anschluss des Gerats beginn't die Uhr bei 0:00 00.
Netz- und Batteriebetrieb
Wenn Sie das Gerät vom Netz führen, gehen eventuell vorgenommene Einstellungen (Uhrzeit, Weckzeit, Radiosender) verloren. Legen Sie ggf. vorher Batterien ein (s. u.), wenn Sie die Einstellungen sichern möchten, und führen Sie das Gerät erst dann vom Netz.
Batterien einlagen
Statt am Netz, können Sie das Gerät auch mit Batterien (nicht mitgeliefert) betreiben. Sie bereits gegen 1.5 V Mignonbatterien, Große AA, LR6.
Offnen Sie das Batteriefachs auf der Geräterückseite, indem Sie den Deckel nach unten schieren.
Legen Sie die vier Batterien unter Beachtung der Polarität (der Minus-Pol liegt an der Feder an) in das Fach.
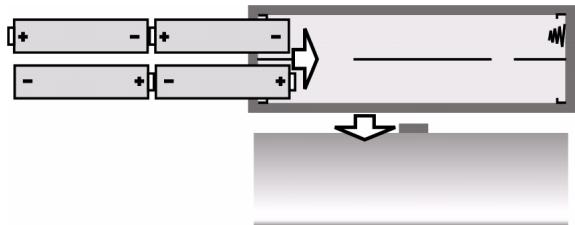
Schieben Sie den Deckel wieder auf das Fach.
Werden die Batterien zu schwach, so wird dies im Display durch das blinkende Symbol angezeigt.
Umgang mit Batterien
- Wenn Sie das Gerät wieder am Netz betreiben, nehmen Sie die Batterien hersa.
- Tauschen Sie Batterien nur insgesamt aus; mischen Sie keine alten mit neuen Batterien.
Ohrhörer anschließen
An der linken Geräteseite finds Sie den Ohr-/Kopfhöreranschluss .
Schließen Sie hier den mitgelieferten Ohrhörer oder einen anderen Ohr-/Kopfhörer mit 3.5 mm-Klinkenstecker an.
Der Laufsprecher schaltet sich dann automatisch aus.

ACHTUNG!
Übermaßiger Schalldruck bei Verwendung von Ohrhörn und Kopfhörn kann zu Schäden am Hörvermögen und/oder zum Verlust des Hörsinns führen. Stellen Sie die Lautstärke vor der Wiedergabe auf den niedrigsten Wert ein. Starten Sie die Wiedergabe und erhöhen Sie die Lautstärke auf das Maß, das für Sie angenehm ist.

Wenn ein Gerät langere Zeit mit erhöhter Lautstärke über einen Kopfhörer betrieben wird, kann das Schäden am Hörvermögen des Zuhörers verursichen.
Allgemeine Funktionen
Tastensperre
Zum Einsatz der Tastensperre halten Sie die Taste MEM für ca. 3 Sekunden gedrückt. Sie verhindern dadurch, dass durch unabsichtliches Berühren der Tasten die Einstellungen geändert werden. Im Display erscheint die Anzeige KEYLOCK.
Halten Sie die Taste MEM erneut für ca. 3 Sekunden gedrückt, um die Tastensperre wieder aufzuheiten. Die Anzeige KEYLOCK im Display erlischt.

Displaybeleuchtung
Drucken Sie eine beliebige Taste, um das Display zu beleuchten. Das Display wird für ca. 10 Sekunden beleucht.

Ist die Tastensperre aktiv, so kann die Displaybeleuchting nur über die Taste SNOOZE aktiviert werden.
Standfuß
Klappen Sie den Standfuß auf der Geräterückseite aus, um das Gerät stabiler aufzustellen.
Zeitfunktionen
Die Zeitfunktionen können bei ausgeschalteten Radio eingestellt werden. Bei der Inbetriebnahme beginnt die voreingestellte Zeit des Weltempfängers bei „0:00 00".

Wenn das Gerät vom Netz genommen wird, gehen die Einstellungen verloren.
Uhrzeit, Datum, Zeitzone und Weltzeit
Sie können in einem Zuge über die MODE-Taste Uhrzeit, Datum und Zeitzone einstellen und die Weltzeit abfragen. Wenn Sie MODE drücken, blinkt die einzustellende Funktion für ca. 15 Sekunden.
Nehmen Sie die Einstellung in dieser Zeit mit der UP ▲ ▲ /DOWN ▼▼-Taste vor.
- MODE 1 x drücken: Uhrzeit
- MODE 2 x drucken: Datum
- MODE 3 x drucken: Zeitzone ("Local City")
- MODE 4 x drucken: Weltzeit
- MODE 5 x drücken: Spezieller Datumsalarm
- MODE 6 x drücken: Empfangsbereich für Mittelwelle einstellen.
- MODE 7x drücken: Weckunterbrechung einstellen.
- MODE 8x drucken: Umschalten zwischen 12 Sd. und 24 Std. Anzeige
Um eine Einstellung zu übernehmen, warten Sie einfach ab, bis die Anzeige nicht mehr blinkt (das Display schaltet auf die Uhrzeitanzeige darüber), oder gehen Sie über MODE zur{nachsten Funktion.
Uhrzeit einstellen
Drucken Sie einmal MODE. Im Display blinkt die eingestellte Uhrzeit (bei den Inbetriebnahme 0:00 00).
Drücken Sie UP bzw. DOWN▼, um die Uhrzeit in Minuten-Schritten vor bzw. zurückzustellen. Halten Sie eine der Tasten ein paar Sekunden gedrückt, um die Zeit im Schnelllauf in Zehn-Minuten-Schritten vor bzw. zurückzustellen.

Stellen Sie die Uhrzeit ohne Sommerzeitversatz ein. Eine eventuelle Sommerzeit kann im Zuge der Zeitzoneneinstellung (s. u.) eingestellt werden.
Datum einstellen
Drucken Sie ein weiteres Mal bzw. zweimal MODE. Im Display blinkt das eingestellte Datum (bei der Inbetriebnahme 1.01.08).
Drucken Sie UP 但对于zw. DOWN▼, um das Datum vorwärts bzw. rückwärts zu stellen. Halten Sie eine der Tasten ein paar Sekunden gedrückt, um das Datum in Zehn-Tages-Schritten vor bzw. zurückzustellen.
Wochentagsanzeige:
S_u = Sonntag
Mo = Montag
Tu = Dienstag
We = Mittwoch
Th = Donnerstag
F r = Freitag
Sa = Samstag
Die Anzeige für die Wochentage lauft automatisch mit. Sie wird mit den ersten zwei Buchstaben für die englishen Name der Wochentage angezeigt.

Der eingebaute Kalender reicht von 2000 bis 2099.
Zeitzone einstellen
Drucken Sie ein weiteres Mal bzw. dreimal MODE. Im Display blinkt die eingestellte Zeitzone als Kurzel für die zugehörige Stadt (bei der ersten Inbetriebnahme UTC); die Uhrzeit verschwindet.
Drucken Sie UP bzw. DOWN▼▼, um zur{nachsten bzw. vorherigen Zeitzone zu gelangen.
Folgende Tabelle gibt eine Übersicht der Städtekürzel für die Zeitzonen und die Zeitverschiebungen.
| Kürzel | Differenz zu MEZ | Stadt | Kürzel | Differenz zu MEZ | Stadt |
| LON | 0:00 | London | MEZ | 00:00 | Mittel Europäische Zeit |
| MUN | + 1:00 | Munich | BUE | -03:00 | Buenos Aires /Argentinien |
| CAI | + 2:00 | Cairo | CCS | - 4:00 | Karacas |
| MOW | + 3:00 | Moscow | YUL | - 5:00 | Montreal /Kanada |
| DXB | + 4:00 | Dubai | NYC | - 5:00 | New York /USA |
| KHI | + 5:00 | Karachi | YYZ | - 5:00 | Toronto /Kanada |
| DAC | + 6:00 | Dakar | MEX | - 6:00 | Mexico |
| BKK | + 7:00 | Bangkok | CHI | - 6:00 | Chicago/USA |
| HKG | + 8:00 | HongKong | DEN | - 7:00 | Denver/USA |
| TYO | + 9:00 | Tokyo | YVR | - 8:00 | Vancouver /Kanada |
| SYD | + 10:00 | Sydney | LAX | - 8:00 | Los Angeles/USA |
| NOU | + 11:00 | Numea | ANC | - 9:00 | Anchorage /USA |
| AKL | +12:00 | Auckland | HNL | - 12:00 | Honolulu/USA |
Sommerzeitversatz
SNOOZE|Sleep Timer Stop Watch|Count Down Timer Start/Stop
Drucken Sie, während noch die Anzeige für die Zeitzone blinkt, die SNOOZE/SLEEP TIMERTaste. Im Display erscheint das Sommerzeit-Symbol.
Weltzeit anzeigen
Drucken Sie ein weiteres Mal bzw. viermal MODE, um sich die Weltzeit anzeigen zu halten. Es erscheint das blinkende Städtekürzel mit der zugehörigen Zeit.
Drucken Sie UP bzw. DOWN▼, um zur{nachsten bzw. vorherigen Zeitzone zu gelangen.
Spezieller Datumsalarm (,,SDA“)
Drucken Sie ein weiteres Mal bzw. fünfmal MODE, um den speziellen Datumsalarm einzuststellen. Im Display blinkt die Daten sanzeige SDA.
Drucken Sie UP bzw. DOWN▼▼, um das Datum einzustellen, an dem der Alarm ertönen soll.
Drucken Sie die Taste SNOOZE/SLEEP TIMER, um die Eingabe der Jahreszahl zu ignorantieren. Der Alarm ertont dann jeder Jahr.
Stellen Sie den Alarm durch Drücken einer beliebigen Taste aus.
Anzeigemodus wahlen
Sie können wahlen, welche Daten im Display angezeigt werden, wenn das Radio ausgeschaltet ist.
Der entsprechende Modus wird über entsprechende Symbole im Display angezeigt:
CLOCK = Zeit
DATE= Datum
Local=Zeitzone

Wahlen Sie den Anzeigemodus durch wiederholten Druck der Taste FINE nach folgender Tabelle aus:
| Symbol im Display | Anzeigemodus |
| CLOCK | es wird nur die Uhrzeit angezeigt |
| CLOCK + LOCAL | Uhrzeit und Weltzeit werden angezeigt |
| CLOCK + DATE | Uhrzeit und Datum werden angezeigt |
| CLOCK + DATE + LOCAL | Uhrzeit, Datum und Weltzeit werden angezeigt |
Weckfunktion
Der Weltempfänger stellt Ihnen zwei unabhängig von einander einstellbare Weckzeiten ALARM 1 und ALARM 2 zur Verfügung. Für beiden können Sie einstellen,
ob das Gerät an jedem Wochentag oder nur von Montag bis Freitag wecken soll;
- ob Sie mit Alarnton oder mit dem Radio geweckt werden wollen.
Weckzeit einstellen
Drucken Sie ALARM 1 (ALARM 2). Im Display blinken für ca. zehn Sekunden die eingestellte Weckzeit (bei der Inbetriebnahme: 0:00 AL1 (AL2) und die Wochentagsanzeige (englische Kürzel der Wochentage, s. S.11).
Drucken Sie, während die Zeit noch blinkt, UP bzw. DOWN▼, um die Weckzeit in Minutenschritten vor- bzw. zurückzustellen. Halten Sie eine der Tasten ein paar Sekunden gedrückt, um die Zeit im Schnellauf in Zehn-Minuten-Schritten vor- bzw. zurückzustellen.
SNOOZE|Sleep Timer
Stop Watch|Count Down Timer Start/Stop
Drucken Sie die SNOOZE/SLEEP TIMER Taste, um zwischen den verschiedenen Weckprogrammen zu wahren: Wecken an jedem Tag (Su Mo Tu We Th Fr Sa), nur an den Wochentagen (Mo Tu We Th Fr), nur am Wochenende (Su Sa).
Die Alarmfunktion für einen einzelnen Tag richten Sie ein, indem Sie die SNOOZE Taste für 1 - 2 Sekunden gedrückt halten. Im Display erscheint der gewählte Wochentag (bei der Inbetriebnahme „Mo").
Drucken Sie nun wiederholt die SNOOZE/SLEEP TIMER Taste, um den gewünschten Wochentag einzustellen.
Weckzeit aktivieren
- Wenn die Weckzeit eingestellt ist, aktivieren Sie den Alarm, indem Sie wiederum ALARM 1 (ALARM 2) drücken. Im Display erscheint RAD^① oder RAD^② für das Wecken durch die Radiofung, ALM^① oder ALM^② für das Wecken mit dem Alarmton.

Bitte beachten Sie, dass ein Sender eingestellt sein muss (s. u.), damit das Radio wecken kann.
Drucken Sie ALARM 1 (ALARM 2) ein weiteres Mal, um das Wecken mit Alarmton einzustellen.
Im Display erscheint ALM (ALM).
Wecken unterbrechen
SNOOZE|Sleep Timer Stop Watch|Count Down Timer Start/Stop
Drucken Sie die SNOOZE/SLEEP TIMER-Taste, um die Weckfunktion fur 10 Minuten zu unterbrechen.
Weckunterbrechung einstellen
Drucken Sie siebenmal die MODE- Taste. Im Display erscheint die eingestellte Weckunterbrechung (bei der Inbetriebnahme SNO 10).
Mit den Tasten UP und DOWN können Sie die Weckunterbrechung auf eine Zeit zwischen 1 und 59 Minuten einstehen.
Weckfunktion ausschalten
Alarm Setting
- Drücken Sie ALARM 1 bzw. ALARM 2 so oft, bis die Alarmsymbole RAD im Display verschwinden.
Stoppuhr Funktion
Die Stoppuhr Funktion steht nur bei ausgeschalteten Radio zur Verfügung.

Halten Sie die Taste PAGE für ca. 2 Sekunden gedrückt. Im Display erscheint 0.00.0u . Drücken Sie die SNOOZE/SLEEP TIMER Taste, um die Stoppuhr zu starten. Die maximal zu stoppende Zeitdauer ist 39 Minuten und 59 Sekunden. Wenn die Stoppuhr die maximale Zeit überschreitet, blinkt im Display die Anzeige 39.59.0u .
- Sie können die Zeitmessung durch Drucken der Taste SNOOZE/SLEEP TIMER unterbrechen.
Erneutes Drucken der Taste SNOOZE/SLEEP TIMER latent die Stoppuhr Weiterzahlen.
Halten Sie die Taste SNOOZE/SLEEP TIMER gedrückt, um die Stoppuhr zurück zusetzen.
Durch Drucken der Taste PAGE verlassen die Sie Stoppuhr.
Countdown-Funktion
Die Countdown-Funktion steht nur bei ausgeschalttem Radio zur Verfügung.
Countdown einstellen und speichern
- Sie können bis zu 6 entsprechiche Countdowntimer einstellen.
Halten Sie die Taste VIEW für ca. 2 Sekunden gedrückt. Im Display erscheint die Anzeige d00.00.
Drucken Sie die Tasten UP bzw. DOWN um die gewünschte Zeit einzustellen. Der Countdown kann ab 99 Minuten und 59 Sekunden rückwärts zahlen.
Drucken Sie die Taste MEM, um die eingestellte Zeit speichern zu konnen. Im Display fängt die Speicherplatzanzeige MEM an zu blinken. Wahlen Sie mit den Tasten A, B, C einen Speicherplatz aus. Durch Drucken der Taste MEM bestätigten Sie den Speicherplatz.
Um den Countdown zu starten, betätigen Sie die Taste SNOOZE/SLEEP TIMER.
Mit einem nochmaligen Druck auf die Taste VIEW verlassen Sie den Countdown-Modus wieder.
Countdown-Funktion aufrufen und aktivieren
Halten Sie die Taste VIEW für ca. 2 Sekunden gedrückt. Im Display erscheidt die Anzeige d00.00.
Wahlen Sie die gewünschte, gespeicherte Countdown-Zeit mit Hilfe der Speichertasten A,B,C aus.
Drucken Sie die Taste SNOOZE/SLEEP TIMER um den Countdown zu starten. Erneutes Drucken der Taste SNOOZE/SLEEP TIMER unterbricht den Countdown.
Wenn die eingestellte Zeit vollständig heruntergebnigt ist, ertont für eine Minute das Alarmsignal.

Drucken Sie die Taste VIEW, um den Countdown abzubrechen und den Countdown-Modus zu verlassen.
Radiobetrieb
Einschalten/Lautstärke

Drucken Sie die links abgebildete Taste, um das Radio einzuschalten. Im Display erscheint die aktuell eingestellte Frequenz mit dem gewählten Band.
Regeln Sie die Lautstärke über die Tasten VOLUME:
- TASTE VOL - : leiser;
-TASTE VOL + : lauter.
Ausschalten/Schlummerfungtion
Schalten Sie das Radio aus, indem Sie die Taste drücken. Das Display blendet wieder die Uhrzeit ein.
Schlummerfunktion
Über die Taste SNOOZE/SLEEP TIMER konnen Sie auch die Schlummerfungtion aktivieren. Sie konnen eine Zeit bis zu 90 Minuten in Zehn-Minuten-Schritten einstellen, nach der sich das Radio automatisch abschalten soll.
SNOOZE|Sleep Timer Stop Watch|Count Down Timer Start/Stop
Drucken Sie SNOOZE/SLEEP TIMER. Im Display wird 90 (für 90 Minuten) angezeigt.
Drucken Sie wiederum SNOOZE/SLEEP TIMER, um die Schlummerzeit in Zehn-Minuten-Schritten herunterzuzahlen.
Wahlen Sie entweder eine Schlummerzeit (das Schlummersymbol bleibt eingebrendet) oder drücken Sie weiter SNOOZE/SLEEP TIMER, bis OFF im Display erscheint. Das Radio ist nun ausgeschaltet.
Sender einstellen
Wahlen Sie über den Bandwahlschalter das gewünschte Frequenzband (FM, MW, LW oder SW). Das entsprechende Kürzel wird im Display eingebrendet.
Stellen Sie nun mit UP bzw. DOWN die gewünschte Empfangsfrequency ein.
Wenn Sie UP bzw. DOWN ca. drei Sekunden gedrück halten, starten Sie den automatischen Suchlauf.
Der Suchlauf stoppt, sobald ein Sender mit genügender Sendestärke gefunden ist.
MW-Bereich einstellen
Da sich die Radiosendesysteme in verschiedene Ländern untersenden, sollen den Sie über die Empfangsbereicheinstellung eine Anpassung vornehmen:
Drücken Sie sechsmal die MODE- Taste und wahlen Sie dann mit den Tasten UP bzw. DOWN den entsprechenden Empfangsbereich gemäß der folgenden Tabelle aus:
| Modulationsart | Abtastabstand | Bandbereich |
| FM | 100 KHz | 87.0 – 109.0 MHZ |
| SW | 5 KHz | 5.85 – 17.9 MHz |
| LW | 1 KHz | 144 – 299 KHz |
Abtastabstand im MW Bereich:
| Region | Abtastabstand | Bandbereich |
| Amerika | 10 kHz | 520-1710 kHz |
| Europa | 9 kHz | 522-1656 kHz |
Senderfeinabstimmung
Wenn ein Sender nicht genau gefunden werden kann, ist es durch eine Feinabstimmung möglich, den Empfang zu verbessern.

Im FM Bereich besteht der PLL Tuner das Band in 50 kHz schritten durch. Im SW und im MW Bereich bereits in 1 kHz schritten.

Drucken Sie während der Sendersuche die Taste FINE. Im Display erscheint die Anzeige FINE.
Stellen Sie nun mit UP bzw. DOWN diegsfrequenz mit halben Frequenzschritten ein.
Mit einem erneuten Druck auf die Taste FINE verlassen Sie die Senderfeinabstimmung wieder.
These Funktion steht im LW-Frequenzbereich nicht zur Verfügung.
Antenne
FM und SW
Die schwenkbare Teleskopantenne am Gerät ist im FM- und SW-Band wirksam.
Ziehen Sie die Antenne vollständig hereus und richten Sie sie für den bestmöglichen Empfang aus.
MW und LW
Im MW- und LW-Band wirkt die Teleskopantenne nicht. In diesen Bereichen empfängt das Gerät über die eingebaute Ferritantenne.
Richten Sie das Gerät für den bestmöglichen Empfang aus.
Bass Funktion
Das Gerät besitzt einen „Bass Booster“, um den Bass zu verstärken.
Drucken Sie während des Betriebes die BASS Taste. Es erscheidt „ON BAS" im Display.
Um die Funktion zu beenden, drücken Sie erneut die BASS Taste und im Display erscheint „OFF BAS".
Speicherfunktionen
Sender speichern


Der Weltempfänger kann in den Frequenzbändern FM 90 Sender, im MW-Band 60 Sender, im SW Band 150 Sender und im LW-Band 30 Sender speichern.
Für die Frequenzbänder FM, SW und MW sind die Speicherplätze in Seiten ("Pages") zu je 10 Speicherplätzen organisiert. Um einen Sender zu speichern, gehen Sie wie folgt vor:
Stellen Sie den Sender ein, den Sie abspeichern möchten (s. o.).
Drucken Sie die Taste MEM. Im Display werden die Speicherseite [PAGE] und der Speicherplatz [MEM] angezeigt.
Wahlen Sie mit der Taste PAGE eine Speicherseite aus (nicht im LW-Band) und mit den Tasten A, B oder C einen Speicherplatz. Beide Belegungen werden im Display angezeigt.
Drucken Sie die Taste MEM erneut, um den Sender abzuspeichern.
Gespeicherten Sender auswahlen
Um einen gespeicherten Sender direkt auszuwahlen, drücken Sie die Taste PAGE wiederholt, bis die gewünschte Speicherseite angezeigt wird und dann eine der Tasten A, B oder C zur Auswahl des Speicherplatzes.
Automatischer Sendesuchlauf durchführten
Ihr Weltempfänger kann die Frenzen eines Bandes durchsuchen und die gefundenen Sender im Speicher ablegen. Um diesen automatischen Sendesuchlauf ("Automatic Memory Scan"/AMS) zu aktivieren, gehen Sie wie folgt vor:
Drucken Sie einmal die Taste MEM.
Halten Sie die Taste VIEW für ca. 1 Sekunde gedrückt.
Der Weltempfänger durchsucht alle Frenzen und speichert die gefundenen Sender ab.
Speicherplatz abrufen

Drucken Sie die Taste VIEW, um die Belegung aller Senderspeicher des gewählten Frequenzbandes abzurufen. Alle gespeicherten Sender werden nacheinander für ca. fünf Sekunden angespielt.
Drucken Sie die eine beliebige Taste, um den Sendersuchlauf zu beenden.
Entsorgung

Verpackung
Ihr Weltempfänger befindet sich zum Schutz vor Transportschäden in einer Verpackung. Verpackungen sind Rohstoffe und damit wieder verwendungsfähig oder können dem Rohstoffkreislauf zurückgeführt werden.

Gerät
Werfen Sie ihren Weltempfänger am Ende seiner Lebenszeit keinesfalls in den normalen Hausmull. Erkundigen Sie sich bei ihrer Stadt- oder Gemeindeverwaltung nach einer umwelt- und sachgerechten Entsorgung.

Batterien
Verbrauchte Batterien gehören nicht in den Hausmüll. Die Batterien müssen bei einer Sammelstelle für Altbatterien abgegeben werden.
Technische Daten
Gerät
Radiofrequenzen
FM (Ultrakurzwelle): 87.0 -109.0 MHz
SW (Kurzwelle): 5.85 -17.9 MHz
MW (Mittelwelle): 522 - 1656 kHz für
USA 520-1710
LW (Langwelle): 144 - 299 kHz
Ohr-/Kopfhöreranschluss:
3.5 mm Klinkenstecker
Netzbetrieb
Steckernetzteil; Modell:
A 400-75
Netz-/Eingangsspannung:
230V 50Hz
Ausgangsspannung:
7.5V = 400mA

Batteriebetrieb
Benöttigte Batterien:
4 × 1.5 ~V Batterien,
Große AA, LR6.
(nicht im Lieferumfang enthalten)
Technische Änderungen vorbehalten!

Vista Geral
1) Telescopic Antenna
2) SNOOZE/SLEEP TIMER: Interromper despertar
3) ADIO ON/OFF: Ligar / Desligar radio
4) UP/DOWN: Ajustar a emissora
5) FINE: Sintonia emissoras
6) PAGE: Posicao de memoria
7) VIEW: Indicar emissoras memorizadas
8) MEM: Confirmar selecao
9) Altifalante
10) A;B,C: Posições de memória
11) BASS: Funcao de graves
12) MODE: SeLECTIONAR configurações
13) VOLUME: Ajustar o volume
Alarm 1 / 2 Ajustar hora de descentar
14) Visor
15) Qualidade de recepçao para emissora de ondas curtas
16) Ligação para auscultadores
17) Ligação para adaptordo de rede
18) Selecção banda de frequência
Vista Geral 5
Indicações de segurâça 8
Sobre estas instruções 8
Manter os aparelhos eletricos fora do alcance de crianças 8
Condições ambientais 9
Deixar a ligaçao à rede eletrica acessivel. 9
Nunca reparar o aparelho por iniciativapropria. 9
No caso de anomalias 9
Trovoada 9
Utilizar pilhas 10
Limpar o aparelho 10
O que é um sintonizador PLL? 11
Colocacao em funcaoamento 11
Retirar o aparecido da embalagem 11
Verificar o conteudo do fornecimento 11
Ligaoa rede elcctrica 12
Funciamento de rede eletrica e a pilhas 12
Colocar pilhas 12
Manuseamento das pilhas 13
Ligar auscultadores 13
Funções gerais 14
Bloqueio dos botões 14
Illuminação do visor 14
Base de apoio 14
Funcao de tempo 15
Horas, data, fuso horario e hora mundial. 15
Acertar as horas 16
Regular data 16
Regular fuso horario 16
Ajuste da hora de Verao 18
Indicahoramundial 18
Alarmede data especial (^ ^ ) 18
Selecionar modo de indentacao 19
Funcao de descentar 20
Ajustar hora de despertar 20
Activar hora de despertar 20
Interromper despertar 21
Regular interruptao do descentar 21
Desligarfuncao de descentar 21
Funcao cronometro 21
Funcao Countdown 22
Regular e memorizar Countdown 22
Consultar e activar funcao Countdown 23
Funcionamento do rado 24
Ligar/volume 24
Desligar 24
Funcao Snooze. 24
Ajustar a emissora 25
Regular frequencia MW 25
Sintonia emissoras 25
Antenna 26
FM e SW. 26
MW e OL 26
Funcao de graves 27
Funções de memória 27
Memorizar emissoras 27
Seleccionar emissoras memorizadas 28
Efectuar localização automática de emissora 28
Consultar posições de memória 28
Eliminação 29
Embalagem 29
Aparelho 29
Pilhas 29
Dados&Tecnicos 29
Funcionamento de rede 29
Funcionamento a pilhas. 30
Indicações de segurança
Sobre estas instruções

Leia as indentações de segurarca com atençao antes da colocacao em funcaoamento. Tenha em atençao as advertencias no manual de instruções.
Mantenha o manual de instruções sempre à mão. Se vendier ouentarregar o aparecido a terreiros, entrega obligatoriamente estemanual
junto com o aparelho.
Manter os aparelhos electricos fora do alcance de crianças
Não permita que as crianças utilizem apareiros electricos sem vigilência.
Pilhas/baterias podem causar risco de vida ao serem ingeridas. Por也是如此, deve guardar o aparelho e as pilhas fora do alcance das crianças. Se uma piha for ingerida, procure imeditamente ajudamedicala.
Mantenha también as embalagens fora do alcance de crianças. Existe risco de asfixia.
As crianças devem ser supervisionadas para que não brinquem com o equipamento. Este aparecido não foi concebido para ser realizado por pessoas (incluindo crianças) com capacidades fisicas, sensoriais ou mentalis limitadas ou com falta de experiencia e/ou conheçimentos, a não ser que sejam
supervisionadas por uma pessoa responsavel pela sua segurarca ou tenham recebido instruções de como usar o aparecido.
Condições ambientais
Certifique-se de que
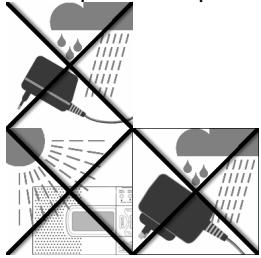
- a fonte de alimentação aquando do funciona quando está entrainou em contacto com água, incluindo gotas ou salpicos de água
- nenhum recipiente com água (por ex. jarras) é colocado na fonte de alimentação
- não há luz solar forte e directa a incidir sobre o aparelho por um prolongado periodo de tempo
- não existem fontes de combustão (por ex. velas acases) na proximidade do aparelho.
- o aparecido é constantemente ventilado
Deixar a ligaçao à rede eletrica accesivel.
Ligue o adaptor d'rede apenas a uma tomada eletrica bem acessivel (230 V ~ 50 Hz), que se encontre na proximidade do local de instalação. A tomada eletrica deve estar bem acessivel para o caso de necessitar de desligar rapidamente o aparelho da rede.
Nunca reparar o aparelho por iniciativapropria
No caso de danos no adaptorador de rede, cabo de ligação ou do aparelho, retire imeditamente a fonte de alimentação da tomada.
Nunca tenteAbrir ou reparar o aparelho ou o adaptador de rede por iniciativa propria.Existe risco deCHOque electrico!Em caso de avaria, dirja-se ao"Ourso service de assistencia的技术ica ou a uma loja especializada.
No caso de anomalias
Se o aparelho aparecerar anomalias, pode querer dizer quehouve una descarga electrostatica. Neste caso retire o adaptador de rede da rede e retire as pilhas. Volte a colocar as pilhas e ligue o aparelho novamente à rede. Desta forma o aparelho é reposto.
Trovoada
No caso de ausência prolongadas ou de trovoadaletalr o adaptor de rede da tomada.
Utilizar pilhas
Nunca corregarar as pilhas! Perigo de explosao!
Mantenha as pilhas fora do alcance das crianças, não deite as pilhas ao fogo nem as curte-circuite ou desmonte.
Tenha atençao quanto a polaridade ao colocac-las.
Se necessario limpar os contactos do aparelho como das pilhas antes de as colocar.
Pilhas desgastadas devem ser retiradas imeditamente do aparelho! Elevado perigo de transbordo!
Substituir sempre as pilhas ao mesmo tempo.
Colocar apenas pilhas do mesmo tipo, não utilizes differentestips ou pilhas velhas enovas simultaneamente.
Não expor as pilhas a condições extremas, por exemplo em cima de aquecedores!
Elevator perigo de transbordo!
A inobservança pode levar as pilhas até à sua tensão final a ficarem descarregadas e verteorem. Substituir de imediato as pilhas para fazer danos.
Evitar o contacto com os olhos e mucosas. Caso entre em contacto com o acido das pilhas, lava a parte do corpo em causa com agua limpa e abundante e consulte imeditamente um medico.
Se o aparelho não for正常使用 durante muito tempo,utar as pilhas do aparelho.
Certifique-se de que desliga o aparelho après autilização.
Limpar o aparelho
Antes de起初 a limpeza desligue o adaptador de rede da tomada. Para a limpeza deve ser utilizado um pano seco e suave. Devem ser evitados produits de limpeza ou solventes qu'micos, visto these poderem danificar a superficie e/ou as inscrições no aparecido.
O que é um sintonizador PLL?
Um sintonizador PLL (Phase locked loop) é utilizado para gerar uma frequência estével de recepçao, com a ajuda de um quartzo. O sintonizador PLL permite a seleção e memorização exacta de uma frequência de emissão, e consigue assim uma qualida constante aquando da recapçao de emissoras de rádio.
Colocação em functimento
Retirar o aparelho da embalagem
Remova todo o material de embalagem.

Atença!
Nunca deixe criançasPEGAs brincarem com a pellicula de plastico.
Existe o perigo de asfixia!
Certifique-se de que
- o adaptor de rede não entra em contacto com água, incluindo gotas ou salpicos de água;
- não há luz solar forte e directa a incidir sobre o aparecido por um prolongado perfeito de tempo.
Verificar o conteudo do fornecimento
Ao retiring o aparelho da embalagem, certifique-se de que as segunte peças foram fornecidas:
Sintonizador mundial
Mala
Adaptor de rede
Auscultadores
- Manual de instruções com documents de garantia
Ligação à rede electrica
Ligue a ficha do aparelho da fonte de alimentacao a tomada DC-7.5V no lado do aparelho. Ligue o adaptorador de rede a uma tomada de fácil accesso. De modo a não tropear, não utilize o aparelho com cabos de extensao.

Não utilize mais nenhum adaptorador às dàquele adaptorador de rede modelos A 400-75 fornecido, uma vez que pode levar a danos no aparecido ou na fonte de alimentação.
Aquando da ligação do aparheiro, o relógio está a 0:00 00.
Funcimiento de rede electrica e a pilhas
Quando retira o aparelho da rede, perdem-se eventualmente as configurações efectuadas (horas, hora de despertar, emissora de rádio). Se necessário, coloque previamente pilhas (v. em b.), de modo a guardar as configurações e retire(before o aparelho da rede.
Colocar pilhas
Em vez da ligação à rede electrica, pode usar también o aparelho com pilhas (não fornecidas). Necessita de quatre pilhas Mignon de 1.5V, tamanho AA, LR6.
Abra o compartmento das pilhas no lado traseiro do aparelho, empurrando a tampa para baixo.
Inserir as quatro pilhas no compartmento, tendo em consideracao a polaridade (o polo negativo fica voltado para as molas).
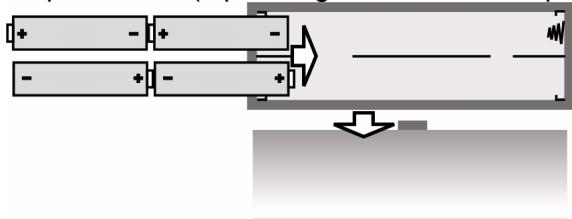
Volte a deslocar a tampa para o compartmento.
Se as pilhas estiverem fracas, isto é indicado no visor através do símbolo intermitente.
Manuseamento das pilhas
- Quando utilizes o aparecido ligado à rede, retire as pilhas.
- As pilhas devem ser substituías apenas emedayo; não misture as pilhas velhas com as novas.
Ligar auscultadores
No lado esquerdo do aparelho encontrar a ligação para auscultadores.
Liguequiryosauscultadoresfornecidos,ouquaisquerotvos,comumconector RCA de 3.5mm
A colunas desliga-se automaticamente.

ATENÇAO!
A pressão acústica em demasia, no caso de'utilização de auriculares e auscultadores, pode provocar danos na capacidade de audiência e/ou perda da audiência. Antes da reprodução, ajuste o volume no;nivel minimo.
Inicié a reprodução e acontece o volume até um;nível comfortavel para si.

Se um aparecido for operado durante um longo periodo de tempo com um elevado volume de som através de auscultadores, tal pode provocar danos na capacité de audiência do ouvinte.
Funções gerais
Bloqueio dos botões
- Prima e mantenha premido o botão MEM durante aprox. 3 segundos, de modo a fazer que as configurações sejam alteradas aquando de um contacto involuntário. No visor surge a indicação KEYLOCK.
- Prima e mantenha premido o botão MEM novamente durante aprox. 3 segundos, de modo a desactivar obloqueio dos botões. A indicação KEYLOCK no visor apagase.

Iluminação do visor
Primarialquerboto para iluminarovisor.Ovisoreluminado duranteaprox.10 segundos.

Se o bloqueio dos botões estiver activo, a iluminação do visorsole pode aktivado atraves do botão SNOOZE.
Base de apoio
Abra o pé de suporte na parte inferior do(APARLHO, de modo a estabilizar o aparelho.
Funções de tempo
As funções de tempo podem ser configuradas quando o rádio está ligado ou desligado. Aquando da colocação em funciona, a hora pré-definida do sintonizador mundial está em "0:00 00".
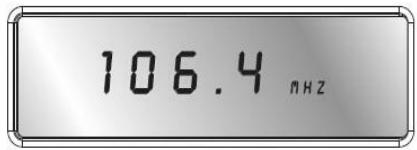

Quando o aparelho é retirado da rede, perdem-se as configurações.
Horas, data, fuso horário e hora mundial
De umasolezpodecfguiaratravésdo botaoMODEas horas, datae fusohorário e consultarahora Mundial. Quando prime MODE,afuncaoaconfigurarpisca duranteaprox.15 segundos.
- MODE premir 1 vez:Horas
- MODE premir 2 vezes: Data
- MODE premir 3 vezes: Fuso horário ("Local City")
- MODE premir 4 vezes: Hora mundial
- MODE premier 5 vezes: Alarme de data especial
- MODE premir 6 vezes: Regular area de recepçao para onda
- MODE premir 7 vezes: Regular interrupção do despertar.
- MODE premir 8 vezes: Comuração entre indicatoração de 12 horas e 24 horas.
De modo a assumir uma configuração, aguarde às indicações parar de piscar (o visor muda para a指示ação das horas), ou está para aproxima função atraves de MODE.

Sequência das indicações de visor:
Acertar as horas
Pressione uma vez MODE. No visor, a hora ajustada pisca (aquando da colocacao em funcaoamento 0:00 00).
Prima UP▲▲ e DOWN▼▼, de modo aajustar as horas em Minutes.
Mantenha uma das teclas premida durante algunos segundos, de modo a configurar as horas em avanco rápido em intervalos de 10 minutos.

Acerte as horas sem hora de Verão. A hora de verão pode ser configurada no seguimento da regulação do fuso horário (v. em b.).
Regular data
- Prima uma vez mais ou两大 vezes em MODE. No visor, a data ajustada pesca (aquando da colocação emFUNICIONamento "1.01.08").
- Prima UP e DOWN▼▼, de modo a alterar a data. Mantenha uma das teclas premida durante algunos segundos, de modo a alterar a data em intervalos dedez dias.
Indicação do dia damana:
SU = Domingo
n_0 = Segunda-feira
TU = terça-feira
U E = Quarte-feira
TH = Quinta-feira
FR = Sexta-feira
S R = S a b a d o
A indentao para o dia da sexta corre automaticamente. E como a das primeiras das letras do nome inglês dos dias da sexta.

O calendário incorporado vaid 2000 a 2099.
Regular fuso horario
- Prima uma vez mais ou outros vezes em MODE. No visor, o fuso horário configurado piscá como abreviatura da responsiva%cidade (na primeira colocação em funcaoamento UTC); a indentacao das horas desaparece.
Prima UP e DOWN▼▼, para chegar ao fuso horário segunte ou anterior.
A seguenteabela dá uma visión das abreviaturas das cidades para os fudos horários e alterações da hora:
| Abbrev. | Diff. to GMT | City | Abbrev. | Diff. to GMT | City |
| LON | 0:00 | London | MEZ | 00:00 | Wellington |
| MUN | + 1:00 | Munich | BUE | -03:00 | Buenos Aires |
| CAI | + 2:00 | Cairo | CCS | -4:00 | Karacas |
| MOW | + 3:00 | Moscow | YUL | - 5:00 | Montreal /Kanada |
| DXB | + 4:00 | Dubai | NYC | - 5:00 | New York/USA |
| KHI | + 5:00 | Karachi | YYZ | - 5:00 | Toronto /Kanada |
| DAC | + 6:00 | Dakar | MEX | - 6:00 | Mexico |
| BKK | + 7:00 | Bangkok | CHI | - 6:00 | Chicago /USA |
| HKG | + 8:00 | Hong Kong | DEN | - 7:00 | Vencer/USA |
| TYO | + 9:00 | Tokyo | YVR | - 8:00 | Vancouver /Kanada |
| SYD | + 10:00 | Sydney | LAX | - 8:00 | Los Angeles /USA |
| NOU | + 11:00 | Numea | ANC | - 09:00 | Anchorage /USA |
| AKL | +12:00 | Auckland | HNL | - 12:00 | Honolulu /USA |
Ajuste da hora de Verão
SNOOZE|Sleep Timer Stop Watch|Count Down Timer Start/Stop
Prima, enquanto a indentação do fuso horário pisca, o botão SNOOZE/SLEEP TIMER. No visor aparece o símbolo da hora de Verão.
Indicar hora mundial
- Prima uma vez mais ou quatre vezes MODE, de modo a indicator a hora mundial. Surge a abreviatura intermitente da cidade com a hora correspondente.
Prima UP▲e DOWN▼▼, para chegar ao fuso horario segunte ou anterior.
Alarme de data especial (,,SDA“)
Prima o botto MODE uma quinta vez, de modo a configurar o alarme de data especial. No visor pisca a indentacao da data SDA.
Prima UP e DOWN▼▼, de modo a configurar a data na qual o alarme deve tocar.
Prima o botão SNOOZE/SLEEP TIMER, de modo a ignorar a introdução do ano, o alarme toca antes todos os anos.
Desligue o alarme premindo qualquer botao.
Selecionar modo de indentacao
Pode escolher quais os dados a serem indicados no visor, quando o rádio está desligado.
O respective modo é indicado no visor através do respectivo símbolo:
CLOCK = Hora
DATE= Data
LOCAL=Hora mundial

Seleciono o modo de indentacao premindo repetidamente o botao FINE de acordo com a segunteabela:
| Símbolo no visor | modo de indicação |
| CLOCK | sãoindicadas apenas as horas |
| CLOCK + LOCAL | sãoindicadas as horas e data |
| CLOCK + DATE | sãoindicadas as horas e hora mundial |
| CLOCK + DATE + LOCAL | sãoindicadas as horas, data e hora mundial |
Função de descentar
- O sintonizador mundial colocá à disposição das horas de despertar independentes uma da另一边 ALARM 1 e ALARM 2. Em às vezes pode decidir se o aparecido devê tocar em todos os dias da sexta ou apenas de segunda a sexta;
Se quer ser acordado com tom de alarme ou com o rádio.
Ajustar hora de despertar
- Prima ALARM 1 (ALARM 2). No visor, a hora de despertar pisca durante aprox. 10 segundos (aquando da colocação em funciona: 0:00 RL1 (RL2) e a indicação dos dias da sexta (abreviaturas em inlgês dos dias da sexta, v. em cima).
Prima,upon as horas piscam,UP▲eDOWN▼,de modo a ajustar a hora de despertar em intervalos decretos. Mantenha uma das teclas premida durante algunos segundos,de modo a configurar as horas em avanco rápido em intervalos de 10 minutos.
SNOOZE|Sleep Timer Stop Watch|Count Down Timer Start/Stop
- Prima o botão SNOOZE/SLEEP TIMER, de modo a escolher entre os differentes programas de despertar: Despertar todos os dias (SUNOTU WE TH FR SA), aparenas nos dias damana (TUTU WE TH FR), aparecas ao fim-de-semana (SUSR).
Para regular a funcao de alarme para cada dia, prima o botao SNOOZE e mantenha premido durante 1 - 2段时间. No visor surge o dia da sexta selecionado (aquando da colocacao em functiOnamento "no").
- Prima repetidamente o botão SNOOZE/ SLEEP TIMER de modo a fazer o dia damana desejado.
Activar hora de descertar
- Quando a hora de despertar estiver regula, active o alarme, premindo ALARM 1 (ALARM 2). No visor RAO ou RAO para despertar atravás da função do rádio.

Por favor tenha em atençao que uma emissora tem de ser ajustada (v. em b.), para que o rádio desperte.
Prima ALARM 1 (ALARM 2) mais uma vez, de modo a regular o despertar com tom de alarme.No visor surge RLm (RLm^ )
Interromper despertar
SNOOZE|Sleep Timer Stop Watch|Count Down Timer Start/Stop
- Prima o botão SNOOZE/SLEEP TIMER, de modo a interromper a função de despertar durante 10 minutos.
Regular interruptão do despertar
Prima 7 vezes o botão MODE, no visor surge a interruptão do despertar regulada (aquando da colocação em funciona "SNO 10").
Com os botões UP▲▲ e DOWN▼▼ pode regular a interrupção do despertar para um tempo de 1 a 59关键时刻.
Desligar funcao de descentar
Alarm Setting
Prima ALARM 1 e ALARM 2 até os símbolos de alarme RAD ou RAD desaparecerem no visor.
Função cronómetro
A funcão cronómetro está à disposicaoapanas quando o radio está desligado.
SNOOZE|Sleep Timer Stop Watch|Count Down Timer Start/Stop
PAGE
- Prima e mantenha o botão PAGE premido durante aprox. 2 seg., no visor surge 0.00.0 u.Prima o botão SNOOZE/SLEEP TIMER, de modo a inicial o cronómetro. A duração Tmaxima a cronometrar é de 39 minutos e 59segundos. quando o cronómetro ultrapassa o tempo maior, aindicação 0.00 surge e pesca no visor. 39.59.0 U.
-
Durante a cronometragem, esta pode ser interrompida premindo o botão SNOOZE/ SLEEP TIMER.
-
Se premir novamente o botão SNOOZE/SLEEP TIMER, o cronómetro volta a cronometrar.
- Mantenha premido o botão SNOOZE/ SLEEP TIMER, de modo a repor as funções do cronómetro.
Premindo o botão PAGE sai do menu do cronómetro.
Função Countdown
A funcão Countdown está à disposicaoapanas quando o rádio está desligado.
Regular e memorizar Countdown
- Prima e mantenha o botão VIEW premido durante aprox. 2 seg., no visor surge a indicação d00. 00.
A contagem decrescente pode estar paraRAR a partir de 99 instantos e 59 segundos.
Prima os botões UP e DOWN▼▼ de modo a fazer a hora desejada.

- Prima o botão VIEW, de modo a memorizar a hora definida, no visor surge a indicação de posicao de memória men. Como o botão A, B, C, seleciona uma posicao de memória, premindo a respectiva tecla a hora é guardada esta posicao de memória.
Premindo novamente o botão VIEW sai do modo Countdown.
Consultar e activar funcao Countdown
| SNOOZE|Sleep Timer
Stop Watch|Count Down Timer Start/Stop |
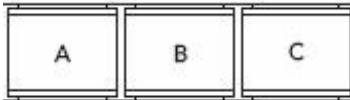
- Prima e mantenha o botão View Cdt premido durante aprox. 2 seg., no visor surge a indentação d00. 00.
- SeLECTIONA hora de Countdown desejada e memorizada com a ajuda do botão A, B, C.
- Prima o botão SNOOZE/SLEEP TIMER, de modo a iniciar o Countdown. Premindo novamente o botão SNOOZE/SLEEP TIMER, o Countdown é interrompido.
Quando o tempo ajustado terminar, soa um sinal de alarme durante um minuto.

- Prima o botão VIEW, de modo a interromper o Countdown e a sair do modo do Countdown.
Funcimiento do rádio
Ligar/volume

- Prima o botão de modo a ligar o rádio. No visor é muitoBXbrevemente em seguida surge a frequência actualmente regulada com a banda selecionada.
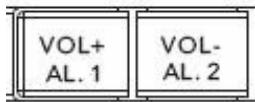
Regule o volume através dos botães VOLUME:
- BOTÃO VOL -- mais baixo;
- BOTÁO VOL +: mais alto.
Desligar
Desligue o rádio, premindo o botão. O visor minha novamente as horas.
Função Snooze
Atravíes do botão SNOOZE/SLEEP TIMER pode activar também a funcção Snooze. Pode regular uma hora até 90 minutos em intervalos de 10 minutos, na qual o rádio se deverá deslagir.
SNOOZE|Sleep Timer Stop Watch|Count Down Timer Start/Stop
- Prima novamente SNOOZE/SLEEP TIMER,upono. Surgem os sintellos paraa funcao Snooze e 90 (para 90 minuto).
Prima SNOOZE/SLEEP TIMER, de modo a reduzir o tempo Snooze em intervals dedezcretos.
- Seleccione um tempo Snooze (o símbolo Snooze é做不到) ou prima novamente SNOOZE/SLEEP TIMER, às vezes surgir no visor. O rádio está agora desligado.
Ajustar a emissora
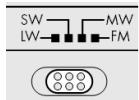
- Seleciona a banda de frequência desejada (FM, AM, LW ou SW) atravZs do interruptor de seleção de bandas. A abreviatura correspondente é muito boa no visor.

Ajuste com UP e DOWN a frequência de emissão desejada.
Se mantiver UP e DOWN premido durante aprox.增值服务, não segundos, inicia a localização automática.
A localização para quando encontrar uma emissora comrengtha de emissão sufficiente.
Regular frequência MW
Uma vez que os sistemas de emissão de radio divergem em发展目标 pa'ses, deveria efectuar uma adaptação atraves da configuração da area de recepçao: Prima vezes o botão MODE e selecionce com o botão UP▲e DOWN▼, aarea de recepçao correspondente de acordo com a segunteabela:
| Espécie de moduração | Distência de exploração | Banda de frequência |
| FM | 100 kHz | 87.0 -109.0 MHz |
| SW | 5 KHz | 5.85 - 17.9 MHz |
| LW | 1 kHz | 144 -299 KHz |
Distência de frequência MW:
| Região | Distância de exploraçao | Banda de frequência |
| América | 10 kHz | 520 -1710 KHz |
| Europa | 9 kHz | 522 -1656 KHz |
Sintonia emissoras
Quando uma emissora não é encontrar, é posível melhorar a receção atraves de um ajuste preciso.

Na faixa FM, o sintonizador PLL percorre a banda em passos de 50 kHz. No entanto, na faixa SW e MW percorre em passos de 1 kHz.

Durante a localização de emissora, prima o botão FINE, no visor surge a indicaça FINE.
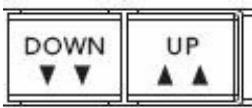
Ajuste com UP▲ e DOWN▼ a frequência de emissão desejada com metades de intervalos de frequência.
Premindo novamente o botão FINE, sai do ajuste preciso da emissora.
Esta funcao nao está a disposicao na gama de frequencias OL.
Antena
FM e SW
A antenna telescópica giratória no aparelho é eficaz na banda FM e SW.
Retire a antenna completeness e ajuste-a para uma melhor recepçao.
MWeOL
Nas bandas MW e OL, a antenna telescópica não é eficaz. Nestas和地区, o aparecido receivebe através da antenna de ferrite instalada.
Direcione o aparelho para a melhor recepçao.
Função de graves
- O aparecido possui um „Bass Booster“ para intensificar os graves. Durante a operação, prima a tecla BASS. Surge „ON BRS“ no visor.
Para terminar a funcao prima de novo a tecla BASS e no visor surge ,OFF BRS".
Funções de memória
Memorizar emissoras

O receptor mundial pode memorizar nas bandas de Frequência FM 90 emissoras, na banda MW 60 emissoras, na banda SW 150 emissoras e na banda LW 30 emissoras.
- Para as bandas de frequência FM, SW e MW, as posições de memória está organizedas em 10 páginas ("Pages") para cada de memória. De modo a memorizar uma emissora, procedo do segunte modo:
Defina una emissora que queria memorizar (v. em c.).
- Prima o botão MEM. No visor são indicadas a págnia [PAGE] e a posicao de memória [MEM].
- SeLECTIONE com o botão PAGE uma páginá de memória (não na banda LW) e com os botões A, B, C, uma posicao de memória.
- Ambas as ocupações são indicadas no visor. Prima novamente MEM, de modo a memorizar a emissora.
Seleccionar emissoras memorizadas


De modo a selecionar directamente uma emissora memorizada, prima repetidamente o botão PAGE, às a páginá de memória desejada for做不到. Prima进驻 um dos botões A, B, C, para selecionar a posio de mem'pria.
Efectuar localização automática de emissora
O seu sintonizador mundial pode localizar as frequências de uma banda e colocar as emissoras encontrar na memória. De modo a activar esta localização automática de emissoras (Automatic Memory Scan / AMS),LLL:
Prima uma vez o botão MEM.
Prima e mantenha premido o botao VIEW durante aprox. 1 segundo. O sintonizador mundial localiza todas as frequencias e memoriza-as.
Consultar posições de memória

Prima o botão VIEW, de modo a consulutar a ocupação de todas as memórias da banda de frequência selecionada. Todas as emissoras memorizadas são reproduzidas durante aprox. cinco segundos.
Prima um botão qualquer, para parar a localização da emissora.
Eliminação

Embalagem
O seu sintonizador mundial encontrar-se numa embalagem para ficar protegido de danos de transporte. As embalagens são de materiais reutilizaveis ou podem ser entregaes na reciclagem de matériaprima.

Aparelho
Nunca deposite o seu sintonizador mundial no lixo dométrico no fim da sua vida útil. Informe-se muito dos serviços Municipais sobre as possibilidades de uma eliminação correcta e ecológica.

Pilhas
As pilhas gastas não podem ser depositadas no lixo dométrico. As pilhas tem de ser depositadas no pilhão.
Dados技术和
Frequências de rádio
FM (onda ultracurta):
87.0 - 109.0 MHz
SW (onda curta):
5.85 - 17.9 MHz
AM (onda media):
522-1656kHz
LW (onda longa):
520 - 1710 kHz para os EUA
Auscultadores: conductor RCA de 3.5 mm
144 - 299kHz
Funcimiento de rede
Adaptador de rede; modelos:
A400-75
Tensó de rede/entrada:
230 V ~ 50 Hz
Tensó de saía:
7.5V = 400mA

Funcimiento a pilhas
Pilhas necessarias: baterias Mignon 4 x 1.5 V,
tamanho AA, LR6.
(não incluío no volume de fornecimento)
Reservamos os direitos a alteracoes tecnicas!

Strona czołowowa odtwarzacza
- Antena teleskopwa
- SNOOZE/SLEEP TIMER Przerywanie sygnatu budzika
- RADIO ON/OFF Węcznie / Wyȩczanie budzika
- UP/DOWN: Przyciski wyboru czestotliwość
- FINE: Dostrajanie preczyjne
- PAGE: Komórkapatęci
- VIEW: Wyswietlanie zapisanych staci
- MEM: Zatwierdzanie wyboru
- Gósnik
- A,B,C: Komórki pamięci.
- BASS: Wzmacniacz basów
- MODE: Wybór ustawien
- VOLUME Ustawianie górsnosci Alarm 1/2 Ustawianie czasu budzenia
- Wyswietlacz
- Jakosc odbioru dla stacji nadawanych na falach krótkich
- Gniazdo stuchawek
- Gniazdo zasilacza
- Wybor pasma czestotliwość
Wskazówki dotyczbepeziczeistwa 8
Informacja dotyczze niniejszej instrukcji obslugi 8
Urzadzenia elektryczne nie moga sie znalecz w reckach daneci 8
Warunki panujace w otoczeniu 8
Zapewnic latwy dostep do gniazdka 9
Nigdy nie próbowac samodzielnie naprawiać urzadzenia 9
W przypadku zlokćeni dzialania 9
Burza 9
Korzysta z baterii w bezpieczny sposob 9
Czyszczenie urzadzenia 10
Czym jest Tuner PLL? 11
Uruchomienie 11
Sprawdzenie zawartosci zestawu 11
Podlączenia do sieci 12
Zasilanie sieciowe i z baterii 12
Wkladanie baterii 12
Obchodzenie sie z bateriami 13
Podlączenia sluchawek 13
Funkcje ogólne 14
Blokada klawiszy 14
Podswietlenie wyswietlacza 14
Podstawka 14
Funkcje zegara 14
Funkcje zegara 15
Godzina, data, stefa czasowa, czas na swiecie 15
Ustawianie godziny. 16
Ustawianie daty 16
Ustawianie strefy czasowej 17
Przejcie na czas letni 19
Wyświetlanie czasu na swiecie 19
Specialny alarm dla wybranej daty ("SDA") 19
Wybor trybu wyswietlania 20
Funkcja budzenia 20
Ustawianie czasu budzenia 21
Aktywacja czasu budzenia 22
Przerywanie sygnalu budzika 22
Ustawianie przerwy sygnalu budzika 22
Wyluczanie fungcji budzenia 22
Funkcja stopera 23
Funkcja odliczania czasu (do zera) 23
Ustawianie i zapisywanie funkcj odliczania czasu 23
Wywolywanie i aktywacja funkcj odliczania czasu 24
Radio. 25
Wlaczanie/Posiom glosnosci 25
Wyluczanie/Funkcja wyluczania automatycznégo 25
Funkcja wyluczania automatycznégo 25
Ustawianie staci radiowej 26
Ustawianie zakresu MW 26
Dostrajanie preczyjne 27
Antenna 27
FM i SW. 27
MWi LW 27
Funkcja basow 28
Funkcje zapamietywania 29
Zapamietywanie staci 29
Wybor zapisanej staci 30
Automatyczewyszukiwanie staci 30
WywoIywanie pozycji pamięci 30
Utylizacja 31
Opakowanie 31
Urzadzenie 31
Baterie 31
Dane Techniczne 32
Urzadzenie 32
Zasilanie sieciowe 32
Zasilanie z baterii 32
Wskazówki dotyczne bezpiecznychstwa

Przed przystapieniem do uzytkowania produktu prosze uwaznie przyciezyac wskazówki dotyczne bezpieczędsta. Stosować są do ostrzeżn zawartych w instrukcji obslugi.
Zawsze przechowyść instrukcje obshugi pod ręka. W przypadku przybekazania urzadzenia osobie trzechiej naleź do niedogo dołączytokość.
niniejsz z instrukcje obstugi.
Urzadzenia elektryczne nie mogą są znaleść w ryckach daneci
W przypadku połknięcia baterie/akumulatory moga stwarzać zagrożenie zycia. Z tego powodu urzadzenia i baterieNSEZY przechować poza zasięgiem mazych;dzieci. W przypadku połknięcia baterii nalezy natychmiast zasięgnac porady lekarskiej.Rowniez opakowania nalezy przechowywać z dala od;dzieci. Istnieje ryzyko uduszenia.
Naleź pilnowość, aby daneci nigdy nie bawify sie urzadzeniem. Urzadzenia nie są boć obstrugiwane przyez osoby (wączajc w to daneci) z ograniczonymi z dolnośćciami fizycznymi, sensorycznych lub umysłowymi, są niediepiadajcie oppowiedniego doświadczenia i/lub wiedzy, chyba, są korzystaja one z urzadzenia pod nadzorem osoby odpopiewiaznej za ich bezpieczność lub ostrzymań od nich instrukcję dotyczȩce sposobu korzystania z urzadzenia.
Warunki panujace w otoczeniu
Niedopuszczacdo tego,aby:
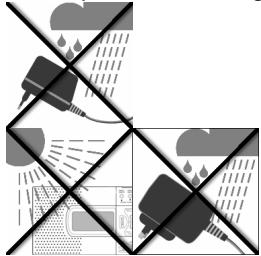
- zasilacz miał kontak t z woda, równieź ze spadajycymi kroplami lub Rozchlapywana woda lub z innymi cieczami;
- na zasilaczu stawiane bythy pojemniki wypelnione ciecz (np. wazony);
- na urzadzenie padało przydruźyszcy czas bezposrednie, silne swiatto stoneczne;
- w bezposrednim sąsiedztwie urzadzenia znajdowały sie otwarte płomienie (np. zapalone szwie).
- Nalezy rownikę zapiȩtać o zapewnieniu regularnégo wietrzenia.
Zapewnic Łatwy dostęp do gniaźdka
Włoźyc wtyczka zasilacza do Łatwo dostepnégo gniażdka zasilania (230 V ~ 50 Hz) znejdućęgo są w poplȩu urzadzenia. Gniazdko to musi być Łatwo dostepné na wypadek koniecznosci szybkiego odcȩcia urzadzenia od zasilania.
Nigdy nie probować samodzielnie naprawiać urzadzenia
W przypadku zauważenia uszkodzenia wtyczki, kabla zasilania lub samego
urzadzenia, nalezy natychmiast wyjac wtyczkę z gniaźdka.
W zadnym wypadku nie nalezy przybować samodzielnie otwierac i/lub naprawiać urzadzenia lub wtyczki. Istnieje niebepezcieństwo porazenia pradem! W przypadku awarii nalezy sie zwrócić do naszego centrum serwisowej lub odpowiedniago warsztatu
specialistycznegeto.
W przypadku zakfócen działania
Jeęeli urzadzenia wykazuje zlokzenia w działy, być要去 miało mistręsce wyładowanie elekrostatyczne. W takim wypadku naleź wy sączek z gniaźdka i wy są baterie z urzadzenia. Nastepnie naleź ponownie włość baterie i podȩczyć urzadzenia do sieci. Urzadzenia jestanine w ten sposob zresetowane.
Burza
W przypadku dędzsej nieobecnosci lub podczas burzyNSE wyjać wtyczkę zgniazdka.
Korzystać z baterii w bezpieczny sposób
Pod zadnym pozorem nie zadowaec ponownie baterii! Grozi to wybuchem!
Baterie nalezy przechowywać z dala od daneci, nie nalezy ich wrzuć do ognia, zwierać, ani demontować.
Przy wiktadani baterii zwracać uwagę na prawidłową biegunowość.
W razie potrzeby przy wtozeniem baterii nalezy ocyszeci ich styki oraz styki urzadzenia.
Zuzyte baterie nalezy niedzwocznie wyjać z urzadzenia! Istnieje ryzyko wycieku ich zawartosci!
Zawsze pamietac o regulnej wymianie baterii.
Baterie nalezy wymieniać na nowe unto go somego typu, nie uzywać baterii innych typów oraz nie mieszao nowych baterii ze starymi.
Nie wystawiać baterii na dziatanie warunków ekstremalnych, np. nie kłasć ich na grzejinikach! Istnieje ryzyko wycieku ich zawartosci!
Nieprzestrzeganie tych zalecen moze spowodować Rozladowanie baterii i wyciek ich zawartosci. Aby uniknac uszkodzenia urzadzenia, nalezy natychmiast wyjacbaterie. Unikać kontaktu ze skóra, oczami i sluzówka. W przypadku kontaktu z kwasami zawartym w baterii nalezy natychmiast przemyć obficie zanieczyszczone.),.), czysta woda i natychmiast zasięgnac porady lekarskiej.
Ježeli urzadzenie ma pozostć nieduźwyane przydruźyszymi zierzy z niego wyjadbaterie.
Czyszczenie urzadzenia
Przed czyszczeniem wyjac wtyczke z gniażdka. Do czyszczenia uzywaćSuchej, miękkiej sciereczki. Unikać stosowania chemicznych sądków czyszczących i rozpuszczalników, gdyź moga one uszkodzić powierzchnie urzadzenia i/lub umieszczone na nim napisy.
Czym jest Tuner PLL?
Tuner PLL (Phase locked loop) sfuzy do generowania stabilnej czestotliwość odbioru przy pomocy kwarcu. Tuner PLL uzmolniwa doklady wybor i zapisanie czestotliwość przyresyfania sygnału i gwarantuje taką sama trwało jakość przy odbiorze transmisji radiowych.
Uruchomienie

UWAGA!
Nie pozwalać dzeciom na jabawę z folia. Istnieje niebeźpieczność wyduszenia!
Niedopuszczacdo tego,aby
zasilacz miał kontakt z woda, równieź ze spadajycymi kroplami lub Rozchlapywana woda lub z innymi cieczami;
na urzadzenie padało przyez dluszysz czas bezposrednie, silne swiatlo sstoneczne.
Sprawdzenie zawartosci zestawu
Przy Rozpakowaniu naleź sie upewnić,czy w zestawie dostarczone zostawy nastepujecka elementy:
- Odbiornik
Zasilacz
Stuchawski
- Pasek do przenoszenia
- Torba do przenoszenia
Podłaczenia do sieci
Podczyc wtyk zasilacza do gniazda DC-7.5V z boku urzadzenia.
Podłaczyc wtyczke do latwo dostepnego gniazdka zasilania. Aby uniknocy przeszkód, nie uzywać urzadzenia z przyędźuczem.

Nie uzywać zadnégo innego wtyku oprócz dostarczonego modelu A 400-75, poniewaź mogłowby to spowodowej do uszkodzenia urzadzenia lub zasilacza.
Przy podlączeniu urzadzenia zegar wskazuje godzine 0:00 00.
Zasilanie sieciowe i z baterii
Gdy urzadzenie zostanie odaczone od sieci, ewentualne wprowadzone ustawienia (godzina, czas budzika, stace radiowe) zichana utracone. Jezi chce sie zachowa te ustawienia, nalezy njapierw wlozyc do urzadzenia baterie, a dopiero potem odaczyc je od sieci.
Władanie baterii
Zamiast podłaczać urzadzenia do sieci,ość je zasilac za pomocă baterii (niedostarczone w zestawie). Potrzebne są cztery baterie typu AA-LR6, 1.5 V
- Otworzyć przyegródkę na baterie z tyfu urzadzenia, przysem uwajć w tym celu pokrywo w doł.
Wtozycdo przegrodki cztery baterie, zwracajucwage na prawidowa biegunowosc (biegun ujemny znajduje sie przy spreźynie).
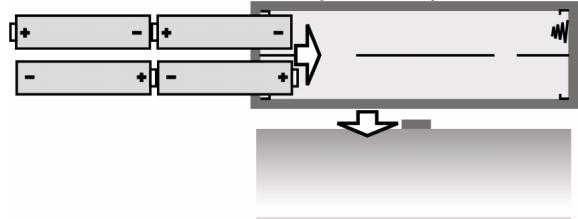
Nałoźyc z powrotem pokrywne na przyegródke.
Gdy baterie są s让大家, na wyświetlaczu pojawia są migajczy symbol
Obchodzenie sie z bateriami
Przy ponownym podłaczeniu urzadzenia do sieci naleź wyjadć baterie.
Baterie nalezy wymeniać zawsze w komplecie. Nie nalezy mieszaoć starych baterii z nowymi.
Podłaczenia szechawek
Po lewej stronie urzadzenia znajduje sie gniazdo stuchawek
- Można do niedo podłęczyc dostarczone słuchawki lub jakiekolwiek innę słuchawki z wtykiem 3.5 - milimetrowym.
Podłęczenia słuchawek powoduje automatyczne wyłączenia gośnika.

Uwaga!
Zbyt duzy poziom górsnosci podczas korzystania stuchawek要去 spowodować uszkodzenia słuchu i/lub seinen utrata. Na poucătku odtrwarzia naleź yustawić poziom górsnosci na najnizsza wartość. Rozpoczć odtrwarzie i zȩkszać poziom górsnosci zgodnia z wąsnymi upodobaniami.

Zbyt duzy poziom gołosnosci podczas korzystania ze słuchawek przyezdłuźsy czasMZe spowodowauszatkodzenia słuchu.
Funkcje ogólne
Blokada klawiszy
W celu wączenia blokady klawiszyn aleźwcisntag
przycisk MEM i przytrzymać go przyze okło 3
sekundy. W ten sposob zapobiega siezmianie
ustawien poprzej przypadkowe dotkBiecie przyciskow.
Na wyświetlaczu pojawi są symbol KEYLOCK.
Aby anulować blokade klawiszny, naleź y ponownie
wcisnac przycisk MEM i przytrzymac go przye zoTo 3
sekundy. Symbol KEYLOCKzniknie z wyświetlacza.

Podświetlenie wyświetlacza
Welu podświetlenia wyświetlacza nalezy wcisnć dowolny przycisk. Wyświetlacz pozostanie podświetlony przyez okło 10 sekund.

Gdy blokada klawisz jest aktywna, podstawienie wyświetlacza są zawość tylko za pomocamy przycisku SNOOZE.
Podstawka
Aby zwiekszyc stabilnosc urzadzenia, nalezy Rozlozyc podstawke znajdujacsi ztyfu.

Funkcje zegara
Funkcje zegara möglich ustawiać przy wyłęczonym odiorniku radiowym. Gdy urzadzenie zostaje wączone po raz pierwszy, ustawieniem fabrycznym odiornika o zasięgu swiatowym jest „0:00 00".
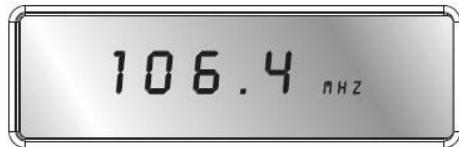

Odázcenie urzadzenia od zasilania sieciowego powoduje utrata ustawien.
Godzina, data, stefa czasowa, czas na swiecie
Za pomocą przycisku MODEość ustawic godzine,dating strefę czasowa, jak również sprawdzić czas na calym swiecie. Po wciȩciu przycisku MODE ustawiana funkacja miga przyez okół 15 sekund. W tym czasie sąȩ zpwrawdzić ustawienie za pomocą przycisków UP ▲ △ /DOWN ▼ ▼.
W tym czasie naleź wropyadzić ustawuminium za pomocapiżyprzycisków UP ▲ ▲ /DOWN▼▼.
Wcisnć przycisk MODE 1 x : Godzina
- Wcisn污染防治模式 2 x : Data
- Wcisn污染防治模式3x:Stefaczasowsa(“Local City”)
- Wcisn污染防治模式 4 x : Czas na swiecie
- Wcisn污染防治模式 5 x : Specialny alarm dla ustawionej daty
- Wcisn污染防治模式 6 x: Słuzy do ustawiania zakresu odbioru dla fal srednich
- Wcisn污染防治模式 7 x: Słuzy do ustawienia przerwania syngatu budzika
- Wcisn污染防治模式 8x: Sztwy do przyȩczania pomietźny trybem 12 i 24-godzinnym
Aby ustawienie zaczego działac, nalezy po prostu zaczekac, az wyświetlane symbole przyestana migać (wyświetlacz przyłącza są ponownie na wskazanie funkcję zegara) lub wcisnól przyczysk MODE, aby przyȩść do nastepnej funkcjji.
Kolejnosc symboli na wy'swietlaczu:

Ustawianie godziny
Wcisnac jeder raz przycisk MODE. Na wyswietlaczu zacznie migać ustawiona godzina (przy pierwszym wączeniu zegar ustawiony jest na 0:00 00).
Wcisnac przycisk UP lub DOWN▼,aby ustawic godzne w odstepach minutowych. Przytrzymac przycisk wcijsniety przyez kilka sekund,aby ustawienie zmieniafo sie w odstepach dziesieciominutowych.

Ustawic godzne bez przesunięcia na czas letni. Ewentualne przesuniȩcie na czas letni sąna ustawic w trakcie ustawiania strefy czasowej (patrz wyzej).
Ustawianie daty
Wcisnac jesteczne raz lub dwa razy przyczisk MODE. Na wyświetlaczu zacznie migać ustawiona data (przy pierwszym wączeniu data ustawiona jest na 1.01.08).
Wcisnac przycisk UP ▲ ▲ lub DOWN▼, aby ustawić nowa date, przywuławsi do przyodu lub do tyfu. Przytrzymań przycisk wcińskipty przykila sekund, aby przywuławsi do przyodu lub do tyfu w odstepach dziesieciodniowych.
Symbole dni tygodnia:
$$
\begin{array}{l} S u = \text {N i e d z i e l a} \ M o = \text {P o n i e d z i a t e k} \ T u = W t o r e k \ W e = \dot {S} r o d a \ T h = C z w a r e t k \ F r = \text {P i a t e k} \ S a = S o b o t a \ \end{array}
$$

Symbole dni tygodnia zmieniaja sie automatycznie. Dni tygodnia są oznakowane dwoma pierwszymi literami nazw angielskich.
Ustawianie strefy czasowej
Wcisnac jestzsche raz lub trzy razy przyczisk MODE. Na wyświetlaczu zacznie migac ustawiona strefa czasowa jako skrot naleź成语o do niedmiasta (przy pierwszym wączeniu jest to skrot UTC); Godzina znika.
Wcisnac przycisk UP ▲▲ lub DOWN▼▼, aby przyjeść do nastepnej lub poprzejność strefy czasowej.
W ponieszzej tabei przystawione zostwy skroty miast odpowiadajych poszczególnym strefom czasowym wraz z przesunieciami czasu.
| Skrót | Róznica wzglédem GMT | Miasto | Skrót | Róznica wzglédem GMT | Miasto |
| LON | 0:00 | Londyn/Wielka Brytania | UTC | 0:00 | Universalny Czas Koordynow any |
| MUN | + 1:00 | Monachium/Niemia | BUE | - 3:00 | Buenos Aires/Argentyna |
| CAI | + 2:00 | Kair/Egypt | CCS | - 4:00 | Caracas/Wenezuela |
| MOW | + 3:00 | Moskwa/Rosja | YUL | - 5:00 | Montral/Canada |
| DXB | + 4:00 | Dubai | NYC | - 5:00 | New York/USA |
| KHI | + 5:00 | Karaczi/Pakistan | YYZ | - 5:00 | Toronto/Canada |
| DAC | + 6:00 | Dakka/Bangladesz | MEX | - 6:00 | Meksyk/Meksyk |
| BKK | + 7:00 | Bangkok/Tajlandia | CHI | - 6:00 | Chicago/USA |
| HKG | + 8:00 | Hong Kong | DEN | - 7:00 | Denver/USA |
| TYO | + 9:00 | Tokyo/Japonia | YVR | - 8:00 | Vancouver/Kanada |
| SYD | + 10:00 | Sydney/Australia | LAX | - 8:00 | Los Angeles/USA |
| NOU | + 11:00 | Numea/Nowa Kaledonia | ANC | - 9:00 | Anchorage/USA |
| AKL | +12:00 | Auckland/Nowa Zelanda | HNL | - 12:00 | Homululu/USA |
Przejcie na czas letni
SNOOZE|Sleep Timer Stop Watch|Count Down Timer Start/Stop
Podczas gdy symbol strefy czasowej jesteczne miga na wyświetlaczu, proszewcisnę przycisk SNOOZE. Na wyświetlaczu pojawi są symbol czasu letniego.
Wyświetlanie czasu na swiecie
Wcisnac jesteczra raz, ewentualnie trzy razy przycisk MODE, aby wyswietlic czas na swiecie. Na wyswietlaczu pojawi sie migajczy skrot miasta wraz z odpowiadajacz mu godzina.
Wcisnac przycisk UP lub DOWN , aby przyjeść do następnej lub poprzejność strefy czasowej.
Specjalny alarm dla wybranej daty (,SDA^ )
Wcinsć jestecz raz, ewentualnie pięć razy przyczisk MODE, aby ustawić spezialny alarm dla wybranje daty. Na wyświetlaczu zacznie migić symbol SDA.
Wcisnac przycisk UP lub DOWN , aby ustawic date, w której ma sie wączyć alarm dzwiekowy.
Wcisinć przycisk SNOOZE, aby zignorowej w povadzenia roku. Alarm;będzie są wtedy uaktywniał co roku.
Alarm 生命周期 poprzej wciśniece dowolnégo przycisku.
Wybór trybu wyświetmania
Istnieje mozliwość wyboru dat, króre besteht są pojawiać na wyświetlaczu, gdy radio jest wyłączone.
Wybrany tryb wskazywany jest przyez odpwiednie symbole na ekranie:
CLOCK = Godzina
DATE= Data
Local=Strefaczasowa

Prosze wybrać tryb wyświetlania poprzej wciȩpie przycisku FINE zgodnia z poliższa,tabela:
| Symbol na wyświetlaczu | Tryb wyświetlandia |
| CLOCK | Wyświetlana jest tylko godzina |
| CLOCK + LOCAL | Wyświetlana jest godzina i czas na świecie |
| CLOCK + DATE | Wyświetlana jest godzina i data |
| CLOCK + DATE + LOCAL | Wyświetlana jest godzina, data i czas na świecie |
Jeżeli wciągu 3 sekund nie zostanie wciśnietyźaden przycisk, urzadzenia przy.§ćza sie automatycznie do poprźedniago trybu wyświetlania.
Funkcja budzenia
- Odbiornik umozliwa ustawienie dwoch niezaleznych od siebie godzin budzenia ALARM 1 i ALARM 2. W obu przypadkach mayna ustawić:czy budzik ma działac w kaźdy;dzień tygodnia,czy tylko od poniedziałku do piątku;
-czy ma dziać alarm budzika,czy teas ma sie zamiast niego walksć radio.
Ustawianie czasu budzenia

Wcisinac przycisck ALARM 1 (ALARM 2). Na wyswietlaczu besteht miga cyez przez okato dziesieciu sekund ustawiony czas budzenia (w przypadku pierwszego wynczenia urzadzenia: 0:00 AL1 lub (AL2) i symbol dnaia tygodnia (skrot angielskiej nazwy dnaia tygodnia - patrz wyzej).
Podczas gdy miga czas budzenia,wcisnac przycisk UP▲lub DOWN▼, aby ustawic czas budzenia w odstepach minutowych. Przytrzyma przycisk wcińskiptyrzekilka sekund,aby ustawienie zmieiao sie w odstepach dziesieciominutowych.
SNOOZE|Sleep Timer Stop Watch|Count Down Timer Start/Stop
Wcisnac przycisk SNOOZE/SLEEP TIMERA, aby wybrać jeder z dostepnych programów budzenia: Budzenie codzienne (Su Mo Tu We Th Fr Sa), tylko w dni robocze (Mo Tu We Th Fr) lub tylko w weekend (Su Sa).
Funkcję alarmu dla poszczególnych dni ustawia są poprzej wciśniece przycisku SNOOZE i przytrzymaniu go przyze 1-2 sekundy. Na wyświetlaczu pojawsi są wybrany;dzień tygodnia (przy pierwszym wączeniu urzemdatzenia - „Mo”).
TerazNSEKIKAKROTNIE wciSnac przycisk SNOOZE/SLEEP TIMER,aby ustawic wybrany dzien tygodnia.
Aktywacja czasu budzenia
- Po ustawieniu czasu budzenia naleź aktywować alarm poprzej wciȩść przycisku ALARM 1 (ALARM 2). Jeźeli wybrano funkacja budzenia przy bez radio, na wyświetlaczu pojawie są symbol RAD lub RAD.

Naleź przy tym pamiętać, ze funkćja budzenia przyże radio działa tylko wtedy, gdy ustawiona jest jakaś stacja (patrz wyzej).
Wcisnac jesteczne raz przycisk ALARM 1 (ALARM 2), aby ustawic budzenia sygnalem dzwiekowym. Na wyświetlaczu pojawi są symbol ALM (ALM).
Przerywanie sygnału budzika
SNOOZE|Sleep Timer Stop Watch|Count Down Timer Start/Stop
Wcisnac przycisk SNOOZE/SLEEP TIMER, aby przyerwać sygnat budzika na 10 minut.
Ustawianie przyrewy sygnatu budzika
Wcisnac siedmiokrotnie przycisk MODE. Na wyswietlaczu zacznie migać ustawiona przyerwa sygnatu budzika (przy pierwszym wączeniu - SNO 10).
Za pomocę przycisków UP ▲▲ i DOWN▼▼ nutzen ustawic przyrzwo sygnatu budzenia w zakresie od 1 do 59 minut.
Wyłacznie fungcjibudzenia
Alarm Setting
Wciskać przycisk ALARM 1 lub ALARM 2, dopóki z wyświetlacza nie zniknie symbol RAD① lub RAD②.
Funkcja stopera
Funkcja stopera jest dostepna tylko przy wyłacznym radiu.
SNOOZE|Sleep Timer Stop Watch|Count Down Timer Start/Stop
PAGE
Trzymać przycisk PAGE wciśniety przyez okło 2 sekundy. Na wyświetlaczu pojawi są 0.00.0 u. Aby wączyć stoper,NSEWy zwiCnAcz przycisk SNOOZE/SLEEP TIMER. Maksymalny czas, ktoź myno uzawic na stoperze, to 39 minut i 59 sekund. Po przykroczeniu maksymalnégo czasu dla stopera na wyświetlaczu pojawi są ponownie symbol 39.59.0 u.
Pomiar czasu möglich przyerwać poprzejcz wciśniece przycisku SNOOZE/SLEEP TIMER.
SNOOZE|Sleep Timer Stop Watch|Count Down Timer Start/Stop
PAGE
- Ponowne wciśćcie przycisku SNOOZE/SLEEP TIMER spowoduje dalsze odliczanie czasu przyez stoper.
Aby zresetować stoper,{naleź trzymać przycisk SNOOZE/SLEEP TIMER wciśniety przyez kilka sekund.
Wciśćcie przycisku PAGE powoduje wyjsćz funkcj stopera.
Funkcja odliczania czasu (do zera)
Funkcja odlicznania czasu jest dostepna tylko przy wyłacznonym radiu.
Ustawianie i zapisywanie funkcji odliczania czasu
Istnieje moziwość ustawienia aż do 6 roźnych wyłączników czasowych.
Trzymać przyczysk VIEW wciśniety przyez okło 2 sekundy. Na wyświetlaczu pojawi są symbol d00.00.
Wcisnac przycisk UP lub DOWN▼, aby ustawic zadany czas. Odliczanie czasu do zera moza ustawic maksymalnie na 99 minut i 59 sekund.

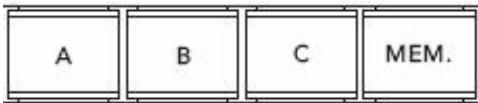
Wcisnac przycisk MEM, aby zapisać ustawuminium czasu. Na wyświetlaczu zacznie migać symbol poźycjiAMIÇE MEM. Za pomocą przycisków A,B,C sąȩwy wybrać poźycjeAMIÇE. W celu zatworżenia wybranej poźycjiAMIÇE sąȩwy wcisnac przycisk MEM.
Aby uruchomic odliczanie czasu, nalezy wcisnac przycisk SNOOZE/SLEEP TIMER.
- Ponowne wciśniece przycisku VIEW powoduje wyjscie z trybu odliczania czasu.
Wywoływanie i aktywacja funkcj odliczania czasu
SNOOZE|Sleep Timer Stop Watch|Count Down Timer Start/Stop
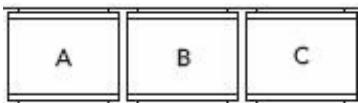
Trzymać przycisk VIEW wciśniety przyez około 2 sekundy. Na wyświetlaczu pojawi są symbol d00.00.
Wybrać zędany zapisany czas do odliczania za pomoczą przyciskowy pamieci A,B,C.
- Aby Rozpoczamy odliczanie czasu,NSEWy wcisnac przycisk SNOOZE/SLEEP TIMER. Ponowne wcijsiecie przycisku SNOOZE/SLEEP TIMER przerwie odliczanie czasu.
Po upywie ustawionego czasu przyez minute bedzie slychać sygnat alarmowy.

Wcisnac przyciscVIEw,abyprzerwaocdliczanieczasu i wyjsc z lorobu.
Radio
Włączanie/Posiom gośnosci

Wcisnac przycisk pokazany na lewej ilustraci, aby wączyc radio. Na wyświetlaczu pojawsi są aktualnie ustawiona czestotliwość wraz z wybranym pasmem.
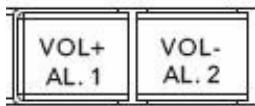
- Poziom górsnosci möglich regulować za pomocą przycisków VOLUME: VOL --: sciszanie, VOL + : zȩkszanie górsnosci.
Wyłacznie/Funkcja wyłacznia automatycznégo
Aby wyłaczyc radio, naleź ywcisné przycisk Na wyświetlaczu pojawtie sie ponownie wskazanie godziny.
Funkcja wyłuczania automatycznégo
Za pomocę przycisku SNOOZE/SLEEP TIMER są nowie zȩczyć funkcję wyłączania automatycznego. W odstepach dziesiocimunutowych są ustawic zȩdany czas aź do 90 minut, po upływie którego radio wyłączy są automatycznie.
SNOOZE|Sleep Timer Stop Watch|Count Down Timer Start/Stop
Wcisnac ponownie przycisk SNOOZE/SLEEP TIMER, aż na wyświetlaczu pewa węlączania automatycznego ONoraz 90(dla ustawenia na 90 minut).
Wcisnac ponownie przycisk SNOOZE/SLEEP TIMER, aby Rozpoczac odliczanie czasu przyd automatycznym wygfczeniem urzadzenia.
Wybrać czas automatyczné wyłączenia (symbol czasu automatyczné wyłączenia —— pozostaje na wyȩwietlaczu) lubwciskań nadal przycisk SNOOZE/SLEEP TIMER, dopóki na wyȩwietlaczu nie pijawi są symbol OFF. Teraz radio jest wy)—źzone.
Ustawianie stacji radiowej
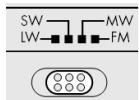
Wybrać za pomocamy przyȩcznika pasma zędane pasmo czestotliwość (FM, MW, LW lub SW). Na wyświetlaczu pojawi są odpowiadajcy mu skrót.
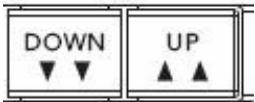
Za pomocę przycisku UP ▲ lub DOWN▼▼ naleź teraz ustawić ządania czestotliwość odbioru.
Gdy przycisk UP lub DOWN zichniety na oko to trzy sekundy, Rozpocznie sie automatyczne wyszukiwanie.
Wyszukiwanie zatrzymuje są po znalezieiu staci z wystarczajaco mocnym sygnatem.
Ustawianie zakresu MW
Jako ze systemy nadawania transmisji radiowych roźnia sie wazoleńosci od kraju, po ustawieniu zakresu odbioru nalezy go dostroić:
Wcinsac szesciokrotnie przycisk MODE, a nastepnie wybrać za pomocą przycisku UP ▲ lub DOWN▼▼ odpowiedni zakres odbioru zgodnie z poniższa tabela:
| Tryb modulazioni | Odleg(lość próbkownikia | Zakres pasma |
| FM | 100 KHz | 87.0 – 109.0 MHz |
| SW | 5 KHz | 5.85 – 17.9 MHz |
| LW | 1 KHz | 144 – 299 KHz |
Odeglość probkowania w pasmie MW:
| Region | Odlególosc próbkownikia | Zakres pasma |
| Ameryka | 10 kHz | 520-1710 kHz |
| Europa | 9 kHz | 522-1656 kHz |
Dostrajanie precyzyjne
Ježeli nie udaćo sąznalecz dokladyne danej staci, przydostrajaniu precyzijnemu要去 poprawic jakość odbioru.

W zakresie FM tuner PLL skanujpe pasmo w odstepach co 50 kHz.
W zakresach SW i MW pasmo skanowane jest w odstepach co 1 kHz.

Podczas wyszukwania staci nalezy wcisnac przycisk FINE. Na wyświetlaczu pojawi sie symbol FINE.

Za pomocę przycisku UP▲ lub DOWN▼NSEnz teraz ustawić zędaną czestotliwość odbioru z połowicznych odstepami czestotliwość.
- Ponowne wciśćcie przycisku FINE powoduje wyjscie z trybu dostrajania precyzyjniego.
Ta funkćja nie jest dostepna dla zakresu czestotliwość LW.
Antena
FM i SW
Obrotowa antenna teleskopowa wbudowana w urzadzenia działa w zakresach FM i SW.
Wyciagnac antene na caIa dlugosc iustawic ja tak,aby zapewnia za mozliwie jak najepszy odbior.
MWi LW
Antena teleskopowa nie dane za w pasmach MW i LW. Zakresy te są odzierane przy zanien ferrytowa wbudowan z urzadzenie.
Ustawic urzadzenie w taki sposob, aby uzyskać föloiwie jak najlepszy odbior.
Funkcja basów
Urzadzenie posiada funkcjé „Bass Booster“, sąȩća do wzmacniania tonów basowych.
Podczas przyzadzenia prosze wciśnac przycisk BASS. Na wyświetlaczyny pojawsi są symbol "ON Bas".
Aby wyłaczyc te funkcję, naleź y ponownie wciąć przyczisk BASS - na wyświetlaczu pojawi są woczas symbol „OFF Bas".
Funkcje zapamiętywania
Zapamiętywanie stacji


W pamięci odbiornikaMZa zapisć do 90 staci w zakresie czestotliwość FM,do 60 staci w pasmie MW,do 150 staci w pasmie SW oraz do 30 staci w pasmie LW. Pozycje pamięci dla pasm czestotliwość FM,SW i MW są zorganizowane na stronach (^P a g e s^) -po 10 pozycji na jedernej.Aby zapisć ządana stȩje,naleź wykonac nastepujuce czynnosci:
Ustawic stacja, która chce sie zapisić (patrz wyzej).
Wcisnac przycisck MEM. Na wyswietlaczu pojawi sie strona paminsci [PAGE] oraz pozycja paminsci [MEM].
Za pomocą przycisku PAGE naleź wtedy wybrać strone pAMIęci (nie dla pasma LW), a za pomocą przycisku A, B lub C pozycje pAMIęci. Obie lokalizacja zostano potkazane na wyświetlaczu.
Wcisinć ponownie przycisk [MEM],aby zapisć stacje.
Wybór zapisanej stacji

Aby bezposrednio wybrać zapisana stȩje, naleźwcśkać przycisk PAGE aź do wyświetzenia zędanej strony, a nastepnie wybrać pozycje pAMIęci za pomocamy przyciscu A, B lub C.
Automatyczne wyszukiwanie stagji
Odbiornikmöe przeszukac czestotliwość danego pasma i zapisać wamyęci znalezionie stacje. Aby wączyć automatyczne wyszukiwanie stagini ("Automatic Memory Scan"/AMS), naleź wykonac nastepujuce kroki:
Wcisnac jederanzprzycisk MEM.
Trzymać przyczisk View wciśniety przyze okło 1 sekunde.
Odbiornik przyszuka wszystkie czestotliwość i zapisze znationale stacje wAMIęci.
Wywoływanie pozycji pAMIcI

Wcisnac przycisk VIEW, aby wywołac lokalizacja wszystkich zapisanych staci dla wybranego pasma czestotliwość. Sygnat wszystkich zapisanych stacje besteht odtwarzany po kolei przyze okato pięc sekund.
Wcisnac dowolny przycisk, aby zakończy wyszukiwanie staci.
Blokada klawiszy
W celu wączenia lub wyȩćzenia blokady klawiszny daneź trzymać przycisk „MEM” wcińskipty przyez
co najmiej 3 sekundy. Jedynym przyciskiem, który jesteczne na nią reaguje, jest przycisk „SNOOZE".
Utylizacja
Opakowanie

Urzadzenie znajduje sie w opakowaniu chroniacym je przyd uszkodzeniami, do kórych mogłowby dojsć podczas transportu. Opakowania są surowcami i nadaj są do ponownego użycia lub moga zostać poddane recyklingowy.

Urzadzenie
Po zakończeniu eksploatacji urzadzenia nie nalewy wźadnym wypadku go wyrzuća razem z normalnymi opadami komunalnymi. Informacje uptylizacja zgodnej z przypusami i bezpiecznośćstwem dlaŚrodowiska zaȩgnąć wlokalych instytucjach.

Baterie
Zuzytych baterii nie wolno wyrzuać do smieci! Naleź je odniaść do punktu zbiórki zuzytych baterii.
Dane Techniczne
Urzadzenie
Częstotliwość radiowe
FM (fale ultrakrátkie):
87.0 -109.0 MHz
MW (fale srednie):
SW(fale krótkie):
5.85-17.9MHz
MW dla Europa
522-1656kHz
dla USA
520 - 1710 kHz
Podłaczenia stuchawek: Wtyk
LW (fale dugie):
144 - 299 kHz
Zasilanie sieciowe
Zasilacz zwtyczka, Model:
A 400 -75

Napięcie sieciowe/wejsciowe:
230V 50Hz
Napięcie wyjsciowe:
7.5V-400mA
Zasilanie z baterii
Wymagane baterie:
4 baterie 1.5 V
Typ AA, LR6.
(niedostarczone w zestawie)
Dane techniczne moga, ulec zmianie!


