
SFW 400 A1 - Washing machine SILVERCREST - Free user manual and instructions
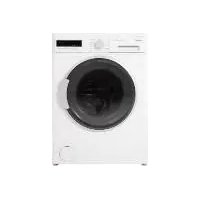
Find the device manual for free SFW 400 A1 SILVERCREST in PDF.


| Product type | Washing machine |
| Brand | SilverCrest |
| Model | SFW 400 A1 |
| Dimensions (W x H x D) | 60 x 85 x 50 cm |
| Weight | 65 kg |
| Power supply | 220-240 V ~ 50 Hz |
| Power consumption | 2000 W |
| Washing capacity | 6 kg |
| Maximum spin speed | 1000 rpm |
| Number of programs | 15 programs |
| Main functions | Washing, rinsing, spinning, delayed start, child lock |
| Energy class | A+ |
| Noise level (wash/spin) | 58 dB / 76 dB |
| Maintenance and cleaning | Clean the filter, detergent drawer and door seal regularly |
| Safety | Child lock, anti-overflow system, door lock |
| Spare parts and repairability | Available from SilverCrest customer service |
| General information | Compact front-loading washing machine, ideal for small spaces |
Frequently Asked Questions - SFW 400 A1 SILVERCREST
User questions about SFW 400 A1 SILVERCREST
0 question about this device. Answer the ones you know or ask your own.
Ask a new question about this device
Download the instructions for your Washing machine in PDF format for free! Find your manual SFW 400 A1 - SILVERCREST and take your electronic device back in hand. On this page are published all the documents necessary for the use of your device. SFW 400 A1 by SILVERCREST.
USER MANUAL SFW 400 A1 SILVERCREST
ELECTRIC MINCER / ELEKTRISCHER FLEISCHWOLF / HACHOIR À VIANDE ÉLECTRIQUE SFW 400 A1
GB IE
ELECTRIC MINCER
Operating instructions
FR BE
GB/IE Operating instructions Page 1
Safety instructions 4
Assembly / Disassembly....6
Assembling the meat grinder 6
Assembling the sausage stuffer attachment 7
Assembling the kubbe attachment 8
Assembling the biscuit attachments 8
Fitting the strainer attachment 9
Operation 10
Operating the appliance 1
Processing meat 11
Processing sausage meat 12
Using the kubbe attachment 12
Making biscuits 13
Straining tomatoes 13
Non-functionality 14
Cleaning 14
Cleaning the motor block 15
Cleaning the accessories 15
Storage 16
Disposal 17
Disposal of the appliance 17
Disposal of the packaging 17
Kompernass Handels GmbH warranty 18
Service 19
Import 19
Recipes 20
Kibbeh 20
Tomato sauce 21
Fresh Grill Sausages 22
Biscuits 22
Introduction
Congratulations on the purchase of your new appliance.
You have clearly decided in favour of a quality product. These operating instructions are a part of this product. They contain important information in regard to safety, use and disposal. Before using the product, familiarise yourself with all of these operating and safety instructions. Use the product only as described and only for the specified areas of application. Retain these instructions for future reference. In addition, pass these documents on, together with the product, to any future owner.
Intended use
This appliance is intended only for the preparation of food in quantities expected in domestic households:
- Mincing fresh meat,
- Making sausages with natural or artificial sausage skin,
- Making biscuits,
- Straining tomatoes.
This appliance is not intended for the processing of frozen foods or other hard foodstuffs, e.g. bones or nuts, or for use in commercial or industrial environments.
Items supplied / Component description
Figure A:
① Biscuit attachment with pattern strips ② Stodger ③ Feeding tray 4 Cable retainer 5 Motor unit ⑥ Meat grinder casing made of metal 7 Fasteners 8 Drip tray 9 Plastic screw 10 Strainer sieve ⑪ Transport screw 12 Spring 13 Cross blade
14 Cutting discs for coarse and fine mincing 15 Ring clamp ⑯ Sausage stuffer attachment ⑰ Sausage disc 18 Kubbe attachment
Figure B:
19 Locking button
Figure C:
20 "<" button (Reverse) 21 "0" button (Off) 22 "1" button (On)
Technical data
| Voltage 220 - 240 V ~ (AC), 50 Hz | |
| Power consumption 400 W | |
| Protection class | II / ☐ (Double insulation) |
 | All of the parts of this appliance that come into contact with food are food-safe. |
| C.O. Time 15 minutes | |
C.O. Time
The C.O. Time (Continuous Operation) details how long an appliance may be used without the motor overheating and being damaged. After the appliance has run for this period it must be switched off until the motor has cooled itself down.
Safety instructions

RISK OF ELECTRIC SHOCK
- Ensure that the power cable does not become damaged. Protect the cable from heat and ensure that it cannot be trapped or clamped. To avoid potential risks, if the appliance power cable is damaged, it must be replaced by the manufacturer, its customer service or by a qualified technician. ▶ Use the appliance only in dry indoor areas, not outdoors.

Never immerse the motor block in water or any other liquid! If you do, you could receive a potentially fatal electric shock.

WARNING!
▶ Never use the appliance for purposes other than those listed here. There will be a major risk of serious accidents should you try to neutralize the safety fitments on the appliance!

WARNING! RISK OF INJURY!
▶ Never put your hand into the openings of the appliance. Do not insert any objects of any kind into the openings – except for the appropriate stodger and the foodstuff to be processed. If you do, there will be a serious risk of accidents! ▶ Unplug the appliance from the power source before attaching or removing accessories. - Do not leave the appliance unsupervised when it is ready for use. To avoid it being switched on accidentally, always unplug the appliance after use or during breaks. ▶ Only use the original accessory parts for this appliance. Other accessories may not meet the safety requirements.
⚠ WARNING! RISK OF INJURY!
▶ Never operate the appliance in a no-load condition. This could irreparably damage the appliance. Before changing accessories or additional parts that are in motion during operation, the appliance must be switched off and disconnected from mains power. ▶ Never use the appliance for purposes other than those described in these instructions. ▶ Warning – the cross blade is very sharp! Always take care when handling and cleaning the appliance. The appliance should always be disconnected from the mains when unattended and before assembly, disassembly or cleaning. This appliance may not be used by children. The appliance and its connecting cable must be kept away from children. This appliance may be used by persons with limited physical, sensory or mental capabilities or lack of experience and knowledge, provided that they are under supervision or have been told how to use the appliance safely and are aware of the potential risks. The appliance must not be used as a plaything by children.
Assembly / Disassembly
CAUTION - PROPERTY DAMAGE!
▶ All accessories are coated with a thin film of oil to protect them from corrosion. Therefore, carefully clean all of the parts before using the appliance for the first time, as described in detail in the chapter "Cleaning". After subsequent usage, always apply a light coating of cooking oil to the metallic components.
NOTICE
Before using for the first time, remove the protective foil from the control panel.
Assembling the meat grinder
Unfold the fold-out side. There you will find the step-by-step illustrations for assembling the appliance. Please note that you do not need the cross blade ⑬ and the spring ⑫ or a cutting disc ⑭/sausage disc ⑰ for all attachments.
1) Coat all metal parts with cooking oil. 2) Place the transport screw ⑪ in the meat grinder casing ⑥. 3) Place the spring ⑫ onto the transport screw ⑪. 4) Then fit the cross blade ⑬ on so that the sharp side points away from the spring ⑫. Ensure that the square opening in the cross blade ⑬ is placed correctly on the square axle.

Fig. 1
WARNING! RISK OF INJURY!
The cross blade 13 is very sharp! Risk of injury!
CAUTION - PROPERTY DAMAGE!
The appliance will be damaged if the cross blade ⑬ is inserted the other way around!
5) Select the required cutting disc 14/sausage disc 17.
6) Place your selected cutting disc 14 into the meat grinder casing 6 so that the fixings on the cutting disc 14 are located in the openings in the meat grinder casing 6.
7) After everything has been correctly assembled, screw the ring clamp 15 back on hand-tight.
8) The ready-assembled meat grinder casing ⑥ is connected by a bayonet connector to the motor unit ⑤:
- Fit the meat grinder casing ⑥ into the motor unit ⑤ so that the 🔔 symbol on the meat grinder casing ⑥ is aligned with the 🔔 symbol on the motor unit ⑤. The locking button ⑲ pushes in (fig. B).
- Press the meat grinder casing ⑥ in gently, at the same time turning the feed tube on the meat grinder casing ⑥ to the middle position (fig. B), so that the 🔒 symbol on the feed tube points to the 🔒 symbol. When the meat grinder casing ⑥ clicks into place, the locking button ⑲ pops out again.
- Finally, place the feeding tray ③ on top of the feeding funnel.
- To dismantle it, press the locking button 19 and turn the feeding funnel to the right (Fig. B). You can now pull the meat grinder casing 6 out.
Assembling the sausage stuffer attachment
Unfold the fold-out side - there you will find the step-by-step illustrations for assembling the appliance.
1) Remove the meat grinder casing ⓑ as described under "Assembling the meat grinder".
2) Dismantle all parts which are fitted to/in the meat grinder casing ⑥ and clean them.
3) Coat all metal parts with cooking oil.
4) Put the transport screw ⑪, the spring ⑫ and the cross blade ⑬ back into the meat grinder casing ⑥.
5) Insert the sausage disc ⑰ so that the fixings on the sausage disc ⑰ are located in the openings in the meat grinder casing ⑥.
6) Then place the sausage stuffer attachment 16 before the sausage disc 17.
7) Screw the ring clamp 15 on hand-tight.
8) Assemble the meat grinder casing ⑥ as described under "Assembling the meat grinder".
Assembling the kubbe attachment
Unfold the fold-out side. There you will find the step-by-step illustrations for assembling the appliance.
1) Remove the meat grinder casing ⓑ as described under "Assembling the meat grinder". 2) Disassemble any attachments that might be fitted and clean the meat grinder casing 6.
To use the kubbe attachment ⑱, neither the cross blade ⑬ with the spring ⑫, nor a cutting or sausage disc ⑭/⑰ are required! Remove these from the meat grinder casing ⑥ if necessary.
3) Coat all metal parts with cooking oil.
4) Insert the two plastic parts of the kubbe attachment ⑱ so that the fixings on the bottom kubbe attachment ⑬ ring are located in the openings in the meat grinder casing ⑥.
5) When everything has been attached correctly, screw the ring clamp ⑮ back on hand-tight.
6) Assemble the meat grinder casing ⓑ as described under "Assembling the meat grinder".
Assembling the biscuit attachments
Unfold the fold-out side. There you will find the step-by-step illustrations for assembling the appliance.
1) Remove the meat grinder casing ⓑ as described under "Assembling the meat grinder".
2) Disassemble any attachments that might be fitted and clean the meat grinder casing ⑥.
NOTICE
To use the biscuit attachment ①, neither the cross blade ⑬ with the spring ⑫, nor a cutting or sausage disc ⑭/⑰ are required! Remove these from the meat grinder casing ⑥ if necessary.
3) Coat all metal parts with cooking oil.
4) Pull the pattern strips ① away from the front of the biscuit attachment ①.
5) First place the plastic disc and then the metal disc of the biscuit attachment ① into the meat grinder casing ⑥ (see fold-out side). Insert the biscuit attachment ①. so that the fixings on the biscuit attachment ①. are located in the openings in the meat grinder casing ⑥.
6) After everything has been correctly assembled, screw the ring clamp 15 back on hand-tight.
7) Replace the pattern strips ① back in to the front of the biscuit attachment ①. Ensure that the grip on the pattern strips ① points away from the appliance. If it does not, you will not be able to adjust the pattern, which is located directly on the grip. 8) Assemble the meat grinder casing ⑥ as described under "Assembling the meat grinder". 9) To dismantle it, you must first remove the pattern strips ① before you can screw the ring clamp ⑮ open and take the biscuit attachment ⑪ back out.
Fitting the strainer attachment
Unfold the fold-out page – it contains the step-by-step illustrations for assembling the appliance.
1) Remove the meat grinder casing ⑥ as described in "Assembling the meat grinder". 2) Remove any attachments that might be fitted and clean the meat grinder casing ⑥.
NOTE
Neither the cross blade ⑬ with the spring ⑫, nor a cutting or sausage disc ⑭/⑰ are required for the tomato strainer! Remove these from the meat grinder casing ⑥ if necessary.
3) Push the transport screw ⑪ into the meat grinder casing ⑥.
4) Place the plastic screw ⑨ onto the transport screw ⑪. Make sure that the angular axis of the transport screw ⑪ engages completely in the square recess of the plastic screw ⑨. You may need to turn the plastic screw ⑨ back and forth a little until it is securely in place.
5) Then push the strainer sieve ⑩ all the way over the plastic screw ⑨. Place it onto the meat grinder casing ⑥ so that the two small fastenings engage in the two matching recesses on the thread. This prevents the strainer sieve ⑩ from turning. The small holes on the strainer sieve ⑩ face downwards.
6) When all the parts have been put together correctly, roll the ring clamp ⑮ over the strainer sieve ⑩ and then screw it hand tight onto the meat grinder casing ⑥.
7) Fit the meat grinder casing ⑥ as described in "Assembling the meat grinder".
8) Now attach the drip tray ⑧ onto the strainer sieve ⑩ (see fig. 2). To do this, push the ring onto the tip of the strainer sieve ⑩ and hook the fasteners ⑦ on both sides of the wide end. The hole in the drip tray ⑧ faces downwards.

Fig. 2
Operation

RISK OF ELECTRIC SHOCK
▶ NEVER open the housing of the motor unit ⑤ – it does not contain any user-serviceable elements. If the housing is opened, the warranty becomes void. If the housing is opened, there is a risk of receiving a potentially fatal electric shock.
CAUTION - PROPERTY DAMAGE!
▶ Do not use the appliance for longer than 15 minutes continuously. To avoid overheating, switch it off after such a period and allow it to cool down for about 30 minutes.
▶ NEVER activate the buttons "I" 22 or "<" 20 during a change of rotation direction if the appliance motor has not come to a complete stop. This could damage the motor.
Operating the appliance
Once the appropriate attachments have been fixed:
1) Place the appliance where it will at all times be absolutely stable and under no circumstances could it fall off the work surface or in any way come into contact with water (due to vibrations or becoming snagged in the power cable). Vibration is unavoidable when it is working.

RISK OF ELECTRIC SHOCK
▶ Never touch an appliance that is plugged in or operational if it falls or lands in water – or in the case of other emergencies! First disconnect the appliance from the mains power source in all emergency situations! Otherwise, you run the risk of serious injury or loss of life!
2) Put the food to be processed in the feeding tray ③ and place a catchment container at the front under the exit opening.
3) First press the button "0" ② to check that the appliance is still switched off. Otherwise, there is a risk that the appliance could unintentionally start when the plug is inserted into the power socket.
4) Then insert the plug into a mains power socket.
5) Press the button "I" 22 to start the appliance.

WARNING! RISK OF INJURY!
Push the foodstuff into the feeding shaft ONLY with the round stodger ② - NEVER with one's fingers, forks, spoons, or similar objects. That could lead to physical injury and also damage the appliance.
CAUTION - PROPERTY DAMAGE!
▶ Do not ever press so hard that the motor gets audibly slower. This could overburden the machine and damage it.
Processing meat
1) Use pieces of meat that fit easily into the feeding funnel. If necessary, cut the meat to size beforehand. Check that the meat does not have any bones or tendons.

WARNING!
▶ Minced meat is very prone to bacterial contamination. Therefore, take care to maintain good hygiene when processing meat. If you do not, it may cause serious health problems.
2) When you have read and understood all of the instructions on the topic "Meat", you can now use the appliance as described in the chapter "Operating the appliance".
Processing sausage meat
1) Pass meat through the meat grinder twice before using it as sausage stuffing. 2) To make sausage stuffing, add some chopped onions, spices and other ingredients to the minced meat, as per your recipe, and knead the mixture well. Refrigerate this for 30 minutes before processing it further. 3) Pull one end of the sausage skin (natural or artificial sausage skin) onto the sausage stuffer attachment ⑯ and tie a knot in the other end. For 1 kg of the filling, you will need approximately 1.60 m of sausage skin.
TIP!
Soak the natural sausage skin in lukewarm water for about 3 hours before using it and wring it out before attaching it. This will make the natural sausage skin more elastic. Natural sausage skins are available from butcher suppliers close to slaughterhouses or from your family butcher.
4) The sausage mixture will be pressed into the sausage skin by the sausage stuffer attachment ⑯. When it is long enough, switch the appliance off, press the sausage together at the ends and rotate it a couple of times along its longitudinal axis.
TIP!
Sausage meat tends to expand when cooked or frozen. Therefore, to prevent it from bursting, it is best not to overstuff the sausage.
5) When you have read and understood all of the instructions on the topic "Sausage", you can now use the appliance as described in the chapter "Operating the appliance".
Using the kubbe attachment
With the kubbe attachment 18, foodstuffs can be processed to form hollow rolls of meat or vegetables, which can then be stuffed as desired.
1) First put the meat through the meat grinder twice before pressing it through the kubbe attachment ⑬. 2) When you have read and understood all of the instructions on the topic "Kubbe-Attachment", you can now use the appliance as described in the chapter "Operating the appliance".
Making biscuits
After you have made the biscuit pastry according to your recipe, and after having fixed the biscuit attachment ①:
1) Line a small baking tray with greaseproof paper and place or hold it directly under the exit opening at the front of the appliance. 2) Press pastry evenly into the meat grinder casing ⑥ - the transport screw ⑪ then pushes it through the selected design on the design motif strip of the biscuit attachment ①. 3) When the biscuit is the required length, stop the appliance and break the pastry off at the exit opening. Lay the biscuits on the baking tray. 4) When you have read and understood all of the instructions on the topic "Biscuits", you can now use the appliance as described in the chapter "Operating the appliance".
Straining tomatoes
1) Place a container under the drip tray ⑧ as the strained tomatoes flow out through this opening during operation. 2) Place a vessel by the narrow end of the strainer sieve 10. 3) Quarter the tomatoes and use the stodger ② to push them into the meat grinder casing ⑥ slowly and evenly. The plastic screw ⑨ pushes the tomatoes through the small holes of the strainer sieve ⑩. The strained tomatoes flow into the drip tray ⑧ and then down through the opening. The tomato residues, such as peelings and seeds, are discharged from the narrow end of the strainer sieve ⑩.
NOTE
If tomato juice starts leaking from the screw joints of the strainer attachment, this can have the following causes:
-You are working too fast.
- You are using too much pressure to press the tomato pieces into the appliance.
—The tomato pieces are too large.
▶ Try working more slowly, press the tomato pieces gently into the appliance and cut the tomatoes into smaller pieces.
4) Once you have read and understood all of the instructions in the section "Straining tomatoes", you can use the appliance as described in the section "Operating the appliance".
Non-functionality
If the drive is blocked by accumulated food:
Press the button "O" 21 to stop the meat grinder.
Press and hold the button "<" 20. The appliance will now run in the reverse direction. This enables you to transport the food which has become stuck a short way backwards, and the motor to run freely again.
When the drive runs smoothly again, release the "<" 20 button.
■ Press the button "I" 22 to re-start the meat grinder.
If you do not succeed in getting the drive free with this, clean the appliance as described in the chapter "Cleaning".
Should the motor suddenly stop, it could be due to automatic activation of the internal overload fuse. This is intended to protect the motor.
■ Switch the appliance off and allow it cool down for approximately 30 minutes before continuing to use it.
■ Should this not work, wait for a further 15 minutes.
If it still does not function at the end of this period, this indicates a technical problem. In this case, contact the Customer Service Centre.
If the power cable is damaged or the accessories are visibly damaged:
Immediately switch the appliance off by pressing the "0" 21 button!
If this is not possible without risk to personal safety, disconnect the plug from the mains power socket.
- Arrange for the defective parts to be repaired by Customer Services before re-using the appliance.
Cleaning

RISK OF ELECTRIC SHOCK
▶ Disconnect the plug from the mains power socket before cleaning the appliance. This prevents accidents caused by inadvertent switching on and electric shocks.
Cleaning the motor block
■ Clean the exterior surfaces and the power cable with a slightly damp cloth. For stubborn dirt, add mild detergent to the cloth. Afterwards, wipe with a cloth moistened only with fresh water to ensure all detergent is removed. Dry the appliance well before re-using it.

RISK OF ELECTRIC SHOCK
▶ Never immerse the motor block ⑤ in water or any other liquid! If this happens, there is a risk of a potentially fatal electric shock if moisture comes into contact with the electrical wiring.
CAUTION - PROPERTY DAMAGE!
▶ Never use detergents, abrasive cleaners, or solvents. These could damage the appliance and leave residues on foodstuffs.
Cleaning the accessories
■ Clean all accessories that come into contact with food using hot soapy water and a household detergent suitable for food.
NOTICE
▶ We recommend using a bottle brush to clean the strainer sieve ⑩. This makes it easier to clean the small holes.
NOTICE


The plastic part of the biscuit attachment ①, the kubbe attachment ⑱, the sausage stuffer attachment ⑯, the stodger ②, the plastic screw ⑨, and the drip tray ⑧ are dishwasher-safe.
▶ Place these plastic parts in the upper basket of the dishwasher if possible and ensure none of the parts can get stuck. Otherwise, the parts could become deformed!

WARNING! RISK OF INJURY!
The cross blade 13 is very sharp! Risk of injury!
Dry all parts thoroughly before re-using the appliance.
NOTICE
Apply a light coating of cooking oil to all metallic components after each cleaning. Otherwise, metal parts can discolour!
Storage
Wind the mains cable clockwise around the cable retainer ④ on the underside of the appliance and fasten it in place as shown below. This keeps it safe from damage:

Fig. 3
Store the appliance at a dry location. After drying the metal attachments, coat them lightly with a little cooking oil if you are not going to use the appliance immediately. This will protect them from corrosion. Store the appliance where it will be out of reach of children and people requiring supervision. They are not always able to correctly assess the potential risks involved with using electrical appliances.
Disposal
Applies only to France:


The product, its packaging and the operating instructions are recyclable. They are subject to an extended manufacturer responsibility and will be collected separately.
Disposal of the appliance

The adjacent symbol of a crossed-out dustbin means that this appliance is subject to Directive 2012/19/EU. This directive states that this appliance may not be disposed of in the normal household waste at the end of its useful life, but must be taken to specially set-up collection locations, recycling depots or disposal companies.
The disposal is free of charge for the user. Protect the environment and dispose of this appliance properly.
If your old appliance has stored any personal data, you are responsible for deleting it yourself before returning it.

Your local community or municipal authorities can provide information on how to dispose of the worn-out product.
Disposal of the packaging

The packaging materials have been selected for their environmental friendliness and ease of disposal and are therefore recyclable. Dispose of packaging materials that are no longer needed in accordance with applicable local regulations.

Dispose of the packaging in an environmentally friendly manner. Note the labelling on the packaging and separate the packaging material components for disposal, if necessary. The packaging material is labelled with abbreviations (a) and numbers (b) with the following meanings: 1-7: plastics, 20-22: paper and cardboard, 80-98: composites.
This appliance has a 3-year warranty valid from the date of purchase. If this product has any faults, you, the buyer, have certain statutory rights. Your statutory rights are not restricted in any way by the warranty described below.
Warranty conditions
The warranty period starts on the date of purchase. Please keep your receipt in a safe place. This will be required as proof of purchase.
If any material or manufacturing fault occurs within three years of the date of purchase of the product, we will either repair or replace the product for you or refund the purchase price (at our discretion). This warranty service requires that you present the defective appliance and the proof of purchase (receipt) within the three-year warranty period, along with a brief written description of the fault and of when it occurred.
If the defect is covered by the warranty, your product will either be repaired or replaced by us. The repair or replacement of a product does not signify the beginning of a new warranty period.
Warranty period and statutory claims for defects
The warranty period is not prolonged by repairs effected under the warranty. This also applies to replaced and repaired components. Any damage and defects present at the time of purchase must be reported immediately after unpacking. Repairs carried out after expiry of the warranty period shall be subject to a fee.
Scope of the warranty
This appliance has been manufactured in accordance with strict quality guidelines and inspected meticulously prior to delivery.
The warranty covers material faults or production faults. The warranty does not extend to product parts subject to normal wear and tear or to fragile parts which could be considered as consumable parts such as switches, batteries or parts made of glass.
The warranty does not apply if the product has been damaged, improperly used or improperly maintained. The directions in the operating instructions for the product regarding proper use of the product are to be strictly followed. Uses and actions that are discouraged in the operating instructions or which are warned against must be avoided.
This product is intended solely for private use and not for commercial purposes. The warranty shall be deemed void in cases of misuse or improper handling, use of force and modifications / repairs which have not been carried out by one of our authorised Service centres.
Warranty claim procedure
To ensure quick processing of your case, please observe the following instructions:
■ Please have the till receipt and the item number (IAN) 411313_2207 available as proof of purchase.
■ You will find the item number on the type plate on the product, an engraving on the product, on the front page of the operating instructions (below left) or on the sticker on the rear or bottom of the product.
If functional or other defects occur, please contact the service department listed either by telephone or by e-mail.
■ You can return a defective product to us free of charge to the service address that will be provided to you. Ensure that you enclose the proof of purchase (till receipt) and information about what the defect is and when it occurred.

You can download these instructions along with many other manuals, product videos and installation software at www.lidl-service.com.
This QR code will take you directly to the Lidl service page (www.lidl-service.com) where you can open your operating instructions by entering the item number (IAN) 411313_2207.
Service
GB Service Great Britain
Tel.: 0800 404 7657
E-Mail: kompernass@lidl.co.uk
IE ServiceIreland
Tel.: 1800 101010
E-Mail: kompernass@lidl.ie
IAN 411313_2207
Importer
Please note that the following address is not the service address. Please use the service address provided in the operating instructions.
KOMPERNASS HANDELS GMBH
BURGSTRASSE 21
44867 BOCHUM
GERMANY
www.kompernass.com
Recipes
Kibbeh
Ingredients for the mince filling
400 g lean beef or lamb
2 onions
10 g flour
25 g coarsely chopped pine nuts
1/2 tsp. each of ground allspice, cinnamon, cumin, caraway, cloves, nutmeg
Salt and pepper
Ingredients for the shell
500 g bulgur wheat (soaked)
500 g lean beef or lamb
1 onion
1 pinch of black pepper, 1 pinch of chilli
Mince filling
Prepare the mince filling first and leave it to cool while you prepare the shell.
Chop the meat twice with the mincer (using first the coarse, then the fine perforated disc 14). Mix the meat, flour, pine nuts and spices well. Chop and sear the onions.
Add the mince and mix it with the onions. Thoroughly fry the mixture, then let it cool.
Shell
Chop the meat for the shell twice with the mincer (using first the coarse, then the fine perforated disc 14) and mix it with the bulgur wheat, chopped onion and spices. Process the mass twice more using the mincer. Replace the perforated disc 14 with the kibbeh attachment 13 (see chapter "Installing the kibbeh attachment") and make kibbeh shells of approx. 7 cm length.
Preparation
Fill each kibbeh shell with the mince as soon as it is made, pinching the ends together to create small pouches. Deep-fry the finished kibbeh in hot oil (190 °C) for approximately 3 minutes. They should have a golden brown colour.
Tomato sauce
Ingredients:
approx. 600 g tomatoes
1 medium onion (or alternatively 1-2 shallots)
1-2 garlic cloves
1 tsp. tomato paste
30-50 ml dry white wine
2 tbsp. olive oil
1-2 tsp. sugar
1/2 tsp. salt
1 pinch of pepper
Dried thyme (alternatively: basil or oregano)
Prepare and strain tomatoes
Quarter the tomatoes, remove the stalk and cut into smaller pieces if necessary.
Strain the tomatoes using the grinder. Use the appropriate attachment. Note that a portion of the tomatoes must be disposed of as leftovers. The quantity of strained tomato produced varies and depends on the type of tomato, the amount of water, the amount of pulp, etc.
Preparing sauce
Remove the skins from the onion and garlic. Finely dice the onion and either crush the garlic with a garlic press or chop it into small pieces.
Heat the oil in a saucepan or frying pan. Add the onion, garlic and tomato paste, stir well and sauté briefly. Deglaze with a little white wine. Add the strained tomatoes. Season with salt, pepper, sugar and herbs to taste.
Bring everything to the boil and simmer at a low temperature for about 10-15 minutes. Stir constantly to make sure that the sauce doesn't burn onto the pan. If necessary, add a little more white wine if the liquid evaporates quickly.
Fresh Grill Sausages
Ingredients:
300 g lean Beef
500 g lean Pork
200 g Shoulder bacon
20 g Salt
1/2 Tsp ground white Pepper
1 Tsp Caraway
1/2 Tsp Nutmeg
Pass the beef, pork and bacon through the meat grinder twice.
Add the mixed spices and salt and thoroughly knead for 5 minutes.
Place the sausage filling in the refrigerator for about 30 minutes. Fill the skins with sausage meat as detailed (see chapter "Processing sausage meat") and make sausages of about 25 cm in length.
Grill the sausages well and eat them on the same day.
Biscuits
Ingredients:
500 g butter
500 g sugar
2 - 3 packets of vanilla sugar
1 packet of vanilla custard
1/4 tsp salt
1 egg
4 egg yolks
800 g plain flour
2 tbsp baking powder
200 g ground (blanched) almonds
Zest of a lemon
Beat the butter until fluffy. Add the remaining ingredients one after another and knead well into the dough. Cover the finished dough and allow to stand for around 12 hours in the fridge (e.g. overnight). Then pass it through the meat grinder with the biscuit attachment ①. Place the biscuits on a baking tray lined with baking paper. Bake the biscuits in a pre-heated oven at 180°C for approx. 10 - 15 minutes until golden brown.
Table of Contents
Introduction 24
Fig. 1
Fig. 2
Operation

DANGER OF ELECTRIC SHOCK
Fig. 3
KOMPERNASS HANDELS GMBH
BURGSTRASSE 21
44867 BOCHUM
GERMANY
www.kompernass.com
Recipes
Kebbe
1 packet of vanilla pudding
1/4 teaspoon salt
1 egg
4 egg yolks
800 g flour (type 405)
Fig. 1
⚠ WARNING! RISK OF ACCIDENT!
Fig. 2
Operation

RISK OF ELECTRIC SHOCK
Fig. 3
KOMPERNASS HANDELS GMBH
BURGSTRASSE 21
44867 BOCHUM
GERMANY
www.kompernass.com
Recipes
Kibbeh
⚠ WARNING! RISK OF INJURY!
⚠ WARNING! RISK OF INJURY!
Fig. 1
⚠ WARNING! RISK OF INJURY!
Fig. 2
Operation

WARNING! RISK OF INJURY!
WARNING! RISK OF INJURY!
Fig. 3
KOMPERNASS HANDELS GMBH
BURGSTRASSE 21
44867 BOCHUM
GERMANY
www.kompernass.com
Recipes
Kebbe
Fig. 1
⚠️ WARNING! RISK OF INJURY!
Fig. 2
Operation
DANGER OF ELECTRIC SHOCK
Fig. 3
KOMPERNASS HANDELS GMBH
BURGSTRASSE 21
44867 BOCHUM
GERMANY
www.kompernass.com
Recipes
Kebbe
Fig. 1
Fig. 3
Operation
DANGER OF ELECTRIC SHOCK
Fig. 3
KOMPERNASS HANDELS GMBH
BURGSTRASSE 21
44867 BOCHUM
GERMANY
www.kompernass.com
Recipes
Kebbe
Fig. 1
⚠️ WARNING! RISK OF INJURY!
Fig. 2
Controls

DANGER OF ELECTRIC SHOCK
Fig. 3
KOMPERNASS HANDELS GMBH
BURGSTRASSE 21
44867 BOCHUM
GERMANY
www.kompernass.com
Recipes
Kebbe
Fig. 1
Fig. 2
Operation

DANGER OF ELECTRIC SHOCK
Fig. 3
KOMPERNASS HANDELS GMBH
BURGSTRASSE 21
44867 BOCHUM
GERMANY
www.kompernass.com
Recipes
Kibbeh
Fig. 1
⚠ WARNING! DANGER OF PERSONAL INJURY!
Fig. 2
Operation

DANGER OF ELECTRIC SHOCK
Fig. 3
KOMPERNASS HANDELS GMBH
BURGSTRASSE 21
44867 BOCHUM
GERMANY
www.kompernass.com
Recipes
Kibbeh
1 packet vanilla pudding
1/4 tsp. salt
1 egg
4 egg yolks
800 g flour (type 405)
2 tsp. baking powder
Fig. 1
Fig. 1
Use

Fig. 3
KOMPERNASS HANDELS GMBH
BURGSTRASSE 21
44867 BOCHUM
GERMANY
www.kompernass.com
Recipes
Kibbeh
- Figure
⚠️ WARNING! RISK OF INJURY!
- Figure
Use
DANGER OF ELECTRIC SHOCK
Figure 3
KOMPERNASS HANDELS GMBH
BURGSTRASSE 21
44867 BOCHUM
GERMANY
www.kompernass.com
Recipes
Kebbe
CAUTION - PROPERTY DAMAGE!
Figure 1
⚠️ WARNING! RISK OF PERSONAL INJURY!
CAUTION – PROPERTY DAMAGE!
Figure 2
Use
DANGER OF ELECTRIC SHOCK
WARNING - PROPERTY DAMAGE!
WARNING – PROPERTY DAMAGE!
WARNING - PROPERTY DAMAGE!
Figure 3
■ Store the device in a dry place. After wiping, rub the metal attachments with a thin layer of cooking oil – if you do not intend to use the device immediately. This provides good protection against corrosion. ■ Store the device out of reach of children and persons requiring supervision. They may not always be able to correctly assess the dangers associated with electrical devices.
Disposal
KOMPERNASS HANDELS GMBH
BURGSTRASSE 21
44867 BOCHUM
GERMANY
www.kompernass.com
Authorized service center
SI ServisSlovenija
Tel.: 080 080 917
E-Mail: kompernass@lidl.si
IAN 411313_2207
Warranty certificate
Figure 1
⚠ WARNING! DANGER OF INJURY!
Figure 2
Operation

DANGER OF ELECTRIC SHOCK
Figure 3
KOMPERNASS HANDELS GMBH
BURGSTRASSE 21
44867 BOCHUM
GERMANY
www.kompernass.com
Recipes
Fig. 1
WARNING! RISK OF INJURY!
Fig. 2
Operation

DANGER OF ELECTRIC SHOCK
Fig. 3
KOMPERNASS HANDELS GMBH
BURGSTRASSE 21
44867 BOCHUM
GERMANY
www.kompernass.com
Recipes
Meatballs
Fig. 1
Fig. 2
Maintenance

Fig. 3
Fig. 1
Fig. 2
Operation
Fig. 3
KOMPERNASS HANDELS GMBH
BURGSTRASSE 21
44867 BOCHUM
GERMANY
www.kompernass.com
Recipes
Kempe
KOMPERNASS HANDELS GMBH
BURGSTRASSE 21
44867 BOCHUM
GERMANY
www.kompernass.com
Last Information Update · Stand der Informationen · Version des informations · Stand van de informatie · Stav informaci Stan informacji · Stav informácií · Estado de las informaciones · Tilstand af information · Versione delle informazioni Információk állása · Stanje informacij · Stanje informacija · Versiunea informațiilor · Актуалност на информацията Έκδοση των πληροφοριών: 08/ 2022 · Ident.-No.: SFW400A1-072022-1


- ELECTRIC MINCER / ELEKTRISCHER FLEISCHWOLF / HACHOIR À VIANDE ÉLECTRIQUE SFW 400 A
- ELECTRIC MINCER
- INTRODUCTION
- INTENDED USE
- ITEMS SUPPLIED / COMPONENT DESCRIPTION
- FIGURE A
- TECHNICAL DATA
- C.O. TIME
- SAFETY INSTRUCTIONS
- RISK OF ELECTRIC SHOCK
- WARNING
- WARNING! RISK OF INJURY
- ⚠ WARNING! RISK OF INJURY
- ASSEMBLY / DISASSEMBLY
- CAUTION - PROPERTY DAMAGE
- NOTICE
- ASSEMBLING THE MEAT GRINDER
- ASSEMBLING THE SAUSAGE STUFFER ATTACHMENT
- ASSEMBLING THE KUBBE ATTACHMENT
- ASSEMBLING THE BISCUIT ATTACHMENTS
- FITTING THE STRAINER ATTACHMENT
- NOTE
- OPERATION
- OPERATING THE APPLIANCE
- PROCESSING MEAT
- PROCESSING SAUSAGE MEAT
- TIP
- USING THE KUBBE ATTACHMENT
- MAKING BISCUITS
- STRAINING TOMATOES
- NON-FUNCTIONALITY
- IF THE DRIVE IS BLOCKED BY ACCUMULATED FOOD
- SHOULD THE MOTOR SUDDENLY STOP, IT COULD BE DUE TO AUTOMATIC ACTIVATION OF THE INTERNAL OVERLOAD FUSE. THIS IS INTENDED TO PROTECT THE MOTOR
- IF THE POWER CABLE IS DAMAGED OR THE ACCESSORIES ARE VISIBLY DAMAGED
- CLEANING
- CLEANING THE MOTOR BLOCK
- CLEANING THE ACCESSORIES
- STORAGE
- DISPOSAL
- APPLIES ONLY TO FRANCE
- DISPOSAL OF THE APPLIANCE
- THE DISPOSAL IS FREE OF CHARGE FOR THE USER. PROTECT THE ENVIRONMENT AND DISPOSE OF THIS APPLIANCE PROPERLY
- DISPOSAL OF THE PACKAGING
- WARRANTY CONDITIONS
- WARRANTY PERIOD AND STATUTORY CLAIMS FOR DEFECTS
- SCOPE OF THE WARRANTY
- WARRANTY CLAIM PROCEDURE
- SERVICE
- IMPORTER
- RECIPES
- KIBBEH
- MINCE FILLING
- SHELL
- PREPARATION
- TOMATO SAUCE
- FRESH GRILL SAUSAGES
- BISCUITS
- TABLE OF CONTENTS
- DANGER OF ELECTRIC SHOCK
- FIG
- KEBBE
- ⚠ WARNING! RISK OF ACCIDENT
- ⚠️ WARNING! RISK OF INJURY
- CONTROLS
- ⚠ WARNING! DANGER OF PERSONAL INJURY
- USE
- FIGURE
- ⚠️ WARNING! RISK OF PERSONAL INJURY
- CAUTION – PROPERTY DAMAGE
- WARNING - PROPERTY DAMAGE
- WARNING – PROPERTY DAMAGE
- AUTHORIZED SERVICE CENTER
- WARRANTY CERTIFICATE
- ⚠ WARNING! DANGER OF INJURY
- MEATBALLS
- MAINTENANCE
- KEMPE
- KOMPERNASS HANDELS GMBH
Brand : SILVERCREST
Model : SFW 400 A1
Category : Washing machine