
KH 800 - Microwaves BIFINETT - Free user manual and instructions
Find the device manual for free KH 800 BIFINETT in PDF.
| Product type | Microwave with turntable |
| Brand | BIFINETT |
| Model | KH 800 |
| External dimensions (H x W x D) | 295 x 458 x 370 mm |
| Internal dimensions (H x W x D) | 231 x 300 x 302 mm |
| Capacity | 20 liters |
| Net weight | 13.9 kg |
| Power supply | 230 V ~ 50 Hz |
| Microwave output power | 800 W |
| Operating frequency | 2450 MHz |
| Turntable diameter | 270 mm |
| Functions | Cooking at one or two levels, quick defrost, weight defrost, preprogramming, clock, child lock |
| Power levels | 10 levels (10% to 100%) |
| Timer | Up to 99 min 99 s |
| Display | LED digital |
| Interior materials | Stainless steel or enamel (not specified) |
| Door | Glass with safety lock |
| Care and cleaning | Clean inside and outside with a damp cloth; glass tray and ring dishwasher safe |
| Safety | Door safety lock, key lock, automatic stop when door opens |
| Included accessories | Glass tray, rotating ring |
| Repairability | Repair only by qualified personnel; bulb replaceable by dealer |
| Certification | Compliant with European directives (low voltage, EMC) |
Frequently Asked Questions - KH 800 BIFINETT
User questions about KH 800 BIFINETT
0 question about this device. Answer the ones you know or ask your own.
Ask a new question about this device
Download the instructions for your Microwaves in PDF format for free! Find your manual KH 800 - BIFINETT and take your electronic device back in hand. On this page are published all the documents necessary for the use of your device. KH 800 by BIFINETT.
USER MANUAL KH 800 BIFINETT
natural_image
White bifinett microwave oven with a close-up of its interior display showing two people (no visible text or symbols on the device itself)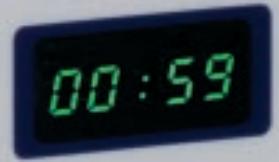


D Bedienungs- und Sicherheitshinweise
GB Operating and safety instructions
F Mode d'emploi et instructions de sécurité
① Informazioni di sicurezza e istruzioni per l'uso
E Instrucciones para el manejo y la seguridad
P Instruções de utilização e de segurança
NL Bedienings- en veiligheidsaanwijzingen
GR Υποδείξεις χειρισμού και ασφαλείας
PL Instrukcja obsługi
FIN Käyttöohjeet
s Användaranvisning
D Bedienungs- und Sicherheitshinweise Seite 5 – 12
GB Operating and safety instructions Page 13 – 20
F Mode d'emploi et instructions de sécurité Page 21 – 28
① Informazioni di sicurezza e istruzioni per l'uso Pagina 29 – 35
E Instrucciones para el manejo y la seguridad Página 36 – 42
P Instruções de utilização e de segurança Página 43 – 50
NL Bedienings- en veiligheidsaanwijzingen Pagina 51 – 57
GR Υποδείξεις χειρισμού
και ασφαλείας Σελίδα 58 – 65
PL Instrukcja obsługi Strona 66 – 73
FIN Käyttöohjeet Sivu 74 – 80
s Användaranvisning Sidan 81 – 87
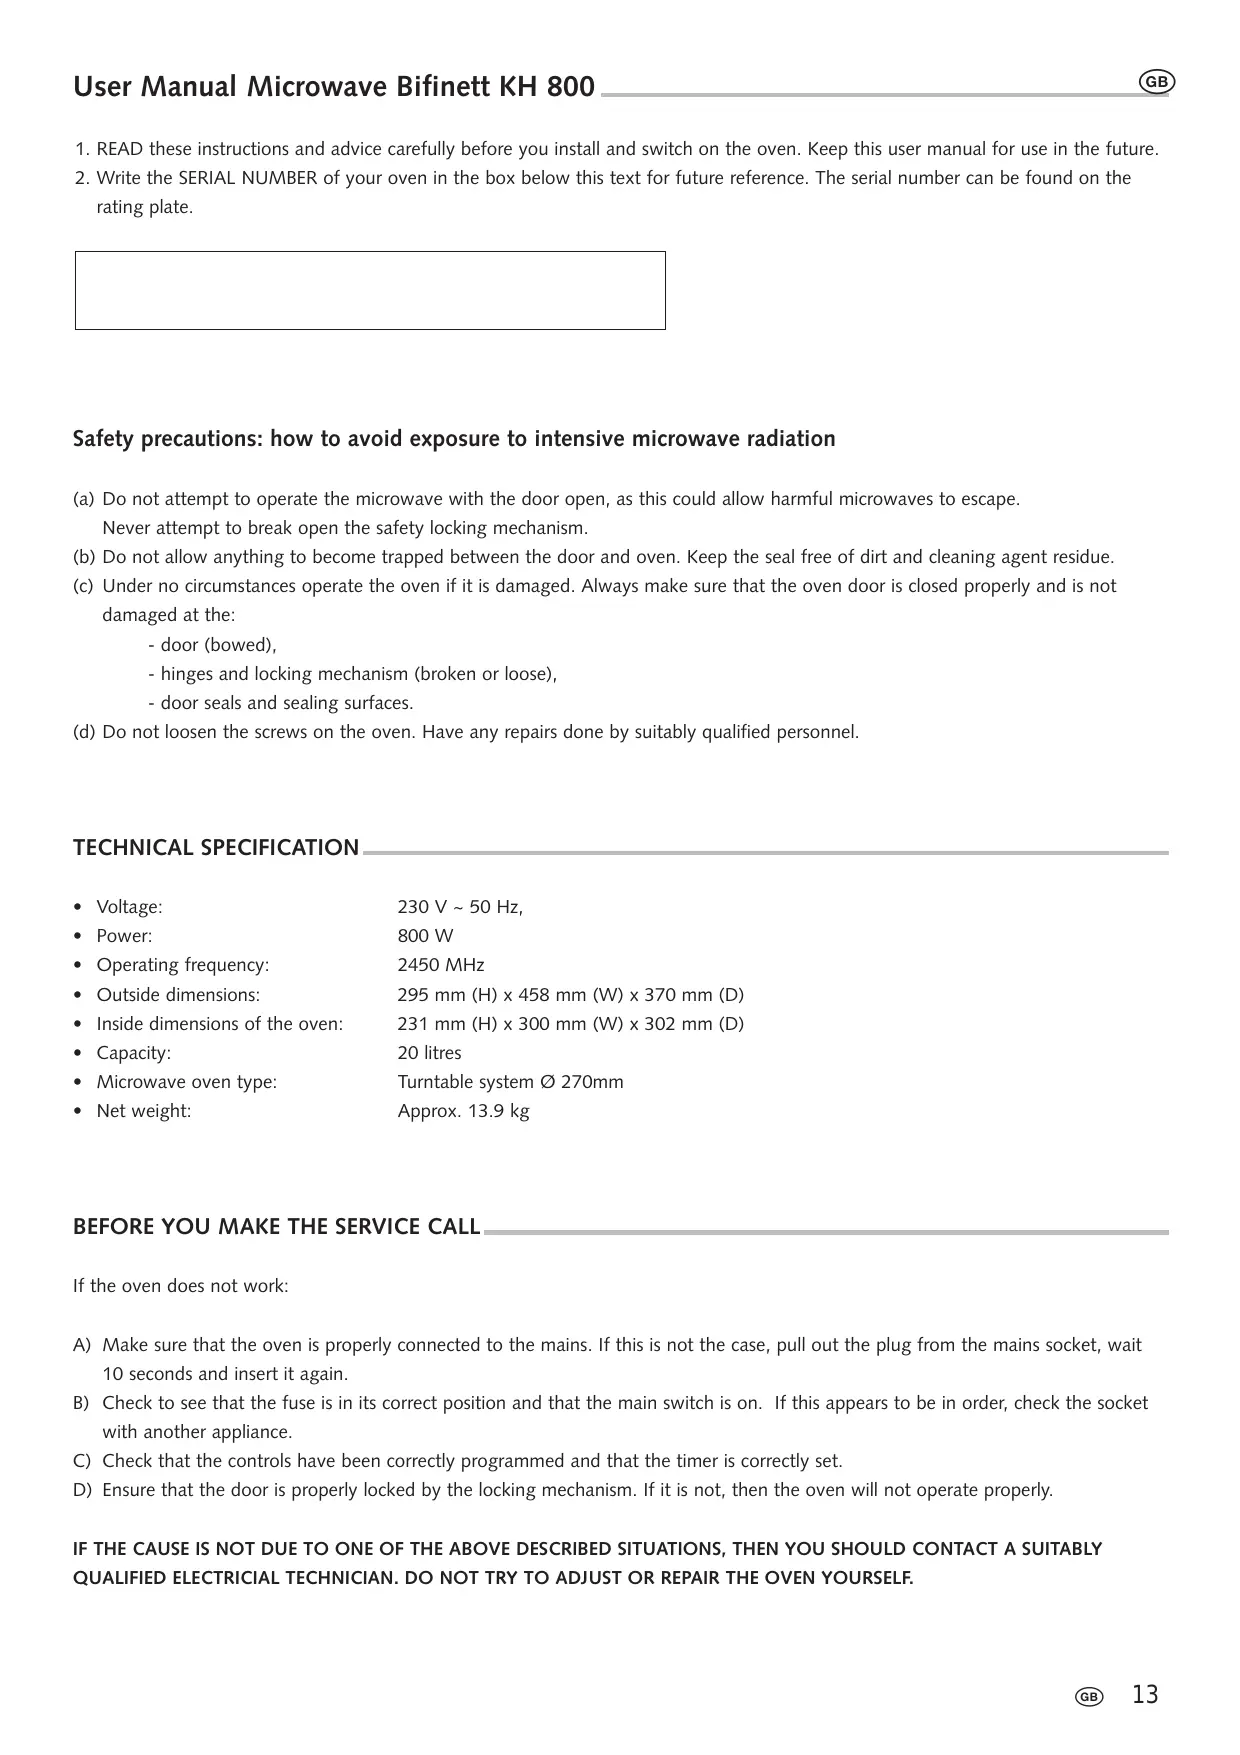
- READ these instructions and advice carefully before you install and switch on the oven. Keep this user manual for use in the future.
- Write the SERIAL NUMBER of your oven in the box below this text for future reference. The serial number can be found on the rating plate.
Safety precautions: how to avoid exposure to intensive microwave radiation
(a) Do not attempt to operate the microwave with the door open, as this could allow harmful microwaves to escape.
Never attempt to break open the safety locking mechanism.
(b) Do not allow anything to become trapped between the door and oven. Keep the seal free of dirt and cleaning agent residue.
(c) Under no circumstances operate the oven if it is damaged. Always make sure that the oven door is closed properly and is not damaged at the:
- door (bowed),
- hinges and locking mechanism (broken or loose),
- door seals and sealing surfaces.
(d) Do not loosen the screws on the oven. Have any repairs done by suitably qualified personnel.
TECHNICAL SPECIFICATION
• Voltage: 230 V \~ 50 Hz,
• Power: 800 W
- Operating frequency: 2450 MHz
• Outside dimensions: 295 mm (H) x 458 mm (W) x 370 mm (D)
- Inside dimensions of the oven: 231 mm (H) x 300 mm (W) x 302 mm (D)
• Capacity: 20 litres
- Microwave oven type: Turntable system ∅ 270mm
- Net weight: Approx. 13.9 kg
BEFORE YOU MAKE THE SERVICE CALL
If the oven does not work:
A) Make sure that the oven is properly connected to the mains. If this is not the case, pull out the plug from the mains socket, wait 10 seconds and insert it again.
B) Check to see that the fuse is in its correct position and that the main switch is on. If this appears to be in order, check the socket with another appliance.
C) Check that the controls have been correctly programmed and that the timer is correctly set.
D) Ensure that the door is properly locked by the locking mechanism. If it is not, then the oven will not operate properly.
IF THE CAUSE IS NOT DUE TO ONE OF THE ABOVE DESCRIBED SITUATIONS, THEN YOU SHOULD CONTACT A SUITABLY QUALIFIED ELECTRICIAL TECHNICIAN. DO NOT TRY TO ADJUST OR REPAIR THE OVEN YOURSELF.
- Make sure that all the packaging materials have been removed from inside the microwave oven.
- Examine the oven for damage such as a damaged or bowed door, broken or loose hinges, locking mechanism, door seals or dents inside the oven or on the door. If you discover any damage do not operate the oven. Contact suitably qualified service personnel.
- This microwave must be placed down upon a stable level surface that is capable of supporting the weight of the appliance and the item being cooked.
- Do not position the oven near sources of heat, moisture, or in a highly humid atmosphere or close to inflammable materials.
- The oven must have adequate ventilation to operate properly. Make sure that the space around the oven is unobstructed for 20 cm above, 10 cm behind and for 5 cm on both sides. Do not cover the openings on the appliance. Do not remove the feet from the appliance.
- The oven is only to be operated with the glass turntable, roller support ring and the drive shaft connection in their right positions.
- Make sure that the mains cable is not damaged and does not run under the oven or over hot surfaces or sharp edges.
- The mains socket must be within easy reach so that if necessary the plug can be swiftly removed from the socket.
- Do not use the oven outside.
EARTHING INSTRUCTIONS (FOR UK MODEL)
This appliance must be earthed. This oven is fitted with a cable, which has an earth wire with an earthed plug. It must be inserted into a wall socket that is correctly wired and earthed. In the event of an electrical short circuit, the earth connection reduces the risk of electric shock through the discharge cable. It is recommended that a separate circuit be used for the microwave oven. Using the appliance on a higher voltage supply is dangerous as this can lead to fire or have other damaging effects on the oven.
Warning: Incorrect use of the earthed plug can result in electric shock.
Notes: 1. If you have any questions about earthing or electrical matters you should contact a qualified electrician or service technician.
- The manufacturer and the retailer accept no liability for damage to the oven or persons resulting from the non-compliance with indicated electrical connection procedure.
The wires in the mains cable are coloured as follows:
Green and yellow = EARTH
Blue = NEUTRAL
Brown = LIVE
ELECTROMAGNETIC INTERFERENCE
- The operation of the microwave can cause interference on your radio, television or similar devices.
- Should there be electromagnetic interference it can be reduced or eliminated by the following actions:
a. Cleaning the door and the internal surfaces of the oven.
b. Realigning the radio/ television aerial.
c. Moving the microwave to another place in relation to the radio/television receiver.
d. Using a different mains socket so that the receiver and the microwave are not on the same circuit.
IMPORTANT SAFETY ADVICE
There are some basic safety precautions that should be observed when using electrical devices. They include:
Warning: To reduce the risk of burns and electric shock, fires and personal injury:
- Read the whole of the instructions and advice before you use the appliance.
- Use this appliance only for the intended purpose described in this user manual. Do not use any corrosive chemicals or vapours in this appliance. This appliance has been specially designed for heating or cooking food. It is not intended for industrial use or for laboratory work.
-
Do not operate the oven if it is empty.
-
Do not operate this appliance with a damaged mains cable or plug, if it is not working properly, or if it has been damaged or dropped.
- Please ensure that children do not operate the appliance unsupervised.
- To avoid fires in your oven:
a. When you are heating up food in plastic or paper containers, please ensure that the containers are suitable for use in a microwave oven.
b. Remove all metal parts such as the closers on plastic or paper bags before you place the bags in the oven.
c. If you notice any smoke, switch off the oven or pull the plug out of the mains socket and keep the door closed to suffocate the flames.
d. Do not use the microwave as storage space. Do not leave anything in the oven.
- Do not heat liquids or other foodstuffs in sealed containers, as this can cause them to explode.
- Heating liquids in a microwave can produce delayed boiling. Be careful when you touch the container.
- Do not deep-fry in the microwave. Hot oil can cause damage to the oven components and containers, and can lead to skin burns.
- Whole eggs should not be heated in the oven as they can explode.
- Pierce foodstuffs with thick skins, such as potatoes, whole pumpkins, apples or chestnuts before you cook them.
- Stir or shake the contents of babies' bottles or drinks containers. Likewise, be sure to check the temperature before the food is served in order to avoid burns.
- Cooking appliances can become hot from the heat given off by the hot food. Please handle by the top flaps.
- Cooking utensils, plates etc. should be suitable for use in microwaves. To test whether a utensil or plate is microwave-suitable place the empty utensil or plate in the oven and set the microwave to work on full power for 60 seconds. An empty container that becomes very hot is not suitable for use in a microwave.
- WARNING: Repairs are only to be carried out by suitably trained and qualified personnel.
PRINCIPLES OF MICROWAVE COOKING
- Place the thickest foodstuff at the edge of the plate.
- Take note of the indicated cooking time. Cook for the shortest time indicated and extend this if necessary. If food is cooked for too long in the microwave it may smoke or catch fire.
- Cover the food during cooking. This will avoid splattering and the food will cook more evenly.
- To reduce the cooking time, turn the food, e.g. chicken or hamburgers, once during the cooking process. Large items of food, such as roasts, must be turned at least once.
- Rearrange the food on the plate, e.g. for meatballs, during the cooking process: turn the underside of the meatball to the top and move the ones in the centre of the plate to the edge.
MICROWAVE COOKING UTENSILS/PLATES
- The ideal material for microwave containers is transparent to microwaves, allowing them to pass straight through the container and heat the food.
- Microwaves cannot pass through metal. Therefore metal containers or plates should not be used in microwave ovens.
- Do not use items made from recycled paper for microwave cooking. These products contain small metal particles, which can lead to sparking and/or fire.
- Round/oval containers are preferred, as the food in the corners in angular/long ones can become overcooked.
The following list gives you information about which types of cooking utensils are microwave-suitable.

Yes
Heat resistant glass
Heat resistant ceramic
Plastic intended for microwave use
Kitchen roll
Aluminium foil or foil containers

No
Non-heat resistant glass
Metal tray/plate
Metal cutlery
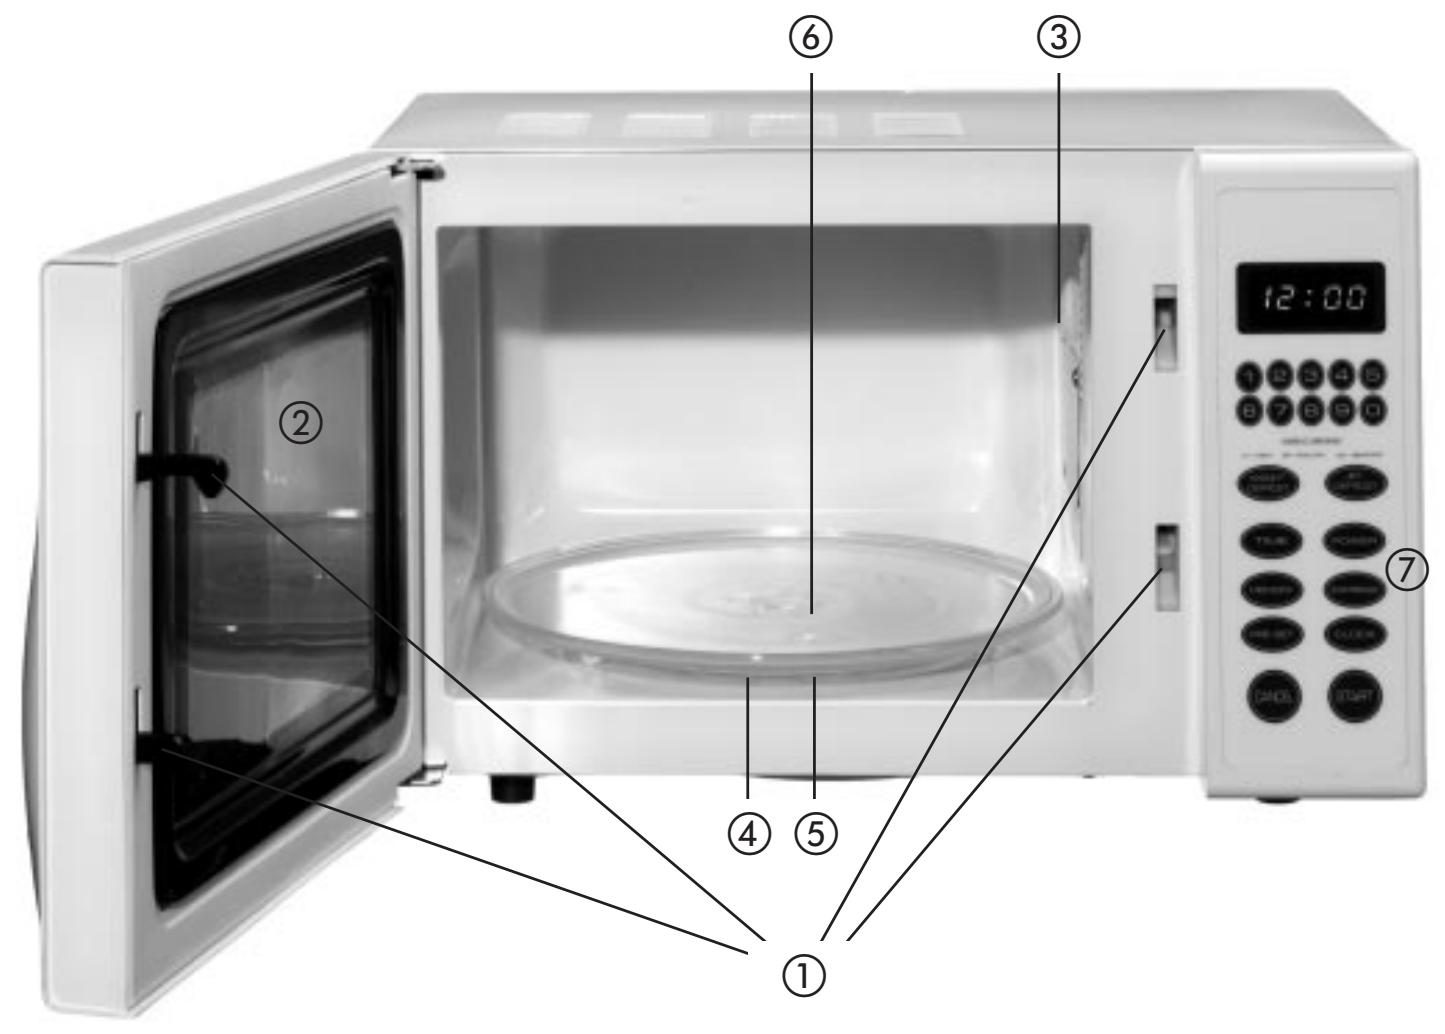
① Safety door
② Door glass
③ Ventilation hole
④ Drive shaft
⑤ Roller support ring
⑥ Glass turntable
⑦ Controls
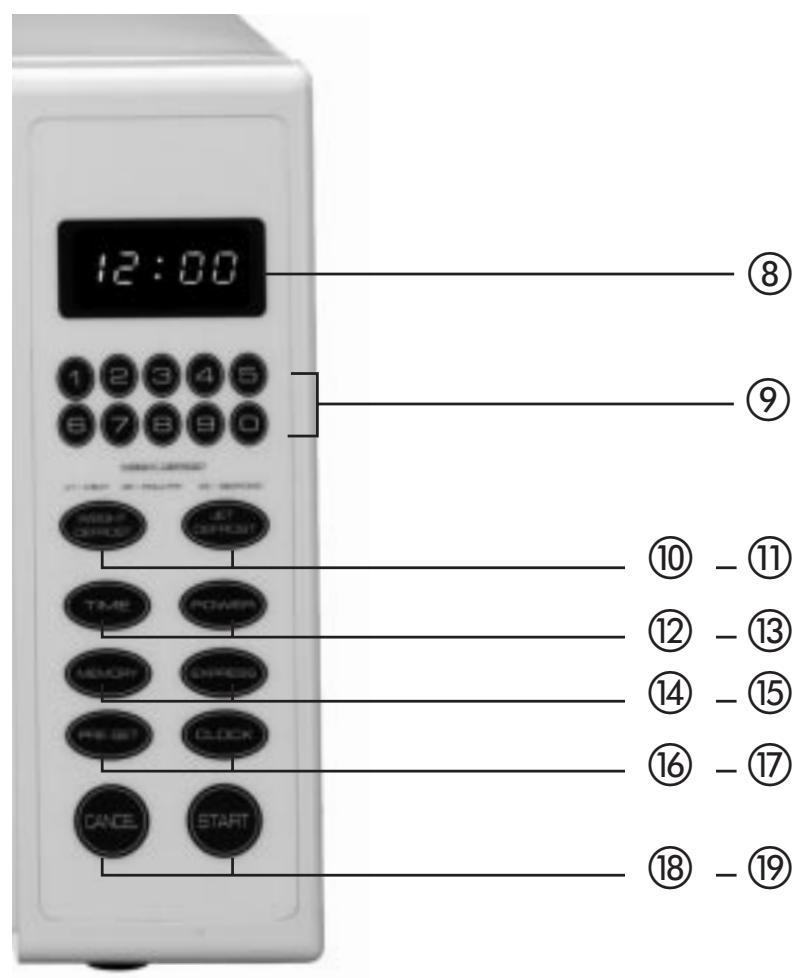
CONTROLS
DISPLAY ⑧
Cooking time, power setting, messages and current time are displayed.
NUMERICAL KEYS (0-9) ⑨
Press these to set the time or the weight.
WEI. DEFROST ⑩
Use this button to defrost frozen meat, poultry or seafood taking account of their weights. The defrosting time and the power setting are determined automatically when you input the type of food to be defrosted and its weight.
JET DEFROST ⑪
Press this button if you wish to set the defrosting time yourself. The oven splits up the defrosting time into appropriate defrosting and resting periods.
POWER ⑬
Press this button to select the desired power setting. You can also press the POWER button to check on the selected power setting during cooking.
PRE-SET ⑯
Press this button to set the oven to start at a particular time. The Pre-set function display flashes when the oven is in the Pre-set mode. Before you can use the Pre-set function, the microwave must be set to the current time.
CLOCK ⑰
Use this button to set the current time or to display the current time. The current time is always displayed except when the oven is operating. In the event of a power cut or if the oven is not properly closed, the time must be set again.
CANCEL ⑱
Press this button to cancel the selected power setting or the cooking or defrosting times. The current time cannot be cancelled.
MEMORY ⑭
If you wish to program the microwave to cook at a particular time, you can press the MEMORY button when you set the first or the second cooking stage. The relevant display lights up to show the stage the microwave is in.
TIME ⑫
Use this button to set the cooking time. The cooking time can be set up to 99 minutes and 99 seconds.
EXPRESS ⑮
Use this button to set your 4 most frequently used time settings (refer to "Express" in the operating instructions).
The microwave will operate at the 100% power setting.
Press this button to start the cooking or defrost program. The cooking display and microwave internal light come on and the ventilation fan starts up.
OPERATING INSTRUCTIONS
Acoustic signal sounds during setting
Each time a button is pressed this is confirmed by an acoustic signal.
SETTING THE CLOCK
- Press the CLOCK button.
- Press the CANCEL button.
- Use the numerical buttons to set the current time. You must enter at least 3 numbers; one for the hour setting and two for the minutes.
- Press the CLOCK button again.
Note:
- This is a 12 hour clock. When the oven is closed the display should show 1:01. To set the current time repeat the steps described above. Press the CLOCK button to display the current time during the cooking process.
- Press the TIME button.
- Enter the time for which the microwave should run by pressing the numerical buttons. The time is entered in minutes and seconds from left to right. You have the option of entering one digit (e.g. 5 for 5 seconds) or up to four digits (e.g. 2405 for 24 minutes 5 seconds).
- Press the POWER button.
- Press the numerical button 0.
- Press START.
Note:
- To delete the time during the time setting process, first press TIME then CANCEL.
SETTING THE COOKING TIME AND THE POWER
A. One stage cooking
- Press the TIME button.
- Use the numerical buttons to set the cooking time. The cooking time can be set to any period from one second to 99 minutes and 99 seconds. If you select a cooking time that is longer than one minute, you must set the minutes and the seconds.
Example: To set 20 minutes, enter the following numbers: 2,0,0,0.
- If you wish to use a power setting other than 100%, you can make the necessary change using the numerical buttons after you have pressed the POWER button. You can select between settings 1-9.
- To start the cooking process, press the START button.
USE THESE BUTTONS TO SET THE DESIRED POWER SETTING
| Button | Power output |
| 9 | 90% |
| 8 | 80% |
| 7 | 70% |
| 6 | 60% |
| 5 | 50% |
| 4 | 40% |
| 3 | 30% |
| 2 | 20% |
| 1 | 10% |
B. Two stage cooking
Some recipes require different temperatures for different cooking stages.
- Setting the 1st stage:
Refer to steps 1 and 2 for one stage cooking.
BUT DO NOT PRESS THE START BUTTON
- Setting the 2nd stage:
Press the MEMORY button, enter the required cooking period and the (lower) power setting as described above. (Most 2-stage recipes require a lower power setting for the 2nd stage)
- Press START.
Note:
- The display will show the stage the oven is on at the moment. After the full set time has expired the oven sounds 3 acoustic signals. After a cooking or defrosting program has ended, the oven will automatically sound 3 acoustic signals every two minutes until the door is opened or CANCEL is pressed.
PRE-SET
Let us assume that you wish the oven to start in two hours time.
Steps: 1. Press the PRE-SET button.
- Press the numerical buttons 2,0,0.
- Set the cooking program.
- Set the cook program
- Press START.
Note:
Ensure that the current time is correctly set before you use the PRE-SET function.
EXPRESS
Use this feature to set the 4 most frequently used microwave times.
Successive presses of the EXPRESS button allow you to set the microwave to the following cooking periods:
15 seconds ..... press once
30 seconds ..... press twice
1 minute..... press three times
2 minutes ..... press four times
With the EXPRESS program selected, the oven operates at 100% power. Let us assume that you wish to operate the oven at 100% for one minute:
Steps: 1. Press the EXPRESS button three times; "1:00" appears on the display.
- Press the START button.
"JET DEFROST"
- Press the JET DEFROST button.
-
Enter the desired defrosting time by pressing the appropriate numerical buttons. The numbers for the minutes and seconds are entered from left to right. You have the option of entering a single digit (e.g. 5 for 5 seconds) or up to 4 digits (e.g. 2405 for 24 minutes 5 seconds).
-
Press START.
SETTING "WEIGHT DEFROST"
Let us assume that you wish to defrost 600 grams of shrimps.
- Press WEI. DEFROST three times. "d3" appears on the display.
- Press the numerical buttons 6,0,0.
- Press START.
Note: The maximum allowable weights for the various foodstuff types are given in the following table.
| Foodstuff type | Maximum weight | Display |
| Meat | 2300g | d1 |
| Poultry | 4000g | d2 |
| Seafood | 900g | d3 |
For foodstuffs of a weight that exceeds the maximum weight please use the JET DEFROST program. If the maximum weight is exceeded, the oven will not perform correctly.
Cooking program
This appliance allows you to program several functions.
Let us assume that you wish to set the following cooking program:
(1) JET DEFROST;
(2) First stage: Cook for 5 minutes at 100% power.
(3) Second stage: Cook for 10 minutes at 50% power.
Steps: 1. Press CANCEL.
- Enter the JET DEFROST program.
- Enter the time (5 minutes) and power setting (100%).
- Press MEMORY.
- Enter the time (10 minutes) and power setting (50%) for the cooking program.
- Press START.
Note: JET DEFROST and WEIGHT DEFROST can only be selected before the cooking stage.
The programs cannot be changed between or after stages 1 or 2.
Setting the "SAFETY LOCK" (button lock)
The button lock prevents children from operating the oven unsupervised. To activate the button lock, press and hold down the numerical buttons 5 and 7 for three seconds. The oven sounds an acoustic signal and LOCK appears on the display.
To release the safety locking feature, press and hold down the numerical buttons 5 and 7 for three seconds.
An acoustic signal sounds when the door is unlocked.
How to stop the microwave during operation
- Open the door.
- You can continue the cooking process by closing the door and pressing START.
Note:
The oven starts operating as soon as the door is closed.
Cleaning and maintenance
- Before you clean the microwave, switch it off and pull the plug out of the mains socket.
- Keep the interior of the microwave clean. If food is splattered or spilled on the walls of the oven, it should be wiped away using a moist cloth. You can use a mild detergent if the microwave has become very dirty. Do not use cleaning sprays or other powerful cleaning agents as they can result in the surfaces becoming stained, dull or streaky.
- The exterior surfaces can be cleaned with a moist cloth. To avoid damage to the internal components you should make sure that no water can enter through the ventilation holes.
- Wipe the glass door on both sides with a moist cloth to remove any splatter.
- Do not allow the controls to become wet. Clean the controls with a soft moist cloth. When you clean the controls, leave the door open to prevent the microwave from being inadvertently switched on.
- If any condensation forms on the inside or outside of the microwave oven door, wipe it off with a soft cloth. This condensation can form if the microwave is operated in humid conditions.
- From time to time it may be necessary to remove the glass turntable in order to clean it. Wash the glass turntable in warm water with a little detergent or in a dish washer.
- The roller support ring and the microwave oven floor should be cleaned regularly. Just wipe the surface using a mild cleaning agent. The roller support ring can be washed in warm water with a little detergent or in a dish washer. Make sure that you replace the roller support ring in the correct position.
- To remove odours, place a microwave-safe bowl of water containing the juice and some peel from a lemon inside the microwave. Heat this for 5 minutes in the microwave. Thoroughly wash the microwave and dry it with a soft cloth.
- If it should be necessary to replace the lamp inside the oven, this should be carried out by a dealer.
We, Kompernaß Handelsgesellschaft mbH, Burgstr. 21, D-44867 Bochum, Germany, hereby declare that this product conforms with the following EC regulations:
EC low voltage regulations, Electromagnetic compatibility, Applicable harmonised standards.
Type:
KH 800
Bochum, 31.07.2002

Hans Kompernaß
- Managing Director -
USTAWIENIE FUNKCJI "SAFETY LOCK"
(BLOKADA PRZYCISKÓW)
PRE-SET (ESIASETUS) ⑯
EXPRESS (PIKATOIMINNOT) ⑮
| Numeropainike | Teho |
| 9 | 90% |
| 8 | 80% |
| 7 | 70% |
| 6 | 60% |
| 5 | 50% |
| 4 | 40% |
| 3 | 30% |
| 2 | 20% |
| 1 | 10% |
KONFORMITETSDEKLARATION
- Safety precautions: how to avoid exposure to intensive microwave radiation
- TECHNICAL SPECIFICATION
- BEFORE YOU MAKE THE SERVICE CALL
- EARTHING INSTRUCTIONS (FOR UK MODEL)
- ELECTROMAGNETIC INTERFERENCE
- IMPORTANT SAFETY ADVICE
- PRINCIPLES OF MICROWAVE COOKING
- MICROWAVE COOKING UTENSILS/PLATES
- Yes
- No
- CONTROLS
- DISPLAY ⑧
- NUMERICAL KEYS (0-9) ⑨
- DEFROST ⑩
- JET DEFROST ⑪
- POWER ⑬
- PRE-SET ⑯
- CLOCK ⑰
- CANCEL ⑱
- MEMORY ⑭
- TIME ⑫
- EXPRESS ⑮
- OPERATING INSTRUCTIONS
- Acoustic signal sounds during setting
- SETTING THE CLOCK
- Note:
- SETTING THE COOKING TIME AND THE POWER
- One stage cooking
- Two stage cooking
- BUT DO NOT PRESS THE START BUTTON
- PRE-SET
- EXPRESS
- "JET DEFROST"
- SETTING "WEIGHT DEFROST"
- Cooking program
- Setting the "SAFETY LOCK" (button lock)
- How to stop the microwave during operation
- Cleaning and maintenance
- USTAWIENIE FUNKCJI "SAFETY LOCK"
- (BLOKADA PRZYCISKÓW)
- PRE-SET (ESIASETUS) ⑯
- EXPRESS (PIKATOIMINNOT) ⑮
- KONFORMITETSDEKLARATION
Brand : BIFINETT
Model : KH 800
Category : Microwaves