
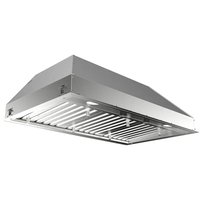
The Cylindra Isola - Range hood FABER - Free user manual and instructions
Find the device manual for free The Cylindra Isola FABER in PDF.


| Product type | Cooker hood |
| Brand | Faber |
| Model | The Cylindra Isola |
| Dimensions (diameter × height) | 30 cm × 60 cm |
| Net weight | 7 kg |
| Power supply | 220-240 V, 50/60 Hz |
| Maximum power | 200 W |
| Maximum extraction flow | 600 m³/h |
| Number of speeds | 3 speeds + intensive |
| Lighting | Integrated LED (2 × 1.5 W) |
| Noise level (min – max) | 45 – 65 dB(A) |
| Energy class | A |
| Main material | Stainless steel |
| Grease filter type | Washable aluminum grease filter |
| Carbon filter (recirculation) | Activated carbon filter (optional) |
| Main functions | Extraction / recirculation, LED lighting, automatic shut-off, remote control |
| Maintenance and cleaning | Dishwasher-safe grease filter, carbon filter to replace every 3-6 months |
| Safety | Overheat protection, automatic shut-off, child safety (lockable control) |
| Spare parts and repairability | Filters, LED bulbs, motor, remote control – available on manufacturer's website |
| Warranty | 2 years (parts and labor) |
Frequently Asked Questions - The Cylindra Isola FABER
User questions about The Cylindra Isola FABER
0 question about this device. Answer the ones you know or ask your own.
Ask a new question about this device
Download the instructions for your Range hood in PDF format for free! Find your manual The Cylindra Isola - FABER and take your electronic device back in hand. On this page are published all the documents necessary for the use of your device. The Cylindra Isola by FABER.
USER MANUAL The Cylindra Isola FABER
SAFETY INFORMATION....16
CHARACTERISTICS 19
INSTALLATION....21
USE 25
CARE AND CLEANING....26
SAFETY INSTRUCTIONS....28
CHARACTERISTICS....31
INSTALLATION....33
USE 37
CLEANING AND MAINTENANCE 38


ELECTRICAL CONNECTION


Control panel
Lighting
For your safety and correct operation of the appliance, read this manual carefully before installation and use. Always keep these instructions with the appliance even if you move or sell it. Users must fully know the operation and safety features of the appliance.

The wire connection has to be done by a specialized technician.
- The manufacturer will not be held liable for any damages resulting from incorrect or improper installation.
- The minimum safety distance between the cooker top and the extractor hood is 650 mm (some models can be installed at a lower height, please refer to the paragraphs on working dimensions and installation).
- If the instructions for installation of the gas hob specify a greater distance, this must be respected.
- Check that the mains voltage corresponds to that indicated on the rating plate fixed to the inside of the hood.
- Means for disconnection must be incorporated in the fixed wiring in accordance with the wiring rules.
- For Class I appliances, check that the domestic power supply guarantees adequate earthing.
- Connect the extractor to the exhaust flue through a pipe of minimum diameter 120 mm. The route of the flue must be as short as possible.
- Regulations concerning the discharge of air have to be fulfilled.
- Do not connect the extractor hood to exhaust ducts carrying combustion fumes (boilers, fireplaces, etc.).
- If the extractor is used in conjunction with non-electrical appliances (e.g. gas burning appliances), a sufficient degree of aeration must be guaranteed in the room in order to prevent the backflow of exhaust gas. When the cooker hood is used in conjunction with appliances supplied with energy other than electric, the negative pressure in the room must not exceed 0.04 mbar to prevent fumes being drawn back into the room by the cooker hood.
- The air must not be discharged into a flue that is used for exhausting fumes from appliances burning gas or other fuels.
- If the supply cord is damaged, it must be replaced by the manufacturer or its service agent.
- Connect the plug to a socket complying with current regulations, located in an accessible place.
- With regards to the technical and safety measures to be adopted for fume discharging, it is important to closely follow the regulations provided by the local authorities.
⚠ WARNING: Before installing the Hood, remove the protective films.
- Use only screws and small parts supplied with the hood.
⚠ WARNING: Failure to install the screws or fixing device in accordance with these instructions may result in electrical hazards.
- Do not look directly at the light through optical devices (binoculars, magnifying glasses...).
- Do not flambé under the range hood; risk of fire.
- This appliance can be used by children aged from 8 years and above and persons with reduced physical, sensory or mental capabilities or lack of experience and knowledge if they have been given supervision or instruction concerning use of the appliance in a safe way and understand the hazards involved. Children shall not play with the appliance. Cleaning and user maintenance shall not be made by children without supervision.
- Children should be supervised to ensure that they do not play with the appliance.
- The appliance is not to be used by persons (including children) with reduced physical, sensory or mental capabilities, or lack of experience and knowledge, unless they have been given supervision or instruction.
⚠️ Accessible parts may become hot when used with cooking appliances.
- Clean and/or replace the Filters after the specified time period (Fire hazard). See paragraph Care and Cleaning.
- There shall be adequate ventilation of the room when the range hood is used at the same time as appliances burning gas or other fuels (not applicable to appliances that only discharge the air back into the room).
- The symbol 📁 on the product or on its packaging indicates that this product may not be treated as household waste. Instead it shall be handed over to the applicable collection point for the recycling of electrical and electronic equipment. By ensuring this product is disposed of correctly, you will help prevent potential negative consequences for the environment and human health, which could otherwise be caused by inappropriate waste handling of this product. For more detailed information about recycling of this product, please contact your local city office, your household waste disposal service or the shop where you purchased the product.
Dimensions


* Dimensions of the hood in ducting version.
** Dimensions of the hood in recycling version.
Components
Ref. Q.ty Product Components
1 1 Hood Body, complete with: Controls, Light, Blower, Filters 2 1 Chimney Upper 7.1 1 Telescopic frame complete with extractor, consisting of: 7.1a 1 Upper frame 7.1b 1 Lower frame 9 1 Reducer Flange ø 150-120 mm 15 1 Recirculation Air Outlet Connection 25 Pipe clamps (not included)
Ref. Q.ty Installation Components
11 4 Wall Plugs ø 10 12c 4 Screws 2,9 x 12,7 12f 4 Screws M6 x 10 12g 4 Screws M6 x 80 12h 4 Screws 5,2 x 70 21 1 Drilling template 22 4 6.4 mm int. dia washers 23 4 M6 nuts
Q.ty Documentation
1 Instruction Manual


Drilling the Ceiling/shelf and fixing the frame
DRILLING THE CEILING/SHELF
- Use a plumb line to mark the centre of the hob on the ceiling/support shelf.
- Place the drilling template 21 provided on the ceiling/support shelf, making sure that the template is in the correct position by lining up the axes of the template with those of the hob. Mark the centres of the holes in the template.
- Drill the holes at the points marked:
- For concrete ceilings, drill for plugs appropriate to the screw size.
- For hollow brick ceilings with wall thickness of 20 mm: drill φ 10 mm (immediately insert the Dowels 11 supplied).
- For wooden beam ceilings, drill according to the wood screws used.
- For wooden shelf, drill φ 7 mm.
- For the power supply cable feed, drill φ 10 mm.
- For the air outlet (Ducted Version), drill according to the diameter of the external air exhaust duct connection.
Insert two screws of the following type, crossing them and leaving 4-5 mm from the ceiling:
- For concrete ceilings, use the appropriate plugs for the screw size (not provided).
- For cavity ceiling with inner space, with wall thickness of approx. 20 mm, use Screws 12h, supplied.
- For wooden beam ceilings, use 4 wood screws (not provided).
- For wooden shelf, use 4 screws 12g with washers 22 and nuts 23, provided.
PREPARATION OF THE FRAME FOR THE HOOD IN RECYCLING VERSION
In case the hood is used in recycling version it is necessary to prepare the frame with all the necessary connection pieces. In order to make the installation easier it is necessary to lengthen the frame:
- Unscrew the two screws 2.1 fixing the upper chimney to the frame and pull the chimney out.
- Unscrew the four safety screws placed at the top in the frame separation area. (A).
- Unscrew the eight metric screws connecting the two columns, placed on both sides of the frame (B).
Installation of components in recycling version:
- Fix the recycling air outlet piece 15 to the upper part of the frame using four 12c screws supplied with the hood.
- At this point, join the flanges with a pipe. In order to calculate the height of the pipe it is necessary to estimate the height of the hood (mm) and subtract 615 mm. (H pipe = H hood - 615).
- Lengthen the frame so that the pipe can be inserted. Place the pipe between the two flanges and block it. Make sure that the height of the frame is correct considering the height of the cooker hood (H frame = H hood - 184). Adjust the height of the frame and tighten again the earlier removed screws. Tighten again the safety screws in order to give more stability to the structure.
Fix the pipe with the pipe clamps 25.


FIXING THE FRAME
- Lift the frame up, making sure that the index over the frame plate is turned forwards.
- Fit the frame slots onto the two screws inserted in the ceiling as above, and turn until reaching the centre of the adjustment slot.
- Tighten the two screws and fasten the other two screws provided; before locking the screws completely, it is possible to adjust the frame by turning it, making sure that the screws do not come out of their housing in the adjustment slot.
- The Frame must be securely fastened so as to support both the weight of the Hood and the stress caused by occasional axial pressure against the fitted Appliance. After fixing, make sure that the base is stable even when the Frame is subjected to lateral stress.
- If the ceiling is not strong enough in the area where the hood is to be fixed, the installer must strengthen the area using suitable plates and counterplates anchored to resistant structures.

Ducted version air exhaust system connection
When installing the ducted version, connect the hood to the chimney using either a flexible or rigid pipe of 150 or 120 mm diameter, the choice of which is left to the installer.
- To install a 120 mm air exhaust connection, insert the reducer flange 9 on the hood body outlet. Fix the pipe using the pipe clamps 25 provided.
- Remove any activated charcoal filters.


Installing the chimney and fixing the hood
When the hood is installed in recycling version, the chimney has to be positioned with the slots upwards. When the hood is installed in ducting version, it has to be positioned in the opposite way.
- Place the chimney on the frame and fix it to the upper part of it with the earlier removed screws. When installing the hood in recycling version, make sure that the slots correspond to the air outlet of the recycling air outlet piece 15.
- Open the lighting unit by slightly pulling the notch. Remove the unit from the hood by sliding the fixing pivot.
- Remove the filter by pushing it towards the back side of the hood unit and simultaneously pulling downwards.
- Remove possible charcoal filters.
- In order to fix the hood body to the frame, insert the 4 screws 12f in their seats. It is necessary to leave at least 4-5 mm gap between the screw heads and the frame plate.
- Hook the hood canopy to the frame and turn it to the left until it reaches the stop, then lock the screws immediately to prevent the hood canopy from falling out accidentally.


ELECTRICAL CONNECTION
- Connect the hood to the mains power supply, inserting a two-pole cut-out switch with contact aperture of at least 3 mm along the line.
- Ensure that the supply cable connector is properly inserted into the Suction device socket.
- Hook up the Commands connector Cmd.
- Hook up the Spotlights connector Lux to the socket provided behind the lighting unit cover.
- For the Recirculation Version, fit the Activated Charcoal Odour Filter.
- Replace the filters and the lighting unit.


Control panel
| Button | Led Function | |
| L | - | Turns the lights on/off at maximum strength. |
| T1 | Fixed Turns the motor on/off at speed one. | |
| T2 | Fixed Turns the Motor on at speed two. | |
| - | Press and hold the button for approximately 3 seconds, with all the loads turned off (Motor and Lights), to turn the Activated Charcoal Filter alarm on. The relevant LED flashes twice to confirm.To turn the alarm off, press the button again and hold for at least 3 seconds. The relevant LED flashes once. | |
| T3 | Fixed Turns the Motor on at speed three. | |
| - | Press and hold the button for approximately 3 seconds, with all the loads turned off (Motor and Lights), to perform a reset of Filter saturation alarm. The LED S1 flashes three times. | |
| T4 | Fixed Turns the Motor on at INTENSIVE Speed.This speed is timed to run for 6 minutes. At the end of this time, the system returns automatically to the speed that was set before. If it is activated with the motor turned off, the hood will switch to OFF at the end of the time. | |
| - | Press and hold for 3 seconds to enable the remote control, indicated by the LED flashing twice.Press and hold for 3 seconds to disable the remote control, indicated by the LED flashing just once. | |
| S1 | Fixed Signals the Metal Grease Filter saturation alarm, indicating that it is necessary to wash the filters. The alarm is triggered after the Hood has been in operation for 100 working hours. | |
| Flashing | When this is activated, it signals the Activated Charcoal Filter saturation alarm, indicating that the filter must be changed; the Metal Grease Filters must also be washed. The Activated Charcoal Filter saturation alarm comes into operation after the Hood has been working for 200 hours. | |
REMOTE CONTROL (OPTIONAL)

Metal grease filters
These can be washed in the dishwasher, and need to be cleaned whenever the S1 LED comes on or at least once every 2 months of use, or more frequently if use is particularly intensive.
CLEANING THE FILTERS
Resetting the alarm signal
- Turn the Lights and the Suction Motor off.
- Press T3 and hold for at least 3 seconds, until LED flashes three times in confirmation.

Cleaning the Filters
- Open the lighting unit by pulling on the notch.
- Remove the filter, pushing it towards the back of the unit and at the same time pulling downward.
- Wash the filter without bending it, and leave it to dry thoroughly before replacing (if the surface of the filter changes colour over time, this will have absolutely no effect on its efficiency).
- Replace, taking care to ensure that the handle faces forwards.
- Replace the lighting unit.
This cannot be washed or regenerated, and must be changed when LED S1 starts to flash, or at least once every 4 months. The alarm signal, if it has been activated, only appears when the suction motor is turned on.
Activating the alarm signal
- In recirculation version hoods, the filter saturation alarm must be activated on installation or at a later date.
- Turn the lights and the suction motor off.
- Press button T2 and hold it for 5 seconds until the LED flashes twice in confirmation:
CHANGING
Resetting the alarm signal
- Turn the lights and the suction motor off.
- Press T3 and hold for at least 3 seconds, until LED flashes three times in confirmation.
Changing the filter
- Open the lighting unit by pulling on the notch provided.
- Remove the Metal Grease Filter
- Remove the saturated Activated charcoal filter, using the hooks provided.
- Fit the new Filter, hooking it into place.
- Fit the Grease filter and the Light Unit back into place.

Lighting unit
- For replacement contact technical support ("To purchase contact technical support").


AIR OUTLET EXTRACTOR VERSION

ELECTRICAL CONNECTION


Control panel
Lighting
* Dimensions of the hood in extraction version.
** Dimensions of the hood in recirculation version.
Components

Connection in extraction version

ELECTRICAL CONNECTION


Control panel
Metal grease filter
Lighting
LED spotlight
Ref. Qty Installation parts
11 4 Plugs ø 10 12c 4 Screws 2.9 x 12.7 12f 4 Screws M6 x 15 12g 4 Screws M6 x 80 12h 4 Screws 5.2 x 70 21 1 Drill bit 22 4 Washers ø 6.4 23 4 Nuts M6
Qty Documentation

Drill holes in ceiling/shelf and attach frame
DRILL HOLES IN CEILING/SHELF
AIR OUTLET EXTRACTION VERSION

Metal grease filters
Lighting


ELECTRICAL CONNECTION
Lighting


Electrical installation
Metal grease filter
Filter cleaning
Lighting
AIR OUTLET FOR THE ASPIRATING VERSION

ELECTRICAL CONNECTION


Control panel
Metal anti-grease filters
Lighting

- ELECTRICAL CONNECTION
- LIGHTING
- COMPONENTS
- REF. Q.TY PRODUCT COMPONENTS
- REF. Q.TY INSTALLATION COMPONENTS
- Q.TY DOCUMENTATION
- DRILLING THE CEILING/SHELF AND FIXING THE FRAME
- DRILLING THE CEILING/SHELF
- PREPARATION OF THE FRAME FOR THE HOOD IN RECYCLING VERSION
- FIXING THE FRAME
- DUCTED VERSION AIR EXHAUST SYSTEM CONNECTION
- INSTALLING THE CHIMNEY AND FIXING THE HOOD
- METAL GREASE FILTERS
- CLEANING THE FILTERS
- RESETTING THE ALARM SIGNAL
- ACTIVATING THE ALARM SIGNAL
- CHANGING
- CHANGING THE FILTER
- LIGHTING UNIT
- AIR OUTLET EXTRACTOR VERSION
- CONNECTION IN EXTRACTION VERSION
- METAL GREASE FILTER
- LED SPOTLIGHT
- REF. QTY INSTALLATION PARTS
- QTY DOCUMENTATION
- DRILL HOLES IN CEILING/SHELF AND ATTACH FRAME
- DRILL HOLES IN CEILING/SHELF
- AIR OUTLET EXTRACTION VERSION
- ELECTRICAL INSTALLATION
- FILTER CLEANING
- AIR OUTLET FOR THE ASPIRATING VERSION
- METAL ANTI-GREASE FILTERS
Brand : FABER
Model : The Cylindra Isola
Category : Range hood