
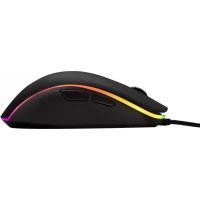
Pulsefire Warp - Mouse HYPERX - Free user manual and instructions
Find the device manual for free Pulsefire Warp HYPERX in PDF.
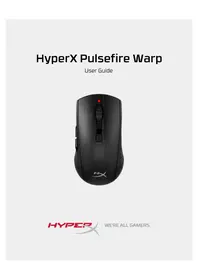


| Product Type | Wired Gaming Mouse |
| Brand | HyperX |
| Model | Pulsefire Warp |
| Connection Type | USB 2.0 (Braided Cable) |
| Sensor Type | Optical (Pixart 3389 or equivalent) |
| DPI Range | 100 – 16,000 DPI (adjustable in 100 DPI increments) |
| Polling Rate | 1000 Hz (1 ms response) |
| Number of Buttons | 6 Programmable Buttons |
| Switch Durability | 50 million clicks (Omron or equivalent) |
| Lighting | RGB per-key lighting with customizable effects via NGENUITY software |
| Dimensions (L x W x H) | 125 mm x 68 mm x 42 mm |
| Weight (without cable) | Approx. 100 g |
| Cable Length | 1.8 m |
| Onboard Memory | Yes (for saving profiles) |
| Compatibility | Windows 10/11, macOS, Linux (plug-and-play) |
| Power Supply | USB bus-powered (5V, 500 mA) |
| Cleaning Instructions | Use a soft, dry cloth to wipe the surface. Do not use liquids or abrasive cleaners. |
| Safety Precautions | Avoid exposure to extreme temperatures, moisture, or direct sunlight. Unplug during cleaning. |
| Spare Parts & Repairability | Replaceable mouse feet and cable available via HyperX support. No user-serviceable internal parts. |
| General Information | All specifications are subject to change. For latest info, visit hyperxgaming.com. |
Frequently Asked Questions - Pulsefire Warp HYPERX
User questions about Pulsefire Warp HYPERX
0 question about this device. Answer the ones you know or ask your own.
Ask a new question about this device
Download the instructions for your Mouse in PDF format for free! Find your manual Pulsefire Warp - HYPERX and take your electronic device back in hand. On this page are published all the documents necessary for the use of your device. Pulsefire Warp by HYPERX.
USER MANUAL Pulsefire Warp HYPERX
HyperX Pulsefire Warp
User Guide

Languages
ENGLISH 3
简体中文 18
繁體中文 34
CONTENTS
Overview 4
Installation 5
Wireless Mode....5
Wired Mode 5
Replacement Skates 6
Charging 7
DPI....8
Polling Rate....9
Software - HyperX ILLUSION....10
Software Link....10
System Requirements....10
HyperX ILLUSION Features....10
Settings 11
Advance Mouse Options....12
Macros 13
Factory Reset 14
Restart Mouse Power 15
Questions or Setup Issues?......15
Specifications ....16
SKU Numbers....16
Overview

A Left click button
E Forward button
Polling rate button
M USB wireless receiver
B Right click button
F Back button
J Power button
N Wireless adapter
C Mouse wheel
G USB-C port
K USB charge/ data cable
D DPI button
H Restart button
L Spare Mouse skates
Wireless Mode
For optimal performance, please use the provided wireless adapter and keep within 20cm of the mouse. These instructions apply both for Computers and Game Consoles (PS4, PS5, Xbox One, Xbox Series X|S).
- Connect the wireless receiver to the wireless adapter.
- Connect the USB-C connector to the wireless adapter.
- Connect the USB-A connector to the computer or game console.
- Flip the mouse to its underside.
- Hold the Power button until green light appears.
![graph LR A["USB"] --> B["HYPER"] B --> C["USB Cable"] C --> D["Remote Control Interface"]](/content/2026/06/1376334/images/084589c2a9e5764ee1381db30041059f3024836dfbd83193927d8eae281099c4.jpg)
Wired Mode
Connect the mouse to a PC using the included USB-C to USB-A cable. These instructions apply both for Computers and Game Consoles (PS4, PS5, Xbox One, Xbox Series X|S).
- Connect the USB-C connector into the mouse USB-C port.
- Connect the USB-A connector into the computer or game console.
![graph LR A["Device with '天' icon"] -->|Data flow arrow| B["TYPE.C"] B --> C["Server with USB cable"] C --> D["Device with 'B' icon"] D --> E["Server with USB cable"]](/content/2026/06/1376334/images/5584e6f427c49f39a3f1b58df59bbdc82f992ac711ee3e91135ab0d1513120d0.jpg)
Replacement Skates
Pulsefire Warp Wireless includes an extra set of PTFE skates in case the preinstalled skates are lost, damaged, or worn. To replace the skates, follow these instructions.

- Remove the skate by gently wedging a flat tool under the skate. If needed, use a small flathead screwdriver, plastic card, or similar tool.
- Lift and pry the skate from the mouse.
- Remove adhesive residue and debris from the mouse. A clean dry surface will provide optimal adhesion.
- Peel the replacement mouse skate from the backing paper and install on the mouse. Use tweezers if needed.
- Remove the outer protective film.
Charging
It is recommended to fully charge your mouse before first use.
The mouse is charged via USB-C port, located at the top part of the mouse.
While the cable is attached, the mouse will operate in wired mode.
![graph LR A["Device with 'X' icon"] -->|Data Flow| B["TYPE C cable"] B --> C["Server with USB cable"] C --> D["Device with 'S' icon"]](/content/2026/06/1376334/images/4df3f98ed82ae7d8f53edbd9b0fba751e123d636de39874b06657c5126ae424b.jpg)
Battery percentage can be found on the top right corner in HyperX ILLUSION software, while unplugged in Wireless Mode.

There are 7 default DPI presets.
Customizing and saving DPI settings can be done within HyperX ILLUSION software.
| DPI Level | DPI LED Color |
| 400 | Red |
| 800 | Blue |
| 1600 | Yellow |
| 2400 | Purple |
| 3200 | Green |
| 6400 | Cyan |
| 16000 | White |

Polling Rate
There are 4 default Polling Rate presets.
Polling Rate can also be selected within HyperX ILLUSION software
| Polling Rate | Polling Rate LED Color |
| 125Hz | Green |
| 250Hz | Blue |
| 500Hz | Orange |
| 1000Hz | Red |

Software Link
Download HyperX ILLUSION software at hyperx.com/illusion
System Requirements
Windows 7 or higher
HyperX ILLUSION Features
- Modify Button Mappings
- Save, Export, Import Mouse Profiles
- Adjust Debounce Time
- Adjust DPI
- Polling Rate
- Advanced Mouse Features
○ Lift off Distance ○ Angle Snapping - Ripple Control
• Create and Set Macro Settings - Check Battery Life
All changes in HyperX ILLUSION software will automatically save to the mouse and will not require the software to be running in background to maintain changes.
Settings
Refer to the Settings Page to customize
- Multiple Mouse Profiles (up to 4)
- Import / Export Mouse Profiles • Factory Reset Mouse Profile
- Modify Button Mappings, including assigning Macros
- Adjust Debounce Time
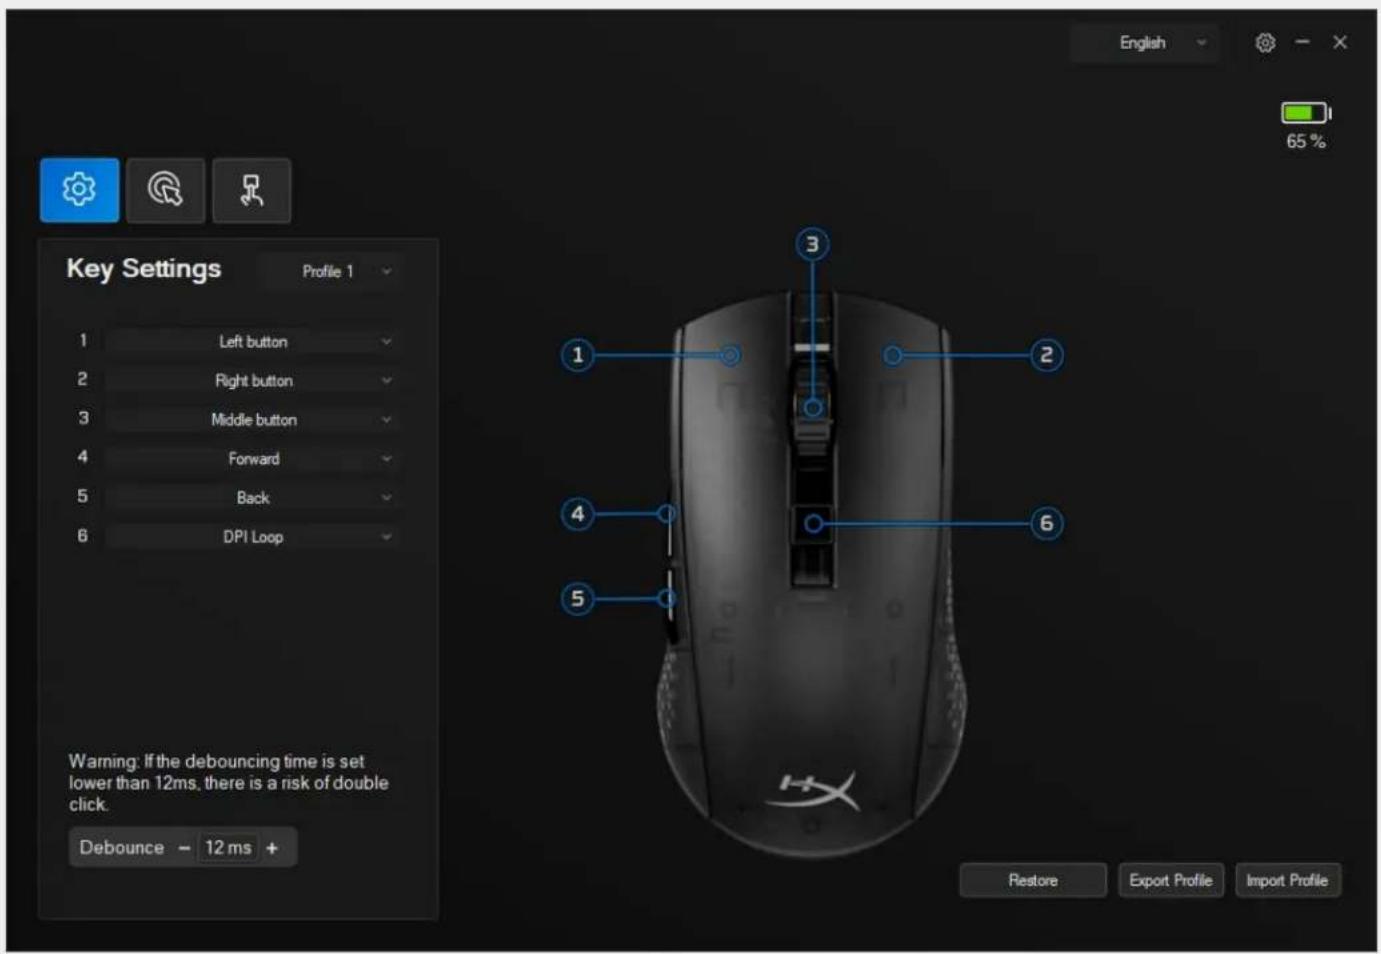
Advanced Mouse Options
Refer to the Advanced Mouse Options page to customize
• DPI stages stored on mouse - Adjust and select DPI values - Polling rate - Advanced mouse features
○ Lift-off distance ○ Angle snapping - Ripple control

Macros
To customize/record macro(s), please refer to the instructions below
- Click on "New macro" and type in the macro name.
- Click on the "Start record" button. ILLUSION will start recording inputs for the macro.
- Type or press the keys you want to be recorded in the macro.
- When finished, click on "Stop record".
- Click on "Save" to save the macro.
To apply your macro, switch to the Settings page and select one of the 6 programmable buttons, then choose your macro's name from the list.

Factory Reset
Hold the DPI button and scroll wheel for 5 seconds.
The mouse LED will flash red momentarily and disappear once the reset is completed.

Restart Mouse Power
If you are experiencing any issues with the mouse, you can perform a mouse restart.
The mouse will restart with the previous DPI and report rate settings.
- Flip the mouse over to its bottom side.
- Locate the small hole cutout below the label.
- Use a small tool to press the button.
The mouse LED will turn off when the button is pressed, and the mouse will power back on when the button is released.

Questions or Setup Issues?
Contact the HyperX support team at hyperx.com/support
You may also find the User Guide or Quick Start Guide on the support page.
Mouse Specifications
| Shape | Symmetrical | |
| Sensor | PAW3335 | |
| Resolution | Up to 16000 DPI | |
| DPI Presets | 400 / 800 / 1600 / 2400 / 3200 / 6400 / 16000 DPI | |
| Speed | 400 IPS | |
| Acceleration | 40G | |
| Buttons | 6 | |
| Left / Right Button Switches | Kailh GM 8.0 | |
| Left / Right Button Durability | 80 million clicks | |
| Light Effects | None | |
| Onboard Memory | 1 profile | |
| Connection Type | 2.4GHz Wireless / Wired | |
| Charging Type | USB-C Wired | |
| Polling Rate | 1000Hz | |
| Skate Material | Virgin-grade PTFE | |
Battery Specifications
| Battery Type | 500mAh Lithium Polymer battery |
| Battery Life | Up to 100 hours* |
Physical Specifications
| Length | 120mm | |
| Height | 65.4mm | |
| Width | 37.8mm | |
| Weight (without cable) | 74g | |
| Weight (with cable) | 110g | |
| Cable Type | Detachable, Braided USB-C to A Cable | |
| Cable Length | 1.6m | |
* Tested under continuous usage at 125Hz polling rate. Battery life varies based on usage and computing conditions.
SKU Numbers
6X255AA#AB2
Doc Rev:202211R0
HyperX Pulsefire Warp
User Guide

Table of Contents
Overview 19
Installation....20
Wireless Mode....20
Wired Mode....20
Replacing the Mouse Feet....21
Charging....22
DPI....23
Polling Rate 24
Polling Rate
There are 4 default polling rate presets.
Advanced mouse options
Customize according to the advanced mouse options
Factory reset
Press and hold the DPI button and scroll wheel for 5 seconds.
Restart the mouse power
Have questions or experiencing setup issues?
HyperX Pulsefire Warp
User Guide

HYPER
WE'RE ALL GAMERS.
Contents
Overview 35
Installation Instructions 36
Wireless Mode....36
Wired Mode....36
Spare mouse feet 37
Charging 38
DPI....39
Polling rate 40
CC Left button
DD Right button
EE Mouse wheel
FF DPI button
GG Forward button
HH Back button
II USB-C port
JJ Restart button
KK Polling rate button
LL Power button
MM USB charging/data cable
Spare mouse feet
00 USB wireless receiver
PP Wireless receiver extension cable port
Wireless mode
Wired mode
Spare mouse feet
This product has 7 DPI presets.
Polling rate
This product has 4 polling rate presets.
Advanced mouse options
Refer to the Advanced Mouse Options page to customize
Restore factory settings
Restart mouse power
Any questions or setup issues?

- HYPERX PULSEFIRE WARP
- LANGUAGES
- CONTENTS
- OVERVIEW
- INSTALLATION
- CHARGING
- DPI
- POLLING RATE
- SOFTWARE - HYPERX ILLUSION
- FACTORY RESET
- RESTART MOUSE POWER
- QUESTIONS OR SETUP ISSUES
- SPECIFICATIONS
- SKU NUMBERS
- WIRELESS MODE
- WIRED MODE
- REPLACEMENT SKATES
- SOFTWARE LINK
- SYSTEM REQUIREMENTS
- HYPERX ILLUSION FEATURES
- SETTINGS
- ADVANCED MOUSE OPTIONS
- MACROS
- TABLE OF CONTENTS
- RESTART THE MOUSE POWER
- HAVE QUESTIONS OR EXPERIENCING SETUP ISSUES
- INSTALLATION INSTRUCTIONS
- SPARE MOUSE FEET
- RESTORE FACTORY SETTINGS
- ANY QUESTIONS OR SETUP ISSUES
Brand : HYPERX
Model : Pulsefire Warp
Category : Mouse