
DIGITAL - Baby monitor BABYMOOV - Free user manual and instructions
Find the device manual for free DIGITAL BABYMOOV in PDF.
| Product type | Digital baby monitor |
| Brand | BABYMOOV |
| Model | DIGITAL (BC-52) |
| Operating frequency | 863-870 MHz |
| Range in open space | 800 m |
| Transmitter power supply | 3 AAA batteries (not included) or 5 V mains adapter (included) |
| Receiver power supply | Rechargeable lithium-polymer battery 3.7 V (included) or 5 V mains adapter (included) |
| Receiver battery life | Approximately 10 hours in normal use |
| Number of supported transmitters | Up to 2 |
| Main features | VOX (voice activation), "Talk to Baby" function (talkback), soft nightlight, remote nightlight control, temperature indicator, out-of-range alarm, temperature alarm, vibration, microphone sensitivity adjustment |
| Display | Backlit LCD screen on receiver and transmitter |
| Sound and light indicators | Sound level LED, visual, audible and vibration alarm, low battery notification |
| Transmitter weight | Approximately 80 g (without batteries) |
| Receiver weight | Approximately 100 g (with battery) |
| Transmitter dimensions | Approximately 70 x 50 x 30 mm |
| Receiver dimensions | Approximately 80 x 55 x 25 mm |
| Operating temperature range | -9 °C to +50 °C |
| Safety and compliance standards | EN 60065, EN 301489, EN 300220, EN50371; R&TTE directive 99/05/EC |
| Maintenance and cleaning | Clean with a soft, dry cloth. Do not use abrasive products. Remove batteries if not used for a long time. |
| Spare parts and repairability | Replacement battery available from the manufacturer. Mains adapter included. For any repairs, contact customer service. |
| Warranty | Lifetime warranty under conditions (see manual) |
Frequently Asked Questions - DIGITAL BABYMOOV
User questions about DIGITAL BABYMOOV
0 question about this device. Answer the ones you know or ask your own.
Ask a new question about this device
Download the instructions for your Baby monitor in PDF format for free! Find your manual DIGITAL - BABYMOOV and take your electronic device back in hand. On this page are published all the documents necessary for the use of your device. DIGITAL by BABYMOOV.
USER MANUAL DIGITAL BABYMOOV
Babyphone Digital Green
Réf.: A014200
EC DÉCLARATION DE CONFORMITÉ
Babymoov
ACCESSIONS STANDARDS
Thank you for choosing our Baby monitor Digital Green. We recommend you read these instructions carefully in order to use your Baby monitor to best advantage and ensure it continues to operate as long as possible. If you should find a fault, however, or if you have any problem, please contact our company.
IMPORTANT: This baby monitor uses low emission power, in order to protect baby's health. The receiver and the transmitter don't communicate continuously, in order to limit the emission of radiations in the room. When baby cries, the system is activated immediately to alert parents; when the baby doesn't cry, the transmitter and the receiver communicate only each 20 seconds to check the good communication.
FUNCTIONS
- Digital technology, works on the frequencies 863-870 MHz with no interference.
Automatic channel switching and searching. - 800 metre range in open space.
- Low-power waves.
- "Baby Answering" function on the receiver to quieten your baby at a distance.
- Possibility of connecting up to 2 Transmitters.
-
Gentle nightlight on the Transmitter. Possibility of remote control from the receiver.
-
Temperature indicator.
- Battery charge status indicator and low battery alert on transmitter and receiver.
- Microphone sensitivity setting on the transmitter.
- Out of range alarm (visual and audio).
Volume control on the receiver. - Audio, visual, and vibration alarm on the receiver.
- Back-lit screen for easier viewing.
- Receiver with rechargeable lithium battery.
WARNING
- The Baby monitor Digital Green should not be seen as a medical device. In addition to using Baby monitor Digital Green, it is strongly recommended that an adult checks on your baby directly, on a regular basis. Premature babies or children considered to be at risk should be monitored by your pediatrician or a health professional.
- Never go away from your baby outside the house, even a short moment.
- Non-rechargeable batteries are not to be recharged.
- Rechargeable batteries are to be removed from the device before being charged.
- Different types of batteries: new and used batteries, or rechargeable and not rechargeable batteries, are not to be mixed.
- Rechargeable batteries are only to be charged under adult supervision.
- Batteries are to be inserted with the correct polarity (+/-) .
- Exhausted batteries are to be removed from the device.
- The supply terminals are not to be short-circuited.
- Always use the supplied battery for the receiver: if the battery is damaged it must be replaced by the manufacturer, the after-sales service or people with similar qualifications, in order to avoid any risk.
- For best performance of your babyphone, and to reduce any interference, we recommend you do not plug any other electrical appliance into the same socket as your babyphone. (Do not use multiple socket outlets).
PRECAUTIONS
- Use only the supplied AC adapters, use of other adapters may cause damage to the baby monitor
- When not using the monitor for as long period of time, remove all batteries from the transmitter and receiver to avoid damage due to battery leakage.
- Disconnect the AC adapter from the wall outlet when the monitor is not to be operated.
The baby monitor is best performed within a temperature range of -9^ to +50^
- Do not leave the monitor expose to strong sunlight for a long time or nearby any heat source, moisture and excessive dusty environment.
- Do not open the cabinet, no serviceable part inside.
- Waste Electrical and Electronic Equipment should be disposed of by selective collection. Do not throw electrical and electronic equipment away with unsorted household waste, but dispose of it at a selective collection point.

This marking indicates that this product should not be disposed with other household wastes throughout the EU.
STANDARD ACCESSORIES
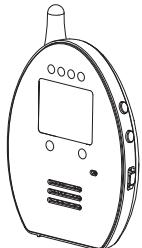
a. 5VAC× 2 mains adapter
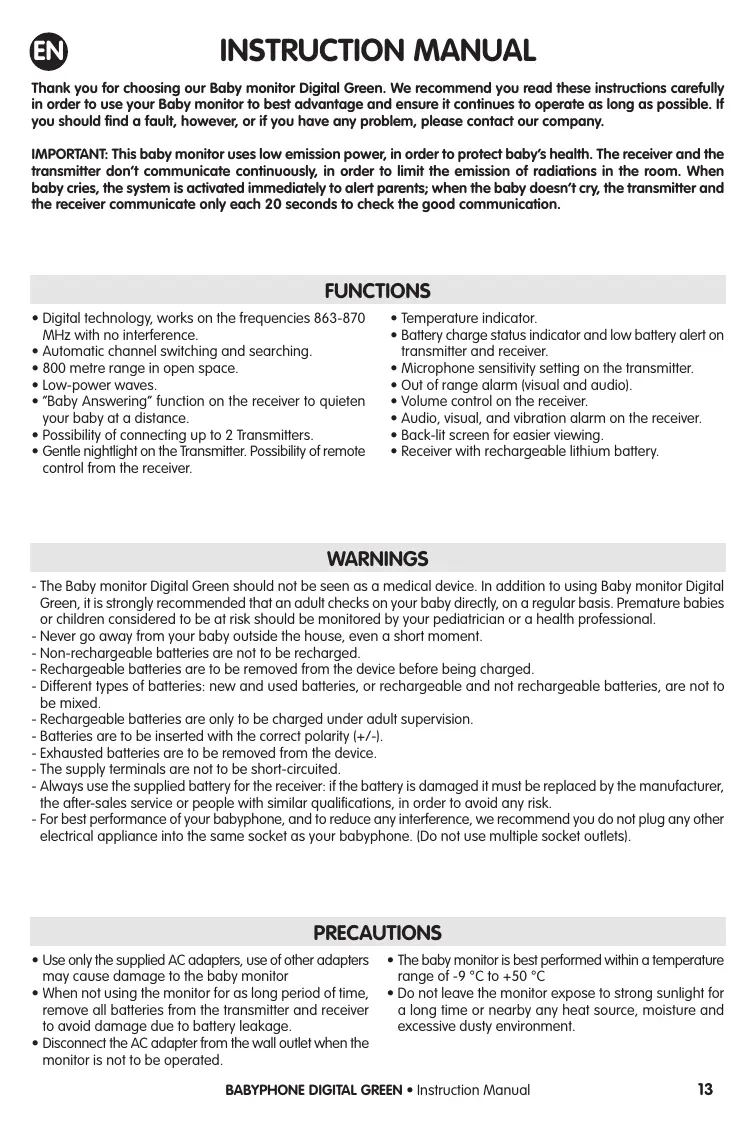
b. Transmitter
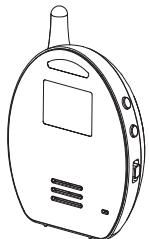
c. Receiver
d. Lithium-Polymer rechargeable 3.7 V battery (installed in the receiver)
e. Instruction manual
b
c

d
CONTROLS
Transmitter
- On/Off switch and nightlight
2-3. Microphone sensitivity control - Menu button
- "Volume" control
- Nightlight
- Microphone
- Speaker
- Temperature sensor
- CC Socket
Receiver
- On/Off switch and vibrator
12-13. Volume control - Menu button
- "Baby answering" control
- Light diodes indicating sound level
- Microphone
- Speaker
- "Baby 1 Unit" indicator light
- "Baby 2 Unit" indicator light
- CC Socket
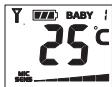
Parent unit (PU) LCD screen
A. Received signal strength
B. Battery status indicator
C. BU battery status indicator
D. BU number
E. Upper temperature limit
F. Transmit icon
Baby unit (BU) LCD screen
N. Transmit icon
O. Battery status indicator
P. BU number
Q. Night light icon
G. Lower temperature limit
H. Vibration icon
1. Speaker volume bar graph
J. Speaker mute icon
K. Baby's room temperature
L. Night light icon
M. Out of range icon
R. Microphone sensitivity and speaker volume bar graph
S. Baby's room temperature
T. Out of range icon
A/ TRANSMITTER
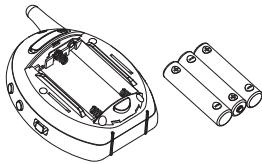
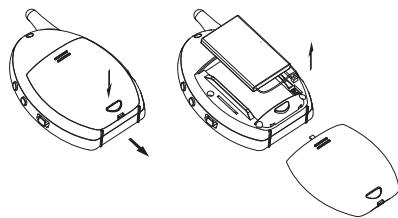
1. Functioning with batteries (not supplied)
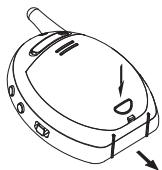
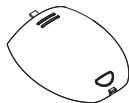
Press the locking button and slide the battery compartment lid in the direction indicated. Insert 3 alkaline AAA type batteries in the compartment. Respect the polarity indications (+/-). Close the cover.
N.B. For the best performances do not mix new and used or rechargeable and alkaline batteries.
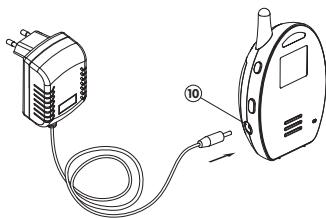
2. Functioning on mains (mains adapter supplied)
The transmitter can be powered from a power point by using the 5 V adapter supplied.
Plug the adapter into the CC socket of the transmitter (10). Connect the adapter to the mains power point. The power supply from the batteries will be cut as soon as the 'transmitter is connected to the mains.
NB. The transmitter has a longer range when it is powered from the mains.
B/ RECEIVER
1. Functioning with the supplied battery
The Lithium-Polymer battery is already installed in the receiver. To change the battery press on the locking button and slide the compartment lid in the direction indicated; take out the battery and disconnect the wire.
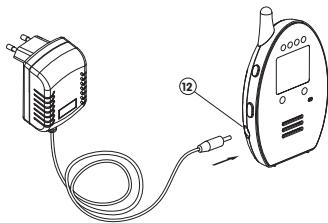
2. Charging the battery with the mains adapter
Connect the 5 V adapter plug to the receiver socket (21). The battery recharges even if the receiver is off. When the receiver is on, the bars of the charge indicator on the LCD screen flash repeatedly. When the battery is fully charged all the bars are visible and stop flashing. It is not necessary to disconnect the adapter from the receiver; it does not harm the battery. When the battery loses its charge and the voltage falls below a certain level the adapter automatically starts to recharger again.
NB. Before using for the first time, charge the Lithium-Polymer battery for at least 3 hours. It is recommended to switch the appliance off when charging for the first time.
NB. To prolong the life of the battery wait for it to be fully uncharged before recharging it.
CONNECTING THE TRANSMITTER TO THE RECEIVER
Your transmitter and your receiver are already connected and ready to communicate. This babyphone can work with several transmitters (up to 2). To connect an additional transmitter please go through the following stages.
-
Keep the button (13) on the receiver down.
-
Switch the start/stop switch (1) to ON and wait until a starts flashing on the screen.
- Maintenez enforcé le bouton (3) sur l'émetteur.
- Switch the start/stop switch (I) to ON and wait until the becomes steady and the Baby unit number starts flashing on the screen (if need be repeat the operation with the additional Baby unit).
- Use buttons (2) (3) ▲▼ to select the number of the transmitter (1) or (2). Do NOT define the same number for each transmitter; this stops the system from working properly.
- Press the "Menu" button (4) to confirm your selection; the number of the transmitter is now steady and the starts to flash.
- Now press the "Menu" button (4) of either transmitter; if the connection has worked the receiver makes two beeps. The P has to be steady on both screens and the number corresponding to the transmitter must appear in the top right corner of the receiver's screen.
- Press the "Menu" button (4) of the 2nd transmitter; the receiver has to make two beeps. The P is steady on the transmitter's screen and flashes twice on the receiver's. The number corresponding to the transmitter appears in the top right corner of the receiver's screen.

STEADY FLASHING


- Switch off all the appliances and then switch them back on. The babyphone is now operational.
- If the receiver and the transmitter do not succeed in communicating start the connection procedure all over again.
N.B. If you had only one transmitter to start with and you subsequently bought an additional transmitter, carry out the above procedure once again to connect the 3 appliances.
FUNCTIONING
A/ TRANSMITTER
- Configuration of the "Out of range" alert function
a. Switch the start/stop switch (1) to ON to switch on the LCD screen. Keep the "Menu" button (4) down for at least 5 seconds to have access to the programming mode. This is what is displayed on the screen:


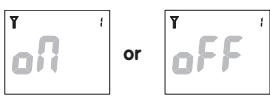
b. Use the (2) (3) to configure the "Out of range" alert function. "On" means the function is activated and "Off" that it is inactivated. If you select "Off" it allows the transmitter's emission level to be reduced. However, the receiver no longer emits any alarm if the transmitter is out of range and the temperature of the room in which the transmitter is located as well as its charge no longer appear on the receiver's screen when it is in stand-by mode.
c. Confirm the selection by pressing the "Menu" button (4), the screen returns to normal mode. If you have selected "On" the "Out of range" alert icon Y appears on the screen.
d. In stand-by mode, briefly press the "Menu" button (4) to display the configuration of the "Out of range" alert.
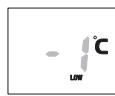
- A sensor built into the appliance detects the ambient temperature which is displayed on the screens of the transmitter and the receiver simultaneously. The sensor functions normally when the temperatures are between
-9^ and +50^ . If lower or higher temperatures are recorded the symbol - appears on the screen. To prevent the heat emitted by the appliance's electronic circuit from affecting the sensor it is recommended to shift it from its position by forming an angle of about 15^ as shown below. In case of a sudden change in temperature (e.g.: the appliance is displaced from indoors to outdoors in the middle of winter), the sensor may need a few minutes to adapt to the new environment and display the right temperature.

-
Place the transmitter about 1 metre from your child's bed and orient the microphone (7) towards him.
-
Adjust the sensitivity of the microphone with the buttons (2) (3) ▲▼; this lets you determine from which level of sound the appliance should transmit the sounds received by the microphone (7). On the screen the number of bars indicating the microphone's sensitivity also changes depending on the level chosen: the higher the number of bars, the greater the sensitivity of the appliance. If you continue to press the button once the minimum or maximum level is reached two beeps sound.
- Once the transmitter starts to transmit the screen lights up and the transmission icon appears ^ . A few seconds after the microphone (7) stops receiving the sounds the appliance goes back into stand-by mode and the transmission icon disappears ^ . The screen also switches off to save energy.
- This babyphone is equipped with a "Baby Answering" function; it lets the parents talk to their child. The sound level of the voice of the parents can be adjusted. Keep the "Volume" button (5) down and press the buttons (2) (3) ▲▼ to adjust the volume of the speaker (8). On the screen the number of bars indicating the volume also changes depending on the level chosen. When it is set to minimum the sound of the speaker is cut completely.
- The nightlight (6) can be lit continuously by setting the start/stop switch (1) in position 2 , the nightlight icon then appears on the screen 3 . The nightlight (6) can also be set to VOX (voice activation)
by briefly pressing the "Menu" button (4): the VOX symbol appears next to the icon. In VOX mode the nightlight (6) comes on when the microphone detects a sound and then automatically goes off when it no longer senses any sound. Briefly press the "Menu" button (4) to switch into VOX mode in continuous mode.
You also have the possibility of controlling the nightlight (6) remotely from the receiver: refer to the latter's Functioning section.

- The batteries' status is shown by the charge status indicator . As the charge of the batteries goes down the bars in the indicator progressively go out. Once empty the latter starts flashing. The charge status indicator also appears on the receiver screen: you can monitor the batteries' charge at a distance. An alarm goes off on your unit as soon as the indicator is empty .
- A beep sounds every time you press a button; it means the appliance has taken your action into account.
B/ RECEIVER
- Configuration of the "Out of range" alert function and temperature alarm
a. Switch the start/stop switch (11) to ON to switch on the LCD screen. Keep the "Menu" button (14) down for at least 5 seconds to have access to the programming mode. This is what is displayed on the screen:

b. Use the buttons (12) (13) to configure the "Out of range" alert function; the configuration must be identical to the transmitter's. If the configuration is different the alarm may go off for no reason or inversely not go off at all even if the receiver is no longer in range of the transmitter. If the appliance is associated with 2 transmitters the configuration must be identical to that of the transmitter with the corresponding number.

c. Press the "Menu" button (14) to confirm the selection. (If you have selected "On" the "Out of range" alert icon appears on the screen in normal mode). This is what is displayed on the screen:
d. By means of the buttons (12) (13) set the maximum temperature above which the appliance must set off an alarm. If you press the buttons briefly the temperatures appear degree by degree in turn. If you keep the buttons (12) (13) down the temperatures appear more rapidly. You can select temperatures ranging from -3^ to +50^ . If you have selected "Off" no maximum temperature is defined. Press the "Menu" button (14) to confirm the selection. This is what is displayed on the screen:
e. By means of the buttons (12) (13) ▲▼, rset the minimum temperature below which the appliance must set off an alarm. You can select temperatures ranging from -8 °C to +44 °C or 2 °C below the maximum temperature chosen. If you have selected "Off" no minimum temperature is defined. Press the "Menu" button (14) to returns to normal mode.
f. Note that the maximum and minimum temperature configuration is identical for both transmitters.
g. In stand-by mode briefly press the "Menu" button (14) to display the configuration of the "Out of range" alert and temperature alarm.

- Place the receiver at a reasonable distance from the transmitter to avoid feedback. If the receiver is too close the speaker may produce a strident sound (18).
- When the receiver receives a signal the screen comes on and the sound level indicator LEDs light up. The higher the sound level of the child's voice the larger the number of LEDs that light up. This function is useful when the parents prefer to switch the speaker (18) off for peace and quiet.
Depending on which transmitter sends the signal the "Baby Unit 1" (19) or "Baby Unit 2" (20) indicator light comes on.
- The volume of the speaker (18) can be adjusted with the buttons (12) (13) . On the screen the number of bars indicating the volume also changes depending on the level chosen: the higher the number of bars, the louder the volume of the speaker (18). When no bar is displayed and the icon appears the speaker (18) is cut completely.
- If the receiver has been connected to function with 2 transmitters, Baby unit no. 1 always has priority. This means that if the receiver is already in transmission with Baby unit no. 2 and Baby unit no. 1 starts to send, the receiver then switches immediately to Baby unit no. 1 until the end of the transmission; it only resumes the transmission with Baby unit no. 2 afterwards.
- In order to prevent the parents from missing the signal from Baby unit no. 2 if it starts transmitting when the receiver is already in transmission with Baby unit no. 1, the indicator light for Baby Unit 2 (20) flashes to warn them. If the parents want to listen to the transmission of Baby unit no. 2 they can switch to the latter by briefly pressing the "Menu" button (14). The "Baby Unit 2" indicator light (20) then lights up while the "Baby Unit 1" indicator light (19) starts flashing (if the first child continues to cry). To switch back to Baby unit no. 1 it is enough to press the "Menu" button (14) again. In this way it is possible to monitor two children at the same time.
-
In stand-by mode, if there are 2 transmitters the screen displays each transmitter's temperature and charge for 15 seconds alternatively. When one of the transmitters starts to transmit the receiver receives the transmission immediately and displays the information concerning the transmitter in question until the signal comes to an end.
-
The receiver is equipped with a vibrator function. Set the start/stop switch (11) to the vibrator position; the vibrator icon appears on the screen (12). The vibrator starts functioning when the sound level of the child's voice reaches a certain intensity. This function is useful when the parents are in a very noisy environment (e.g.: vacuum-cleaner noise). To save energy it is recommended not to use the vibrator function too often.
- If you select "On" on both appliances the "Out of range" alert is set off as soon as the receiver is no longer in range of the transmitter for more than 30 seconds. The LED sound level indicator (16) as well as the "Out of range" alert icon start to flash to warn you. The temperature is no longer displayed as well and the symbol appears. The alert stops as soon as the receiver is back within range of the transmitter. If you are using two transmitters the information concerning the transmitter of which you are out of range stays displayed on the screen throughout the alert.
N.B. The alert is also set off when the transmitter is off, when the batteries are exhausted, when it has no power supply, or when the configuration of the alert is not identical on both appliances. - As soon as the ambient temperature exceeds the upper or lower temperature limits defined an alarm is set off. Depending on the limit that has been exceeded the icon HIGH (max) or LOW (min) as well as the temperature start to flash on the receiver screen.
- It is possible to control the nightlight (6) remotely from the receiver: the start/stop switch (1) needs to be set to 0. Keep button (15) down while pressing button (12) as many times as is necessary to switch off (OFF); continuously switch on (ON) the nightlight or set it to VOX mode. The corresponding icons are then displayed on both appliances' screens. Note the receiver can only control the nightlight of the transmitter of which the number is displayed on the screen at the moment you press the button (15).
- The parents have the possibility of being able to answer their child to quieten him. Keep the button (15) down; the transmission icon appears on the receiver screen. Talk in the microphone (17). Once you have finished speaking release the button (15). Note that parents can talk to their child whenever they like - even during a transmission. The receiver transmits your voice to the transmitter of which the number is displayed on the screen at the moment you press the button (15).
- The status of the lithium battery is shown by the charge status indicator . As the battery charge goes down the indictor segments go out progressively. Once empty the latter starts flashing and an alarm is set off to remind you to recharge the battery with the mains adapter.
- A beep sounds every time you press a button; it means the appliance has taken your action into account.
TROUBLE SHOOTING
| Problem | Possible cause | Solution |
| ·The transmitter is not transmitting. | ·The receiver is off. ·The microphone's sensitivity is too low. ·The batteries are exhausted or the mains adapter is not correctly plugged in. | ·Switch the receiver on. ·Increase the microphone's sensitivity with the "Up" button (2). ·Replace the batteries or check the connection. |
| ·The transmitter is transmitting all the time. | ·The microphone's sensitivity is too high. | ·Reduce the microphone's sensitivity with the "Down" button (3) so that the transmitter reacts to the voice. |
| ·The "Out of range" alert does not switch off. | ·The pairing has failed. ·The transmitter's batteries are exhausted. ·The "Out of range" alert is activated on the transmitter but inactivated on the receiver. ·The distance between the transmitter and the receiver is too great. | ·Carry out another pairing. ·Replace the batteries or use the mains adapter. ·Activate the "Out of range" alert on the transmitter. ·Bring the receiver closer to the transmitter. |
| ·The "Out of range" alert is not working. | ·The "Out of range" alert is inactivated on both appliances. ·The "Out of range" alert is activated on the transmitter but inactivated on the receiver. | ·Activate the alert on both appliances. ·Activate the alert on the receiver. |
| ·The temperature alarm does not switch off. | ·The maximum and minimum temperatures defined are too close to the ambient temperature. | ·Adjust the maximum and minimum temperatures: they must be about 5 °C above and below the temperature displayed on the appliance. |
| ·The battery low alert does not switch off. | ·The batteries are exhausted. ·The battery is damaged. | ·Recharge the battery with the mains adapter (receiver). Replace the batteries or use the mains adapter (transmitter). ·Replace the battery with a new battery. |
| ·The charge runs out quickly. | ·The nightlight is on all the time ·The vibrator function is activated. | ·Switch off the nightlight or set it to VOX. ·Inactivate the vibrator function. |
| ·On the receiver screen both transmitters have the same number. | ·During the pairing the same number was attributed to both transmitters. | ·Carry out another pairing by giving a different number to each transmitter. |
| ·The speaker produces a lot of feedback and interference. | ·The transmitter is placed close to other electric appliances. | ·Change the positions of the electric appliances or move the transmitter away from the source of interference. |
| ·The range of the transmitter is too small. | ·The two appliances are separated by metallic structures. ·The transmitter's batteries are exhausted. | ·Move the transmitter or receiver. ·Replace the batteries or use the mains adapter. |
VOORZORGSGMAATREGELEN
STANDAARD ACCESSORIES
EC DECLARATION OF CONFORMITY
Babymoov
Declare that the following product:
Model: Babyphone Digital Green
Reference: A014200
Model: BC-52
is in conformity with the following relevant harmonised:
EMC: EN 301489-1 V1.9.2 (2011-09)
EN 301489-3 V1.4.1 (2002-08)
Radio: EN 300220-1 V2.3.1 (2010-02)
EN 300220-2 V2.3.1 (2010-02)
Health: EN 50371 : 2002
Following the provisions of Council Directive 99/05/CE on radio equipment and telecommunications terminal equipment and the mutual recognition of their conformity.
Name: Mr Laurent Windenberger
Title: Marketing Manager
Signature:
Date:10/10/12