
HDCC81000 - Surveillance Camera ABUS - Free user manual and instructions
Find the device manual for free HDCC81000 ABUS in PDF.


| Product Type | Surveillance Camera |
| Brand | Abus |
| Model | HDCC81000 |
| Resolution | 1080p Full HD |
| Viewing Angle | 90° |
| Night Vision | Yes, up to 20 meters |
| Motion Detection | Yes, built-in |
| Power Supply | 12 V DC, 1 A |
| Connectivity | BNC (HD analog) |
| Dimensions (L x W x H) | 100 x 80 x 80 mm |
| Weight | 500 g |
| Protection Rating | IP66 |
| Operating Temperature | -20°C to +50°C |
| Main Features | Video surveillance, motion detection, night vision, continuous or alarm recording |
| Maintenance and Cleaning | Clean with a soft, dry cloth. Avoid abrasive products. |
| Security | Screw fixing to prevent theft |
| Spare Parts and Repairability | Available on request from the manufacturer |
| General Information | 2-year warranty, made in Europe |
Frequently Asked Questions - HDCC81000 ABUS
User questions about HDCC81000 ABUS
0 question about this device. Answer the ones you know or ask your own.
Ask a new question about this device
Download the instructions for your Surveillance Camera in PDF format for free! Find your manual HDCC81000 - ABUS and take your electronic device back in hand. On this page are published all the documents necessary for the use of your device. HDCC81000 by ABUS.
USER MANUAL HDCC81000 ABUS
natural_image
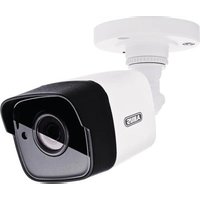
Close-up of a white security camera with a circular lens and black interior (no visible text or symbols)
natural_image
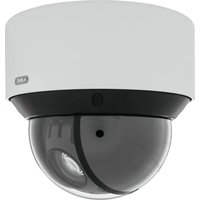
White security camera with dome and multiple camera modules (no visible text or symbols)D Bedienungsanleitung
GB User manual
F Manuel utilisateur
NL Gebruikershandleiding
DK Brugerhåndbog
Version 08/2015
HDCC81000
HDCC82500
CE
D Einführung
| SWProtocol | 8 | 9 |
| Self-adaptive | OFF | OFF |
| Pelco_P | ON | OFF |

| SOFT ADDRESS 1SOFT ADDR ACT OFFSOFT BAUDSOFT BAUD ACT OFFBROADCAST ADDR ONPELCO CHECKSUM ONSYS TIMEBACK EXIT | 2400 | |
| PATTERN NUMBER 1 |
| REMAINING MEMORY 100% |
natural_image
Close-up of a white security camera with a circular lens and black interior (no visible text or symbols)
natural_image
White security camera with dome and multiple camera modules (no visible text or symbols)
User manual
Version 08/2015
HDCC81000
HDCC82500
CE
English translation of the original German user manual. Retain for future reference.
EN Introduction
Dear Customer,
Thank you for purchasing this product.
This device complies with the requirements of the applicable EU directives. The declaration of conformity can be obtained from: ABUS Security-Center GmbH & Co. KG, Linker Kreuthweg 5, 86444 Affing, Germany.
To ensure this condition is maintained and that safe operation is guaranteed, it is your obligation to observe this user manual.
Please read the entire user manual carefully before putting the product into operation, and pay attention to all operating instructions and safety information.
All company names and product descriptions are trademarks of the corresponding owner. All rights reserved.
If you have any questions, please contact your specialist installation contractor or specialist dealer.

Disclaimer
This user manual has been produced with the greatest of care. Should you discover any missing information or inaccuracies, please let us know about them.
ABUS Security-Center GmbH & Co. KG does not accept any liability for technical and typographical errors, and reserves the right to make changes to the product and user manuals at any time and without prior warning.
ABUS Security-Center GmbH is not liable or responsible for direct or indirect damage resulting from the equipment, performance and use of this product. No form of guarantee is assumed for the contents of this document.
Important safety information

All guarantee claims are invalid in the event of damage caused by non-compliance with this user manual. We cannot be held liable for resulting damage.

We cannot be held liable for material or personal damage caused by improper operation or non-compliance with the safety information. All guarantee claims are void in such cases.
Dear Customer,
The following safety information and hazard notes are not only intended to protect your health but also to protect the device from damage. Please read the following points carefully:
- There are no components inside the product that require maintenance by the operator. Opening or dismantling the product invalidates the CE certification and guarantee claims/warranty.
- The product may be damaged if it is dropped, even from a low height.
Avoid the following adverse conditions during operation:
• Extreme heat or cold
- Direct sunlight
- Dust or flammable gases, vapours or solvents
• Strong vibrations
• Strong magnetic fields (e.g. next to machines or loudspeakers)
- The camera must not be installed on unstable surfaces.
General safety information:
- Do not leave packaging material lying around. Plastic bags, sheeting, polystyrene packaging, etc. can pose a danger to children if played with.
- The video surveillance camera contains small parts which could be swallowed and must be kept out of the reach of children for safety reasons.
- Do not insert any objects into the device through the openings.
- Only use replacement devices and accessories that are approved by the manufacturer. Do not connect any non-compatible products.
- Please pay attention to the safety information and user manuals for the other connected devices.
- Check the device for damage before putting it into operation. Do not put the device into operation if you identify any damage.
- Adhere to the normal voltage limits specified in the technical data. Higher voltages could destroy the device and pose a health risk (electric shock).

When installing the device in an existing video surveillance system, ensure that all devices have been disconnected from the mains power circuit and low-voltage circuit.

If in doubt, have a specialist technician carry out assembly, installation and connection of the device. Improper or unprofessional work on the power supply system or domestic installation puts both you and other persons at risk.
Connect the installations so that the mains power circuit and low-voltage circuit always run separately from each other. They should not be connected at any point or become connected as a result of a malfunction.
Contents
- Explanation of symbols ......27
- Scope of delivery 27
- Features and functions ......27
- Device description....28
4.1 Overview - Model number ......28
4.2 Unpacking the device....28
- Installation....28
- Quickstart guide for control units....28
6.1 Control with control panel TVAC26000 28
6.2 Control with analogue HD video recorder (HDCC9XXXX) 28
-
Key combinations....29
-
Connections and DIP switches....30
- Diagnosis (self-test) 33
- OSD menu ....33
- Maintenance and cleaning 42
11.1 Function test....42
11.2 Cleaning....42
- Disposal....42
- Technical data....43
1. Explanation of symbols

The triangular high voltage symbol is used to warn of the risk of injury or health hazards (e.g. caused by electric shock).

The triangular warning symbol indicates important notes in this user manual which must be observed.

This symbol indicates special tips and notes on the operation of the device.
2. Scope of delivery
Indoor PTZ Dome (HDCC81000)
- Indoor PTZ Dome 720p
- Power supply unit
- Adapter panel
• Installation material for mounting on the ceiling - Quick start guide
• Installation material
Outdoor PTZ Dome (HDCC82500)
• Outdoor PTZ Dome 1080p (without wall mount)
- Power supply unit
- Gloves
- Quick guide
- Quick start guide
3. Features and functions
The high-speed dome camera has functions including the following:
• Pan/tilt/zoom camera (PTZ)
- Analogue HD technology
- Transmission via conventional CCTV infrastructure (video signal: up to 500 metres, via RG6 cable; control signal via coaxial cable: up to 200 metres)
- 23x (HDCC81000) or 30x (HDCC82500) optical and 16x digital zoom
• 1/2.8" progressive scan CMOS image sensor
- 720p (HDCC81000) or 1080p (HDCC82500) resolution
- 8 patrols with up to 32 preset positions per patrol
• Protection class IP66 (HDCC82500)
- Integrated heating (HDCC82500)
• Control of the PTZ camera via coaxial cable
- DWDR function to compensate for high image contrasts
4. Device description
4.1 Overview - Model number
| Model number HDCC81000 HDCC82500 | ||
| Resolution | 720p | 1080p |
| IP66 | - | √ |
| IR, infrared - | √ | |
| Operating voltage 24 | VAC 24 VAC | |
4.2 Unpacking the device
Handle the device with extreme care when unpacking it.

If the original packaging has been damaged, start by inspecting the device. If the device shows signs of damage, return it in the original packaging and inform the delivery service.
5. Installation
Instructions and installation variants for the dome cameras can be found in the quick start guide for the PTZ cameras. Please consult this guide before you proceed with the installation.
6. Quickstart guide for control units
The high-speed motorised dome can be controlled with all RS485 devices that have the Pelco D or Pelco P protocol.
For additional information, please refer to the relevant user manual.
6.1 Control with control panel TVAC26000
The TVAC26000 control panel has been specially developed for controlling the HDCC81000 and HDCC82500 high-speed motorised domes and therefore supports all camera functions. For all further information on connection and operation, refer to the control panel instruction manual.

If the Steuerput is connected directly to the analog HD DVR and the PTZ dome to be controlled above, the following setting must be checked.
DVR menu: Menu -> Settings -> Configuration -> General -> Advanced Settings -> Device number = eg 1.
The default setting for this value is 255. This value must be changed in this case.
6.2 Control with analogue HD video recorder (HDCC9XXXX)
In analog HD DVR PTZ Dome can be controlled using the PTZ control panel. The connection of the analog HD PTZ Domes can be carried out exclusively via the video cable (coax). The control data is sent over the cable (up to 200m).
7. Key combinations
This high-speed motorised dome supports three control protocols: Pelco D, Pelco P.
These protocols are supported by many recorders (such as HDCC9XXXX) and controllers, allowing them to control the high-speed motorised dome.
The factory setting of the camera is Pelco D/P (automatic detection) with 2400 bps (bits per second) set. The following information explains how to control the camera using the control panel TVAC26000. Operation with other control units that use the Pelco D/P protocol is possible, but the keys may have different names.
| Preset Function | |||
| 33 Auto Flip 97 Start random scan | |||
| 34 Pan Zero 98 Start image scan | |||
| 35 Tour 1 99 Start pan scan | |||
| 36 Tour 2 100 Start tilt scan | |||
| 37 Tour 3 101 Start panorama scan | |||
| 38 Tour 4 102 Tour 5 | |||
| 39 IR cut filter On 103 Tour 6 | |||
| 40 IR cut filter Off 104 Tour 7 | |||
| 41 Pattern 1 105 Tour 8 | |||
| 42 | Pattern | 2 | |
| 43 | Pattern | 3 | |
| 44 | Pattern | 4 | |
| 92 Turn on the limit settings | |||
| 93 Set the limit settings | |||
| 94 | Reboot | ||
| 95 | OSD | menu | |
| 96 | Stop | scan |
8. Connections and DIP switches
Overview of the connections

| No | Description |
| 1 | Power supply, 24 V ACWiring:Black: 24 V ACYellow/green: EarthRed: 24 V AC |
| 2 | RS-485 control line (optional)Wiring:Yellow: RS-485 MinusOrange: RS-485 Plus |
| 3 | HD-TVI video output (BNC) |

Using dome control via coaxial cable and RS-485 simultaneously can cause problems and camera malfunctioning.

SW 1-5: Dome ID setting
SW 6-7: Baud rate setting
SW 8-9: Control protocol setting
SW 10: Not Used
Dome ID setting
| Dome Ad. \SW | 1 2 3 4 5 | |||
| 0 | OFF OFF OFF OFF OFF | |||
| 1 | ON OFF OFF OFF OFF | |||
| 2 | OFF ON OFF OFF OFF | |||
| 3 | ON ON OFF OFF OFF | |||
| ... | ... | ... | ... | ... |
| 31 | ON ON ON ON ON |
Baud rate setting
| Baudrate\SW | 6 | 7 |
| 2400 | OFF | OFF |
| 4800 | ON | OFF |
| 9600 | OFF | ON |
| 19200 | ON | ON |
Control protocol setting
| Protocol\SW | 8 | 9 |
| Self-adaptive | OFF | OFF |
| Pelco_P | ON | OFF |
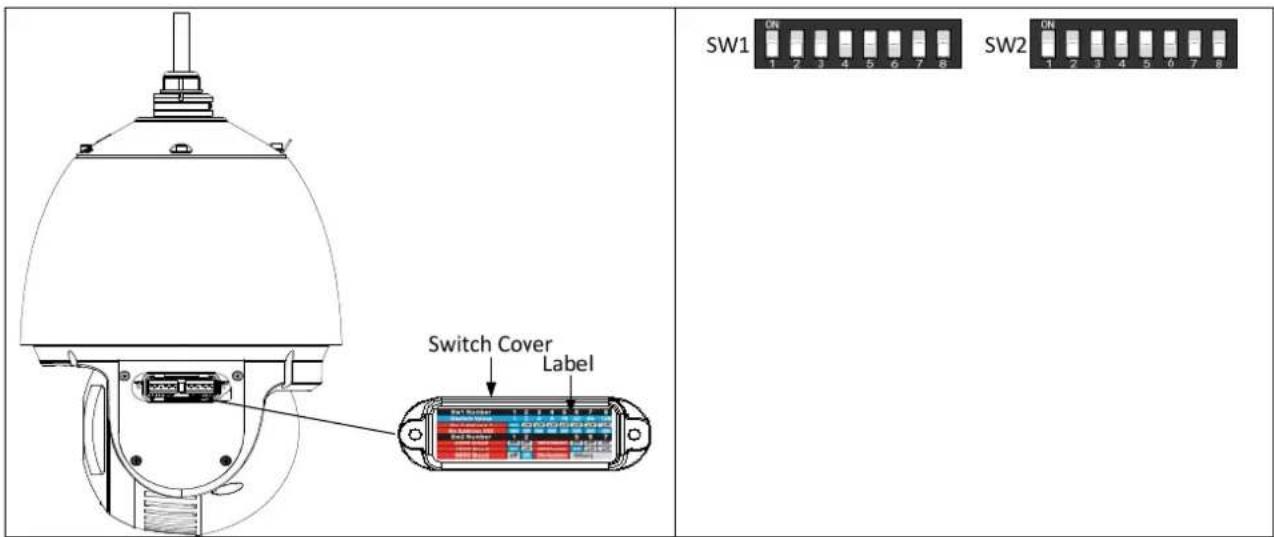
Dome ID settings (SW1, all DIP switches):
Output resolution settings (SW2, DIP 5, 6 and 7):
| DIP switch SW2 | |||
| Resolution | 5 | 6 | 7 |
| 1080P25 | OFF | OFF | OFF |
| 1080P30 | ON | OFF | OFF |
| 720P50 | OFF | ON | ON |
| 720P60 | ON | ON | ON |
9. Diagnosis (self-test)
If the camera is connected to a voltage source, it performs a self-diagnosis.
| SN |
| ADDRESS |
| COM FORMAT |
| PROTOCOL SELF ADAPTIVE |
| VERSION |
| BUILD DATE |
| Function Description | |
| SN Serial No. display | |
| ADDRESS Displays the dome address (ID) | |
| COM FORMAT Displays the baud rate | |
| PROTOCOL SELF ADAPTIVE Displays the protocol | |
| VERSION Displays the firmware version | |
| BUILD DATE Displays the firmware date |
10. OSD menu
To display the OSD menu, call up preset 95. Move the joystick of the control panel up and down around the cursor position. You can confirm and return to the menu by pressing the IRIS+ button.
| MAIN MENU |
| LANGUAGE ENGLISH EXIT |
| Function Description | |
| SYS INFO Displays system | information |
| DOME SETTINGS Camera | parameter settings |
| RESTORE DEFAULTS | Restores factory settings |
| RESTORE CAMERA | Resets settings |
| REBOOT DOME | Restarts the dome |
| LANGUAGE | OSD display language (English only) |
| EXIT | Closes the OSD |
SYS INFO
ADDRESS 0
COM FORM 2400, 8, 1
PROTOCOL AUTO MATCH
FIRMWARE 3.22
HARDWARE 1.3
BUILD DATE 150114
| Function Description | |
| ADDRESS Displays the dome address (ID) | |
| COM FORM Displays the baud rate, data bit and stop bit | |
| PROTOCOL Displays the current control protocol | |
| FIRMWARE Displays the firmware version of the system DSP | |
| HARDWARE Displays the firmware version of the camera module | |
| BUILD DATE Firmware creation date | |
DOME SETTINGS
BACK EXIT
| Function Description | |
| SYS INFO SETTINGS | Basic system settings such as RS-485 parameters or date/time settings |
| CAMERA PARAMETER | Settings for picture and zoom |
| MOTION PARAMETER | Control settings (such as preset speed) |
| PRESETS | Configuration of the presets |
| PATROLS | Configuration of the patrols |
| TIME TASK | Setting of schedule-based tasks |
| PATTERNS | Configuration of patterns |
SYS INFO SETTINGS
SOFT ADDRESS 1
SOFT ADDR ACT OFF
SOFT BAUD 2400
SOFT BAUD ACT OFF
BROADCAST ADDR ON
PELCO CHECKSUM ON
SYS TIME
BACK EXIT
| Function Description | |
| SOFT ADRESS (1-255): Dome ID for using control via the RS-485 protocol. Alternatively, the ID can be set using DIP switches. | |
| SOFT ADDR ACT OFF: Deactivation of the software dome IDON: Activation of the software dome ID | |
| SOFT BAUD (2400-19200): Baud rate setting for the RS-485 interface. Alternatively the baud rate can be set using DIP switches. | |
| SOFT BAUD ACT OFF: Deactivation of the baud rate setting via OSDON: Activation of the baud rate setting via OSD | |
| BROADCAST ADDR ON: If the control unit has the ID 0 all cameras connected to the bus can be controlled.OFF: Function deactivated | |
| PELCO CHECKSUM Only applies if the Pelco D/P protocol is being used.ON: Checksum test following each control commandOFF: Test deactivated | |
| SYS TIME Settings for date and time | |
| FOCUS | AF |
| ZOOM LIMIT 23 | |
| ZOOM SPEED HIGH | |
| SLOW SHUTTER 0 | |
| IR CUT FILTER AUTO | |
| D/N LEVEL 1 | |
| SHARPNESS 7 | |
| BACK EXIT |
| Function Description | |
| FOCUS The following focus | variants are available:- AF: Automatically focuses on the object in the field of view- MF: Manual focussing required- HAF / Semi-Auto: Only automatically focuses after zoom, pan or tilt |
| ZOOM LIMIT Sets the zoom limit; this zoom factor will not be exceeded | |
| ZOOM SPEED The following speeds are available:- Low: High- Medium: Medium- High: Low | |
| SLOW SHUTTER (0-5): Long exposure function. The higher the value, the longer the exposure. This produces a brighter video image in poor light conditions. It also reduces the frame rate. | |
| IR CUT FILTER Setting for day/night switching AUTO: Switches automatically between day and night mode DAY: the camera remains constantly in day mode NIGHT: the camera remains constantly in night mode | |
| D/N LEVEL | (0-2): Setting for the switching threshold between day and night.(0 – lower illumination, 2 – higher illumination) |
| SHARPNESS | (0-15): Software function for setting the sharpness of the video image. A high value increases the sharpness of the video image but this also increases the image noise. |
MOTION PARAMETER
| AUTO FLIP | ON |
| PROPORTIONAL | PAN ON |
| PARK TIME | 5 |
| PARK ACT | NONE |
| SCAN SPEED | 26 |
| IMAGE FREEZE | OFF |
| DOME SPEED | 3 |
| BACK | EXIT |
| Function Description | |
| AUTO FLIP Function for continuously tilting up to 180 degrees (no 90-degree stop)Off: Function deactivatedOn: Function activated | |
| PROPORTIONAL PAN ON: The pan and tilt speed is controlled depending on the zoom setting. We recommend you use this setting.OFF: Function deactivated. There may be difficulties tracking people when a high zoom factor is set. | |
| PARK TIME After a certain period (5 – 720 seconds) of inactivity, the dome can perform the following functions. | |
| PARK ACT One of these functions can be performed after the set time elapses (park action):Auto-Scan, Frame Scan, Random Scan, Tour1-8, Pattern 1-8,Preset 1-8, Panorama Scan, Tilt Scan | |
| SCAN SPEED Scan speed setting:1 – 40°/sec. | |
| IMAGE FREEZE The function freezes the live image while one is started. This reduces the network load in networks. In addition, private areas can be hidden.ON: Function activatedOFF: Function deactivated | |
| DOME SPEED (1-10): The higher the value, the higher the pan/tilt speed. | |
PRESETS
PRESET NUM
1
SET PRESET
CLEAR

The preset numbers 33 - 45 and 92 - 105 are reserved for controlling camera functions. These numbers cannot be used as presets.
| Function Description | |
| PRESET NUM Up to 256 presets can be used. If no preset is defined,[UNDEFINED] appears. | |
| If the preset position has not yet been assigned, then this message is displayed. | |
| SET PRESET Setting the preset position | |
| CLEAR PRESET This allows you to delete the selected preset. | |
| Preset Function | |||
| 33 Auto Flip 97 Start random scan | |||
| 34 Pan Zero 98 Start image scan | |||
| 35 Tour 1 | 99 Start pan scan | ||
| 36 Tour 2 | 100 Start tilt scan | ||
| 37 Tour 3 | 101 Start panorama scan | ||
| 38 Tour 4 | 102 Tour 5 | ||
| 39 IR cut filter On 103 Tour 6 | |||
| 40 IR cut filter Off 104 Tour 7 | |||
| 41 Pattern 1 105 Tour 8 | |||
| 42 | Pattern 2 | ||
| 43 | Pattern 3 | ||
| 44 | Pattern 4 | ||
| 92 Turn on the limit settings | |||
| 93 Set the limit settings | |||
| 94 | Reboot | ||
| 95 | OSD menu | ||
| 96 | Stop scan | ||
PATROLS
| PATROL NUM | 1 |
| EDIT PATROL | |
| PREVIEW | |
| CLEAR PATH | |
| PATROL-D | 5S |
| BACK EXIT |
| Function Description | |
| PATROL NUM Displays the | patrol that is currently being edited. A total of 8 patrols are available for selection. |
| EDIT PATROL Here you can | edit the patrol. |
| PREVIEW Starts a set patrol. | |
| CLEAR PATH Deletes the patrol. | |
| PATROL-D Wait time for "Fast Patrol" between the individual presets (Fast Patrol via preset 46, accessing all programmed presets 1-32) | |
Editing the patrol:
| NUM | PST | TIME | SPEED |
| 1 | 0 | 6 30 | |
| 2 | 0 | 6 30 | |
| 3 | 0 | 6 30 | |
| 4 | 0 | 6 30 | |
| 5 | 0 | 6 30 | |
| 6 | 0 | 6 30 | |
| 7 | 0 | 6 30 | |
| DONE: IRIS+ | QUIT: IRIS- | ||
| Function | Description |
| NUM | Displays the number of individual presets within the patrol. |
| PST (PRESET) | Here you can select the previously set presets. |
| DWELL | Waiting time within the individual presets. |
| SPD (SPEED) | Sets the patrol speed. |
- Move the joystick up and down to select a preset you want to edit.
- Move the joystick left and right to choose between NUM, PRESET, TIME and SPEED.
- After you have selected the appropriate item, move the joystick up or down to change the value.
- Press IRIS+ to save or IRIS- to discard the settings.
Patrol speed overview:
| Level | Speed(°/s) | Level | Speed(°/s) | Level | Speed(°/s) |
| 1 | 0.3 | 2 | 2 | 3 | 4 |
| 4 | 6 | 5 | 8 | 6 | 10 |
| 7 | 12 | 8 | 14 | 9 | 16 |
| 10 | 18 | 11 | 20 | 12 | 25 |
| 13 | 30 | 14 | 35 | 15 | 40 |
| 16 | 45 | 17 | 50 | 18 | 55 |
| 19 | 60 | 20 | 65 | 21 | 70 |
| 22 | 80 | 23 | 90 | 24 | 100 |
| 25 | 110 | 26 | 120 | 27 | 130 |
| 28 | 140 | 29 | 150 | 30 | 160 |
| 31 | 170 | 32 | 190 | 33 | 210 |
| 34 | 230 | 35 | 250 | 36 | 270 |
| 37 | 290 | 38 | 310 | 39 | 330 |
| 40 | 350 | ||||
TIME TASK
The TIME TASK function controls certain tasks and functions
| TASK NUM 1 |
| TASK STATE OFF |
| TASK RESUME(S) 5 |
| TASK DAY MON |
| Function Description | |
| TASK NUM Selection of task 1-8 | |
| TASK STATE Setting of schedule-based tasks | |
| TASK RESUME(S) Time after which the task will start | |
| TASK DAY Select the start and end time. You can select from Monday to Sunday as the day of the week. | |
| TASK EDIT Section: Up to 5 tasks can be plannedStart: Start timeEnd: End timeAction: The following tasks can be defined: Preset 1 – 8, Pattern 1 – 4, Tour 1 – 8, Panorama Scan, Tilt Scan, Dome Reboot, Dome Adjust, Output 1, Output 2, Auto Scan, Random Scan, Frame Scan | |
| TASK CLEAR This will delete the currently selected task. | |
| TASK COPY Copy tasks | Whole week: Whole weekMon-Fri: Monday to Friday |
PATTERNS
PATTERN NUMBER 1
| Function Description | |
| PATTERN NUMBER Up to four patterns can be programmed. | |
| PATTERN RECORD The REMAIN MEMORY display tells you how much memory is available.Important: When the pattern is being saved and called up, the Auto Flip function is active. In addition, the pan/tilt movement and zoom movement cannot be saved simultaneously. | |
| PATTERN PREVIEW Preview of the current pattern | |
| PATTERN CLEAR This allows you to delete the pattern created.Important: Deleting pattern 2 causes patterns 3 and 4 to be deleted as well | |
| REMAINING MEMORY Displays remaining memory | |
11. Maintenance and cleaning
11.1 Function test
Regularly check the technical safety of the product, e.g. check the housing for damage.
If it appears to no longer be possible to operate the product safely, stop using it and secure it to prevent unintentional use.
It is likely that safe operation is no longer possible in the event that:
- the device shows signs of visible damage
- The device no longer works correctly and
- The device has been stored in adverse conditions for a long period of time or
- The device has been subjected to stress during transportation

Please note:
You do not need to perform any maintenance on the product. There are no components to service and nothing inside the product to check. Never open it.
11.2 Cleaning
Clean the product with a clean, dry cloth. The cloth can be dampened with lukewarm water to remove stubborn dirt.

Make sure that no liquids enter the inside of the device, as this will destroy it. Do not use any chemical cleaning agents, as these could damage the surface of the housing.
12. Disposal

Devices displaying this symbol may not be disposed of with domestic waste. At the end of its service life, dispose of the product according to the applicable legal requirements.
Please contact your dealer or dispose of the products at the local collection point for electronic waste.
13. Technical data
| HDCC81000 | |
| Image sensor | 1/3" CMOS |
| Camera type | PTZ speed dome |
| Resolution | 720p |
| Pixels (total) | 1280 x 720 |
| Pixels (effective) | 1280 x 720 |
| Lens | 4–92 mm |
| Horizontal angle of view | 3°–55° |
| Shutter | Auto |
| Optical zoom | 23x |
| Digital zoom | 16x |
| Day/night switching | IR cut filter (ICR), colour / B/W |
| Minimum illumination (colour) | 1 Lux |
| Minimum illumination (B/W) | 0.05 Lux |
| AGC | Auto |
| White balance | Auto |
| WDR | 70 dB |
| Backlight compensation | BLC, DWDR |
| Pan angle | 360° continuous |
| Pan speed | Manual panning: 0.1°–250°/secPanning presets: 300°/sec |
| Tilt angle | 0°–90° (Auto Flip) |
| Tilt speed | Manual tilting: 0.1°–120°/secTilt presets: 200°/sec |
| Number of presets | 256 |
| Number of patrols | 8, with up to 32 presets per patrol |
| Number of patterns | 4 patterns |
| Privacy masking | - |
| Alarm Input | - |
| Alarm output | - |
| Protocol | ABUS-C (control via coax), Pelco D, Pelco P |
| Power supply | 24 V AC |
| Power | 12 Watts (incl. heating & IR LED) |
| Operating temperature | -10°C – +50°C |
| Humidity | 90% or less |
| Protection class | IP20 |
| Dimensions (Hx∅) | 179.5 x 165 mm |
| Weight | Approximately 2 kg |
| Certifications | CE, RoHS, REACHHDCC82500 |
| Image sensor | 1/3" CMOS |
| Camera type | PTZ speed dome |
| Resolution | 1080p |
| Pixels (total) | 1920 x 1080 |
| Pixels (effective) | 1920 x 1080 |
| Lens | 4–120 mm |
| Horizontal angle of view | 1.7°–58° |
| Shutter | Auto |
| Optical zoom | 30x |
| Digital zoom | 16x |
| Day/night switching | IR cut filter (ICR), colour / B/W |
| Minimum illumination (colour) | 1 Lux |
| Minimum illumination (B/W) | 0.05 Lux |
| AGC | Auto |
| White balance | Auto |
| WDR | 70 dB |
| Backlight compensation | BLC, DWDR |
| Pan angle | 360° continuous |
| Pan speed | Manual panning: 0.1°–250°/secPanning presets: 300°/sec |
| Tilt angle | 0°–90° (Auto Flip) |
| Tilt speed | Manual tilting: 0.1°–120°/secTilt presets: 200°/sec |
| Number of presets | 256 |
| Number of patrols | 8, with up to 32 presets per patrol |
| Number of patterns | 4 patterns |
| Privacy masking | - |
| Alarm Input | - |
| Alarm output | - |
| Protocol | ABUS-C (control via coax), Pelco D, Pelco P |
| Power supply | 24 V AC |
| Power | 50 watts (incl. heating & IR LED) |
| Operating temperature | -25°C – +65°C |
| Humidity | 90% or less |
| Protection class | IP66 |
| Dimensions (HxØ) | 353.4 x 220 mm |
| Weight | Approx. 5.5 kg |
| Certifications | CE, RoHS, REACH |
natural_image
Two white security camera modules with camera heads and display screens, shown from different angles (no text or symbols visible)
Manuel utilisateur Gebruikershandleiding
Version 08/2015
HDCC81000
HDCC82500
CE
| Protocole\SW | 8 | 9 |
| Self-adaptive | OFF | OFF |
| Pelco_P | ON | OFF |

SOFT ADDRESS 1 SOFT ADDR ACT OFF SOFT BAUD 2400 SOFT BAUD ACT OFF BROADCAST ADDR ON PELCO CHECKSUM ON SYS TIME
BACK EXIT
| PATROL NUM | 1 |
| EDIT PATROL | |
| PREVIEW | |
| CLEAR PATH | |
| PATROL-D | 5S |
| BACK EXIT |
PATTERN NUMBER 1
natural_image
Two white security camera modules with camera heads and display screens, shown from different angles (no text or symbols visible)| Protocol\SW | 8 | 9 |
| Self-adaptive | OFF | OFF |
| Pelco_P | ON | OFF |
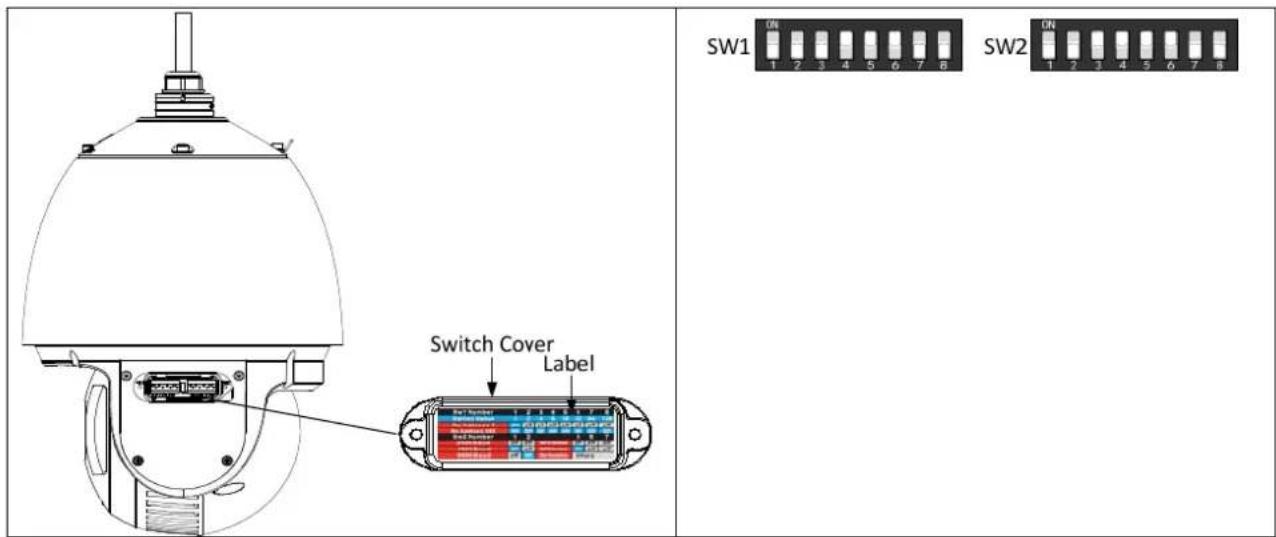
Instelling van de Dome ID (SW1, alle DIP's):
SOFT ADDRESS 1 SOFT ADDR ACT OFF SOFT BAUD 2400 SOFT BAUD ACT OFF BROADCAST ADDR ON PELCO CHECKSUM ON SYS TIME
BACK EXIT
| PATROL NUM | 1 |
| EDIT PATROL | |
| PREVIEW | |
| CLEAR PATH | |
| PATROL-D | 5S |
| BACK EXIT |
PATTERN NUMBER 1
natural_image
Close-up of a white security camera with a circular lens and black interior (no visible text or symbols)
natural_image
White security camera with dome and multiple camera modules (no visible text or symbols)DK
Brugerhåndbog
Version 08/2015
HDCC81000
HDCC82500
CE
| Protocol\SW | 8 | 9 |
| Self-adaptive | OFF | OFF |
| Pelco_P | ON | OFF |
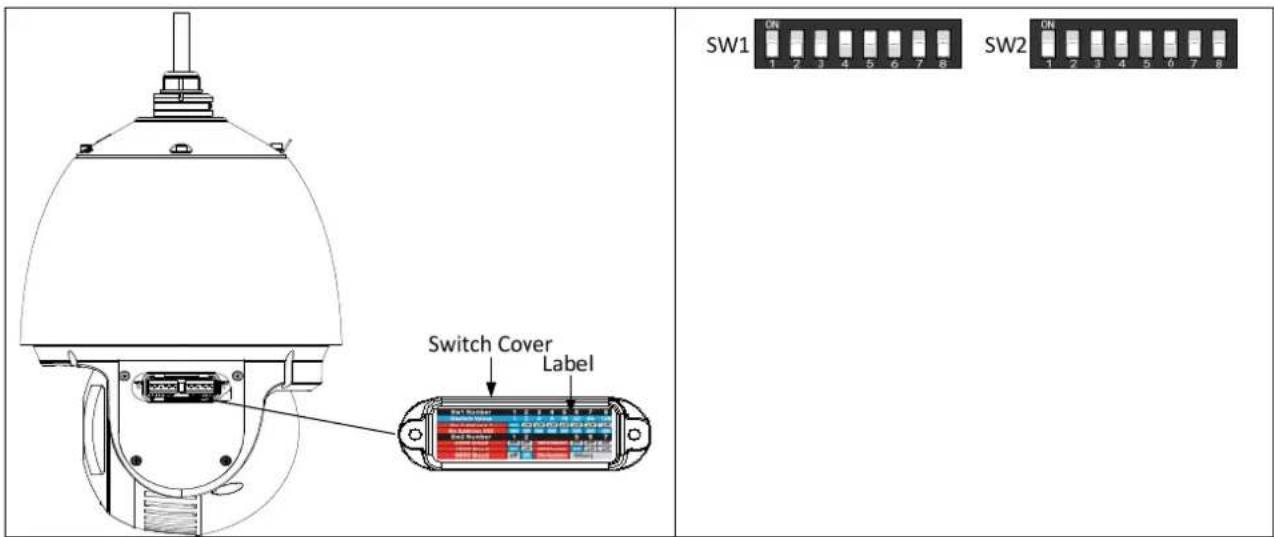
Indstilling af dome-ID (SW1, alle DIP):
| PATROL NUM | 1 |
| EDIT PATROL | |
| PREVIEW | |
| CLEAR PATH | |
| PATROL-D | 5S |
| BACK EXIT |
PATTERN NUMBER 1
- D Einführung
- User manual
- EN Introduction
- Disclaimer
- Important safety information
- Dear Customer,
- Contents
- Explanation of symbols
- Scope of delivery
- Features and functions
- Device description
- Overview - Model number
- Unpacking the device
- Installation
- Quickstart guide for control units
- Control with control panel TVAC26000
- Control with analogue HD video recorder (HDCC9XXXX)
- Key combinations
- Connections and DIP switches
- Dome ID setting
- Baud rate setting
- Control protocol setting
- Diagnosis (self-test)
- OSD menu
- SYS INFO
- DOME SETTINGS
- SYS INFO SETTINGS
- MOTION PARAMETER
- PRESETS
- PATROLS
- Editing the patrol:
- TIME TASK
- PATTERNS
- Maintenance and cleaning
- Function test
- Please note:
- Cleaning
- Disposal
- Technical data
- Manuel utilisateur Gebruikershandleiding
- Brugerhåndbog
Brand : ABUS
Model : HDCC81000
Category : Surveillance Camera