
Mini Media Player - Media player Approx - Free user manual and instructions
Find the device manual for free Mini Media Player Approx in PDF.


| Product Type | Portable Media Player |
| Brand | Approx |
| Model | Mini Media Player |
| Dimensions | 10.5 x 6.2 x 1.4 cm |
| Weight | 160 g |
| Power Source | Rechargeable lithium-ion battery (via USB) |
| Storage Capacity | 8 GB internal, expandable via microSD card (up to 32 GB) |
| Screen | 2.4-inch color LCD screen |
| Supported Audio Formats | MP3, WMA, WAV, FLAC, AAC |
| Supported Video Formats | MPEG-4, AVI, RMVB, FLV |
| Supported Image Formats | JPEG, BMP, GIF |
| Main Functions | Audio/video playback, photo viewing, voice recording, FM radio |
| Connectivity | USB 2.0, 3.5 mm headphone jack, built-in speaker |
| Battery Life | Up to 8 hours audio playback, 4 hours video |
| Maintenance & Cleaning | Clean the screen with a soft microfiber cloth. Avoid harsh liquids. |
| Safety | Do not expose to humidity, extreme temperatures, or violent shocks. |
| Spare Parts and Repairability | Contact Approx customer service for repair options and parts. |
| General Information | Manual available for download at notice-facile.com. Manufacturer warranty 2 years. |
Frequently Asked Questions - Mini Media Player Approx
User questions about Mini Media Player Approx
0 question about this device. Answer the ones you know or ask your own.
Ask a new question about this device
Download the instructions for your Media player in PDF format for free! Find your manual Mini Media Player - Approx and take your electronic device back in hand. On this page are published all the documents necessary for the use of your device. Mini Media Player by Approx.
USER MANUAL Mini Media Player Approx
HDD Mini Multimedia Player
VERSION1.1
Guía de usuario User guide Guide de l'utilisateur Gebrauchsanweisung Guida per l'utente Manual do utilizador
Español.... 1
English.... 15
Français.... 28
Deutsch.... 42
Italiano 56
Português 70
CARACTERÍSTICAS PRINCIPALES
- Multi-functional AV HDD player, with the features of volume delicate and easy to use. It’s a good helper for your study, work, entertainment and a good companion for your life.
- Removable hard disk function: USB2.0 interface WINDOWS management
- Playback function: play AV programs, such as: MPEG4, DVD, VCD, MP3, etc. and JPG pictures;
- Support capacity: Max. 500GB
• HDD format: FAT32/NTFS - Support multi-disk partition HDD program playback.
- Subtitle optional for DVD program: multi language optional.
- Search playback for video, repeat playback for video/audio/picture, etc.
- Slide playback function for the picture, at same time, can choose joined background music.
- With CVBS and HDMI video output, can be connected to TV display.
• TV format: PAL/NTSC/AUTO; - Multi-function control keys on unit and full functional enhanced Remote Control, which is convenient for your use.
SAFETY NOTES
This unit is an electronic product that need to be treated with more care than typical consumer electronic products, please read the below safety methods before you use this unit.
1. CABLE PROTECTION
To avoid unit works improperly, electric shock, fire, disaster or body hurt, please follow up the below operations:
- Cable far away from hot sources;
- Don't press heavy articles on cable or place heavy articles on cables across;
- If smoke, odor or noise rises, please cut off power supply, consult professional or factory directly.
2. DO NOT TOUCH, NO SUNDRIES IN THE UNIT
- It's dangerous to touch inner components of the unit, it will lead to serious destroy, don't try to take apart the unit;
- Don't stuff sundries in the unit.
3. REPAIR
Don't make bold to repair the unit by yourself, because it's dangerous to open or remove unit cover, such as: voltage dangerous or other dangerous.
Please consult professional or factory directly.
4. FAR AWAY FROM VAPOR AND MAGNETISM
- Don't place water, drink or other liquid near to unit, if the liquid dropped on inner unit, it will lead to serious destroy.
- Don't place magnetism near to unit, such as amplifier.
5. VENTILATION
To keep good ventilation around unit, ensure unit release hot normally. If ventilation is not good, unit accumulates too much heat, it will lead to serious destroy.
WORK ENVIRONMENT
When unit playing, please avoid the situations below:
- Sunlight directly or high temperature place;
- Humidity place:
- Easy to spatter water or chemical place;
- Dirty place;
- Poor ventilation place;
- Unstable or shock place;
- Don't place heavy articles on unit.
PORTS & BUTTONS
1. FRONT PANEL:

- IR Window
- POWER/STANDBY LED
2. SIDE PANEL:

- DC IN: 5.2V/2A
- A/V output : CVBS signal output socket
- USB HOST: plug USB disk
- USB Device: connect to your PC for file storage
- HDMI output: connect to the HDMI port on TV SET
REMOTE CONTROL DEFINITION

| Key | Function |
| Power ⏻ | Power ON/OFF |
| SETUP | Enter/ Exit Setup menu |
| HDMI/AV | HDMI/AV output switch key |
| DISK | To select the operation Disk |
| GO TO Press to | select the time point |
| STEP Slow play | for video |
| PSM Press to a | active the thumbnail mode |
| MOVIE | Press to enter MOVIE mode |
| MUSIC | Press to enter MUSIC mode |
| PHOTO | Press to enter PHOTO mode |
| VOL + | Volume+ key |
| VOL - | Volume- key |
| Direction Keys | Move the cursor and rotate pictures, and up/down keys also for program +/- |
| ENTER | Enter/ Play key |
| EXIT | Stop/ Return key |
| EDIT | Press to show edit sub-menu |
| COPY | One key copy function |
| HOME ⏻ | Return to the main menu |
| REPEAT | Choose file repeat mode |
REW  | Fast rewind key |
FF  | Fast forward key |
| PLAY/PAUSE | Press to play or pause |
STOP  | Stop key |
PG. UP  | Back to previous title key |
PG.DN  | Skip to next title key |
| AUDIO | Choose audio track in DVD playback mode |
| SUB-T | Choose subtitle in DVD play mode |
| S.SHOW Select | the transition mode of the photos during the slideshow |
| INFO | Display the file info |
| MUTE [IMAGE] | Mute on/off |
| DVD | Play DVD folder like a common DVD player |
GETTING STARTED
1. HOW TO CONNECT TO COMPUTER
Connect HDD media player USB DEVICE output with computer by USB connection cable, HDD media player becomes computer local HDD, you can edit the file and the folder like a USB storage disk. HDD supportable systems: WINDOWS XP / WINDOWS ME / WINDOWS 2000/Vista/Linux etc.
Warning: do not simply pull out USB cable at any time, please properly remove unit from your computer, otherwise, would cause the data losing or your computer freezing. Please click on the system tray icon, the unit will give your message that you can put out the USB cable safely. For the flash driver or SD card, please also do so.
2. HOW TO CONNECT TO TV
Connect HDD player to TV by AV/HDMI cable.
Warming: confirm the Video output setting is the same with your TV mode. Press the R/C HDMI/AV button to set up the output mode on you HDD media player.
3. HOW TO CONNECT THE POWER SUPPLY
- Connect the AC adapter cable plug in the unit system's jack.
- Plug the AC adapter into wall outlet.
4. POWER SUPPLY
be DC 5.2V/2A; Power supply thestunit with wrong adapter,
Set up the unit on “STANDBY” mode before cut off power supply to avoid the hard disk leads to irreparable destroy.
5. HOW TO CHANGE R/C BATTERY
- Put out the Battery door, the battery door is located on the rear housing. Simply pull the tab to open the battery door.
- Position the battery (including) so it sits in the battery holder correctly, make sure the polarity (the + and the - sides of battery) is correct.
from front panel,1.anglenote ( <60°
- Effective distance of remote control will be difference according to different lightness of environment.
FILE FORMATS SUPPORTED
- MPEG4 Programs, include: DivX3.11 to DivX5.0, XviD1.0, AVI, etc.;
- MPEG2 DVD ,MPG, VOB files;
- MPEG1 VCD, MPG/DAT;;
- Mp3/WAV/AC3/WMA
- JPEG/JPG.
General steps for original setup:
- Press SETUP key, setup menu appears on screen.
- Press direction keys to select title or submenu, then press ENTER key to confirm HIGHLIGHT selection.
- Press SETUP key to exit setup menu display.
2. PLAY
Switch on power supply, HDD player reads hard disk information, screen display the main menu.
3. HOME
During playing, press R/C HOME button to main menu.
4. DISK
Press DISK key, screen showing root catalogue. Press direction keys to move highlights to select catalogue or files, then press ENTER key to confirm your selection. While playback movie files, you can press this button to set the time when you like to start.
Note: Firmware update can only to be operated in SD card or USB Disk, please don't update firmware in HDD.
5. NEXT/PREV
During playing, press NEXT key “▶” to skip to the NEXT title forward accordingly.
During unit playback, press PREVIOUS key “◀” to skip to the PREV title accordingly.
6. FF& REW
During playing, press FF key “▶” to adjust Forward speed, press PLAYeed. Press Rkey to ‘return, fastback playback’s function is contrary with the above function.
7. PAUSE
Press Pause button “☐” in the playing mode, the units will be paused
, press Play button to return to normal playback. immediately
8. STOP
Press STOP key “☐” to exit playback mode during playing.
9. MUTE
Press MUTE key “OK” to mute on/off during playing.
10. NUMERIC KEY
Press numeric keys related to these and also use these key choose the TV program that you like.
11. REPEAT
Press REPEAT key on remote control, select playback mode: Repeat one / Folder repeat / Disc/ Disc Repeat/ single/ Folder.
12. INFO
Press INFO key, screen showing current file information (such as file size, total time, type), press it again to cancel information display.
13. VOLUME +/-
Press VOL+/- key to increase/decrease the volume.
14. COPY
Press COPY key to copy all the files in USB disk to HDD. It works as one key copy function.
Note: The HDD files can't be copied to U disk.
15. DVD
If you have stored VIDEO_TS folders in your HDD, you can press DVD key to DVD navigation.
16. EDIT
To show edit sub-menu. While playback video files, press this button will show the time.
Note: the “edit” button is only effective under “File” directory, and HDD format must be FAT32.
17. AUDIO
DuDil@kelaytoDseDeprasdiAldhannel
18. SUBTITLE
When you press DVD key to start play the DVD which with multi-subtitle (only under DVD mode), you can press SUBTITLE key to switch the subtitles.
19. STEP
During playing, press STEP key, it will enter slow status, play the movie step by step, Press ENTER to return to normal playback speed.
20. ROTATING
When show a picture in full-screen, you can press LEFT/RIGHT to rotate the picture in horizontal direction, and press UP/DOWN to rotate the picture in vertical direction.
FILE EDIT
In the state of “SIGNAL MENU”, press EDIT key, showing edit menu.
Press UP/DOWN direction keys to select operation, press ENTER key, make the corresponding operation to the selected file.
Note: only function under FAT32 of HDD, U disk, under SD card you can only copy content from it.
1. COPY
Choose the file you want to copy, and select "copy" sub-selection.
2. PASTE
Choose the device or folder you want to put the file you copied, and select "paste" sub-selection.
3. DELETE
Select “DELETE” sub-selection, press ENTER key, screen display a reminding dialog window, select “YES” to delete the item or “NO” to cancel this operation.
4. NEW FOLDER/RENAME
Select the file, press EDIT key to show edit menu, select “New folder/Rename” sub-selection, press ENTER key, will show the rename windows.
Remove HIGHLIGHT to aim alphabets by direction keys, press STOP key when you finished
Press EXIT key to cancel operation; press FAV key to cancel the current inputting alphabet.
5. PROPERTIES
Select this sub-selection, screen showing the properties of the file.
6. CANCEL
Select Cancel Sub-Selection to cancel edit operation.
TROUBLESHOOTING
ide before repairing unit. Please read the following
| Symptom Possible | reasons Resolutions | |
| No power | Power cable destroyed | DC power cable if connected correctly |
| Power on, but unit doesn’t work Properly. | Restart player | Plug in power supply and press “Power” button on front panel or “Power” button on remote control |
| No picture | Unit not connected s properly | CMuralPlayer a operation |
| Unit video output not comply with display equipment | Press “HDMI/AV” key on remote control | |
| Display input not setup as receive unit signal | Select proper video input format, usually is video or AV | |
| Video cable not connected effectively | Connect video cable effectively | |
| No volume | Volume display 0 (TV or unit) | Adjust volume |
| Audio cable not Connect audio cable connected effectively effectively | ||
| Playing pictures rolling up, poor quality pictures | Reset up TV format such NTSC, PAL.TV or | Power off first, select correct display format. |
| Programs sources Select good programs not good. sources | ||
| Remote control doesn't work. | Battery with no power energy or not enough power energy | Install new batteries, ensure using same size of batteries: CR-2025, 3V (Remote A) |
| Battery not installed properly. | Install batteries as per correct operation | |
| Remote control not point at remote sensor | Remote control point at remote sensor | |
| Too long distance or too big angle | Distance: Within 7m from the front panel remote sensor; angle:+30' | |
| Remote control route malfunction | Remove obstacle | |
Files not play right away
The number of encoding and compression schemes currently used to create video file is very extensive and seems to change on a weekly basis. There are so many standards and formats that it is very possible that the video file you download form the internet will not play right away on you device, Due to certain “variation”. Even when video files are attend in MPEG4 they may not play right away.
If you have video files of these or other types that you would like to view on it, they will have to be converted first, to re-encode them into the proper XviD or Divx MPEG4 format.
Defragment the unit hard disk
Defragment the unit hard disk may be useful after reading or writing to your computer via the USB connection. Make sure no other program is running while using the Windows defragmenter utility.
If we find new file names or folder names that we never created, the unit FAT has been corrupted. This due to the unit shutting down while reading or writing to your computer via the USB connection. You should use the Error Checking utility or the Check Disk utility in he Widows.
PRINCIPALES FONCTIONNALITÉS
• Support Capacity: Max. 500GB
• Festplattenformat: FAT32/NTFS
• Support Multi-Disk Partition HDD Programm Playback
- Entrata DC: 5.2V/2A
- A/V output : CVBS signal output socket
- USB HOST: plug USB disk
- USB Device: connect to your PC for file storage
- Uscita HDMI: connect to the HDMI port on TV SET
DEFINIZIONI CONTROLLO REMOTO


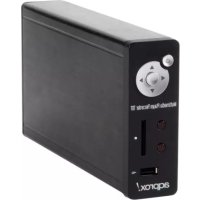
- HDD Mini Multimedia Player
- CARACTERÍSTICAS PRINCIPALES
- SAFETY NOTES
- CABLE PROTECTION
- DO NOT TOUCH, NO SUNDRIES IN THE UNIT
- REPAIR
- FAR AWAY FROM VAPOR AND MAGNETISM
- VENTILATION
- WORK ENVIRONMENT
- PORTS & BUTTONS
- FRONT PANEL:
- SIDE PANEL:
- GETTING STARTED
- HOW TO CONNECT TO COMPUTER
- HOW TO CONNECT TO TV
- HOW TO CONNECT THE POWER SUPPLY
- POWER SUPPLY
- HOW TO CHANGE R/C BATTERY
- FILE FORMATS SUPPORTED
- PLAY
- HOME
- DISK
- NEXT/PREV
- FF& REW
- PAUSE
- STOP
- MUTE
- NUMERIC KEY
- REPEAT
- INFO
- VOLUME +/-
- COPY
- DVD
- EDIT
- AUDIO
- SUBTITLE
- STEP
- ROTATING
- FILE EDIT
- COPY
- PASTE
- DELETE
- NEW FOLDER/RENAME
- PROPERTIES
- CANCEL
- TROUBLESHOOTING
- Files not play right away
- Defragment the unit hard disk
- PRINCIPALES FONCTIONNALITÉS
Brand : Approx
Model : Mini Media Player
Category : Media player