
B 20 A1 FV C/HA - Combined refrigerator HOTPOINT - Free user manual and instructions
Find the device manual for free B 20 A1 FV C/HA HOTPOINT in PDF.



| Product type | Combined refrigerator |
| Brand | HOTPOINT |
| Model | B 20 A1 FV C/HA |
| Power supply | 220-240 V ~ 50 Hz |
| Number of compartments | Refrigerator + Freezer (****) |
| Freezing capacity | Indicated on the rating plate (e.g., 4 kg/24h) |
| Special functions | Meat and Fish compartment, Zero-degree compartment, Door open alarm |
| Defrosting | Refrigerator: automatic; Freezer: manual |
| Temperature adjustment | Mechanical thermostat (refrigerator and freezer) |
| Climate class | N (ambient temperature from +16°C to +32°C) |
| Supplied accessories | Ice cube tray, shelves, door bins, Meat and Fish compartment, Zero-degree compartment |
| Maintenance and cleaning | Clean the interior with warm water and neutral detergent; do not use abrasive products |
| Installation | Minimum distance: 30 cm from coal stoves, 3 cm from electric/gas stoves; level; do not expose to direct heat |
| Safety | Grounding mandatory; do not use adapters or extension cords |
| After-sales service | Contact HOTPOINT service with the model and service number |
| Repairability | Spare parts available through after-sales service |
Frequently Asked Questions - B 20 A1 FV C/HA HOTPOINT
User questions about B 20 A1 FV C/HA HOTPOINT
0 question about this device. Answer the ones you know or ask your own.
Ask a new question about this device
Download the instructions for your Combined refrigerator in PDF format for free! Find your manual B 20 A1 FV C/HA - HOTPOINT and take your electronic device back in hand. On this page are published all the documents necessary for the use of your device. B 20 A1 FV C/HA by HOTPOINT.
USER MANUAL B 20 A1 FV C/HA HOTPOINT
Instructions for use
Remove the ice cube tray (if available) and place it back in the freezer. Under no circumstances use sharp objects to remove ice.
Removing the ice cube tray (depending on the model):
Pull the trays outward until they stop, lift and remove them. To free up additional space, the trays can be removed from the freezer compartment.
Place the food on the wire rack or rollers, and make sure the door is properly closed.
In models with an internal
freezer compartment, fresh food can be frozen. The amount of food that can be frozen within 24 hours is indicated on the rating plate.
How to freeze fresh food:
- Place the food on the wire rack, if available (figure 1), or directly on the bottom of the freezer compartment (figure 2).
- Place the food in the middle of the compartment, so that it does not come into contact with already frozen food. Leave a gap of about 20 mm between packages (figures 1 and 2).
Figure 1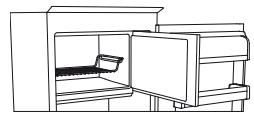
Figure 2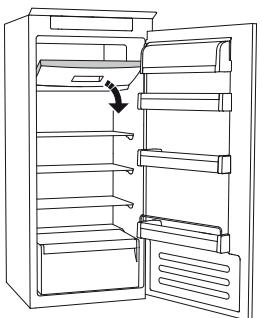
DEFROSTING THE FREEZER COMPARTMENT (depending on the model)
In models with a No Frost system, the defrosting process is automatic. In other models, the formation of frost is normal.
The amount and speed of frost formation depend on the ambient temperature and the frequency of door openings. It is recommended to set a lower temperature or activate the fast freeze function (if available) (see the quick user guide) a few hours before removing products from the freezer, so that they remain frozen longer during defrosting. To defrost, switch off the appliance and remove the drawers. Place the frozen products in a cool place. Leave the freezer door open to allow the ice to melt. To prevent water from leaking during defrosting, place an absorbent cloth at the bottom of the freezer and wring it out regularly. Clean the freezer thoroughly and dry it. Switch the refrigerator back on and put the products back in.
STOP FROST SYSTEM (depending on model)
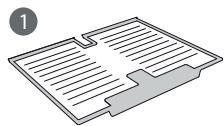
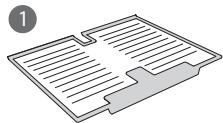
The STOP FROST system (depending on model) facilitates defrosting of the freezer compartment. The special STOP FROST shelf (figure 1) is intended for faster collection of frost, which reduces the duration of defrosting of the freezer compartment.
(depending on model)
The compartment with zero temperature Active0 is specially designed for storing low-temperature fresh food with high humidity for longer preservation of products (e.g., meat, fish, fruits, leafy vegetables).
The Active0 function with humidity control technology ensures optimal preservation of partially packaged products.
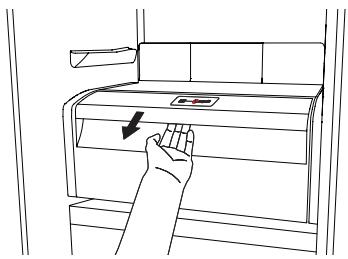
Switching the compartment on and off
When the compartment is switched on, the internal temperature is approximately 0°C.
To switch off the compartment, press the button shown in the figure and hold it for more than a second until the symbol lights up.
The illuminated symbol indicates that the compartment is working. To switch off the compartment, press the button again and hold it for more than a second. To completely switch off the compartment, it is necessary to remove the drawer.
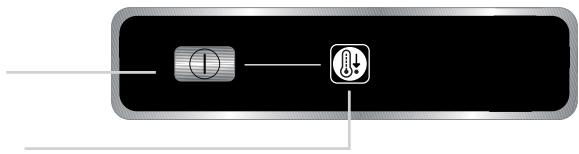
For the zero-temperature compartment Active0 to function correctly, it is necessary:
- that the refrigerator compartment is switched on; - that the temperature is set between +2°C and +6°C; - that the drawer is inserted correctly;
- that none of the special functions are selected: "Cooling mode," "Cooling off", "Vacation" (if available); in this case, it is necessary to remove products from the compartment.
Troubleshooting:
- If the symbol does not light up when you switch on the compartment, check that the drawer is inserted correctly; if the problem persists, contact an authorized service center.
- If the compartment is switched on and the drawer is open, the symbol on the control panel may automatically switch off and turn on again when the drawer is inserted back into place.
- Depending on the position of the drawer, weak sounds may be heard, which is normal.
- When the drawer is switched on, its temperature does not depend on the general temperature in the cold chamber. In this case, it is recommended to store fruits and vegetables that are not sensitive to cold (apples, pears, apricots, carrots, spinach, lettuce, etc.).
Important: if the drawer is on and products with high moisture content are stored in it, condensation may form on the shelves. In this case, temporarily turn off the function. Be careful when placing small products and small containers on the top shelf of the zero-temperature drawer, so that they do not accidentally fall into the space between the shelves and the back wall of the cold chamber.
To remove the zero-temperature drawer,
perform the following steps:
- For easier access, it is recommended (if possible) to remove the lower shelf; - turn off the drawer; - remove the drawer by turning it upwards; - remove the white plastic shelf under the drawer;
Note: the top shelf and side panels are not removable.
To use the zero-temperature drawer again, carefully insert the white plastic shelf above the drawer, then insert the drawer and turn on the function. To increase the volume of the cold chamber and reduce electricity consumption, it is recommended to turn off the zero-temperature drawer and remove it.
From time to time, clean the drawer and its parts with warm water (do not immerse the white shelf or the drawer in water) with a neutral detergent intended for cleaning refrigerators. Do not use abrasive cleaners.
Before cleaning the drawer (even from the outside), it is necessary to remove the drawer and disconnect the electrical power to the drawer.
Technical assistance of service centers
Before contacting a service center:
Turn the appliance back on to check if the fault is resolved. If not, turn the appliance off again and repeat the procedure after an hour.
If after checking in accordance with the troubleshooting table and turning the appliance on, it still does not function correctly, contact the service center and clearly describe the problem, indicating:
the type of fault; the model;
The serial number of the device (indicated on the nameplate inside the device); - service number (if any) (the number after the word SERVICE on the nameplate inside the device).
SERVICE
0000 000 0000
Applied:
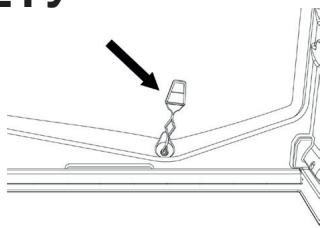
Replacing the door, performed by a service center representative, is not considered warranty service.
ANFAI PET PAIДАЛАНY
Do not use the device for purposes other than its intended use.
The electronic device may emit signals; if the signal temperature is too high, the signal may be damaged. If you notice this, please contact the manufacturer or an authorized service center.
Expert: If the device is used for purposes other than its intended use, the temperature of the device may rise and it may operate for 4-5 hours.
MAINTENANCE AND CLEANING
Before cleaning, unplug the device and let it cool down. Clean with a soft, damp cloth. Do not use harsh cleaning agents. To avoid electric shock, do not immerse the device in water or other liquids.
Do not use the device if the power cord or plug is damaged.
Do not clean the device with a steam cleaner (see instructions).
Before cleaning or maintenance, unplug the device from the power outlet and let it cool down.
TROUBLESHOOTING (see table)
The lamp is designed for use in household and similar areas. It is based on the working principle of the lamp. The lamp is intended for use in technical maintenance and in sales at retail outlets.
1st type
To install the lamp, it must be inserted into the socket, having first disconnected the voltage. The lamp must be removed from the catalog after 5 minutes of operation.
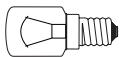
- Lamp base (max. 25V)
Lamp type
Not applicable
- Closed type lamp (with integrated components) is intended for technical maintenance and sales
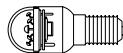
Closed type lamp
2nd type
If it is necessary to replace the lamp in the socket, and the closed type lamps are installed, you must contact the technical service.
Closed type lamps are equipped with a short circuit protection device, which prevents damage to the internal elements and the surrounding environment.
LAMP DISPOSAL
When the lamp reaches the end of its service life, it must be disposed of properly. To avoid possible harm to health and the environment, do not dispose of it with household waste. Its incorrect disposal may lead to negative consequences for the environment.
INSTALLATION INSTRUCTIONS
Install the lamps correctly, and the products must be kept in a dry place away from water. Do not immerse in water and do not expose the products to moisture. If the lamp is damaged, it is possible to replace the lamp with a new one (electronic version).
The dosing devices and the bath products are not standard equipment.
The dosing device is only used with the pipe.
The contents of the container may be under pressure. The dosing device is a pressure indicator. When connecting the water supply hose, it must be placed in a container that can be opened and closed.
The device can be checked with the "cold water" indicator, which is important for the safety of the bath and the bath products.
Warning: The characteristics of the dosing device are set at the factory.
Warning: The temperature of the device, the heating element, and the rotation speed of the drum may affect the temperature of the two indicators. Please check the temperature settings.
Warning: In case of frost, the dosing device may be damaged. In such cases, remove the dry containers (e.g., soap, powder) and the wet products (e.g., detergent) and store them in a frost-free place.
Draining the water and detergent (for large capacity)
Pull the drain hose out and let the water flow out. To drain the water and detergent, loosen the two screws on the lower part (and remove the drain hose), then the drain hose can be pulled out.
Anti-bacterial and anti-fungal agent
(for large capacity)
The temperature of the detergent container and the storage of the products can be adjusted by cutting off the power supply. Do not use the detergent. If the detergent is used, the automatic pipe may be damaged.
There is a dosing device for the bath.
The musical instrument can be used with the standard tuning (the most common tuning). The standard tuning is indicated in the table below. If the standard tuning is not suitable for your instrument, you can adjust it according to the instructions. Do not use the instrument with the standard tuning if it causes damage. The standard tuning is for the instrument's normal use. To avoid damage, use the standard tuning.
Adjusting the instrument
From the beginning (the thickest string) fill 2/3 with water, then insert the tuning peg. To tune the instrument, turn the peg in either direction. Tighten the string (first time)
Loosen the string by turning the peg counterclockwise, then remove it. To make it easier to insert the string, place the string without the peg into the hole.
After placing the string in the bridge or saddle, pull it through and insert it into the hole.
The instrument is ready to play
The instrument can also be used with the standard tuning. The standard tuning is indicated in the table below. If the standard tuning is not suitable for your instrument, you can adjust it according to the instructions.
Standard tuning is as follows:
- Place the string under the bridge (1st picture) or under the saddle (2nd picture). - When the string is inserted into the hole, leave a gap of 20 mm, then place the string on the saddle (see pictures 1 and 2).
1st picture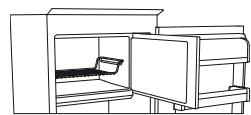
2nd picture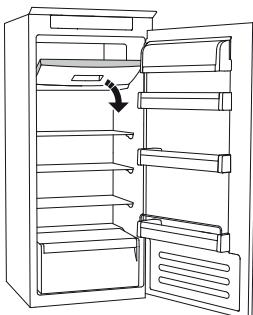
The instrument is ready to play
(first time)
For quick tuning, there is a special tool for adjusting the pegs.
For other tunings, you can use the tuning table provided.
The device is designed for household use only. Before use, check the device, power cord, plug and other parts for damage. If the device is damaged, do not use it. To avoid danger, the device must be used with a residual current device (RCD) with a rated residual operating current not exceeding 30 mA. Contact a qualified electrician for installation. Do not use the device if it has been dropped or shows visible damage. To prevent electric shock, do not immerse the device, cord, or plug in water or other liquids.
Do not use the device if the power cord or plug is damaged.
Place the device and its parts on a flat, stable surface.
STOPPING THE DEVICE (temporary stop)
The device has a stop button (temporary stop function). The stop button (Fig. 1) is designed to stop the device quickly and safely. Press and hold it to stop the device immediately.
To release the stop button, press it again.
STOP BUTTON RELEASE
- Remove the protective cover from the device and keep it (Fig. 2). -Press the stop button (Fig. 3) and hold it, then remove the protective cover (Fig. 4). Note: If the button is stuck or difficult to press, do not force it, as this may damage the device.
- Remove the protective cover from the device.
- Clean the stop button and its surroundings with a dry cloth (Fig. 5).
- Keep the device and plastic parts away from heat sources. -Refer to the markings on the device (Fig. 7-A) and ensure the voltage matches the power supply (Fig. 7-B). If the device is not working properly, remove the protective cover.
The stop button can be used to stop the device temporarily. Pressing the stop button will stop the device immediately.
Note: If the device is not working properly, do not use it without the stop button.
TECHNICAL MAINTENANCE
Before technical maintenance, unplug the device.
If the power cord is damaged, it must be replaced by the manufacturer, its service agent, or similarly qualified persons in order to avoid a hazard. Before replacing the power cord, disconnect the appliance from the power supply and contact technical support for assistance. Do not attempt to replace the power cord yourself.
Power cord
Type and serial number (as shown on the rating plate) Technical data (if applicable) (the number following the SERVICE word on the technical label placed inside the appliance)
SERVICE
0000 000 0000
Notes:
If technical service is required, do not attempt to repair the appliance yourself; contact the service center.
USING THE APPLIANCE
Plug the appliance into an electrical outlet.
In models equipped with an electronic control, a sound signal may sound. Press the button to turn on the appliance. Press the button to turn off the appliance. Install an anti-odor filter in the ventilator to reduce unpleasant odors, as shown on the packaging (the filter is supplied with the appliance).
Note. After switching on the appliance, wait 4-5 hours before placing food inside, so that the internal temperature reaches the required value for proper food storage.
CLEANING AND MAINTENANCE
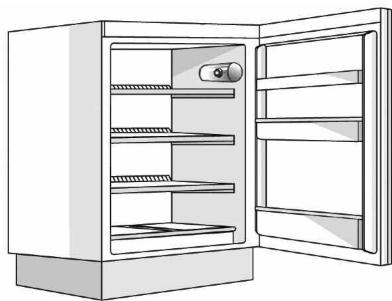
Regularly clean the appliance with a soft cloth and warm water with a mild neutral detergent, suitable for cleaning the interior surfaces of the refrigerator. Do not use abrasive cleaners. To ensure proper drainage of thawed water, regularly clean the drain hole located on the rear panel of the refrigerator compartment, using the cleaning tool supplied with the appliance (see figure).
Before performing any cleaning or maintenance work
To clean the appliance, unplug it from the outlet or disconnect it from the power supply.
REPLACING THE LIGHT BULB OR LED (depending on the model)
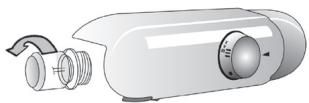
Before replacing the lamp, disconnect the appliance from the power supply. Then remove the lamp cover depending on the type of lamp, as indicated for your model. Replace the old lamp with a new one (their characteristics must match). The lamp can be replaced by contacting the Technical Assistance Center or an authorized dealer.
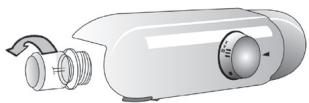
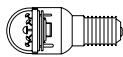
Lamp 1.
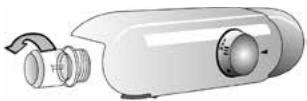
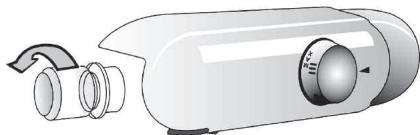
To replace the lamp, turn it counterclockwise, as shown in the figure. Wait 5 minutes before reconnecting the appliance.
Instructions for use
Fridge with freezer compartment
| DEUTSCH | Gebrauchsanweisung | Seite 4 |
| FRANÇAIS | Mode d'emploi | Page 10 |
| ENGLISH | Instructions | Page 16 |
| NEDERLANDS | Gebruiksaanwijzing | Pagina 22 |
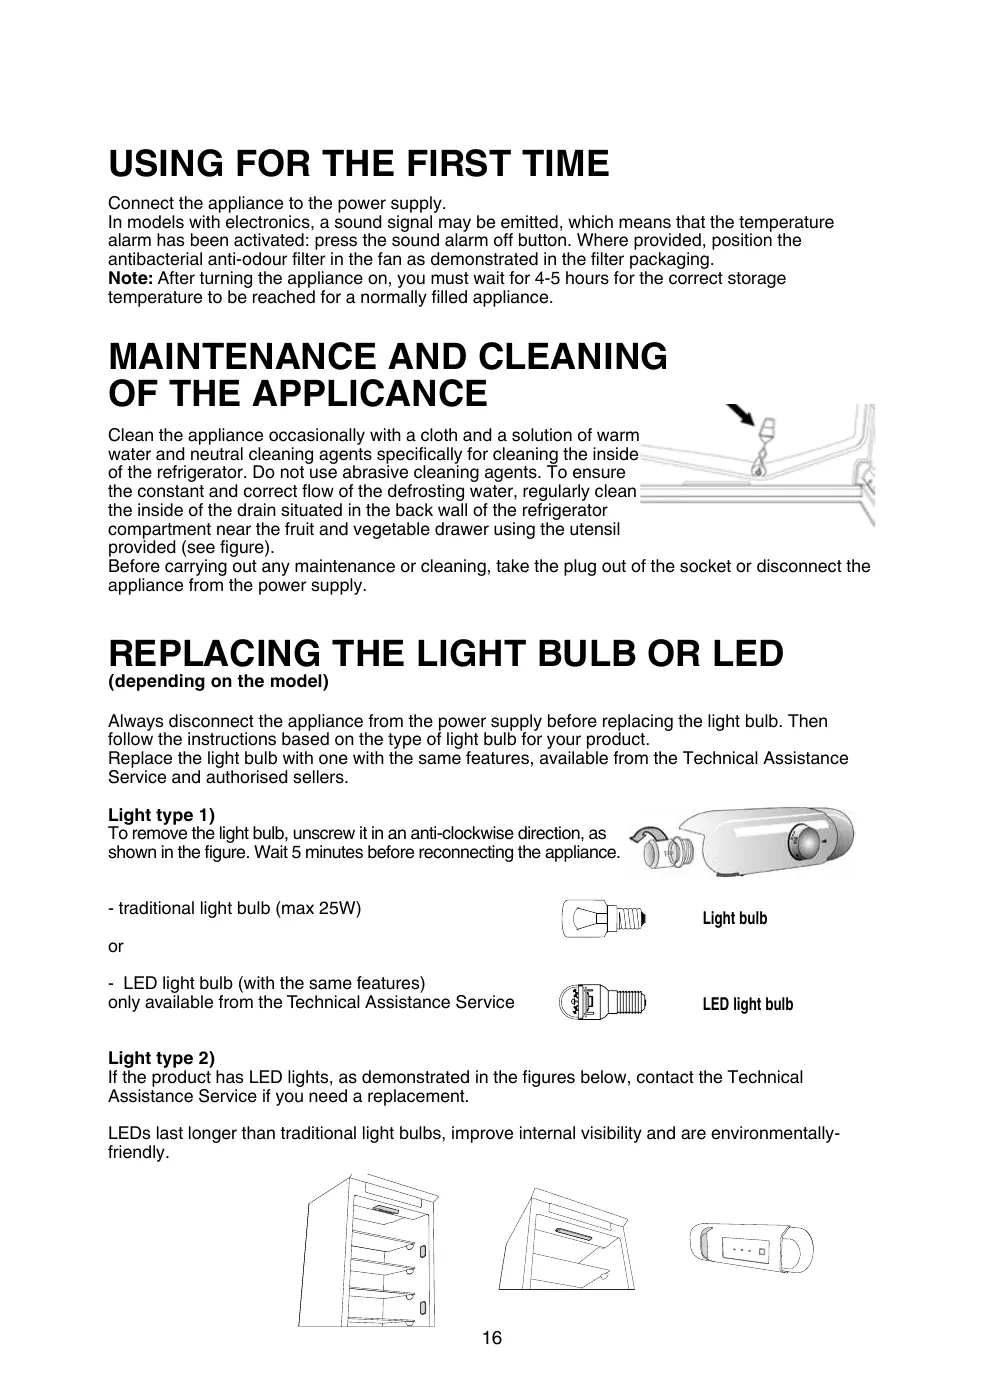
USING FOR THE FIRST TIME
Connect the appliance to the power supply.
In models with electronics, a sound signal may be emitted, which means that the temperature alarm has been activated: press the sound alarm off button. Where provided, position the antibacterial anti-odour filter in the fan as demonstrated in the filter packaging.
Note: After turning the appliance on, you must wait for 4-5 hours for the correct storage temperature to be reached for a normally filled appliance.
MAINTENANCE AND CLEANING OF THE APPLICANCE
Clean the appliance occasionally with a cloth and a solution of warm water and neutral cleaning agents specifically for cleaning the inside of the refrigerator. Do not use abrasive cleaning agents. To ensure the constant and correct flow of the defrosting water, regularly clean the inside of the drain situated in the back wall of the refrigerator compartment near the fruit and vegetable drawer using the utensil provided (see figure).
Before carrying out any maintenance or cleaning, take the plug out of the socket or disconnect the appliance from the power supply.
REPLACING THE LIGHT BULB OR LED
(dependently on the model)
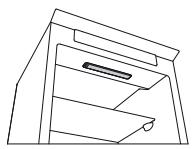
Always disconnect the appliance from the power supply before replacing the light bulb. Then follow the instructions based on the type of light bulb for your product.
Replace the light bulb with one with the same features, available from the Technical Assistance Service and authorised sellers.
Light type 1)
To remove the light bulb, unscrew it in an anti-clockwise direction, as shown in the figure. Wait 5 minutes before reconnecting the appliance.
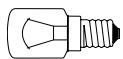
- traditional light bulb (max 25W)
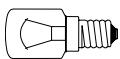
Light bulb
or
- LED light bulb (with the same features)
only available from the Technical Assistance Service
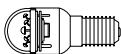
LED light bulb
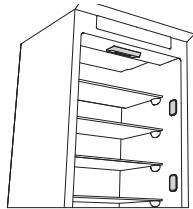
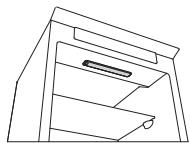
Light type 2)
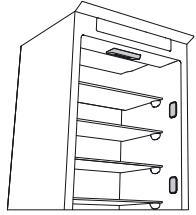
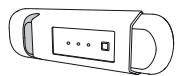
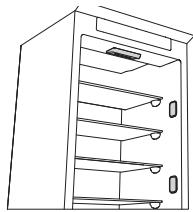
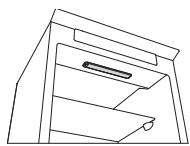
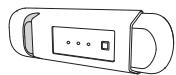
If the product has LED lights, as demonstrated in the figures below, contact the Technical Assistance Service if you need a replacement.
LEDs last longer than traditional light bulbs, improve internal visibility and are environmentally-friendly.
IN THE EVENT OF NON-USE OF THE APPLICANCE
Disconnect the appliance from the power supply, empty it, defrost it (if necessary) and clean it. Keep the doors slightly ajar to let air circulate inside the compartments. By doing this, you avoid the development of mould and bad odours.
IN THE EVENT OF AN INTERRUPTION TO THE POWER SUPPLY
Keep the doors closed so the food stays cold for as long as possible. Do not re-freeze food that has partially defrosted. If there is a prolonged power cut, the blackout alarm may also activate (in products with electronics).
REFRIGERATOR COMPARTMENT
The refrigerator compartment allows for the storage of fresh food and drink.
The refrigerator compartment defrosts completely automatically.
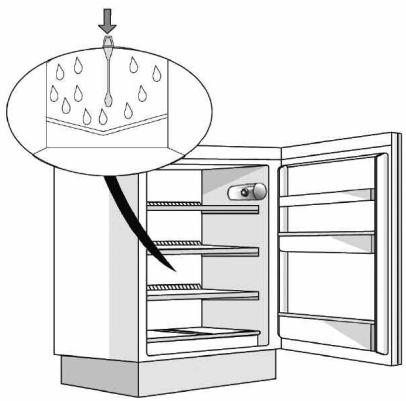
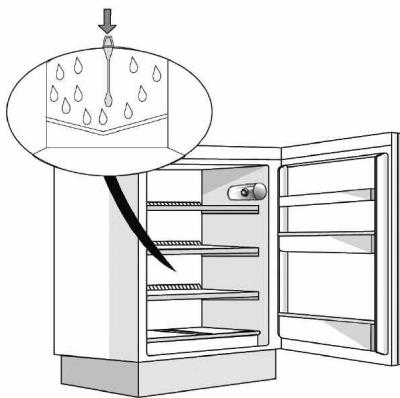
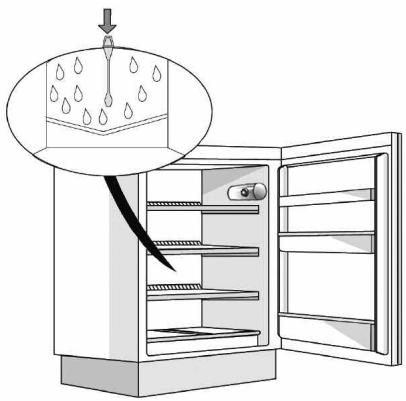
The occasional presence of drops of water on the internal back wall of the compartment is a sign of the automatic defrosting phase. The defrosting water is channelled into a drain and then collected in a container, where it evaporates.
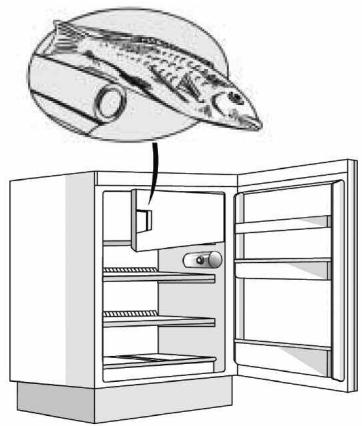
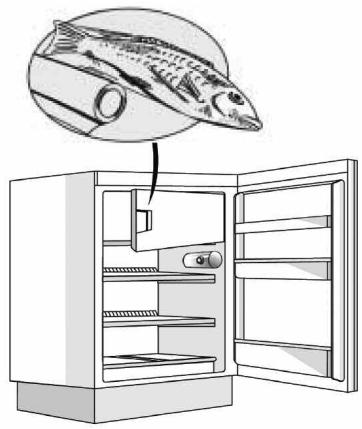
Depending on the model, the product may be equipped with a special "Zero Degrees" compartment, which is ideal for storing fresh meat and fish.
Warning: do not clean refrigerator accessories in a dishwasher.
Note: the ambient temperature, how often the doors are opened and the position of the appliance may affect the internal temperatures in the two compartments. Set the temperatures depending on these factors.
Note: in very humid conditions, condensation may form in the refrigerator compartment, especially on the glass shelves. In this case, it is recommended that you close containers with liquids in (e.g. a pot of stock), wrap up food with a high water content (e.g. vegetables) and turn on the fan, if there is one.
Removing the fruit and vegetable drawer (depending on the model)
Pull the drawer outwards as far as it will go, lift it up and take it out.
To make it easier to remove the fruit and vegetable drawer, it may be necessary to empty (and possibly remove) the two lower door shelves and then continue to remove the drawer.
Fan and antibacterial anti-odour filter (depending on the model)
The fan allows for the even distribution of the temperatures inside the compartments and, consequently, better preservation of the food and reduction of excess humidity. Do not obstruct the ventilation area. The fan can be turned on/off manually (see the Quick Guide); if it is turned on, it operates automatically when necessary.
FREEZER COMPARTMENT
Model with separate freezer compartment
The freezer compartment ** allows for the storage of frozen food (for the period indicated on the packaging) and the freezing of fresh food. The quantity of fresh food that can be frozen in 24 hours is written on the rating plate. Arrange the fresh food in the freezing area inside the freezer compartment (see Quick Guide), leaving enough space around the food packages to allow air to circulate freely. It is advisable that you do not re-freeze food that has partially defrosted. It is important to wrap the food in a way that prevents the ingress of water, humidity or condensation.
Making ice cubes
Fill 2/3 of the ice tray (if available) with water and put it back in the freezer compartment. Do not use sharp or pointed objects to remove the ice under any circumstances.
Removing the drawers (depending on the model)
Pull the drawers outwards as far as they will go, lift them up and remove them. To get more volume, the freezer compartment can be used without the drawers.
Make sure that the door is closed properly after putting the food back on the grilles/shelves.
Models with an internal product compartment
In the freezer compartment *** you can also freeze fresh food. The quantity of fresh food that can be frozen in 24 hours is written on the rating plate.
How to freeze fresh food:
- arrange the food on the grille, if present (figure 1), or directly on the bottom of the compartment (figure 2)
- put the food in the middle of the compartment without it coming into contact with food that is already frozen, keeping a distance of about 20 mm (figure 1 and 2).
Figure 1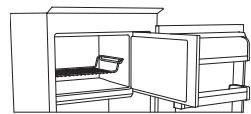
Figure 2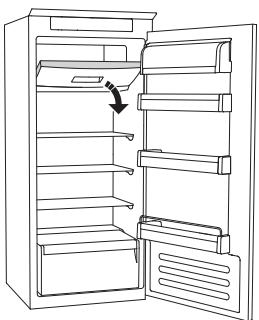
HOW TO DEFROST THE FREEZER COMPARTMENT
(depending on the model)
For frost-free models, no defrosting procedures are necessary.
For other models, frost buildup is normal.
The amount and speed of frost accumulation vary depending on ambient conditions and how often the door is opened. It is advisable to set the temperature colder or, if available, turn on the quick freeze function (see Quick Guide) four hours before removing food from the freezer compartment, to prolong food preservation during defrosting. To defrost, turn off the appliance and remove the drawers. Place frozen food in a cool location. Leave the door open to allow frost to melt. To prevent water from escaping during defrosting, place an absorbent cloth at the bottom of the freezer compartment and wring it out regularly.
Clean the inside of the freezer compartment and dry it carefully.
Turn the appliance back on and put the food back inside.
STOP FROST SYSTEM (depending on the model)
The STOP FROST SYSTEM (available depending on the model) facilitates defrosting of the freezer compartment. The STOP FROST accessory (figure 1) is designed to collect some of the frost that forms in the freezer compartment and is easy to remove and clean, thereby reducing the time needed to defrost the inside of the freezer compartment.
To remove frost from the STOP FROST accessory, follow the cleaning procedure shown below.
PROCEDURE TO CLEAN THE STOP FROST ACCESSORY
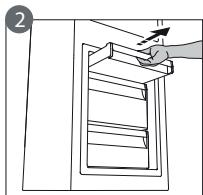
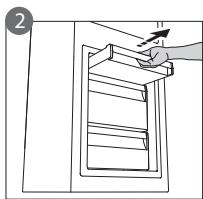
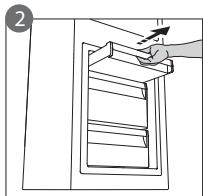
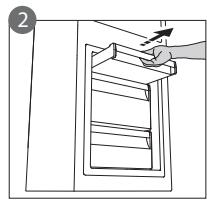
- Open the freezer compartment door and remove the upper drawer (figure 2).
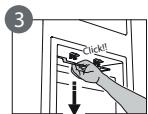
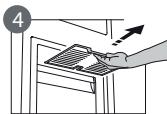
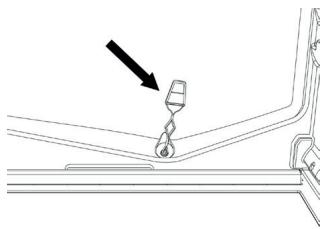
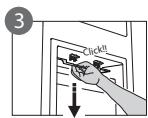
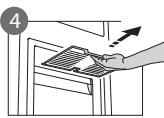
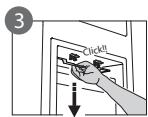
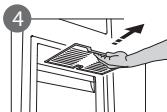
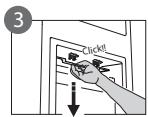
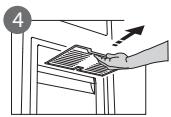
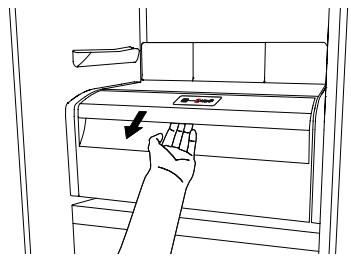
- Unfasten the STOP FROST accessory (figure 3) and remove it (figure 4), taking care not to drop it on the glass shelf below. Note: if the accessory is jammed or difficult to remove, do not force it; instead, proceed with a complete defrost of the freezer compartment.
- Close the freezer compartment door.
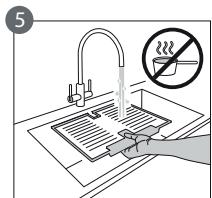
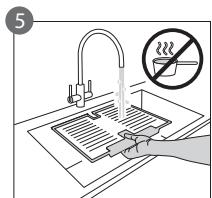
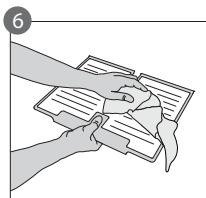
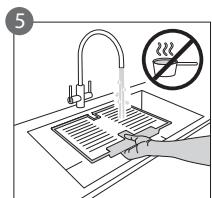
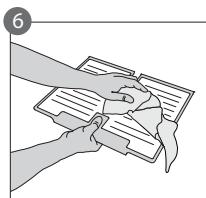
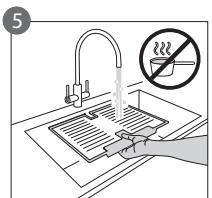
- Remove frost from the accessory by rinsing it under running (not hot) water (figure 5).
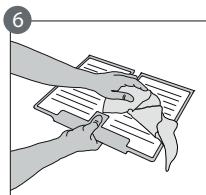
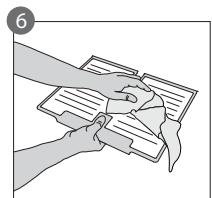
- Let the accessory drip dry and dry the plastic parts with a soft cloth.
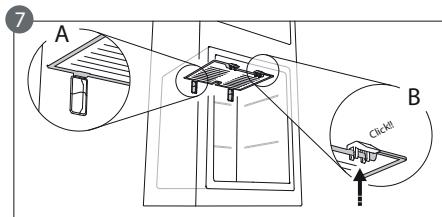
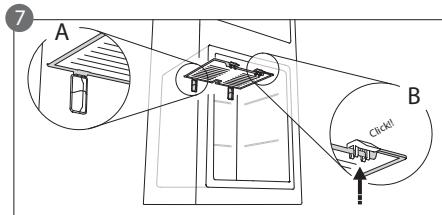
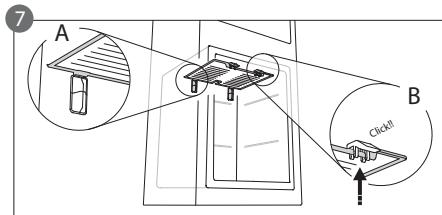
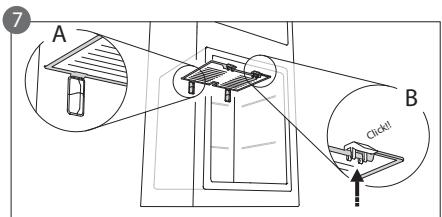
- Reinsert the accessory by placing the back part on the projections shown in figure 7-A, then refasten the handle of the accessory to the clasps above (figure 7-B).
- Reinsert the upper drawer and close the door to the freezer compartment.
It is possible to clean the STOP FROST accessory on its own without completely defrosting the freezer compartment. Cleaning the STOP FROST accessory regularly helps to reduce the need to completely defrost the freezer compartment.
Note: the product specifications, including volume and energy, are calculated without the STOP FROST accessory.
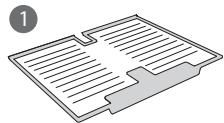
"ZERO DEGREES" COMPARTMENT
(depending on the model)
The "Zero Degrees" compartment is specifically designed to maintain a low temperature and the correct humidity to preserve fresh food for longer (for example, meat, fish, fruits and winter vegetables).
Humidity control technology coupled with Activ0° provides the best food preservation when the food is not completely packed.
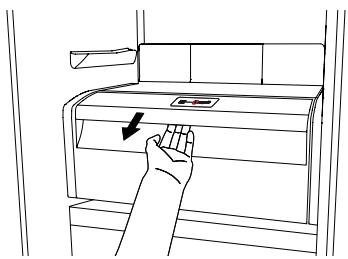
Turning on and turning off the compartment
The internal temperature of the compartment is approximately 0° when the compartment is turned on.
To turn on the compartment, press the button shown in the figure for more than one second until the symbol lights up.
The lit symbol means that the compartment is working. Press the button again for more than one second to turn off the compartment. To turn off the compartment completely, you must remove the drawer.
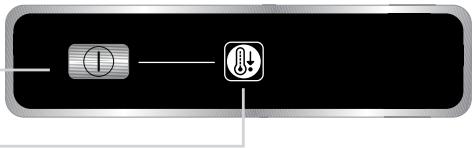
For the correct functioning of the "Zero Degrees" compartment, it is necessary that:
- the refrigerator compartment is turned on
- the temperature is between +2°C and +6°C
- the drawer in the "Zero Degrees" compartment must be inserted for it to be turned on
- one of the following special functions is not selected: Stand-by, Cooling-Off, Vacation (if present), in this case, remove the food contained in it.
Note:
- if the symbol does not light up when you turn on the compartment, check that the drawer is properly inserted; if the problem persists contact the authorised Technical Assistance Service.
- if the compartment is turned on and the drawer is open, the symbol in the control panel may automatically turn off. The symbol will light up again when the drawer is inserted
- regardless of the state of the compartment, you may hear a faint noise, which you should consider as normal
- when the compartment is not in operation, the temperature inside it depends on the general temperature of the refrigerator compartment. In this case, it is advised that fruits and vegetables that are not sensitive to cold (berries, apples, apricots, carrots, spinach, lettuce, etc.) are stored in it.
Important: if the compartment is turned on and food with a high water content is present, condensation may form on the shelves. In this case, turn the function off temporarily.
Be careful when positioning food and containers that are small in size on the upper shelf of the "Zero Degrees" compartment in order to prevent them accidentally falling between the shelf and the back wall of the refrigerator compartment.
Removing the "Zero Degrees" compartment:
Carry out the following steps:
- to make it easier to remove the compartment, we recommend that you empty (and possibly remove) the lower door shelves
- turn off the compartment
- remove the compartment by rotating it upwards
- remove the white plastic shelf under the compartment
Note: it is not possible to remove the upper shelf and side supports.
To use the "Zero Degrees" compartment again, carefully reposition the white plastic shelf under the compartment before inserting the drawer and turning the function back on.
To have a larger refrigerator volume and to reduce energy consumption, it is recommended that you turn off the "Zero Degrees" compartment and remove the compartment.
Clean the compartment and its components occasionally using a cloth and a solution of warm water (taking care not to submerge the white plastic shelf under the drawer) and neutral cleaning agents specifically for cleaning the inside of the refrigerator. Do not use abrasive cleaning agents.
Before cleaning the compartment (also externally) it is necessary to remove the drawer to disconnect the electrical supply for the compartment.
TECHNICAL ASSISTANCE SERVICE
Before contacting the Technical Assistance Service:
Restart the appliance to check if the problem has been solved. If not, disconnect the appliance again and repeat the procedure after one hour.
If, after having completed the checks listed in the guide for malfunctions and after restarting the appliance, your appliance continues to function incorrectly, contact the Technical Assistance Service, clearly describing the problem and stating:
the type of malfunction the model
- the type and serial number of the appliance (written on the rating plate)
- the Service number (if available) (the number that is after the word SERVICE on the rating plate placed inside the appliance)
SERVICE 0000 000 00000
Note:
Reversing the doors of the appliance, if carried out by the Technical Assistance Service, is not considered as a warranty claim.
Nederland Home Product Service (ATAG)
Postbus 249
6920 AE Duiven
FREEZER COMPARTMENT WITH ZERO TEMPERATURE
depending on model)
FROST FREE SYSTEM (depending on model)
- Traditional bulb (max. 25 W)
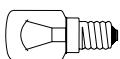
Bulb
or
- LED bulb (with same functions) can only be obtained from a service center
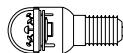
Bulb for LED indicator lights
Bulb type 2)
Button for the light
N
- The light bulb of the lamp (with the same characteristics) is available only from the Technical Assistance Department.
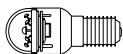
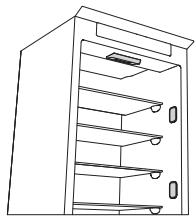
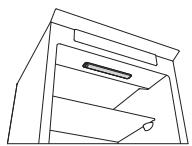
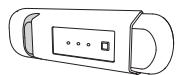
Light bulb of the lamp
Lamp type 2)
If the product is equipped with a light bulb, as shown in the figure below, contact the Technical Assistance Department if you need a spare bulb.
The light bulbs last longer than standard lamp bulbs, improving visibility and are environmentally friendly.
Switch on again and put the cover back on.
ICE MAKER SYSTEM
(Depending on model)
The ice maker system (available depending on model) facilitates the defrosting procedure of the freezer compartment. The ice maker accessory (Figure 1) is designed to collect part of the frost that forms in the freezer compartment, and is easy to remove and clean, which saves time needed for defrosting the freezer compartment.
To remove frost from the ice maker accessory, follow the cleaning procedure below.
CLEANING PROCEDURE FOR THE ICE MAKER ACCESSORY
- Open the freezer compartment door and pull out the ice maker accessory (Figure 2).
- Unhook the ice maker accessory (Figure 3) and remove it (Figure 4), being careful not to drop it on the floor. Note: If the accessory is stuck or difficult to remove, do not force it, but contact the defrosting service for the freezer compartment.
- Close the freezer compartment door.
- Remove the frost from the accessory by rinsing it under lukewarm (not hot) water (Figure 5).
- Install the accessories in the reverse order of removal. Mount the accessories by placing the removed parts back in the reverse order, as shown in Figure 7-A, then insert the accessory plug into the socket (Figure 7-B). -Replace the cover and close the refrigerator door.
You can clean only the accessories for dispensing ice without completely defrosting the freezer compartment. Regular cleaning of the accessories for
dispensing ice helps reduce the need for full defrosting of the freezer compartment.
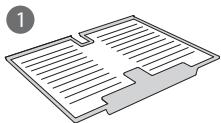
Note: Product specifications, including volume and energy, are calculated without the ice dispensing accessories.
COMPARTMENT "ZERO DEGREES"
(Depending on model)
The "Zero Degrees" compartment is specially designed for storing meat, fish, poultry, and vegetables at a temperature close to 0°C and controlled humidity, keeping them fresh for longer.
The humidity control technology, combined with active circulation, ensures optimal preservation of food when they are not fully packed.
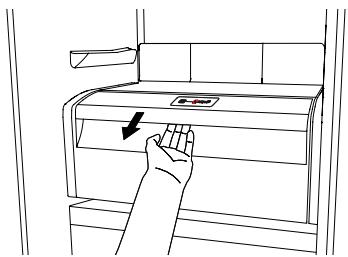
Switching the compartment on and off
The internal temperature of the compartment is approximately 0°C when the compartment is switched on.
To switch on the compartment, press the button shown in the figure for more than one second until the symbol lights up.
The light symbol indicates that the compartment is working. Press the button again for more than one second to switch off the compartment. To switch off the compartment completely, you must remove the cover.
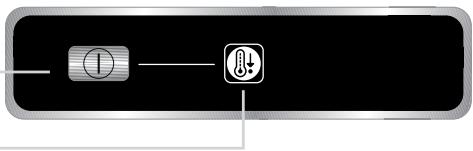
For the correct functioning of the "Zero Degrees" compartment, it is necessary:
- The refrigerator compartment must be switched on
- The temperature must be between +2°C and +6°C
- When the appliance is switched on, the "Zero Degree" compartment is supplied and switched on.
- It is switched off from the special functions unless it is not disabled: readiness, cooling-off, vacation (if available), in which case the compartment is delayed, it is switched on again.
Note:
- If the symbol does not light up when you switch on the compartment, check that the drawer is correctly inserted; if the problem persists, contact the technical support department. If the compartment is switched on and the drawer is open, the control panel symbol may switch off automatically. The symbol will light up again when the drawer is inserted.
- Regardless of the state of the compartment, you may hear a slight noise, which should be considered normal.
- When the compartment is not working, the temperature in it depends on the ambient temperature in the refrigerator compartment. In this case, we recommend that foods that are not sensitive to cold (e.g., dairy products, onions, potatoes, spinach, lettuce, etc.) be stored in it.
Important: If the compartment is switched on and there is food with high water content, condensation may form on the shelves. In this case, switch off the function temporarily. Pay special attention when placing food and containers with a small size on the upper shelf and in the "Zero Degree" compartment, to prevent accidental contact between the shelf and the rear wall of the refrigerator compartment.
Removing the "Zero Degree" compartment:
Pull out the special shelves:
- To facilitate the removal of the compartment, we recommend that you empty it (and possibly remove) the additional shelves on the door - switch off the compartment - remove the compartment by lifting it upwards - remove the white plastic cover under the compartment.
Note: the guides and supports cannot be removed.
To use the "Zero Degree" compartment again, place the white plastic cover back under the compartment, insert the drawer and switch on the function again.
To increase the volume in the refrigerator and reduce energy consumption, it is recommended to switch off the "Zero Degree" compartment and remove it.
Clean the compartment and its components using a soft cloth with warm water (and pay attention to avoid wetting the white plastic cover under the drawer) and neutral detergents specially designed for cleaning the interior of the refrigerator. Do not use abrasive detergents.
Before cleaning the compartment (drawer), it is necessary to remove the drawer to switch off the supply to the compartment.
TECHNICAL SUPPORT DEPARTMENT
Before contacting the Technical Support Department:
Restart the device to check if the problem is not resolved. If not, turn off the device and repeat the procedure after a while.
If after performing the checks, following the troubleshooting guide, and restarting, the device still does not work properly, contact the Technical Support Department, describe the problem and follow:
Device malfunction type
Device model and serial number (see the rating plate with the main data) - service code (if available) (see after pressing the "SERVICE" button on the rating plate with the main data, placed inside the device)
SERVICE 00000000000
Note:
Repair of the device, if performed by the Technical Support Department, is not considered a claim under the warranty.
| Българсн | Инструкции за у鞘тpeба | Станица 4 |
| HRVAT | Uputama za uporabu | Stranica 10 |
| ROMÁNă | Instruktiuni de/utilizare | Pagina 16 |
| SRPSKI | Uputstvo za upotrebu | Strana 22 |
FIRST USE
- The refrigerator compartment should be switched on
- The temperature is between +2°C and +6°C
Note:
Perform these steps:
Models with internal compartment
(LED)
(1)
(1) ε = 0. C4^2
()00
g
(LED)
(LED)
(1) Egill C
aall aie aiaaiiae aae Jy Jaaiaai (LED) 111
jglal pdlilp 1
aIbI Juae Ibaia Jla
J
a jlll llllll lllllll
J
a a a a a a a a a a a a a a a a a a a a a a a a a a a
a a a a a a a a a a a a a a a a a a a a a a a a a a a
__SUPPIMER__
STOP FROST
STOP FROST
STOP FROST
STOP FROST
STOP FROST
STOP
FROST
STOP FROST

i-
Therefore, 4k > 3l.
(1)
Therefore, 4k > 3l.
Therefore, SΔ = SΔ.
Instructions for use
Instructions for use
Switching on the appliance
- Plug in the appliance
- When the appliance is plugged in, it is normally factory set to a temperature of 5°C.
Adjusting the temperature
For temperature adjustment, see the enclosed product sheet.
Note:
Ambient air temperature, the frequency of door opening, the introduction of hot food and unsuitable appliance positioning can all affect the internal temperature of the refrigerator, which may differ from that shown on the display.
Storing food in the refrigerator compartment:
Cover food to prevent it drying out. The distance between the shelves and the rear wall inside the refrigerator ensures the free circulation of air. Do not place food in direct contact with the rear wall of the refrigerator compartment. Do not place hot food in the refrigerator. Store liquids in closed containers.
Important:
Storing vegetables with a high water content can cause condensation to form on the glass shelves; this will not affect the correct operation of the appliance.
MEAT & FISH BOX (depending on model)
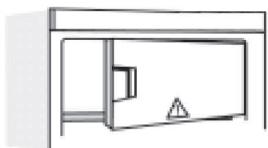
The Meat & Fish box was designed specially to keep foods fresher for longer, without altering nutritional values or original freshness. Do not store fruit or vegetables in this box, as the temperature may drop below 0°C, causing water contained in the food to freeze.
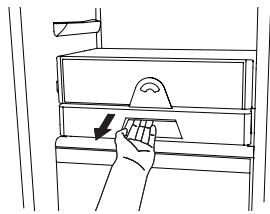
Temperature Adjustment
The temperature inside the Meat & Fish box is indicated by the position of the arm on the door of the box, and depends on the general temperature of the refrigerator compartment.
We recommend setting the temperature of the refrigerator compartment between +2° and +6°. To work out if the temperature inside the Meat & Fish box is correct, refer to the pictures below:
When the arm points to the left, you need to raise the temperature in the refrigerator compartment.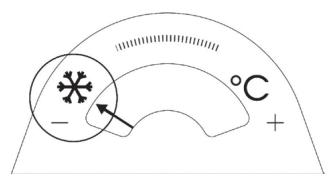
When the arm is in the middle, the temperature is ok.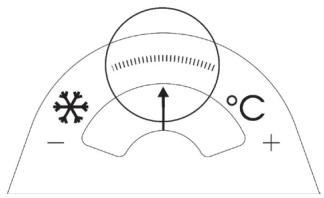
When the arm points to the right, you need to lower the temperature in the refrigerator compartment.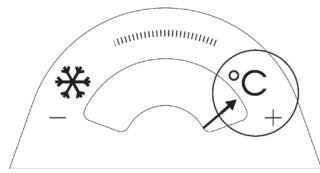
Important: when the function is activated and foods with a high water content are present, condensation may form on the shelves. In this case, disable the function temporarily.
Removing the Meat & Fish compartment:
To ensure correct operation of the product, adequate preservation of food and to optimise energy consumption, it is advisable not to remove the Meat & Fish compartment if the symbol (see Quick Guide) is not present on the control panel. In all other cases, the Meat & Fish compartment can be removed to obtain more space inside the refrigerator.
Proceed as follows:
- Remove the compartment drawer (Figure 1).
- Remove the drawer cover by releasing the bottom side clips (Figure 2).
To reinstate the Meat & Fish compartment, make sure to refit the drawer cover before inserting the drawer and reactivating operation.
- Press the "Meat & Fish compartment function" button on the control panel for 3 seconds, until the yellow indicator goes off.
To optimise energy consumption, it is advisable to deactivate the Meat & Fish compartment and remove its components (except the shelf above the crisper drawers).
Fig. 1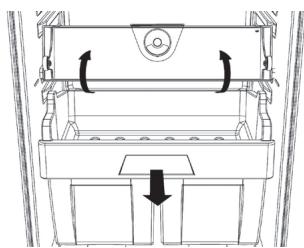
Fig. 2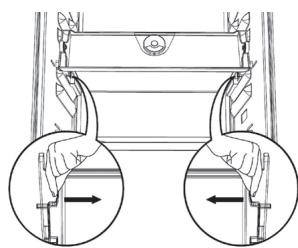
"ZERO DEGREES" BOX (depending on the model)
The "Zero Degrees" box is specifically designed to maintain a low temperature and a suitable humidity level, in order to keep foods fresher for longer (e.g. meat, fish, fruit and winter vegetables).
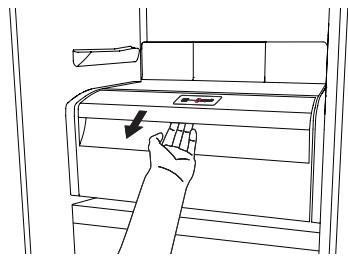
Activating and deactivating the box
The temperature inside the box, when active, is approximately 0° .
To activate the compartment, press the button shown in the figure for more than 1 second, until the symbol lights up
The symbol lit indicates that the compartment is functioning. Press the button again for more than 1 second to deactivate the compartment
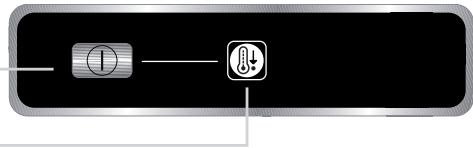
The following factors are vital for the "Zero Degrees" box to work properly:
- the refrigerator compartment must be switched on
- the temperature of the refrigerator compartment must be between +2°C and +6°C
- the box must be inserted to enable activation
- no special functions must have been selected (Standby, Cooling-Off, Vacation – where applicable).
If one of these special functions has been selected, the "Zero Degrees" box must be deactivated manually, and any fresh food inside it removed. If manual deactivation does not take place, the box will be deactivated automatically after 8 hours.
Note:
- if the symbol does not light up when the box is activated, check that the box is properly inserted; if the problem persists, contact your nearest authorized After-sales Service
- if the box is active and the drawer open, the symbol on the control panel may be deactivated automatically. If the drawer is inserted, the symbol will become active again
- irrespective of the state of the box, a slight noise may be heard: this is normal and is not a cause for concern.
- when the box is not active, the temperature inside it depends on the general temperature inside the refrigerator compartment. In this case, we recommend it is used to store fruit and vegetables which are not sensitive to cold temperatures (fruits of the forest, apples, apricots, carrots, spinach, lettuce, etc.).
Important: If the function is activated and food with high water content is present, condensate may form on the shelves. In this case, temporarily deactivate the function.
When placing small containers and food products on the top shelf of the "zero degrees" compartment, make sure they do not accidentally fall between the drawer and the back of the refrigerator compartment.
Removing the "Zero Degrees" box:
The "Zero Degrees" box can be removed to create more space inside the refrigerator. In this case proceed as follows:
- To facilitate removal, we recommend emptying (and if necessary, removing) the two lower door trays.
- Switch off the box.
- Pull out the drawer and the white plastic shelf underneath the box.
Note: the upper shelf and the side supports cannot be removed.
To restore "Zero Degrees" box operation, make sure you replace the white plastic shelf underneath the box before inserting the drawer and reactivating the function. To optimise energy consumption, we recommend you deactivate the "Zero Degrees" box and remove it.
Clean the box and all its parts regularly, using a cloth and a solution of warm water and neutral detergent specifically formulated for refrigerator interiors (take care not to immerse the white plastic shelf underneath the box in water).
Before cleaning the box (including the outside), remove the drawer so as to disconnect the box from the electricity supply.
Never use abrasive detergents.
HOW TO USE THE FREEZER COMPARTMENT (if present)
The freezer compartment ★★★★ can also be used for freezing fresh food. The quantity of fresh food that can be frozen in 24 hours is shown on the rating plate.
Freezing fresh food
- The recommended position for fresh food is that indicated in Fig. 1, if a wire shelf is present, or that in Fig. 2 for models with no wire shelf.
- Place food in the middle of the compartment, making sure it does not touch already frozen food, but is placed at a distance of approx. 20 mm (fig. 1 and 2).
The table alongside shows the recommended maximum storage time for frozen fresh foods.
When purchasing frozen food products:
- Make sure the packaging is not damaged, since the product quality may have deteriorated. If the package is swollen or has damp patches, it may not have been stored under optimal conditions and defrosting may have already begun.
- When shopping, leave frozen food purchases until last and transport the products in a thermally insulated cool bag.
- Place the items in the compartment as soon as you get home.
- If food has defrosted even partially, do not re-freeze it. Consume within 24 hours.
- Avoid, or reduce temperature variations to the minimum. Respect the best-before date on the package. Always follow the storage instructions on the frozen food packages.
Making ice cubes
- Fill the ice cube tray 2/3 full and place it in the compartment * ***.
- Do not use sharp or pointed instruments to detach the tray if it is stuck to the bottom of the compartment.
- Bend the ice tray slightly to remove the cubes.
Fig. 1 Fig. 2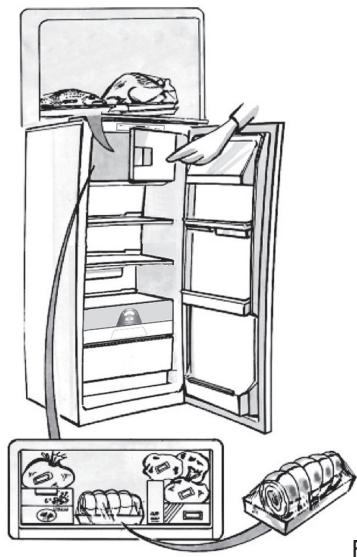
| 1-3 | |||
| 4-7 | |||
| 8-12 |
HOW TO DEFROST THE APPLIANCE
Before defrosting the appliance, unplug it or switch off the power at the mains. Defrosting of the refrigerator compartment is completely automatic. Droplets of water on the rear wall of the refrigerator compartment indicate that the periodic automatic defrost cycle is in progress. The defrost water is automatically routed to a drain outlet and into a container from which it evaporates.
Clean the defrost water drain outlet regularly using the tool supplied with the appliance in order to ensure defrost water is removed correctly. (Fig. 1)
Defrosting the compartment **** (if present)
Defrost the *** compartment once or twice a year or when ice formation is excessive. It is perfectly normal for ice to form. The amount of ice which forms and the rate at which it accumulates will vary depending on ambient conditions and the frequency with which the freezer door is opened. Ice formation is concentrated at the top of the compartment and does not affect the efficiency of the appliance.
If possible, defrost the freezer when it is nearly empty.
- Remove the food from the freezer compartment and group together in a cool place or in a cool bag.
- Leave the door open to allow the frost to melt.
- Clean the interior of the freezer with a sponge and warm water and/or neutral detergent. Do not use abrasive substances.
- Rinse the interior and dry thoroughly.
- Put the food back into the freezer.
- Close the door.
Plug the appliance back in and switch on, following the instructions in chapter "How to operate the refrigerator compartment". The settings and selections made prior to switching off will be restored.
Fig. 1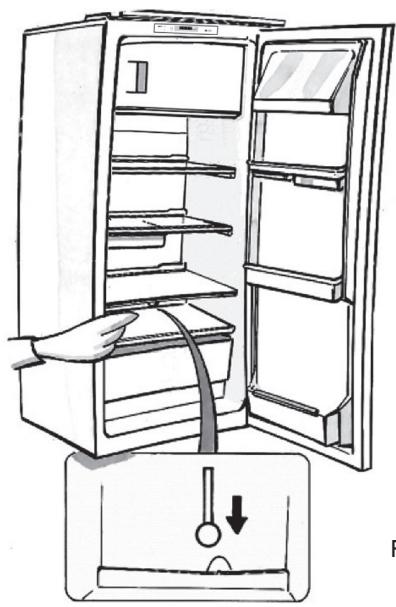
CLEANING AND MAINTENANCE
Before any cleaning or maintenance operation, unplug the appliance from the mains or disconnect the electrical power supply.
- Clean the inside of the refrigerator compartment periodically with a sponge dampened in warm water and/or neutral detergent. Rinse and dry with a soft cloth. Do not use abrasive products.
- The separators must not be washed in water but simply cleaned with a damp sponge.
- Clean the inside of the freezer compartment when defrosting.
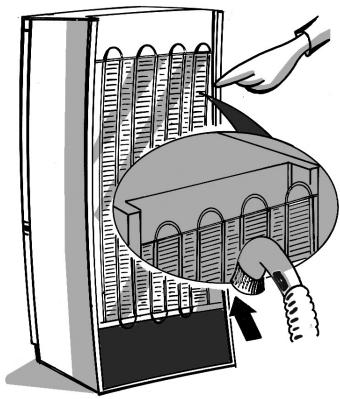
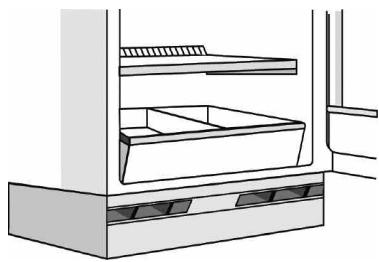
- Clean the air vents and condenser at the rear of the appliance regularly with a vacuum cleaner or brush.
- Clean the outside with a damp cloth. Do not use abrasive products, scourers, stain-removers (e.g. trichlorethylene, acetone) or vinegar.
Prolonged disuse
- Empty the refrigerator.
- Disconnect the appliance from the mains power supply.
- Defrost and clean the interior.
- In the event of prolonged disuse, leave the appliance door open to prevent mould, odours and oxidation from forming.
- Clean the appliance.
- Clean the inside of the low temperature compartment (where present) when defrosting.
- Clean the inside of the refrigerator compartment periodically with a sponge dampened in warm water and/or neutral detergent. Rinse and dry with a soft cloth. Do not use abrasive products.
AFTER-SALES SERVICE
Before contacting the After-Sales Service:
- See if you can solve the problem yourself with the help of the Troubleshooting guide.
- Switch the appliance off and then on again to check if the problem has been eliminated. If it has not, switch the appliance off again and repeat the operation after one hour.
- If the problem persists after this course of action, contact After-Sales Service.
Specify:
the type of fault and the appliance model
- The Service number (the number after the word SERVICE on the rating plate inside the appliance)
- Your full address
- Your telephone number and area code
SERVICE
0000 000 00000
Note:
The direction of door opening can be changed. If this operation is performed by After-Sales Service it is not covered by the warranty.
INSTALLATION
- Install the appliance away from heat sources. Installation in a hot environment, direct exposure to the sun or installation near heat sources (heaters, radiators, cookers) will increase power consumption and should therefore be avoided.
- If this is not possible, the following minimum distances must be respected:
- 30 cm from coal or paraffin stoves; -3 cm from electric and/or gas stoves.
- Fit the spacers (if supplied) on the rear of the condenser positioned at the back of the appliance.
- Install the appliance in a dry, well-ventilated place, and ensure it is level, using the front adjustment feet if necessary. Clean the interior.
- Fit the accessories.
- Regulations require that the appliance be earthed. The manufacturer declines all liability for injury to persons or animals and for damage to property resulting from failure to observe the above procedures and reminders.
- If the plug and socket are not of the same type, have the socket replaced by a qualified electrician.
- Do not use extension leads or adapters.
Disconnecting the appliance
It must be possible to disconnect the appliance by unplugging it or by means of a two-pole switch fitted upline of the socket.
Electrical connection
- Electrical connections must be made in accordance with local regulations.
- Voltage and power consumption are indicated on the rating plate inside the appliance.
ELECTRICAL CONNECTION FOR GREAT BRITAIN AND IRELAND ONLY
Warning - this appliance must be earthed
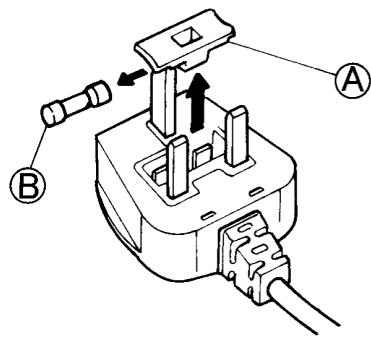
Fuse replacement
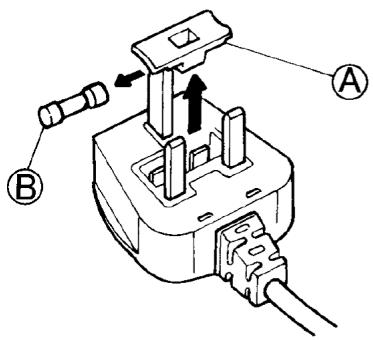
If the mains lead of this appliance is fitted with a BS 1363A 13amp fused plug, to change a fuse in this type of plug use an A.S.T.A. approved fuse to BS 1362 type and proceed as follows:
- Remove the fuse cover (A) and fuse (B).
- Fit replacement 13A fuse into fuse cover.
- Refit both into plug.
Important:
The fuse cover must be refitted when changing a fuse and if the fuse cover is lost the plug must not be used until a correct replacement is fitted.
Correct replacement are identified by the colour insert or the colour embossed in words on the base of the plug.
Replacement fuse covers are available from your local electrical store.
For the Republic of Ireland only
The information given in respect of Great Britain will frequently apply, but a third type of plug and socket is also used, the 2-pin, side earth type.
Socket outlet / plug (valid for both countries)
If the fitted plug is not suitable for your socket outlet, please contact After-sales Service for further instruction.
Please do not attempt to change plug yourself. This procedure needs to be carried out by a qualified technician in compliance with the manufactures instructions and current standard safety regulations.
HOW TO OPERATE THE REFRIGERATOR COMPARTMENT
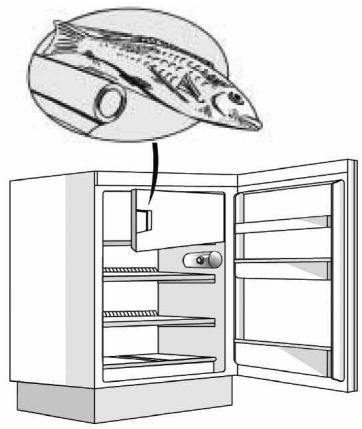
MEAT AND FISH COMPARTMENT
STARTING THE APPLIANCE
CLEANING AND MAINTENANCE
Temperature regulation
Temperature regulation
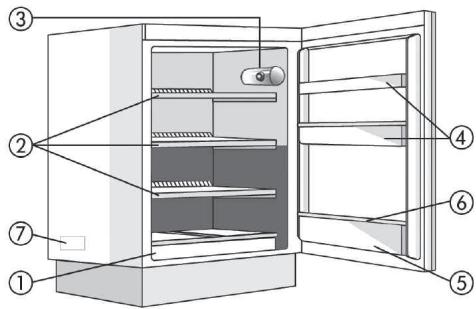
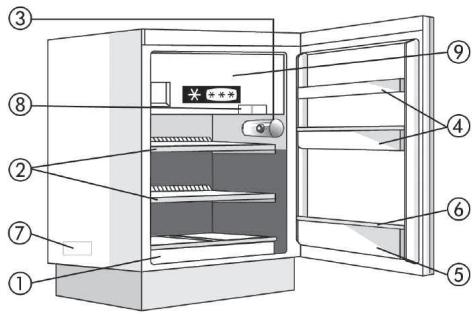
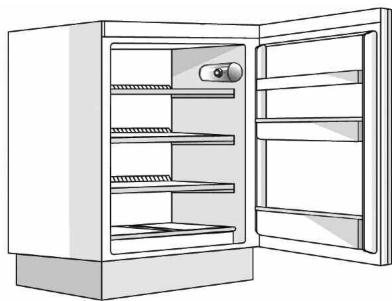
A. Refrigerator compartment
- Fruit and vegetable drawer
- Shelves / Shelves with shelf
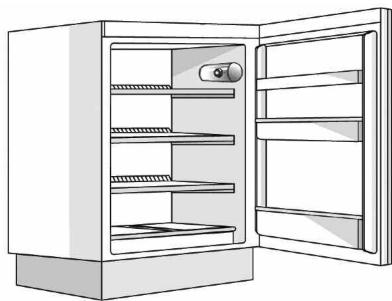
- Thermostat control knob and light switch
- Door compartments
- Bottle shelf
- Removable bottle holder
- Rating plate (on the side of the fruit and vegetable drawer)
- Ice cube tray
- Low temperature compartment door
B. Low temperature compartment, if marked

Coldest zone

Note: The number of shelves and door compartments may vary depending on the model. All shelves, door compartments, and interior fittings are removable.
Important: Do not place the refrigerator in a dishwasher.

Important: Close the appliance doors!
CONTROL ELEMENTS
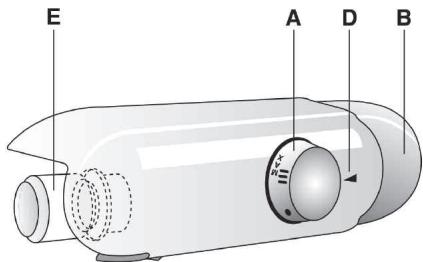
A. Thermostat knob B. Light switch D. Thermostat indicator E. Lamp
Preparation of ice cubes
Remove the ice tray and place it in the low-temperature compartment.
If the tray is frozen to the bottom of the low-temperature compartment, do not attempt to separate it with sharp or cutting tools.
DEFROSTING AND CLEANING THE LOW-TEMPERATURE COMPARTMENT
To ensure proper operation of the device, it is recommended to defrost the low-temperature compartment at least twice a year, and also when the ice layer thickness reaches 3 mm. If possible, defrost the freezer when it contains a minimum of products.
- Remove all products from the freezer, wrap them in newspaper, and place them tightly together in a cool place or in a thermos bag.
- Disconnect the appliance from the power supply.
- Leave the doors open to speed up the melting of the ice.
- Remove the melted water with a sponge.
- Clean the compartment with a sponge soaked in a warm solution of neutral detergent. Do not use abrasive agents.
- Rinse with water, then thoroughly dry all surfaces.
- Warning: Do not use sharp or cutting tools to remove the ice. Do not heat the low-temperature compartment with artificial heat sources.
CLEANING THE REFRIGERATOR COMPARTMENT
Regularly clean the refrigerator compartment. Defrosting of the refrigerator compartment occurs automatically.
Drops on the inner wall of the refrigerator indicate that automatic defrosting is currently being performed. The water drains through the drain hole into a special container, where it evaporates.
Do not use abrasive cleaners.
CLEANING AND CARE
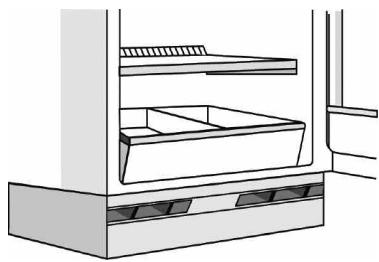
- Periodically clean the ventilation grilles and the condenser on the back of the appliance with a vacuum cleaner or a brush.
- Wash the appliance with a soft cloth.
During prolonged absence
- Remove products from the refrigerator and freezer compartments.
- Disconnect the appliance from the power supply.
- Defrost the freezer compartment, wipe both compartments dry.
- Leave the doors open to prevent the formation of unpleasant odors.
ENERGY SAVING TIPS
- Place the appliance away from high temperatures and direct sunlight, do not install it near radiators or gas stoves, as all this leads to increased energy consumption.
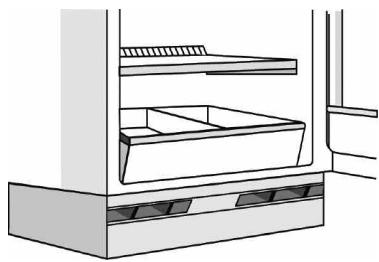
- Do not block the ventilation openings of the appliance. To defrost products, place them in the refrigerator compartment to use the cold released by frozen products. Reduce the frequency and duration of door openings. Do not put hot products in the refrigerator compartment. Do not leave the freezer door open.
TROUBLESHOOTING
1. The appliance does not work.
- The plug is poorly inserted into the socket?
- Is the power supply disconnected?
- Has the fuse blown?
- Is the thermostat in the correct position?
2. Insufficient temperature in the compartments.
Is the door not closed properly? - Is the appliance installed near a heat source? - Incorrect thermostat settings? - Are the ventilation grilles blocked?
3. Temperature too low in the refrigerator compartment.
- Incorrect thermostat settings?
5. The internal light does not work.
Perform the checks indicated in point 1, after which
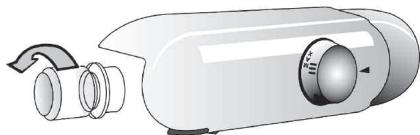
- Disconnect the appliance from the electrical supply. Replace the blown bulb. The power of the new bulb must match the original and not exceed the maximum value (W) indicated next to the socket. To replace the bulb, unscrew it counterclockwise as shown in the figure.
It is necessary to install the fuse cover in place. If the cover has been lost, do not use the plug until a replacement cover has been installed.
With a star marking.
Recommended storage times for frozen products are indicated on the packaging.
When purchasing frozen products, follow the instructions on the packaging.
Check that the packaging is not damaged, as this could lead to product damage. If the packaging is bent or has damaged areas, possibly due to poor storage conditions, the product in the packaging may start to thaw. - When shopping, buy frozen products last and transport them in a thermal bag. Place products in the compartment with the lowest temperature, if possible. - If products have partially thawed, do not refreeze them. Such products should be consumed within one day. - Avoid or minimize temperature fluctuations.
Consume the product within the period of best quality, the expiration date indicated on the packaging.
Always adhere to the storage conditions for frozen products as indicated on the packaging.
Freezer ice cube tray
- Fill the ice cube tray with water to 3/4 and place it in the lower compartment of the low-temperature section.
It is forbidden to use sharp objects to remove the tray if it is stuck to the lower compartment.
THAWING OF THE LOW-TEMPERATURE COMPARTMENT
For optimal performance, it is recommended to thaw the low-temperature compartment at least once a year or when the frost layer on the walls reaches about 3 mm. If possible, thaw the freezer when it is almost empty.
- Remove products from the freezer, wrap them in newspaper and place them in a cool place or in a cooler bag.
- Turn off the appliance at the power source.
- Leave the door open so that the frost melts.
- Sponge-like ice scraper.
- Clean the compartment with a cloth soaked in warm water and a neutral cleaning agent. Do not use abrasive agents.
- Rinse and dry the compartment thoroughly.
- Caution. Do not attempt to remove the ice with sharp metal instruments; do not heat the low-temperature compartment with external devices.
Periodically clean the inner surface of the cold compartment.
Defrosting of the cold compartment must be done automatically.
The water formed on the inner walls of the cold compartment drains through the drain hole and collects in a container, from where it evaporates.
Regularly clean the drain hole of the defrost water using the tool provided with the appliance. Before performing any maintenance or repair, disconnect the appliance from the power supply.
Use a sponge soaked in warm water and/or a neutral detergent. Rinse and dry with a soft cloth. Do not use abrasive agents.
CLEANING AND MAINTENANCE
Regularly clean the ventilation openings and the condenser on the rear wall of the appliance with a brush or vacuum cleaner. Clean the exterior surfaces with a soft cloth.
During prolonged absence
- Remove all food from the refrigerator and the freezer compartment.
- Disconnect the appliance from the power supply.
- Defrost the freezer compartment and clean and dry the interior of the appliance.
- Leave the door open to prevent the formation of unpleasant odors.
Troubleshooting guide:
- If the appliance does not operate, check the power supply and the thermostat setting. If the problem persists, contact the service center. Do not attempt to repair the appliance yourself.
- Do not use the device if the temperature is above the maximum allowable. If any signs of damage are found, do not use it. For 24 hours, keep it in a dry place.
- Do not use or store the device below the minimum temperature. Use it only within the specified temperature range.
- Do not use the device if it has been dropped or if the accessories are damaged.
Making ice cubes
Cut the ice cubes into 3/4 pieces and place them in the water tank. If the ice cubes are stuck in the water tank, use a tool or hot water to remove them.
Using the water tank
For optimal performance, fill the water tank with cold water up to the MAX mark, about 2/3 full. If possible, fill it just before use.
- Remove the tank from the device, place it on a newspaper, and fill it with clean water or filtered water.
- Close the lid securely after filling.
- To avoid damage to the device or the tank, do not use hot water.
- Rinse the tank with clean water. 5. Clean the tank with a soft cloth and mild detergent. Do not use abrasive cleaners.
- Dry the tank thoroughly.
Note: Do not use sharp or hot objects to remove the ice; do not scratch the water tank with metal objects.
Using the ice tray
Clean the ice tray with a soft cloth.
To adjust the white balance, only automatic devices are difficult to operate.
To adjust the white balance, the color temperature can be adjusted manually using the automatic adjustment process. Before adjusting, turn on the device, then place it in the container, and adjust.
Before adjusting the water temperature, make sure the water is not too hot, otherwise the water may splash.
Do not place the device near flammable materials or in a place where it can be easily knocked over.
Do not use a sponge that has been in contact with water and/or chemicals to clean the device.
- Do not touch the device with wet hands. Do not pull the power cord.
CLEANING AND MAINTENANCE
Before cleaning, unplug the device from the power outlet and let it cool down. Clean the device with a soft, damp cloth.
For household use only
- Do not immerse the device in water or any other liquid.
- Do not pull the power cord to unplug the device.
- Before cleaning, unplug the device and let it cool down completely.
- To prevent any risk of electric shock, do not open the device.
POWER SUPPLY CONNECTION
Do not operate the device at temperatures higher than the specified range and do not expose it to direct sunlight. Do not place it near heat sources or open flames. Do not use the device for purposes other than its intended use. To adjust the temperature, set the device to the desired temperature and wait for it to reach that temperature. Do not immerse the device in water. Do not place the device on a hot surface. - Do not leave the device unattended while it is in operation.
1. Check that the device is connected to the mains.
- Is the plug inserted correctly? Is the socket working properly?
- Is the main power cord damaged?
- Is the safety thermostat triggered?
- Is the thermostat set correctly?
2. The temperature in the heater is too low.
Is it covered? Is the air inlet or outlet blocked? Are the thermostat parameters correct? Are the air analysis ports clean?
3. The heater temperature is too high.
- Are the thermostat parameters correct?
4. Water is leaking under the heater.
- Are the connections tight?
5. The heater makes noise.
If the problems are not resolved, contact the service center:
Disconnect the device from the mains. - Check the device and power cord for visible damage. - To replace the device, contact the service center as shown in the figure.
6. Temperature of the heating surface of the boiler is normal.
- The temperature of the heating surface is within the permissible limits?
Check:
- The boiler operator must perform a set of works (including analysis of water chemistry, adjustment and testing...) - this is the operator's duty.
CALL FOR SERVICE
Contact the service organization:
1. Turn off the boiler and let it cool down. 2. To inspect/repair, open the boiler cover again. If not, carefully open the boiler cover and after visual inspection close it again. 3. If the problem persists after these actions, contact the service organization.
Provide the following information:
Boiler type, model, serial number (according to the nameplate on the boiler),
SERVICE (service) department after-sales service number,
Your full name, phone number and email address.
SERVICE
0000 000 0000
Check:
This operation should be performed by a qualified specialist. If this operation is performed by the service organization, it is not covered by the warranty.
OPHATY
KypblfblHb Kbl3y Ke3epiHeH anlwaK opHaTbHbI3 (eh XaKaBH apakaBbIKbK: KMeip KHe 6anaybI3 neWTepiHc 30 cm, PnITanap MeH 3neKtpnik nicipy nnITanapbIHn H 3 CM. KypblfblbkypKa,kaKcbjXeIeTietiH Xepre opHaTbHb3. KypbInfBbHbHaaya caHbIayJaPaHa Keepri KeMecin. Iuki6eJIirIH Ta3aJHaHbI3 (KaTbICTbI TapaynapdbI KePiH3). - Bepinre H KepeK-XapaKaTapdbi 6eKiTiH3.
TynbIKanybI Tanap etiJeDi. OHdpywi XorapbJa KepceTirren npoecdypanap MeH eckepTynepiOpbIHdAmay HTNXeciHde opBH aTaTBn aam HeMeCe XaHyap XapaKaTbMIeH MyNIkTIH 3aKbIMaYbI yWiH ew XayanKepeWiniKiTi MOBbHdaMaNbI.
- Erep asha men po3etka 6ip-6ipine cai KeIMece, po3etkHaHbI 6iJIkTi MAmaHfA ayblCTbIPtBhl3. ¥3apTkblIup Hemece aanTepepepi naDanaHbAHy3
KypbIJIfblHbl axbIpaTy
KyaT Ke3iH axbipaty KypblfblHbI HeMece po3eTKaHbIH XOFapfbXaftbHa opHaJaCKaH Koc nonIOCTI KockblshbH eWipy apkblbIMymkiH 6onybl KaKeT.
3NEKTP CbIMdAPbIH JKAJFAY
3NeKtp KocbIbIMap XeprijikTi 3aHHaMaFa CcIKec OpbHdaJybl Tnic. Kephey KəHe Kyat TybIHy MJIiUepi KEmic cany TapTnacbHbI 6yNipHderi DepeKTep TaKTacbIHda KepcetilreH. -Epexe 6oynbIHwa KypblfblHbHxepre
TEK YIbIbPITAHnA MEH INPJIaHdNIAFA APHAJFAH 3JIeKTPJIk KOCbIJbIM
EckepTy - 6yn KypbInfbl Jkepre Tynbiktanybl KepeK
CaKaTHdbIpyfblWtblaybICtbipy
Erep KpybIfblHbI JKeJIiIK cbIMbl BS 1363A 13 amnepi 6aJIbIbIbI aIbIPMeH Ka6bIKtaIFAH 6oNca, ocb typeri aIbIPdbIH caKaTHdbIpflbIH ayBICbpy ywiH,A.S.T.A. pactaraH caKaTHdbIpflbTI BS 1362 typHe naindaNaHbIbIz KHe KeLeciDee apeket etinj3:
- CaKaTHaBbIPbBII KaKNaBbIH (A) KHe caKaTHaBbIPbBIIbTbI (B) anbIn TaCTaHbI3.
- AImactby 13 A caKaTaHDbipfbIiTbI KaKnaK iUiHe CaJIbIHbI3.
- Ekeyi De aaiip iuhe KaiaTa opHaTbHbI3.
Controls:
When the appliance is operating, the required temperature must be maintained. If the required temperature is not maintained, the appliance must be checked by a specialist.
The appliance should be installed in a dry, well-ventilated place, away from heat sources and direct sunlight.
The appliance must be connected to the electrical supply through a properly installed socket with an earth connection.
Republic of Kazakhstan
Mains socket / Power cord (for two-door models)
If the power cord is damaged, it must be replaced by the manufacturer, its service agent, or similarly qualified persons in order to avoid a hazard. The power cord must be replaced with an original spare part. The replacement must be carried out by qualified personnel in accordance with the safety standards and regulations.
Gebrauchsanweisung Instructions for use Mode d'emploi Gebruiksaanwijzing Istruzioni per l'uso
Brugsanvisning Bruksanvisning Käyttöohje Manuel d'utilisation Instruções para o uso

The appliance you have just bought, marked by the symbol , allows the freezing - in of fresh and cooked food, the production of ice cubes and the storage of frozen food. Please read these instructions carefully, as they include a description of your appliance and the useful hints to enable you to achieve the best performances required to freeze fresh food and to store already frozen food.
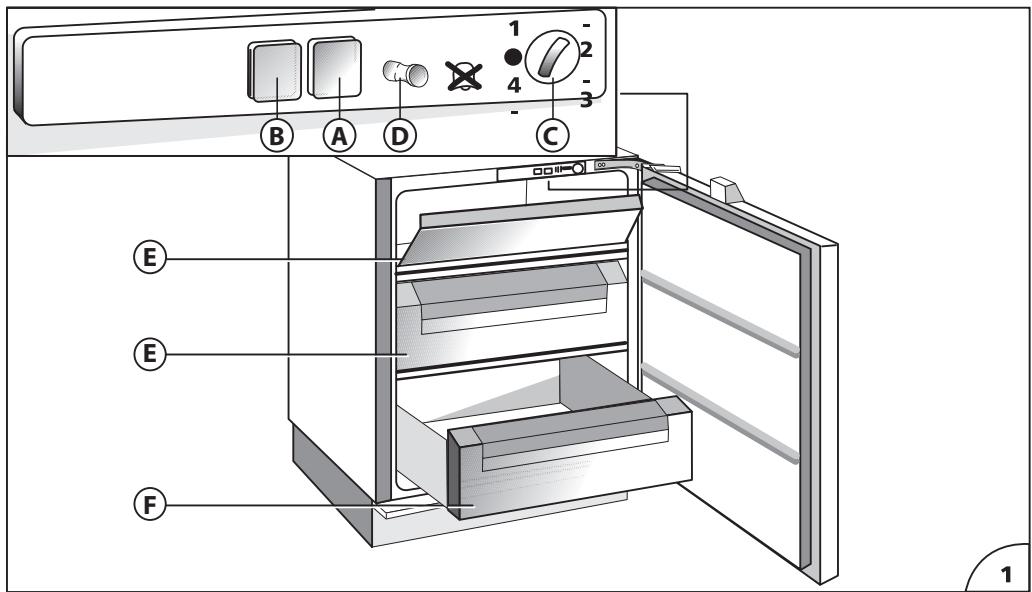
DESCRIPTION OF THE APPLIANCE (Fig. 1) Control panel
A) Operation control lamp (green light) B) Temperature control lamp (red alarm light) C) Temperature control knob (thermostat) D) Open door alarm switch (if present) E) Baskets (freezing - in and storage baskets) F) Storage basket only. G) Eutectic system: remove from drawer F and insert into the high compartment E to optimise the product's consumption.
Some models are supplied with containers filled with cooling liquid (eutectics).
INSTALLATION
Ensure that the appliance is not damaged. Transit damages must be reported to your dealer within 24 hours of receipt of the appliance. The appliance should not be installed close to heat sources such as cookers, central heating, boilers, sunlight, etc. It must however be located in a well ventilated dry space.
Attention: Accessibility to the plug has to be guaranteed even after installation of the appliance to disconnect it, if required. Alternatively, connect the appliance to the mains by means of a two-pole switching device with contact separation of 3 mm situated in an accessible position.
ELECTRICAL CONNECTION AND OPERATION
Please check that the voltage indicated on the rating plate situated inside the compartment corresponds to the voltage in your home. The earthing of this appliance is compulsory by law. The manufacturer will accept no liability for injury to persons or damage to objects arising from the non observance of this requirement.
When the appliance is plugged in, if the thermostat knob is not set to symbol •, the green and the red lamps (A) and (B) (Fig. 1) light up. The green control light always remains alight and indicates the operation of the appliance. The red control light remains alight until the set operation temperature has been attained. It lights up again when the temperature inside the freezer rises due to frequent or prolonged door opening, and when the appliance has been loaded with fresh food to be frozen.
ADJUSTMENT OF THE TEMPERATURE
The thermostat (Fig. 1) controls the temperature inside the appliance. Position • indicates that the operation of appliance is interrupted. The ideal storage temperature of frozen food for a long time is -18°C. In normal ambient conditions (temperature between +20°C and +25°C), we suggest you adjust the thermostat control knob to a middle position. To obtain colder or warmer temperatures than -18°C, turn the thermostat control knob to the highest or lowest setting respectively. We remind you that internal temperatures are affected by the location of the appliance, the temperature of the surrounding air, the frequency of the door opening. The setting of the thermostat may have to be varied to allow for these factors. To check the temperature of the food stored, place the thermometer (if delivered) under the food; if it is placed on the food it will indicate the temperature of the air which does not correspond to that of the food stored.
USE OF THE FREEZER COMPARTMENT
This appliance is equipped with an acoustic alarm which sounds when the door is left open (if present).
FREEZING IN (Fig. 2)
The amount of fresh food which can be frozen in a 24 hours period at an ambient temperature of +25°C is stated on the rating plate.
Do not store warm foods in the freezer. Never re-freeze partially or completely defrosted foods. Prepare and wrap foods to be frozen in aluminium or plastic foils or place them in appropriate containers. Label the packets indicating the freezing-in date and the contents. The freezer compartment maintains the storage temperature for 15 hours approx. even in case of power failure.
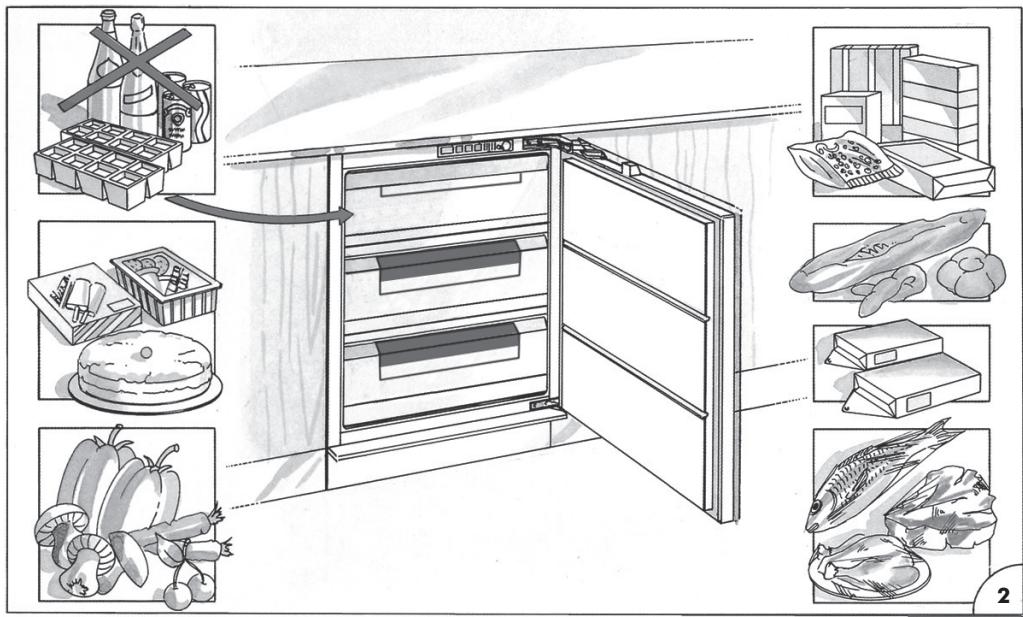
We suggest however you leave the door closed during this time.
Fizzy drinks should not be frozen and some products, such as flavoured water ices, should not be consumed too cold.
Note: Due to the efficiency of the door seal, it is not always possible to open the freezer door immediately after closing it. Wait some minutes before trying to open it.
PRODUCTION OF ICE CUBES
3/4 fill the ice cube trays with water and place them in the low temperature compartment. If the trays stick to the bottom of the compartment, do not detach them with sharp or cutting instruments, which could damage the appliance. Use, if necessary, the handle of a spoon. To allow removal of ice cubes from plastic trays, bend them slightly.
Attention: Do not eat ice cubes or ice lollies immediately after removal from the low temperature compartment as they may give rise to cold burns.
STORAGE OF FROZEN FOOD
When buying frozen food, it is suggested to use thermal bags or cold boxes. They should be the last purchases made and should be well wrapped in newspaper. When home, store them in the compartment, with the least possible delay. In any case these foods have to be used within the date printed on the packet.
THAWING
Here are some basic suggestions:
Raw vegetables: Do not thaw - put straight into boiling water and cook as usually.
Meat (large cuts): Thaw in the refrigerator without unwrapping them. Before cooking, leave at room temperature for some hours.
(Small cuts): Thaw at room temperature or cook directly.
Fish: Thaw in the refrigerator without unwrapping or cook directly before being completely thawed.
Previously cooked food: Re-heat in the oven without removing from its aluminium container.
Fruit: Thaw in the refrigerator.
DEFROSTING
Generally you need to defrost two or three times a year when the layer of frost reaches a 3 mm thickness. We suggest you periodically remove the frost from the freezing plate by means of a plastic scraper. Avoid using sharp or cutting instruments. Defrosting should be carried out when the quantity of food stored is minimum. Wrap the frozen food into several layers of newspaper (or in a cover) and place them in the refrigerator or in a cool place. Adjust the thermostat control knob to position, disconnect the appliance from the mains and leave the door open. Remove the baskets by pulling forward and up. Do not use commercial defrosting products as they could contain dangerous components. At completion of defrosting, clean and dry the appliance carefully. Reconnect the freezer to the mains supply. Reload the freezer with the frozen food.
MAINTENANCE AND CLEANING
A periodic and proper maintenance will ensure a longer life to your appliance. Disconnect the appliance from the mains supply before any intervention. Clean periodically the appliance with a solution of water and vinegar. Rinse and dry thoroughly. Never use abrasive or detergents. Clean periodically the door gasket with water and dry carefully. Avoid soiling the door gasket with oil or other grease which could damage it. After cleaning, reconnect the appliance to the mains supply.
HINTS FOR HOLIDAYS
If you plan to be away for a long time, disconnect the appliance from the mains, empty and clean the inside. Leave the door open to prevent the appliance from smelling musty. If you plan to be away for a short time, let the appliance operate normally.
SERVICE
The incorrect operation of the appliance is not always due to a fault but it may also result from poor installation or usage. To prevent unnecessary service calls for which you will be charged, we suggest you consult this trouble-shooting guide.
If the red light is on continuously or flashing, the internal temperature is too high.
Check that:
- the door is not properly shut;
- the thermostat control knob is correctly set (see chapter "Adjustment of the temperature");
- the freezer is not near a source of heat;
- there is a large build up of frost on the inner walls; the air flow is not restricted.
If the compressor functions continuously. Check that:
the ambient temperature is too warm; - the door is not being opened too frequently. The appliance is excessively noisy. Check that: the appliance is level.
The appliance does not operate. Check that:
- the thermostat control knob is not set to position ;
- there is not a power failure;
- the plug is making good contact with the supply socket;
- any automatic circuit breakers have tripped or any fuses blown;
- the supply cable is intact (see also Note).
Note: When replacing a damaged supply cord, be sure the new cord is correctly clamped. If you have followed this trouble shooting guide and your freezer still does not work properly, get in touch with your Retailer or Service Agent. State clearly what is wrong and the type and serial number of your freezer.
- REMOVING THE ICE CUBE TRAY (DEPENDING ON THE MODEL)
- IN MODELS WITH AN INTERNAL
- HOW TO FREEZE FRESH FOOD
- DEFROSTING THE FREEZER COMPARTMENT (DEPENDING ON THE MODEL)
- STOP FROST SYSTEM (DEPENDING ON MODEL)
- SWITCHING THE COMPARTMENT ON AND OFF
- TROUBLESHOOTING
- TO REMOVE THE ZERO-TEMPERATURE DRAWER
- TECHNICAL ASSISTANCE OF SERVICE CENTERS
- BEFORE CONTACTING A SERVICE CENTER
- APPLIED
- ANFAI PET PAIДАЛАНY
- MAINTENANCE AND CLEANING
- TROUBLESHOOTING (SEE TABLE)
- ST TYPE
- ND TYPE
- LAMP DISPOSAL
- INSTALLATION INSTRUCTIONS
- THERE IS A DOSING DEVICE FOR THE BATH
- ADJUSTING THE INSTRUMENT
- THE INSTRUMENT IS READY TO PLAY
- STOPPING THE DEVICE (TEMPORARY STOP)
- STOP BUTTON RELEASE
- TECHNICAL MAINTENANCE
- BEFORE TECHNICAL MAINTENANCE, UNPLUG THE DEVICE
- NOTES
- USING THE APPLIANCE
- CLEANING AND MAINTENANCE
- REPLACING THE LIGHT BULB OR LED (DEPENDING ON THE MODEL)
- LAMP
- USING FOR THE FIRST TIME
- MAINTENANCE AND CLEANING OF THE APPLICANCE
- REPLACING THE LIGHT BULB OR LED
- (DEPENDENTLY ON THE MODEL)
- LIGHT TYPE 1)
- LIGHT TYPE 2)
- IN THE EVENT OF NON-USE OF THE APPLICANCE
- IN THE EVENT OF AN INTERRUPTION TO THE POWER SUPPLY
- REFRIGERATOR COMPARTMENT
- THE REFRIGERATOR COMPARTMENT DEFROSTS COMPLETELY AUTOMATICALLY
- REMOVING THE FRUIT AND VEGETABLE DRAWER (DEPENDING ON THE MODEL)
- FAN AND ANTIBACTERIAL ANTI-ODOUR FILTER (DEPENDING ON THE MODEL)
- FREEZER COMPARTMENT
- MODEL WITH SEPARATE FREEZER COMPARTMENT
- MAKING ICE CUBES
- REMOVING THE DRAWERS (DEPENDING ON THE MODEL)
- MODELS WITH AN INTERNAL PRODUCT COMPARTMENT
- HOW TO DEFROST THE FREEZER COMPARTMENT
- FOR OTHER MODELS, FROST BUILDUP IS NORMAL
- STOP FROST SYSTEM (DEPENDING ON THE MODEL)
- PROCEDURE TO CLEAN THE STOP FROST ACCESSORY
- ZERO DEGREES" COMPARTMENT
- (DEPENDING ON THE MODEL)
- TURNING ON AND TURNING OFF THE COMPARTMENT
- NOTE
- REMOVING THE "ZERO DEGREES" COMPARTMENT
- TECHNICAL ASSISTANCE SERVICE
- BEFORE CONTACTING THE TECHNICAL ASSISTANCE SERVICE
- FREEZER COMPARTMENT WITH ZERO TEMPERATURE
- DEPENDING ON MODEL)
- FROST FREE SYSTEM (DEPENDING ON MODEL)
- BULB TYPE 2)
- LAMP TYPE 2)
- ICE MAKER SYSTEM
- CLEANING PROCEDURE FOR THE ICE MAKER ACCESSORY
- COMPARTMENT "ZERO DEGREES
- (DEPENDING ON MODEL)
- REMOVING THE "ZERO DEGREE" COMPARTMENT
- TECHNICAL SUPPORT DEPARTMENT
- BEFORE CONTACTING THE TECHNICAL SUPPORT DEPARTMENT
- FIRST USE
- MODELS WITH INTERNAL COMPARTMENT
- (LED)
- JGLAL PDLILP
- AIBI JUAE IBAIA JLA
- J
- STOP FROST
- SWITCHING ON THE APPLIANCE
- ADJUSTING THE TEMPERATURE
- STORING FOOD IN THE REFRIGERATOR COMPARTMENT
- IMPORTANT
- MEAT & FISH BOX (DEPENDING ON MODEL)
- TEMPERATURE ADJUSTMENT
- REMOVING THE MEAT & FISH COMPARTMENT
- ZERO DEGREES" BOX (DEPENDING ON THE MODEL)
- ACTIVATING AND DEACTIVATING THE BOX
- REMOVING THE "ZERO DEGREES" BOX
- HOW TO USE THE FREEZER COMPARTMENT (IF PRESENT)
- FREEZING FRESH FOOD
- THE TABLE ALONGSIDE SHOWS THE RECOMMENDED MAXIMUM STORAGE TIME FOR FROZEN FRESH FOODS
- WHEN PURCHASING FROZEN FOOD PRODUCTS
- HOW TO DEFROST THE APPLIANCE
- DEFROSTING THE COMPARTMENT **** (IF PRESENT)
- PROLONGED DISUSE
- AFTER-SALES SERVICE
- BEFORE CONTACTING THE AFTER-SALES SERVICE
- INSTALLATION
- DISCONNECTING THE APPLIANCE
- ELECTRICAL CONNECTION
- ELECTRICAL CONNECTION FOR GREAT BRITAIN AND IRELAND ONLY
- FUSE REPLACEMENT
- FOR THE REPUBLIC OF IRELAND ONLY
- SOCKET OUTLET / PLUG (VALID FOR BOTH COUNTRIES)
- HOW TO OPERATE THE REFRIGERATOR COMPARTMENT
- MEAT AND FISH COMPARTMENT
- STARTING THE APPLIANCE
- TEMPERATURE REGULATION
- LOW TEMPERATURE COMPARTMENT, IF MARKED
- CONTROL ELEMENTS
- PREPARATION OF ICE CUBES
- DEFROSTING AND CLEANING THE LOW-TEMPERATURE COMPARTMENT
- CLEANING THE REFRIGERATOR COMPARTMENT
- CLEANING AND CARE
- DURING PROLONGED ABSENCE
- ENERGY SAVING TIPS
- THE APPLIANCE DOES NOT WORK
- INSUFFICIENT TEMPERATURE IN THE COMPARTMENTS
- TEMPERATURE TOO LOW IN THE REFRIGERATOR COMPARTMENT
- THE INTERNAL LIGHT DOES NOT WORK
- FREEZER ICE CUBE TRAY
- THAWING OF THE LOW-TEMPERATURE COMPARTMENT
- USING THE WATER TANK
- USING THE ICE TRAY
- FOR HOUSEHOLD USE ONLY
- POWER SUPPLY CONNECTION
- CHECK THAT THE DEVICE IS CONNECTED TO THE MAINS
- THE TEMPERATURE IN THE HEATER IS TOO LOW
- THE HEATER TEMPERATURE IS TOO HIGH
- WATER IS LEAKING UNDER THE HEATER
- THE HEATER MAKES NOISE
- TEMPERATURE OF THE HEATING SURFACE OF THE BOILER IS NORMAL
- CHECK
- CALL FOR SERVICE
- CONTACT THE SERVICE ORGANIZATION
- SERVICE
- OPHATY
- KYPBIJIFBLHBL AXBIPATY
- NEKTP CBIMDAPBIH JKAJFAY
- TEK YIBIBPITAHNA MEH INPJIAHDNIAFA APHAJFAH 3JIEKTPJIK KOCBIJBIM
- CAKATHDBIPYFBLWTBLAYBICTBIPY
- CONTROLS
- REPUBLIC OF KAZAKHSTAN
- MAINS SOCKET / POWER CORD (FOR TWO-DOOR MODELS)
- DESCRIPTION OF THE APPLIANCE (FIG. 1) CONTROL PANEL
- ELECTRICAL CONNECTION AND OPERATION
- ADJUSTMENT OF THE TEMPERATURE
- USE OF THE FREEZER COMPARTMENT
- FREEZING IN (FIG. 2)
- PRODUCTION OF ICE CUBES
- STORAGE OF FROZEN FOOD
- THAWING
- DEFROSTING
- HINTS FOR HOLIDAYS
- CHECK THAT
Brand : HOTPOINT
Model : B 20 A1 FV C/HA
Category : Combined refrigerator