
SI E40 BA1 - Dishwasher HOTPOINT - Free user manual and instructions
Find the device manual for free SI E40 BA1 HOTPOINT in PDF.
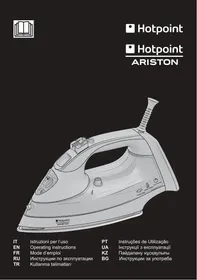



| Product type | Steam iron |
| Brand | HOTPOINT |
| Model | SI E40 BA1 |
| Power supply | 220-240 V, grounded plug |
| Power | 2000-2400 W (estimated) |
| Tank capacity | Approximately 300 ml (estimated) |
| Main functions | Steam burst, spray, vertical steam, dry ironing, anti-drip, auto shut-off, Auto-Clean |
| Temperature adjustment | Electronic (+/- buttons) or rotary selector depending on version |
| Auto shut-off | 30 seconds in horizontal position, 10 minutes in vertical |
| Safety | Anti-drip, auto shut-off, child lock not specified |
| Soleplate | Non-stick soleplate (estimated) |
| Cleaning and maintenance | Auto-Clean function for descaling; clean soleplate with a soft cloth |
| Recommended water type | Demineralized water |
| Dimensions (approx.) | 30 x 12 x 15 cm (estimated) |
| Weight (approx.) | 1.5 kg (estimated) |
| Spare parts and repairability | Original parts available through authorized Hotpoint-Ariston centers |
| Included accessories | Measuring cup (not shown) |
| Cord length | Built-in cord winder (length not specified, estimated 2 m) |
Frequently Asked Questions - SI E40 BA1 HOTPOINT
User questions about SI E40 BA1 HOTPOINT
0 question about this device. Answer the ones you know or ask your own.
Ask a new question about this device
Download the instructions for your Dishwasher in PDF format for free! Find your manual SI E40 BA1 - HOTPOINT and take your electronic device back in hand. On this page are published all the documents necessary for the use of your device. SI E40 BA1 by HOTPOINT.
USER MANUAL SI E40 BA1 HOTPOINT
EN Operating instructions
FR Mode d'emploi
RU Инструкция по эксплуатации
TR Kullanma talimatları
GENERAL SAFETY INSTRUCTIONS
- Do not operate the iron in case of damaged plug, power cord or appliance, or in the presence of visible damage or water leaks from the appliance. In such a case the appliance must be inspected by the Hotpoint authorized technical staff in order to avoid dangerous situations. If the appliance was dropped, do not operate it.
- The appliance is not intended to be used by individuals (children included up to 8 years of age) with impaired physical, sensory or mental capabilities, inexpert individuals or individuals who are not familiar with the product, unless they are supervised by a person responsible for their safety, or by individuals who have not received preliminary instructions on the use of the appliance.
- Supervise children to prevent them from playing with the appliance.
- Never leave the appliance unattended when the plug is connected into the electrical socket.
- After each use of the appliance, when filling and emptying the water reservoir, as well as when cleaning the appliance, set the steam regulator to Off. Then place the appliance in a stable position, using the stand, and disconnect the plug from the electrical socket.
- The appliance must be used and placed on a stable, flat horizontal surface. The use on an ironing board is recommended.
- For your safety, all repairs or maintenance operations must be carried out exclusively by the Hotpoint authorized technical staff.
- Keep the iron and its cord out of reach of children less than 8 years of age when it is energized or cooling down.
- Cleaning and user maintenance shall not be made by children without supervision.
- When placing the iron on its stand, ensure that the surface on which the stand is placed is stable.
- The plug must be removed from the socket-outlet before the water reservoir is filled with water.
- This steam iron is equipped with the safety device Power off system. When the plug has been connected, move the iron to switch it on.
GENERAL SAFETY RULES
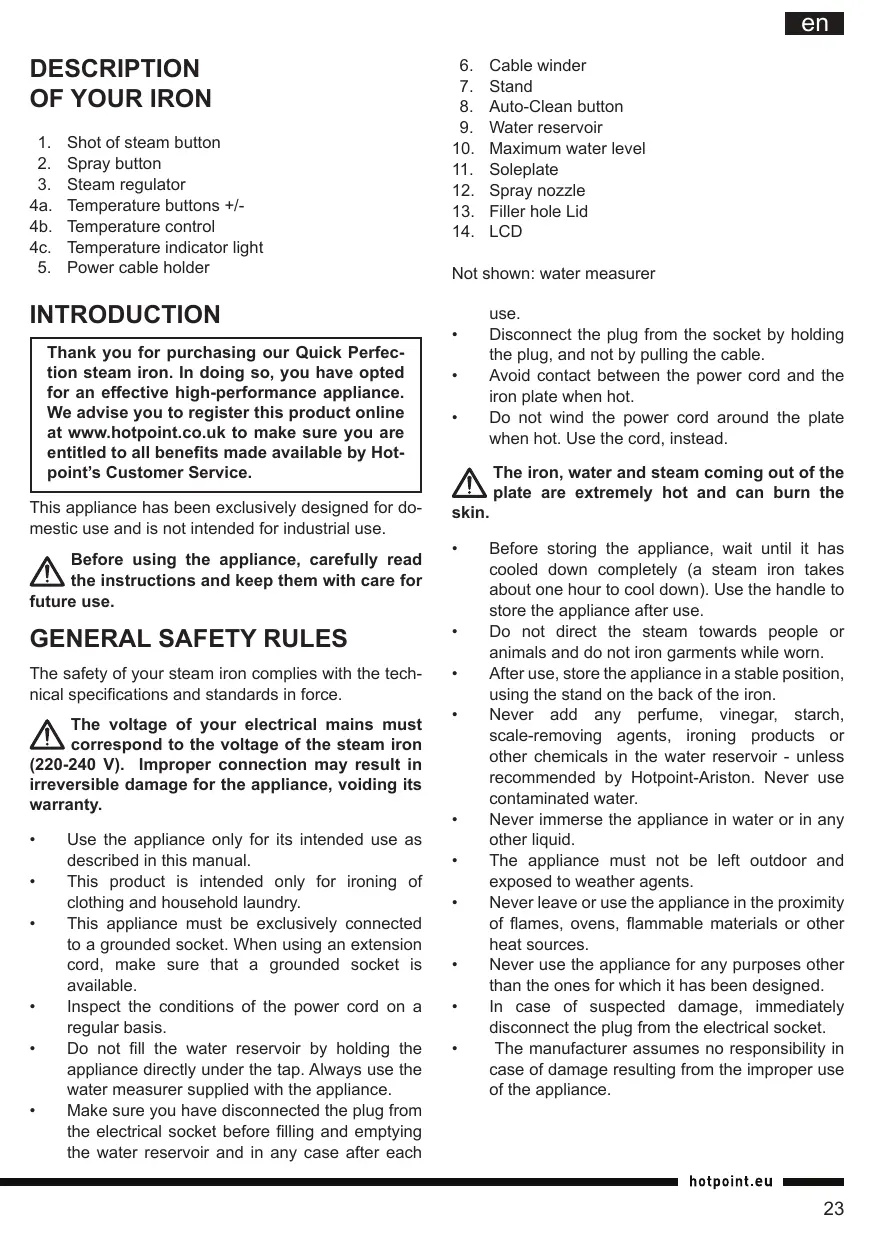
- Shot of steam button
- Spray button
- Steam regulator
4a. Temperature buttons +/- 4b. Temperature control 4c. Temperature indicator light 5. Power cable holder
INTRODUCTION
Thank you for purchasing our Quick Perfection steam iron. In doing so, you have opted for an effective high-performance appliance. We advise you to register this product online at www.hotpoint.co.uk to make sure you are entitled to all benefits made available by Hotpoint's Customer Service.
This appliance has been exclusively designed for domestic use and is not intended for industrial use.
Before using the appliance, carefully read the instructions and keep them with care for future use.
GENERAL SAFETY RULES
The safety of your steam iron complies with the technical specifications and standards in force.
The voltage of your electrical mains must correspond to the voltage of the steam iron (220-240 V). Improper connection may result in irreversible damage for the appliance, voiding its warranty.
Use the appliance only for its intended use as described in this manual. This product is intended only for ironing of clothing and household laundry. - This appliance must be exclusively connected to a grounded socket. When using an extension cord, make sure that a grounded socket is available. - Inspect the conditions of the power cord on a regular basis. - Do not fill the water reservoir by holding the appliance directly under the tap. Always use the water measurer supplied with the appliance. Make sure you have disconnected the plug from the electrical socket before filling and emptying the water reservoir and in any case after each
- Cable winder
- Stand
- Auto-Clean button
- Water reservoir
- Maximum water level
- Soleplate
- Spray nozzle
- Filler hole Lid
- LCD
Not shown: water measurer
use.
- Disconnect the plug from the socket by holding the plug, and not by pulling the cable.
- Avoid contact between the power cord and the iron plate when hot.
- Do not wind the power cord around the plate when hot. Use the cord, instead.
The iron, water and steam coming out of the plate are extremely hot and can burn the skin.
Before storing the appliance, wait until it has cooled down completely (a steam iron takes about one hour to cool down). Use the handle to store the appliance after use. - Do not direct the steam towards people or animals and do not iron garments while worn. After use, store the appliance in a stable position, using the stand on the back of the iron. - Never add any perfume, vinegar, starch, scale-removing agents, ironing products or other chemicals in the water reservoir - unless recommended by Hotpoint-Ariston. Never use contaminated water. - Never immerse the appliance in water or in any other liquid. - The appliance must not be left outdoor and exposed to weather agents. - Never leave or use the appliance in the proximity of flames, ovens, flammable materials or other heat sources. - Never use the appliance for any purposes other than the ones for which it has been designed. - In case of suspected damage, immediately disconnect the plug from the electrical socket. - The manufacturer assumes no responsibility in case of damage resulting from the improper use of the appliance.
BEFORE USE
Before using the appliance for the first time, remove all stickers, protective plastic or cardboard case from the soleplate of the iron.
Make sure that all adhesive parts have been removed from the soleplate with a dampened soft cloth and eliminate any residues or particles from the manufacturing process, by repeatedly filling and emptying the water reservoir.

When switching on the iron for the first
time, you may notice an unpleasant odour, a
little smoke and some impurities that will disappear in a few minutes. When using the steam function for the first time, do not direct the steam jet on the garments because of the possible presence of manufacturing residues in the steam dispenser.

Never add any perfume, vinegar, starch,
other chemicals in the water reservoir - unless recommended by Hotpoint-Ariston. Never use contaminated water.
Filling the water reservoir (A)

We recommend using demineralised water.
Before filling the iron with water, make sure that the iron is switched off and disconnected from the electrical socket.
- Set the steam regulator (3) to Off.
- Tilt the iron in such a position to make water entrance easier.
- Open the lid of the filler hole (13) and fill the water reservoir using the water measurer supplied with the iron. Never fill the water reservoir above the maximum water level (10).
- Close the lid of the filling hole.
USING THE IRON
In order to make reading this instructions manual easier and identify the model of your Quick Perfect iron, refer to the graphics on page II.

Your iron is supplied with Power Off System
safety device which automatically switches
the iron off when it is left unattended or tips over and ensures maximum safety.
Selecting the temperature and adjusting the steam (B1)

- Connect the plug of the appliance into a grounded socket (220-240V).
- The LCD (14) lights up in red and starts flashing to indicate that the iron is reaching the set temperature.
- Use the temperature buttons +/- (4a) to select the desired temperature. An acoustic signal is emitted every time you press one of the two buttons, the display lights up and starts flashing to indicate that the steam iron is reaching the selected temperature.
- When the iron reaches the set temperature, an acoustic signal is emitted, the LCD lights up in green and the set temperature is shown in fixed mode to indicate that the iron is ready for use.
- Make sure to check the garment label in order to identify the fabric type. In case of doubts, it is recommended not to use the spray function and iron a hidden corner in order to determine the most appropriate temperature and avoid damaging the fabric. In case of very delicate fabrics, such as silk, wool, and synthetic materials, iron the garment inside out to prevent shiny marks. Start ironing the garments that require a lower temperature, such as synthetic fabrics.

Fabrics with this symbol on the label must not be ironed.
| GARMENT LABEL | FABRIC TYPE | TEMPERATURE INDICATION | STEAM INDICATION |
| synthetic | ○●○ | Off | |
| silk mixed cotton | ●●○ | Off | |
| wool mixed wool | ○○○ | ||
| cotton | ●●● | ||
| linen jeans | ○○○ |
- Select the steam level with the steam regulator (3) or move it to Off to iron without steam. When steam ironing, make sure that the water level in the reservoir is at least 1/4.
Selecting the temperature and adjusting the steam (B2)

- Connect the plug of the appliance into a grounded socket (220-240V).
- Use the temperature control (4b) to select the desired temperature. If you go from a lower temperature to a higher temperature, the temperature indicator light (4c) will light up until the selected temperature is reached.
- When the iron reaches the set temperature, an acoustic signal is emitted and the temperature indicator light goes off.
- We recommend to check the garment label in order to identify the fabric type. In case of doubts, it is recommended not to use the spray function and iron a hidden corner in order to determine the most appropriate temperature and avoid damaging the fabric. In case of very delicate fabrics, such as silk, wool, and synthetic materials, iron the garment inside out to prevent shiny marks. Start ironing the garments that require a lower temperature, such as synthetic fabrics.

Fabrics with this symbol on the label must not be ironed.
| GARMENT LABEL | FABRIC TYPE | TEMPERATUR INDICATION | STEAM INDICATION |
| synthetic | MIN | Off | |
| silk mixed cotton | Off | ||
| wool mixed wool | |||
| cotton | |||
| linen jeans | LINEN |
- Select the steam level with the steam regulator (3) or move it to Off to iron without steam. When steam ironing, make sure that the water level in the reservoir is at least 1/4.
USE


The iron starts producing steam as soon as it reaches the set temperature.

If the water in the reservoir is finished, it may be necessary to press the shot of steam button several times to (re)activate the pump, after filling the water reservoir again.
steam button several times to (re)activate the pump, after filling the water reservoir again.
Ironing without steam (C1)
- Set the steam regulator (3) to Off (=no steam).
- Select the recommended ironing temperature with the temperature buttons +/- (4a) (see step B1 and chapter "Using the iron", section "Selecting the temperature and adjusting the steam").
Steam ironing (D1)
- Check that the water level in the reservoir is higher than 1/4.
- Select the appropriate steam with the steam regulator (3) and the recommended ironing temperature with the temperature buttons +/- (4a) (see step B1 and chapter "Using the iron", section "Selecting the temperature and adjusting the steam").
Ironing with shot of steam (E1)
The shot of steam function allows you to eliminate persistent wrinkles. You can use this function both in no-steam and steam ironing mode.
- Check that the water level in the reservoir is higher than 1/4.
- Select the recommended ironing temperature with the temperature buttons +/- (4a) (see step B1 and chapter "Using the iron", section "Selecting the temperature and adjusting the steam").
- Press the shot of steam button (1) to obtain an extra steam flow when ironing. If the shot of steam function has not been used for some time, it may be necessary to press the button repeatedly to activate the pump.
USE

Ironing without steam (C2)
- Set the steam regulator (3) to Off (=no steam).
- Select the recommended ironing temperature with the temperature control (4b) (see step B2 and chapter "Using the iron", section "Selecting the temperature and adjusting the steam").
Steam ironing (D2)
- Check that the water level in the reservoir is higher than 1/4.
- Select the appropriate steam with the steam regulator (3) and the recommended ironing temperature with the temperature selector (4b) (see step B2 and chapter "Using the iron",
section "Selecting the temperature and adjusting the steam").
Ironing with shot of steam (E2)
The shot of steam function allows you to eliminate persistent wrinkles. You can use this function both in no-steam and steam ironing mode.
- Check that the water level in the reservoir is higher than 1/4.
- Select the recommended ironing temperature with the temperature control (4b) (see step B2 and chapter "Using the iron", section "Selecting the temperature and adjusting the steam").
- Press the shot of steam button (1) to obtain an extra steam flow when ironing. If the shot of steam function has not been used for some time, it may be necessary to press the button repeatedly to activate the pump.
FEATURES
Spray function (F)
The spray function is used to dampen the garment in order to remove persistent wrinkles easily. You can use the spray function both in no-steam and steam ironing mode at any temperature.
- Check that the water level in the reservoir is higher than 1/4.
- With the iron in horizontal position, press the spray button (2) to dampen the garment.
Vertical steam function (G)
The vertical steam function is useful to eliminate wrinkles from hanging garments, curtains, etc. You can use this function by simply placing the iron in vertical position. All functions of the appliance will remain unchanged also in this position (refer to chapter "Use" according to the model).

Do not direct steam towards people or animals and do not iron garments while
Anti-drip function
The iron is provided with anti-drip function in order to automatically interrupt the steam distribution when the temperature is too low, thus preventing water dripping out of the soleplate.

Do not use steam with low temperatures (see chart in step B1 and B2 chapter "Using iron", according to the type of iron you are using).
Automatic Stand-by function (H1)
LCD
The automatic switch-off function guarantees total safety.
This function automatically switches off the iron when it is not used for a few minutes. In particular:
- the iron switches off automatically after 30 seconds when left unattended in the ironing position or sideways;
- the iron switches off automatically after 10 minutes when left unattended in the rest position (vertical).
If you leave the iron unattended, the display flashes a green light and an acoustic signal is emitted to inform that the automatic stand-by function is active.
Simply move the iron or press the temperature buttons +/- (4a) to switch it back on.

Wait until the display becomes red before starting ironing again.
Automatic switch-off function (H2)

The automatic switch-off function guarantees total safety.
This function automatically switches off the iron when it is not used for a few minutes. In particular:
- the iron switches off automatically after 30 seconds when left unattended in the ironing position or sideways;
- the iron switches off automatically after 10 minutes when left unattended in the rest position (vertical).
If you leave the iron unattended an acoustic signal is emitted to inform that the automatic switch-off function is active.
Simply move the iron to switch it back on.

Wait until the temperature indicator light turns off before starting ironing again.
CLEANING AND MAINTENANCE
After use (I)
- Set the steam regulator (3) to Off, disconnect the appliance plug from the electrical socket and let the iron cool down.
- Empty the water reservoir (9).
- Wind the cord around the cable winder (6) and store the iron in vertical position, in a dry safe place.

Never store the iron in horizontal position. Always use the stand at the back of the iron.
Cleaning (J)

Never use aggressive and/or abrasive substances to clean the plastic parts and on soleplate.
- Set the steam regulator (3) to Off, disconnect the appliance plug from the electrical socket and let the iron cool down.
- Use a dry or slightly dampened soft cloth to clean the upper part of the iron.
- For the ordinary cleaning and/or removal of stains or other residues deposited on the plate, clean with a dampened soft cloth and dry.
- Use a dampened cotton tip to eliminate scale in the steam holes that may impair the performance of your iron.

In order to keep the soleplate perfectly smooth and polished, avoid contacts with objects, do not iron sharp objects, such as pins, studs and hinges in order to avoid chipping the plate.
- Regularly rinse the reservoir with clean water. After cleaning, always empty the water reservoir.
Auto-Clean Function (K1)

If you have been using water from the tap, we recommend starting the Auto-Clean function after ironing.

The use of the Auto-Clean function should not be deemed the same as using demineralized water on a regular basis.
- Check that the appliance is disconnected from the electrical socket and the steam regulator is (3) set to Off.
- Fill the water reservoir (9) up to the maximum water level (10).
- Connect the plug of the appliance into a grounded socket (220-240V).
- Set the temperature to the maximum value with the temperature buttons +/- (4a).
- Wait at least 2 or 3 minutes to warm the iron completely.
- Holding the iron above the sink or a container
made of resistant material, press the Auto-Clean button (8) and shake gently.

Steam and boiling water will come out of the soleplate with scale residues and other impurities. Never use plastic containers for this operation.
- Switch off the iron and disconnect it from the electrical socket.
- Set the steam selector to the maximum position.
- Allow water to come out of the holes for at least 30 minutes.
- Slide the iron gently on a cloth to eliminate any stains from the soleplate.
- Before using the iron again, press the shot of steam button (1) repeatedly to eliminate any scale residues.

When performing this operation, keep the iron away from the garments in order not to damage them.
Auto-Clean Function (K2)

If you have been using tap water, we recommend starting the Auto-Clean function after ironing.

The use of the Auto-Clean function should not be deemed the same as using demineralized water on a regular basis.
- Check that the appliance is disconnected from the electrical socket and the steam regulator (3) is set to Off.
- Fill the water reservoir (9) up to the maximum water level (10).
- Connect the plug of the appliance into a grounded socket (220-240V).
- Set the temperature to the maximum value with the temperature control (4b).
- Wait at least 2 or 3 minutes to warm the iron completely.
- Holding the iron above the sink or a container made of resistant material, press the Auto-Clean button (8) and shake gently.

Steam and boiling water will come out of the soleplate with scale residues and other impurities. Never use plastic containers for this action.
- Switch off the iron and disconnect it from the electrical socket.
- Set the steam select to the maximum position.
- Allow water to come out of the holes for at least 30 minutes.
- Slide the iron gently on a cloth to eliminate any stains from the soleplate.
- Before using the iron again, press the shot of steam button (1) repeatedly to eliminate any scale residues.

When making this operation, keep the iron away from the garments in order not to damage them.
TIPS
If your Compact Generator is not equipped with the Optimal Soleplate Temperature technology, you may find the following tips useful.
- Sort the garments out according to the fabric types. This will reduce the need to adjust the temperature according to the different fabrics.
- Start with the garments that require a low ironing temperature and continue with the garments requiring higher ironing temperatures. If you are not sure about the composition of the fabric, try ironing a hidden part such as a seam, hem or internal section. Start with a low temperature and gradually increase it until you find the ideal ironing setting.
- When you reduce the Compact Generator's temperature to iron delicate garments, wait approximately 2 minutes to let the iron reach the new settings. Pure wool (100% wool) garments can be steam-ironed as long as the temperature is set to wool. We recommend using a cotton cloth to prevent any shiny marks on the garment.
- Never iron areas with obvious perspiration marks because the heat will fix the stains and make them permanent.
DISPOSAL OF OLD ELECTRICAL APPLIANCES
The European Directive 2012/19/UE on Waste Electrical and Electronic Equipment (WEEE), requires that old household electrical appliances must not be disposed of in the normal unsorted municipal waste stream.
Old appliances must be collected separately in order to optimise the recovery and recycling of the materials they contain and reduce the impact on human health and the environment.
The crossed out "wheeled bin" symbol on the product reminds you of your obligation, that when you dispose of the appliance it must be separately collected. Consumers should contact their local authority or retailer for information concerning the correct disposal of their old appliance.
TROUBLESHOOTING
Problem
The soleplate remains cold and does not warm up.
The temperature indicator light turns on and off.
Steam comes out in reduced quantity or does not come out.
Impurities come out from the soleplate and stain the garments.
Water is dripping out of the soleplate
Possible cause / Solutions
- The plug may not be inserted into the electrical socket, or it may not make contact.
- Check that the temperature is not set to MIN.
- The temperature indicator light turns on to indicate that the iron is getting hot. The indicator light turns off when the set temperature is reached.
The steam regulator is set to Off. Not enough water in the water reservoir. Fill the water reservoir. - The iron is not sufficiently hot and/or the anti-drip function is active. Replace the iron in vertical position, using the stand, and wait until the temperature indicator light turns off or the LCD becomes red before starting to iron. - The plate temperature may be too low due to the excessively frequent activation of the shot of steam button. Slightly increase the interval between steam shots.
- There may be residues in the vaporisation chamber. Make the cleaning operations (see chapter "Cleaning and maintenance", section "Auto-Clean Function" according to the model).
- You are using perfume, vinegar, starch, vinegar, starch, scale-removing agents, ironing products or other chemical substances. Remember that these substances may damage the product. Rinse the water reservoir.
- You are using starch. You can use starch directly on the inside out of the fabrics and in any case never in the water reservoir. The garment was not washed correctly or has some soap residues. You are ironing a new garment that was not washed for the first time.
- The soleplate temperature may be too low due to the excessively frequent activation of the shot of steam button. Slightly increase the interval between steam shots. The soleplate temperature is set to a too-low temperature.
- You have replaced the iron horizontally without emptying it and/or without setting the steam regulator to Off. You did not close the lid of the filler hole correctly.
- You have used the shot of steam function with a too-low temperature. We recommend to use these functions with temperatures higher than .
- You are using perfume, vinegar, starch, vinegar, starch, scale-removing agents, ironing products or other chemical substances. Remember that these substances may damage the product. Rinse the water reservoir.
The soleplate is dirty or dark and may stain the fabrics.
- You are using a too-high temperature. Clean the soleplate (see chapter "Cleaning and maintenance", section "Cleaning").
- You are using starch. You can use starch directly on the inside out of the fabrics and in any case never in the water reservoir. The garment was not washed correctly or has some soap residues. You are ironing a new garment that was not washed for the first time.
The spray function does not work.
Not enough water in the water reservoir. Fill the water reservoir.
DESCRIPTION OF THE APPLIANCE
Causes / Possible solutions
Filling the reservoir (A)

We recommend using demineralized water.
Before filling the iron with water, check that it is unplugged from the mains socket.
- Set the steam regulator (3) to the off position.
- Tilt the iron in the position that facilitates filling with water.
- Open the filling flap (13) and pour water into the iron using the special measuring cup. Never exceed the maximum fill level (10) of the reservoir.
- 3akpoTe 3acNoHky OTBepCTnHaNoJIHeHnA.
NcPOnb3OBAHNE YTHOFA
For your convenience, to familiarize yourself with these instructions and to find your Quick Perfection iron, see the diagram on page II.
Temperature setting for the iron (B1)

- Insert the plug of the appliance into a grounded wall outlet (220-240 V).
- The display (14) lights up red and starts blinking, indicating that the iron is heating to the set temperature.
- Using the temperature setting buttons +/- (4a), set the desired temperature. With each press of one of these buttons, a sound signal is emitted, the display lights up and starts blinking, indicating that the iron is heating to the set temperature.
- When the iron has heated to the set temperature, a sound signal is emitted again, the display lights up green, and the temperature is shown, indicating that the iron is ready for use.
- Check the labels on the white laundry before ironing to determine the type of fabric. In case of doubt, it is recommended not to use the spray function and to first iron a small inconspicuous area of the white laundry to determine the optimal temperature to avoid damaging the clothes. Iron delicate white laundry made of silk, wool, and synthetic materials inside out to avoid shiny spots. Start ironing with items that require a lower temperature, for example, those made of synthetic fabrics.

Fabrics with this symbol on the label cannot be ironed.
Do not direct steam at people or animals and do not iron clothes worn by people.
Anti-drip system
The iron has an anti-drip system, thanks to which the water supply is automatically interrupted when the temperature is too low, thus preventing water leakage from the holes in the soleplate of the iron.

Do not use it at low
temperatures. (See the table in points B,
B2, "Using the iron", B3 depending on the model of your iron).
Automatic shut-off function (H1)

If you leave it without the stand, a sound signal will turn on,
warning you about the automatic shut-off function.
To turn the iron on again, simply change its position.

Wait until the temperature indicator
goes out before resuming ironing.
CLEANING AND CARE
After use (I)
- Set the temperature dial (3) to the off position, disconnect the plug from the wall outlet and let the iron cool down.
- Empty the water from the reservoir (9).
- Wind the power cord around the special part of the iron body (6) and store the iron in an upright position in a safe and dry place.

Do not store the iron horizontally, always place it on
the rear part of the iron body.
Cleaning (J)

Do not use aggressive substances
or abrasive sponges.
- Set the steam regulator (3) to the off position, disconnect the appliance plug from the wall socket and let the iron cool down. 2. To clean the upper part of the iron, use a soft dry cloth or a slightly damp cloth. 3. For regular maintenance or to remove stains or any deposits on the soleplate, use a slightly damp cloth and wipe dry.
- To remove limescale deposits in the steam outlet holes, which can reduce the performance of your iron, you can use a damp cotton swab.

To preserve the soleplate
of the iron, avoid contact with metal objects, do not place it on rough surfaces, such as, for example, buttons, zippers, or snaps, as they may scratch the soleplate.
- Regularly rinse the water tank with clean water. After cleaning, always empty the water from the tank.
Auto-Clean function (K)
LCD
If you use tap water, it is recommended to use the Auto-Clean function at the end of each ironing session.

Using the Auto-Clean function
Auto-Clean is not a substitute for regular
use of demineralized water.
- Make sure the appliance is disconnected from the power supply and that the steam regulator (3) is in the off position.
- Fill the water tank (9) up to the maximum level (10).
- Connect the plug of the device to a grounded electrical outlet (220-240 V).
- Set the temperature to the maximum value using the temperature adjustment buttons +/- (4a).
- Wait 2-3 minutes for the iron to heat up to the set value. 6. Hold the iron over a sink or a container made of heat-resistant material, press the AutoClean button (8) and gently shake the device.
In this way, steam with water will be released from the soleplate, containing possible scale particles and other impurities. Do not use plastic containers for this operation.
- Turn off the iron and disconnect it from the power supply.
- Set the steam regulator to the maximum power position. 9. Let the water drain from the holes for 30 minutes.
- Without pressing, run the iron over an unnecessary cloth to remove any possible stains left by the soleplate.
- Before the next use, press the steam boost button (1) several times to remove any scale residue.

Do not perform this operation over laundry to avoid stains.
Auto-Clean function (K2)

If using tap water, it is recommended to use the Auto-Clean self-cleaning function at the end of each use.

Using the Auto-Clean self-cleaning function is not a substitute for regular
use of demineralized water.
- Make sure the device is disconnected from the power supply and that the steam regulator (3) is in the off position.
- Fill the water reservoir (9) up to the maximum level (10).
- Connect the plug of the device to a grounded wall outlet (220-240 V).
- Set the temperature to the maximum value using the thermostat +/-
(4).
- Wait 2-3 minutes for the iron to heat up to the set value. 6. Hold the iron over a sink or a container made of heat-resistant material, press the AutoClean button (8) and gently shake the iron.

In this way, steam with water will come out from the soleplate, containing
possible scale particles and impurities. Do not use plastic containers for this operation.
- Turn off the iron and disconnect it from the mains.
- Set the regulator right to the maximum power position. 9. Let the water drain from the holes for 30 minutes.
- Without pressing, run the iron over an unnecessary cloth to remove any possible stains left by the water.
- Before the next use, press the steam boost button (1) several times to remove any remaining scale.

Do not perform this operation on laundry to avoid stains.
RECOMMENDATIONS
Sort the laundry for ironing by fabric type. This will help avoid frequent temperature readjustments for different fabrics. - Start ironing with items that require the lowest temperature, and continue as the temperature increases. - If you are unsure about the fabric type of a garment, try ironing a small hidden area of the garment, such as an inside seam or an inside fold. Start ironing at a low temperature and gradually increase it, setting the optimal temperature. When you set the temperature of the iron for delicate items, wait about 2 minutes so that the iron can reach the set temperature. - Items made of pure wool (100% wool) can be ironed with steam at a temperature suitable for wool. It is recommended to iron through a cotton cloth to avoid shiny marks on the items. Never iron areas with visible stains. Note: The thermostat protects the fabric, making it non-ironable.
TROUBLESHOOTING
Fault
Possible causes / Troubleshooting methods
The soleplate remains cold and does not heat up.
- The plug is not inserted into the wall socket or there is no contact.
- Check that the temperature is not set to the minimum value.
The temperature indicator turns on and off.
The temperature indicator turning on means the iron is heating up. Once the set temperature is reached, the indicator goes out.
Steam output is too weak or no steam comes out at all.
- The steam regulator is in the off position. There is not enough water in the reservoir. Add water to the reservoir.
- The iron heats up intermittently or the anti-drip function is activated. Place the iron in an upright position on the designated stand and wait until the temperature indicator goes out, or until the anti-drip indicator lights up red. The soleplate temperature may be too low due to too frequent pressing of the steam boost button. Increase the interval between steam boost presses.
The soleplate of the iron is dirty or has scratches, which can damage clothes.
Possible scale build-up in the steam chamber. Perform descaling (see section "Cleaning and Care", section "AutoClean Function" depending on the model). Water with descaling agent, starch, anti-scale agent, starching agents, or other chemicals may have been added to the water reservoir. Remember that these substances can damage the appliance. Rinse the water reservoir thoroughly. You are using starch. Starch can be used directly on the wrong side of the garments, but never pour it into the water reservoir. The laundry was poorly washed or there is residual detergent. You are ironing new, unwashed clothes.
Water droplets leak from the soleplate of the iron.
The soleplate temperature of the iron may be too low due to too frequent pressing of the steam boost button. Increase the interval between steam boost presses. The soleplate temperature of the iron is too low. You placed the iron in a horizontal position without emptying the water or without setting the steam regulator to the off position. The water tank filler cap is not closed tightly. You used the steam boost button at too low a temperature. We recommend using this function at a higher temperature. ● Water with descaling agent, starch, anti-scale agent, starching agents, or other chemicals may have been added to the water reservoir. Remember that these substances can damage the appliance. Rinse the water reservoir thoroughly.
The soleplate of the iron is dirty or has darkened and may stain clothes.
- You are using the iron at too high a temperature.
- If the laundry is not sufficiently clean (see paragraph "Cleaning and care", paragraph "Cleaning"). You use starch. Starch can be used directly on the wrong side of the item and in any case never put it in the water reservoir.
- The item was poorly washed or detergent remained on it. You have added too much detergent, not yet rinsed.
The rinse function is working.
The water in the reservoir is insufficient. Add water to the reservoir.
AFTER-SALES SERVICE
Free hotline 800 3333 887*
- (The service is free for subscribers of all landline phones throughout Russia)
We care about our customers and strive to provide high-quality service. We constantly improve our products to make your life easier and more enjoyable.
Care of the appliance
The line of professional care products Professional for appliance care, recommended by Hotpoint Ariston, extends the service life of your appliance and reduces the likelihood of breakdowns. The line of professional products Professional was created taking into account the features of your appliance. The products are manufactured in Italy in compliance with high European standards of quality, safety and ease of use. Find out more on the website www.hotpoint-ariston.ru in the "Service" section and ask in stores in your city.
Authorized service centers
To be closer to our customers, we have created a wide service network, the distinctive feature of which is high training, professionalism and honesty of service technicians.
Auto-Clean function (K2)

Never iron steam on the soleplate or on the item. Do not press the iron on yourself or on others.
To see the spray again, just press it again.

Wait until the temperature indicator is no longer visible, then unplug the iron.
Descaling (J)
Before use (I)
- Set the steam regulator (3) to the Off position (= no steam), unplug the iron from the electrical outlet and wait for the iron to cool down.
- Empty the water reservoir (9).
- Wrap the power cord around the special cord wrap (6) and store the iron vertically in a safe and dry place.

Do not store the iron in a horizontal position; use the support, which is located at the rear of the iron.
Descaling (J)

Do not use abrasive or corrosive materials to clean the soleplate and the iron body.
- Set the steam regulator (3) to the Off position (= no steam), unplug the iron from the electrical outlet and wait for the iron to cool down.
- To clean the upper part of the iron, use a soft, dry or slightly damp cloth. To remove scale or other deposits from the soleplate, use a damp cloth and then wipe the surface dry.
- To remove scale or dirt from the steam vents, use a cotton swab or a soft cloth dampened with water.

The soleplate of the iron is designed for optimal gliding; avoid contact with zippers, buttons, snaps, or other metal objects that could scratch the soleplate. Regularly refill the water reservoir with clean water. After descaling, always empty the water reservoir.
Auto-Clean function (K)

If using tap water, it is recommended to use the Auto-Clean function before ironing.

The steam generator cannot be operated without demineralized water.
The plug is not inserted into the socket or the contacts are missing. - Check that the temperature is not set to MIN (minimum).
The temperature indicator does not light up and does not go out.
- The temperature indicator lighting up indicates that the iron is heating up. When the set temperature is reached, the indicator goes out.
Steam enters in insignificant quantities or does not enter at all.
Set the steam regulator to the Off position (i.e., no steam). Not enough water in the water tank. Fill the tank. - The iron is not hot enough and/or the steam function is set to a low steam flow. Set the iron to a higher temperature, using the soleplate (the iron), and wait until the temperature indicator goes out or the pilot light turns red. After that, you can start ironing. The soleplate temperature is too low due to frequent steam bursts. Slightly increase the interval between steam bursts.
Dirty water comes out of the soleplate, leaving stains on the laundry.
The steam generator chamber is heavily soiled. Perform the descaling operation (see section "Descaling and Cleaning", paragraph "Self-Cleaning Function", according to the model). You use vinegar, citric acid, starch, anti-scale agents, descaling agents, or other chemical reagents. Remember that such reagents can damage the product. Rinse the tank with water. You use starch. Starch can be used directly on the reverse side of the laundry, but in no case in the water tank. - The item of clothing you are ironing has not been properly washed or has stains. You are ironing a new item for the first time and it has not been washed.
Water droplets come out of the soleplate.
The soleplate temperature is too low due to frequent steam bursts. Slightly increase the interval between steam bursts. The soleplate temperature is set to a very low value. You place the iron horizontally, without first emptying it and/or without setting the steam regulator to Off (i.e., no steam). You have incorrectly closed the cap on the water filling opening. You use the steam burst function at a very low temperature. We recommend using this function at a temperature above ● ● You use vinegar, citric acid, starch, anti-scale agents, descaling agents, or other chemical reagents. Remember that such reagents can damage the product. Rinse the tank with water.
The soleplate is dirty and may leave stains on fabrics.
You use a very high temperature. Clean the soleplate (see section "Cleaning and Maintenance", paragraph "Cleaning"). You use starch. Starch can be used directly on the reverse side of the laundry, but in no case in the water tank. - The item of clothing you are ironing has not been properly washed or has stains. You are ironing a new item for the first time and it has not been washed.
Power Off System activated due to a short circuit.
The temperature of the tank is not correct (B1).

- Connect the appliance to a properly installed socket (220-240 V).
- If the temperature exceeds the set temperature, the indicator (14) will light up and then go out.
- To set the temperature, use the temperature dial + / - (4a). The dial does not give a signal when the set temperature is reached; it will only indicate that the set temperature has been reached after the heating starts.
- When the set temperature is reached, a signal is given, the indicator light (14) will light up and then go out, and the appliance will turn off.
- To turn off the appliance, press the power button. If you do not use the appliance, unplug it and close the water inlet. For safety, do not touch the appliance with wet hands. Do not use the appliance near water, and do not immerse it in water. If the appliance is used near water, ensure that the plug is dry before connecting it to the power supply.

Do not use the appliance if the power cord is damaged.
| КИМ КИЛAKLUACbl | MATA TYPI | temпература Корсetedkilii | БY KОретkedkilii |
| СИNTETИКа | ○●○ | Off | |
| жibeк .apалас мakта | ●●○ | Off | |
| ЖУH .apалас жUH | ○○○ | ||
| мakта | ●●● | ||
| Зыfvьд ДжIMнсbl | ○○○ |
- If the water level is below the minimum level, do not turn on the appliance. If the water level is below the minimum level, the appliance will not operate. Check that the water level in the water container is at least 1 / 4 full.
Temperature setting and water filling (B2)

- Connect the appliance to a properly installed socket (220-240 V).
- To set the temperature, use the temperature dial (4b). If the temperature is lower than the set temperature, the temperature indicator light (4c) will light up.
- When the set temperature is reached, a signal is given and the temperature indicator light will go out.
- To turn off the appliance, press the power button. If you do not use the appliance, unplug it and close the water inlet. For safety, do not touch the appliance with wet hands. Do not use the appliance near water, and do not immerse it in water. If the appliance is used near water, ensure that the plug is dry before connecting it to the power supply.

Do not use the appliance if the power cord is damaged.
| КИМ КИЛAKLUACbl | MATA TYPI | STEMПЕРATYPA КИPSCETKILL | БY KИPSCETKILL |
| СИNTETINKA | MIMH | Off | |
| Жібек аразлас мakта | Off | ||
| ЖУн аразлас кун | W | ||
| мakта | 3blIFbIP | ||
| 3ыIFыр ДЖIMHCbl |
- If the water level is below the minimum level, do not turn on the appliance. If the water level is below the minimum level, the appliance will not operate. Check that the water level in the water container is at least 1 / 4 full.


The temperature setting button is pressed first.

If the container is full of water, it is possible to pour out the water by tilting the container.
Without heating (C1)
- This function (3) is used without heating.
- Set the heating temperature using the +/- temperature buttons (4a) (see "Setting the temperature" and "Adjusting the temperature" sections).
With heating (D1)
- Remove the container's water tank lid.
- With this function (3) and using the +/- temperature buttons (4a), set the heating temperature (see "Setting the temperature" and "Adjusting the temperature" sections).
With this function (E1)
This function can be used for various tasks. This function can be used without heating and with heating modes.
- Remove the container's water tank lid.
- Set the heating temperature using the +/- temperature buttons (4a) (see "Setting the temperature" and "Adjusting the temperature" sections).
- To use this function, press the function button (1) during heating. If this function is not activated, it may be necessary to press the button again to pour out the water.
POURING

Without heating (C2)
- By turning (3) the button (=6ycb3) to the right.
- +/Set the temperature (4b) to the desired temperature using the temperature analysis (B2 button and the «Set temperature» and «Temperature measurement and adjustment» indicators).
Button for turning on the device (D2)
- Check that the water level in the container is above the 1/4 mark.
- By turning (3) the knob, set the temperature using the temperature analysis (B2 button and the «Set temperature» and «Temperature measurement and adjustment» indicators).
By turning the knob (E2)
This function allows you to set the temperature for the heating mode. This function can be used in both the off and on modes.
- Check that the water level in the container is above the 1/4 mark.
- +/Set the temperature (4b) to the desired temperature using the temperature analysis (B2 button and the «Set temperature» and «Temperature measurement and adjustment» indicators).
- After turning on, press the knob (1) to start this function. If this function is not used for a long time, it may be necessary to reset it.
POSSIBILITIES
Shutdown function (F)
The shutdown function allows you to turn off the device after a set time. The shutdown function can be used in both the off and on modes.
- Check that the water level in the container is above the 1/6 mark.
- After turning on, press the shutdown button (2) to set the time.
Tik 6y function (G)
Tik 6y function is intended for supplying, transferring, etc. to the user. To use this function, the device must be installed. The main functions are described in this chapter (see the model-specific "Installation" section).

Not shown: device for measuring water temperature
Perform the device for measuring the temperature of the water, supplied by the device.
Make sure that you have disconnected the device from the power supply before any maintenance or repair. Disconnect the device from the power supply, not by pulling the cable. Avoid contact between the power cable and the hot surface of the appliance. Do not place the power cable near the appliance while it is hot. Instead, perform the cable.
The appliance, water and steam can be very hot and may cause burns to the skin.
- Before storing the device, wait for it to cool down completely (at least one hour). Use the handle to store the device after use. Do not point the steam at people or animals and do not iron clothes while wearing them. After use, store the device in a stable position with the help of the stand of the iron. Never add perfume, oil, or other chemicals to the water tank - unless recommended by Hotpoint-Ariston. Never use dirty water. Never immerse the device in water or other liquid.
- The device must not be left outdoors or exposed to atmospheric conditions. Never leave or use the device near flames, stoves, flammable materials, or other heat sources. Never use the device for purposes
other than those for which it was designed.
In case of damage, immediately disconnect the device from the electrical contact. - The manufacturer is not responsible for damages caused by improper use of the device.
BEFORE USE
Before using the device for the first time, remove all stickers, protective films, and cardboard packaging from the ironing surface.
Make sure that all adhesive parts have been removed from the ironing surface with a soft cloth, and that all residues or parts from the manufacturing process have been removed by rinsing the water tank several times.
When using the iron for the first time, you may notice an unpleasant smell, slight smoke, or noise, which will disappear within a few minutes. When using the steam function for the first time, do not point the steam at clothes, because there may be manufacturing residues in the steam dispenser. Never add perfume, oil, or other chemicals to the water tank - unless recommended by Hotpoint-Ariston. Never use dirty water.
Do not point the steam at people or animals and do not iron clothes while wearing them.
The hob is equipped with an anti-scald function for automatic regulation of the distribution of power when the temperature is very low, in this way preventing the entry of any water from the sudden supply.
Do not use the hob at low temperature (see the graph in the section B1uB2, chapter "Use of the hob", depending on the model of the hob you use).
Automatic standby mode function (H1) LCD
The function for automatic shutdown guarantees complete safety.
This function automatically turns off the hob,
when it is not used for a certain number of minutes. Specifically:

- The hob turns off automatically after 10 seconds when left unattended in the cooking or frying position;
The hob turns off automatically after 10 minutes when left unattended in the warming position (vertical).
If you leave the hob unattended, the display will beep and an audible signal will sound to inform you that the automatic standby mode function is active.
Simply press the hob or press the temperature buttons +/- (4) to turn it back on.

Wait until the display turns red before turning it back on to cook.
Automatic shutdown function (H2)

The function for automatic shutdown guarantees complete safety.
This function automatically turns off the hob when it is not used for a certain number of minutes. Specifically:
The device will turn off automatically after 30 seconds if left unattended in the standby position for programming; the device will turn off automatically after 10 minutes if left unattended in the standby position for operation (vertical).
If you leave the device unattended, an audible signal will sound to inform you that the automatic shutdown function is active. Simply press the device to turn it on again.

Wait until the temperature indicator turns off before turning the device on again.
Stay with the device. Never use plastic containers for collection.
Stay with the device. Never use plastic containers for collection.
- GENERAL SAFETY INSTRUCTIONS
- GENERAL SAFETY RULES
- INTRODUCTION
- BEFORE USE
- FILLING THE WATER RESERVOIR (A)
- USING THE IRON
- SELECTING THE TEMPERATURE AND ADJUSTING THE STEAM (B1)
- SELECTING THE TEMPERATURE AND ADJUSTING THE STEAM (B2)
- USE
- IRONING WITHOUT STEAM (C1)
- STEAM IRONING (D1)
- IRONING WITH SHOT OF STEAM (E1)
- IRONING WITHOUT STEAM (C2)
- STEAM IRONING (D2)
- IRONING WITH SHOT OF STEAM (E2)
- FEATURES
- SPRAY FUNCTION (F)
- VERTICAL STEAM FUNCTION (G)
- ANTI-DRIP FUNCTION
- AUTOMATIC STAND-BY FUNCTION (H1)
- AUTOMATIC SWITCH-OFF FUNCTION (H2)
- CLEANING AND MAINTENANCE
- AFTER USE (I)
- CLEANING (J)
- AUTO-CLEAN FUNCTION (K1)
- AUTO-CLEAN FUNCTION (K2)
- TIPS
- DISPOSAL OF OLD ELECTRICAL APPLIANCES
- TROUBLESHOOTING
- PROBLEM
- POSSIBLE CAUSE / SOLUTIONS
- DESCRIPTION OF THE APPLIANCE
- CAUSES / POSSIBLE SOLUTIONS
- FILLING THE RESERVOIR (A)
- WE RECOMMEND USING DEMINERALIZED WATER
- NCPONB3OBAHNE YTHOFA
- TEMPERATURE SETTING FOR THE IRON (B1)
- FABRICS WITH THIS SYMBOL ON THE LABEL CANNOT BE IRONED
- DO NOT DIRECT STEAM AT PEOPLE OR ANIMALS AND DO NOT IRON CLOTHES WORN BY PEOPLE
- ANTI-DRIP SYSTEM
- AUTOMATIC SHUT-OFF FUNCTION (H1)
- CLEANING AND CARE
- AUTO-CLEAN FUNCTION (K)
- USE OF DEMINERALIZED WATER
- RECOMMENDATIONS
- FAULT
- POSSIBLE CAUSES / TROUBLESHOOTING METHODS
- AFTER-SALES SERVICE
- CARE OF THE APPLIANCE
- AUTHORIZED SERVICE CENTERS
- DESCALING (J)
- BEFORE USE (I)
- THE STEAM GENERATOR CANNOT BE OPERATED WITHOUT DEMINERALIZED WATER
- THE TEMPERATURE OF THE TANK IS NOT CORRECT (B1)
- DO NOT USE THE APPLIANCE IF THE POWER CORD IS DAMAGED
- TEMPERATURE SETTING AND WATER FILLING (B2)
- WITHOUT HEATING (C1)
- WITH HEATING (D1)
- WITH THIS FUNCTION (E1)
- POURING
- WITHOUT HEATING (C2)
- BUTTON FOR TURNING ON THE DEVICE (D2)
- BY TURNING THE KNOB (E2)
- POSSIBILITIES
- SHUTDOWN FUNCTION (F)
- TIK 6Y FUNCTION (G)
- AUTOMATIC SHUTDOWN FUNCTION (H2)
Brand : HOTPOINT
Model : SI E40 BA1
Category : Dishwasher