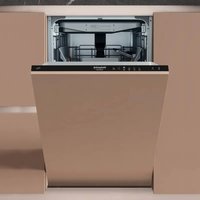
SI DC30 BA1 - Dishwasher HOTPOINT - Free user manual and instructions
Find the device manual for free SI DC30 BA1 HOTPOINT in PDF.
User questions about SI DC30 BA1 HOTPOINT
0 question about this device. Answer the ones you know or ask your own.
Ask a new question about this device
Download the instructions for your Dishwasher in PDF format for free! Find your manual SI DC30 BA1 - HOTPOINT and take your electronic device back in hand. On this page are published all the documents necessary for the use of your device. SI DC30 BA1 by HOTPOINT.
USER MANUAL SI DC30 BA1 HOTPOINT
EN Operating instructions
FR Mode d'emploi
RU Hnctpykunno 3Kcnnyataun
TR Kullanma talimatlari
GENERAL SAFETY INSTRUCTIONS
- Do not operate the iron in case of damaged plug, power cord or appliance, or in the presence of visible damage or water leaks from the appliance. In such a case the appliance must be inspected by the Hotpoint authorized technical staff in order to avoid dangerous situations.
If the appliance was dropped, do not operate it. - The appliance is not intended to be used by individuals (children included up to 8 years of age) with impaired physical, sensory or mental capabilities, inexpert individuals or individuals who are not familiar with the product, unless they are supervised by a person responsible for their safety, or by individuals who have not received preliminary instructions on the use of the appliance.
- Supervise children to prevent them from playing with the appliance.
- Never leave the appliance unattended when the plug is connected into the electrical socket.
- After each use of the appliance, when filling and emptying the water reservoir, as well as when cleaning the appliance, set the steam regulator to Off. Then place the appliance in a stable position, using the stand, and disconnect the plug from the electrical socket.
- The appliance must be used and placed on a stable, flat horizontal surface. The use on an ironing board is recommended.
- For your safety, all repairs or maintenance operations must be carried out exclusively the the Hotpoint authorized technical staff.
- Keep the iron and its cord out of reach of children less than 8 years of age when it is energized or cooling down.
- Cleaning and user maintenance shall not be made by children without supervision.
- When placing the iron on its stand, ensure that the surface on which the stand is placed is stable.
-
The plug must be removed from the socket-outlet before the water reservoir is filled with water.
-
This steam iron is equipped with the safety device Power off system. When the plug has been connected, move the iron to switch it on.
fr CONSIGNES GENÉRALES DE SECURITÉ
- Shot of steam button
- Spray button
- Steam regulator
4a. Temperature buttons +/-
4b. Temperature control
4c. Temperature indicator light
5. Power cable holder
INTRODUCTION
Thank you for purchasing our Quick Perfection steam iron. In doing so, you have opted for an effective high-performance appliance. We advise you to register this product online at www.hotpoint.co.uk to make sure you are entitled to all benefits made available by Hotpoint's Customer Service.
This appliance has been exclusively designed for domestic use and is not intended for industrial use.
Before using the appliance, carefully read the instructions and keep them with care for future use.
GENERAL SAFETY RULES
The safety of your steam iron complies with the technical specifications and standards in force.
The voltage of your electrical mains must correspond to the voltage of the steam iron (220-240 V). Improper connection may result in irreversible damage for the appliance, voiding its warranty.
Use the appliance only for its intended use as described in this manual.
This product is intended only for ironing of clothing and household laundry.
- This appliance must be exclusively connected to a grounded socket. When using an extension cord, make sure that a grounded socket is available.
- Inspect the conditions of the power cord on a regular basis.
- Do not fill the water reservoir by holding the appliance directly under the tap. Always use the water measurer supplied with the appliance.
Make sure you have disconnected the plug from the electrical socket before filling and emptying the water reservoir and in any case after each
- Cable winder
- Stand
- Auto-Clean button
-
Water reservoir
-
Maximum water level
- Soleplate
- Spray nozzle
- Filler hole Lid
- LCD
Not shown: water measurer
use.
- Disconnect the plug from the socket by holding the plug, and not by pulling the cable.
- Avoid contact between the power cord and the iron plate when hot.
- Do not wind the power cord around the plate when hot. Use the cord, instead.
The iron, water and steam coming out of the plate are extremely hot and can burn the skin.
Before storing the appliance, wait until it has cooled down completely (a steam iron takes about one hour to cool down). Use the handle to store the appliance after use.
- Do not direct the steam towards people or animals and do not iron garments while worn.
After use, store the appliance in a stable position, using the stand on the back of the iron.
- Never add any perfume, vinegar, starch, scale-removing agents, ironing products or other chemicals in the water reservoir - unless recommended by Hotpoint-Ariston. Never use contaminated water.
- Never immerse the appliance in water or in any other liquid.
- The appliance must not be left outdoor and exposed to weather agents.
- Never leave or use the appliance in the proximity of flames, ovens, flammable materials or other heat sources.
- Never use the appliance for any purposes other than the ones for which it has been designed.
- In case of suspected damage, immediately disconnect the plug from the electrical socket.
- The manufacturer assumes no responsibility in case of damage resulting from the improper use of the appliance.
BEFORE USE
Before using the appliance for the first time, remove all stickers, protective plastic or cardboard case from the soleplate of the iron.
Make sure that all adhesive parts have been removed from the soleplate with a dampened soft cloth and eliminate any residues or particles from the manufacturing process, by repeatedly filling and emptying the water reservoir.

When switching on the iron for the first
time, you may notice an unpleasant odour, a
little smoke and some impurities that will disappear in a few minutes. When using the steam function for the first time, do not direct the steam jet on the garments because of the possible presence of manufacturing residues in the steam dispenser.

Never add any perfume, vinegar, starch,
other chemicals in the water reservoir - unless recommended by Hotpoint-Ariston. Never use contaminated water.
Filling the water reservoir (A)

We recommend using demineralised water.
Before filling the iron with water, make sure that the iron is switched-off and disconnected from the electrical socket.
- Set the steam regulator (3) to Off.
- Tilt the iron in such a position to make water entrance easier.
- Open the lid of the filler hole (13) and fill the water reservoir using the water measurer supplied with the iron. Never fill the water reservoir above the maximum water level (10).
- Close the lid of the filling hole.
USING THE IRON
In order to make reading this instructions manual easier and identify the model of your Quick Perfect iron, refer to the graphics on page II.

Your iron is supplied with Power Off System
safety device which automatically switches
the iron off when it is left unattended or tips over and ensures maximum safety.
Selecting the temperature and adjusting the steam (B_1)

- Connect the plug of the appliance into a grounded socket (220-240V).
- The LCD (14) lights up in red and starts flashing to indicate that the iron is reaching the set temperature.
- Use the temperature buttons +/- (4a) to select the desired temperature. An acoustic signal is emitted every time you press one of the two buttons, the display lights up and starts flashing to indicate that the steam iron is reaching the selected temperature.
- When the iron reaches the set temperature, an acoustic signal is emitted, the LCD lights up in green and the set temperature is shown in fixed mode to indicate that the iron is ready for use.
- Make sure to check the garment label in order to identify the fabric type. In case of doubts, it is recommended not to the use spray function and iron a hidden corner in order to determine the most appropriate temperature and avoid damaging the fabric. In case of very delicate fabrics, such as silk, wool, and synthetic materials, iron the garment inside out to prevent shiny marks. Start ironing the garments that require a lower temperature, such as synthetic fabrics.

Fabrics with this symbol on the label must not be ironed.
| GARMENT LABEL | FABRIC TYPE | TEMPERATURE INDICATION | STEAM INDICATION |
| synthetic | ○●○ | Off | |
| silk mixed cotton | ●●○ | Off | |
| wool mixed wool | ○○○ | ||
| cotton | ●●● | ||
| linen jeans | ○○○ |
- Select the steam level with the steam regulator (3) or move it to Off to iron without steam. When steam ironing, make sure that the water level in the reservoir is at least 1/4 .
Selecting the temperature and adjusting the steam (B_2)

- Connect the plug of the appliance into a grounded socket (220-240V).
- Use the temperature control (4b) to select the desired temperature. If you go from a lower temperature to a higher temperature, the temperature indicator light (4c) light up until the selected temperature is reached.
- When the iron reaches the set temperature, an acoustic signal is emitted and the temperature indicator light goes off.
- We recommend to check the garment label in order to identify the fabric type. In case of doubts, it is recommended not to use the spray function and iron a hidden corner in order to determine the most appropriate temperature and avoid damaging the fabric. In case of very delicate fabrics, such as silk, wool, and synthetic materials, iron the garment inside out to prevent shiny marks. Start ironing the garments that require a lower temperature, such as synthetic fabrics.

Fabrics with this symbol on the label must not be ironed.
| GARMENT LABEL | FABRIC TYPE | TEMPERATUR INDICATION | STEAM INDICATION |
| synthetic | MIN | Off | |
| silk mixed cotton | Off | ||
| wool mixed wool | |||
| cotton | |||
| linen jeans | LINEN |
- Select the steam level with the steam regulator (3) or move it to Off to iron without steam. When steam ironing, make sure that the water level in the reservoir is at least 1/4 .
USE


The iron starts producing steam as soon as it reaches the set temperature.

If the water in the reservoir is finished, it may be necessary to press the shot of
steam button several times to (re)activate the pump, after filling the water reservoir again.
Ironing without steam (C_1)
- Set the steam regulator (3) to Off (=no steam).
- Select the recommended ironing temperature with the temperature buttons + / - (4a) (see step B_1 and chapter "Using the iron", section "Selecting the temperature and adjusting the steam").
Steam ironing (D_1)
- Check that the water level in the reservoir is higher than 14 .
- Select the appropriate steam with the steam regulator (3) and the recommended ironing temperature with the temperature buttons +/- (4a) (see step B_1 and chapter "Using the iron", section "Selecting the temperature and adjusting the steam").
Ironing with shot of steam (E_1)
The shot of steam function allows you to eliminate persistent wrinkles. You can use this function both in no-steam and steam ironing mode.
- Check that the water level in the reservoir is higher than 14 .
- Select the recommended ironing temperature with the temperature buttons + / - (4a) (see step B1 and chapter "Using the iron", section "Selecting the temperature and adjusting the steam").
- Press the shot of steam button (1) to obtain an extra steam flow when ironing. If the shot of steam function has not been used for some time, it may be necessary to press the button repeatedly to activate the pump.
USE

Ironing without steam (C_2)
- Set the steam regulator (3) to Off (=no steam).
- Select the recommended ironing temperature with the temperature control (4b) (see step B_2 and chapter "Using the iron", section "Selecting the temperature and adjusting the steam").
Steam ironing (D_2)
- Check that the water level in the reservoir is higher than 14 .
- Select the appropriate steam with the steam regulator (3) and the recommended ironing temperature with the temperature selector (4b) (see step B_2 and chapter "Using the iron",
section "Selecting the temperature and adjusting the steam").
Ironing with shot of steam (E_2)
The shot of steam function allows you to eliminate persistent wrinkles. You can use this function both in no-steam and steam ironing mode.
- Check that the water level in the reservoir is higher than 14 .
- Select the recommended ironing temperature with the temperature control (4b) (see step B_2 and chapter "Using the iron", section "Selecting the temperature and adjusting the steam").
- Press the shot of steam button (1) to obtain an extra steam flow when ironing. If the shot of steam function has not been used for some time, it may be necessary to press the button repeatedly to activate the pump.
FEATURES
Spray function (F)
The spray function is used to dampen the garment in order to remove persistent wrinkles easily. You can use the spray function both in no-steam and steam ironing mode at any temperature.
- Check that the water level in the reservoir is higher than 1% .
- With the iron in horizontal position, press the spray button (2) to dampen the garment.
Vertical steam function (G)
The vertical steam function is useful to eliminate wrinkles from hanging garments, curtains, etc. You can use this function by simply placing the iron in vertical position. All functions of the appliance will remain unchanged also in this position (refer to chapter "Use" according to the model).

Do not direct steam towards people or animals and do not iron garments while
Anti-drip function
The iron is provided with anti-drip function in order to automatically interrupt the steam distribution when the temperature is too low, thus preventing water dripping out of the soleplate.

Do not use steam with low temperatures (see chart in step B1 and B2 chapter "Using on", according to the type of iron you are).
Automatic Stand-by function (H_1)
LCD
The automatic switch-off function guarantees total safety.
This function automatically switches off the iron when it is not used for a few minutes. In particular:
- the iron switches off automatically after 30 seconds when left unattended in the ironing position or sideways;
- the iron switches off automatically after 10 minutes when left unattended in the rest position (vertical).
If you leave the iron unattended, the display flashes a green light and an acoustic signal is emitted to inform that the automatic stand-by function is active.
Simply move the iron or press the temperature buttons +/- (4a) to switch it back on.

Wait until the display becomes red before starting ironing again.
Automatic switch-off function (H_2)

The automatic switch-off function guarantees total safety.
This function automatically switches off the iron when it is not used for a few minutes. In particular:
- the iron switches off automatically after 30 seconds when left unattended in the ironing position or sideways;
- the iron switches off automatically after 10 minutes when left unattended in the rest position (vertical).
If you leave the iron unattended an acoustic signal is emitted to inform that the automatic switch-off function is active.
Simply move the iron to switch it back on.

Wait until the temperature indicator light turns off before starting ironing again.
CLEANING AND MAINTENANCE
After use (I)
-
Set the steam regulator (3) to Off, disconnect the appliance plug from the electrical socket and let the iron cool down.
-
Empty the water reservoir (9).
- Wind the cord around the cable winder (6) and store the iron in vertical position, in a dry safe place.

Never store the iron in horizontal position. Always use the stand at the back of the iron.
Cleaning (J)

Never use aggressive and/or abrasive substances to clean the plastic parts and on soleplate.
- Set the steam regulator (3) to Off, disconnect the appliance plug from the electrical socket and let the iron cool down.
- Use a dry or slightly dampened soft cloth to clean the upper part of the iron.
- For the ordinary cleaning and/or removal of stains or other residues deposited on the plate, clean with a dampened soft cloth and dry.
- Use a dampened cotton tip to eliminate scale in the steam holes that may impair the performance of your iron.

In order to keep the soleplate perfectly smooth and polished, avoid contacts with objects, do not iron sharp objects, such as pins, studs and hinges in order to avoid chipping the plate.
- Regularly rinse the reservoir with clean water. After cleaning, always empty the water reservoir.
Auto-Clean Function (K_1)
If you have been using water from the tap, we recommend starting the Auto-Clean function after ironing.

The use of the Auto-Clean function should not be deemed the same as using deminera-water on a regular basis.
- Check that the appliance is disconnected from the electrical socket and the steam regulator is (3) set to Off.
- Fill the water reservoir (9) up to the maximum water level (10).
- Connect the plug of the appliance into a grounded socket (220-240V).
- Set the temperature to the maximum value with the temperature buttons +/- (4a).
- Wait at least 2 or 3 minutes to warm the iron completely.
- Holding the iron above the sink or a container
made of resistant material, press the Auto-Clean button (8) and shake gently.

Steam and boiling water will come out of the soleplate with scale residues and other virtues. Never use plastic containers for action.
- Switch off the iron and disconnect it from the electrical socket.
- Set the steam select to the maximum position.
- Allow water to come out of the holes for at least 30 minutes.
- Slide the iron gently on a cloth to eliminate any stains from the soleplate.
- Before using the iron again, press the shot of steam button (1) repeatedly to eliminate any scale residues.

When making this operation, keep the iron away from the garments in order not to them.
Auto-Clean Function (K_2)

If you have been using water from the tap, we recommend starting the Auto-Clean function after ironing.

The use of the Auto-Clean function should not be deemed the same as using deminera-water on a regular basis.
- Check that the appliance is disconnected from the electrical socket and the steam regulator is (3) set to Off.
- Fill the water reservoir (9) up to the maximum water level (10).
- Connect the plug of the appliance into a grounded socket (220-240V).
- Set the temperature to the maximum value with the temperature control (4b).
- Wait at least 2 or 3 minutes to warm the iron completely.
- Holding the iron above the sink or a container made of resistant material, press the Auto-Clean button (8) and shake gently.

Steam and boiling water will come out of the soleplate with scale residues and other virtues. Never use plastic containers for action.
- Switch off the iron and disconnect it from the electrical socket.
-
Set the steam select to the maximum position.
-
Allow water to come out of the holes for at least 30 minutes.
- Slide the iron gently on a cloth to eliminate any stains from the soleplate.
- Before using the iron again, press the shot of steam button (1) repeatedly to eliminate any scale residues.

When making this operation, keep the iron away from the garments in order not to them.
TIPS
If your Compact Generator is not equipped with the Optimal Soleplate Temperature technology, you may find the following tips useful.
- Sort the garments out according to the fabric types. This will reduce the need to adjust the temperature according to the different fabrics.
- Start with the garments that require a low ironing temperature and continue with the garments requiring higher ironing temperatures.
If you are not sure about the composition of the fabric, try ironing a hidden part such as a seam, hem or internal section. Start with a low temperature and gradually increase it until you find the ideal ironing setting. - When you reduce the Compact Generator's temperature to iron delicate garments, wait approximately 2 minutes to let the iron reach the new settings.
Pure wool (100% wool) garments can be steam-ironed as long as the temperature is set to wool. We recommend using a cotton cloth to prevent any shiny marks on the garment. - Never iron areas with obvious perspiration marks because the heat will fix the stains and make them permanent.
DISPOSAL OF OLD ELECTRICAL APPLIANCES

The European Directive 2012/19/UE on Waste Electrical and Electronic Equipment (WEEE), requires that old household electrical appliances must not be disposed of in the normal unsorted municipal waste stream.
Old appliances must be collected separately in order to optimise the recovery and recycling of the materials they contain and reduce the impact on human health and the environment.
The crossed out "wheeled bin" symbol on the product reminds you of your obligation, that when you dispose of the appliance it must be separately collected. Consumers should contact their local authority or retailer for information concerning the correct disposal of their old appliance.
TROUBLESHOOTING
Problem
The soleplate remains cold and does not warm up.
The temperature indicator light turns on and off.
Steam comes out in reduced quantity or does not come out.
Impurities come out from the soleplate and stain the garments.
Water is dripping out of the soleplate
Possible cause / Solutions
- The plug may not be inserted into the electrical socket, or it may not make contact.
-
Check that the temperature is not set to MIN.
-
The temperature indicator light turns on to indicate that the iron is getting hot. The indicator light turns off when the set temperature is reached.
The steam regulator is set to Off.
Not enough water in the water reservoir. Fill the water reservoir.
- The iron is not sufficiently hot and/or the anti-drip function is active. Replace the iron in vertical position, using the stand, and wait until the temperature indicator light tuns off or the LCD becomes red before starting to iron.
- The plate temperature may be too low due to the excessively frequent activation of the shot of steam button. Slightly increase the interval between steam shots.
- There may be residues in the vaporisation chamber. Make the cleaning operations (see chapter "Cleaning and maintenance", section "Auto-Clean Function" according to the model).
- You are using perfume, vinegar, starch, vinegar, starch, scale-removing agents, ironing products or other chemical substances. Remember that these substances may damage the product. Rinse the water reservoir.
-
.You are using starch. You can use starch directly on the inside out of the fabrics and in any case never in the water reservoir.
The garment was not washed correctly or has some soap residues.
You are ironing a new garment that was not washed for the first time. -
The soleplate temperature may be too low due to the excessively frequent activation of the shot of steam button. Slightly increase the interval between steam shots.
The soleplate temperature is set to a too-low temperature. - You have replaced the iron horizontally without emptying it and/or without setting the steam regulator to Off.
You did not close the lid of the filler hole correctly. - You have used the shot of steam function with a too-low temperature. We recommend to use these functions with temperatures higher than .
- You are using perfume, vinegar, starch, vinegar, starch, scale-removing agents, ironing products or other chemical substances. Remember that these substances may damage the product. Rinse the water reservoir.
The soleplate is dirty or dark and may stain the fabrics.
- You are using a too-high temperature. Clean the soleplate (see chapter "Cleaning and maintenance", section "Cleaning").
- You are using starch. You can use starch directly on the inside out of the fabrics and in any case never in the water reservoir.
The garment was not washed correctly or has some soap residues.
You are ironing a new garment that was not washed for the first time.
The spray function does not work.
Not enough water in the water reservoir. Fill the water reservoir.
DESCRIPTION DE L'APPAREIL
Causes / Solutions possibles
HanoJIHeHne pe3epyapa (A)

PekomeHnyem 傳MnHepaN3OBAHHyIO BODY.
Ipeep hanoHHeHem BoOn yTOra npOBepbTe, TTo6bl OH 6bl ONtKJIuOeH ON cTeBOI po3ETKn.
- YctahOBHTe peryIaTOp npapa (3) B noJoxeHne BbIKn.
-
HakoHInTe yTIOB B noIooKeHne, oIneruAIOUe erO HanoJIHeHne BOIoJ.
-
OtkpoTe 3acnoHky OTBepCTnHaonHeHn (13) HaneTe B yTOr BOy CneuaJIbHbIM npinaraOuImcra TakaHOM. HnkOrJa He npebIshaTe MaKcMaJIbHbI ypOBeHb HapOnHeHn (10) pe3epByapa.
- 3akpoTe 3acNoHky OTBepCTnHaNoJIHeHnA.
NcPOnb3OBAHNE YTHOFA
Дпяболгу удобноу Oзнakомленья С hactошими Инструкшилчи и Дпя haxхжdeня модели Baшero ythora Quick Perfection CMOTpnte cxemy Ha CTpaHnizce II.
Hactpoika TempepaTypbI npoaun npap (B_1)

- BcTaBbTe ⅢTeNceJIbHyU BnIky npIbopa B3a3EmJIeHHyIO ceTeByIO po3eTKy (220-240 B).
- JKK dncnpei (14) 3aropaeTcKpaChbIM cBeTom n HauHnaeT MraTb, NOKa3bIBa, YTO yTIO HarpeBaetcDo 3aDaHHoN TemnepaTpybl.
- Пп РОМОДС KHONOK HACТРОКИ TЕРМОРЕЛЯЦИN +/- (4a) HACТРОТЕ HUKHYO TEMNEPAPTY. Пп КадOM HAKATIN OДНОИ 3ТиX KHONOK pa3ДаeTcR 3BYKOBOI CnHAnJ, JKK ДиСПЕЕ 3aRopaetcR n HaChHaET MmRaTb, NOKa3bIBAr, YTO yTIOH HarpeBaETcRdo 3aDaHHOI TEMNEPAPTybl.
- Korda yTJor Harpeetcdo 3aDaHHoN TeMnepaTypbI, BHOBb BKHNoaEtc 3ByKOBoCnHaJ, JKK dncnne 3aropaetc 3eJeHbI cBeTOM, pokaBaetc TemnepaTypa, T0 O3NaUaET, YTO yTHOr rTOB K pa6Ote.
- Пюверпье үнікіткін 6өлья пэрдгліжkon ділэ ор dedеленя типа тkaин.В с lyчae comнецн He pekOMeHnyetcny ИСПОЛьЗOBаТБ ФУнкцИо pa3брьl3rNBaTeTЯ n BHaЧаile NOrДNTb MaIeHbKn He3aMeTHbI yuactOK 6elЯ Длэ ор dedelnenя Han6Oone ONTMmaJIbHNoI TempepaTyPbI BO n36ExKaHne NOBpexKeHnry OdexKdI, ГlaDbTe ocOBo DeNikKaTHoe 6elbe n3ШeКka, Wepctn I CInHTeTNUeCKnx MATEpnaIIOB, BblBepHyB erO Han3HaHky BO n36ExKaHne O6pa3OBAHnI 6JleCTaUxII nonoc. HauHnaIte rJaXky c Beuei, Tpe6yUoUx 6OJIee Hn3Koi TempepaTyPbI, HapRIMep, n3 CInHTeTNUeCKnx TkaHei.

TkaHn C 3TNM CNMBOJOM Ha 3TNKETKe HEnb3ra INaIHTb.
He HappaBJIaIe Te nap Ha JIOdei nn XINBOTHbIX IN He rJaIbTe ODeJy, HaNTeYIO Ha JIOdei.
CnCTema «AHTN-KanJa»
Ythor nmeet CnCTemy AHTN-Kanra》,6naoapra KOTOpOI NOdaPnapa ABTomatueckn npepbIbaeTcR npCNIuKOM H3KoI TemnepaType,npedOTbpaIa TaKIM O6pa3OM yTeUKN BODbl N3 OTBepCTN B IOdoWBe yTHora.

He nCnoJb3yIte np npn Hn3Knx
TemnepaTypax. (Cm. Ta6nuky B nyHkTax B,
B2, rnaBbl «NcnoJb3ObaHne ythora», B3aBncmocn OT moDeni Baawero ythora).
ФункцяаabTomaTnueckoroOTKJIHoueHn(H1)

EcnBbOCTaBnnyTIOg6e3 npncMOtpa BkHouaETc3ByKOBOI CnHaJ,
PpeDynpexKaIOuO O cpaBaTbIbAHN yHKUABTOMaTnueCKOrO OTKJIIOUeHIN.
Для NOBTOPHOROBKLOUeHn yTOra DOCTaTOUHO N3MeHHT beroIIOJKeHne.

Iokntecb, noka HndkaTop TemnepaTypbI norachET, nepeB BO306HOBJIeHNEM rnaKKn.
CHCTKA I YXOД
Iocne nCnoJIb3OBAHnA (I)
- YctahOBHTpepyTJTOP npapa (3) B noJIOKeHne BbIKn., OTcoeINHTe 7TeNCBHyU BuJIky npIbopa ot cTeBOi po3ETKn i daJIte yTIOry OCTbITb.
- CneTe BOy u3 pe3epByapa (9).
- 3amotaTe CeTeBOI shHpy BOKpyr CneuaJIbHOJ Uactn KOpnyca yTjora (6) n y6epnte yTjorB BEptNKaJIbHOM NIOJOKeHHN BHaJeKHOe n CyXoe MecTO.

He ybnpaTe yTOr B roPn3OHTaIbHOM noJoxeHH, Bcerda CTabTe ero Ha
noCTaBky B 3aDHe N qactN Kopnyca yThora.
UncTka (J)

IyTbHa He IcNOb3yTe arpeccBHBie BeeCTBa
n/nnn a6pa3NBhble ry6kn.
- YctahOBHTpepyTJTOP npapa (3) B noJIOKeHne BbIKn., OTcoeINHTe 7TeNCBHyU BuJIky npIbopa ot cTeBOi po3ETKn i daJIte yTIOry OCTbITb.
2.ДЯЧСТКВерхнйчAcTиУТогИССПОЛБУTe MЯrkYU cyxHy UIN CJIeRka BnAχHNY TprIKNY.
3.ДЯperynapnOryxOdaI/INyUdaneHnIpyTeHnnKAnx-Ⅱ60HaJIeTOBHaNIOoBBeYTOraNCNoB3yIteMnKyUBoJaxHyU TpIkyI npotnpaIte Hacyxo. - Дя удалени hyanetob haKINB O TBepctnex BbIXOda npapa B NOdoWBe, KOTopoe MoKET npnbecTN K CHNKeHIO 3ΦΦeKTNBHOCTNaUero yTOrA, MOxHO INCIONb3OBaTB BLnXHy IO BaTHyIO nanoQky.

Дя coхранноctи ndeajbHo rnaKoN
pOBHON nooBbI yTOra n36eAte ee Ktac MeTaNnueckmnpEpmTaMn,He ONDte eo NO OCTpbIM npEpmTaM, TAKM KaK, IMep,nyROBNUcbl,3aKJIeNkn MOnHmN,Tak KaK NORYT NoapanaTb NooOBy.
- Perynapno onoIaKnbAai Te pe3epByap IINB OdbI uNcToI BDOi. Iocne uNCTKn Bcerda CInBaAIte BOy n3 pe3epByapa.
ФункцяaabTomatnueckoучstkn Auto-Clean (K)
LCD
B cnyae nCNoIb3OBAHnB OBOIpOBoIDHO B0bl peKomeHdyETcN CNOJIb3OBAt fYHKUIO camooHneHnA Auto-Clean B KOHcKe KaJdo JrJaXKn.

IcnoJb3OBAHne yHKcnn camooHCTKn
Auto-Clean He paBHa peryIpaHOMy
NcNoJIb3OBAHnIO DEMINHEpaJIIN3OBAHHoB OdbI.
- Поверът, утобь пиборъл отcoeинен OT cetи, и утобь рergyлгсрnapa (3) haxoindcв noloxhenn BbIKI.
- HanolHnTe pe3epByap BOdbl (9) Do MaKcImaJIbHO rYoBnA (10).
- BCTaBbTe 1TEnCeIbHyU BVJky npn6opa B 3a3emJIeHHyO CeTeByO p03eTkY (220-240 B).
- HacrpoTe Tempeatypy Ha MaKcImaJIbHoe 3NaueHHe npn NOMOu KHOPOK TepMOperyJzU+/- (4a).
- Пождnte 2-3 МнHyтbl HarpeBa yTOra Do 3aDaHHoro 3HaueHnI.
6.Держутогнад рakOBHOnилннад EMKOCtBOn n3 npOHyOro MaTePnAJa,нжмITE KhONkY AutoClean (8)и спeгka notpЯсite npi6op.
TakmO6pa30mN3nooBbIyTOraBbIyD Tropyne nap c BODOn, codepxauNe BO3MOxHbIe qactnCbI HAKINn n npOue 3arp3HeHH. He nCNoIb3yIte dIra 3Toi onepaun nnactkOBbIe EMKocTn.
- BbIKJIIOHHTe yTOr n OTOeINHInTe erO OT cETn.
- YctahOBHTe peryIaTOp npapa B noJIOKeHne MaKcImaJIbHOm MOUHOCTN.
9.ДаиTe BOe CteYb N3 OTBepCTn B TeueHne 30 MNHT. - Be3 haxmna npoBeDnTe yTOrom nO HeHyxHn OKaHN dIyUdJeHn BO3MOXhblx PnTeH, OCTablaembIX nOdoBoi.
- Перед следуюшим Испльбизанемуюг НжмITE KнОКу РИнHyДиТeьНOro napoyВладЖеня (1) HeckOЛько pa3 Длу удаленя OCTaTKOB HakINI.

He BbINOJIHnIe 3Ty OpeaunHO nAD 6eJIbEM BO n36exaHne pTeH.
ФункцяaabTomatnueckoучstkn Auto-Clean (K)

B clyuae IcnoIb3ObaHnI BODonpoBOHOB BObl peKomeHdyETcN CIOJIb3OBAt b yHKUIO camooHneHnAuto-Clean B KOHc KeKdoJrAaKn.

IcnoIb3ObaHne cyHKcnn cAmooUcTkn Auto-Clean He paBHa peryIpaHomy
NcNoJIb3OBAHnIO DeMInHepaIIN3OBAHHoB Odbl.
- Поверът, утобь пиборъл отcoeинен OT cetи, и утобь рergyлгсрnapa (3) haxoindcв Положень Вькл.
- HanonHnTe pe3epByap DЯ BODJI (9) Do MaKcImaJIbHO rO yPoBnA (10).
- BcTaBbTe ⅢTeNceIbHyO BnIky npIbopa B 3a3emJIeHHyO ceTeByO p03eTky (220-240 B).
- HactpoTe TeMnepaTpy Ha MaKcImaJIbHoe 3NaueHHe Ipr NOMOUs TepMOpErJyIaTopa +/-
(4b).
- Подождente 2-3 МнHyтbl HarpeBa yTOrado3aDaHHORO 3haYeHnA.
6.Держутогнад рakOBHOnилннад EMKObTbU n3 npOHyOro MaTePnAJa,нжмITE KhoNky AutoClean (8)и спeгкоторсite npi6op.

Takm o6pa3OM n3 nooWbIyTHOra BblnyT ropyne nap c BODo, codepkaune
BO3MOXHbIe YactnCbI HAKINN n npOyne 3aqrpa3HeHH. He nCNoJIb3yJTe dJIra 3Toi onepaunn pJaCTNKOBblcE mKoCTn.
- BbIKJIIOHHTe yTHOr n OTCoeDINHnTe erO OT cETn.
- YctaHOBNTe peYyIaTOp npapa B NOJIOKeHne MaKcIMaJIbHOI MOUHOCTN.
9.ДаиTe BOe CTeYb N3 OTBepCTn B TeueHne 30 MInHyT. - Be3 haxmna npoBeDnTe yTHOrom nO HeHyxHoi TkaHn dIy ydaJIeHn BO3MOxHbIX nIaTeH, OCTabJIreMbIX NOOJBOI.
- Перед следуюшим Испльбизанемуюг НжмITE KнОКу пинундтельно napoyвлajхеня (1) Heckoько pa3 дя удалиая OCTаTKOB HabINI.

He BbInOpHnIe 3Ty onepaunIO nAid 6eJIbEM BO n36exKaHne nIaTeH.
PEKOMEHDAUIN
PaccopTpuyTe 6eIbe DnIg IaJkN no Tnyn TkaHn. 3TO nOMOKeT u3bExKaTb uactoI nepenactpoiKu TempepaTypbl dny pa3hblx TkaHei.
- HauHnaiTe rIaJkCy c 6eJIb, TpeSyIooIero camoHn3KoI TeMpepaTpybl, I npOIoJkaIte no Mpeee IOBbIeHnIy.
- Ecni BbI He yBepenbI B Tnne TkAHN BeuNi, nonpObyTe nOrlaDnTb He6oJIbwoi CkpyItbIy uYactOK BeuNi, HApPImeP, BHyTpEHHN IooB, crNo nn BHyTpEHHIO CKpyITyo DetaIb. HauHaiTe rJaxky C Hn3Koi TEMpepaTybl NocTepeHHO NOBbIaMte ee, yCTaHaBnIBaB onTImaJIbHyIO TEMpepaTypy.
Korda Bbl nonhkaete temnepatypy yTora IraJgkkn DeIikKaTHoro 6bBy, noOdoXdnte npImepHO 2 MmHyTbI, yTo6bl yTOr MOr OCTbITb Do 3aadaHNO TemnpaTypbl.
- Beuzи n3 chstoy uepctn (100% uepctb) moxho rIaIntb c npaoyBnaJaxHeHem npi Tempepatype, npirodno Ipyeepctn. PekomeHyetcra rIaIntb chee3 x/6 TkaHb BO n36exAHne noarblenhy 6necTauxn noLOC ha Beazx.
Hikorda He rnaBte yacTknc BnIMbIMn CneDAMN Nota: TepNo fKcpyet PTHa, DeJAA Hx HeBbIbOIMbIMn.
YDAJIEHNE HENCINPABHOCTEIN
HencnpabHoctb
Bo3MOxHbIe npuHbI / MeTobl yctpaHnna
IpoOwBa yTHora ocTaetcXoJOnHOH He HArpeBaETc.
I3 nooobbl yTOra BbITEkaHOT KANNI BObl.
TemnepaIpya nooObbl yTOra MoKet 6bItb CNIuKOM Hn3KoN I3-3a cnIuKOM YacToR OHaKaTIN KHOPIKIN npAOyBnaJxHeHIny. YBeJIuYbTe INHTepBaJIb MExdy npHUYdntBbIM npAOyBnaJxHeHIneM.
TemnepaTypa NOOWBbl yTOra CNIuKOM Hn3KaJ.
Bbl nomectnyn ythor B ronp3oHTaIbHoe noJoxeHne, He cInVB n3 Hero body n/nn He nepeKlnuHb peryIaTOp npapa B noJoxeHne BblkI.
HeIIOTHO 3aKpbIta 3acJIOHka OTBepCTnHaIOJIHeHn BObl.
BbI nCNoJIb3OBAJIIN KHOJIpy npInHydIteJIbHOrO npOyBnAaKHeHIN npi CJIuIeKOM Hn3KoI TempepatType. PeKOMeHdyem Bam nCNoJIb3OBAtB 3Ty dYHKUIO C 60Jee BbICOKOI Tempepatypoi ●
BpeepByap BObl 6bl Iobablen apomatn3aTOp, kpaXmaI, cpeCTBO npOTIN HAKINN, cpeCTBA JnIraKKn NIn Dpyrne XmUeCKne BeEcTBa. POMHnte, TTO 3TN BeEcTBa MOryt NOBpeDntb pni6op. TuaTeNbHO onoNoChnte peepByap dIy BObl.
PonowBa yTOra 3arpa3HnlaScb NIN NOTemHeJa M MoKet 3anaKaTb 6eJIbe.
- Bын сильзуete утог слшков Всоков Temператур.
- Рочисту не пошу утога (смогге парраф "Чstka и ухол", парраф "Чstka").
BbI nCnOJIb3yeTe KpaxMaI. KpaxMaI MoXHO nCnOJIb3OBAtB HeNOCpeIcTBeHNO Ha I3HaHKe BeUeI N B JIObOM CInyae HIKoTda He NOMEuATb erO B pe3epByap c BoIoN. - Beüb 6bIa pIoXo nOCTnpaHa IIn Ha Hei octaIocb CTnpaJIbHoe BeuecTB0.
BbI rnaIne HObyIO, eue He CTnpaHHyIO Beu.
Функця pa36pb13rHbAHnHe pa60taet.
Bpe3epByape HeIOCTaTOHObI. IOneIte BOy B pe3epByap.
CEPBNUCHOE OBCJIYXINBAHNE
BecnlaTHa rOpuaJINHJ: 88003333887*
- (Ycnyra 6ecnlaTHa DnЯ aboHeHToB BcEx ctauHOapbIX liHH N ha Bcei TeppuTopn PoCCm)
Mbl 3abotmcr O CBOUX NOKyntenx IN CTapaemc8
OeHTb BbICOKOE KaueCTBO cepBnCHOrO
OcbnykBaHn. Mbl NoctoHNO COBepHeCTByEM
Haan npOdyKtby, YTObI CdeNaT BaIe oBSeHne c
TEXHKoN PnOCTbIM IN PnIaTHbIM.
YXoD 3a TeXHnKoI
JinHn npoFeccNoHaIbHbIX cpeCTB Professional no yxody 3a TexHnKo, peKoMeHyemar Hotpoint Ariston, npoDnT cpoK ekCnPyatauB Bawe TExHnKu n CnH3NT BepoAHTOcTB ee NpOMKn. JInHn npoFeccNoHaIbHbIX cpeCTB Professional co3daHa c yuetom oc6eHHocTei Bawe texHnKu. PnpOyKtbl npOn3BOyraTcB NtAlnn C cO6NIODeHNEM BbICOKX eBpOnecknx cTaHdaptOB bO6laTc KaueCTBa, kOJOrn m 6e3onacHOCTn NCnONb3OBAHn. Y3haIte noDPo6He Ha caTe www.hotpoint-ariston. ru B pa3dene «CepBnc» n cnpaunBaIte B mara3nHex Bawero roPOda.
AbTopn3OBaHHbIe cepBnCHbIe cHTpbI
Ytobb6bTb6bnke KHaunm NOTpeBnteJAM, Mblco3dJIIN shpOKyO cepBnCHyO cTeB,OCo6eHHOCTbIOKOTOpO JBnETc BbICOKa NOIROTOBAk, npocceCNOHAJIIN3M N YecTHOCTb CepBnCHbIXMaCTepOB.
Função Auto-Clean (K2)

Iepsh Hix 3anOBHnT npacky BDOIO, nepekoHaTeCra, I0 BOHA BmKHeHa i BnIka BNTaHyTa 3 pOeTKN.
- BctaHOBiTb peryIaTOp napn (3) B noJIoXeHHa Off (= Bic C H I c I napn).
- Haxinitb npacky B take noJoxKeHH, 06 noJerWHTBxID BOIN.
- BiKpnIte KpUkcy OTbOpy DnA 3anOBHeHHB Odn (13) i 3anOBHiTb pe3epByap 3a DonomorOcneiaJIbHOI CKJHKn 3 KomIIeKtY NOCTaAHHH. Hi B
KOMy pa3i He nepeBnUyTe MaKcMaJIbHNI pIbeHb 3aNoBHeHHra (10) B pe3epByapi.
4. 3akpiTe KpiuKy OTbOpy IJIa 3anOBHeHHB ODOIO.
BVKOPNUCTAHNIIPACKI
IooB nonerwnBawe 03haHOMenneHH 3 cIMMdoBIDNkOM 3 IHCTpyKiziamn i dI3HaTNCbIbWe npo Bnachy Moen npackn Quick Perfection, Mn nIdroTyBaJIr rpaqiHi 3O6paKeHH Ha CTOpIHJI.
Bn6ip TempeaTyprni peRyIIOBaHnHa napi (B_1)

- BCTaBTe BnIky npnIady B eNeKtpnHy po3EtKy, OCHaIeHOIO CnpaBHOIO CNCTeMOIO 3a3EmJHNN (220-240B).
- PidokpnctaniHn Dncnne (14) cnaaxye cepBOHm CbTIOM i pO3noHnAe 6bnMaTn, Bka3yOnn Ha Te, 0o npacka 6bn3bKa Do DocarHeHHa 3aDaHnx TEMnepaTyPHNX XapakTePncTnK.
- 3a DoNOMOROIO KHONOK HanaHTyBaHHa TEMnepatypn +/- (4a) o6eipb baxaHy TEMnepatpy. KoXhoro pa3y npri NaTnCKaHNi Ha ONDy 3 DBOX KHOJOK LyHae 3ByKOBm CnHaN, PK-DinCpnei cnaIaxye i po3nouHae 6nImaTu, BkazuyuHa Ha Te, Uo npacka Doocrae o6paHy TEMnepatypy.
- Kolni npacka doocarhe 3adaHOI Temnepaotypn, 3HOBy nponyhae 3ByKOBNI cHnA, PKDinCJIne Cnajaxye 3eJeHmCBiTnOM i BkazanaHa Temnepaotypa He 6JImMaTmE, BkAzyUHn Ha Te, IIO npacka rOToBA dIra BVKOpNCTaHHJ.
- Ipepebipte etKekTy ha peyi, kai nlaIrae npacvbaHnIO, 06B Bu3HaunTn TnTkAHnN. B pazi cyMHIBIB 6baxaHO He BnKOpNCtOBvBaTN fynKcIIO po3nInenHna I BnnpacyBaTN He DyXe nomITnIKyToK, 06o6obatn npdaTHy Temnepatpy i yHKHTn 3incvBaHH TaKaHH. B pazi ocOblNO DeiKaTHNX TKAHH, TAKNX Jk OWBK, BOBaH i CInHTeTnHi MaTePiaJN, Heo6xIDHO npacvBaTN peei HABNVopit, 06 3anObirn «InCHIOHM» cnIdam. P03nouHaJIte npacvBaHH 3 Tnx peey, kki BmMarAObTB 6jBbU Hn3bKx Tempepatyp, HapNKJa, peey 3 CInHTeTnHx TkaHH.
| ETNUKETKA PEUEN | ТПТКАНИН | ВКAZIBKII SCIOДО TEМПЕРATУРИ | ВКAZIBKII SCIOДО ПAPIN |
| СИNTETNUHII | ○●○ | Off | |
| SUOBK БавOBнA 3MIIaHOrO cKnIaDy | ●●○ | Off | |
| BOBnA BOBnA 3MIIaHOrO cKnIaDy | ○○○ | ||
| БавOBnA | ●●● | ||
| ЛьОН Джинс | ○○○ |
- 06epitb npndaThe halaTbyHnna napn 3a donomoroo peryIaTopy nap (3) afo nepecyhthe peryIaTOp y noLoKeHHN Off (= BiCyTHicTB nap), 1o6 npacyBatn 6e3 nap. Pia cac npacybaHHn 3 npaoJepeKoHaTeC, zo pibeBbOy pe3epByapi CKlaJaAe He MeHwE 14
Bn6ip tempeatypni pepyuobannnap (B_2)

- BCTaBTe BnIky npnIady B eNeKtpnHy po3eTKy, OCHaIeHOIO CnpaBHOIO CNCTeMOIO 3a3emJHn (220-240B).
- 3a donomoroTo tempeatypno perytnatopa (4b) o6epitb baxaHy tempeatypy.Pn np epexodi BID Hn3bKOI Do 6iBb WBCOKOI TEMpeatypn iHdkaTOp Tempeatypn (4c) cBtntbcj, DOKn He 6yde doocarhyta o6pana tempeatypa.
- Kolni npacka doceIhe 3adaHOI Tempepatypn, 3HOBy npolyha 3ByKOBn ciHaI i iHdkaTop Tempepatyn BIMKHeTbcra.
- Mn paДIMO nepeBiprTn etNKeTky Ha peyi, Ika NiIJIrae npacyBaHnHO, 106 Bu3HaunTI TIN TKAHNHN. B pa3i cymHIBIB 6bXaHO He BVKOPNCTOByBatn 4yHKUIO pO3NIIeHHa I BUNPcayBaTN He Dnyke NOMITH KytOK, 106 O6paTn PpNDATHy Temnepatyp i YHKNHTN 3iNCyBaHnR TKAHNHN. B pa3i OOC6NIbBO DeIiKaTHNX TKAHN, TaKx Jk 5oBk, BOBHa i CINTETNUHm MatepiAIn, HeOBxIDHO npacyBaTN peYi HABNBoPit, 106 3anO6IITN "JINCHIOUM" CπiDAM. Po3NouHainTe npacyBaHnR 3 TINx peey, Iki BImaraIOTb 6IbS Hn3bKnx Temnepatyp, HApNKnAd, peey 3 CINTETNUHx TKAHNH.
| ETNIKETKA PEUEN | ТПТКАИNHIN | ВКАЗIBКИ ΜΙΟΥΟ TEМЕРАΤΥΝΙ | ВКАЗIBКИ ΣΙΟΥΟ ΠΑΝΥΝΙ |
| СИNTETNUHIN | MIH | Off | |
| SUOBK Бавовна 3Mιχаного СКладу | Off | ||
| BOBHA BOVBHA 3Mιχаного СКладу | |||
| Бавовна | LINEN | ||
| Льон Джинс |
- OBepiTb npiDaTHe HanaaTuBaHnI dIy napn 3a DOnomoroOp peryIaTOp npn (3) a6o nepeCyhIe peYIaTOp y noLoXeHNr Off (= BiDcTyHicTb npn), uOb npacByaTn 6e3 npn. Pid qac npacyBaHHra 3 npao InepeKoHaIteCra, Uo pIBeHb BODIn y pe3epByapi cKnJaAc He MeHJSe 1 / 4
PEXIMBNKOPNUCTAHH


Ipacka po3noue Hnpo6jTn napy BiDpa3y X nicra doocrHennr 3aadoHOI Temnepaatypn.

Ykso BOda B pe3epByapi 3akihynlacsy, MoKe 3HaIO6bTcH HeOHDopa30Be
HaTnckaHnHa KONky BkNdy napn IyBimKHeHH a6o BiHOBHeHH po6Ot nOMnnicra HOBO 3anOBHeHH BOOIO pe3epByapy.
PpacyBaHnHa 6e3 napn (C_1)
- BctaHOBiB peryIaTOp napn (3) B noJIoXeHHy Off (= BIcTyTHicb napn).
- 06epiTb peKOMeHIOBaHy tempeatypy npacyBaHHa 3a DOnOMoROI KHOOK HanaTuBaHHa Tempeatypn +/- (4a) (INB.Φa3y B, i B pozdi "BukopncTaHHa npackn", naparpaΦ "Bun6ip Tempeatypi i peryuOBaHHa nap").
PpacyBaHHa 3 npoIo (D_1)
- IpepeKoHaItecA, 10 p iBeH B ODN B pe3epByapi nepeBnUye 1 / 4 o6'Emy.
- 06epitb peryniobanna napn 3a donomoropopeynrTopapnap (3)i pekomehoBaHy Tempeatypny npacybaHHra 3a donomoroo KHONOK
HaIaIaIbYBaHnIeTmpePaTyprn+/-(4a)(IINB.Φa3y B1iBpo3dJIi"BnKOpNCtAnHnI npackn",naparpaF "Bn6ip tempePaTyprn i perynIOBaHnI napr").
IIO6 3HOBy yBIMKHyTN npacky, DOCTaTHbO nepecyHyTN ii.

3auekaTe, nokn He BmKHeTbcr TemnepaTyprHn iHndkaTop, i notIM OBxuyTe npacyBaHHra.
OuHueHHI DOrJaI
IicJIa BnKOpncTaHHa (I)
- BctaHOBiTb peryIaTOp napn (3) B noJIoKeHHa Off (= BiDcyTHicTb napn), BmMiTb BuJIky 3 eJeKtpnUHOi po3eTKn i 3aueKaIte Ha oxOJIoJKeHHa npackn.
- CnpoJxHITb pe3epByap 3 BOIOI (9).
- O6MotaIte IHHyp JINBHeHnHaBKOnO cneiaJbHoro HAMOTyBaHa (6) iCKnaIITb npacky BePTNkaJIbHO y HaIiHOMy i 3axNuEHomy BiD BOJOr NiCi.

He 3aIIuIaIe npacky y ropn3oHTaIbHOMy nnoJoxeHHi, a ckOpncTyItecra onopoIO, p n'ATKOIO y 3adHnI qactnHi npackn.
OuHnHn (J)

He BnKOpNCTOByIte arpeCnBHI peYOBHNI i/ a6o abpa3NBHi MaTePiaJI N IJN OUYIeHHr TnKOBHX qaTnH i 3aJI3HOI NiOoWBn npackn.
- BctaHOBiTb peryIaTOp napn (3) B noJIoKeHHa Off (= BiDcyTHicTb napn), BmMiTb BuJIky 3 eJeKtpnUHOi po3eTKn i 3aueKaIte Ha oxoJIoJKeHHa npackn.
- Дя оишени Верхьоі частни праски використову Te M'ky cyxy a60 3лэрka 3воложену raHчрky.
3.ДяЗвчанHOrO OUnSeHnI a/b6 BvdaJIeHnI pIaM a60 iHUnx HakONuYeHb 3 NiIOUWBn BVKnOpNCToBvIte M'Jky 3BOJOnKeHy raHcipKy, nicIyorO BNTpIb HacYxo NOBepXHIO. - Κιοδ Bνιαλιπη Ḁκαπι n a𝑏ο hαλιτ 3 σθυριβ ἡνη BνχόODY παρι, λεί MɔκγTy bσmbεκητη pοδούιν BλαctɪνθοCi πρακη, Bνκορικόθουγι Te KIhynché 3ΒΟλοχΕΟΙ δαβοΒΗΟΙ τανΗμρΚ.

Lio6 niOoBa npackn 3aBxDn 3aIiMaJacn
ONTImaJIbHO rJaDKOIO, yHnKaIte KOHTaTY
PaeBIMn peyamn, He npacyuTe 3arOCTpeHn
Taki kRyD3NKn, 6bnckabKn, 3acti6Kn, 0o6
dprnatnoBepxHNO npackn.
5. PeryIpaHNo 6bnolickyIte pe3epByap cnCToIO BDOIO. IicnO uNueHHa 3aBxDn cnpoxHIOIte pe3epByap BiD BOIN.
Функцяcamоочицehнг(K)

B pa3i BnKOpNCtAHnH BODn 3-niD KpaHy peKoMeHdyEeTbc 3aDiTu FyHKuIHO Auto-Clean HanpkiHcKOxHOrO npacyBaHH.

BvKnOpncTaHHaФyHKuIcIcamOoUHcHnHaAua to-Clean He MoKe po3rJaDaTnCra JK aRpHe BxNBaHnHa DeMInepaJIi3OBaHOI BODn.
Bunika He BCTabJeHa B po3eKy a6o BiDcyTHi KOHTaKT.
- IpepebiTe, 10 TeMnepaTpa He BCTaHOBneHa Ha MIN (miHimaJIbHy).
IhdkaTop Tempepatny He cnapanxyc i He rache.
- YbIMKHeHnI TeMnepaTpHOrO iHdNkaTOpy Bka3Ye Ha Te, IIO npacka HarpiBaetbcr. KOni 3aHaHa TeMnepaTpy 6yJe DoCraHHeHa, iHdNkaTOp 3rache.
Napa BxOoNTb y He3HaunHi KInbKOcTi a60 He BxOoNTb B3arani.
BctaHObITb peryIaTOp napn B noJIOxHeHH Off (= biDcyTHic t_B napn).
HeoctaTHbO BOIN B pe3epByapi IJIa BOIN. 3anOBHITb pe3epByap.
- Пpackа недостаимь rapая i/aбо задяно Функцию пори крапань. Встановы пackу вervтikальни поожени, використовуочи сецialby onopy (n'яту), i zayekaite, kony Bumkhetbcя Temпературни indinkatop abo PK-dinслел салaxhe урвонм CBITJOM. Пicя сboro можна розочати пасуваши.
TemnepaIpa NiIOoBbN IpaCK NDCHTb Hn3bKa 3 npuHn 3aHaTTO Yactoro BMKcAHH KHOJKN BkNdy nap. 3nerka 36iNbItb iHTepBaM MIX BkNDAMn nap.
3 niOoBn npackn BHXoJrTb 3a6pydHeHHra kI 3aIIuHaOTb PJIaMn Ha 6iIn3Hi.
B kamepi naporehepatopa haraBHI 3aJinukobi 3abpydHeHn. BInKoHaIte onepaui 3 ouHsEHHN (INB.pOzDIn "OuHsEHHN i DOrIa", nparpaF YHKUcIg CAMooUHsEHN, BiIOBvIDHO do MOdeni).
Bn BnKOpncTOByeTe Duxn, ouet, kpoXmaJIb, 3acobn npOTn Hakiny, 3acobn dIpyaCyBaHHa6o iHsi xiMiyHi peOBOHN. PAm'raTaNTE, IIO Taki peOBOHN MoKyTB yUkoNTn Bvpi6. OonoocHITb pe3epByap 3 BODOJ.
Bn BnKOpNCTOByeTe KPOxMaJIb. MoXHa BnKOpNCTOByaTn KPOxMaJIb 6e3nocepEdHb Ho Ha 3BOpOTHi cTcPOHi 6iIN3Hn i Hi B YAKOMy pa3i B pe3epByapi dIra BOiN.
- PpeDMeT OJdIgY, kIiPiIJIrae npacyBaHHIO, HnPaBnIbHO BnIpaHn aO Ma e 3aIIuKmMna.
Bn npacyte Hoby pivbepse i BOHa ige He 6yna BnnpaHa.
3 niOoBn npackn BHXOaTb kpani BOH.
Temnepatypa niooBn npacKn Docntb Hn3bKa 3 npuHn 3aHaTOn YactTO BmKaNHH KONKn BnKNDy nap. 3nerka 36iNbWitb iHTepBaN MIX BnKDAMn nap.
Tempepatya nioobn npackn 3aandaHa Ha dyke Hn3bke 3HaueHHra.
Bn po3tauBya n npacky ropu3oHTaIbHo, nonepedHbo He cnopoxKnBn ii i/a6o He BcTaHOBnBn nperyTOp npn Ha Off (= BiDcyTHicTb nap).
Bn HnnpaBnIbHo 3aKnJIn KpnIky Ha OTBopi IJna 3aIOBHeHHBaOIOU.
Bn BnKOpNCtAni FyHKUIO BnKnDy napn npn dYke Hn3bKi Temnepatypi. Mn paIIMo BnKOpNCtOByBaTn TaKy FyHKUIO npn Temnepatypi Bnue ● ● ●
Bn BnKOpncTObYeTe Duxn, ouet, kpoXmaJIb, 3acobn npOTn hakiny, 3acobn dIpyaCyBaHnA b6o iHIx xiMiyHl peOvBNH. PAm'raTaNTE, IIO Taki peOvBNH moKyTB yUkoNTn Bnpi6. OonoJocHITb pe3epByap 3 BODOI.
Пиошва npackn 3a6pydHeHa i moKe 3aHnHnTn PJIaMn Ha TkaHnHax.
Bn BnKOpNCObyTe 3aHaTTo BnCOKy Tempepaty. OunctiTB nIOuBy npackn (DnB. po3diN "OunueHn i DOrIaD", naparpaq "OunueHHA").
Bn BnKOpncTOByeTe KPOxMaJIb. MoXHa BnKOpncTOByBaTn KPOxMaJIb 6e3nocepEaHb Ho Ha 3BOpOTHi CTOpOHi 6IIN3H i Hi B YAKOMy pa3i B pe3epByapi dIra BOJn.
- PpeDMeT OdAry, knniPiDJIrae npacyBaHHIO, HnnpaBnIbHO BnnpaHn a6o MaE 3aIIuKmMna.
Bn npacyte Hoby piv Bneppe i BOHa 6bna BnnpaHa.
Power Off System Kayinci3ik KypblfbcIMeH Ka6dbkTaNFAH.
TemnepaTpaHb TaHday KHe 6ydb peTTey (B_1)

- KypbIfbl aibIpbIH Jepre TybIKtaJFaH po3eTKaFA (220-240 B) KocbIHbI3.
- Ytik opHaTbIJaH TemnepaTypara Xetin KaIFaHbHa KepcTeY yuiH CKI (14) Kb3bl TycTI 60bl XaHbIn, XblbIKtaB6actaDbI.
- KaKETTI TemnepaTpaHbI TaHday yuIH Temnepatypa TuMelepiH + / - (4a) KOndaHbHbI3. TyMelepdi 6ackan caBbIN dblb6tBk ciHAn 6epinei, dinPJIeJ XaHbIN XbINbIKTaI 6actaNbI, cetin on 6y ytirih TaHaJFaH Temnepatypara KeTin kAraHbH 6iDipei.
- Ytik opHaTbIJFaH temnepaTpyara XeTKeH Ke3de Dbl6bIcTBK CnHaN 6epineDi, CKJ Xacbl TycI 60bln XaHaNb JxHe opHaTbIFaH temnepaTpya TypaKTb KepCetiin TpyaBb, CeiTin on Ytik KOJaHaYfdaBbH eKeHH BinDipei.
- Mata Typin anbiktay yuH KIM Knyakwacih TeKcepyi yMbITnabH3. KymHdi 60ncahb3, eH TmIMTeMnepaTpyaHbA nBkTay XHe MATAHB 3AkBIMdAn aNmay yuH uWbIpaTkbI W cyHKUcBb H KOJdaH6a, Keip6eTIN 6bpblbH YIKTe Kepy Kepe. Xi6ek, xHy XHE CINTETKa CnKTB1 eTe H3iK MaTalap KImHi iuih CbPTka KapaTbI, XaNTbIpaHa 6enrJep KaMbayi yuH KIMDi iuih cbiptbHa KapaTbI eHderen XeH. CINTETKAJIbK MaTalap CnKTB1 TemeH TemnepaTypaHb KaKet etetIH KIMDepden Bactan, YtIKTeH3.

MYHDAI KYJAKUACbI BAP MaTanapDbI, TyikTeyre 6oMaMdbI.
| КИМ КИЛAKLUACbl | MATA TYPI | temпература Корсetedkilii | БY KОретkedkilii |
| СИNTETИКа | ○●○ | Off | |
| жibeк .apалас мakта | ●●○ | Off | |
| ЖУH .apалас жУH | ○○○ | ||
| мakта | ●●● | ||
| Зыfvьд ДжIMнсbl | ○○○ |
- By teririHIN (3) Kemerimeh 6y deHrein TaandaHb3 Hemece 6ycb3 yTikTey yuH 6y terirH Θwipyni KyiHe XblKbTBih3. Bymen YtikTeren Ke3de cy KOHTeHepiDeri cy deHreIne KEM DereHne 1/4 eKeHH TeKcepin3.
TempeaTpaHb TaHday XHe 6yDb peTTey (B_2)

- KypbIfbl aibipbIH Jepre TybIKtaJFaH po3eTKaFA (220-240 B) KocbIHbI3.
- KaKETTI TemnepaTpaHb TaHday yuIH TemnepaTpa Tetirih (4b) kondaHbIbI3. TeMeH TemnepaTpaDah JOFapbl TemnepaTpaFa e3reptcHiz, TaHdaJfAH TemnepaTpaFa XeTKeHwe TemnpaTpa HndkaTop IaMbI (4c) XaHbIn TpyAbI.
- Ytik opHaTbIJaH TemnepaTypara XeTeKeHde Dbl6bIcTBk CnHAn 6epin, TemnepaTypa HndIkATOp WAmbl CeHeJI.
- Mata Typin anbiktay yuH KIm Kynakwacbih Tekceprhen XeH. KymaHdi 6oIcahbI3, eH TmIMi TeMnepaTypab1 aHykTay XHe MaTaHbI 3aKbIMdAn aMAY yuH WauBipatKbIw FyHKUraCbIH KOJaHaBai, KepiH6eiTIn Bip 6pybIbH YIKTeN Kepy Kepek. Xi6ek, XyH XHe CnHTeTKa CnAeTbI eTe H3iK MataJap KImHi iuiH CbPTKa KapaTbI, XaJIbIpaFaH 6enrJep KaMaysi HuaH KImDi iuiH cIbTIbHa KapaTbIN eHderen XeH. CnHTeTKaJIbIK MataJap CnAeTbI TemeH TemnepaTypab1 kXket etetih KImDepdEn bactan, YtIKTeH3.

MYYHDAI KYJAKUACbI BAP MaTanapdbI LyTKteyre 6oMaJdbI.
| КИМ КИЛAKLUACbl | MATA TYPI | STEMПЕРATYPA КИPCETKILI | БY KИPCETKILI |
| СИNTETINKA | MIMH | Off | |
| Жібек аразлас мakта | Off | ||
| ЖУн аразлас кун | W | ||
| мakта | 3blIFbIP | ||
| 3ыIFыр ДЖIMHCbl |
- By teririHIN (3) Kemerimeh 6y deHrein TaHaNbI3 Hemece 6ycbI3 yTikTeY yuH 6y terirH Θiipyni KyiHe XblXbITbIHbI3. Bymen YtikTereH Ke3de cy KOHTeHepiHderi cy deHreIne KEM dereHne 1 / 4 eKeHH TeKcepH3.
ПАДАЛAHY


OphatbJInFaH TempepaTypa XeTKeH Ke3de yTik 6y bIraPapa 6actaIdbI.

KoHTeHeppe cy Taycblnca, cy KOHTeHepiHa KaTadaH TOITbIPfAHH KeIH COPFbIHbI Kocy yuH 6y aftbHb TYmecih 6iphewe petkepek bonyb MyMKIH.
Bycb3 YtikTey (C_1)
- By TeTiriH (3) Θuipyni (=6ycbI3) kyinHe opHaTbIHbI3.
- +/- TemnepaTpya TymmepepiH (4a) kemerimeh YcblbIaNfAH YtIKtey TemnepaTypacbIH TaHaNbI3 (B, KaamblH Xane «Ytikti NaJdaNaHy» TapaybH, «TemnepaTpya TaHday Xane 6bypeTTey» 6eImiH KepiH3).
Bymeh YtikTey (D_1)
- KoHTeHepDeri cy deHrei 1/6enricinH XoFapbEkenH TKcepin3.
- By teririmeh (3) TiicTi by MmIeepin Jxhe +/TemnepaTypyImeepiH (4a) Kemerimeh YcbHbINFaH YtIKTeY TemnepaTypacBn TaHaNbI3 (B, Kaambl H xHe «YtikTi naJaDAnHy TapaybH, «TemnepaTypa TaHday XHe 6ydbpeTey» 6enimih KepiH3).
By afbihbimeh ytktey (E_1)
By afbHb fynHKUncBc KeTne KOrTBn KbIptbCTapDbJ kAsyfa MymKIndk bepei. ByfynKUncHb 6ycb3 XHe 6ymen ytiktey pexmdepiHne KOJaHyfa 6oanaBb.
- KoHTeHepDeri cy deHrei 1/6enricinH XoFapbEkenH TKcepin3.
- +/- TemnepaTpya TymmepeiH (4a) kemerimeh ycbHbINFaH YtIKtey TemnepaTpaCbH TaHaBb3 (B1 KaDAmBH XaHe «YtIKti NaIdaNaHy» TapaybH, «TemnepaTpya TaHday XaHe 6bypeTtey» 6eImiH KepiH3).
- YtIKTeReH Ke3e KocbIMsa 6y afbIHbH UbIrApy yuH 6y afbIbTuMeciH (1) 6acbHb3. By afbIHbФyHKUcBb 6ipwama YaKbIT KOnDaHbIMaHaH 6oNa, copfBbHb KOCy yuIH TuMeHi 6ipHeWe pet 6acy Kepek 6onybMyMKIn.
PAnJaIAHy

Bycb3 YtikTey (C_2)
- By teiriH (3) Θuipyni (=6ycb3) kyinhe opHaTbIHb3.
- +/TemnepaTpa TeTiriHIN (4b) Kemerimeh YcblhblfAH YtIKTey TemnepaTypacsbH TaHaNbI3 (B_2 Kaambl H XeHe «YtIKTI naJaNaHy Tapaybln, «TemnpaTpa TaHday XeHe 6ydbpeTey» 6eImiH KepiH3).
Bymeh YtikTey (D_2)
- KoHTeHepDeri cy deHrei 1/4 6JIriciHeH JxOfapbl eKehIH TKecepij3.
- By Tetirimeh (3) Tnicti 6y MeIeepin Xhe +/TemnepaTypa TeTiriHIN (4b) Kemerimeh YcbHbJFaH YtIKTeY TemnepaTypacbH TaHaNbI3 (B_2 Kaambl H Xane «YtikTi naJaNaHy? TapaybH, «TemnepaTypa TaHday XHe 6ydbI pettey》6enimHKepiH3).
By afbihbimeh yTiktey (E_2)
By afbHbI cyHKUncBc KeTne KOrTBnKbIpTbICTapdbI Ka3yfa MymkiHik 6pepi. ByI cyHKUncHb I 6ycbl3 KHe 6ymen YtIKtey pexmepinde KonlaHyf60anaBl.
- KoHTeHepDeri cy deHrei 1/4 6enricinH JxorapbI eKehIH Tekcepini3.
- +/TemnepaTpa TeTiriH (4b) Kemerim HycbHbIFAH YtIKTey TemnepaTpaCbH TaHaHb3 (B_2 Kaambl H Xane «YtikTi naJaNaHy Tapaybl, «TemnepaTpa TaHday XHe 6ydbI pettey» 6eImiH KepiH3).
- Ytikteren Ke3e KocbIMsa 6y afbHbH NbIrapy yin6 by afbHbT Tymecin (1) 6acbH3. By afbHbI cyHKnca6ip7aMa yaKbIT KOndaHbIMaHaB 6oJca, copfbHbIKocy yuH Tymehi bipHepe pet 6acy kepek 6onyb MyMKIn.
MYMKIIHДIKTEP
UaawbipatKbIw yHKuIcbl (F)
UaBbpaTkbI ϕyHKcIraCbl KeTnei KOrTaHb KbIpTbICTapdbI OHaJka3y yuH KnIMdi DbIMKbIJaHaDbIpy MaKCaTBHda KOJaHaJIJaDbI. UaBbpaTkbI ϕyHKcIraHbI 6ycb3 XeHe 6ymeYtKTey pexmdepiHke3 KeIreH TemnepaTypada KOnDaHyfa 60nAbI.
- KoHTeHepDeri cy deHrei 1/6enricinH JxofapbEkenH TKcepin3.
- Ytik KeIeHeH KyIe TyPfAH Ke3Je KImiDJIbIMKblIaHaHbIPy UwIH WauBipaTkblT YuMeciH (2) 6acblbI3.
Tik 6yФункцясbl (G)
Tik 6y fynkunrcbI iinHIn KIMdepderi, nepenepderi, T.6.3attapdaI bKbIpTbcTapdbKetipy yuih konaiNb.IyN fynkunraHbI KOlaHy yuih YtkiTik Kynde yctacaHb3 6oJFaHbI.KpyblfBbHbIbapnbIK fynkunnapbI 6yI KaIbInTa e3repicci3 kanaDbI (Modenbre cainkec «PaindaIaHy» tapaybH kapaHbI3).
Bydby aadamap MeH kahyapnapFa 6aftbTTaMaHbI3 XHe KImdi KIn Typbln YtIKTeMeHi3.
TamyaH Kopray yHKnrcbI
TemnepaTpa TbIM Temen 6oIraH Ke3de By yIneCTipimH ABTomaTTbI TypE TOKtaTBIN, CoaIIa Ta6aHHa Cy TaMbJInapbIHb IN blybHa KonBepMey ySiHIn YtIK TamyaH a KopFay cyHKUraCbIme H Ja6DbIKtanFaH.
TemnepaTypa TeMeH 6oNfAH Ke3Je 6y fynKcunycbIH KOnJaHa6aHbI3 (KOnJaHaTbIH YtIK moJeiHe 6aJIaNbIcTbI, B1 He B KaadMbIHdaFbI KeCTeHi, «YtIKTI KOndAHy» TapayBH KapaHbI3).
AByHKnucbI (H)

ABTOMaTTbI Tpyde eUipy FyHKUraCbI TOJIK KayiCi3diKi KaMTaMaCbI 3 ete.i.
ByfynyHKnY, yTik bipHeWe MmHyt KOndaHbImaHaKe3de OHbl ABtOMaTT typee eWipei. Atan aiTkahda:
yTikTey KaIbHda Hemece bip KAKKa Kapan TypFaH Kynde BaKbIaycbI3 KaIc, yTik 30 cekHytdan KeiH aBtOMaTTbI Tpyde eIeDi;
- 6acTaNkbl KaIbHnDa (Tik) 6aKbIaayCbI KAnca, yTik 10 MInHyTTan KeiH aBtOMaTTb Tpye eEweJI.
YtikTi 6aKbIaycbl3 KaIbIpcAhbl3, DnCnIe JkblblkTan, dl6bcIcTBk CnHAn bepinei, ceiTin aBOMaTTb TyPe eWipy fynKcnraCb Kocblfahbl biDipipnei.
YtKi KaTaN H Kocy yuH YtKi XbJXbIbIbHb3 Hemece +/- TempepaTypa TyMelepi (4a) 6acbHb3.
Ytikteuyi KaTadaH 6actamac 6ypbH DnCnnei KbI3bl TycneH XaHaHaHbH Kytih3.
KoJaHaHaHaH KeiH (I)
- By Teririh (3) Θιργίη κυήσε opHaTbIbI3, Kypblfbi aiBpbiH po3eTKaJaah afblTbIbI3 xεHe γτικTiH caJIbHdaybiH KyTih3.
- Cy KOHTeHepiN 6oCaTbIb3 (9).
- Kaßebi di opaɪtbɪn 6ənɪkke (6) opan, yɪtɪkti tɪk Kaɪbɪnta, kʊpfaɪ ᵠpi kayɪncɪs 3ɛkpɪde caɪtaɪbɪz.

YtikTi KENDeHeH KaIbInTa CaKtayuBb 60JMaHbI3. 2pdaBIM YtIKTih apTKbl HdaFbTIpeKTi KonDaHbIHbI3.
Ta3aJay (J)

IbnactMaccanbIK 6eJIkTepei Hemece yTKaTa6aHbIH Ta3aJay YwH KUwTI XaHe/Hemece 3BNTi 3aTtap KOJaHaHybI 6OImaHbI3.
- By Teririh (3) Θιπργίη κυμίνη έρατβιHβι3, ΚύρβιΓβι aίβιρβιH pοεΤΚαλάν αύβιΓβιHβι 3 ΜεΗ θεγικότιH caɪΚβιHdʌaybιH Kτιήσι3.
- YtikTH Kofapfbl JkafbH Ta3aay yuH KpyrKa Hemece cAJ DbIMkbl JyMCAK uSybepekti KOJaHaBbHbI3.
-
KaDIMr Ta3anay XaHe Ta6aHra Xa6bIcBn KaIFaH DaKTapbl I BaCKa KaIbIKTapbl KeTipy UwH DbIMkbl JxMca KU6bepeKeNeh cyptin, KypTaBhlB13.
-
YtiktiH Kymblciba H eep etyi MymkiH 6y IblfataH Tecikteri KaKtbi Ketipy yuH DbIMkbl MaKaTa TaKaJaIapbli KOnlaHaHbI3.

Ta6aHdbI Teric epi KbIITbIpaK Kynde yCTay YwIH MetaII 3aTTapra TnI36eHI3, Enepe, XeHiIReKTeP XeHe IImMeKTeP CnAKeTbI 3aTTapDbI YtIKTeMeHI3. OHTnece, Ta6aHdbI Kanybl MymKiH.
5. KoHTeHepDi JyIeJI TpyDe Ta3a CymEn WaBIn OTyIpbIbIbI3. Ta3aJraHaHH KeiH apKaUan Cy KOHTeHepIN 6OcaTbIHbI3.
ABTota3aJay yHKcuaCbl (K,)

Ky6bipdafl cybl kondaHbn jxprhen 60ncahbl3, YtikteyuDen Kein ABTOtaanay yHKnraCbH icke KOKaH JeH.

ABTota3anay fynkunycbIH KOndaHy KyyeI Type demHepaandaHraH cydbI KOndaHymen den ecentemeyi Tnic.
- Kypblfbl po3eTkaadah afblbIHaBbHa JxHe 6y Tetiri (3) Θuipnyi KyiHc KoBlFaHbH TeKcepiH3.
- Cy KOHTeHepiH (9) MaKcImMaJIbI ToTbIpY DeHreInHe (10) DeiH ToTbIpBbIb3.
- KypbIJIbIaIbIpbIH Xepre TyIbIKTaIIraH po3eTKaFa (220-240 B) KocblbI3.
- +/TemnepaTypa TyMmepeIme (4a) TemnepaTypaHbI MaKcIMaJIdbI MAnHe OPhaTbIHb3.
- YtikTi TOnbIbImeH XbIbIbIy yUoiH KEM DereHDe 2-3 MInHyT KytiHi3.
- Ytikti uHbIHa HemeCe Te3imDi MaTePnAJIaH JkacJFaH bIbIC yCTiHde yCTan TybIn, ABTOtaJaiay TYmecin (8) 6acbHb3 da, a3dAn IaKaNAbI3.

Ta6aHHa KaKaJIbIKTapbMeH 6acaKa 6eIe 3aTAP 6yMeH XaHe KaHaHaC yMeH 6Ib. BycIb XnHay ySiH nJaCTMaCCaJIbK cTapbl KOnDaHybI 6oMaHbI3.
- Ytikti eWipin, po3eKaad afbIbHbI3.
- By tetirih makcmaanblkyre opHaTbHbI3.
- TecikTep cy uBikKaHua KEM dereHne 30 MnHyT KyTiH3.
- TabaHda KaIbIn KOIraH daKTapDbI KeTipy Ushin YtIKTI Uy6epeK yCTimeH akblpbiHdAn CbIPfblTbIHbI3.
- Ytikti Kaitadah naidaIaanb6ac 6ypbH KaNbIN KOIO MymKIn KAnDbIKTapdbKeTipy yuiH by afbHbI TyIMeciH (1) 6ipHeWe pet 6acbHb3.
ABTotaayfynKcunycbl (K_2)

Ky6bipdaft cydb kondaHbIn xypren 60ncahb3, Ytikteye den Kein ABToTa3anay yHKcnaRcbn icKe KOKaH JeH.

ABTO3aay fynKcuncBIn KOJaHy JyJeiTyPde demHepaIHaHraH cydbI KOJaHymen nn en ecentemeyi Tnic.
- KypbIJfbl po3eTkadaan afIbIbnFaHbHa JxHe 6y TeTiri (3) ΘiipnyIkyiHe KoIbIaNFaHbIH TeKcepiH3.
- Cy KOHTeHepiH (9) MaKcMaJIbI ToTbIpy DeHreInHe (10) DeiH ToTbIPbIbI3.
- KypbIJIbIaIbIpbIH Xepre TyIbIKTaIIFaH po3eTKaFA (220-240 B) KocblbI3.
- +/- TemnepaTypa Tetirimeh (4b) TemnepaTypaHbIMAKCIMaJIbIMaHReOpHaTbIHbI3.
- YtikTi TOnbIfbImeH KblbI TY yliH KEM DeReHDe 2-3 MInHyT KytiH3.
- YtikTi uHbIiHa HeMeCe Te3iMi MaTePnAJaH XacalFaH bIbIC yCTiHe yCTaT TypbI, ABTOtaJaiy Tymecin (8) 6acbHbI3 da, a3dAn IaKaNbI3.

Ta6aHHaH KaK KaIbIKTapbMeH 6acka 6e3TAP 6yMeH XHe KaHaRaH cyMeH 6bI. Byn cybl xHay yWIn nJaCTMaCCaBik 6tapbl KOndaHybl 6oMaHbI3.
- Ytikti eWipin, po3eTKaDaH aftbIbHbI3.
- By tetirih makcmaandbkyre opHaTbHb3.
- TecikTep cy 乌bIKKaHua KEM dereHne 30 MnHyT KyTiHi3.
- TabaHda KaIbIn KoIraH daKTapDbI KeTipy Ushin YtikTi uSybepek yCTimeH akblpbiHdAn CblPfblTbIHbI3.
- YtikTi KaItaDah NaIdaIaHb6ac 6ypbH KaIbIn KOIO MymKiH KAnDbIKTapdbKeTipy yuIH by aFbIHbI TyIMeciH (1) 6ipHeWe pet 6acbHb3.

ByhOpbHaFaH Ke3eYtIKTI KImdepEnaynak YcTaHbI3, eTnece onap KipneHHyMmKiH.
KEHEC
KnIMdepi MaTa TypHe cAnKeC cypbInTaHbI3. OHIN apKaCbIHJa TemNepaTypaHbI ap TpyPi MaTajapFa KaTa-KaTa peTtey KaKet 6oJMaIbI.
TEmeH yTikTey TeMnepaTypacbIH KaKet eTeTIH 3aTTapdAn 6actan, 6iptiHden OdaH Kofapbl yTikTeY TeMnepaTypacbIH KaKet eTeIH KNIMdepre Keuhi3.
MaTaHbIn KypamblHa KaTbIcTb KymaHi3 6oJca, tiric xepi, weti Hemece iKxKi Xaftb CnAeTb Keipin6eBtiN 6ip xepiH ytkTeN kepiH3. TeMeH Tempepatypaanh 6actan, eH KonaiNbI ytkTey npametpiH taby ysiH TempepatypaHbI 6iptiHden KeTePi3.
Həzik KIMdepdi yTikTey yuHIn yTikTey TemnepaTypacbIH TeMeHdTeKeH Ke3de, yTik KaHa npametpre XeTKeHWe 7aAMaMeH 2 MmHy TkyTih3.
Tata xynHHEN (100% xyn) xacanfah KIMdepdi Temnepatypa xynHre opHaTbIbI typrAh 6oNca, ytIKTe bepyre 6oJadbl. KmIme XbJIbIpaK xepnep KaJmaybl yuHm MaKTaJaH xacanfah MaTaHbI KOJdaHFaH xEH.
Tep ciHreJxepnepDi yTikTeyIi 60MaHbI3: Kbl3y DaKTapDbI 6ekitin, onapdbI KeTneiTIn KblaDbI.
KbI3MET KOPCETY
Bi3 e3 TbIHybInapMbI3Fa KbI3Met KepcTeM3 XHe cepBnCTIK KbI3METI KOFapI DeHReIe YcbHyf TaPbICaMbI3. Ci3re KpyblfImeh OHai XHe KOJaNbI XMybIC JAcayFa MymkiHik bepy yuH e3 HImdpeim3di y3dkci3 KeTinDipin Otbyf TaPbICaMbI3.
KypbJnfbifa Kytim Kepecy
KypbInfbFa Kytim KepcTyre apHAnrH Hotpoint Ariston yCbHAtbH KypblnfbHbH Professional KeC6n 6yIMdApbHbH Jenici KypblnfbHbH KondaHbc Mep3IMh Y3apTaBbXeHe OHbH cbHbN kany KayniH a3aTaNbI.
Professional Kcci6n 6yIbIMdapbIHbH XeJIcI KypIbIbIb3DbH epeKwEJIkTePi Eckepe OtbpIn
XacanFaH. OhIMdep Cana, kONOrna XHe KOJaHy
Kayinci3diri 6oBbHua Eyponanblk XoFapbl
ctAndaptTAPbl KaTaN CaTaN OTbpIN ITanra
XacanFaH. TOnblk AknapaTbI www.hotpoint-ariston. ru Be6-cainbHIn "KbI3Met Kepcety" 6enlmiHen
KapaHbI3 XKeHe KaNAbI3Dafl DyKeHepDeh CypaHbI3.
Yekinetti Kbi3Met KepcTey optanbIKtapbl
Θ3 TtbyHyybInapbIMbI3fa JxakbHbpak bOly yuH we6ep MaMaHdapbIhIn XOFaPbI DeHreJeri Kacib DaBbHdbfBi MeH eDinirime H epeKweneHetIH KbI3MeT KepcTe Jxeninepi H KaIbITactbIpdk.
Akay naIda 6oIraH kaFdaIa
KbI3Met Kepcety opTaIbIbHa xa6apnacap anIbIHda, akayIbIKbI e3iH3 Ty3eTIN Kepyre TbIpbICbHb3 ("AkaayblkTap JHe OnapblTy3eTJxKoIaPabI" TapaybIH KapaHb3).
Kb3MeT Kepcety OpTaIbIbHa KeinDik KyKaTbHda KepcetinreH TelefoH HemipimHe xaBapnacyf60anabl.
I Bi3 yokinetti Kbi3Met Kepcety optaibiktapbHa fHa xa6apnacydbYcbHbAmbl3
1!KeHey JxmbicTapbIH icke acbipFaH Ke3e dmpMaIbIK 6enweKtepdi FaHa KOJaAHyBt Tana etiH3.
Kb3MeT KepeTeY opraIbIbIHa xa6apnacap anIbIHda keNeci mAnimetTepri 6epyre daBH eKeHHi3di TeKcepin aIbIHbI3:
AkayIbIK TpyiH CnnaTay;
Kenilik KyaKaTbHbH Hemipi (KbI3MeT Kepcety KiTaIwacbl, Kbl3MeT KepcTeY cepTnPhiKaTb T.C.c.);
KypbIfblHbAknapaTakTaIwacblHa Hemece KenilDik KjkaTbHda KepcetinreH KypblfbHbH MoDeni XaHe cepraBbIK Hemipi (S/N);
KypblfblHbH CaTblnFaH a-NyHi
Baca naДаы aknapat peн канытары www.hotpoint-ariston.ru Be6-caTbHbH «КызмТ Керсу»ТapayынанКеpe anacbI3.
KOKbICKA TACTAY

3NeKtp KHe 3NeKtpoHnKaIbIK KpaIaIapDbIH KaIbIKTapbHa (WEEE) KaTbICTb 2012/19/ UEEypona 3aHnAmacbHa CseKec y KypbIbIbApbl KaIbITb TObl K KaIaNbIK KaIbIK aHaNbIMbIH naJaIaHbIN XOyblMaybl TNC.

KopshaFaH opta MeH xanbIK DeHCayIbIbHa TneTIH 3nHHbIH aJIbIH ana OTbIPbIN, JapamCbI3 Kpyblfblnap KaTaNaiDaJHy MeH MaunHa
iuiHderi MATEpnaIapabbl eHdey KHybIH OHTaIaNbIpy MaKcTaBHa 6eKeJ XnHaIybl Kepek. BApNbIK eHIMdeperi Cb3blfAH KOKbc Kxawiri eHIM NecinHI 6eKeTEnRIeKoKbIC XnHayfa KaTbICTbl MiDeTIH ecke canaBl. JkapAmCbI3 yu KpyblfBnapabH dYpbIC KOHOFA KaTbICTbl KocbIMwa aknapaT any yuiH eHIM Neepi Tnicti xaIbIKKa KbImET Kepcety optaIbIbHa Hemece Oanpbln JekpriniKi t Ekindepine xabapnaca anabl.
EuBip opama mateparcha
tarAMMa TMMEy kepek
AKAYIbIKTAPDbI XOIO
AkayIbIK
blktmamce6e6i/weuimdepi
Ta6aH XbIbImaIbI.
Aynbpo3eTKaFA KocbImaHaB 60JyHHeMece TmEn TypyMymKIn.
TemnepaTpa MNH KyiHe opHaTbIrfaHbIH TeKcepiH3.
TempepatyapahbIH INHdNkaTop 1ambl6ip xahbIn,6ip cenei.
Temnepatypa INHdkatop 7ambl Ytik Kb3bIn Keene XaTkaHbIN 6indpy yuhi xhaanda. OpahtbIrfan Temnpatypara JeTeKeH Ke3de INHdkatop 7ambl cehedi
By a3 KeIeMDe WbIFaDbI HEmec MyJdEm WbIKnaDbI.
By teiri Othipyni KyiHe KoBbIrfaH.
Cy KOtTeHepiHc cy JeKtiikci3.Cy KOtTeHepiH TOJIbIbIbI.
Ytik JeTePnIKTei BCTbIK eMeC XeHe/Hemec TaMydAn KOpfay yHKuNcblKocblnFaH. YtIKTI TipeKe TIK KaJIbInKa KObln, YtIKTeyDi KaIHa bactamac 6ybpH TempepaTpyaHbH INDInKaTOp IaMbI ceHReHH Hemece CKI Kb3blTcKae ayBicKaHbH Kytih3.
By afbHb Tymecin Kni Kocy caanapbHaH Taan TemnepaTpaCbI TbIM TeMeH 60nybMyMKiH. By afbHdapbIH apacbHa apalkbTbI cJI Ke6eBntiH3.
Ta6aHHH 6eIe 3aTap 乌fBn, KIMdi KipNeiDi.
- Byanndbyp KaempacbHda KaIdbkTap 6onybl MyMkiH. Ta3aaypekeETepiH opbHdAHy3 («Ta3aay JxHe TexHnKaBk Kbi3MeKepcTe» TapaybHda «ABToTa3aay
Vic cy, cipke cybl, kpxmaJI, kaK keTIpiu 3aTAPbI, yTKTey eHIMdePiH HeMece xMmNlBk 3aTAPbI KOJaHaCbI3. ByI 3aTAP eHIMdi 3aKbIMdaybl MymKiH eKeHiE cKePiH3. Cy KOHeHepi HaaBlbI3.
KpaxmaI KOJaHaBbIFaH. KpaxMaI MaTaHbIH iWiKi XaFbHaKOJaHy 6oJaDbI, 6ipak cy KOHTeHepine eWkaan Hocyfa 6oImaIdbI.
KIM dypbic xyblmafah HeMece OHda ca6bH KaIbIKTapbi 6ap. - Θπi xyblmaraH xaHa KIMdi YtKTeydeci3.
Ta6aHHan Cy TaMaIbI.
By afbHb Tymecin Kni Kocy caIaapbHaH Ta6an TempepaTpaCbI TbIM TeMeH 60JbMyMkiH. By afbHdapbHbH apacbHa apalbIKtbi cJI Ke6eBtiH3.
Tabah TemnepaTypacbTBIM TEmeH MHeOpHaTbJFaH.
Ytikti bocatnai jxHe/Hemec6 by teirih Owipyni KyiHe opHaTnai KEnDeHeKoFaHCbI3.
ToTbipy TeciriHkKaNafbH Dypbc KannnaFaHcbI3.
TemnepaTpya TemeH Ke3de 6y afbHbI cyHKUraCbIH KOJaHaBbIb3. ByI cyHKUraIapDbI TemnepaTpya ● ● MHiHeH Jxofapbl 6oJFaH Ke3de KOnDaHaF H XeH.
Vic cy, cipke cybl, kpxmaI, kaK keTpiriu 3aTapdb, ytkTey eHIMepiH hemece xmMnIbIK 3aTapdb konDaHaCbI3. ByI 3aTatp eHIMdi 3akblmdaybl MymkIH eKeHH eckepiH3. Cy KOHTeHepi HaaBhl3.
Ta6aH KIP Hemece KOhBIP TyCTI XeHe MaTaHbI Kipneyi MymKInH.
TbIM KOFapbl Tempepa Tpa KOJaHyaDacb3. Ta6aHbI Ta3aJahB13 (Tataay Xane TexnKaIbIK KbI3MeT KepcetyT apaybIH, Ta3anay) 6eJIiMH kapaHbI3).
KpaxmaI KOndaHbInFaH. KpaxmaI MaTaHbIn iUki XaftbHa N KOJaHy 6oJadbl, bipak cy KOHTeHepiHe eUkaan Hocyfa 6oJMaJdbI.
KIM dypbic kyybImarah Hemece OHda ca6bIH KaIbIKtapbi 6ap.
- ΘNi JxbyImMaFaH JxHa KIniMdi YtikTeydeci3.
WaaibpaTkbIw dyHKnIcbl Kymbic icTeMeiDi.
Cy KOHTeHepiHne cy XeTkiNkci3. Cy KOHTeHepiToTbIpbIbI3.
He e nok3aHOb: ypeD 3a n3MepBaHc Ha BODaTa
I3PON3BaIte ypeDa 3a I3MepBaHe Ha HNBOTO H BODaT, DocTaBrt Cypeda.
YBepTe ce, Ye cTe N3KJIOpUInIeNcEa OTo KOnTaKaTAppeDn PbLnHeHn3Pna3BaHe Hape3epBoapara 3a BODa n 3a BCEKn CnyaHn CneBBCya ynoTpe6a.
I3KJIIOUOte IeNCeNa OT KOHTaKTa, IbPKeiKnIeNCeNa, a He Ype3 N3IbPnBaHe Ha Ka6eJa.
I368BaTe KOtAKT Mexy 3axpaHbuaa Ka6eI n IIOuata Ha IOTnra, KOrato e ropeuca.
He HauBaIte 3axpaHbAuzna Ka6eI OKoIOnpOuata,doKaTo e ropeua.BmecTo ToBaH3PON3BaIte Ka6eHa.
IOTnra,Boaata n npata,Imn3aun OT Hea Ca MHoro ropeuN MoarTa da N3ropaT KoxaTa BN.
- Прази сьхранявае на урета, Ичakайся оке oxлади habлно) naphaюпгия Иства за okолу[eин чac).Изпалзайда рбжката за сьхранене на урета сдед уnotpe6a.
He hacoubaTe npaTa KbM Xopa UIN XMBOTN IN He IpaTe dpexn, DOKaTO HOCHTe.
Cne ynoTpe6a,cbxpanhaBaiTe ypeda B ctabnHa nO3nca C nOMoUta Ha cToiKaTa Ha TbpaHa HOTnra
Hikora He doabayTe npfom, ouet, Hnuece Te nn dpyrn XmukanB pe3epBoapa 3a Boda -ocben ako He e npenopbyaHo ot Hotpoint-Ariston. Hikora He n3non3BaTe 3ambpceHa Boda.
Hikora He notapnTe ypea BbB BOda nn Dpyra TeuHOCT. - YpeIbT He TpI6BJa ca ocTAbra Ha oTKpIto I da ce n3nara Ha atmocOpeHnte ycIobna.
Hnkora He octabaTe nIu n3non3BaIte ypeaB 6n30CT Do nIaMbuc, fypHn, 3anaJIIMMaTePnaJIuN IJN dpyu N3TOUHNi Ha TOnnHa.
Hikora He n3noI3BaIte ypea 3a ceN,
pa3JIuHn OT Te3n, 3a KOnTo e 6Bn IpoEeTupaH.
BcnyaHa cBmHHe 3a noBpeHa, He3abABHO nKJIIOUeTe UENCeNa OT eNEKTpuYeCKn KoHTaKT.
- Пониьоителг He Hocn OTROBOPHOCT BCnyaH Na igeTn,прчиненOT He npabuHa ynoTe6bHa ypeda.
ПЕДИУNOTPEBA
IpeiDa n3nON3BaTe ypeia 3aIbPBINbT,OTCTpaHete BCNUKN CTUKEPI,3aUNTHITE NIACTMACOBN IIN KAPTOHEH ONAKOBKOn OTIaDeuata NOBbpxHOCT Ha IOTNA.
YBepTe Ce, Ye BCNUKn aXe3NBHn qactn Ca 6bNJN OTCTpaHEHn OT rnaDeuTa nOBbpxHOCT C MeKa KbPna, KaTOn YCe Ca 6bNJN IpemaxHaTn BCNUKn OCTaTBcNJ NJIu qACTnCn OT pON3BOOCTBeHn PPOUCe Qpe3 MHorOKpATHo PbJHeH e N3npa3BaHe Ha pe3epBoapa 3a BOda.
PnB KblnoyBaHe Ha IOTna 3a NbpBn NbT, MoKe Da 3a6eJekTe HEnpnaTHa MnpN3Ma, MaIKo DNm HnKo npMecn, KOnto 0ne N3ye3HaT B pAMKte Ha HkONko MNHytn. PnH3NOJ3BaHe Ha cyHKunra 3a napa 3a NbpBn NbT, He HacOuBaIe CTyra napa cpeuy dpexnte, 3aIoTO B DnCneHcep a 3a napa MoKe da Nma IpOn3BOdCTBeHn OCTaTbci.
Hnkora He do6abYTe napfHOM, ouet, HnIeCTe nn DpyrXmHKaJIIN B pe3epBoapa 3a Boda-OCBeHako He enpeNoPbUaHO ot Hotpoint-Ariston. Hnkora He n3non3BaTte 3ambpceHa Boda.
He HacouBaIte npapaT KbM Xopa IJN JXIBOTHn I He rnaTe dpexN, DOKaTO rHOCHTe.
ANTKaIKOBA yHkUra
IOTnra e cha6deHa c aHTNKanKOBa fynKmna 3a abTomatuHNo pkebcBaHe Ha pa3npedeJeHneTo Ha npapa, KORATo TEMnpaTypatae TBbpDe HNCKO, KaTO nO To3n HaHH Ce npedotBpTaBA nonaHeto Ha kANKN BODa OT IIOyata Ha noCTabkata.
He n3non3BaIte npaTa npn Hncka Tempepatya (BnKTe rpaФnKaTa B CtbnKa B1uB2, rnaBa "n3non3BaHe Ha IOTnra", B 3aBnCmOCT OT MoeJa Ha n3non3BaHaTa ot Bac IOTnJ).
ABTOMaTHueH peXnM Ha rOToBHOcI function (H_1) LCD
Функцята 3а ABITomaTNUHO N3KJIIOUBaHe rapaHTnpa IIbJIHa Be3ONaCHOCT.
Ta3nФyHKUЯИЗКЛЮУВаabTomatuHOrIOTnraT,
Korato TRe He Ce I3No3Ba B IpOdbJxKeHne Ha HraKOJIko MNHyT. Po-cneuaJIHo:

- IOTNtA t Ce N3KJIIOUBa aBbTOMaTNUHcIeD O cekyHdN, KOraTo e ocTaBeHa 6e3 HaI3Op B OJOnOKeHHe 3a rJaIeHe NJIN HAcTpAHn;
IOTNtAte n3KJIIOUBA aBtOMaTNUHO cIeI 10 MnHyTN, KOraTO e OCTaBeHa 6e3 HaI3Op B INoJIOXeHne 3a NoYIBKa(BePTNKaJIHO).
Ako octabnte IOTnra 6e3 HaI3Op, IINCIIpeT 3aONUba Da Mira B 3eIeTo IN Ce CyBa 3ByKOB CnHaJ, 3a Da INΦopMnpa, Ye e AKTNBHa ΦyHKuŋra 3a aBTOMATnueh PexkIM Ha rotobHOCT.
IpocTo npemecTeTe IOTnTa NIN HATNCHeTe TEMnepaTyPhNTe 6yToHn +/- (4a), 3a daЯ BKJIIOHTe OTHOBO.

I3yakaIte,doKATO DnCnJIeT CTAHe UepBEN npEi Da 3aONuHHeTe OTHOBO Da rnaIte.
ABTomatnUHO n3KJIIOuBaHe function (H_2)

Функцята 3a abTomatuHNO n3KJIIOUBaHe rapaHTnpa nIbHa 6e3ONaCHOCT.
Ta3nФyHKUЯN3KJIIOUBA aBTOMaTNUHO IOTYra, KOrato TRe He Ce N3IPOJ3Ba B IpOДbJIxKeHne Ha HЯKOJIko MInHyTu. ITo-CneuaJIHo:
IOTnTa ce n3KJIIOUBA aBtOMaTNUHO cnei 30 CeKyHdN, KOraTo e ocTaBeHa 6e3 Hau3Op B NOLOXKeHne 3a rnaDeHe IIN NactpaHn;
IOTNtAte n3KJIIOUBA aBOMaTNUHO cne10 MNHTN, KOrATO e OCTaBeHa 6e3 HaI3Op B NOJIOXeHnE 3a NoYINbKA (BepTNKaJIHo).
Ako octabnte IOTnTa 6e3 HaI3Op, ige npO3Byu 3ByKOB CnHaN, KOITo ige BN INHOpMnpa, ye fYHKUraT3 a ABtOMaTHNO N3KJIIOVAHe e AKTNBa. IpoCTO npemecTeTe IOTnTa, 3a da y BKJIIOHTe OTHBO.

I3yakaTe, DOKaTO HnDnKaTOpbT 3a TemnepaTypaTe n3KJIouH, PpeHn Da Hete OTHOBO da rJaNTe.
OCTaTbCn I Dpyrnpimecn. Hnkora He n3No13BaITe PJIaCTMaCOBn KOHTeHepn 3a Cb6upane.