
SCX464 - Baby monitor PHILIPS - Free user manual and instructions
Find the device manual for free SCX464 PHILIPS in PDF.


| Product type | Baby video monitor |
| Brand | Philips |
| Model | SCX464 |
| Parent unit dimensions (W x D x H) | 80 x 50 x 20 mm |
| Baby unit dimensions (W x D x H) | 100 x 60 x 30 mm |
| Parent unit weight | 200 g |
| Baby unit weight | 200 g |
| Parent unit power | Rechargeable Li-ion battery 3.7 V 1000 mAh |
| Baby unit power | Mains adapter 5 V DC 1 A (included) |
| Maximum range | 300 m in open field |
| Parent unit screen | 2.8 inch color LCD |
| Night vision | Yes, automatic infrared LED |
| Ambient temperature | Temperature display in baby's room |
| Nightlight | Integrated in baby unit |
| Talk-back function | Yes, two-way microphone and speaker |
| Care method | Clean with a soft, dry cloth. Do not use abrasive products. |
| Wireless security | FHSS (Frequency Hopping Spread Spectrum) technology |
| Spare parts available | Mains adapters, replacement batteries |
| Repairability | Repairability score: 7.5/10 |
| Warranty | 2 years |
Frequently Asked Questions - SCX464 PHILIPS
User questions about SCX464 PHILIPS
0 question about this device. Answer the ones you know or ask your own.
Ask a new question about this device
Download the instructions for your Baby monitor in PDF format for free! Find your manual SCX464 - PHILIPS and take your electronic device back in hand. On this page are published all the documents necessary for the use of your device. SCX464 by PHILIPS.
USER MANUAL SCX464 PHILIPS
natural_image
Black-and-white photo of a woman holding a baby, both facing each other (no text or symbols visible)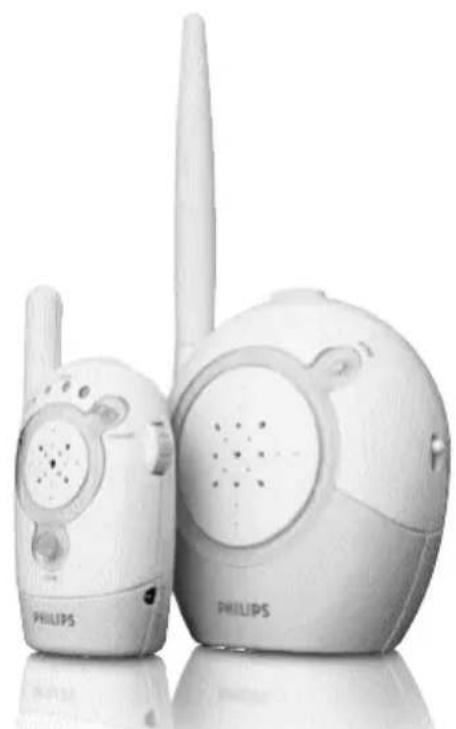
natural_image
Two Philips radio speakers with antenna, one emitting signal waves (no text or symbols visible on device body)PHILIPS

B. Parent unit

Legend of functions
A. Baby unit
A-1 On/Off button
A-2 DC 9V ◇-⊕ power supply jack
A-3 AC power adapter
A-4 Power plug
A-5 Microphone
A-6 POWER light
A-7 Microphone sensitivity switch
A-8 Channel selection switch
A-9 Battery compartment cover
B. Parent Unit
B-1 Sound level lights
B-2 Loudspeaker
B-3 LINK light
B-4 DC 9V ◇-⊕ power supply jack
B-5 AC power adapter
B-6 Power plug
B-7 Channel selection switch
B-8 ON/OFF switch / VOLUME control
B-9 POWER light
B-10 LINK alarm switch
B-11 Battery compartment cover
B-12 Belt clip
C.What else you'll need
- Coin (to open the battery compartment of the baby unit)
- Small, flat screwdriver (to set the channel selection switches)
- 4 x 1,5 V AA batteries for the baby unit (optional, we recommend Philips Alkaline batteries)
- 3 x 1.5 V AAA batteries for the parent unit (optional, we recommend Philips Alkaline batteries)
Contents
EN
3 Illustrations
4 Legend of functions
4 Baby unit
4 Parent unit
4 What else you need
5 Contents
6 Welcome
6 Safety information
7 Getting your baby monitor ready
7 Baby unit
7 Parent unit
8 Using your baby monitor
9 Other features
9 Avoiding interference
10 Adjusting microphone sensitivity
10 Monitoring baby silently
II Switching the LINK alarm on and off
II Connecting / disconnecting the belt clip
12 Troubleshooting
14 Frequently asked questions
14 Technical specifications
15 Important information
15 Environmental information
15 Maintenance
15 Need help?
Philips is dedicated to produce caring, reliable products to give parents the reassurance they need. With this baby monitor you can hear your baby from where ever you are in and around your house. With sixteen different channels options you will experience minimal interference.
Philips Baby Care, taking care together
Safety information
Please read this user manual carefully before using your baby monitor and keep it for future reference. This baby monitor is intended as an aid. It is not a substitute for responsible and proper adult supervision and should not be used as such.
- Make sure the baby unit and adapter cable are always out of reach of the baby (at least 1 meter / 3 feet away).
- Never place the baby unit inside the baby's bed or playpen.
- Never cover the baby monitor (with a towel, blanket, etc.).
- Never use the baby monitor in moist places or close to water.
- Check if the voltage indicated on the type plate of the adapters (A-3, B-5) correspond to the local power voltage before connecting to the AC power supply.
- Do not expose the baby monitor to extreme cold, heat or light (e.g. direct sunlight).
- To prevent electric shock, do not open the inside of the baby unit and parent unit (except for the battery compartment cover).
- The antennas on both units are fixed; do not try to extend them.
Getting your baby monitor ready
EN
Baby unit
The baby unit can be mains or battery operated.
When batteries are installed, you have an automatic back up in case of mains failure.
Mains operated use
I Connect the power adapter cord to the power supply jack (DC 9V ◇-⊕- + - A-2) of the baby unit.
2 Connect the AC power adapter (A-3) to a wall outlet.
→ The baby unit is now ready for mains operated use.
Battery operated use
I Remove the battery compartment cover (A-9) of the baby unit, using a coin.
2 Insert four 1,5V AA batteries, noting the + and - configuration inside the battery compartment (batteries are not supplied, we recommend Philips Alkaline batteries).
3 Close the battery compartment cover (A-9), using a coin.
→ The baby unit is now ready for battery operated use.
Parent unit
The parent unit can be mains or battery operated.
When batteries are installed, you have an automatic back up in case of mains failure.
Mains operated use
I Connect the power adapter cord to the power supply jack (DC 9V ◇-⊕- + - B-4) of the parent unit.
2 Connect the AC power adapter (B-5) to a wall outlet.
→ The parent unit is now ready for mains operated use.

natural_image
Illustration of a person wearing a helmet and holding an electrical plug (no text or symbols visible)
natural_image
Simple cartoon illustration of a smiling character with a hat and a small object inside (no text or symbols)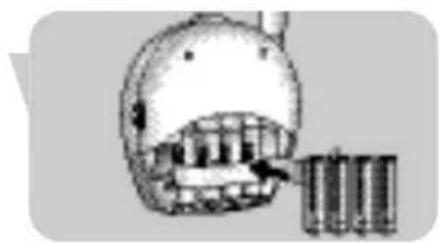
natural_image
Illustration of a helmet with teeth and a magnified inset showing internal components (no text or symbols)
natural_image
Illustration of a hand inserting a plug into a wall socket connected to a device (no text or symbols visible)EN
Getting your baby monitor ready
natural_image
Three-step diagram showing a device with internal components and directional arrows, no text or symbols present.Battery operated use
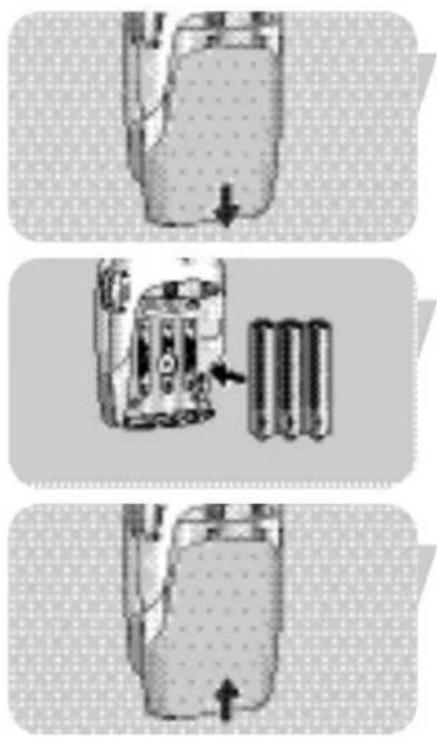
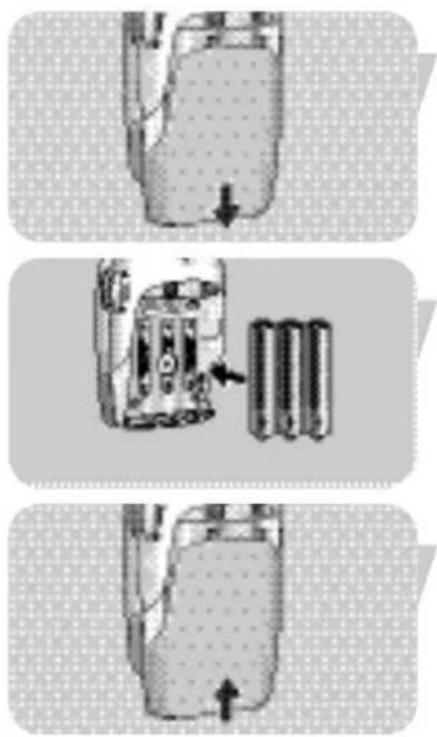
I Remove the battery compartment cover (B-11) of the parent unit, by sliding down the cover
2 Insert three 1,5V AAA batteries, noting the + and - configuration inside the battery compartment (batteries are not supplied, we recommend Philips Alkaline batteries)
3 Slide the battery compartment cover (B-11) back in place until it clicks in position
→ The parent unit is now ready for battery operated use.
Using your baby monitor

I Position both units in the same room to test the connection. Make sure the baby unit is at least 1 meter / 3 feet away from the parent unit.
2 Press the ON/OFF button (A-1) to switch on the baby unit. > The POWER light (A-6) lights up green.
3 Switch on the parent unit using the ON/OFF switch (B-9) and adjust the volume to the level you prefer using the VOLUME control (B-9).
The POWER light (B-9) lights up green.
When connection has been established between the units, the LINK light (B-3) on the parent unit lights up green.
Using your baby monitor
EN
4 Position the baby unit at least 1 meter / 3 feet away from your baby.

5 Position the parent unit at the desired place within the operating range of the baby unit but at least 1 meter / 3 feet away from the baby unit. For more information on the operating range see 'Technical specifications'.

natural_image
Diagram of a two-story house interior showing internal furniture layout (no text or symbols)→ Your can now monitor you baby!
Other features
Avoiding interference (channel selection)
Always make sure that the CHANNEL selection switches (A-8, B-7) inside the battery compartments (A-9, B-11) on both units are set to the same position! With the CHANNEL selection switches (A-8, B-7) you can select sixteen different channel positions. If you experience interference from other baby monitors, radio devices, etc. select a different channel.
I Open the battery compartment covers (A-9, B-11) of both units.
- Parent unit: slide down the cover.
- Baby unit: use a coin.
2 If you are operating the units on battery power, remove the batteries from both units.

natural_image
Pure diagram of a mechanical component with no visible text, numbers, or symbols
natural_image
Simple cartoon illustration of a smiling, round character with a small object inside (no text or symbols)
natural_image
Mechanical assembly diagram showing piston and crankshaft mechanism (no text or labels)3 Use a small, flat screwdriver to rotate the inner circle of the channel selection switches (A-8, B-7) to the desired position. Make sure both units are set to the same channel.
If you don't experience any interference after testing the connection, close the battery compartment covers (A-9, B-11). If you do experience interference, try switching to another channel.
4 Close the battery compartments.
Adjusting microphone sensitivity
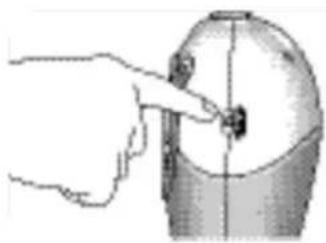
With the microphone sensitivity control (A-7) on the baby unit, you can set the sound, coming from the baby unit, to the desired level: low, mid or high. When set to the maximum level, the baby unit monitors all sounds. If no sound is picked up, the baby monitor will not monitor since continuous transmission is prohibited by law. You can only change the microphone sensitivity if the connection between the baby unit and the parent unit is established (when LINK light (B-3) on the parent unit lights continuously green).
natural_image
Illustration of a hand pressing a button on a cylindrical device (no text or symbols visible)- Use the microphone sensitivity switch (A-7) to adjust the baby unit microphone sensitivity to the desired level. You can use your own voice as a sound reference.
The POWER light (A-6) on the baby unit lights up yellow when a sound is picked up.

natural_image
Hand holding a mobile phone with a circular dial and pointer (no visible text or symbols)Monitoring baby silently
- Use the ON/OFF switch / VOLUME control (B-8) on the parent unit to set the volume to the lowest level. Do not switch off the parent unit completely!
The sound level lights (B-1) on the parent unit visually alert you to baby's sounds. The more sounds your baby makes, the more lights you will see.
When no sound is detected all sound level lights (B-1) will be off.
Switching the LINK alarm on and off
You can switch on the LINK alarm on the parent unit. The LINK alarm will beep when connection between the units is lost.
I Open the parent unit's battery compartment (B-11) by sliding down the cover.
2 Set the switch (B-10) inside the compartment (B-11) to the ON (O position.
3 Slide the battery compartment cover (B-11) back in place until it clicks in position.
- To switch off the alarm, set the switch (B-10) to the OFF (☒ position.
Connecting / disconnecting the belt clip
If the parent unit is operating on batteries, you can carry it in and around your house, giving you freedom of movement while still monitoring your baby.
Connecting the belt clip
- Insert the little spindle on the rear of the belt clip into the recess on the rear of the parent unit. Turn the belt clip to the left until it clicks in position.
Disconnecting the belt clip
- Turn the belt clip to the right (TURN▶) and take it off.

natural_image
Three-step diagram showing a mechanical device with arrows indicating motion, no text or symbols present.
natural_image
Two-panel illustration showing a person performing a neck massage or grip technique (no text or symbols present)Problem Possible cause Solution
No sound on parent unit. Volume off or too low. Turn VOLUME control (B-8) on parent unit downwards.
Units out of range. Move parent unit closer to baby unit.
No connection Parent unit out of range of Move parent unit closer between units. tansmitted signal. to baby unit.
Units are set to different Set channel selection switches channels. (A-8, B-7) to the same
position on both units.
Interference or poor Mobile or cordless phone(s) Move phone(s) away from reception. too close to baby monitor. baby monitor.
Interference from other baby monitors in the channel using the channel neighborhood. Switch both units to another selection switch (A-8, B-7).
Battery power running low. Replace batteries.
Transmitted signal is out of range; e.g. there are too many walls and/or ceilings between baby unit and parent unit. Move parent unit closer to baby unit.
Parent unit located too close to a window and picking up interfering signals from other appliances. Move parent unit away from window.
Problem Possible cause Solution
POWER light (A-6, B-9) Unit not switched on. Press On/Off button (A-1) or does not light. set On/Off switch (B-8) to ON.
AC power adapter (A-3, B-5) Connect AC power adapter not connected to the (A-3, B-5) to the DC 9V DC 9V ◇-⊕-⊕ power supply power supply jack (A-2, B-4). jack (A-2, B-4).
AC power adapter (A-3, B-5) Connect AC power adapter (A-3, not connected to the power B-5) to a wall outlet. supply.
Batteries low. Replace batteries.
| POWER light (A-6, B-9) is blinking. | Batteries low. Replace batteries. | |
| High pitched noise. | Units too close to each other. | Move parent unit away from baby unit (at least 1 metre / 3 feet). |
| Volume set too high. | Turn ON/OFF switch / VOLUME control (B-8) upwards. | |
| Pick-up from another baby monitor. | Both systems are operating on the same frequency. | Switch channels (A-8, B-7). Make sure both units are set to the same position. |
| LINK light (B-3) flashing red / LINK alarm beeps. | Units are out of range. | Move units closer together. |
| Interference from another baby monitor. | Switch to a different channel (A-8, B-7). | |
| Interference from another FM source. | Remove other FM source. |
Frequently asked questions
| Question | Answer |
| Parent unit reacts too slow/late on baby's cry. | Set microphone sensitivity on the baby unit to a higher level and/or move the baby unit closer to the baby (keep minimal distance of 1 meter / 3 feet). |
| Parent unit reacts too quick on other ambient sounds. | Set microphone sensitivity on the baby unit to a lower level and/or move the baby unit closer to the baby (keep minimal distance of 1 meter / 3 feet). |
| The link is lost every now and then, sound interruptions etc. | You are probably approaching the outer boundaries of the practical range. Try a different location or reduce the distance slightly. Please note that it takes about 30 seconds each time before a new link is established. |
Technical specifications
| Power supply | - AC power adapter 230V AC, 50 Hz (two included).Output voltage 9V DC, 200mAh. |
| Operating range | - Up to 200 meters / 600 feet in open air.Depending on the surroundings and other disturbing factors this range may be limited. |
| Dry materials Material Loss of thickness range | |
| Wood, plaster, plaster < 30cm / 12" 0-10%cardboard, glass (without metal or wires, no lead) | |
| Brick, plywood < 30cm / 12" 5-35% | |
| Reinforced concrete < 30cm / 12" 30-100% | |
| Metal grids, bars < 1cm / 0.4" 90-100% | |
| Metal, aluminium sheets < 1cm / 0.4" 100% | |
| For wet and moist materials reduction can be as up to 100%. | |
| Operating temperature | 0 °C - 40 °C |
| Transmission frequencies | 40.665 MHz, 40.680 MHz, 40.695 MHz |
Environmental information
Disposal of your old product
Your product is designed and manufactured with high quality materials and components, which can be recycled and reused.
When this crossed-out wheeled bin symbol is attached to a product it means the product is covered by the European Directive 2002/96/EC.
Please inform yourself about the local separate collection system for electrical and electronic products.
Please act according to your local rules and do not dispose of your old products with your normal household waste.
The correct disposal of your old product will help prevent potential negative consequences for the environment and human health.

Maintenance
- Clean the baby monitor with a damp cloth
- Dispose of used batteries in an environmentally friendly manner
- Do not mix old and new batteries or different types of batteries.
- Remove batteries if the baby monitor is not to be used for long periods of time.
- If the batteries are left in the unit when it is powered from the mains, check them for leakage every six months.
Need help?
Online help: www.philips.com
For interactive help, downloads and frequently asked questions
Contact line:
If you have any questions about the SCD464, please contact our helpline for assistance! You can find the number in the separate Guarantee leaflet.
Before you call, please read this manual carefully.
You will be able to solve most of your problems.
You will be asked for:
• A description of the problem and when it occurs
- The type number on the label of your product
• The date of purchase
A. Unité bébé
Philips Baby Care, Taking care together
natural_image
Illustration of a person wearing a helmet and holding an electrical outlet (no text or symbols visible)
natural_image
Simple cartoon illustration of a smiling face with a small object inside, no text or symbols present.
natural_image
Diagram of a mechanical device with internal components and a directional arrow (no text or symbols)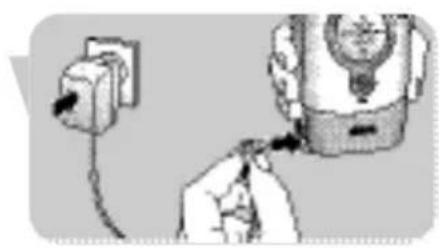
natural_image
Illustration of a hand inserting a plug into a device (no text or symbols visible)FR
natural_image
Three-step diagram showing a device with internal components and directional arrows, no text or symbols present.natural_image
Diagram of a two-story house interior showing internal furniture layout (no text or symbols)natural_image
Diagram of a mechanical component with a downward arrow indicating force or direction (no text or symbols)
natural_image
Simple cartoon illustration of a smiling face with a small object inside, no text or symbols present.FR
natural_image
Mechanical assembly diagram showing a lever and gear mechanism (no text or labels)natural_image
Hand pointing at a small object on a cylindrical surface (no text or symbols visible)natural_image
Hand holding a mobile phone with a circular dial and antenna (no visible text or symbols)natural_image
Three-step diagram showing a device with internal components and directional arrows, no text or symbols present.
natural_image
Two-panel illustration showing hand positioning of a mechanical component, with no visible text or symbols.natural_image
Symbol of a trash bin crossed with no text or numbers, representing environmental restriction (no text present)Entretien
natural_image
Illustration of a person using a medical device to interact with another person (no text or symbols visible)
natural_image
Simple cartoon illustration of a smiling face with a small object inside (no text or symbols)
natural_image
Illustration of a helmet with a gear and a gear shift, showing mechanical components (no text or symbols)
natural_image
Illustration of a hand inserting a plug into a wall socket connected to a device (no text or symbols visible)natural_image
Three-step diagram showing a device with internal components and directional arrows, no text or symbols present.natural_image
Diagram of a two-story house interior showing internal furniture layout (no text or symbols)natural_image
Diagram of a mechanical component with a downward arrow indicating force or direction (no text or symbols)
natural_image
Simple cartoon illustration of a smiling character with a small object inside, no text or symbols present.
natural_image
Mechanical assembly diagram showing a lever mechanism (no text or labels visible)natural_image
Hand pointing at a small object on a cylindrical surface (no text or symbols visible)natural_image
Hand holding a flip phone with a circular dial and pointer (no visible text or symbols)natural_image
Three-step diagram showing a mechanical device with arrows indicating movement, no text or symbols present.
natural_image
Two-panel illustration showing a person performing a finger manipulation or tool, with no visible text or symbols.Mantenimiento
natural_image
Illustration of a person wearing a helmet and holding an attached electrical outlet (no text or symbols visible)
natural_image
Simple cartoon illustration of a smiling character with a small object inside (no text or symbols)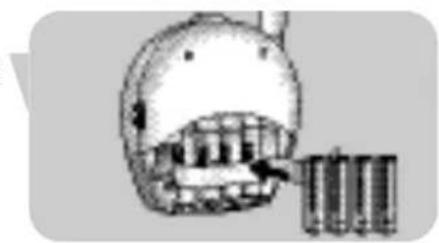
natural_image
Diagram of a helmet with internal components and a directional arrow, no visible text or symbols
natural_image
Illustration of a hand inserting a plug into a wall-mounted device (no text or symbols visible)natural_image
Three-step diagram showing a device with internal components and directional arrows, no text or symbols present.Batteriebetrieb
natural_image
Diagram of a two-story house with internal furniture and plants (no text or symbols)natural_image
Diagram of a mechanical component with a downward arrow indicating force or direction (no text or symbols present)natural_image
Simple cartoon illustration of a smiling face with a small object inside, no text or symbols present.natural_image
Mechanical assembly diagram showing a lever mechanism (no text or labels visible)natural_image
Illustration of a hand pressing a button on a cylindrical device (no text or symbols visible)natural_image
Hand holding a handheld device with a circular dial and pointer (no visible text or symbols)natural_image
Pure diagram of a mechanical component with no visible text, numbers, or symbols
natural_image
Close-up of a hand pressing down on a mechanical component with arrows indicating motion (no visible text or symbols)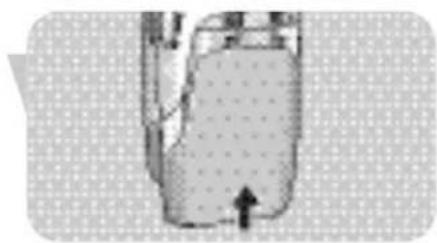
natural_image
Diagram of a mechanical component with a central arrow indicating direction (no text or symbols)natural_image
Illustration of a hand holding a small object with an arrow indicating motion or force (no text or symbols present)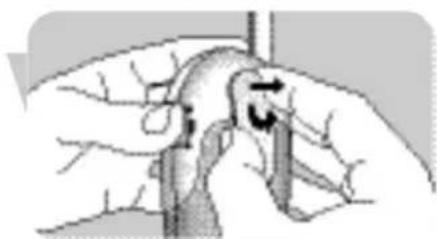
natural_image
Illustration of hands performing a manual task with a tool, no text or symbols visibleWartung
natural_image
Illustration of a person using a medical device to interact with a wall-mounted electrical outlet (no text or symbols visible)
natural_image
Simple cartoon illustration of a character with a hat and beard, no text or symbols present
natural_image
Diagram of a helmet with an arrow pointing to a battery stack (no text or symbols present)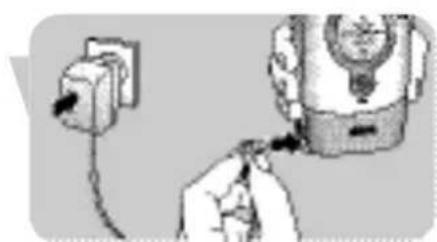
natural_image
Illustration of a hand inserting a plug into a wall socket and a device with a cable (no text or symbols visible)NL
natural_image
Three-step diagram showing a device with internal components and directional arrows, no text or symbols present.natural_image
Diagram of a two-story house with internal furniture and plants (no text or symbols)→ U kunt nu op uw baby letten!
natural_image
Diagram of a mechanical component with a downward arrow indicating force or direction (no text or symbols)natural_image
Simple cartoon illustration of a smiling, round character with a small object inside (no text or symbols)natural_image
Mechanical assembly diagram showing a lever mechanism (no text or labels visible)natural_image
Hand pointing at a small object on a cylindrical surface (no text or symbols visible)natural_image
Illustration of a hand holding a flip phone with a circular dial and pointer (no text or symbols visible)natural_image
Illustration of a person in bed with hands and legs, showing head and torso positioning (no text or symbols)
natural_image
Illustration of a hand holding a curved mechanical component with a directional arrow indicating rotation (no text or symbols present)natural_image
Symbol of a trash bin with crossed lines indicating no waste or discharge (no text or labels)Onderhoud
natural_image
Illustration of a person wearing a helmet and holding an electrical outlet (no text or symbols visible)
natural_image
Simple cartoon illustration of a smiling character with a small object inside, no text or symbols present.
natural_image
Diagram of a helmet with teeth and a magnified inset showing teeth (no text or labels)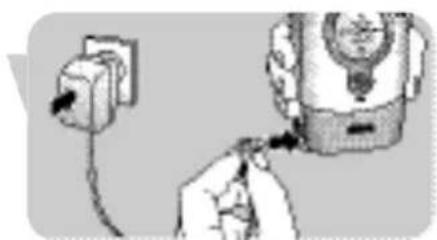
natural_image
Illustration of a hand inserting a plug into a wall socket and a device (no text or symbols visible)IT
natural_image
Three-step diagram showing a device with internal components and directional arrows, no text or symbols present.natural_image
Diagram of a two-story house with internal furniture layout (no text or symbols)natural_image
Diagram of a mechanical component with a downward arrow indicating force or direction (no text or symbols present)natural_image
Simple cartoon illustration of a smiling character with a small object inside, no text or symbols present.natural_image
Mechanical assembly diagram showing piston and crankshaft mechanism (no text or labels)natural_image
Hand pointing at a small object on a cylindrical surface (no text or symbols visible)natural_image
Hand holding a vintage mobile phone with a circular dial and antenna (no visible text or symbols)natural_image
Three-step diagram showing a device with internal components and directional arrows, no text or symbols present.
natural_image
Two-panel illustration showing a hand performing a manual tool on a mechanical component, with no visible text or symbols.Manutenzione
natural_image
Illustration of a person using a medical device to interact with a wall-mounted electrical outlet (no text or symbols visible)
natural_image
Simple cartoon illustration of a smiling character inside a dome-shaped container (no text or symbols)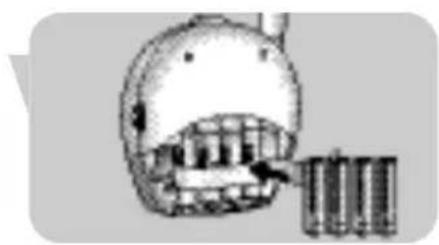
natural_image
Diagram of a helmet with internal components and a directional arrow, no visible text or symbols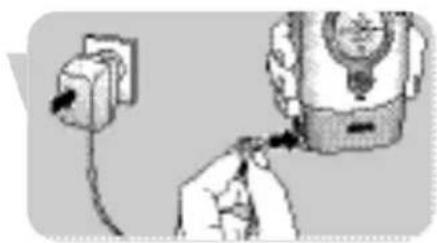
natural_image
Illustration of a hand inserting a plug into a wall socket connected to a device (no text or symbols visible)natural_image
Three-step diagram showing a device with internal components and directional arrows, no text or symbols present.natural_image
Diagram of a two-story house with internal compartments showing furniture and plants (no text or symbols)natural_image
Pure diagram of a mechanical component with no visible text, numbers, or symbols
natural_image
Simple cartoon illustration of a smiling character with a small object inside (no text or symbols)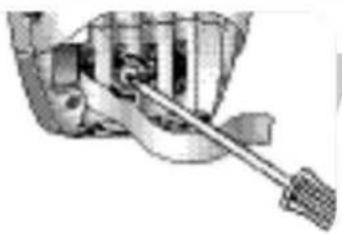
natural_image
Mechanical assembly diagram showing piston and crankshaft mechanism (no text or labels)natural_image
Illustration of a hand pressing a button on a cylindrical object (no text or symbols visible)natural_image
Illustration of a hand holding a mobile phone with a circular dial and antenna (no text or symbols visible)natural_image
Pure diagram of a mechanical component with no visible text, numbers, or symbols
natural_image
Close-up of a hand pointing at a mechanical component with arrows indicating motion (no visible text or symbols)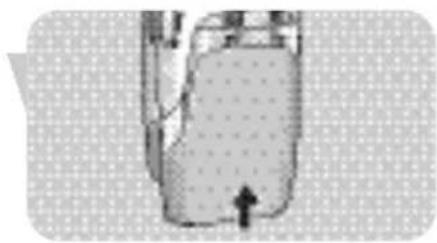
natural_image
Diagram of a vehicle interior with a highlighted rectangular area and directional arrows (no text or symbols)natural_image
Illustration of a hand holding a small animal, possibly a mouse or rodent, with no visible text or symbols.
natural_image
Illustration of hands performing a manual tool manipulation (no text or symbols visible)natural_image
Symbol of a trash bin crossed with no visible text or numbers, indicating no waste or discharge restriction.Manutenção
natural_image
Illustration of a person using a medical device to connect or interact with an electrical outlet (no text or symbols present)
natural_image
Simple cartoon illustration of a smiling character inside a dome-shaped container (no text or symbols)
natural_image
Illustration of a helmet with teeth and a gear mechanism (no text or symbols)
natural_image
Illustration of a hand inserting a plug into a device (no text or symbols visible)natural_image
Three-step diagram showing a battery cell assembly with an arrow indicating the process (no text or symbols present)natural_image
Diagram of a two-story house interior showing internal furniture layout (no text or symbols)natural_image
Diagram of a vehicle interior with a highlighted rectangular area and directional arrows (no text or symbols)
natural_image
Simple cartoon illustration of a character inside a dome-shaped container (no text or symbols)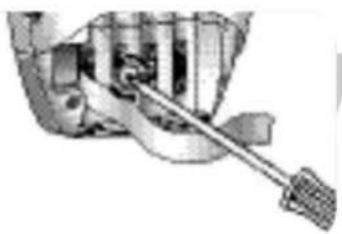
natural_image
Mechanical assembly diagram showing a lever mechanism (no text or labels visible)natural_image
Hand pointing at a small object on a cylindrical surface (no text or symbols visible)natural_image
Hand holding a mobile phone with a circular dial and antenna (no visible text or symbols)natural_image
Three-step diagram showing a device with internal components and directional arrows, no text or symbols present.
natural_image
Two-panel illustration showing a hand performing a finger manipulation technique, with no visible text or symbols.Συντήρηση
Philips Baby Care, Taking care together
Säkerhetsinformation
natural_image
Illustration of a person using a medical device to interact with a wall-mounted cable (no text or symbols visible)
natural_image
Simple cartoon illustration of a smiling character with a small object inside, no text or symbols present.
natural_image
Illustration of a helmet with teeth and a magnified inset showing internal components (no text or symbols)
natural_image
Illustration of a hand inserting a plug into a wall socket and a device with a cable (no text or symbols visible)Installera babyvakten
natural_image
Three-step diagram showing a device with internal components and directional arrows, no text or symbols present.Batteridrift
natural_image
Diagram of a two-story house interior showing internal furniture layout (no text or symbols)natural_image
Pure mechanical component diagram without any text, numbers, or symbols
natural_image
Simple cartoon illustration of a smiling character with a small object inside (no text or symbols)
natural_image
Mechanical assembly diagram showing a lever and gear mechanism (no text or labels)natural_image
Hand pointing at a small object on a cylindrical surface (no text or symbols visible)natural_image
Hand holding a vintage mobile phone with a circular dial and antenna (no visible text or symbols)natural_image
Three-step diagram showing a device with internal components and directional arrows, no text or symbols present.
natural_image
Two-panel illustration showing hand positioning of a bird on a branch, with arrows indicating movement direction (no text or symbols)Underhåll
A-3 Vekselstrømsadapter
A-4 Strømstik
A-5 Mikrofon
A-6 POWER (strøm) lys
natural_image
Illustration of a person using a tool to connect or install an electrical outlet (no text or symbols present)
natural_image
Simple cartoon illustration of a smiling character with a small object inside, no text or symbols present.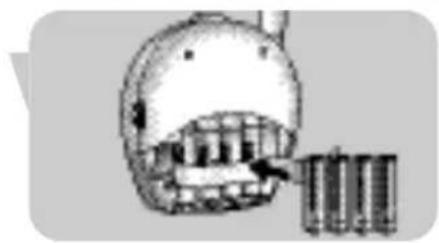
natural_image
Illustration of a skull with teeth and a magnified inset showing internal components (no text or symbols)
natural_image
Illustration of a hand inserting a plug into a device (no text or symbols visible)DK
natural_image
Three-step diagram showing a device with internal components and directional arrows, no text or symbols present.Batteridrift
natural_image
Diagram of a two-story house interior showing internal furniture layout (no text or symbols)natural_image
Pure diagram of a mechanical component with a downward arrow, no text or symbols present
natural_image
Simple cartoon illustration of a smiling character with a small object inside (no text or symbols)
natural_image
Mechanical assembly diagram showing piston and crankshaft mechanism (no text or labels)natural_image
Hand pointing at a small object on a cylindrical surface (no text or symbols visible)natural_image
Hand holding a handheld device with a circular dial and pointer (no visible text or symbols)natural_image
Close-up of a mechanical component with a downward arrow indicating a specific part (no visible text or symbols)
natural_image
Close-up of a hand pressing down on a mechanical component with arrows indicating motion (no text or symbols visible)
natural_image
Diagram of a mechanical device with a central component and directional arrow (no text or symbols)natural_image
Illustration of a hand holding a small object with an arrow indicating motion or force (no text or symbols present)
natural_image
Illustration of a hand holding a curved mechanical component with directional arrows indicating motion (no text or symbols)Vedligeholdelse
A-3 Vekselstrømsadapter
A-4 Støpsel
A-5 Mikrofon
A-6 Strømlampe (POWER)
natural_image
Illustration of a person using a medical device to connect or interact with an electrical outlet (no text or symbols visible)
natural_image
Simple cartoon illustration of a character inside a dome-shaped container (no text or symbols)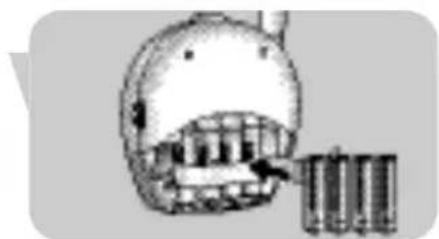
natural_image
Illustration of a helmet with internal components and a magnified view of battery cells (no text or symbols)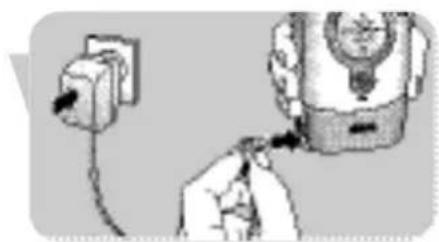
natural_image
Illustration of a hand inserting a plug into a wall and a device with a bulb (no text or symbols visible)natural_image
Three-step diagram showing a device with internal components and directional arrows, no text or symbols present.Batteridrift
natural_image
Diagram of a two-story house interior showing internal furniture layout (no text or symbols)natural_image
Diagram of a mechanical component with a downward arrow indicating force or direction (no text or symbols)
natural_image
Simple cartoon illustration of a smiling face with a small object inside, no text or symbols present.NO
Andre funksjoner

natural_image
Mechanical assembly diagram showing a lever mechanism (no text or labels visible)natural_image
Illustration of a hand pointing at a small object on a cylindrical surface (no text or symbols visible)natural_image
Hand holding a mobile phone with a circular dial and an arrow icon (no text or symbols visible)natural_image
Three-step diagram showing a device with internal components and directional arrows, no text or symbols present.
natural_image
Two-panel illustration showing hand positioning of a bird's head and tail, with arrows indicating movement direction (no text or symbols)natural_image
Symbol of a trash bin crossed with no visible text or numbers, indicating no waste or discharge.Vedlikehold
natural_image
Illustration of a person wearing a helmet and holding an attached electrical outlet (no text or symbols visible)
natural_image
Simple cartoon illustration of a smiling bird perched on a rounded shell (no text or symbols)
natural_image
Diagram of a helmet with internal components and a directional arrow, no visible text or symbols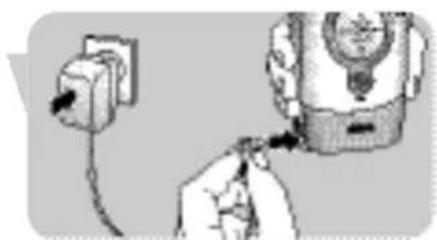
natural_image
Illustration of a hand inserting a plug into a wall-mounted device (no text or symbols visible)natural_image
Three-step diagram showing a device with internal components and directional arrows, no text or symbols present.natural_image
Diagram of a two-story house with internal furniture layout (no text or symbols)natural_image
Diagram of a mechanical component with a downward arrow indicating force or direction (no text or symbols)
natural_image
Simple cartoon illustration of a smiling face inside a dome-shaped container with a small object inside (no text or symbols)FI
Muut ominaisuudet

natural_image
Mechanical assembly diagram showing a lever mechanism (no text or labels visible)natural_image
Hand pointing at a small object on a cylindrical surface (no text or symbols visible)natural_image
Hand holding a flip phone with a circular dial and an arrow pointing to the right (no visible text or symbols)natural_image
Three-step diagram showing a mechanical device with arrows indicating movement, no text or symbols present.
natural_image
Two-panel illustration showing a person performing a manual tool on a curved object, with no visible text or symbols.Hoito ja huolto
natural_image
Illustration of a person using a medical device to connect or attach a cable (no text or symbols visible)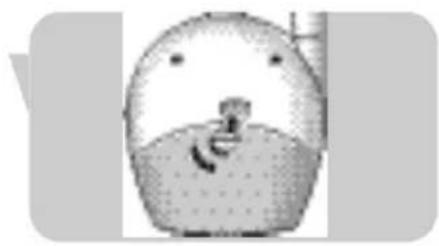
natural_image
Simple cartoon illustration of a smiling character with a hat and beard (no text or symbols)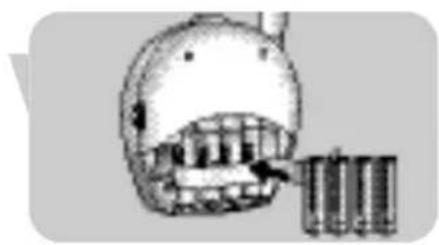
natural_image
Diagram of a helmet with a gear and battery pack inserted, showing mechanical components (no text or labels)
natural_image
Illustration of a hand inserting a plug into a device (no text or symbols visible)TR
natural_image
Three-step diagram showing a device with internal components and directional arrows, no text or symbols present.Pille kullanım
natural_image
Diagram of a two-story house interior showing internal furniture and plants (no text or symbols)natural_image
Pure mechanical component diagram without any text, numbers, or symbols
natural_image
Simple cartoon illustration of a smiling face with a small object inside, no text or symbols present.
natural_image
Mechanical assembly diagram showing a lever mechanism (no text or labels visible)natural_image
Hand pointing at a small object on a cylindrical surface (no text or symbols visible)natural_image
Hand holding a vintage mobile phone with a circular dial and antenna (no visible text or symbols)natural_image
Three-step diagram showing a mechanical device with arrows indicating motion, no text or symbols present.
natural_image
Illustration of two hand positions showing a person performing a finger movement or grip manipulation (no text or symbols present)Bakım





- Legend of functions
- Baby unit
- Parent Unit
- C.What else you'll need
- Contents
- Illustrations
- Legend of functions
- Contents
- Welcome
- Getting your baby monitor ready
- Using your baby monitor
- Other features
- Troubleshooting
- Frequently asked questions
- Technical specifications
- Important information
- Need help?
- Philips Baby Care, taking care together
- Safety information
- Getting your baby monitor ready
- Baby unit
- Mains operated use
- Battery operated use
- Parent unit
- EN
- Using your baby monitor
- Other features
- Avoiding interference (channel selection)
- Adjusting microphone sensitivity
- Monitoring baby silently
- Switching the LINK alarm on and off
- Connecting / disconnecting the belt clip
- Connecting the belt clip
- Disconnecting the belt clip
- Problem Possible cause Solution
- Frequently asked questions
- Technical specifications
- Environmental information
- Maintenance
- Online help: www.philips.com
- Contact line:
- Unité bébé
- FR
- Entretien
- Mantenimiento
- Batteriebetrieb
- Wartung
- NL
- Onderhoud
- IT
- Manutenzione
- Manutenção
- Συντήρηση
- Säkerhetsinformation
- Installera babyvakten
- Batteridrift
- Underhåll
- DK
- Vedligeholdelse
- NO
- Andre funksjoner
- Vedlikehold
- FI
- Muut ominaisuudet
- Hoito ja huolto
- TR
- Pille kullanım
- Bakım
Brand : PHILIPS
Model : SCX464
Category : Baby monitor