
Avent SCD971 - Baby monitor PHILIPS - Free user manual and instructions
Find the device manual for free Avent SCD971 PHILIPS in PDF.


| Product type | Baby video monitor |
| Brand | Philips |
| Model | Avent SCD971 |
| Transmission technology | DECT 2.4 GHz |
| Indoor range | Up to 50 meters |
| Outdoor range | Up to 300 meters |
| Parent unit screen | 2.8-inch color LCD screen |
| Screen resolution | 320 x 240 pixels |
| Night vision | Infrared, range up to 5 meters |
| Temperature sensor | Yes, with alarm |
| Nightlight function | Yes, on baby unit |
| Talk-back function | Yes, two-way communication |
| Lullaby playback | Yes, built-in lullabies |
| Power supply | Mains (adapter included) |
| Battery life (parent unit) | Approximately 10 hours |
| Weight of parent unit | Approximately 120 g |
| Weight of baby unit | Approximately 100 g |
| Dimensions (parent unit) | 100 x 80 x 35 mm |
| Dimensions (baby unit) | 90 x 60 x 40 mm |
| Care and cleaning | Clean with a soft, dry cloth. Do not use abrasive products. |
| Safety | Complies with European safety standards. Use only the supplied adapters. |
| Spare parts and repairability | Available on the Philips website. Adapter, battery, cables. |
| Warranty | 2 years |
Frequently Asked Questions - Avent SCD971 PHILIPS
User questions about Avent SCD971 PHILIPS
0 question about this device. Answer the ones you know or ask your own.
Ask a new question about this device
Download the instructions for your Baby monitor in PDF format for free! Find your manual Avent SCD971 - PHILIPS and take your electronic device back in hand. On this page are published all the documents necessary for the use of your device. Avent SCD971 by PHILIPS.
USER MANUAL Avent SCD971 PHILIPS


Introduction
Congratulations on your purchase and welcome to Philips Avent! To fully benefit from the support that Philips Avent offers, register your product at
www.philips.com/welcome.
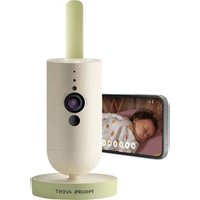
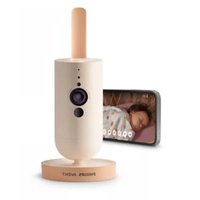
Philips Avent Premium Connected Baby Monitor with SenseIQ technology makes the invisible visible for complete reassurance. It's simple and intuitive for parents to see, hear, and know their baby is safe and sound from home or away. SenseIQ helps parents stay connected with wearable-free sleep and breathing rate tracking providing a real-time picture of their baby's wellbeing. Personalized notifications and auto-generated sleep logs gives parents quick and easy insights and understanding into their baby's sleep patterns and cycles.
General description
1 Parent unit 2 Link light 3 Eco-mode light 4 Sound level lights 5 Battery status light 6 Display 7 Confirm button 8 Microphone 9 Menu button 10 Control button (menu navigation/volume/brightness) 11 True talk-back button 12 Soothing sounds button 13 On/Off button 14 Foldable antenna 15 Mode button 16 USB-C socket 17 Speaker 18 Battery compartment 19 Baby Unit 20 Microphone 21 Camera 22 Nightlight 23 Nightlight button 24 Soothing sounds button 25 On/Off button 26 Status light 27 Ambient light sensor 28 Infrared light 29 Antenna 30 USB-C socket 31 Speaker 32 Temperature sensor 33 Power adapter (2x) 34 Anchor (2x) 35 Screw (2x) 36 Clamp 37 Wall mount bracket 38 2-in-1 mount (Crib mount & Wall mount)
Important safety information
Read this important information carefully before you use the appliance and save it for future reference.
IMPORTANT
This baby monitor is intended as an aid. It is not a substitute for responsible and proper adult supervision and should not be used as such.
Never leave your baby alone in your home. Always make sure there is someone present to look after the baby and take care of its needs.
Disclaimer
Please note that you use this baby monitor at your own risk. Koninklijke Philips N.V. and its subsidiary companies are not responsible for the operation of this baby monitor or your use of it and therefore do not accept any liability in connection with your use of this baby monitor.
Philips Avent Premium Connected Baby Monitor is not a medical device. Philips Avent Baby Monitor+ App is not a medical app.
The Philips Avent Premium Connected Baby Monitor is in NO way intended to diagnose, treat or cure any disease or other health related condition, including but not limited to, Sudden Infant Death Syndrome (SIDS), and is therefore NOT a medical device. This baby monitor is intended for household use only and is a connected consumer product designed and intended to help understand how a baby sleeps, moves and cries.
This product is NOT intended to detect breathing interruptions, breathing disorders, or other medical conditions. This product will NOT notify users of all their baby's breathing or sleep irregularities, patterns, cries, and/or current status that may occur.
The Philips Avent Premium Connected Baby Monitor should never be a substitute or replacement for adult supervision, nor affect the decision to consult a medical professional. Users should consult a medical professional if concerned about their baby's health and should NEVER solely rely on the readings from this product to diagnose and make medical decisions about their baby's health and care.
Always follow official safe sleep, health, and care guidelines to ensure your child's safety and wellbeing.
Danger
- Never immerse any part of the baby monitor in water or any other liquid. Do not place the appliance where water or any other liquid can drip or splash onto it. Never use the baby monitor in moist places or close to water.
- Never put any object on top of the baby monitor and do not cover it. Do not block any ventilation openings. Install according to the manufacturer's instructions.
Warning
- Long cable. Strangulation hazard!
- Check if the voltage indicated on the adapter corresponds to the local mains voltage before you connect the appliance.
- Do not modify or cut off any part of the adapter and its cord, as this causes a hazardous situation.
- Only use the adapter supplied.
- If the adapter is damaged, always have it replaced with one of the original type in order to avoid a hazard.
- Keep the baby monitor and its accessories away from your baby and children.
- This appliance can be used by children aged from 8 years and above and persons with reduced physical, sensory or mental capabilities or lack of experience and knowledge if they have been given supervision or instruction concerning use of the appliance in a safe way and understand the hazards involved. Children shall not play with the appliance. Cleaning and user maintenance shall not be made by children without supervision.
- Protect the mains cord from being walked on or pinched particularly at plugs, convenience receptacles, and the point where they exit from the appliance.
- Make sure that you place the baby monitor in such a way that its cord does not obstruct a doorway or passage. If you place the baby monitor on a table or low cabinet, do not let the mains cord hang over the edge of the table or cabinet. Make sure the cord does not lie on the floor where it presents a tripping hazard.
- Keep the packaging materials (cardboard buffers, etc.) out of the reach of children, as they are not a toy.
- To prevent electric shock, do not open the housing of the baby unit or parent unit.
Battery safety instructions
- Only use the product for its intended purpose. Read this information carefully before you use the product and its batteries and accessories, and save it for future reference. Misuse can lead to hazards or serious injuries. Accessories supplied may vary for different products.
- Only use original Philips accessories or consumables. Only use detachable *supply unit ASSA105X-050100 (x=B or E) series.
- Charge, use and store the product at a temperature between 0 °C and 40 °C.
- Keep product and batteries away from fire and do not expose them to direct sunlight or high temperatures.
- If the product becomes abnormally hot or smelly, changes color or if charging takes longer than usual, stop using and charging the product and contact Philips.
- Do not place products and their batteries in microwave ovens or on induction cookers.
- Do not open, modify, pierce, damage or dismantle the product or battery to prevent batteries from heating up or releasing toxic or hazardous substances. Do not short-circuit, overcharge or reverse charge batteries.
- If batteries are damaged or leaking, avoid contact with the skin or eyes. If this occurs, immediately rinse well with water and seek medical care.
Caution
- Do not install the appliance near any heat sources such as radiators, heat registers, stoves or other apparatus (including amplifiers) that produce heat.
- Make sure that your hands are dry when you handle adapters, plugs and the mains cord.
- Screw covers / rubber pad can detach from the appliance, check on a regular basis.
- All required markings on the Baby Unit, Parent Unit and power adapter are located on the bottom of the Baby Unit, Parent Unit and power adapter.
- The mounting accessory works best on a crib of which the square bar width is between 15 mm to 32 mm. Avoid using it on round or soft rails.
- If your baby crib has a round edge, the mounting bracket is best mounted to the wall.
- Remove the crib mount from your baby's crib and mount it on the wall when your baby can pull themselves up on their own or show signs of standing.
Declaration of conformity
Hereby, Philips Consumer Lifestyle B.V. declares that this product is in compliance with the essential requirements and other relevant provisions of Directive 2014/53/EU. A copy of the EC Declaration of Conformity (DoC) is available online at www.philips.com/support.
Electromagnetic fields (EMF)
This Philips appliance complies with all applicable standards and regulations regarding exposure to electromagnetic fields.
General Information
Lithium-ion rechargeable battery (2600 mAh)
Modulation type: IEEE 802.11 b/g/n
Operating frequency range: 2412 - 2472 MHz
Maximum radio-frequency power: ≤ 20 dBm e.i.r.p
Off mode power consumption:
Baby unit: < 0.3 W
Parent unit: < 0.3 W (< 1 min)
*Supply unit:
Model: ASSA105x-050100 (x = E (EU plug) / x = B (UK plug))
Input: 100-240 V~, 50/60 Hz, 0.35 A
Output: 5.0 Vdc, 1.0 A, 5.0 W
Average active efficiency: ≥ 73.62 %
No-load power consumption: < 0.1 W
Preparing for use
Download the Baby Monitor+ app

Philips Avent Baby Monitor+


To fully experience and activate the SenselQ and Cry Translation features, we recommend downloading the Baby Monitor+ app before using your baby monitor.
With the Philips Avent Baby Monitor+ app, you can see and hear your baby and check on their wellness from anywhere in the world by using Wi-Fi or mobile internet.
Before you start the set-up procedure, make sure:
- You have wireless Internet access (2.4 GHz Wi-Fi).
- You have a good Wi-Fi signal.
Note: If you use a Wi-Fi extender, make sure that your router and your Wi-Fi extender have the same SSID (the network name) and that you use the same password for the router and the extender. Also make sure the Wi-Fi extender supports 2.4 GHz Wi-Fi.
- You have the password of your Wi-Fi network at hand. Always connect the baby monitor to a secure network (see 'Security and privacy').
1. Download the app. Scan the QR code or search the keywords "Philips Avent Baby Monitor+" in the App Store or Google Play Store.
2. Launch the app.
Tip: Connect your phone to the Internet via Wi-Fi. Use of data connection may involve extra charges from your provider, depending on your subscription.


3. Create your account by following the on-screen instructions.
a. Make sure that you use a working email address on which you can always be reached. b. Use a strong password (see the "Strong passwords" section). c. When you receive the verification email, follow the instructions in the email to continue creating your account.
4. Set up your baby monitor by following the instructions in the app.
Security and privacy
Network security
Do not use the app on an unsecured Wi-Fi network. We advise you to use the baby monitor only on a Wi-Fi network protected with WPA2 or higher encryption. With the app, you can also use your phone's data network (often referred to as 4G or 5G).
Wi-Fi hotspots in public places, such as airports and hotels, are convenient, but they are often not secure.
We advise you to use the baby monitor only on a Wi-Fi network protected with WPA2 or higher encryption. We advise you not to use the baby monitor on a network that uses WEP encryption.
Note: Wi-Fi networks that do not require a password are not secure.
Strong passwords
Passwords are essential to protect your Wi-Fi network and your account against unauthorized access. The stronger your password, the better protected your Wi-Fi network and your account are.
The rules for a strong password are:
1. Has at least 8 characters. 2. Does not contain your name, your baby's name, another real name, or a brand name. 3. Does not contain a complete word. 4. Is very different from passwords that you have used before. 5. Contains at least 3 out of 4 types of the following characters: a. Uppercase characters (A - Z) b. Lowercase characters (a - z) c. Numeric characters (0 - 9) d. Special characters (e.g., #\$%&).
Personal data security
To delete and therefore protect your personal data, factory-reset your Baby Unit by long pressing the On/Off button for 10 seconds when the Baby Unit is on, before discarding the device. It is strongly advised to disconnect the Baby Unit from the Philips Avent Baby Monitor+ app by selecting "Disconnect Baby Monitor" option in the Baby Unit settings of the app.
If you are a second-hand owner, we advise you to perform the following steps to factory-reset your Baby Unit to secure your device:
1. Turn on your Baby Unit. 2. Once the LED has changed from orange to green or white, press the On/Off button for more than 10 seconds until the LED flashes between green and orange, and the Baby Unit will factory-reset.
In case you do not perform the factory-reset, Philips will not be responsible for the performance and functionalities of the device, and your privacy might be compromised.
Account management
There are different access rights for the Admin user and Guest users. You can invite relatives or friends as guest users and allow them to monitor your baby on their smart devices.
Admin User Guest Users
| Monitoring Video | Video | |
| Audio | Audio | |
| SenseIQ | Background monitoring | |
| Cry Translation | ||
| Temperature | ||
| Background monitoring | ||
| Alerts notification Sound detection | N/A | |
| Movement detection | ||
| SenseIQ associated notification | ||
| Cry detection | ||
| Cry Translation | ||
| Temperature range detection | ||
| Soothing features Nightlight, soothing sounds,lullabies, true talk-backVoice recording | N/A | |
| Account management Admin user invitationGuest user invitation | N/A | |
Note: The Baby Monitor+ app supports two admin accounts. You can invite your partner to sign up as the other admin and share the same access rights. Do not share admin credentials with anyone outside of your immediate household.
Provision of security updates
We continuously monitor the security of the software used in the product. If necessary, security updates will be provided through software updates. Software updates may also be provided to offer bug-fixes and performance improvements, or to introduce new product features. Updates may be provided to the Baby Unit and Parent Unit firmware, or in the mobile app. Updates are wirelessly delivered to the product without the usage of special cables or equipment.
Philips will provide the necessary updates for a period of at least two years after the delivery of the product.
Compatibility
iOS system: Requires iOS 11.0 or later
Android system: Requires Android 6.0 or later
Note: The compatibility is subject to change over time.
Mount your Baby Unit
For the optimal monitoring experience with the sleep tracking feature offered by SenselQ, we highly recommend utilizing the 2-in-1 mount to attach the Baby Unit to either a crib or a wall. By doing so, you will be able to position the camera in the most suitable location with an excellent view, allowing you to monitor your baby's sleep and breathing patterns with ease and efficiency.
How are you mounting?

The highest mattress position is typically used for newborns and smaller babies. We recommend using the crib mount when the mattress is in this position.

It is advised to move the mattress down when your baby can push themselves up onto their knees and show signs of sitting up. In this case using the crib mount is still preferred.

When your baby can start to pull themselves up on their own and show signs of standing, it is best to lower the mattress to the lowest position. We recommend using the wall mount for mattresses at lower positions.
Dos and Don'ts

Try and keep your baby's crib and sleeping area free from hanging mobiles, toys, or moving lights. The fewer objects cluttering the view, the better your baby monitor will work.
The monitor is sensitive to movement, avoid using a rocking crib or bassinet.

Avoid mounting your Baby Unit over the short side of the crib. This will limit how well you will see your baby.

Sleep-sacks, bedding and patterned clothes are great to use with this baby monitor.

Try to avoid thick clothes and bedding that are all the same color, as the Baby Unit uses contrast to detect motion.

The mattress should appear as a straight horizontal rectangle on your screen. The straighter the mattress is on screen, the better.

The Baby Unit or mattress should not be placed at an angle.
Crib mount

Note: For cribs with round bars, please use the wall mount.

1 Take out the 2-in-1 mount, clamp, power adapter, and Baby Unit.

2 For the best results, mount the Baby Unit centered and over the long side of the crib.

3 Attach the clamp to the middle of the long side of the crib by lowering it onto the railing.

4 Turn the knob clockwise to secure it onto the bar.

5 Take the two poles and push them together to make one longer pole. Note: You will hear a small click when they are secured.
6 Then, with the power cord first, insert the pole through the opening of the clamp.
7 Align the pole into position by using the dots on the pole and clamp, and rotate it 45 degrees clockwise to lock it into place.
8 The bottom of the pole is telescopic, so you can extend it down to the floor. Make sure to place the power cord in one of the slots provided at the end of the tube towards a power outlet.
9 Run the cord where the floor and wall meet. Using the provided power adapter, attach the cord from the pole and plug it into a power outlet.
![graph TD A["Device Insert"] --> B["Step 1: Discharge"] B --> C["Step 2: Discharge with cable"] C --> D["Step 3: Acute mouse with curved cord"] D --> E["Handheld device with trigger"] E --> F["Image Display with mouse on screen"]](/content/2026/06/1393100/images/a33106a49de3e6a42ab82a45d8c8a89596b185dd213151fc92ff94d42f9fd613.jpg)
10 Attach the Baby Unit to its cradle by aligning the pegs with the holes at the bottom of the Baby Unit and pushing down.
11 Slide the Baby Unit forward to lock it into place and connect the USB-C power cable into the back of the Baby Unit.
12 Tilt your Baby Unit slightly up, down, right, or left to ensure the mattress becomes entirely visible with your baby in the center. Use your Parent Unit or Baby Monitor+ app to ensure the Baby Unit is in the best position. Adjust the Baby Unit to see your baby's mattress is centered and level on the screen.
Wall mount

1 Take out the 2-in-1 mount, clamp, power adapter, screws and anchors, wall mount template, and the Baby Unit.
2 Remove the wall mount bracket from the clamp by turning the knob counterclockwise with one hand while guiding the bracket out with the other hand.

3 Remove the screw section by unlocking it with your thumb and sliding it down and off. You are now left with the piece that will be used as the wall mount.

4 Find the wall mount template and use a ruler to measure 1.1 meters up from the floor and mark where the two screws should go. Drill small holes into the wall and push in the anchors provided.
Tip: The wall mount template (see the "Wall mount template" chapter) can be found at the end of this user manual.

5 Take the wall mount bracket and align the holes with the anchors. Attach the wall mount bracket to the wall securely by using the screws provided.

6 Take the two poles and push them together to make one longer pole.
Note: You will hear a small click when they are secured.

7 Then, with the power cord first, insert the pole through the opening of the wall mount bracket.

8 At about the half-way point, the pole will no longer slide down and needs to be locked into position. Using the dots on the pole and wall mount bracket, align the pole into position, and rotate it 45 degrees clockwise to lock it into place.
9 The bottom of the pole is telescopic, so you can extend it down to the floor. Make sure to place the power cord in one of the slots provided at the end of the tube towards a power outlet.
10 Run the cord where the floor and wall meet. Using the provided power adapter, attach the cord from the pole and plug it into a power outlet.
11 Attach the Baby Unit to its cradle by aligning the pegs to the holes at the bottom of the Baby Unit and pushing down.
12 Slide the Baby Unit forward to lock it into place and connect the USB-C power cable into the back of the Baby Unit.

13 Tilt your Baby Unit slightly up, down, right, or left to ensure the mattress becomes entirely visible with your baby in the center. Use your Parent Unit or Baby Monitor+ app to ensure the Baby Unit is in the best position. Adjust the Baby Unit to see your baby's mattress is centered and level on the screen.
Parent Unit
Display overview

1 Battery level indicator 9 SenselQ (Active) 2 Signal strength indicator 10 Sleep stage indicator 3 Mute (On) 11 In bed duration 4 Nightlight (On) 12 Average breathing rate 5 Room temperature 13 Cry Translation result 6 Selected soothing sound (On) 14 Cry Translation (Active) 7 Selected Parent Unit monitoring mode 15 True talk-back feature (On) 8 Privacy mode (On)
Charging the Parent Unit
The Parent Unit runs on a built-in rechargeable Lithium-ion battery.

Follow the steps below to charge the Parent Unit:
1 Plug the power adapter into the Parent Unit and the wall socket.

2 The battery status light turns solid orange to indicate that the Parent Unit is charging.

3 When the battery is fully charged, the battery status light turns to solid white.

When you charge the Parent Unit for 3 hours, it can be used cordlessly for up to 12 hours in Eco mode.
If the Parent Unit is switched on during charging, charging takes approximately twice as long.

When the Parent Unit is not connected to the mains power and the battery is almost empty (lower than 10%), the battery status light flashes orange and the low battery alert will sound.
If the Parent Unit battery is empty and it is not connected to the mains power, the Parent Unit will switch off and connection to the Baby Unit will be lost.
Tip: Keep the Parent Unit connected to the mains power during the night, as if the battery runs low, the low battery alert sound may wake you up.
Tip: To save battery, switch off the Parent Unit when not in use.
Note: The battery gradually and very slowly discharges, even when the Parent Unit is switched off.

If the battery status light on the Parent Unit shows a solid red color when it is connected to the mains power, it means there is an issue with the battery and you should contact the Consumer Care Centre in your country.
Using the baby monitor
How to pair your Baby and Parent Unit

For the best connection possible, keep the Baby Unit and Wi-Fi router in the same room. Solid walls or other electronics can disrupt the signal.
1 Press the On/Off button for 1.5 seconds to turn on the Baby Unit.
Note: The Baby Unit will automatically turn on once you plug it into the power outlet.

2 When the Baby Unit is powered on, the status light turns orange momentarily during the boot-up process.

3 The status light will change to green when the Baby Unit is ready to pair.

4 Make sure that the Parent Unit and the Baby Unit are at least 2.5 meters away from each other to avoid acoustic feedback.
Note: If you use a cordless phone, wireless video, Wi-Fi network, microwave oven or Bluetooth device on 2.4 GHz and you might experience interference on either the Parent Unit or Baby Unit, move the Parent Unit until there is no more interference.

Press the On/Off button for 1.5 seconds to turn on the Parent Unit.

The display turns on, the Philips shield appears on the display and the link light turns red. The Parent Unit starts to search for the Baby Unit.

When the Parent Unit and Baby Unit are linked, the link light turns white on the Parent Unit and one or more signal strength bars appear on the display.

Note: It takes about 15 seconds to establish the link between the Parent Unit and the Baby Unit.
Make sure that the Baby Unit is switched on. When the Baby Unit is switched off, the display of the Parent Unit will show the out of range image.
If no connection has been established, the link light turns red, the Parent Unit alert will sound about every 25 seconds and the out of range image appears on the display.

The operating range is up to 50 meters indoors and 400 meters outdoors. The operating range of the baby monitor varies depending on the surroundings and factors that cause interference. Wet and moist materials cause so much interference that the range loss is up to 100%.
Dry materials Material thickness Loss of range
| Wood, plaster, cardboard, glass (without metal, wires or lead) | < 30 cm 0-10 % |
| Brick, plywood < 30 cm 5-35 % | |
| Reinforced concrete < 30 cm 30-100 % | |
| Metal grills or bars < 1 cm 90-100 % | |
| Metal or aluminium sheets < 1 cm 100 % |
Features and settings
Menu features


The Philips Avent Premium Connected Baby Monitor equipped with six excellent features to help parents monitor their baby with ease. These features include:
SenseIQ - uses AI technology to detect your baby's sleep and breaths.
Cry Translation - gives you translations of your baby's cries, so you can better understand their needs.
Connection to the Baby Unit - allows for two connection options (Auto and Direct) between the Baby Unit and the Parent Unit to ensure you are always connected to your little one.
Nightlight - provides soft, gentle lighting to soothe your baby and create a calming sleep environment.
Zoom - enables you to zoom in on your baby's crib, providing you with a closer look at your little one.
Temperature alert - informs you if the baby's room temperature is too high or too low.
All features described in the following sections can be operated through the menu of the Parent Unit or app.
1 Press the menu button on the bottom right of the Parent Unit to enter the menu list.
Note: You will leave the menu when pressing the menu button again.

2 Use the control button to navigate through the menu. The selected menu item is highlighted purple.
Note: If you are already in one of the sub menus and you want to switch between menu features, press the menu button again to navigate back to the main menu.
Note: If you are in the menu but do not press a button for 8 seconds, the menu will exit without saving changed settings.
SenseIQ

Philips Avent Premium Connected Baby Monitor with SenseIQ technology analyzes every movement and breath to give parents the clearest picture into their baby's wellbeing. Intuitive and wearable-free, SenseIQ technology produces real-time breath and sleep status updates, so parents can rest easy knowing they'll always be connected, and their baby is safe and sound.
To activate SenseIQ, please download the Baby Monitor+ app (see the "Download the Baby Monitor+ app" chapter) and follow the steps in the app to turn it on.
1 Press the menu button on the bottom right of the Parent Unit.

2 Select "SenseIQ" and press the confirm button to access the SenseIQ feature.

3 Press the confirm button to set the SenseIQ feature on or off.

The display shows the sleep stage, in bed duration, and average breathing rate in the bottom bar.
Cry Translation
zoundream

The Cry Translation service, powered by Zoundream™, offers a useful tool to help you understand your baby's different cries and tells you what they might mean. However, it is important to remember that this tool is not meant to replace parental judgment. Philips is not liable for the translation results. It is recommended to seek the advice of a medical professional when necessary.
To activate Cry Translation, please download the Baby Monitor+ app (see the "Download the Baby Monitor+ app" chapter) and follow the steps in the app to turn it on.
Cry Translation service is available for a 90-day free trial period. Afterwards you can continue using it by signing up for a subscription service with Zoundream™. Terms and conditions apply. Usage will be measured in days, and any activity within a day will be considered as a full day of usage.
Note: Cry Translation only works when your Baby Unit is connected to the internet.
1 Press the menu button on the bottom right of the Parent Unit.

2 Select "Cry Translation" and press the confirm button to access the Cry Translation feature.

3 Press the confirm button to set the Cry Translation feature on or off.

The display shows the Cry Translation result in the bottom bar.
Tip: Keep any sounds emitting devices, such as fans or white noise machines, away from the Baby Unit to avoid interfering with the microphone and disrupting the feature's accuracy.
Connection to the Baby Unit

You can choose different connection options with this menu feature.
Direct: The Parent Unit and the Baby Unit are pre-paired and will connect to each other directly.
![graph TD A["Device 1"] -->|Wireless Sensor| B["Rugger"] C["Device 2"] -->|Wireless Sensor| B D["Device 3"] -->|Wireless Sensor| B B --> E["Router"] style A fill:#f9f,stroke:#333 style C fill:#f9f,stroke:#333 style D fill:#f9f,stroke:#333 style B fill:#ccf,stroke:#333](/content/2026/06/1393100/images/d30302a6c8940f29d445fa5a1a2fe4d697dac97343f0a07a152522a54bad3a6b.jpg)
Auto: Direct or Wi-Fi: This setting optimizes the connection between the Baby Unit and Parent Unit by automatically choosing the best connection using either direct mode or Wi-Fi network.

1 Press the menu button on the bottom right of the Parent Unit.

2 Select "Connection to the Baby Unit" and press the confirm button to access the Connection to the Baby Unit menu.
3 Press the top or bottom part of the control button and the confirm button to choose the desired connection.
Nightlight

To activate the Nightlight function from the Parent Unit, follow the instructions below:
1 Press the menu button on the bottom right of the Parent Unit.
2 Select "Nightlight" and press the confirm button to enter the Nightlight feature.

3 Press the confirm button to switch on and off the Nightlight feature.

The display shows a light icon in the status bar when the Nightlight is on.

The Nightlight of the Baby Unit turns on.

You can set the brightness level of the Nightlight from the Parent Unit. Press the left or right part of the control button to choose low, medium or high.

You can set the timer of the Nightlight from the Parent Unit. Press the left or right part of the control button to choose the time you prefer.

You can also control the Nightlight from the Baby Unit.
1 Press the Nightlight button on the Baby Unit to turn on the function.

The Nightlight turns on.

2 Press the Nightlight button again to switch off.
Zoom

1 Press the menu button on the bottom right of the Parent Unit.

2 Select "Zoom" and press the confirm button to access the zoom feature.

3 Press the confirm button to adjust the video image. You can use the top/bottom/right/left part of the control button to choose what part of the image will be shown on the Parent Unit.
4 Press the menu button to save the new setting and exit.
5 If you want to zoom out the image on the Parent Unit, go to the zoom menu and turn off the zoom function.
Tip: Long-press the confirm button for two seconds to get a quick access to the Zoom function.
Temperature alert

The temperature sensor enables you to monitor the temperature in your baby's room.
Note: The current temperature in your baby's room is shown in the status bar of the Parent Unit.
1 Press the menu button on the bottom right of the Parent Unit.

2 Select "Temperature alert" and press the confirm button to access the temperature alert feature.

3 The temperature alert can be set on or off, press the confirm button to turn it on or off.

4 To change the maximum and minimum temperatures for the temperature alert, select the desired temperatures in the temperature menu.
Tip: You can switch the temperature unit between C (Celsius) and F (Fahrenheit) by selecting the unit option.

5 Press the left part of the control button to save the new setting and return to the main menu.
The Parent Unit shows this alert when the measured temperature goes outside the range between the minimum and the maximum values.

1 Press the menu button on the bottom right of the Parent Unit.

2 Select "Settings" and press the confirm button to access the settings menu.

You can change the language setting of the Parent Unit.
1 Press the confirm button to access the list of languages. 2 Press the top or bottom part of the control button to scroll through all the languages and then press the confirm button to select the desired language.

3 Press the confirm button to save the new setting and return to the main menu.

You can check the current firmware version of the baby monitor.
1 Press the confirm button to enter the firmware menu.

2 The display shows the latest firmware version of the Parent Unit and the Baby Unit.

Note: In case a firmware update is available, it will be installed automatically, and you will receive a notification.
Status light
Orange

Solid orange: the Baby Unit is booting up.

Flashes orange: the Baby Unit is upgrading its firmware. Do not switch it off during the upgrade.
Note: The Baby Unit might reboot briefly during the firmware upgrade.
Green

Solid green: the Baby Unit is ready to connect to the Parent Unit.
White

Solid white: the Baby Unit is ready to connect to the Parent Unit and app.

Flashes white: the Baby Unit is searching for the home network.
Red (Set up only)

Solid red: the baby monitor failed to connect to internet.

Flashes red: you have entered a wrong SSID or password.
Purple

Solid purple: video live streaming is turned on for one or more app users.
Blue

Solid blue: Privacy mode is activated.
Volume

You can adjust the speaker volume of the Parent Unit to the level you prefer.
1 Press the top or bottom part of the control button to adjust the volume.

2 The volume bar appears on the display to show the selected volume level.
Note: If the volume is set to a high level, the Parent Unit consumes more power.
Note: When the volume bar is at its minimum, the volume is muted. The Parent Unit shows a mute icon in the status bar and you will only receive alerts and video from the Parent Unit.
Display brightness

You can adjust the display brightness of the Parent Unit to the level you prefer.
1 Press the left or right part of the control button to adjust the brightness of the display on the Parent Unit.

2 The brightness bar appears on the display to show the selected brightness level.
Note: The Parent Unit consumes more power with a higher brightness.
Sound level lights

The Parent Unit continuously monitors the sound level in your baby's room. The sound level lights on the Parent Unit let you know if there is any sound picked up in the baby's room.
As long as no sound is detected, the sound level lights are off.

When the Baby Unit picks up a sound, one or more sound level lights on the Parent Unit turn white. The number of lights depends on the loudness of the sound picked up.
Modes and sensitivity
This baby monitor has three different modes that allow you to choose how you want to monitor your baby: Video, Audio, Eco.
The sensitivity level of the Baby Unit defines what you hear through the Parent Unit. When the level is set to high, you will hear many sounds, including soft background sounds. When the sensitivity level is set low, you will hear only the louder sounds.

With the baby monitor on, press the mode button on the top left of the Parent Unit, press the top or bottom part of the control button to switch between these different modes, and then press the confirm button to select the desired mode.

You can choose different sensitivity levels for different modes by pressing the left or right part of the control button.

The display shows the selected mode.
The selected mode is also indicated in the status bar.
When turning on the device, the mode that was last used will be active.

If your baby only makes soft sounds, the sensitivity of the Baby Unit needs to be set to a high level on the Parent Unit.
The louder your baby sounds, the lower the sensitivity can be set on the Parent Unit.
Note: In Audio and Video mode, you will have continuous sound when the sensitivity level is set to the highest. Otherwise, low sounds will be muted.
Tip: The sensitivity level can be adjusted so you will always hear your baby without the disruption of other sounds. When there is a lot of background noise, turn down the sensitivity so that you will not hear these sounds through the Parent Unit.
Press the confirm button to save the new setting.
Video mode

1 Press the mode button on the top left of the Parent Unit. 2 Press the confirm button to select the Video mode.

When the Video mode is activated, the display is always on.

Note: Set the sensitivity level to the highest to have continuous sound on the Parent Unit.
Audio mode

1. Press the mode button on the top left of the Parent Unit. 2. Press the bottom part of the control button to switch to Audio mode. 3. Press the confirm button to select the Audio mode.

When the Audio mode is activated, the display of the Parent Unit will switch off. Note: The status bar is not visible when the display is off.

Note: The white link light shows that the Parent Unit is still on and connected to the Baby Unit.
Note: When sensitivity is not set to the highest level, low sounds will be muted.
Note: Set the sensitivity level to the highest to have continuous sound on the Parent Unit. Please see the "Modes and sensitivity" chapter for more information.
If your baby makes any sound, the sound level lights turn on and the sounds detected by the Baby Unit are transmitted to the Parent Unit. As long as no sound is detected, the sound level lights are off.
Eco mode

1. Press the mode button on the top left of the Parent Unit. 2. Press the bottom part of the control button to switch to Eco mode. 3. Press the confirm button to select the Eco mode.
Note: When the display is on, the selected mode will be visible in the status bar. The status bar is not visible when the display is off.

The display and sound level lights switch off when there is no sound detected for 20 seconds. The Eco-mode light turns white to indicate that the Parent Unit is still on and Eco mode is active.

When sound is picked up by the Baby Unit, the display and sound level light of the Parent Unit turn on immediately. The video and sounds are transmitted to the Parent Unit and the sound level lights turn white.
As long as no sound is detected, the sound level lights are off.
Note: The minimum sound level to activate sound and display is defined by the sensitivity setting.
Privacy mode

1 Press the mode button on the top left of the Parent Unit. 2 Press the bottom part of the control button to switch to Privacy mode. 3 Press the confirm button to activate the Privacy mode.

When the Privacy mode is activated:
1 You can still monitor your baby from the Parent Unit.
Note: When the display is on, the privacy mode indicator is shown in the status bar. The status bar is not visible when the display is off.

2 You cannot monitor your baby from the app.
Note: The status light of the Baby Unit turns blue. You will receive a push notification from the app.
Note: When you try to monitor via the app it will display that the Baby Unit is in Privacy mode.
Soothing sounds

To activate it from the Parent Unit, follow the instructions below:
1 Press the soothing sounds button on the Parent Unit to open the menu.
Note: Pressing the button while the menu is already open, will close the menu.

2 Press the bottom part of the control button to scroll down to "Select sound" menu item, press the confirm button to enter the soothing sounds list.

3 Press the top or bottom part of the control button to scroll through the list.
4 Press the confirm button to select or deselect the one you want to play. You can also select "All lullabies" to playback the first 5 lullabies.

5 Navigate to "Play" and press the confirm button to start playing the selected sound.
If you want to stop, press the confirm button again.
The status bar of the Parent Unit shows the name of the sound that is being played.
Tip: Long-press the soothing sounds button to start or stop playing the selected sound.

You can set the volume level of the sound or lullaby from the Parent Unit. Press the left or right part of the control button to choose the volume level.

You can set a timer for the soothing sound to stop. Do this from the Parent Unit. Press the left or right part of the control button to choose the time you prefer.

To activate the soothing sounds feature from the Baby Unit, press the soothing sounds button on the Baby Unit.

The latest sound selected on the Parent Unit starts to play continuously according to the last timer setting.
To stop the soothing sounds on the Baby Unit, press the soothing sounds button again.
True talk-back

You can use the true talk-back button on the Parent Unit to talk to your baby.
1 Press the true talk-back button on the Parent Unit.

2 The display of the Parent Unit shows the true talk-back icon, indicating the active connection. Talk clearly into the microphone at the front of the Parent Unit from a distance between 15-30 cm.

The baby can hear you talking into the Parent Unit. At the same time, you will hear any sounds your baby makes.

3 Press the true talk-back button again to turn off when you have finished talking.
Note: It is important to turn off talk-back when you're finished using it in order to avoid any unexpected sounds coming from the Baby Unit.
Cleaning and maintenance

Warning: Do not immerse the Parent Unit, Baby Unit and power adapters in water and do not clean them under the tap.

Warning: Do not use cleaning sprays or liquid cleaners.

1 Switch off the Baby Unit, remove the power adapter from the Baby Unit and remove the power adapter from the wall socket.

2 Clean the Baby Unit with a dry cloth.
Note: Fingerprints or dirt on the lens of the Baby Unit may affect the camera's performance. Avoid touching the lens with your fingers.

3 Switch off the Parent Unit, remove the power adapter from the Parent Unit and wall socket.

4 Clean the Parent Unit with a dry cloth.

5 Clean the adapters with a dry cloth.
Storage
When you are not going to use the baby monitor for a long time, store the Parent Unit, the Baby Unit and adapters in a cool and dry place.
To optimize battery lifespan during long periods of inactivity or storage, it is recommended that you charge your Parent Unit to 50% before turning it off.
Ordering accessories
To buy accessories or spare parts, visit www.philips.com/parts-and-accessories or go to your Philips dealer. You can also contact the Philips Consumer Care Center in your country (see the international warranty leaflet for contact details).
Recycling

- This symbol means that electrical products and batteries shall not be disposed of with normal household waste. Follow your country's rules for the separate collection of electrical products and batteries.
Removal of built-in rechargeable battery
The built-in rechargeable battery must only be removed by a qualified professional when the appliance is discarded. Before removing the battery, make sure that the appliance is disconnected from the wall socket and that the battery is completely empty.
Take any necessary safety precautions when you handle tools to open the appliance and when you dispose of the rechargeable battery.
When you handle batteries, make sure that your hands, the product and the batteries are dry.
To avoid accidental short-circuiting of batteries after removal, do not let battery terminals come into contact with metal objects (e.g. coins, hairpins, rings). Do not wrap batteries in aluminum foil. Tape battery terminals or put batteries in a plastic bag before you discard them.
Procedure:
1 Use a coin to unlock the openings of the battery compartment on the back of the Parent Unit. 2 Remove the 2 rubber feet at the bottom of the Parent Unit. 3 Remove the 2 screws that are now visible at the bottom of the Parent Unit. 4 Pull apart the battery compartment from the Parent Unit. 5 Remove the battery.
If there is no collection/recycling system for electronic products in your country, you can protect the environment by removing and recycling the battery before disposing the product.
Support
For all product support, power consumption details and the EU Declaration of Conformity, please visit www.philips.com/support.
Troubleshooting
This chapter summarizes the most common problems you could encounter with the appliance. If you are unable to solve the problem with the information below, visit www.philips.com/support for a list of frequently asked questions or contact the Consumer Care Center in your country.
PARENT UNIT
| Problem Solution | |
| Why can't I connect my Parent Unit to other Philips Avent Baby Units? | The Philips Avent Premium Connected Baby Monitor's Parent Unit can only connect to the Baby Unit which is included in the same package. |
| If you want to view other Philips Avent baby monitors (SCD641, SCD643, SCD921, SCD923), you can add them in the Philips Avent Baby Monitor+ app. | |
| Why doesn't the Parent Unit charge when I plug it in? | Perhaps the adapter is damaged.Check if this issue persists by using the other adapter supplied in the package. If the adapter is damaged, always have it replaced with an original one in order to avoid hazards. (see the "Ordering accessories" chapter) |
| Perhaps there is a battery error.Check the battery status light on the Parent Unit. If it is solid red, contact the consumer care centre in your country. | |
PARENT UNIT
| Why can the charging time of the Parent Unit exceed 3 hours? | Perhaps temperature has exceeded the charging tolerance that could potentially cut off the charging circuit as a safety protection mechanism. To resume charging, move the charging station away from any heat sources such as radiators, heat registers, stove or other appliances (including amplifiers) that produce heat. |
 | Perhaps you are not using the right power adapter. If you see the icon on the left, it means an incorrect power adapter is detected. Always use the provided adapter for optimal charging performance. |
| Why does my baby monitor manage a much smaller distance than specified in this user manual? | The specified operating range between the Parent Unit and Baby Unit is up to 400 meters, and it's only valid outdoors in open air and in the line of sight. Depending on the surroundings and other disturbing factors, the operating range may be smaller.Inside your house, the operating range is up to 50 meters, which is also limited by the number and type of walls and/or ceilings between the Parent Unit and the Baby Unit. |
| Why can't I establish a connection between the Parent Unit and Baby Unit? Why is the connection lost every now and then? Why are there sound interruptions? | The Baby Unit and the Parent Unit are probably close to the outer limits of the operating range or there is interference from other 2.4 GHz wireless devices.Try a different location, decrease the distance between the units or switch off other 2.4 GHz wireless devices (laptops, mobile phones, microwaves, etc).Maybe the router connection of the Baby Unit is not strong or steady.Check the router signal strength of your Baby Unit on the Baby Monitor+ app, if it is weak, try moving the router closer to the Baby Unit or using Wi-Fi extenders to ensure a strong and steady connection for an optimal performance. |
| Why does the app/Parent Unit react too quickly to other sounds than my baby makes? | The sensitivity level may be set too high. When your baby makes soft sounds, the sensitivity has to be higher. However, the noisier the nursery room is, the lower the sensitivity level can be set. You can change the sensitivity of your baby monitor on the Parent Unit's menu. |
| Why don't I hear a sound from the Parent Unit? Why the Parent Unit is not transmitting sounds? | Perhaps the Parent Unit is muted. Unmute it by pressing the top part of the control button and adjust the volume.Perhaps you have muted on the app. Unmute it by tapping the mute icon on the video screen.The sensitivity is set too low. Increase the sensitivity in the Parent Unit's menu or the app to a higher level.The Baby Unit may be too far away from your baby. Make sure the Baby Unit is not further than 1.5 meters away from your baby for optimal sound detection. |
| Why do I get interference on the Parent Unit? Why does the video display on the Parent Unit flicker?Why does the Parent Unit make a buzzing sound? | Interference may occur when the Parent Unit is out of range of the Baby Unit. If there are too many walls or ceilings between the Parent Unit and the Baby Unit. Or when other 2.4 GHz wireless devices are switched on (e.g. microwave, Wi-Fi router).Put the Parent Unit in a different place, closer to the Baby Unit, or switch off other wireless devices. |
SenseIQ/Cry Translation
| Problem Solution | |
| Why is there no breathing and movement analysis? | Maybe you haven't activated / turned on the SenseIQ feature. Download the Philips Avent Baby Monitor+ app (see the "Download the Baby Monitor+ app" chapter) on your phone, and then activate / turn on the SenseIQ feature in the menu of the Parent Unit or app. |
| Maybe the Baby Unit is not set up properly.To ensure everything's mounted and positioned well, you can do a positioning check found in the Tutorials and Tips section of the Help and support menu in the app. Completing the positioning check should allow for SenseIQ to function without interruption after enabling it.Avoid using solid-colored blanket or sleeping bag and use a patterned blankets or baby clothes to improve visibility. Make sure you have contrast between the baby blanket/sleeping bag and the mattress cover. | |
| Maybe the Baby Unit is too far away from your baby.When using the crib mount, make sure to put the mount on the long side of the crib. When using the wall mount, ensure that the distance between the crib and the Baby Unit is not too much. This will help ensure that the whole baby mattress area is clearly seen and that you can monitor your baby effectively. | |
| Cry Translation is not working, what should I do? | Perhaps the Wi-Fi connection is weak or not stable.Check the Wi-Fi signal strength on the setting page of the app and it works best when it shows "Excellent" or "Good". |
| Perhaps the Baby Unit connection is not good.Make sure the Baby Unit is properly connected to the Parent Unit or the App.Ensure that the Baby Unit is placed close to the baby to detect the baby's cry and minimize interference from ambient noise. | |
| Perhaps the subscription has expired.The Cry Translation service is available for a 90-day free trial period. If you want to continue using it, you would need to sign up for a paid subscription service with ZoundreamTM. | |
| Perhaps there are too many environmental noises.Avoid positioning the Baby Unit near loud sources like televisions or devices that produce sounds and vibrations, such as smartphones on vibration mode. These noises can interfere with the device's ability to accurately detect and translate your baby's cries. | |
APP
| Problem Solution | |
| I can't connect to the baby monitor. Each time I end up in the connection error screen. What is the matter? | Make sure your smart device uses the same Wi-Fi network you want to connect the baby monitor to. |
| Check the status light of the Baby Unit, if it is flashing red, the Wi-Fi password entered was wrong. Restart the set up process. Re-enter the Wi-Fi password and make sure that the password is correct. | |
| Perhaps the router SSID (the network name) or the password contains special symbols. If it does, change the name of your router SSID or the password accordingly. | |
| If the status light turns solid red while trying to connect, the baby monitor successfully connected to the router but fails to connect to the internet. Then check if you have access to 2.4 GHz Wi-Fi by trying to access other apps like YouTube, Facebook etc. If other apps do not respond, please make sure you have internet access. If there is internet access, the server could be temporarily unavailable. Please try to set up again later. | |
| Perhaps you have been tying to connect the baby monitor to a 5 GHz network. Please check that you have chosen a SSID of a network that supports 2.4 GHz. | |
| I have problems making my baby monitor read the QR code on my smart device. What can I do? | Make sure that you hold the QR code at approx. 20 cm / 7.8 inch distance from the baby monitor lens. Try moving the smart device slightly up, down, left or right to ensure the QR code is directly in front of the baby monitor lens. You can also try moving the smart device closer to or further away from the baby monitor lens to allow proper focusing. Make sure that there is enough light in the room, but avoid too bright light. When the baby monitor has read the QR code, you hear a confirmation sound and the status light of the Baby Unit turns white. |
| Perhaps part of your hand covers the QR code. Hold your device in such a way that your hand does not cover the QR code. | |
| I lose connection to the app frequently. What is the matter? | If the status light on the front of the baby monitor is solid white and you keep losing connection, there may be a problem with the Internet connection of your router, smartphone or baby monitor. Check the Wi-Fi signal on your smartphone or the 4G or 5G speed by trying to watch a movie, e.g. on YouTube. Or reset your Wi-Fi router. |
| Why can't I get video live streaming on the app? | Check the Wi-Fi signal strength on the setting page of the app and it works best when it shows "Excellent" or "Good". |
| Perhaps there are already three people monitoring your baby. The app only allows three people to watch simultaneously. If you have administrator rights, you can remove access for one of the guests to be able to watch yourself. | |
| Perhaps the privacy mode is on which will temporarily disconnect the connection with the Baby Unit. You can turn off the privacy mode in the Parent Unit. (see the "Privacy mode" chapter) | |
APP
| Why do I get black and white images instead of colour ones? | The baby monitor has switched to night vision mode because the room where the baby monitor is placed is dark.If there is enough light in the room, the light sensor on the baby monitor may be covered or dirty. Make sure that this sensor is fully exposed to the light in the room. |
| Why does the app not notify me that the baby is crying? | Check the Wi-Fi signal strength on the setting page of the app and it works best when it shows "Excellent" or "Good". |
| The sound threshold for notification may have been set too low. In that case, the app will only notify you when the baby produces a lot of sound. Open the app setting to set the sound threshold higher to ensure that you are notified sooner. | |
| Perhaps you have muted your smart device, turn on the volume. | |
| Check if you have activated the notification function in the setting of the app. | |
| Check if you have activated the notification function in the setting of your smart device. | |
| Check if you have viewing rights as a guest. The notification function is disabled for guest users. | |
| Why can't my partner and I connect to the baby monitor at the same time? | The secondary admin user does not need to go through the same connection process again, you only need to invite your partner as an admin user through the app. |
| If you do not wish your partner to have full access, invite your partner to login as a guest user. Access rights of guest users have limitations. Please refer to the ''Account management'' chapter for details. | |
| Why can't I talk to the Baby Unit after pressing the true talk-back button from the app? | Perhaps the true talk-back feature is active via the Parent Unit or your partner's app.The Parent Unit has a higher priority in using true talk-back function. |
| I am a guest user already, why can't I get video live streaming? | Perhaps the administrator has temporarily turned on the Privacy mode. You should have received a notification about this. |
| The baby monitor may be offline. To receive a notification when the baby monitor goes offline in future, switch on app notifications from the app's settings menu. | |
| Do I have to keep the app open to monitor my baby? | No, the app can monitor in the background while you do other things.Switch on background monitoring from the Monitoring and Video settings menu of the Baby Monitor settings, put the app in the background by locking the smartphone or going to the home screen of your smartphone. You will be able to hear your baby's sounds even if the app is not open. Furthermore you can still receive push notifications. |
| Why can't I hear sound from multiple Baby Units/cameras? | You can view multiple live steamings in split screen format on the preview page of app, but you can only hear sound from the Baby Unit/camera you selected. |
APP
| Is the baby monitor hacker-proof? | We take every possible measure to prevent hacking and ensure the highest level of security. This includes issuing security updates as appropriate to maintain our standards. Please make sure that you always use the latest app software and baby monitor firmware. If you lose your smart device, factory-reset the baby monitor to remove any connections to it. You can also log in to the app from another smart device and delete your account. If you are the only administrator, all guest users will be disconnected from the baby monitor too. |
| I have lost my phone.How can I prevent strangers from viewing my baby? | Log in to the app from another smart device and delete your account. If you are the only administrator, this will disconnect all guest users of the app from the baby monitor. You can also factory-reset the baby monitor to disable all connections to the device you lost. Long-press the On/Off button of the Baby Unit for 10 seconds to factory-reset. |
| Why am I not notified of the upgrades of the app or the baby monitor software? | Maybe you have set the App Updates to manual in the App store or Play store. To ensure you are using the most up-to-date version, periodically check for updates. If an update is available, the App store or Play store will prompt you to install it. |
Wall mount
Printing instructions:
Print this page in scale 100% and use the template to accurately mark the position of the holes for the screws on the wall.


Introduction


SenseIQ


Introduction
Output: 5.0 Vdc, 1.0 A, 5.0 W


Cry translation
zoundream


2 Press the night light button again to turn it off.
Zoom

3 Temperature alarms can be turned on or off. Press the confirmation button to turn it on or off.


When privacy mode is enabled:


Introduction


Cry interpretation
zoundream


Introduction
Important safety instructions
Output: 5.0 Vdc, 1.0 A, 5.0 W

The baby unit or mattress should not be placed at an angle.
Crib attachment


Warning. Do not immerse the parent unit, baby unit, or power adapter in water or clean them under the tap.

4 Clean the parent unit with a dry cloth.

5 Clean the adapters with a dry cloth.
Storage
Output: 5 V, 1.0 A, 5.0 W


Zoom


Introduction
Output: 5.0 Vdc, 1.0 A, 5.0 W

9 SenseIQ technology (active)


SenseIQ


![graph TD A["Radio System"] --> B["Switch"] C["Satellite Device"] --> B D["Radio System"] --> B B --> E["Router"] style A fill:#f9f,stroke:#333 style C fill:#f9f,stroke:#333 style D fill:#f9f,stroke:#333 style B fill:#ccf,stroke:#333 style E fill:#ccf,stroke:#333](/content/2026/06/1393100/images/b7eab0e08f04d7b40bac10e18ffa39d479c1098633fcaea0282c207f924e0d58.jpg)


Introduction
Congratulations on your purchase and welcome to Philips Avent! To get full benefit from the support that Philips Avent offers, register your product at
www.philips.com/welcome.
The Philips Avent Premium Connected Baby Monitor with SenseIQ technology makes the invisible visible for complete peace of mind. It is simple and intuitive for parents to see, hear, and know that their baby is safe and healthy at home or away from home. SenseIQ helps parents stay connected, without wearable devices, to sleep and breathing rate monitors that provide real-time insight into their baby's well-being.
Output: 5.0 Vdc, 1.0 A, 5.0 W
1 Download the app. Scan the QR code or search for "Philips Avent Baby Monitor+" on the App Store or Google Play Store.
When your baby starts to push up and show signs of standing, it is best to lower the mattress to the lowest position. We recommend using the wall mount for the mattress in lower positions.
Avoid mounting the baby unit over the short side of the crib. This will limit your view of the baby.

Sleep sacks, bedding, and patterned clothing are excellent for use with this baby monitor.

Try to avoid thick clothing and bedding of the same color because the baby unit uses contrast to detect movement.

The baby unit or mattress must not be placed at an angle.
Crib mount
Note: If the crib has round bars, use the wall mount.


1 Remove the 2-in-1 mount, connector, power adapter, and baby unit.
2 For best results, mount the baby unit in the middle and over the long side of the crib.
3 Attach the connector to the middle of the long side of the crib by lowering it onto the rail.
10 Attach the baby unit to its base by aligning the pegs with the holes on the bottom of the baby unit and pushing down.

1 Remove the 2-in-1 mount, connector, power adapter, screws and wall plugs, wall mount template, and baby unit.

3 Remove the screw part by unlocking it with your thumb, sliding it down, and removing it. You are now left with the part that will be used as the wall mount.

4 Find the template for wall placement and measure 1.1 meters from the floor with a tape measure, then mark where the two screws should go. Drill small holes in the wall and insert the provided wall plugs.
7 Then, through the opening of the wall mount, after the power cable, insert the rod.


3 When the battery is fully charged, the battery status indicator starts to glow steadily white.

When you charge the parent unit for three hours, it can be used wirelessly for up to 12 hours in eco mode.
When the parent unit is not plugged into the mains power and the battery is almost empty (below 10%), the battery status indicator starts to blink orange and a low battery warning sounds.
If the parent unit battery is empty and it is not connected to the mains power supply, the parent unit will turn off and the connection with the baby unit will be lost.
For the best possible connection, place the baby unit and the Wi-Fi router in the same room. Solid walls or other electronics can interfere with the signal.
3 The status indicator will light up green when the baby unit is ready for pairing.

4 Make sure the parent unit and the baby unit are at least 2.5 meters apart to avoid acoustic feedback.
Note: If you use a cordless phone, wireless video, Wi-Fi network, microwave oven, or Bluetooth device on 2.4 GHz and notice interference on the parent unit or baby unit, move the parent unit until the interference stops.

When the parent unit and baby unit are connected, the link indicator on the parent unit lights up white and one or more signal strength bars are displayed on the screen.

The operating range is up to 50 meters indoors and 400 meters outdoors. The operating range of the baby monitor varies depending on the environment and factors that cause interference. Wet and damp materials cause so much interference that range loss can be up to 100%.
The Philips Avent Premium Connected Baby Monitor is equipped with six excellent features that help parents monitor their baby with ease. These features include the following:
SenselQ – uses artificial intelligence technology to detect the baby's sleep and breathing.
SenseIQ


All features described in the following sections can be controlled via the parent unit menu or the app.
The bottom bar of the screen shows the sleep phase, time spent in bed, and average breathing rate.
Cry translation
zoundream
The bottom bar of the screen shows the cry translation result.
To activate the night light function from the parent unit, follow the instructions below:
Note: The current temperature of the room where the baby is located is displayed on the status bar of the parent unit.
2 Select the Temperature Alert option and press the confirm button to access the temperature alert feature.

4 To change the maximum and minimum temperatures for the temperature alert, select the desired temperatures in the temperature menu.
Tip: You can change the temperature unit from C (Celsius) to F (Fahrenheit) by selecting the units option.

2 The screen displays the latest version of the software files for the parent unit and the baby unit.

Note: If a firmware update is available, it will be installed automatically and you will receive a notification.
Status indicator
Orange color

Solid orange: The baby unit is starting up.

Solid green: The baby unit is ready to connect to the parent unit.
White color

Solid white: The baby unit is ready to connect to the parent unit and the app.

Flashing white: The baby unit is connected to the home network.
Red color (setup only)

Solid red: the baby monitor has failed to connect to the internet.

Flashing red: you have entered an incorrect SSID or password.
Purple

Solid purple: live video streaming is enabled for one or more app users.
Blue

Solid blue: Privacy mode is on.
Volume

The parent unit continuously monitors the sound level in the baby's room. The sound level indicators on the parent unit let you know if any sound is heard in the baby's room.
As long as no sound is detected, the sound level indicators remain off.

The selected mode is displayed on the screen.
The selected mode is also indicated on the status bar.
When Audio mode is activated, the parent unit screen turns off.
Note: The status bar is not visible when the screen is off.

To activate it from the parent unit, follow the instructions below:
To activate the soothing sounds feature from the baby unit, press the soothing sounds button on the baby unit.

2 The parent unit screen displays a response icon, indicating an active connection. Speak clearly into the microphone on the front of the parent unit from a distance between 15 cm and 30 cm.

The baby can hear you while you speak into the parent unit. At the same time, you will hear the sounds the baby makes.

Warning: do not immerse the parent unit, baby unit, or power adapters in water or wash them under running tap water.

Warning: do not use sprays or cleaning liquids.

1 Turn off the baby unit, unplug the power adapter from the baby unit, and unplug the power adapter from the wall outlet.

2 Clean the baby unit with a dry cloth.
3 Turn off the parent unit, unplug the power adapter from the parent unit and the wall outlet.

4 Clean the parent unit with a dry cloth.

5 Clean the adapters with a dry cloth.
Memory


Introduction
Model: ASSA105x-050100 (x = E (EU plug) / x = B (UK plug))
Input: 100-240 V~, 50/60 Hz, 0.35 A
Output: 5.0 V DC, 1.0 A, 5.0 W


![graph TD A["Radio System"] --> B["Satellite Device"] B --> C["Router"] C --> D["TV Computer"] D --> E["Satellite Device"] E --> F["Radio System"] style A fill:#f9f,stroke:#333 style B fill:#ccf,stroke:#333 style C fill:#cfc,stroke:#333 style D fill:#fcc,stroke:#333 style E fill:#cff,stroke:#333 styl…](/content/2026/06/1393100/images/e49a66d6ae3531dd670468230a35cc001319f789291f40f3aa2c72f0c4185c80.jpg)


Output: 5.0 Vdc, 1.0 A, 5.0 W

The baby monitor is commonly used for newborns and younger babies.
3 Lower the clamp onto the rail and attach it to the middle of the long side of the baby's crib.


Note: Pairing the parent unit and baby unit takes approximately 15 seconds.
2 To access the SenselQ function, select "SenselQ" and press the confirm button.


ECO mode


Introduction


![graph TD A["Radio Station 1"] --> B["Router"] C["Radio Station 2"] --> B D["Radio Station 3"] --> B B --> E["Output"] style A fill:#f9f,stroke:#333 style C fill:#f9f,stroke:#333 style D fill:#f9f,stroke:#333 style B fill:#ccf,stroke:#333 style E fill:#cff,stroke:#333](/content/2026/06/1393100/images/3a5b8de6fdf27b93cff1d14b02a19b9d26dcdddbc82bd24d2f19846efded5fb8.jpg)
The night light is connected.

The selected mode is shown on the screen.

5 Wipe the adapters with a dry cloth.
Storage


Introduction
Output: 5.0 Vdc, 1.0 A, 5.0 W


Introduction


Continuous operation: the baby unit starts up.


Introduction
Output power: 5.0 V DC, 1.0 A, 5.0 W

The mattress should appear as a straight horizontal rectangle on the screen. The straighter the mattress is on the screen, the better.

Note: Use the wall mount for cribs with round bars.

3 Attach the clamp to the middle of the long side of the crib by lowering it onto the bar edge.

6 Connect the two rods together to make a long rod.
2 The battery status indicator lights up orange to show that the parent unit is charging.

3 When the battery is fully charged, the battery status light turns white.


5 Press and hold the Power button for 1.5 seconds to turn on the parent unit.

You can choose different connection options with this menu function.
Direct: The parent and baby units are already paired and connect to each other directly.
![graph TD A["Camera 1"] -->|Wireless Link| B["Rutier"] C["Camera 2"] -->|Wireless Link| B["Rutier"] D["Camera 3"] -->|Wireless Link| B["Rutier"] B --> E["Router"] style A fill:#f9f,stroke:#333 style C fill:#f9f,stroke:#333 style D fill:#f9f,stroke:#333 style B fill:#ccf,stroke:#333](/content/2026/06/1393100/images/8c6b63dd612197ee246fb3b3df0b12794581aee11d57ec4ef15e4ae0336906c8.jpg)
You can adjust the brightness of the night light from the parent unit.
You can set the timer for the night light from the parent unit.


4 To change the maximum and minimum temperature for the temperature alert, select the desired temperatures in the temperature menu.
Continuously lit blue: Private mode is activated.
Volume

Sound level lamps

When video mode is activated, the display is always on.

When Private mode is activated:
You can set the volume level for the sound or the lullaby from the parent unit.
2 The display on the parent unit shows the two-way communication icon, indicating the active connection. Speak clearly into the microphone on the front of the parent unit at a distance of 15–30 cm.


- INTRODUCTION
- WWW.PHILIPS.COM/WELCOME
- GENERAL DESCRIPTION
- IMPORTANT SAFETY INFORMATION
- IMPORTANT
- DISCLAIMER
- DANGER
- WARNING
- BATTERY SAFETY INSTRUCTIONS
- CAUTION
- DECLARATION OF CONFORMITY
- ELECTROMAGNETIC FIELDS (EMF)
- GENERAL INFORMATION
- PREPARING FOR USE
- DOWNLOAD THE BABY MONITOR+ APP
- SECURITY AND PRIVACY
- NETWORK SECURITY
- STRONG PASSWORDS
- PERSONAL DATA SECURITY
- PROVISION OF SECURITY UPDATES
- COMPATIBILITY
- MOUNT YOUR BABY UNIT
- HOW ARE YOU MOUNTING
- DOS AND DON'TS
- CRIB MOUNT
- WALL MOUNT
- PARENT UNIT
- DISPLAY OVERVIEW
- CHARGING THE PARENT UNIT
- USING THE BABY MONITOR
- HOW TO PAIR YOUR BABY AND PARENT UNIT
- FEATURES AND SETTINGS
- MENU FEATURES
- SENSEIQ
- CRY TRANSLATION
- ZOUNDREAM
- CONNECTION TO THE BABY UNIT
- NIGHTLIGHT
- ZOOM
- TEMPERATURE ALERT
- STATUS LIGHT
- ORANGE
- GREEN
- WHITE
- RED (SET UP ONLY)
- PURPLE
- BLUE
- VOLUME
- DISPLAY BRIGHTNESS
- SOUND LEVEL LIGHTS
- MODES AND SENSITIVITY
- VIDEO MODE
- AUDIO MODE
- ECO MODE
- PRIVACY MODE
- SOOTHING SOUNDS
- TRUE TALK-BACK
- CLEANING AND MAINTENANCE
- STORAGE
- ORDERING ACCESSORIES
- RECYCLING
- REMOVAL OF BUILT-IN RECHARGEABLE BATTERY
- PROCEDURE
- SUPPORT
- TROUBLESHOOTING
- CRY INTERPRETATION
- IMPORTANT SAFETY INSTRUCTIONS
- CRIB ATTACHMENT
- STATUS INDICATOR
- ORANGE COLOR
- WHITE COLOR
- RED COLOR (SETUP ONLY)
- MEMORY
- SOUND LEVEL LAMPS
Brand : PHILIPS
Model : Avent SCD971
Category : Baby monitor