
TY-SP65P11WK - Soundbar PANASONIC - Free user manual and instructions
Find the device manual for free TY-SP65P11WK PANASONIC in PDF.


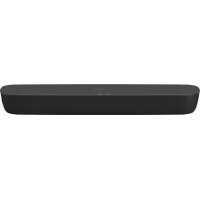
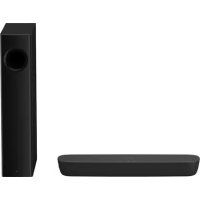
| Product type | Soundbar |
| Brand | Panasonic |
| Model | TY-SP65P11WK |
| Dimensions (W x H x D) | approx. 1000 x 60 x 120 mm |
| Weight | approx. 2.5 kg |
| Power supply | AC adapter (100-240 V, 50/60 Hz) |
| Power consumption | 30 W (max) |
| Inputs | HDMI ARC, optical, auxiliary input (3.5 mm) |
| Wireless connectivity | Bluetooth 5.0 |
| Number of channels | 2.1 (stereo + built-in subwoofer) |
| Total power | 80 W |
| Frequency response | 20 Hz – 20 kHz |
| Main features | Dialogue enhancement, night mode, preset equalizer |
| Care and cleaning | Clean with a soft, dry cloth. Do not use abrasive products. |
| Safety | Do not expose to moisture or liquids. Unplug before cleaning. |
| Spare parts and repairability | Spare parts are available through Panasonic after-sales service. Repairability index: 7.5/10. |
| Included accessories | Remote control, optical cable, AC adapter, wall mounts |
| TV compatibility | Designed for Panasonic TVs (VIERA series with ARC support) |
Frequently Asked Questions - TY-SP65P11WK PANASONIC
User questions about TY-SP65P11WK PANASONIC
0 question about this device. Answer the ones you know or ask your own.
Ask a new question about this device
Download the instructions for your Soundbar in PDF format for free! Find your manual TY-SP65P11WK - PANASONIC and take your electronic device back in hand. On this page are published all the documents necessary for the use of your device. TY-SP65P11WK by PANASONIC.
USER MANUAL TY-SP65P11WK PANASONIC
natural_image
Two identical line drawings of a cylindrical architectural element with flanges and base (no text or symbols)Model No.
TY-SP65P11WK
| Installation InstructionsSpeakers for Plasma DisplayBefore commencing work, carefully read these Instructions and the Manual for the plasma display to ensure that fitting is performed correctly.(Please keep these instructions. You may need them when maintaining or moving.) | |
| InstallationsanleitungLautsprecher für PlasmadisplayVVor der Ausführung lesen Sie bitte diese Anleitung und die Bedienungsanleitung für das Plasmadisplay sorgfältig durch, damit die Anbringung richtig ausgeführt wird.(Bitte bewahren Sie diese Anleitung auf. Sie kann bei der Wartung oder der erneuten Anbringung der Halterung benötigt werden.) | |
| InstallatiehandleidingLuidsprekers voor Plasmadisplay MonitorLees deze installatiehandleiding en de bedieningshandleiding voor het plasmascherm zorgvuldig door voordat u begint, zodat de montagewerkzaamheden op de juiste wijze worden uitgevoerd.(Bewaar deze handleiding. U hebt de handleiding weer nodig wanneer u de bevestigingssteun verwijdert of verplaatst.) | |
| Istruzioni per l’installazioneAltoparlanti per lo Schermo al PlasmaPrima di iniziare il montaggio leggere attentamente queste istruzioni ed il manuale dello schermo al plasma allargato per poter procedere al montaggio in modo corretto.(Conservare poi queste istruzioni che si renderanno necessarie per la manutenzione e l’eventuale spostamento della staffa.) | |
| Instructions d’installationEnceintes pour écran PlasmaAvant de commencer le travail, lisez attentivement ces instructions ainsi que le mode d’emploi de l’écran large à plasma de manière à réaliser un montage convenable.(Conservez soigneusement les présentes instructions. Vous pouvez en avoir besoin pour effectuer un entretien ou si vous désirez déplacer l’applique.) | |
| Instrucciones de instalaciónAltavoces para Pantalla de PlasmaAntes de empezar el trabajo, lea atentamente estas instrucciones y el manual de la pantalla de plasma para asegurar una instalación correcta.(Guarde estas instrucciones. Podrá necesitarlas cuando haga trabajos de mantenimiento o mueva el soporte.) | |
| MonteringsanvisningarHögtalare för plasma-monitorInnan arbetet påbörjas ska du noga läsa dessa anvisningar och bruksanvisningen som medföljer plasmaskärmen för att försäkra att arbetet utförs på rätt sätt.(Bevara dessa anvisningar. Du kan behöva anlita dem på nytt för underhåll eller flyttning av hållaren.) | |
| MonteringsvejledningHøjttalere til plasmaskærmFør arbejdet påbegyndes, skal de omhyggeligt læse disse instruktioner og betjeningsvejledningen til plasmaskærmen for at sikre at opsætningsarbejdet udføres korrekt.(Gen disse instruktioner. De kan få brug for dem ved vedligeholdelse, eller hvis ophænget skal flytttes.) | |
| Инструкция по установкеАкустические системы для плазменного дисплеяПеред проведением работ внимательно прочитайте эту Инструкцию и Руководство для плазменного дисплея, чтобы убедиться в том, что установка выполняется правильно.(Сохраните, пожалуйста, эту инструкцию. Она может Вам понадобиться для технического обслуживания или перемещения.) | Русский Dansk Svenska España Français Italiano Nederland |
| Посібник із встановленняКолонок плазмового дисплеяЩоб правильно виконати встановлення, сперщу уважно ознайомтесь із даним посібником та посібником користувача плазмового дисплея. (Збережіть даний посібник. Він може знадобитися вам під час технічного обслуговування або при переміщенні дисплея і колонок.) | Українська |
Safety Precautions
CAUTION
After installing the speakers, do not attempt to move the display by lifting the speakers.
- The mounting brackets may be damaged, and personal injury may result.
Do not suspend the speakers.
- Personal injury may result if the speakers fall off. Take particular care to ensure the safety of children.
These speakers are designed to be used with the Plasma Display only.
- If connecting them to a different amplifier, make sure that the maximum input to the speakers is within their rated level (10 W). If the rated input level is exceeded, fire may result.
Make sure that all screws are tightened securely during installation.
- Ensure that the installation is carried out correctly to prevent the speakers from becoming detached, and possibly causing possible personal injury.
Notes on use
-
If connecting to an external amplifier that exceeds the rated input for the speakers, keep the amplifier volume suitably low to protect the speakers from damage. If any problems occur with speaker operation, disconnect the mains lead of the amplifier and consult a qualified service technician.
-
Do not place the speakers in the following places:
- Areas that are exposed to direct sunlight
• Near heaters or other heat sources
- Areas subject to high humidity
-
This set is equipped with magnetic resistant speakers. However be careful not to place it near a CRT or PDP TV as it may cause colour patches.
-
To clean the speakers, wipe them with a soft cloth. If they are extremely dirty, wipe them with a cloth that has been soaked in a small amount of household detergent, and then wipe them dry with a separate cloth.
- Do not use solvents such as alcohol or thinner.
- If using chemically-treated cloths, follow the instructions supplied with the cloth packaging.
Accessories
Mounting A brackets ....4 Mounting B brackets

(right) 2
(left) 2

LeftRight
Bracket mounting screws 16

Sponges .... 2 Speaker cables (25 cm) .... 2

natural_image
Simple line drawing of three parallel rectangular bars (no text or symbols)
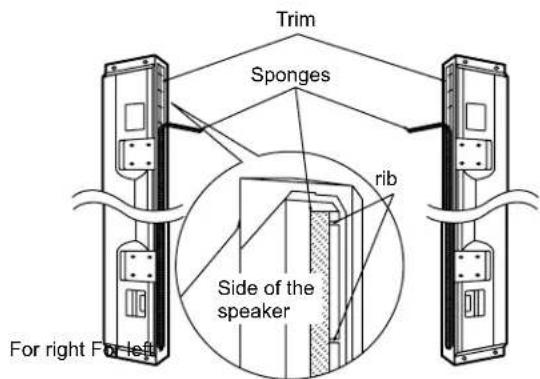


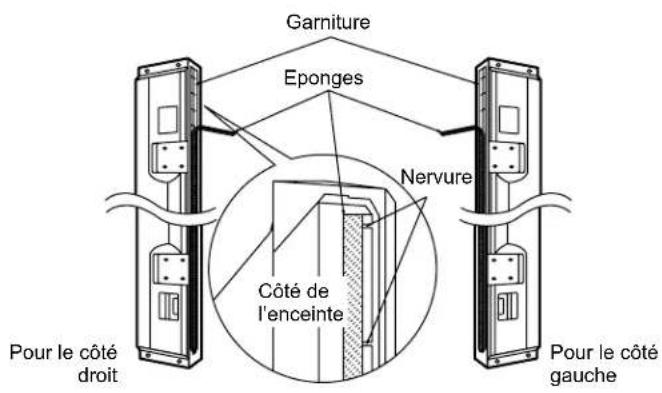
1. Attach the sponges to the speakers.
- Attach the sponges to the surfaces which are in contact with the Display.
- Clean the surfaces before attaching the sponges.
- Attach the sponge along the rib on the speaker.
2. Mount A brackets to the plasma display.
(Four A brackets, for the left, right, top and bottom)
- Remove the mounting screws (2 at the top and 2 at the bottom) of the cover.
- Fit the tab of each mounting A brackets into one of the slits in the back of the display and secure it in place using the cover mounting screws (2 each) removed earlier.
3. Mount B brackets to the speakers.
(Four B brackets, for the left, right, top and bottom)
Caution
• Fit with the clips (claws) at the top.
- The left and right brackets are different, so please check carefully when mounting.
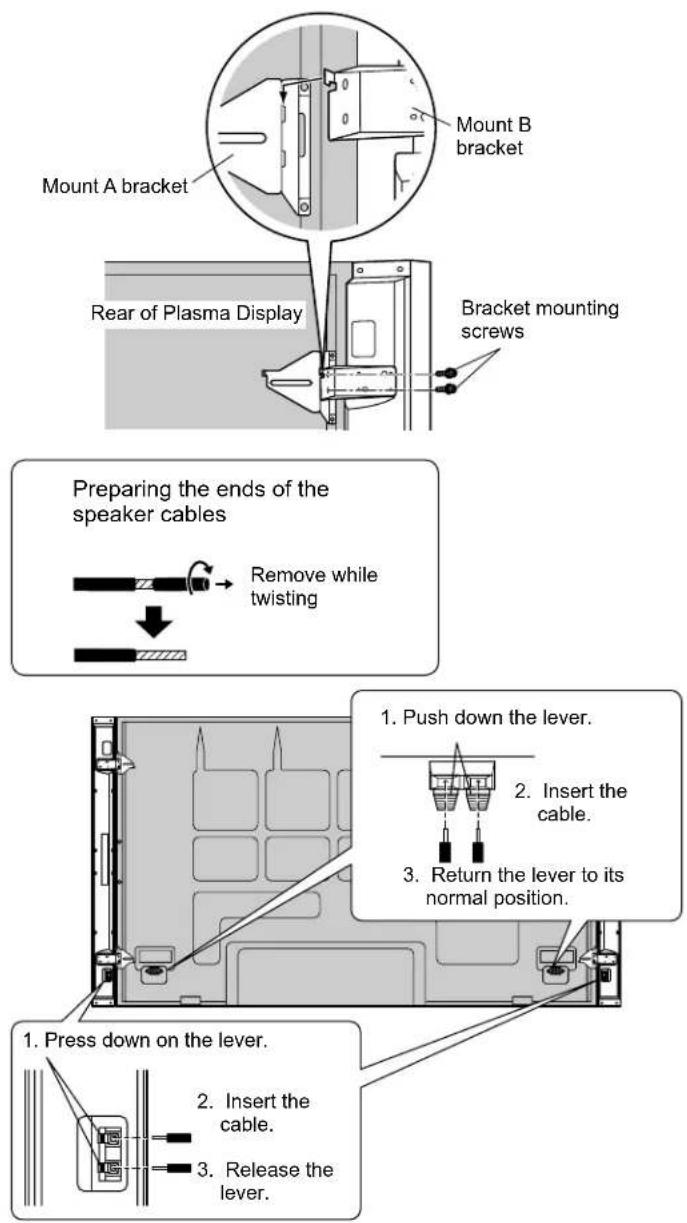
4. Fasten the A and B brackets
- Catch the B bracket claws in the A brackets (plasma display side).
Fasten the A and B brackets with bracket mounting screws. - Adjust display and speaker height when fastening the A and B brackets.
5. Connect the speaker cables.
• After preparing the ends of the speaker cables for the right speaker, connect them as shown in the illustration.
- Connect the speaker cables for the left speaker in the same way.
- The red cable is for the (+) polarity and the black cable is for the (-) polarity. Do not connect the cables to the wrong polarities.
Information for Users on Collection and Disposal of Old Equipment and used Batteries

These symbols on the products, packaging, and/or accompanying documents mean that used electrical and electronic products and batteries should not be mixed with general household waste.
For proper treatment, recovery and recycling of old products and used batteries, please take them to applicable collection points, in accordance with your national legislation and the Directives 2002/96/EC and 2006/66/EC.
By disposing of these products and batteries correctly, you will help to save valuable resources and prevent any potential negative effects on human health and the environment which could otherwise arise from inappropriate waste handling.
For more information about collection and recycling of old products and batteries, please contact your local municipality, your waste disposal service or the point of sale where you purchased the items.
Penalties may be applicable for incorrect disposal of this waste, in accordance with national legislation.

For business users in the European Union
If you wish to discard electrical and electronic equipment, please contact your dealer or supplier for further information.
[Information on Disposal in other Countries outside the European Union]
These symbols are only valid in the European Union. If you wish to discard these items, please contact your local authorities or dealer and ask for the correct method of disposal.

Note for the battery symbol (bottom two symbol examples):
This symbol might be used in combination with a chemical symbol. In this case it complies with the requirement set by the Directive for the chemical involved.
natural_image
Simple line drawing of three parallel diagonal bars (no text or symbols)

natural_image
Simple line drawing of three parallel diagonal bars (no text or symbols)
natural_image
Simple line drawing of three parallel diagonal bars (no text or symbols)natural_image
Three parallel horizontal lines with rounded ends, no text or symbols present

- TY-SP65P11WK
- Safety Precautions
- CAUTION
- Notes on use
- Accessories
- Attach the sponges to the speakers.
- Mount A brackets to the plasma display.
- Mount B brackets to the speakers.
- Fasten the A and B brackets
- Connect the speaker cables.
- Information for Users on Collection and Disposal of Old Equipment and used Batteries
Brand : PANASONIC
Model : TY-SP65P11WK
Category : Soundbar