
CAMIP7N - Surveillance Camera VELLEMAN - Free user manual and instructions
Find the device manual for free CAMIP7N VELLEMAN in PDF.


| Product type | IP surveillance camera |
| Brand | Velleman |
| Model | CAMIP7N |
| Resolution | HD 720p (1280 x 720 pixels) |
| Night vision | Yes, with infrared LED (range up to 10 m) |
| Viewing angle | 70° |
| Connectivity | Wi-Fi 802.11 b/g/n, Ethernet RJ45 |
| Power supply | 5 V DC via mains adapter (included) |
| Dimensions (L x W x H) | 100 x 70 x 70 mm |
| Weight | 200 g |
| Usage | Indoor and outdoor (IP65 rating) |
| Main functions | Motion detection, push notification, microSD card recording (up to 32 GB), two-way audio |
| Mobile app | Compatible with iOS and Android (Velleman app) |
| Maintenance and cleaning | Clean with a soft, dry cloth. Do not use abrasive products. |
| Security | WPA2 encryption, password authentication |
| Spare parts and repairability | Mains adapter available as spare part. Repair by a professional recommended. |
| Warranty | 2 years |
Frequently Asked Questions - CAMIP7N VELLEMAN
User questions about CAMIP7N VELLEMAN
0 question about this device. Answer the ones you know or ask your own.
Ask a new question about this device
Download the instructions for your Surveillance Camera in PDF format for free! Find your manual CAMIP7N - VELLEMAN and take your electronic device back in hand. On this page are published all the documents necessary for the use of your device. CAMIP7N by VELLEMAN.
USER MANUAL CAMIP7N VELLEMAN
WIRELESS IP COLOUR CAMERA
DRAADLOZE IP KLEURENCAMERA
CAMÉRA COULEUR IP SANS FIL
CÂMARA IP INALÂMBRICA A COLOR
natural_image
Exterior view of a security camera with antenna and mounted sensor (no visible text or symbols)USER MANUAL 3
GEBRUIKERSHANDLEIDING 30
MODE D'EMPLOI 57
MANUAL DEL USUARIO 84
To all residents of the European Union
Important environmental information about this product

This symbol on the device or the package indicates that disposal of the device after its lifecycle could harm the environment. Do not dispose of the unit (or batteries) as unsorted municipal waste; it should be taken to a specialized company for recycling. This device should be returned to your distributor or to a local recycling service. Respect the local environmental rules.
If in doubt, contact your local waste disposal authorities.
Thank you for choosing Velleman! Please read the manual thoroughly before bringing this device into service. If the device was damaged in transit, don't install or use it and contact your dealer.
2. Safety Instructions
 | Keep the device away from children and unauthorised users. |
 | Risk of electroshock when opening the cover. Touching live wires can cause life-threatening electroshocks. Do not open the housing yourself. Have the device repaired by qualified personnel. |
 | DO NOT disassemble or open the cover. There are no user-serviceable parts inside the device. Refer to an authorized dealer for service and/or spare parts. |
3. General Guidelines
Refer to the Velleman® Service and Quality Warranty on the last pages of this manual.

Keep this device away from dust and extreme heat.
CAMIP7N

Protect this device from shocks and abuse. Avoid brute force when operating the device.
- Familiarise yourself with the functions of the device before actually using it.
- All modifications of the device are forbidden for safety reasons.
- Only use the device for its intended purpose. Using the device in an unauthorised way will void the warranty.
- Damage caused by disregard of certain guidelines in this manual is not covered by the warranty and the dealer will not accept responsibility for any ensuing defects or problems.
- DO NOT use this product to violate privacy laws or perform other illegal activities.
4. Features
- easy installation procedure
- remote pan/tilt control
• secured Wi-Fi and wired LAN connection
• 24 IR LEDs for night vision (up to 20 m) - embedded microphone and speaker
- motion detection alert via email or upload image to FTP
• audio in- and output - automatic integrated Dynamic Domain Name Service (DDNS): free service
- wireless encryption with one touch (WPS™ - Wireless protect setup)
- compatible with: CAMIP5N1 (same operation modes and user interface)
5. Overview
Refer to the illustrations on page 2 of this manual.
| 1 | lens | 7 | bracket |
| 2 | IR LEDs (24x) | 8 | Wifi antenna |
| 3 | light sensor | 9 | RJ45 network jack |
| 4 | sunshield | 10 | 5 VDC in |
| 5 | camera bolt | 11 | reset |
| 6 | position bolt | ||
CAMIP7N
6. Hardware installation and operation
-
Choose a location for the camera, keeping following guidelines in mind:
-
Do not install the camera in locations where extremely high or low temperatures or excessive vibrations may occur.
- Avoid mounting the camera near high electro-magnetic fields.
-
Do not aim the camera at the sun or other extremely bright objects.
-
The camera can be used free standing or in combination with the included mounting bracket. When the mounting bracket is used, attach it to the wall or ceiling using the 2 included screws. Place the camera on top and secure it with the centre screw. Determine the desired angle and tighten the joint screws.
- Connect the antenna [6] to the antenna connector and/or connect a network cable (included) to the 8P8C (RJ45) jack [9]. Note: it is possible to connect the camera straight to the 8P8C (RJ45) port of a computer. In this case a crossed cable (not incl.) should be used and network settings must be configured manually.
- An external microphone (not incl.) can be connected to the audio input [8].
- When desired, an external speaker system can be connected to the audio output [7].
- Plug the DC connector of the power adaptor into the 5VDC input jack [12]. Only use the included adaptor or one with the same specifications.
- Plug the adaptor into a suitable mains outlet (100\~240V AC/50\~60Hz).
Notes:
- It takes about 30 seconds for the camera to initialise.
- During initialisation the camera will start moving to test the pan/tilt functionality.
- If the image appears out of focus, turn the lens [4] to adjust.
7. Installing the software
To use the camera, you need to install the software IP Camera Tool on your computer.
CAMIP7N
7.1 Microsoft Windows
Software requirements
To work with the IP Camera Tool, you need a recent version of one of the following browsers:
- Internet Explorer (32 bits version only)
- Mozilla Firefox
- Google Chrome
- Safari
- Opera
Note: the functions and layout of the surveillance tool vary depending on the browser you are using. The images in this manual are from Internet Explorer on Microsoft Windows.
Installing the IP Camera Tool
The package contains a cd-rom with the required software.
- Insert the cd-rom in the computer and locate the software installer (IPCamSetup.exe).
- Double-click the installer to launch the installation wizard and go through the steps of the wizard.
- You will find the shortcut IP Camera tool on your desktop.
7.2 Apple Macintosh
Software requirements
To work with the IP Camera Tool, you need a recent version of one of the following browsers:
- Mozilla Firefox
- Google Chrome
- Safari
- Opera
Installing the IP Camera Tool
The package contains a cd-rom with the required software.
- Locate the IP Camera Tool for Mac on the CD.
- Copy the tool to your Mac and start the program.
8. Using the IP Camera Tool
8.1 Before you start
The IP Camera Tool allows:
• managing users, passwords and user permissions
• managing multiple cameras.
On first use, the IP Camera Tool has a single administrator user with no password and a single camera.
Please refer to the full manual on the cd included in the package for more information.
8.2 Starting the surveillance software
To start the IP Camera Tool:
- Make sure the camera is properly connected to the computer or local network via a router and a socket.
- Double-click the icon IP Camera Tool on your desktop. The tool will detect the camera connected to your computer or local network.
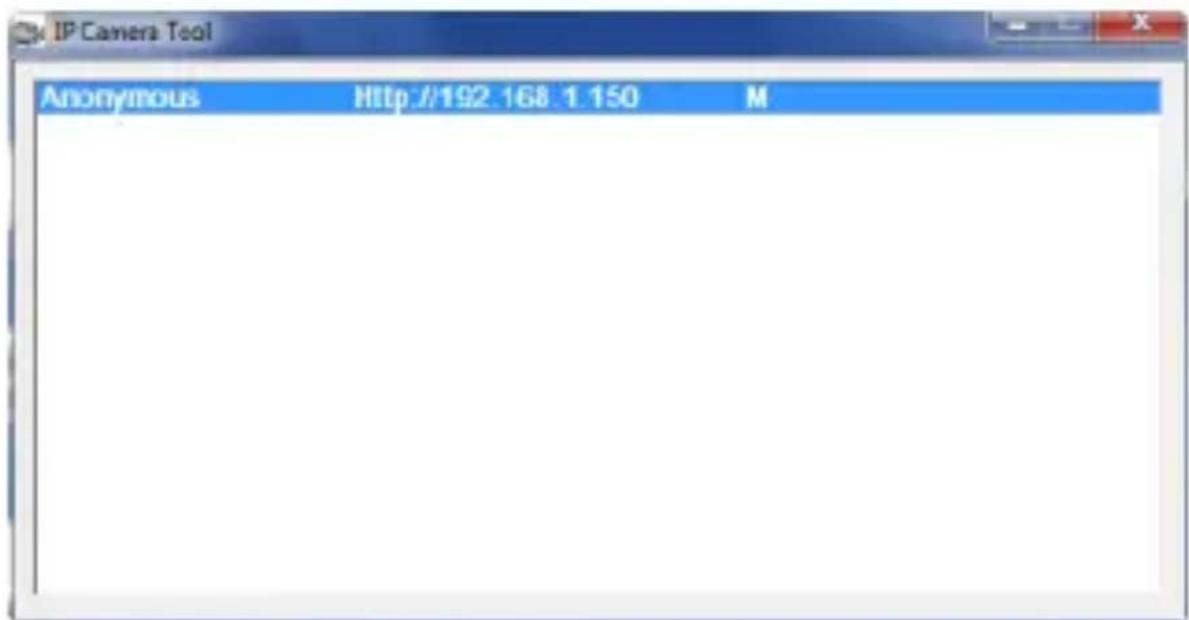
- Double-click the camera you want to use.
The tool will open a new window in your default browser.
CAMIP7N

The default language of the software is English.
- Select another language from the list if you want.
-
Choose the appropriate login method, depending on your browser:
-
For Internet Explorer, always use Active X mode.
- For Mozilla Firefox, Safari, Opera or Google Chrome, always use Server push mode.
-
For a mobile phone, always use Mobile Phone.
-
The system will ask for a user name.
The default user name is admin (case sensitive), without a password.
If you have set another user name or password, provide these instead.
- Click OK.
The surveillance software starts.
The actual content of the window depends on your user type (set by the administrator). Please refer to the full manual on the cd included in the package for more information.
8.3 Window elements
The contents of the window depend on your user type (set by the administrator in the device management settings). The user types are:
- Administrator
- Operator
- Visitor
CAMIP7N
Administrator
If you log in with an administrator user type, you can:
• see the camera view,
• use the software camera controls,
- access and change the device management settings.
Operator
If you log in with an operator user type, you can:
• see the camera view,
- use the software camera controls.
Visitor
If you log in with a visitor user type, you can:
• see the camera view.
9. Using the camera controls
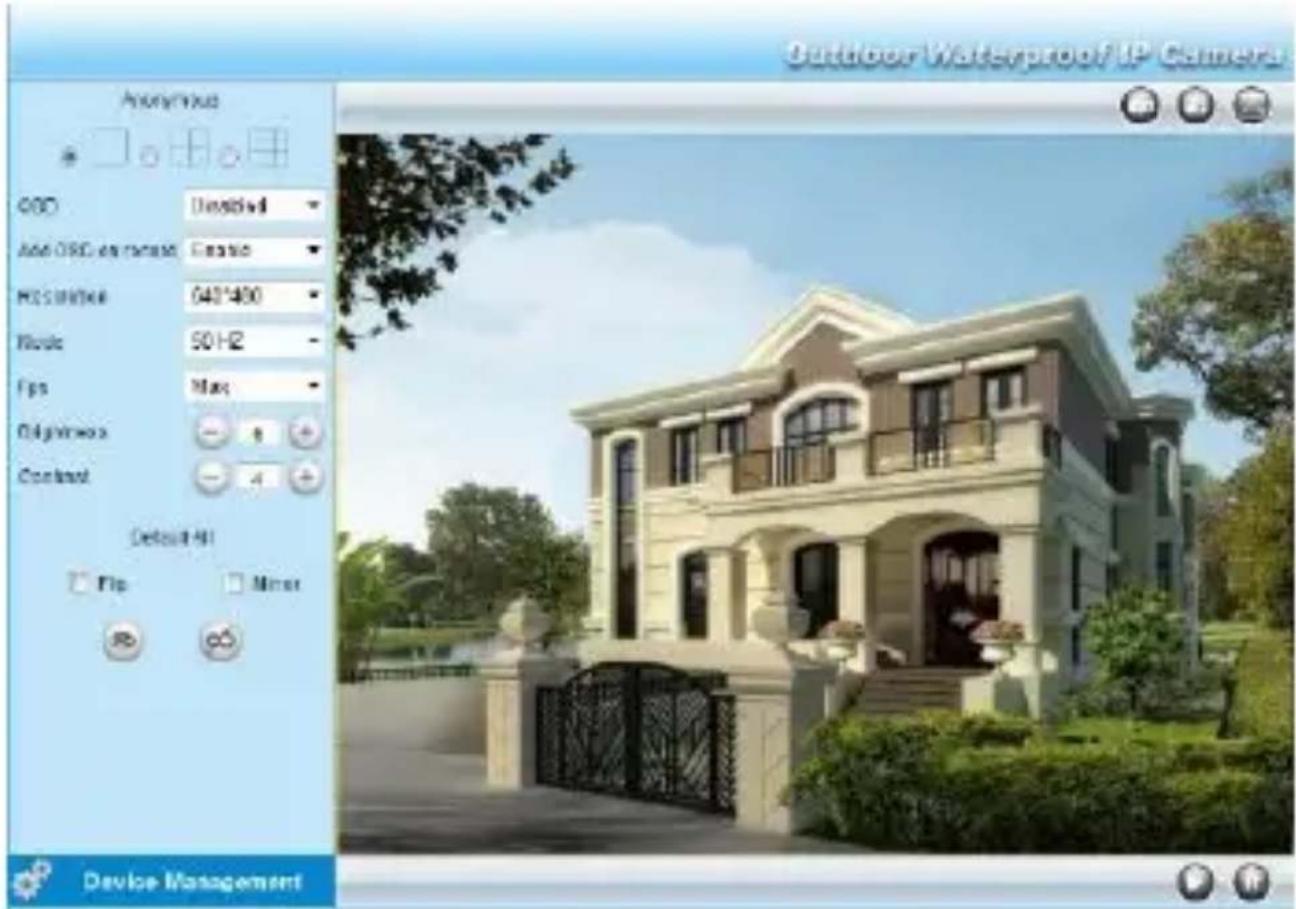
This section describes the camera view and the software camera controls.
CAMIP7N
The camera controls are
| Option | Use |
 | Select the number of cameras you want to display simultaneously (1, 4 or 9). To learn more about setting up multiple cameras, please refer to the item Multi-Device Settings in chapter Device Management below. |
| OSD (= on-screen display) | Show or hide the camera name on the display. |
| Add OSD on record | Show or hide the camera name when recording. |
| Resolution | Select a resolution from the list. |
| Mode | Select a refresh rate from the list. |
| Fps | Select a frame per second setting from the list. |
| Brightness | Set the brightness with the [GTZ2] and  buttons. buttons. |
| Contrast | Set the contrast with the  and and  buttons. buttons. |
| Default all | Reset all settings to their default values. |
| Flip | Select the Flip checkbox to show the image shown upside down. |
| Mirror | Select the Mirror checkbox to mirror the image. |
CAMIP7N
| Option | Use |
 | Click to start live video. |
 | Click to stop live video. |
 | Click to take a snapshot of the current camera view. |
 | Set the camera view to full screen. |
10. Advanced settings
10.1 IP Camera Tool
You can access various options in the IP Camera Tool:
- Double-click the IP Camera Tool on your desktop. The tool will detect the camera connected to tour computer.
- Right-click the camera. The options are:
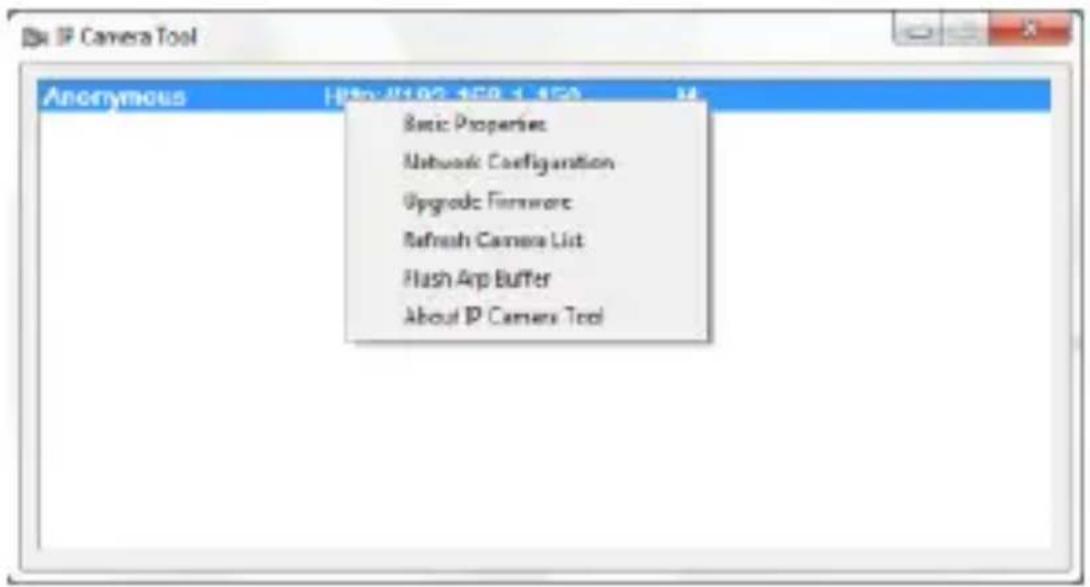
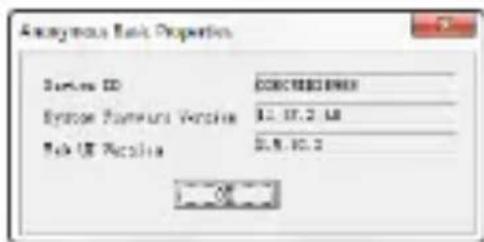
Basic properties
Shows general information about the camera:
CAMIP7N
Network Configuration
Use this window to view or change the network settings of the camera.

- When connected to a DHCP router, check the Obtain IP from DHCP server checkbox, otherwise uncheck it and fill in the data manually.
- In case of a subnet mismatch, change the IP-address or subnet mask.
- When in doubt about the network settings, contact a qualified network administrator.
Upgrade firmware
- Only use this option when problems with the current version are noticed. Do not upgrade if the camera works fine.
- Caution: when the upgrade process is interrupted or a wrong version is installed the camera might not work anymore.

CAMIP7N
Refresh Camera List
Use this option to update the camera list, for example when a new camera is added to the network.
Flush ARP Buffer
When both a wireless and wired connection to a camera exists, a problem with the ARP (Address Resolution Protocol) may arise resulting in the camera not being accessible via the browser. In this case the ARP buffer should be flushed.
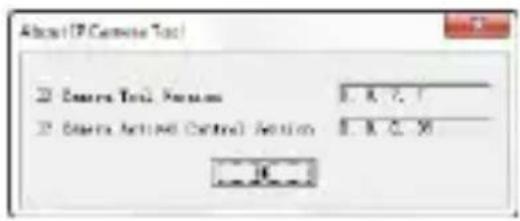
About IP Camera Tool
This window shows details about the IP Camera Tool.
11. Device management
If you login as an administrator, you have access to the device management settings.
To do so:
- Start the IP Camera Tool (see above).
- Login with your browser (see above).
- Click the link Device Management below the camera controls.
CAMIP7N
- To return to the camera view and controls, click the Back link below the options list.

11.2 Device Status
Device Status
| Device ID | 000000000001 |
| Device Parameters Version | 11.35.2.59 |
| Device Embedded Web UI Version | 2.4.20.12 |
| Alias | Anonymous |
| Alarm Status | None |
| DONG Status | No Action |
| UPMP STATUS | No Action |
| MEN STATUS | No Action |
The device status page shows an overview of device information and status set on other settings pages.
11.3 Alias Settings
Alias Settings
| Alias | Anonymous |
| Adention Alias cannot contain any of the following characters (| : " ? " < p ). Otherwise, it cannot create a recording file. | |
Use this page to change the name of a camera.
CAMIP7N
11.4 Date & Time Settings
Date & Time Settings
Device Clock Time
Device Clock Timeline
Sync with NTP Server
NTP Sevel
Sync with PC Time
Daylight Saving Time
msandag 10 december 2012 12:58:16
(OMT)-Gesreich mean time. London. Listot. Casatlan
注
time mail.gov
四
B
Sabina
Relehsa's
Set date and time data for the camera.
Note: if the timestamp on the display shows the wrong time, try selecting the Sync with PC Time checkbox and click Submit.
11.5 Users Settings
Users Settings
Set Alarm Record Path
C. User/Public/Documents
Briozse
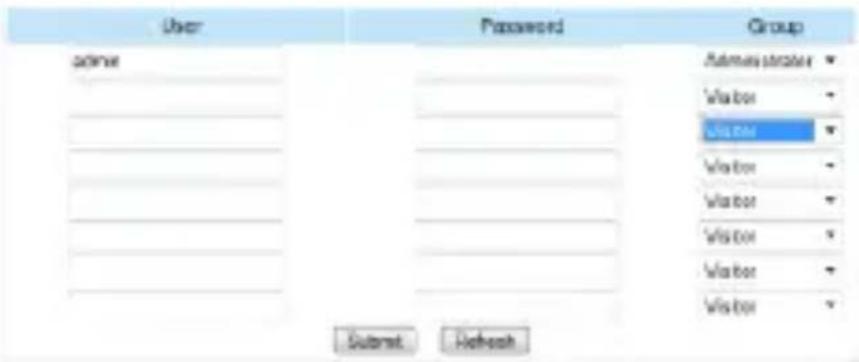
Define users, permissions and passwords
- Up to 8 users can be configured.
- Enter a user name, a password and select a group (Visitor, Operator or Administrator).
- This is also the location to change the default administrator's login name and set a password for the administrator.
Set alarm record path
Use the Browse button to change the default alarm record path.
CAMIP7N
Notes when using Windows Vista:
- Remember to add the IP address of the camera to the 'Trusted sites'.
- The system does not allow setting the Windows system root directory as alarm record path.
11.6 Multi-Device Settings

Manually add extra cameras
To add a camera, click on a blue link and enter an alias, host address, HTTP port, user and password.
11.7 Basic Network Settings
Basic Network Settings

CAMIP7N
Set basic network settings
- When connected to a DHCP router, select the checkbox Obtain IP from DHCP server, otherwise clear it and fill in the data manually.
- The Network Lamp or network LED indicates the network status of the camera. To disable this LED, clear the checkbox Network Lamp.
11.8 Wireless LAN Settings

1. Add and manage wireless networks
- Click the Scan button to retrieve a list of available wireless LANs.
- Click on a found network and enter the password if required.
- When you want to use a wireless LAN, check the checkbox and enter SSID, Channel and encryption method.
Depending on the selected encryption method, more data will have to be provided.
Notes
- Some routers will automatically fill out the necessary data into the fields.
- When entering data manually, check the wireless network settings of your router to find more information on SSID, Channel, encryption and authentication.
2. WPS (Wi-Fi Protected Set-up)
- Press and hold down the RESET BUTTON about 4 seconds, then press the WPS button on the router. Now
- you can use the WPS function.
- Press the WPS button on your router within 60 seconds. The WPS button is usually on the back or side of your router. On some routers, you may need to log in to the web interface and
CAMIP7N
click on an on-screen button to activate the WPS feature. If you are not sure where the WPS button is on your router, prease refer to your Router's manual.
Notes
- The camera will automatically create a secure wireless connection to your router. If you have plugged in the network cable, please plug it out. While connecting, the green network light on RJ45 will blink and the wireless settings will take effect. The IP Camera Tool will search the camera's LAN IP. Make sure the PC and the camera share the same subnet.
- During the WPS settings, you must press the RESET button only for four seconds. When you press and hold down the RESET button for 10 seconds the camera will be reset back to factory default settings.
- The security mode of router cannot be WEP, or else the WPS settings may be failed.
11.9 ADSL Settings

When connected to the Internet directly via ADSL, check the checkbox and enter the ADSL User name and ADSL password you obtained from your Internet Service Provider (ISP).
11.10 UPnP Settings
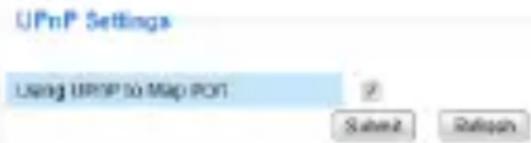
Select the checkbox to use the Universal Plug and Play (UPnP) protocol.
11.11 DDNS Service Settings
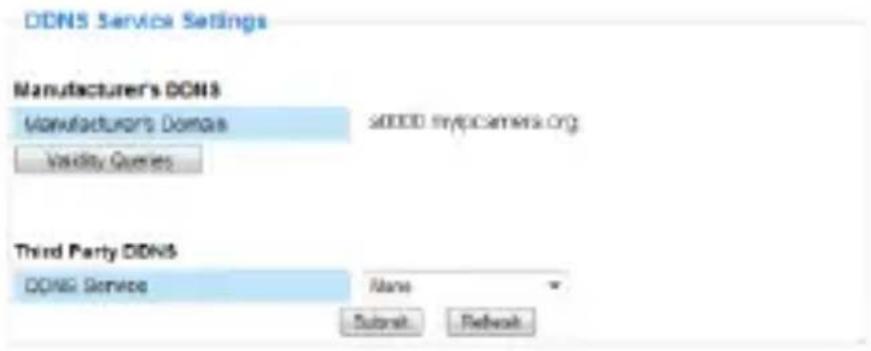
Free DDNS Service
The Dynamic DNS name will be something like:
Now you can use http:// Domain name + HTTP Port to access the camera via internet.
CAMIP7N
Take hostname ipcam1.myipcamera.org and HTTP Port no. 88 for example, the accessing link of the camera via internet would be http://ipcam1.myipcamera.org.org:88
11.12 Mail Service Settings

Define mail service settings
Note
The settings on this page will only take effect if the option Send Mail on Alarm is selected in the Alarm Service Settings (see below).
- Fill in a senders e-mail address in the Sender field.
This is the mailbox from which the mails will be sent.
- Fill in up to 4 receivers mail addresses.
When an alarm condition occurs, mail is sent out to these addresses.
- Fill out all SMTP data related to the sender's mailbox.
- If authentication for the mailbox is required, select the checkbox and enter user name and password in the appropriate fields.
CAMIP7N
- If the Report Internet IP by Mail box is selected, a mail is sent whenever a camera comes online (for example after reboot) or a change in IP address occurs.
Make sure the port is correctly mapped to the router.
- Click Submit to save the data before performing a 'mail test'.
Possible error messages
Following error messages may appear:
| Error message | Possible solution |
| Cannot connect to the server | Check network cables and settings. |
| Network error. Please try later. | Check network cables and settings. |
| Server error. | Check the server. |
| Incorrect user or password. | Make sure to enter the right user name and password. |
| The sender is denied by the server. | Check whether the user needs authentication. |
| The receiver is denied by the server. | Could be due to anti-spam settings of the server. |
| The message is denied by the server. | Could be due to anti-spam settings of the server. |
| The server does not support the authentication mode used by the device. | Try without authentication or use a different server (sender address). |
CAMIP7N
11.13 MSN Settings
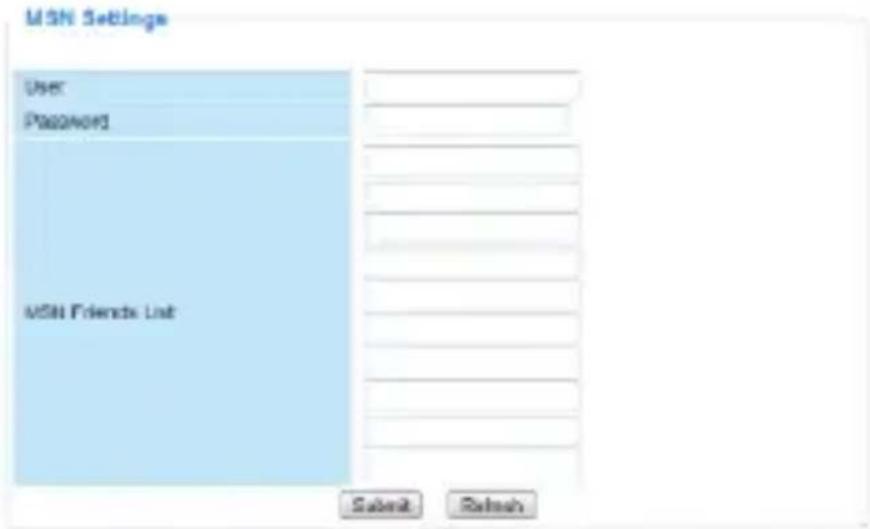
Access the camera with MSN
Function
The MSN feature allows you or the friends from your list to chat to the camera to find out its IP address.
This can be useful if you have lost the camera's IP address.
Note
It is recommended to create a new MSN account for the camera. When the camera login uses the MSN account, this account cannot be used for anything else when the camera works.
Set-up
- Enter the User and Password of the MSN account you will use for the camera (see image above).
- Add the MSN account of your friends in the friends list and click Submit.
- Go to the Device Status page of the settings and check whether the MSN status indicates "Succeed".
- Next, open MSN Messenger and log into your account.
- The name of the camera will appear in the friends or contacts list.
- Open a chat session with the camera username and type url?
- The camera will reply with its URL.
CAMIP7N
11.14 FTP Service Settings

These settings will only take effect if the option Upload Image on Alarm is selected in the Alarm Service Settings (see below).
11.15 Alarm Service Settings

- Select the checkbox Motion Detect Armed to enable motion detection.
This also allows mails to be sent out (see Mail Service Settings) and image upload to an FTP server (see FTP Service Settings).
Note: when the camera is in auto tilt or auto pan mode, motion detection and external alarm input are disabled.
- The motion detect sensibility can be set between 1 and 10, with 10 being most sensitive.
- Select the checkbox Send Mail on alarm to send a mail when an alarm is detected.
Make sure to fill out all fields on the Mail Service Settings page (see above).
- Select the checkbox Upload Image on alarm to upload images to an FTP server when an alarm is detected.
Make sure to fill out all fields on the FTP Service Settings page
CAMIP7N
(see above). When this option is selected, you can also set the upload interval (in seconds).
- Select the checkbox Scheduler to open the day schedule.
11.16 Upgrade Device Firmware
Upgrade Device Firmware
Upgrade Device Firmware
Course
Salami
Upgrade Device Embedded Web UI
Brown
Subnet
Upgrade Device Firmware
Only use this option if you are experiencing problems with the current version. Do not upgrade if the camera works fine.
11.17 Backup & Restore settings
Backup and restore your system configuration
Use this option to create a backup or restore your system configuration.
- To create a backup, click Submit and choose a location to store the backup file.
- To restore a previously made backup, click Browse to locate the backup and click Submit to start restoring.
CAMIP7N
11.18 Restore Factory Settings

Reset the device to factory settings
Selecting OK will clear the memory and reset the device to factory settings.
All settings will be cleared:
- user settings
- mail and FTP settings
- alarm schedule
...
Tip: backup the system configuration before resetting your device to factory settings.
CAMIP7N
11.19 Reboot Device

Reboot the camera
- Select OK to reboot the camera.
This will reset the system time.
You can adjust date and time in the Date&Time settings page.
11.20 Log
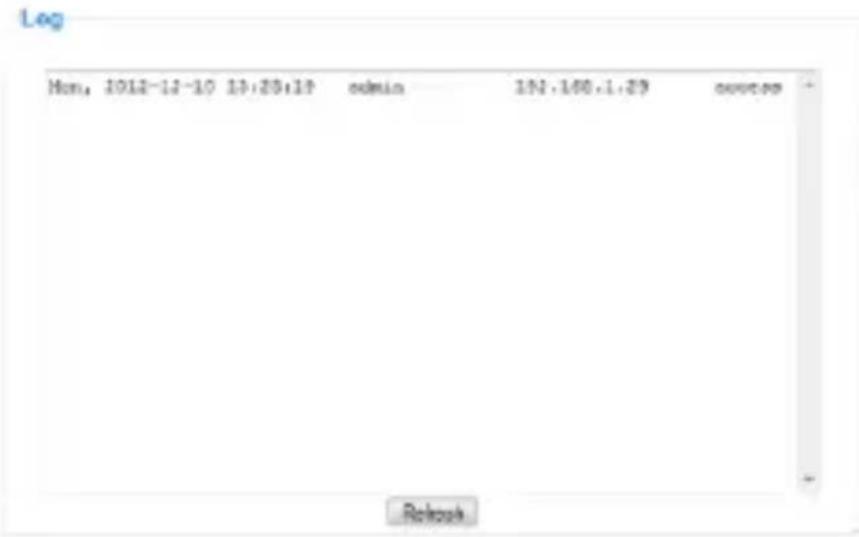
The log contains an overview of everyone who accessed the IP camera. The log is cleared if the camera is rebooted.
CAMIP7N
12. Additional information
12.1 Password
The default administrator login is admin without a password. To enhance security, a new administrator password should be set as soon as possible (see above).
If you have lost the administrator password, you can reset the camera to factory defaults (admin, no password) by pressing and holding the RESET button at the bottom of the camera for about 5 seconds.
When doings so, all other user settings will be lost as well.
12.2 WiFi
- Refer to the user manual of your wireless router to obtain network information e.g. SSID, Channel, Security, authentication, encryption...
- Use previously obtained information to configure your camera via a fixed network cable (see Wireless LAN settings).
- Reboot the camera.
- Wait at least 30 seconds before unplugging the network cable. Then unplug the power supply.
- Re-insert the power plug. After about 30 seconds, the camera should be up and running in WiFi mode.
12.3 Connect the camera on an ADSL network
- Connect the camera to a PC. The easiest way is to use a router. If no router is available, you must use a cross cable (not incl.) to connect the camera directly to the PC's network port (RJ45) and set the IP addresses on PC and camera manually.
- Configure the camera with the IP camera tool (see above).
- Log on to the camera as administrator and configure ADSL settings (user name + password).
- Configure the DDNS Service Settings and click Submit. The camera reboots.
- Connect the camera directly to the ADSL modem. It is now available through the internet by entering the domain name in your internet browser.
CAMIP7N
Note: set the option Report ADSL IP by mail under Mail Service Settings to receive the camera's IP address by mail.
12.4 Connect the camera via a router
- Connect the camera to the LAN and configure the camera with the IP camera tool (see above).
- Log on to the camera as administrator and configure DDNS Service Settings.
- Click Submit to reboot the camera.
The camera is now available through the internet by entering the domain name in your internet browser.
12.5 Static IP users
When using only fixed IP addresses, a DDNS service is not required. There are two ways to find out the static WAN IP address of the camera:
- Connect a computer to the same connection as the camera and open a website that tells you what IP address you are on (e.g. www.whatismyip.com).
- Log on to the router and view the status page to find out its WAN IP address. To connect to the IP camera, enter the WAN IP address of the router followed by the port number to which the camera is connected into the address bar of a browser (e.g. http://116.25.51.115:85/). Make sure UPnP is enabled or the camera is added to the router's virtual mapping list.
12.6 Using a mobile phone
It is possible to connect a smartphone to the IP camera. Many third-party software developers offer compatible software. An example is the "IP Cam Viewer" software which is available from the iTunes and Google Play stores. After installation, just enter the external hostname, IP port, username and password, and you can view the images on your smartphone.
13. Troubleshooting
IP address
Always make sure the camera is on the same subnet (same subnet mask) as the PC you are using to configure it.
Network configuration
- Check if your HTTP server software is configured and running properly.
V. 08 - 04/06/2015 27 ©Velleman nv
CAMIP7N
- If the camera is behind a firewall, make sure the firewall software is allowing inbound connections on port 80. If not, use an alternate port. The same goes for certain anti-spam and anti-virus software packages.
- If the camera is behind a cable/DSL router, make sure to configure port forwarding properly. Refer to the user manual of the router.
No image
- Video streaming is transmitted by the ActiveX controller. If this controller is not installed properly, no video image is shown.
- When you install the IP Camera Tool, the ActiveX controller is installed at the same time. If not, download the ActiveX controller from the internet and set the safety properties of your web browser so it accepts ActiveX content.
Slow image
The frame rate of the shown video depends on a number of external factors, e.g.:
• Network bandwidth
• PC performance and display settings
• Number of visitors that are viewing the camera simultaneously
- Network equipment (e.g. use a switch instead of a hub for multiple IP cameras).
Camera not available via internet
Possible reasons may include:
- ActiveX controller is not installed or not working properly.
- The port of the IP camera is blocked by a firewall or anti-virus software. In this case, try using a different port number.
- Port mapping failed. Either enable UPnP (via UPnP Settings) or edit the routers Virtual map list (refer to the user manual of your router).
14. Technical specifications
| pick-up element | 1/5" colour CMOS sensor |
| lens | f2.8mm / F2.4 |
| lens angle | 60° |
| min. illumination | 0.5 lux |
| number of pixels | 640 (H) x 480 (V) - PAL - |
V. 08 - 04/06/2015 28 ©Velleman nv
CAMIP7N
| supported network protocols | TCP/IP, UDP, IMCP, SMTP, HTTP, FTP, DNS, DDNS, DHCP, PPPoE, GPRS |
| wired connection | Ethernet 10/100 Base-T and RJ45 |
| wireless connection | standard: IEEE 802.11b/g/n |
| supports WEP, WPA & WPA2 encryption | |
| network connection | supports 3 methods: fixed IP, DHCP, PPPoE |
| supports DHCP, installs the IP address automatically (plug-and-play network) | |
| video | compression format: MJPEG |
| frame rate: 15 FPS (VGA), 30 FPS (QVGA) | |
| resolution: 640 x 480 (VGA), 320 x 240 (QVGA) | |
| power supply | 5 Vdc |
| dimensions | 140 x 75 x 80 mm |
| weight | 800 g |
| IP rating | IP66 |
Use this device with original accessories only. Velleman nv cannot be held responsible in the event of damage or injury resulted from (incorrect) use of this device. For more info concerning this product and the latest version of this manual, please visit our website www.velleman.eu. The information in this manual is subject to change without prior notice.
R&TTE Declaration of Conformity
Hereby, Velleman NV declares that the radio equipment type
[CAMIP7N] is in compliance with Directive 1999/5/EC.
The full text of the EU declaration of conformity is available at the
following internet address: www.velleman.eu.
© COPYRIGHT NOTICE
The copyright to this manual is owned by Velleman nv. All worldwide rights reserved. No part of this manual may be copied, reproduced, translated or reduced to any electronic medium or otherwise without the prior written consent of the copyright holder.
GEBRUIKERSHANDLEIDING
1. Inleiding
CAMIP7N
CAMIP7N
Basiseigenschappen
Netwerkconfiguratie
De firmware upgraden
| Alias | Anonymous |
| Adention Alias cannot contain any of the following characters: : " ?" < p \ . Otherwise, it cannot create a recording file. | |
Date & Time Settings
Device Clock Time
Device Clock Timeline
Sync with NTP Server
NTP Sevel
Sync with PC Time
Daylight Saving Time
msandag 10 december 2012 12:58:16
(OMT)-Gesreich mean time. London. Listot. Casatlan
注
time mail.gov
四
B
Sabina
Relehr's
Set Alarm Record Path
C. User/Public/Documents
Because
Obtain IP from DHCP Server
IP Address
Subnet Mask
Catevity
DAS Server
HTTP POST
Network Lamp

192.168.1150
256.256.256.4
152.168.11
报编11


5a bmt
Flebrush
CAMIP7N
2. WPS (Wi-Fi Protected Set-up)
11.12 E-mailinstellingen

Please set first, and then test.
四
四
School
Hoffish
Alarm Service Settings
Motion Detection Alarmed
自
Sound Detection Alerted
四
10ep on Alari
密
Record on Alarm
图
A##R### F#09
图
Sulzerk
Feetrauk
11.16 De firmware upgraden
Upgrade Device Firmware
Upgrade Device Firmware
Upgrade Device Embedded Web UI
Drawn
Cronos...
Submet
Galerá
De firmware upgraden
De fabrieksinstellingen herstellen
natural_image
Symbol of a trash bin crossed with a diagonal line and a horizontal bar below (no text or labels)CAMIP7N
| Also | Anonymous |
| Attention: Also cannot contain any of the following characters: : * ?^** < 0 \ . Otherwise, it cannot create a recording file. | |
Obtain IP from DHCP Server
IF 500165
Submit Mock
Gaduay
DNB Doner
HTTP Port
Network Lamp

TKI 148 1 160
253.255.255.6
197.168.1.1
192:63.11
80
是
Submit
Rafreich
CAMIP7N
2. WPS (Wi-Fi Protected Set-up)
Please set first, and then test.
B
消
Saford
Hoffish
Alarm Service Settings
Motion Detection Alarmed
自
Sound Detection Alerted
四
10ep on Alari
密
Record on Alarm
图
A##R### F#09
图
Sulzerk
Fleetback
Upgrade Device Firmware
Upgrade Device Firmware
Upgrade Device Encoded Web UI
Browse
Brown
Salami
S###
Rétablir la configuration d'usine
natural_image
Symbol of a trash bin crossed with a diagonal line and a horizontal line, representing waste sorting or disposal (no text present)Propiedades básicas (Basic Properties)
Configuración de red (Network Configuration)
11.2 Estado del aparato (Device Status)
Device Status
| Device ID | 000000000001 |
| Device Parameters Version | 11.35.2.58 |
| Device Embedded Web U Version | 2.4.20.12 |
| Alias | Anonymous. |
| Alarm Status | None |
| DONG Status | No Action |
| UPMP Status | No Action |
| MSN Status | No Action |
Date & Time Settings

11.9 Ajustes ADSL (ADSL Settings)
ADSL Settings
Liang ADSL Dealap

Submit
Heirsch
Marque la casilla para utilizar el protocolo Universal Plug and Play (UPnP).
11.11 Ajustes del servicio DDNS (DDNS Service Settings)
CAMIP7N
Alarm Service Settings
Motion Detection Altered
Sound Detection Alerted
Deep on Alarm
Record on Mann
Alarm Record Plcpep
四
前
民
图
图
SABINE
Hotluck
CAMIP7N
Upgrade Device Firmware
Upgrade Device Firmware
Upgrade Device Embedded Web UI
Browse
DKNNA
Salank
Submit
Grundeinstellungen (Basic properties)
CAMIP7N
Die Kameraliste aktualisieren (Refresh Camera List)
CAMIP7N
Attention: Also cannot contain any of the following characters: ^*2^- < 0 . Otherwise, it cannot create a recording file.
Submt
Refresh
Date & Time Settings
Device Good Time
Device Clock Timozone
SYCC WTI NTP Series
MTP Server
Syne with PC Time
Copyright Raving Time
nsanding 10 december 2012 12:58.16
(GMT) Greenwich mean time, London, Lisbon, Casellan
7
line net gov
若
招
Sabma
Railway
Other IP from DHCP Server
P Addigos
Sunneit Uster
Colovay
Dnds Sienver
HTTP Part
Network Lamp
四
12.10.156
266.266.266.0
132.10.11
192:168.1.1
10
室
Submit
Ratwich
2. WPS (Wi-Fi Protected Set-up)
Access the camera with MSN
Funktion
Upgrade Device Firmware
Upgrade Device Firmware
Upgrade Device Embedded Web UI
Browse
Salom
Drawn
Stapená
Sterowniki kamery
Refresh Camera List (Odświeżanie listy kamer)
Date & Time Settings
![Device Clock Time Device Clock Time/Time Sync with NTP Server NTP Server Sync with PC Time Copyright Saving Time msandag 10 december 2012 12:58:16 [OMT] Greenwich main time, London, London, Casattan time reg.gov Submax Refresh](/content/2026/06/1268458/images/0c1f4b4712260a1122996493616ee30f5ee72b1c994858411f27f15a9ca5939c.jpg)
CAMIP7N
Mail Service Settings
December
September 1
November 2
Balance 5
1056-4804
SWIT Server
SUITP Port
Transport Layer Security
Need authentication
Report Internet IP by Mail






Email only supports TLS at port 480 and supports STARTTLS at port 251987.


Please visit last, and then last.


Kathuan
Upgrade Device Firmware
Upgrade Device Firmware
Upgrade Device Embedded Web U
Browse
Brown
Salami
Subnet
© INFORMACJA O PRAWACH WŁASNOŚCI
natural_image
Symbol of a trash bin crossed with a diagonal line and a horizontal bar below (no text or labels)| Alias | Anonymous |
| Adention Alias cannot contain any of the following characters: : " ?" < p \ . Otherwise, it cannot create a recording file. | |
Date & Time Settings
Device Clock Time
Device clock timeline
Sync with NTP Server
NTP SeVet
Sync with PC Time
Daylight Saving Time
msandag 19 december 2012 12:58:16
(EMT) Greenwich meet Email, London, Liston, Canadian
注
Internal.gov
西
图
5-abmit
Railway
Set Alarm Record Path
C:\Users\Public\Documents
(1)
Euronix
Obtain IP from DHCP Server
P does not
Subnet Mask
Gobervoy
DNS Denver
HTTP Port
Network Lamp

THE 168.1150
253 255 255 6
192.163.11
132.16.11
83
室
Submit
Rstrom
CAMIP7N
1. Adicionar e gerir redes sem fios
2. WPS (Wi-Fi Protected Set-up)
Upgrade Device Firmware
Upgrade Device Firmware
Upgrade Device Embedded Web UI
Brown
C12026...
Submet
Salam
Reiniciar a câmara
CAMIP7N
Velleman® Service and Quality Warranty
Since its foundation in 1972, Velleman® acquired extensive experience in the electronics world and currently distributes its products in over 85 countries.
All our products fulfil strict quality requirements and legal stipulations in the EU. In order to ensure the quality, our products regularly go through an extra quality check, both by an internal quality department and by specialized external organisations. If, all precautionary measures notwithstanding, problems should occur, please make appeal to our warranty (see guarantee conditions).
General Warranty Conditions Concerning Consumer Products (for EU):
- All consumer products are subject to a 24-month warranty on production flaws and defective material as from the original date of purchase.
- Velleman® can decide to replace an article with an equivalent article, or to refund the retail value totally or partially when the complaint is valid and a free repair or replacement of the article is impossible, or if the expenses are out of proportion.
You will be delivered a replacing article or a refund at the value of 100% of the purchase price in case of a flaw occurred in the first year after the date of purchase and delivery, or a replacing article at 50% of the purchase price or a refund at the value of 50% of the retail value in case of a flaw occurred in the second year after the date of purchase and delivery.
- Not covered by warranty:
- all direct or indirect damage caused after delivery to the article (e.g. by oxidation, shocks, falls, dust, dirt, humidity...), and by the article, as well as its contents (e.g. data loss), compensation for loss of profits;
- consumable goods, parts or accessories that are subject to an aging process during normal use, such as batteries (rechargeable, non-rechargeable, built-in or replaceable), lamps, rubber parts, drive belts... (unlimited list);
- flaws resulting from fire, water damage, lightning, accident, natural disaster, etc....;
- flaws caused deliberately, negligently or resulting from improper handling, negligent
maintenance, abusive use or use contrary to the manufacturer's instructions;
- damage caused by a commercial, professional or collective use of the article (the warranty validity will be reduced to six (6) months when the article is used professionally);
- damage resulting from an inappropriate packing and shipping of the article;
- all damage caused by modification, repair or alteration performed by a third party without written permission by Velleman®.
- Articles to be repaired must be delivered to your Velleman® dealer, solidly packed (preferably in the original packaging), and be completed with the original receipt of purchase and a clear flaw description.
- Hint: In order to save on cost and time, please reread the manual and check if the flaw is caused by obvious causes prior to presenting the article for repair. Note that returning a non-defective article can also involve handling costs.
• Repairs occurring after warranty expiration are subject to shipping costs. - The above conditions are without prejudice to all commercial warranties.
The above enumeration is subject to modification according to the article (see article's manual).
NL
- Safety Instructions
- General Guidelines
- CAMIP7N
- Features
- Overview
- Hardware installation and operation
- Notes:
- Installing the software
- Microsoft Windows
- Software requirements
- Installing the IP Camera Tool
- Apple Macintosh
- Using the IP Camera Tool
- Before you start
- Starting the surveillance software
- Window elements
- Administrator
- Operator
- Visitor
- Using the camera controls
- Advanced settings
- IP Camera Tool
- Basic properties
- Network Configuration
- Upgrade firmware
- Refresh Camera List
- Flush ARP Buffer
- About IP Camera Tool
- Device management
- Device Status
- Alias Settings
- Date & Time Settings
- Users Settings
- Define users, permissions and passwords
- Set alarm record path
- Notes when using Windows Vista:
- Multi-Device Settings
- Manually add extra cameras
- Basic Network Settings
- Set basic network settings
- Wireless LAN Settings
- Add and manage wireless networks
- Notes
- WPS (Wi-Fi Protected Set-up)
- ADSL Settings
- UPnP Settings
- DDNS Service Settings
- Mail Service Settings
- Define mail service settings
- Possible error messages
- MSN Settings
- Access the camera with MSN
- Function
- Note
- Set-up
- FTP Service Settings
- Alarm Service Settings
- Upgrade Device Firmware
- Upgrade Device Firmware
- Backup & Restore settings
- Backup and restore your system configuration
- Restore Factory Settings
- Reset the device to factory settings
- Reboot Device
- Reboot the camera
- Log
- Additional information
- Password
- WiFi
- Connect the camera on an ADSL network
- Connect the camera via a router
- Static IP users
- Using a mobile phone
- Troubleshooting
- IP address
- No image
- Slow image
- Camera not available via internet
- Technical specifications
- © COPYRIGHT NOTICE
- GEBRUIKERSHANDLEIDING
- Inleiding
- Basiseigenschappen
- Netwerkconfiguratie
- De firmware upgraden
- E-mailinstellingen
- De firmware upgraden
- De fabrieksinstellingen herstellen
- Rétablir la configuration d'usine
- Propiedades básicas (Basic Properties)
- Configuración de red (Network Configuration)
- Estado del aparato (Device Status)
- Ajustes ADSL (ADSL Settings)
- Ajustes del servicio DDNS (DDNS Service Settings)
- Grundeinstellungen (Basic properties)
- Die Kameraliste aktualisieren (Refresh Camera List)
- Funktion
- Refresh Camera List (Odświeżanie listy kamer)
- © INFORMACJA O PRAWACH WŁASNOŚCI
- Adicionar e gerir redes sem fios
- Reiniciar a câmara
- Velleman® Service and Quality Warranty
- General Warranty Conditions Concerning Consumer Products (for EU):
- NL
Brand : VELLEMAN
Model : CAMIP7N
Category : Surveillance Camera