
282990 - Beer dispenser PRINCESS - Free user manual and instructions
Find the device manual for free 282990 PRINCESS in PDF.


| Product Type | Beer Dispenser |
| Brand | Princess |
| Model | 282990 |
| Power Supply | Electric, 220-240V ~ 50Hz |
| Power | 100 W |
| Dimensions (L x W x H) | 30 x 20 x 40 cm |
| Weight | 3 kg |
| Keg Capacity | Up to 5 litres |
| Cooling System | Built-in Compressor |
| Serving Temperature | 2-8 °C |
| Connection Type | Universal system for beer kegs |
| Main Functions | Pressure dispensing, cooling retention, foam regulator |
| Care and Cleaning | Clean after each use with a damp cloth; periodic descaling |
| Safety | Anti-overflow device, automatic shut-off in case of overheating |
| Spare Parts and Repairability | Gasket, pump, hose available on request |
| Included Accessories | 1 beer keg (empty), 1 hose, 1 tap, 1 glass |
Frequently Asked Questions - 282990 PRINCESS
User questions about 282990 PRINCESS
0 question about this device. Answer the ones you know or ask your own.
Ask a new question about this device
Download the instructions for your Beer dispenser in PDF format for free! Find your manual 282990 - PRINCESS and take your electronic device back in hand. On this page are published all the documents necessary for the use of your device. 282990 by PRINCESS.
USER MANUAL 282990 PRINCESS
Beer Tap & Cooler Article 282990
natural_image
Illustration of a Princess water dispenser with lid and side panel (no text or symbols)- Gebruiksaanwijzing • User's instructions • Mode d'emploi
- Bedienungsanleitung • Instrucciones de uso • Istruzioni per l'uso
- Bruksanvisning • Brugsanvisning • Bruksanvisning • Käyttöohje
- Instruções de uso • Οδηγίες χρήσης •
Nederlands 1
English 6
Français 11
Deutsch 16
Español 22
Italiano 27
Svenska 33
Dansk 38
Norsk 43
Suomi 48
Português 53
Ελληνικά 58

A-1

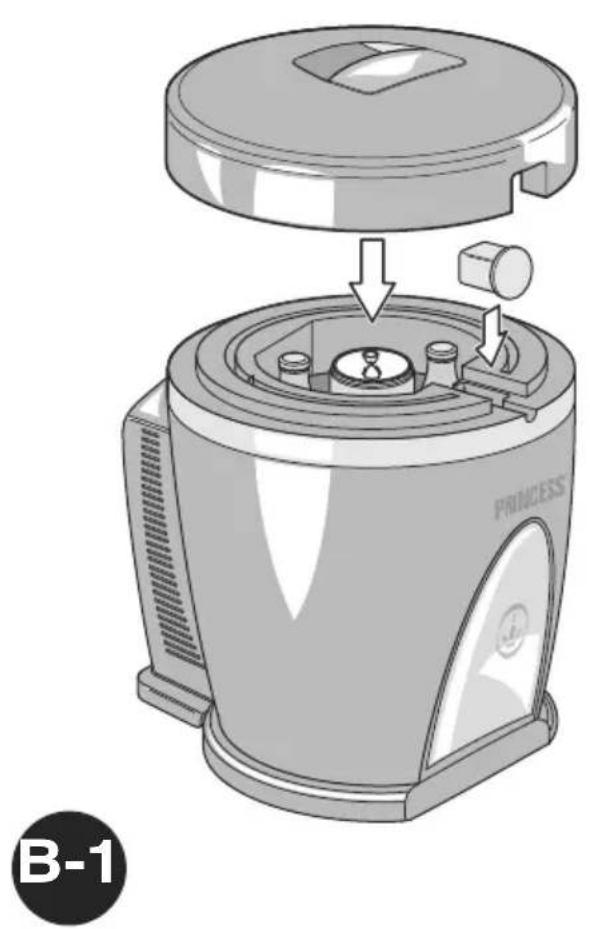
natural_image
Illustration of a PRINCESS PRINCESS oven with internal components and a handle, labeled B-1 (no text or symbols on the device itself)


natural_image
Illustration of a hand using a manual tool to adjust or clean a small appliance (no text or symbols visible)A-4

D-1

Algemeen
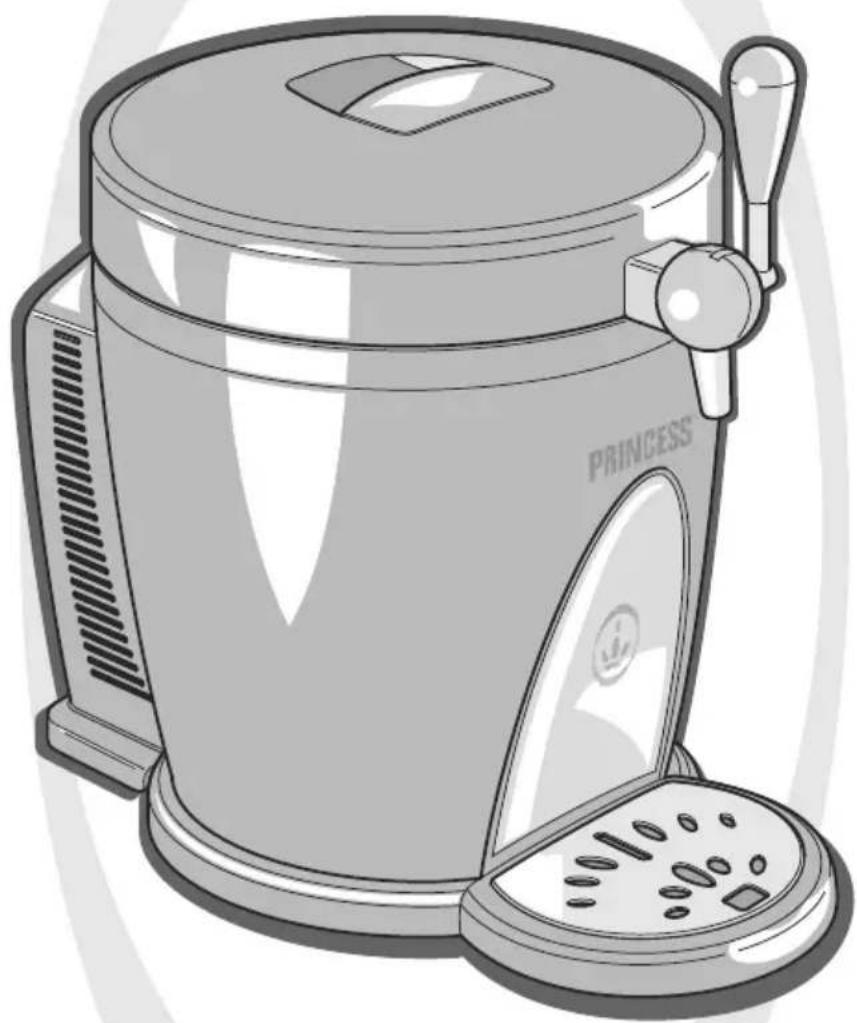
With this attractive Princess Beer Tap & Cooler you can tap the best tasting beer yourself. At home, but also in the garden for a barbecue or party. The cooler's insulated wall ensure that the beer will stay cold for hours, even without power. The Princess Beer Tap & Cooler can dispense Heineken 5 Litre Beer kegs or similar kegs that utilises an internal carbonator that releases carbon dioxide each time the tap is opened. The princess Beer Tap & Cooler is unfortunately not suitable for use with gravity dispensed beer kegs.
As well as for tapping beer, you can also use the Princess Beer Tap & Cooler for keeping bottles of wine, and cans of beer and soft drinks cool. Handy if you're on the road.
The quality and performance of this Beer Tap & Cooler in combination with the Heineken 5 l keg is completely the responsibility of Princess. The brewer is in no way liable for this.
Operation
See Figure D-1.
The equipment consists of the following parts:
1 Housing
2 Cover with hand grip
3 S e a l
4 Tap unit
5 Tap handle
6 Extension pipe (5x)
7 Drip tray with grille
8 12 V DC cable
9 AC cable with plug
See Figure C-1.
10 AC connection
11 12 V DC connection
12 On/Off indicator light
13 Supply voltage selector switch
Before first use
1 Remove all the packaging.
2 Clean the appliance and all accessories (see 'Maintenance and cleaning').
Tapping beer
Position the keg
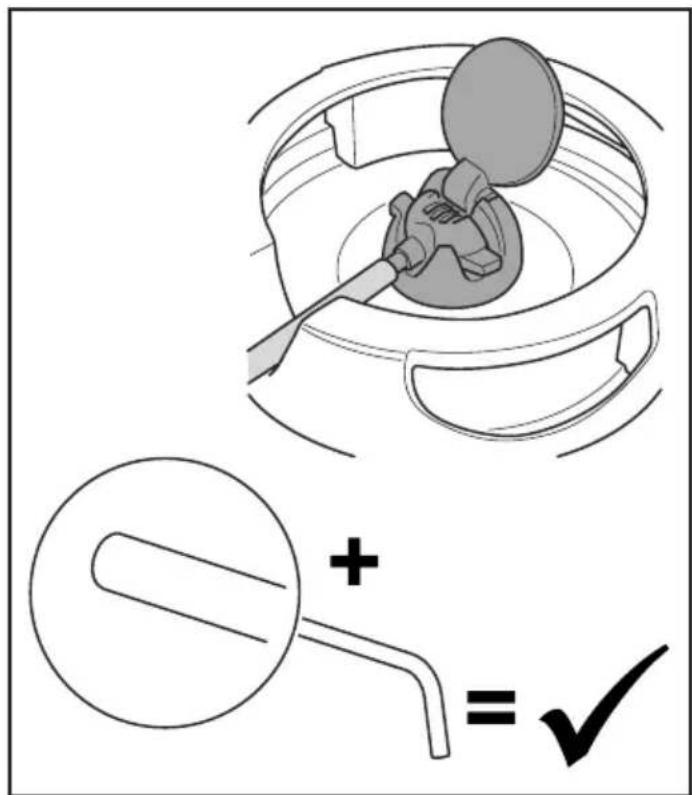
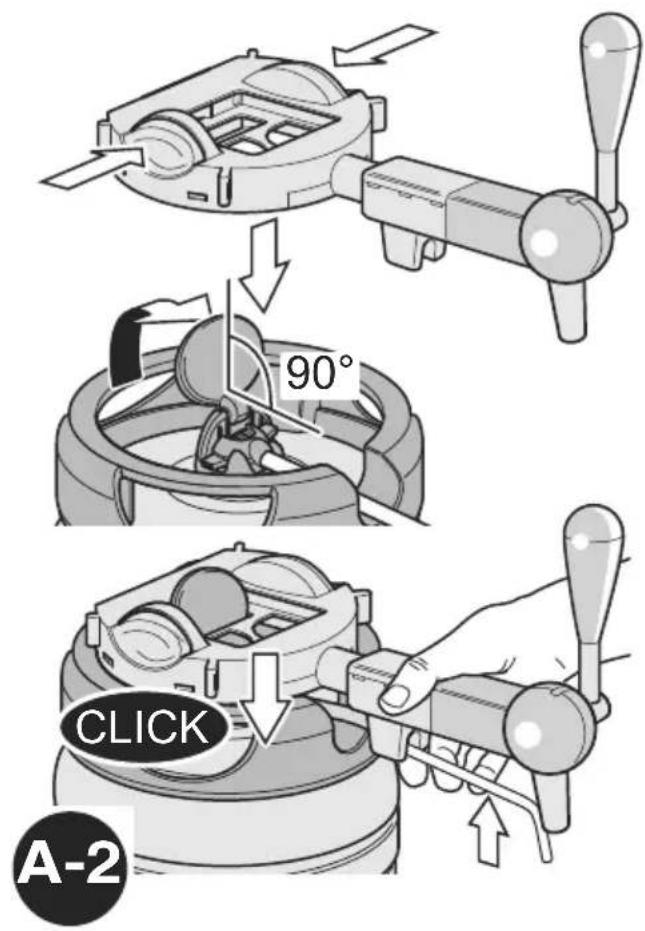
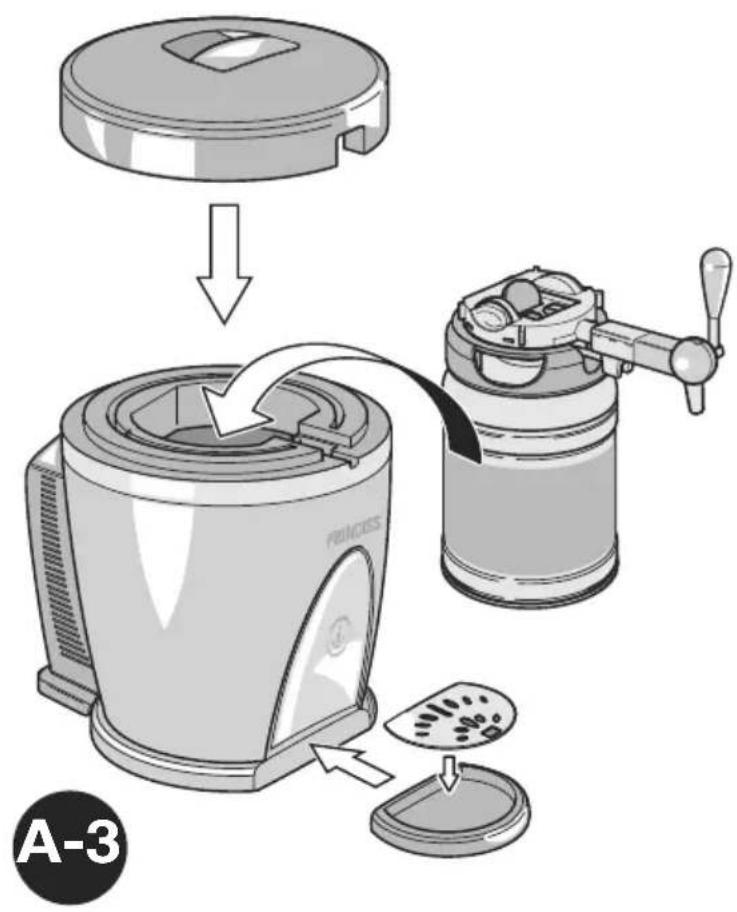
See Figures A-1 to A-3 and Figure C-1.

- The appliance's tap function is only suitable for 5 litre kegs.
- Read and follow the instructions and warnings on the keg before you place it in the appliance.
- Ensure that the keg has been cooled before placing it in the appliance.
• Always check that the use-by date on the keg has not expired before placing the keg in the appliance. - Before using the appliance, check whether the mains supply voltage matches the voltage indicated on the type plate of the appliance.
1 Position the green tap handle holder on the keg.
2 Remove the grey pipe from the green keg connection and replace this pipe with the extension pipe from the Beer Tap & Cooler.
3 Position the keb convection (including extension pipe) in the green tap handle holder. Ensure that the green tap handle is folded fully backwards.
4 Position the tap unit on the keg. Ensure that the green tap handle on the keg is vertical and protrudes through the
opening in the tap unit. Press on the tap unit until it clicks into place on the keg.
5 Push the extension pipe firmly onto the underside of the tap unit.
6 Remove the cover from the appliance.
7 Position the keg with the tap unit in the appliance.
8 Place the cover on the appliance.
9 Place the grille on the drip tray.
10 Position the drip tray against the appliance. The drip tray is held in place by two magnets.
11 Slide the supply voltage selector switch to the required position: AC or 12 V DC.
- Use AC when you connect the appliance to the mains supply at home.
- Use 12 V DC when you connect the appliance to the cigarette lighter socket in the car or caravan.
12 Connect the AC cable or the 12 V DC cable to the associated connection on the appliance.
13 Push the AC cable plug into the wall socket, or plug the 12 V DC cable plug into the cigarette lighter socket. The indicator lamp will light to indicate that the appliance is switched on.
Tapping
See Figure A-4.
1 Rinse a glass with clean, cold water.
2 Hold the glass at an angle just under the tap outlet.
3 Open the tap by tilting the tap handle on the tap unit quickly towards you.
4 Close the tap by pushing the tap on the tap unit quickly away from you when the beer reaches the lip of the tilted glass.
5 Place the glass on the drip tray grille.
6 Take the top of the foam off with a spatula so that the foam head is level with the top of the glass.
7 Leave the appliance switched on if you want to keep the keg cooled for a longer period.
Cooling
See Figure B-1 and C-1.
As well as tapping beer, the Princess Beer Tap & Cooler is particularly suitable for keeping products cold. The Princess Beer Tap & Cooler has the capacity for:
- a maximum of 5 bottles, each with a content of 75 cl, or
• 17 cans, each with a content of 33 cl, or - 12 bottles, each with a content of 33 cl and a diameter of 50 mm.

- Ensure that the products have been cooled before you place them in the appliance.
- Before using the appliance, check whether the mains supply voltage matches the voltage indicated on the type plate of the appliance.
1 Remove the cover from the appliance.
2 Slide the sealing block into the opening in the cover.
3 Slide the supply voltage selector switch to the required position: AC or 12 V DC.
- Use AC when you connect the appliance to the mains supply at home.
- Use 12 V DC when you connect the appliance to the cigarette lighter socket in the car or caravan.
4 Connect the AC cable or the 12 V DC cable to the associated connection on the appliance.
5 Push the AC cable plug into the wall socket, or plug the 12 V DC cable plug into the cigarette lighter socket. The indicator lamp will light to indicate that the appliance is switched on.
6 Place the pre-cooled products in the appliance.
7 Place the cover on the appliance.
8 Leave the appliance switched on if you want to keep the products cooled for a longer period.

Maintenance and cleaning

- Do not use any aggressive or abrasive cleaning agents or sharp objects (such as knives or hard brushes) for cleaning.
- Ensure that the appliance is not plugged into the wall socket or the lighter socket when you are going to clean it.
- Never immerse the appliance in water.
- Never put the appliance or the accessories in a dish washing machine.
- Ensure that no moisture gets into the electrical parts of the appliance.
1 Clean the inside and outside of the appliance with a damp cloth and a mild cleaning agent. Then thoroughly dry the inside and outside.
2 Clean the drip tray and grille in warm soapy water. Then dry them thoroughly.
3 After each use, rinse the tap pipe on the keg and the extension pipe with running water.
4 When fitting a new keg, use a new extension pipe or clean the extension pipe thoroughly in warm soapy water. Then rinse the extension pipe with running water and let it dry completely. You can order new extension pipes through our service address.

Safety
General
- Read and follow the instructions and warnings on the keg before you place it in the appliance.
- Read these instructions carefully and keep them in a safe place.
- Use this appliance only as described in these instructions.
- Use this appliance only for domestic purposes.
- The use of this appliance by children or persons with a physical, sensory, mental or motor limitation or persons who lack the necessary knowledge and experience may result in a dangerous situation. Persons responsible for the safety of these people should give explicit instructions or supervise the use of the appliance.
- Keep the appliance out of the reach of children and persons who are not able to handle it properly.
- Have repairs carried out by a qualified service technician. Never try to repair the appliance yourself.
- Use only accessories that are recommended by the supplier. The use of any other accessories can result in damage to the appliance and create a hazard for the user.
Heat and electricity
- Before using the appliance, check whether the mains supply voltage matches the voltage indicated on the type plate of the appliance.
- If you use an extension lead make sure that it is earthed, has earthed plugs, and is connected to an earthed wall socket. Always use an extension lead with a diameter suitable for the appliance's maximum current (Ampere) and power rating (Watt).
• Always unwind the extension lead completely. - Always remove the plug from the wall socket or the 12 V DC plug from the lighter socket when you are no longer using the appliance.
- When you remove the plug from the wall socket or the 12 V DC plug from the lighter socket, pull on the plug and not on the cable.
- Never pull the connecting cable to move the appliance.
- Check regularly whether the appliance cable is still intact. Do not use the appliance if a cable shows signs of damage. Have a damaged cable replaced by a qualified service technician.
- Ensure that the appliance, the cable and the plug do not come into contact with heat sources, such as a cooking plate or an open fire.
- Ensure that the appliance, the cable and the plug do not come into contact with water.
- The appliance must be able to dissipate its heat to avoid a risk of fire. Therefore ensure that there is sufficient clearance around the appliance and that it cannot come into contact with flammable materials. The appliance may not be covered.
During use
- For optimum performance please use the appliance at ambient temperatures between 10^ and 30^ . When used in higher ambient temperatures, the internal cooling temperatures may
also rise. Keep the appliance in a cool or shaded area.
- Place the appliance on a firm and level surface, at a location where it cannot fall.
- Do not allow the cable to hang over the edge of a kitchen surface, a work surface or a table.
- Ensure that the cable is fully unwound.
- Ensure that your hands are dry before you touch the appliance, the cable or the plug.
- Never use the appliance in damp areas.
- Remove the plug from the wall socket or the 12 V DC plug from the lighter socket if there is a malfunction during use, if you are going to clean the appliance, fit or remove an accessory, or are finished using it.
- Never immerse the appliance, the cable or the plug in water or any other fluid.
- Do not touch the appliance if it has fallen into water. Immediately remove the plug from the wall socket or the 12 V DC plug from the lighter socket. Do not use the appliance any more.
- Clean the appliance thoroughly after use (see the section ‘Cleaning and maintenance’).
-
Store an opened keg at the right temperature by leaving it in the appliance. Ensure that the appliance always has a power supply. If you are not going to use the appliance for an extended period of time, remove the opened keg from the appliance and place it in the refrigerator. After opening, the keg stays fresh for 30 days.
• Always check that the use-by date on the keg has not expired before placing the keg in the appliance. -
Do not use damaged kegs in the appliance as this can lead to damage to the appliance. Always take a damaged keg back to the shop where you bought it.
- Unopened kegs stay good the longest when they are kept at a constant temperature. The cooler you keep the keg, the better.
Safety
U.K. WIRING INSTRUCTIONS
The wires in the mains lead are coloured in accordance with the following code:
As the colours of the wire in the mains lead of this appliance may not correspond with the colour markings identifying the terminals on your plug, proceed as follows:
- The wire which is coloured BLUE must be connected to the terminal which is marked with the letter N or coloured black.
- The wire which is coloured BROWN must be connected to the terminal which is marked with the letter L or coloured red.

WARNING: ON NO ACCOUNT SHOULD EITHER THE LIVE OR NEUTRAL WIRES BE CONNECTED TO THE EARTH TERMINAL

The Environment
Dispose of packaging materials such as plastic and boxes in the appropriate containers.
If you want to dispose of the appliance while it still works properly or can be repaired simply, ensure that the appliance is recycled.

An the end of its life you must have the appliance processed in a responsible manner so that the appliance or parts of it can be reused. Do not dispose of the appliance with unsorted refuse, but hand it in at the retailer's or at a recognised collection point. Contact your local authority for information about available disposal and collection systems.
Applicable European guideline:
• 2002/95/EC
• 2002/96/EC

Généralités
11 12 V likestrømkobling
12 På/av indikatorlys
13 Spenningsvelger

Brand : PRINCESS
Model : 282990
Category : Beer dispenser