Pick your language and provide your email: we'll send you a specifically translated version.
This manual is not available in your language
Product type
Soundbar
Brand
Klipsch
Model
Icon SB1 1
Dimensions (W x H x D)
1000 x 80 x 100 mm (estimated)
Net weight
2.5 kg (estimated)
Power supply
Mains 100-240V, 50/60Hz
Power consumption
30 W (estimated)
Main functions
Bluetooth audio streaming, HDMI ARC connection, optical input, 3.5 mm auxiliary input, infrared remote control
Compatibility
TVs with HDMI ARC or optical output
Total power
200 W (estimated)
Frequency response
40 Hz - 20 kHz
Signal-to-noise ratio
> 80 dB (estimated)
Subwoofer
Wireless (estimated)
Number of channels
2.1
Speakers
2 tweeters and 2 woofers (estimated)
Maintenance and cleaning
Use a soft, dry cloth; do not use chemical products
Safety
Do not expose to water, do not open the casing, unplug before cleaning
Spare parts and repairability
Available from the manufacturer; repair by a professional recommended
General information
Indoor use only; operating temperature: 0°C to 35°C
Frequently Asked Questions - Icon SB1 1 KLIPSCH
How to connect the soundbar to my TV?
To connect the soundbar, preferably use the supplied HDMI ARC cable. Plug one end into the soundbar and the other into the TV's HDMI ARC input. You can also use an optical cable if your TV does not have an ARC port.
The remote control does not work, what should I do?
First check that the batteries are correctly inserted and not worn. Then make sure no obstacles block the infrared sensor of the soundbar. If the problem persists, replace the batteries with new ones.
Can I connect the soundbar via Bluetooth?
Yes, the Icon SB1 1 soundbar is Bluetooth compatible. Enable Bluetooth on your device (smartphone, tablet) and select "Klipsch SB1" from the list of devices. The pairing code is usually 0000 if requested.
How to adjust the subwoofer volume?
The soundbar comes with a remote control that allows you to adjust the subwoofer level. Use the dedicated buttons (often labeled "Bass +/-") to increase or decrease the intensity. You can also adjust the bass from your TV's audio menu if the connection is via HDMI ARC.
What to do if no sound comes out of the soundbar?
First check that the soundbar is turned on (indicator light). Ensure the audio source (TV, phone) is correctly selected on the soundbar. Test another cable or input. Restart the soundbar by unplugging it for 30 seconds.
The soundbar does not turn on, what should I do?
Make sure the power cord is properly connected to the soundbar and a working power outlet. If the soundbar still does not turn on, try another outlet. If unsuccessful, contact Klipsch customer service.
How to clean the soundbar?
Use a soft, dry, lint-free cloth to wipe the surface. Never use chemicals, alcohol, or liquids. For the grilles, a small brush or a low-power vacuum cleaner can remove dust.
Can I use the soundbar with a projector?
Yes, if the projector has an audio output (HDMI ARC, optical, or auxiliary). Connect the soundbar to the corresponding output. Note: some projectors do not have an ARC output, so use an optical connection then.
How to update the firmware?
Firmware update is performed via a USB cable (type A). Download the update file from the Klipsch website, copy it to a USB drive formatted in FAT32, plug it into the soundbar when off, then turn on the soundbar. Follow the instructions in the full manual.
The soundbar emits noise, what should I do?
Move the soundbar away from interference sources such as WiFi routers or microwaves. Check that the audio cables are properly shielded. If the problem persists, try resetting the soundbar (press and hold the power button for 10 seconds).
User questions about Icon SB1 1 KLIPSCH
0 question about this device. Answer the ones you know or ask your own.
Ask a new question about this device
No questions yet. Be the first to ask one.
Download the instructions for your Soundbar in PDF format for free! Find your manual Icon SB1 1 -
KLIPSCH and take your electronic device back in hand. On this page are published all the documents necessary for the use of your device. Icon SB1 1 by KLIPSCH.
USER MANUAL Icon SB1 1 KLIPSCH
KLIPSCH ICON™ SB 1
Owner's Manual
Important Safety InStrUCtionS!
READ these instructions.
KEEP these instructions.
HEED all warnings.
FOLLOW all instructions.
DO NOT use this apparatus near water.
CLEAN ONLY with dry cloth.
DO NOT block any ventilation openings. Install in accordance with the manufacturer's instructions.
DO NOT install near any heat sources such as radiators, heat registers, stoves, or other apparatus (including amplifiers) that produce heat.
DO NOT defeat the safety purpose of the polarized or grounding type plug. A polarized plug has two blades with one wider than the other. A grounding type plug has two blades and a third grounding prong. The wider blade or the third prong are provided for your safety. If the provided plug does not fit into your outlet, consult an electrician for replacement of the obsolete outlet.
PROTECT the power cord from being walked on or pinched, particularly at plugs, convenience receptacles, and the point where they exit from the apparatus.
ONLY USE attachments/accessories specified by the manufacturer.
USE ONLY with a cart, stand, tripod, bracket, or table specified by the manufacturer, or sold with the apparatus. When a cart is used, use caution when moving the cart/ apparatus combination to avoid injury from tip-over.
UNPLUG this apparatus during lightning storms or when unused for long periods of time.
REFER all servicing to qualified service personnel. Servicing is required when the apparatus has been damaged in any way, such as power-supply cord or plug is damaged, liquid has been spilled or objects have fallen into the apparatus, the apparatus has been exposed to rain or moisture, does not operate normally, or has been dropped.
DO NOT expose this apparatus to dripping or splashing and ensure that no objects filled with liquids, such as vases, are placed on the apparatus.
To completely disconnect this apparatus from the AC Mains, disconnect the power supply cord plug from the AC receptacle.
The mains plug of the power supply cord shall remain readily operable.
The exclamation point, within an equilateral triangle, is intended to alert the user to the presence of important operating and maintenance (servicing) instructions in the literature accompanying the product.
The lightning flash with arrowhead symbol within an equilateral triangle, is intended to alert the user to the presence of uninsulated “dangerous voltage” within the product’s enclosure that may be of sufficient magnitude to constitute a risk of electrical shock to persons.
WARNING: To reduce the risk of fire or electrical shock, do not expose this apparatus to rain or moisture.
WARNING: No naked flame sources – such as candles – should be placed on the product.
BATTERY INFORMATION:
WarnInG: Batteries (battery pack or batteries installed) shall not be exposed to excessive heat such as sunshine, fire or the like.
WarnInG: Risk of leakage. Only use the specified type of batteries. Never mix new and used batteries.
Observe correct polarity. Remove batteries from products that are not in use for a long period of time. Store batteries in a dry place.
WarnInG: Danger of explosion if battery is incorrectly replaced. Replace only with the same or equivalent type.
WarnInG: Do not place batteries in mouth or ingest. Keep out of reach of children and pets.
WarnInG: Do not recharge non-rechargeable batteries.
Please dispose of any used batteries properly, following any local regulations. Do not incinerate.
CaUtion
RISK OF ELECTRIC SHOCK.
DO NOT OPEN.
WARNING: Do Not Open! Risk of Electrical Shock. Voltages in this equipment are hazardous to life. No user-serviceable parts inside. Refer all servicing to qualified service personnel.
Place the equipment near a main power supply outlet and make sure that you can easily access the power breaker switch.
WarnInG: This product is intended to be operated ONLY from the AC Voltages listed on the back panel or included power supply of the product. Operation from other voltages other than those indicated may cause irreversible damage to the product and void the products warranty. The use of AC Plug Adapters is cautioned because it can allow the product to be plugged into voltages in which the product was not designed to operate. If the product is equipped with a detachable power cord, use only the type provided with your product or by your local distributor and/or retailer. If you are unsure of the correct operational voltage, please contact your local distributor and/or retailer.
fCC anD CanaDa emC CompLlanCe Information:
This device complies with part 15 of the FCC Rules. Operation is subject to the following two conditions:
(1) This device may not cause harmful interference, and (2) this device must accept any interference received, including interference that may cause undesired operation. NOTE: This equipment has been tested and found to comply with the limits for a Class B digital device, pursuant to part 15 of the FCC Rules. These limits are designed to provide reasonable protection against harmful interference in a residential installation. This equipment generates, uses and can radiate radio frequency energy and, if not installed and used in accordance with the instructions, may cause harmful interference to radio communications. However, there is no guarantee that interference will not occur in a particular installation. If this equipment does cause harmful interference to radio or television reception, which can be determined by turning the equipment off and on, the user is encouraged to try to correct the interference by one or more of the following measures:
Reorient or relocate the receiving antenna.
Increase the separation between the equipment and receiver.
Connect the equipment into an outlet on a circuit different from that to which the receiver is connected.
Consult the dealer or an experienced radio/TV technician for help.
Approved under the verification provision of FCC Part 15 as a Class B Digital Device.
Caution: Changes or modifications not expressly approved by the manufacturer could void the user's authority to operate this device.
Caution: To comply with the limits of the Class B digital device, pursuant to Part 15 of the FCC Rules, this device is to comply with Class B limits. All peripherals must be shielded and grounded. Operation with non-certified peripherals or non-shielded cables my result in interference to radio or reception.
This Class B digital apparatus complies with Canadian ICES-003.
Eligible to bear the CE mark; Conforms to European Union Low Voltage Directive 2006/95/EC; Conforms to European Union EMC Directive 2004/108/EC, Conforms to Eco-Design Directive 2009/125/EC, Conforms to European Union Radio and Telecommunications Terminal Equipment (R&TTE) Directive 1999/5/EC.
This product contains batteries that are covered under the 2006/66/EC European Directive, which cannot be disposed of with normal household waste. Please follow local regulations.
Wee notICe
Note: This mark applies only to countries within the European Union (EU) and Norway.
This appliance is labeled in accordance with European Directive 2002/96/EC concerning waste electrical and electronic equipment (WEEE). This label indicates that this product should not be disposed of with household waste. It should be deposited at an appropriate facility to enable recovery and recycling.
WireLeSS tranSmItter CompLlanCe Information
The term "IC:" before the radio certification number only signifies that Industry Canada technical specifications were met.
This equipment complies with FCC and IC radiation exposure limits set forth for an uncontrolled environment. This equipment should be installed and operated with minimum distance 20cm between the radiator and your body. This transmitter must not be co-located or operating in conjunction with any other antenna or transmitter.
This device is intended for home and office use in all EU countries (and other countries following the EU directive 1999/5/EC) without any limitation except for the countries mentioned below:
Country Restriction Reason/remark
Bulgaria None
General authorization required for outdoor use and public service
France
Outdoor use limited to 10 mW e.i.r.p within the band 2454-2483.5 MHz
Military Radiolocation use. Refarming of the 2.4 GHz band has been ongoing in recent years to allow current relaxed regulation. Full implementation planned 2012
Italy None
If used outside of own premises, general authorization is required
Luxembourg None
General authorization required for network and service supply (not for spectrum)
Norway Implemented
This subsection does not apply for the geographical area within a radius of 20 km from the centre of Ny-Ålesund
Russian Federation None Only for indoor applications
Note: Please don't use the product outdoors in France
DOLBY DIGITAL
Manufactured under license from Dolby Laboratories. Dolby and the double-D symbol are registered trademarks of Dolby Laboratories.
PACKING LIST
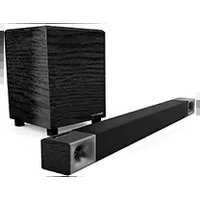
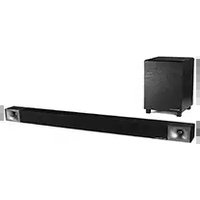
SOUNDBAR
WIRELESS SUBWOOFER
SOUNDBAR POWER SUPPLY/POWER CORD
SUBWOOFER POWER CORD
ONE 4.9 FOOT (1.5M) DIGITAL OPTICAL CABLE
ONE DUAL RCA CABLE
ONE REMOTE CONTROL
QUICK SETUP GUIDE
SOUNDBAR WALL-MOUNT TEMPLATE
THIS OWNER'S MANUAL
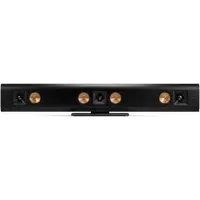
SOUNDBAR FRONT
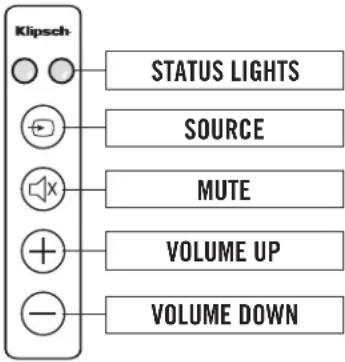
SOUNDBAR STATUS LIGHT
RED: In STANDBY ("Sleep") Mode
GREEN: On Digital Optical Cable Input
ORANGE: On Analog RCA L/R Input
GREEN (Flashing): Digital Input muted
ORANGE (Flashing): RCA Input muted
RED (Flashing): Failure to learn a remote control command
GREEN OR ORANGE FLASHES: A remote control signal has been received
WHITE (Right Status Light): In 3D Surround Mode
RED and GREEN (Alternating):
Remote programming mode activated
SOUNDBAR REAR
SUBWOOFER REAR
SUBWOOFER STATUS LIGHT
BLUE (Solid): Receiving wireless signal from soundbar
RED (Solid): Searching for soundbar wireless signal
PLACEMENT/INSTALLATION
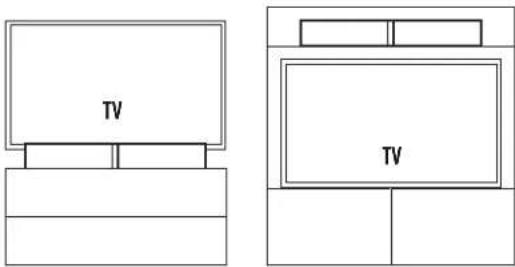
Placing/wall-mounting the soundbar: The soundbar is designed to be placed on a flat surface directly in front of your TV on its two supplied feet, on a shelf directly above or below your TV in a piece of furniture with feet or wall-mounted (via keyholes on the rear of the soundbar) under a TV that is also wall-mounted. If wall-mounting, connect cable to TV first, then use supplied wall-mount template to mount soundbar. If the two mounting holes drill into wall studs, screw two wood screws in those holes to hang the soundbar on. If there are no wall studs where the holes are drilled, use wall anchors that support at least 7 pounds (3.18kg) to hang the soundbar on. Connect cable from TV (see Connection section) to soundbar and hang soundbar on wall.
Placing the subwoofer: The subwoofer is designed to be placed on the floor in the same room within 50 feet (15.24m) of the soundbar near an electrical outlet. For maximum bass output, place the subwoofer in a corner on the same wall as the TV and soundbar. Once the soundbar has been connected to the TV and plugged into a wall outlet, plug the subwoofer into a wall outlet.
CONNECTION
Connecting the soundbar to your TV: The soundbar part of your Kipsch Icon™ SB 1 system is what needs to be connected to your TV, Cable Box or Satellite Receiver. If you have other devices connected to your TV, such as a DVD /BluRay player, gaming system, etc., connect the soundbar to the TV so that you can listen to all those and your TV through the soundbar. If there are no other devices connected to your TV other than a cable or satellite box and you receive all of your television programs from that box, you can connect the soundbar to either that box or your TV. There are three different ways to connect the soundbar to your TV, Satellite or Cable box.
A. Digital Optical Cable
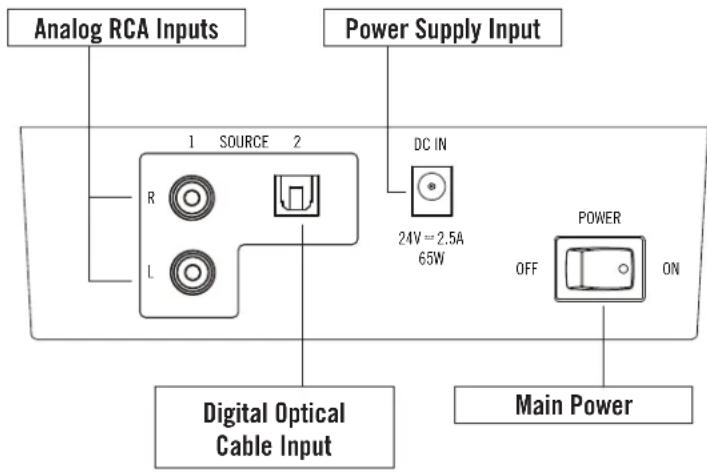
Most High Definition TV's, Satellite and Cable boxes have an DIGITAL OPTICAL AUDIO OUTPUT. First, remove the clear plastic covers from each end of the digital optical cable and connect one end of an optical cable (cable supplied) into the corresponding output of your TV, Satellite or Cable box and connect the other end of the cable into the DIGITAL OPTICAL INPUT on the back panel of the soundbar.
TV Connection Panel
B. RCA Cable
If you do not have an optical digital output, you can use analog left and right audio outputs on your device and connect them to the analog left and right inputs on the soundbar with the a male RCA to male RCA cable (cable supplied).
C. 3.5mm Output (Headphone Jack)
A third choice would be to connect from a headphone output on your device to the analog left and right inputs on the soundbar (cable not supplied).
Once you have made any of the above audio cable connections, connect the supplied soundbar power supply into the "DC Input" on the back of the soundbar, plug the power supply into an active electrical socket and turn the Main Power Switch on the back of the soundbar on.
Connecting the subwoofer to the soundbar: Once you have placed the subwoofer in the room, take the supplied subwoofer power cord, plug one end into the subwoofer where it is labeled "AC In" and plug the other end into an active electrical socket. Turn the Main Power Switch on the back of the subwoofer on. On the soundbar, make sure the left status light is either solid green or orange (press SOURCE button once if light is steady red). The red light on the back of the subwoofer will stay solid until it finds the wireless signal coming from the soundbar. Once it finds that signal (approximately 15 seconds), the solid red light will change to solid blue, indicating the subwoofer is now connected to the soundbar.
Subwoofer Rear Connection Panel
PROGRAMMING YOUR TV REMOTE TO OPERATE THE SOUNDBAR
The following 3 steps should be used to program each function of your TV or cable box remote control buttons (MUTE, VOLUME UP, & VOLUME DOWN). IF THE SOUNDBAR IS IN STANDBY MODE (solid red status light), push the button on the soundbar
until the status light is solid GREEN.
Place the unit in learning mode: With the status light showing solid GREEN, press and hold down both the and buttons on the front of the soundbar at the same time (approximately 3 seconds) until the status light flashes RED and GREEN.
Select the function to learn: Press the button once on the soundbar (the status light changes to solid ORANGE). (Substitute the SOURCE, VOLUME UP & VOLUME DOWN in place of when programming the other buttons during this step)
Learn the function: Hold your remote control within one foot and pointed at the front of the soundbar. Slowly press the button on your remote control four times. On the first three presses, the status indicator light will flicker ORANGE with each press. If the unit has successfully learned the function, on the fourth press of the button, the light will flash GREEN several times and then turn to solid GREEN. (Remember to use the VOLUME UP & VOLUME DOWN in place of when programming the other buttons during this step)
To program the remaining functions, simply repeat all steps, substituting with the new function and button presses (VOLUME UP, and VOLUME DOWN) on steps TWO and THREE.
IMPORTANT NOTE: There is not a power on/off button on the front of the soundbar (there is a "Main Power" switch on the soundbar's rear panel). You DO NOT need to turn off the soundbar (or subwoofer) when finished watching TV. When finished, turn off your TV (or Satellite or Cable box if the soundbar is connected to that). The soundbar (and the subwoofer) will automatically go into a Standby or "sleep" mode if they do not receive an audio signal from your TV, Satellite or Cable Box for approximately 10 minutes. Standby "On" mode is indicated by a solid red left status light on the soundbar front and on the subwoofer rear panel. When your TV, Satellite or Cable box is turned back on and a signal is again received the soundbar (and subwoofer) will automatically come out of Standby mode and turn on.
OPERATING THE KLIPSCH ICON™ SB 1
Once your soundbar is connected and operating, you will want to complete a few basic steps to get the most enjoyment out of your system. First, you will want to turn off the speakers on your TV and let your soundbar be your new sound source. Some TV's will automatically turn off their speakers when you connect the soundbar, while others you must manually turn their speakers off. Refer to your TV's owner's manual for instructions to turn off the TV speakers. If you cannot turn your TV speakers off, the soundbar will still give you an excellent enhancement to the sound coming from your TV, and you can easily adjust your TV sound to blend with the soundbar's sound. To make this adjustment, first program your TV remote to operate the soundbar, then manually turn your TV volume down all the way down from the controls on the TV itself. Next, press the VOLUME UP (+) control on the front of the soundbar until you have a comfortable TV listening volume level coming from the soundbar. Finally, to make sure the KLIPSCH ICON™ SB 1 subwoofer has a balanced sound with the soundbar, set the subwoofer volume on the subwoofer rear to approximately the halfway point, and then adjust up or down.
3D SURROUND
The KLIPSCH ICON™ SB 1 features a 3D Surround Mode which adds spaciousness to the sound, simulating the effect of having multiple speakers surrounding you such as in a movie theater. This feature requires no distinct speaker placement, special room requirements or specific program material to work properly. To turn on, simply push the "3D" button on the KLIPSCH ICON™ SB 1 remote and the soundbar will show a white light indicating the feature is on. To turn off, push the 3D button again and the white light will turn off, along with the feature. This effect will work at multiple listening positions in your room. The four control buttons can be programmed into other remote controls using the built-in Learning Remote feature, but the 3D Surround mode On/Off button cannot be learned by any other remote and must be controlled with the included remote.
TROUBLESHOOTING
Soundbar does not power on
Is the power supply plugged into a "live" outlet?
Is the soundbar "Main Power" rear switch on?
No sound from soundbar
Is it plugged into a "live" outlet and is the "Main Power" rear switch on?
Are all connections from TV/Cable or Satellite box pushed in tightly?
Is TV/Cable or satellite box turned on and the volume turned up?
• Is the soundbar volume turned up?
Is the soundbar "STANDBY" off? (LED green or orange solid)
• Is the soundbar on the correct source input?
No sound from subwoofer
Is it plugged into a "live" outlet and "Main Power" rear switch turned on?
Is the rear subwoofer volume control turned up?
Has the subwoofer "paired" with the soundbar?
Subwoofer will not wirelessly "pair" with the soundbar
(subwoofer green status lights continue flashing)
Move subwoofer closer to soundbar
If other wireless devices nearby (i.e. baby monitors, cordless phones, Wi-Fi, etc.) have multiple channel selection, switch their channel
Turn both the soundbar and subwoofer off, then turn on again to initiate a new pairing sequence
Using the end of a paper clip (or similar small device) lightly press in button inside of unmarked hole on the left side of input panel to the left of the "L" (red) source input for 5 seconds then, within 10 seconds, lightly press in button, with same device, on back of subwoofer on the top right labeled "Factory Use Only"
TV/Cable Box/Satellite Box Remote Will Not Program
Carefully follow all programming instructions
Program your original TV remote to the soundbar, then try using your universal remote without programming it
You may need to repeat the programming of a function in some cases
There may be some cases where the soundbar will not be able to learn all remote control codes
For Questions, contact Klipsch Customer Service: In the United States: 1-800-KLIPSCH
CARE AND CLEANING
Occasional dusting or wiping of the cabinets with a soft cloth is all that is required. Never use water, abrasive or solvent type cleaners or detergents. Never spray polishes or cleaners on the drive units (woofer, midrange or tweeter) or on any controls or connection points. A vacuum cleaner with a soft brush attachment may be used to clean the grill fabric. Take grills off before using a vacuum and do not vacuum on the drivers.
Klipsch is a registered trademark of Klipsch Group Inc.
frenCh ImportanteS ConSIGneS De SéCUrlté!
RISQUE D'ÉLECTROCUTION
NE PAS OUVRIR
RACCORDEMENT
RÉSOLUTION DES PROBLÈMES
CONEXIÓN
NSCHLÜSSE
BLUE (Solid): Receiving wireless signal from soundbar
RED (Solid): Searching for soundbar wireless signal
CONEXÃO
WARNING: Do Not Open! Risk of Electrical Shock. Voltages in this equipment are hazardous to life. No user-serviceable parts inside. Refer all servicing to qualified service personnel.
连接
A wholly-owned subsidiary of VOXX International Corporation
💬 Hi! I'm your manual assistant.I know your KLIPSCH Icon SB1 1.
How can I help you? (use, settings, error codes, maintenance, explaining a step from the manual, etc.)💡 Examples :
• How do I use it ?
• Error code E3 ?
• How do I clean it ?







![graph TD A["TV Connection Panel"] --> B["Headphone"] A --> C["Optical"] A --> D["Digital Audio Out"] A --> E["Audio Out"] B --> F["3.5mm to Male RCA Cable (Not Supplied)"] C --> G["Male RCA to Male RCA Cable (Supplied)"] D --> H["1 2500RCT"] E --> I["DC IN"] E --> J["24V~2.5V NAV"] E --> K["PUMEN"]…](/content/2026/06/1260648/images/ff17c1255ae8aa304f3cc5389daf365eefa08694ff846db9606f0c82ca7f0eaa.jpg)


![graph LR A["Soundbar Front Control Panel"] --> B["Kippsch"] B --> C["STATUS LIGHTS"] B --> D["SOURCE"] B --> E["MUTE"] B --> F["VOLUME UP"] B --> G["VOLUME DOWN"]](/content/2026/06/1260648/images/2d69e05dcd84a18afe8541cd229e26127a607f268dd0c236b2f2a2542a499f06.jpg)
![graph LR A["STANDBY"] --> B["3D SURROUND"] C["MUTE"] --> B D["VOLUME UP"] --> E["3D"] F["VOLUME DOWN"] --> E G["SOURCE"] --> E B --> H["3D"] E --> I["3D"] H --> J["+"] I --> K["+"]](/content/2026/06/1260648/images/5943a90370a5056601ed4ffb18f06a3b490bbd9fb6febb8081e51e4190683e14.jpg)