USER MANUAL LZH-70W KENWOOD
Your LZH-70W console lets rear-seat passengers enjoy audio/video entertainment from its 7" diagonal LCD screen and wired & wireless headphone outputs. These instructions will let you familiarise yourself with all of the LZH-70W's features and capabilities.
For the latest information about this and other Kenwood products, visit the Kenwood Corporation Web site at: www.kenwoodeurope.com
Table of Contents
Safety Precautions 3
Front Panel Controls and Features 4
IR transmitter 4
Power button 4
Volume control buttons 4
Menu button 4
Remote control IR sensor 4
Dimmer button 4
Source button 4
Dome light switch 4
Dome lights 4
Screen release button 4
LCD screen 4
Auxiliary audio/video input 4
Wired headphone jacks 4
Remote Control Functions 5
Power button 5
Mute button 5
Source button 5
Menu button 5
Volume control buttons 5
Dimmer button 5
Installing Batteries in the Remote Control 5
Basic Console Operation 5
Turning the console on and off 5
Console dome lights 5
Connecting an auxiliary audio/video source 5
Wired headphone jacks 6
Using the Parental Attention/MUTE Switch 6
Adjusting the Video Picture 6
Picture Quality settings (Contrast/Brightness/Tint/Colour) 6
Screen Mode settings (Full/Zoom/Normal/Cinema) 6
Resetting the Adjustments 7
Changing the Dome Light Bulbs 7
Troubleshooting Guide 7
Specifications 7
Safety Precautions
WARNING
To prevent injury and/or fire, take the following precautions:
- Ensure that the unit is securely installed. Otherwise it may fly out of place during a collision and other jolts.
- When extending the ignition or earth wires, make sure to use automotive-grade wire or other cables that are 18 gauge (AWG18) or thicker to prevent wire deterioration and damage to the wire coating.
- To prevent short circuits, never put or leave any metallic objects (e.g., coins or metal tools) inside the unit.
- If the unit starts to emit smoke or strange smells, turn off the power immediately and consult your Kenwood dealer.
- Be careful not to drop the unit or subject it to strong shock—the unit may break or crack because it contains glass parts.
- Do not touch the liquid crystal fluid if the LCD is damaged or broken due to shock. The liquid crystal fluid may be dangerous to your health or even fatal. If the liquid crystal fluid from the LCD contacts your body or clothing, wash it off with soap immediately.
- Do not install the console so that the screen can be seen by the driver while operating the vehicle.
CAUTION
To prevent damage to the LZH-70W, take the following precautions:
- Make sure to ground the unit to a negative 12V DC power supply.
- Do not open the back cover of the unit.
- Do not install the unit in a location exposed to direct sunlight or excessive heat or humidity. Also avoid places with too much dust or the possibility of water splashing.
- Do not subject the monitor unit to excessive shock, as it is a piece of precision equipment.
- When replacing a fuse, only use a new one with the prescribed rating. Using a fuse with the wrong rating may cause your unit to malfunction.
- To prevent short circuits when replacing a fuse, first disconnect the wiring harness.
- Do not use any screws except for the ones provided. The use of improper screws might result in damage to the unit.
RESETTING THE MICROPROCESSOR
If the unit does not seem to be working properly, turn the vehicle's ignition off, then on again. If that does not solve the problem, consult your Kenwood dealer.
If you experience problems during installation, consult your Kenwood dealer.
This Product is not installed by the manufacturer of a vehicle on the production line, nor by the professional importer of a vehicle into an EU Member State.
Warnings
- Do not use any solvents or cleaning materials when cleaning the video system.
- Do not use any abrasive cleaners, as they may scratch the screen. Use only a lightly dampened lint-free cloth to wipe the screen if it becomes dirty.
- Lock the LCD screen in the fully-closed position when it is not being used.
- Always adjust the volume setting to the lowest position before putting on headphones.
- Remember to leave the dome light switch in the OFF or AUTO position when the vehicle is unattended, as the dome lights can drain the vehicle's battery if they are left on when the vehicle is not running.
- Do not apply pressure on the LCD screen.
- Caution children to avoid touching or scratching the screen, as it may become dirty or damaged.
KENWOOD
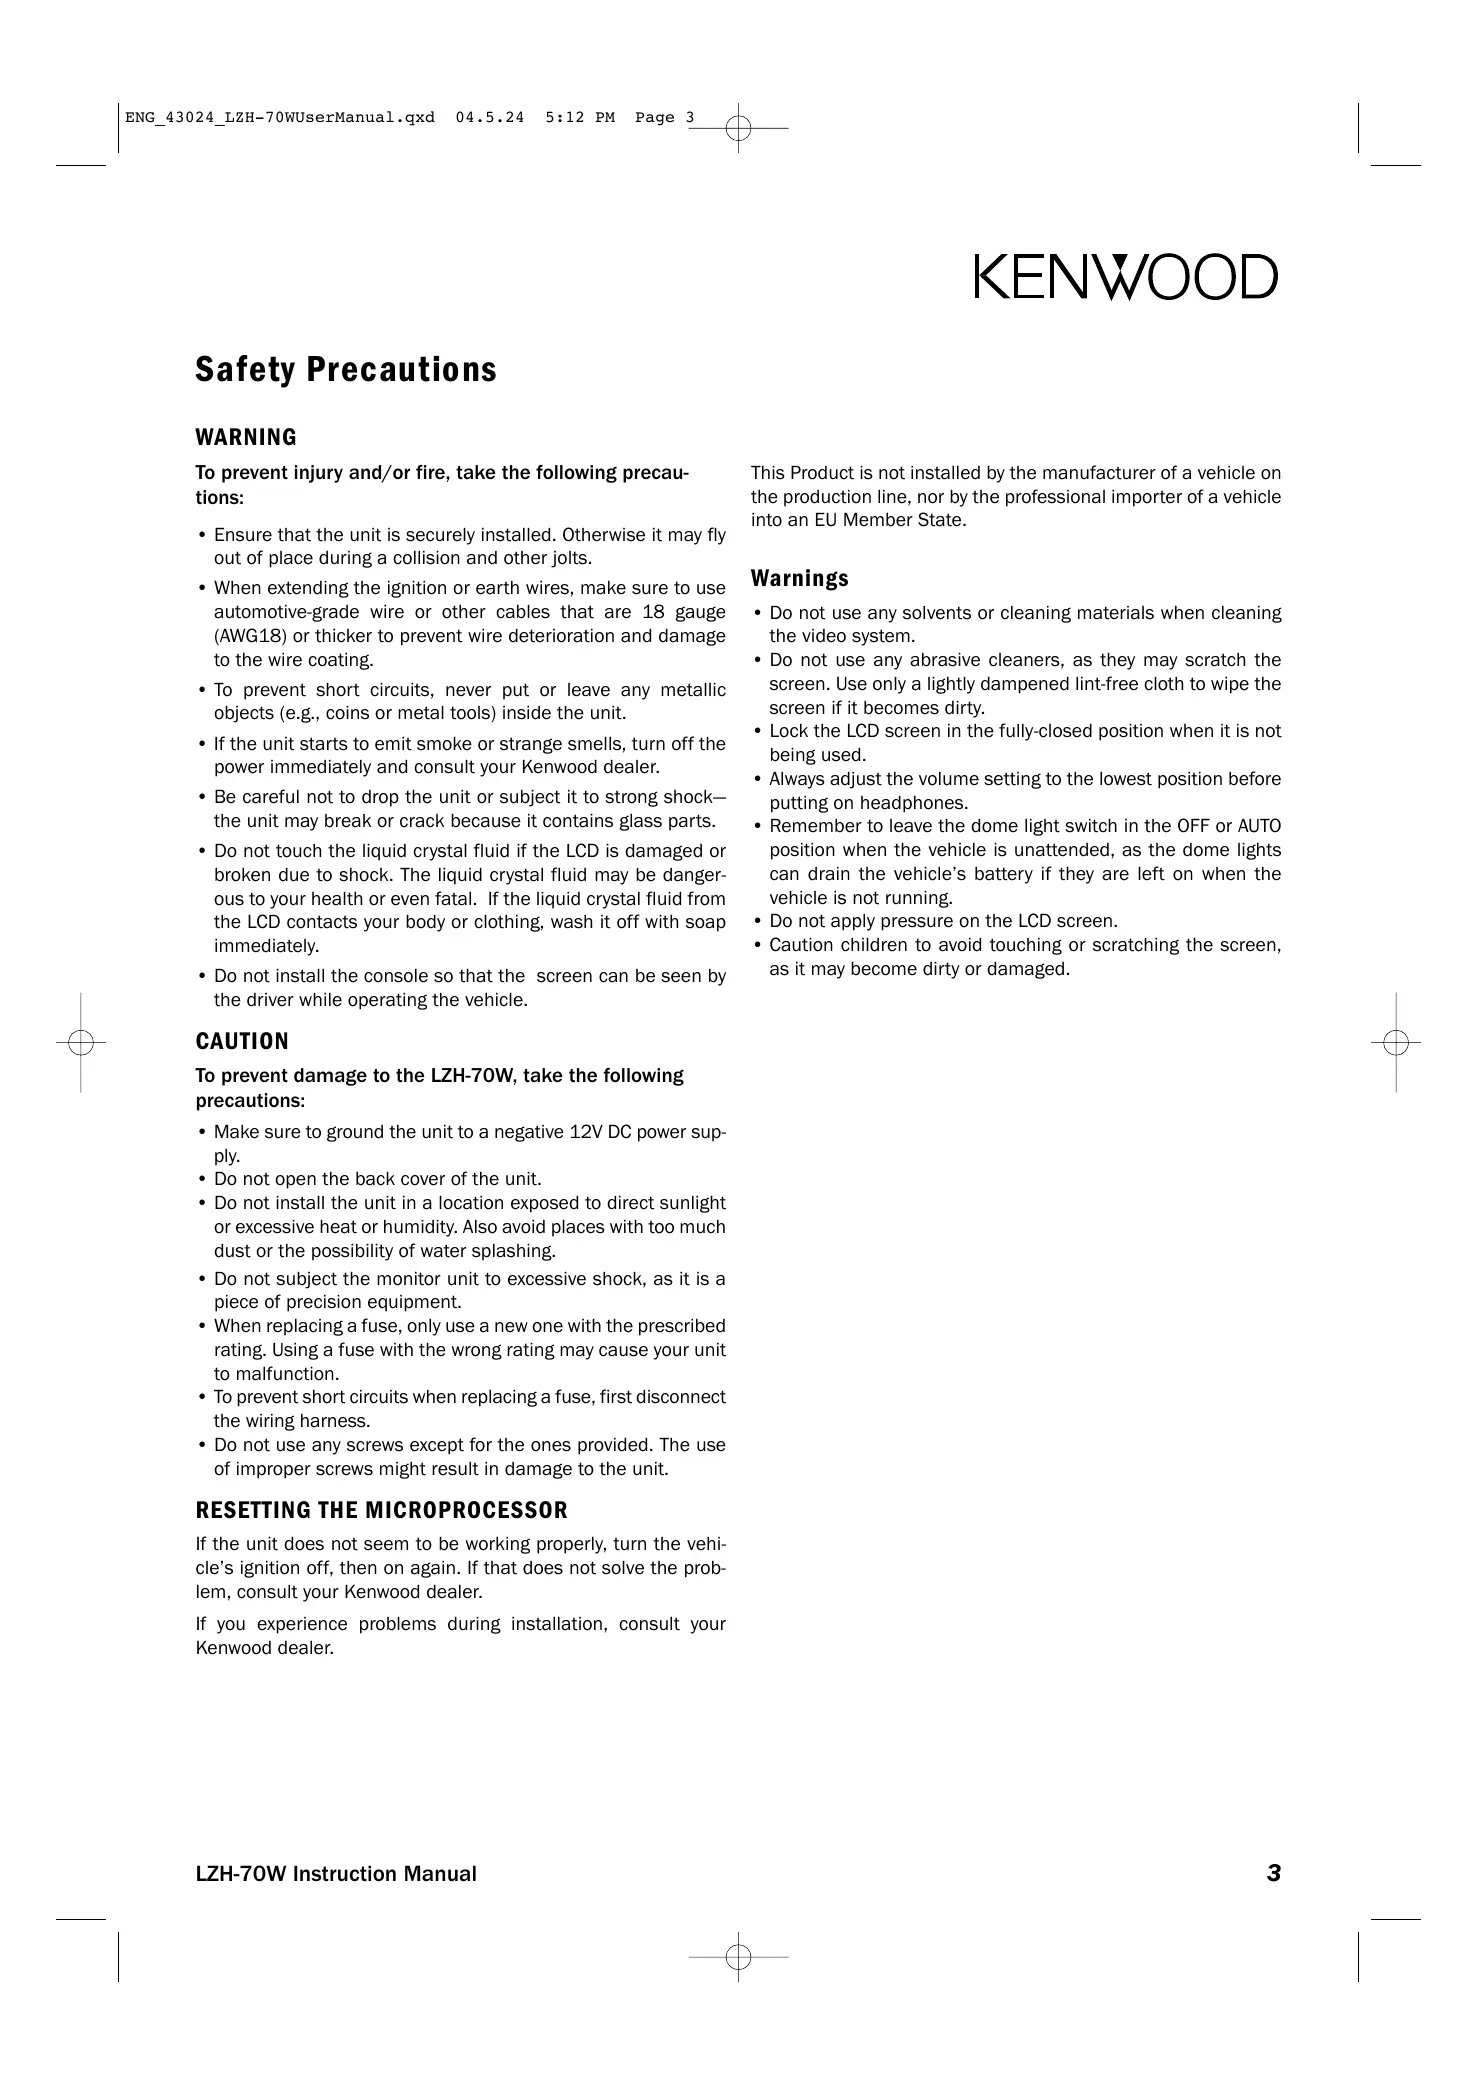
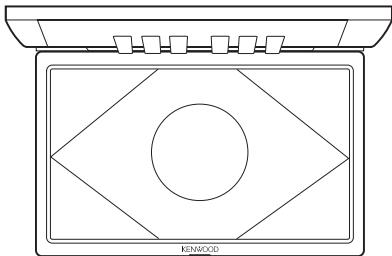
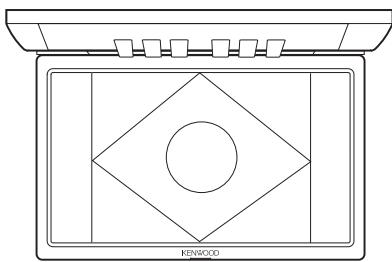
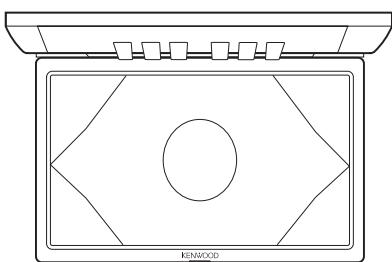
Front Panel Controls and Features
- IR transmitter: Transmits audio to wireless headphones.
- Power button: Press to turn the console on and off.
-
Volume control buttons: Controls volume to the wired headphone jacks and the wired A/V output connections. (Note: The KPH-IR70 wireless headphones have built-in volume controls for use with the LZH-70W.)
-
When the MENU button is pressed, use the VOLUME buttons to perform the various adjustments.
-
Menu button: Activates the screen adjustment modes.
- Remote control IR sensor: Receives signals from the included wireless remote.
- Dimmer button: Press to reduce the screen's brightness for night-time viewing; press again to restore full brightness.
-
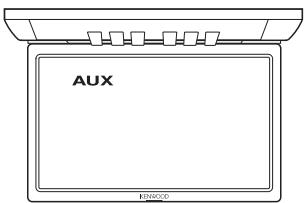
Source button: Each press of the button cycles between the following 3 inputs: AV1/AV2/Aux. The selected input is displayed on the screen.
-
Dome light switch: Switches the console's dome lights into the following modes:
-
OFF: Turns the dome lights off.
- AUTO: Automatically switches the dome lights on and off in conjunction with the vehicle's interior illumination.
-
ON: Turns the dome lights on.
-
Dome lights: Provide additional illumination in the vehicle's interior.
- Screen release button: Slide the button away from the screen to release the flip-down LCD screen.
- LCD screen: 7" diagonal LCD screen with 336,960 pixel resolution.
- Auxiliary audio/video input: Allows connection of a camcorder, video, game, portable DVD player or other audio/video source with video RCA-type output connectors.
- Wired headphone jacks: Allows connection of wired stereo headphones with stereo mini-type connectors.
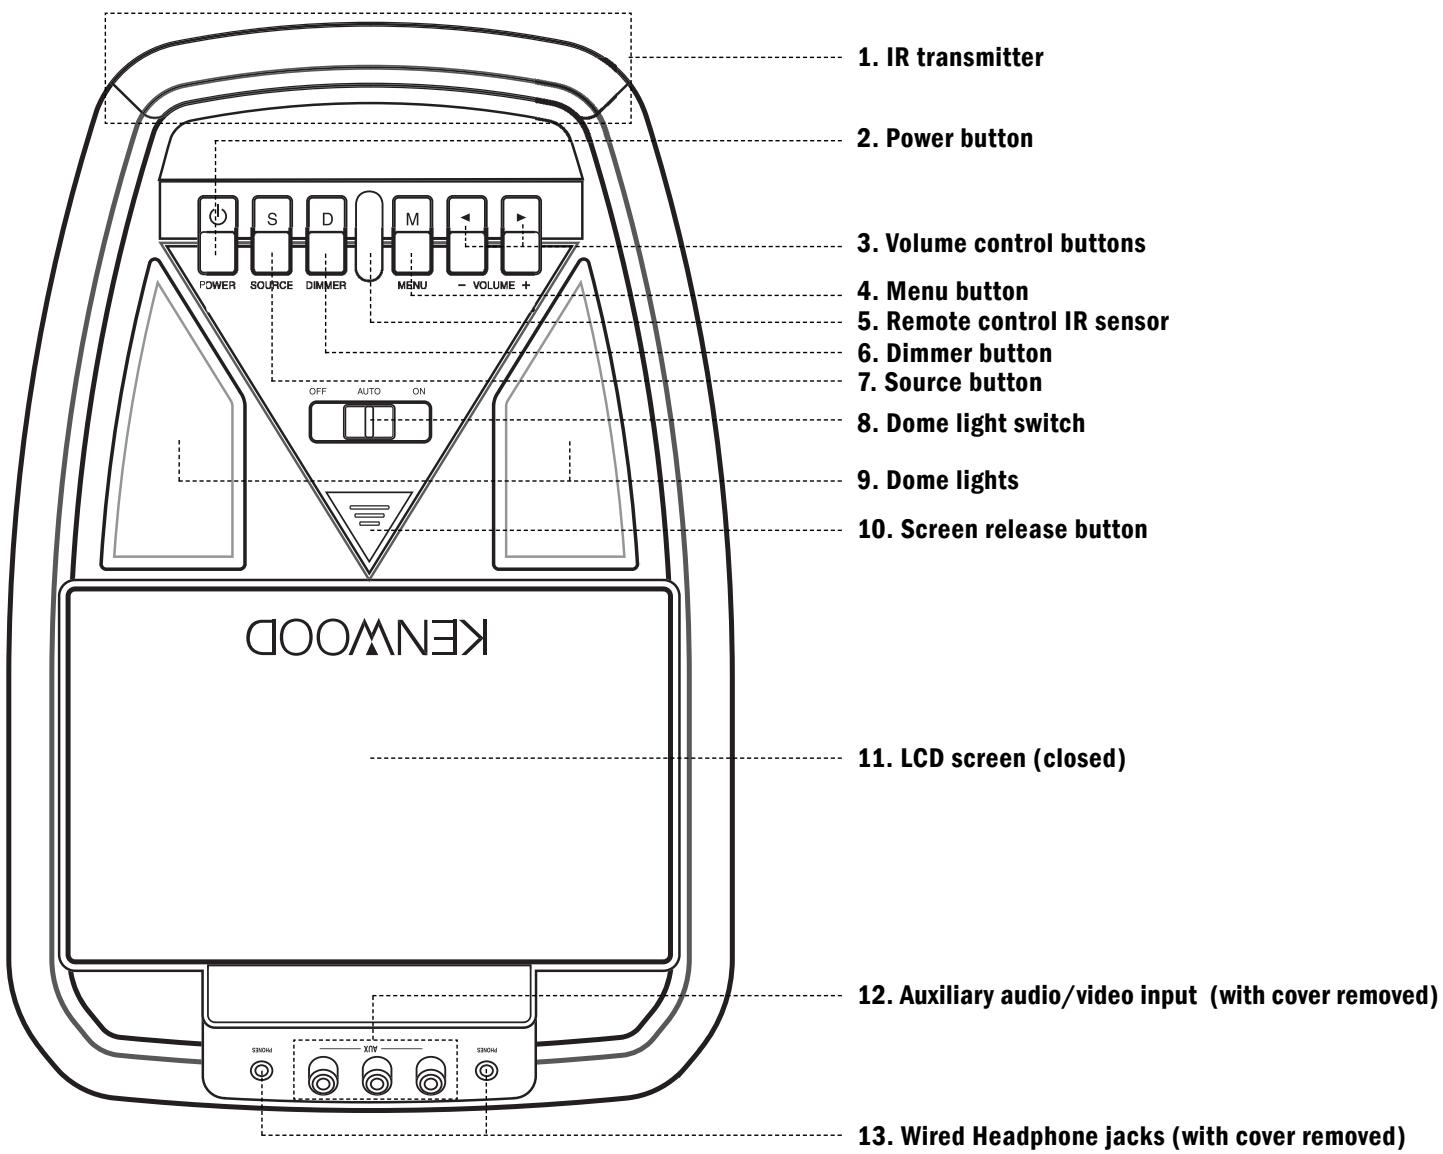
Remote control functions
Power button: Press to turn the console on and off.
Mute button: Press to temporarily mute the sound to the wired headphones; press again to restore the sound.
Source buttons: Press to access the Video 1, Video 2 and Aux inputs.
Menu button: Activates the screen adjustment modes.
Volume control buttons: Controls volume to the wired headphone jacks and wired A/V output connections. (Note: The KPH-IR70 wireless headphones have built-in volume controls for use with the LZH-70W.)
- When the MENU button is pressed, use the volume buttons to perform the various adjustments.
Dimmer button: Press to reduce the LCD screen's brightness for nighttime viewing; press again to restore full brightness.
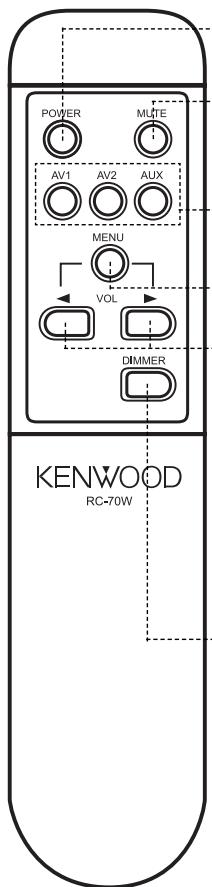
Installing Batteries in the Remote Control
- Remove the battery cover as shown above.
- Install two AAA batteries with their poles as shown above.
- Replace the battery cover.
CAUTION:
Do not leave the remote control in direct sunlight, such as on the dashboard.
NOTE:
The supplied batteries are for operational checks, and may not last as long as regular alkaline batteries.
When the remote-controllable distance becomes reduced, replace both batteries with new ones.
Basic Console Operation
Turning the console on and off
- Slide the screen release button away from the screen to unlock the screen.
- Pivot the screen downward until a comfortable viewing angle is reached. The internal friction detent will hold the screen in position while the console is in use.
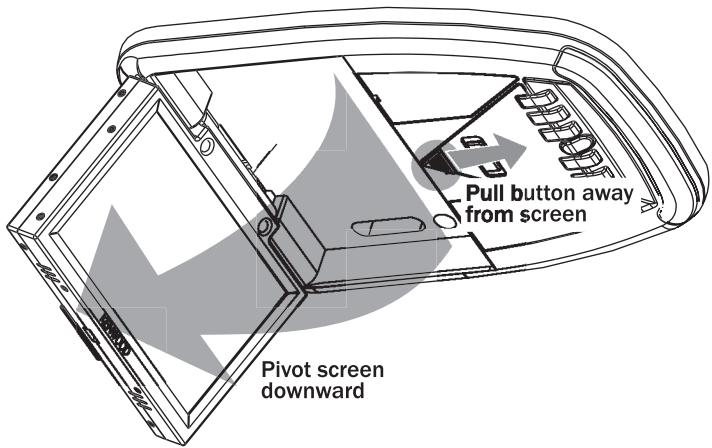
-
Press the POWER button on the console or the remote to turn it on and off. When the console is on, internal backlighting will illuminate the controls.
-
After the unit has been turned on and is displaying a picture, adjust the viewing angle and Dimmer control to optimise the picture quality.
- Pivot the screen to the locked position when not in use. The power will automatically turn off.
Console dome lights
The LZH-70W's dome lights are controlled by the 3-position sliding switch. Sliding the switch to the ON position will turn the lights on. The AUTO position will allow the lights to turn on and off with the vehicle's interior lighting, and the OFF position will prevent the lights from turning on at all times.
- Do not leave the vehicle unattended with the dome light switch in the ON position, as this could discharge the vehicle's battery.
Connecting an auxiliary audio/video source
Make sure the console's power is OFF before making any connections
The Auxiliary A/V Input lets you connect optional A/V equipment, such as a camcorder or video game. The connectors can be accessed by remov
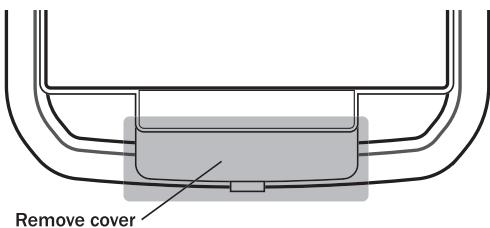
ing their protective plastic cover located behind the screen hinge.
Use RCA cables to connect the audio and video signals to their respective jacks. Mono audio sources will require the use of an RCA Y-cable to connect to both right and left inputs.
KENWOOD
Once the connections have been made, turn the console on and press the SOURCE button until the on-screen display's input indicator reads "AUX".
Wired headphone jacks
The wired headphone jacks are located underneath the A/V AUX input jack cover. You can connect wired headphones with standard 18 stereo mini connectors to each of the wired headphone jacks.
Using the Parental Attention/MUTE Switch
The Parental Attention/MUTE Switch (installed separately at the time the console was installed) allows you to get the attention of passengers in the rear seat. Pressing the switch mutes all audio output from the console (including audio sent to wireless head-
phones) and displays the following message on the console's screen:
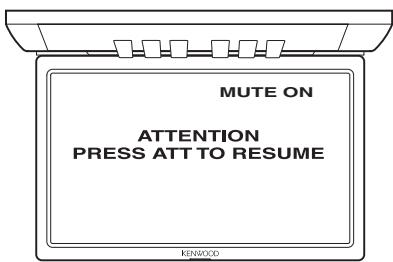
Pressing the switch while the message is displayed removes the message and restores the audio.
Adjusting the Video Picture
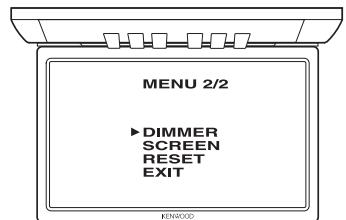
Press the MENU button repeatedly to cycle through the following adjustments:
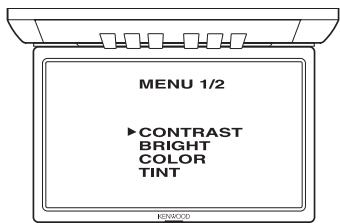
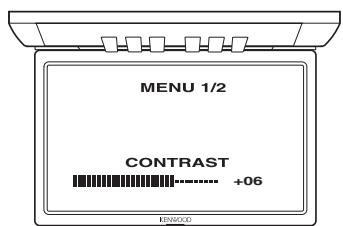
When the adjustment you want appears on the acreen, use the VOLUME + and VOLUME - buttons to perform the adjustment (CONTRAST adjustment shown):
Picture Quality settings
CONTRAST setting
Use the volume buttons to increase and decrease the whiteness in the picture.
BRIGHTNESS setting
Use the volume buttons to make the picture brighter or darker.
TINT setting
Use the volume buttons to tint the colour towards red or green.
COLOUR setting
Use the volume buttons to increase or decrease the colour depth.
Screen Mode settings
The LZH-70W's LCD screen is a widenscreen (16:9) format. Since a conventional video picture (4:3 format) will not fill the screen completely, you can select from four different ways to view a 4:3 picture.
- Press the MENU button to select the SCREEN adjustment, and use the VOLUME buttons to cycle through the following screen modes:
Full Picture mode
The 4:3 picture is stretched so it fills the entire width of the LZH-70W's screen. The image will appear distorted (wider than normal).
Zoom mode
Zooms in on the central portion of the picture so it fills the LZH-70W's entire screen. The image is not distorted, but video resolution will be reduced.
Normal Picture mode
The entire 4:3 picture is displayed without alteration in the centre 75% of the LZH-70W's screen, with grey bars on either side (called "windowboxing").
Cinema mode
Zooms in on the central portion of the 4:3 picture, slightly stretching the image vertically. The edges of the image are stretched horizontally to fill all of the LZH-70W's screen. The image will appear slightly distorted, and video resolution will be reduced.
Resetting the adjustments
You can reset all of the Picture Quality and Screen Mode adjustments to their factory settings:
Press the MENU button until "RESET" appears on the screen.
- Press the VOLUME + button to reset the adjustments to their factory settings.
- Press the MENU button to retain the adjustments you have made.
Changing the Dome Light Bulbs
- Use a flat blade screwdriver to pry the dome light cover off.
- Remove the burned-out bulb.
- Replace the bulb with a 5-Watt (12V) Type 158 T10 Wedge bulb.
- Snap the dome light cover back on.
Troubleshooting Guide
What might appear to be a malfunction in your unit may just be the result of misoperation or miswiring. Before calling for service, first check the following for possible problems.
| PROBLEM
The console does not power up | CAUSE
The fuse has blown
The vehicle's ignition lacks an ACC position | SOLUTION
Replace the fuse with one of the same rating
Connect the console's ignition wire and battery wire together |
| Buttons do not operate, or operate erroneously | The microprocessor is malfunctioning | Reset the microprocessor (see ‘Resetting The Microprocessor’ on page 3) |
| No video picture | Improper connection(s) to video source(s) | Verify that the video sources are properly connected |
| The video image is dark | The screen is cold | Liquid Crystal Display screens may appear darker when they are cold. Once you turn the console's power on and the screen's temperature rises, its normal brightness will return. |
| No sound from wireless headphones | The headphone's power is off
The headphone's batteries are exhausted | Make sure the headphones' power switch is turned on
Replace the headphone batteries with new ones |
Specifications
Screen Size 7.0" (diagonal)
LCD Display Aspect Ratio 16:9
LCD Display Total Resolution 336,960 pixels*
Viewing Angle +30^ / -60^ (vertical), 120^ (horizontal)
Minimum Brightness. > = 350cd / m^2
Typical Brightness 400 cd/m2
Video Input (Composite Signal) 1 Vp-p/75 ohms
Audio Input 1,2 VRMS
Video Output (Composite Signal) .1 Vp-p/75 ohms
Audio Output 1.2 VRMS
Headphone Output .0.1 W/16 ohms (stereo)
Dimensions 305 mm (L) x 208 mm (W) x 46 mm (H)
Weight 1.25 kg
Operating Voltage DC 11 V \~16 V
Power Consumption .0.97 A \~ 1.15 A
Operating Temperature 14°F - 140°F (-10°C - 60°C)
KENWOOD
FÉLICITATIONS!
Definiçao COLOR (Cor)
Tamanho do ecra .7,0" (18 cm) (diagonal)
Resolucao total do ecrar LCD .336.960 pixels*
Angulo de visualização . +30^ / -60^ (vertical), 120^ (horizontal)
Luminosidade minima. > = 350cd / m^2
Luminosidade típica 400 cd/m²
Entrada video (Sinal composto) 1 Vp-p/75 ohms
Entrada audio 1,2 VRMS
Saída video (Sinal composto) 1 Vp-p/75 ohms
Saída录音 1,2 VRMS
Saía de auscultadores .0,1 W/16 ohms (estereo)
Dimensoes 30,5 cm (C) x 20,8 cm (L) x 4,6 cm (P)
Peso 1,25 kg
Tensao de operacao CC 11 V a 16 V
Consumo de corrente .0,97 A a 1,15 A
Temperatura de operacao -10°C - 60°C