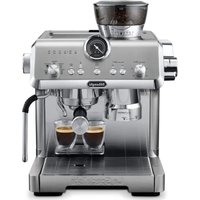
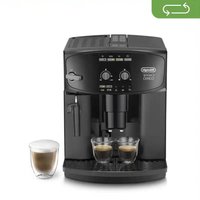
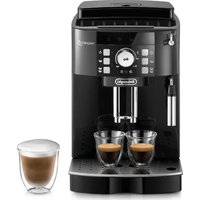
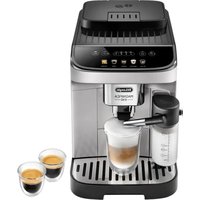
USER MANUAL CORTINA BCO 250 DELONGHI
COFFEE/CAPPUCCINO MAKER
MACHINE A CAFE/CAFE CREME
KAFFEE/ESPRESSO/CAPPUCCINO-MASCHINE
MACCHINA DA ESPRESSO/CAPPUCCINO
KOFFIE/CAPPUCCINO APPARAAT
CAFETERA EXPRESO/CAPUCHINO
MAQUINA DE CAFÉ/CAPUCINO
KAΦETIEPA IIA ESPRESSO/CAPPUCCINO
Instructions for use
Mode d'emploi
Gebrauchsanweisung
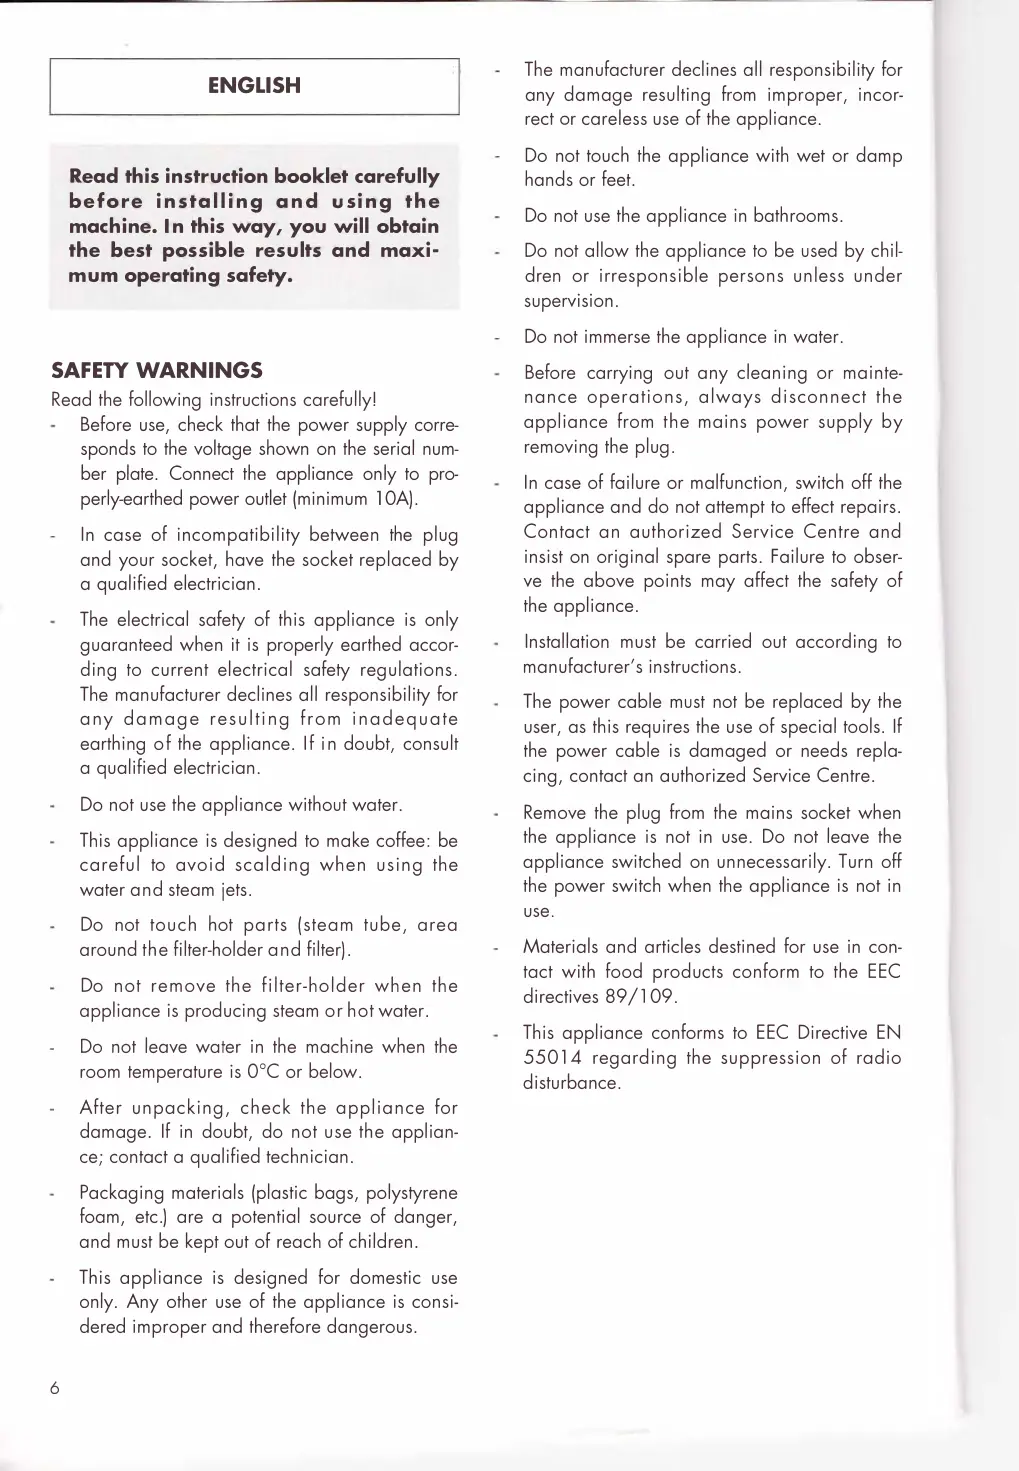
Read this instruction booklet carefully before installing and using the machine. In this way, you will obtain the best possible results and maximum operating safety.
SAFETYWARNINGS
Read the following instructions carefully!
Before use, check that the power supply corresponds to the voltage shown on the serial number plate. Connect the appliance only to properly-earthy power outlet (minimum 10A).
In case of incompatibility between the plug and your socket, have the socket replaced by a qualified electrician.
- The electrical safety of this appliance is only guaranteed when it is properly earthed according to current electrical safety regulations. The manufacturer declines all responsibility for any damage resulting from inadequate earthing of the appliance. If in doubt, consult a qualified electrician.
- Do not use the appliance without water.
- This appliance is designed to make coffee: be careful to avoid scalding when using the water and steam jets.
- Do not touch hot parts (steam tube, area around the filter-holder and filter).
- Do not remove the filter-holder when the appliance is producing steam or hot water.
- Do not leave water in the machine when the room temperature is 0^ or below.
After unpacking, check the appliance for damage. If in doubt, do not use the appliance; contact a qualified technician.
- Packaging materials (plastic bags, polystyrene foam, etc.) are a potential source of danger, and must be kept out of reach of children.
- This appliance is designed for domestic use only. Any other use of the appliance is considered improper and therefore dangerous.
- The manufacturer declines all responsibility for any damage resulting from improper, incorrect or careless use of the appliance.
- Do not touch the appliance with wet or damp hands or feet.
- Do not use the appliance in bathrooms.
- Do not allow the appliance to be used by children or irresponsible persons unless under supervision.
- Do not immerse the appliance in water.
Before carrying out any cleaning or maintenance operations, always disconnect the appliance from the mains power supply by removing the plug.
In case of failure or malfunction, switch off the appliance and do not attempt to effect repairs. Contact an authorized Service Centre and insist on original spare parts. Failure to observe the above points may affect the safety of the appliance.
Installation must be carried out according to manufacturer's instructions.
- The power cable must not be replaced by the user, as this requires the use of special tools. If the power cable is damaged or needs replacing, contact an authorized Service Centre.
- Remove the plug from the mains socket when the appliance is not in use. Do not leave the appliance switched on unnecessarily. Turn off the power switch when the appliance is not in use.
Materials and articles destined for use in contact with food products conform to the EEC directives 89/109.
- This appliance conforms to EEC Directive EN 55014 regarding the suppression of radio disturbance.
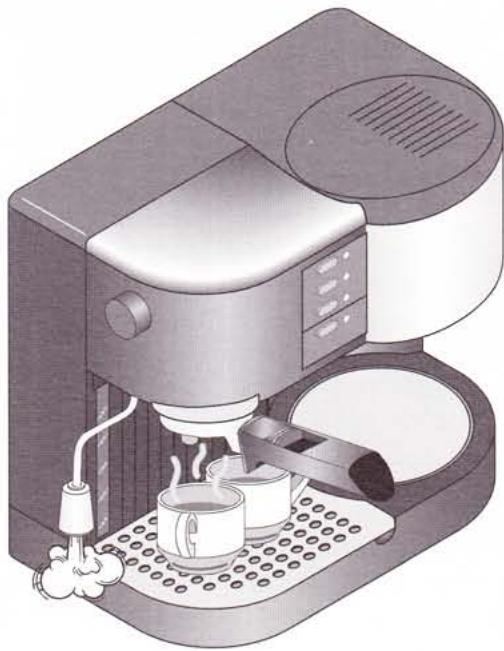
DESCRIPTION OF THE APPLIANCE
1 Removable reservoir cap
2 Water tank cap
3 Drip coffee machine water tank cover
4 Removable drip coffee filter holder
5 Drip coffee water tank
6 Drip coffee water tube
7 Drip coffee filter holder cavity
8 ON/OFF switch and indicator light
9 Coffee dispenser switch and indicator light
10 Steam switch and indicator light
11 Drip coffee ON/OFF switch and indicator light
12 Recessed warming plate
13 Boiler outlet
14 Water level indicator
15 TSteam and hot water spout
16 Steam knob
17 Compartment for filter
18 Grid for caps
19 Removable drip tray
20 2-cup filter
21 1-cup filter
22 Crema system
23 Filter holder
24 Cappuccino nozzle (if fitted)
25 Pressing spoon (if fitted)
26 Measuring spoon
27 Carafe for drip coffee machine
28 Permanent filter (if provided)
USING THE ESPRESSO COFFEE-MAKER FOR THE FIRST TIME
Remove the packaging and take out the bag containing the accessories. When the appliance is new, the following accessories must be washed with lukewarm water and detergent then rinsed thoroughly: filter cup, measure, two filters, frothy-coffee disc. The internal circuit of the coffee-maker must then be pre-washed as follows:
Filling the tank
Raise the espresso coffee maker lid (2) and pour fresh water into the tank (fig. 1). For easier filling, the tank can be extracted by pulling upwards (fig. 2). Be careful to reinsert the tank, pressing it to the end.
Pre-wash
- Plug in at the power socket, remembering the safety instructions.
- Press the ON/OFF switch (8) and the delivery switch (9). The ON/OFF pilot lamp switches
on (fig. 3). The pump will switch on. Wait until water begins to flow from the boiler nozzle, then press the delivery switch again. After about 2 minutes, the OK pilot lamp will light (fig. 4). This indicates that the boiler has reached the correct temperature.
- Press the delivery button again for 10/15 seconds, allowing water to flow from the boiler nozzle (fig. 5), then switch off the delivery button.
- To ensure perfect pre-washing, repeat the above procedure at least five or six times.
The machine is now ready for use.
Positioning the filter holder
To insert the filter holder in the machine, position it under the boiler nozzle (fig. 6). Then push the filter holder upwards and at the same time rotate it towards the right.
HOW TO MAKE A PERFECT ESPRESSO COFFEE
Always use fresh water and keep the tank clean.
- Before making coffee, always wait for the OK pilot lamp to light; this lamp indicates that the water in the boiler has reached the correct temperature for brewing coffee.
- Before making coffee, heat the cups, filter holder, filters and Never Fail Crema system. The accessories can be heated with hot tap water or in the following way:
- Insert the Never Fail Crema system into the filter holder. This device makes it possible for you to get an excellent cup of coffee, no matter what type of powdered coffee you may be using.
Warning: if you wish to use the 2-cup filter, put the "Never Fail Crema" system with the lower projecting parts inserted in the coffee outlet holes of the filter holder cavity (fig. 7). If you wish to use the one-cup filter instead, rotate the "Never Fail Crema" system 1/4 of a turn so that the projecting parts are not inserted inside the coffee outlet holes and in this way the device remains in the high position (fig. 8).
- Insert the 1- or 2-cup filter in the filter holder and attach the filter holder to the machine as explained above.
- Place the coffee cups beneath the filter holder.
- Turn on the machine by pressing the ON/OFF switch (8).
- Wait for the OK light to come on then press the delivery switch (9) making water come out of
the boiler outlet to warm the filter holder, filter and cups.
- Press the delivery switch again, then remove and drain the filter holder, the filter and the cups.
We suggest you follow this procedure (delivering hot water without coffee in the filter) after using the machine to produce steam. This brings the machine back to the optimum temperature for making coffee.
Top quality beans, correctly roasted and ground, will always produce the best coffee.
Procedure
- Switch on the machine by pressing the ON/OFF switch (8) and wait until the OK pilot lamp lights.
- A few drops of water may escape from the boiler nozzle. This is perfectly normal.
- Insert the Never Fail Crema system in the filter holder as explained above; then insert the 1- or 2-cup filter.
- Place 1 or 2 measures of ground coffee in the filter (fig. 9) spreading it evenly and pressing down lightly with the tamper (fig. 10).
- Attach the filter holder as explained above.
- Place the pre-warmed cup or cups on the drip tray under the filter holder spouts. When the OK pilot lamp lights, press the delivery switch. When the desired quantity of coffee is obtained (generally 20 - 30 seconds), turn the delivery switch off (fig. 11).
- Wait a few seconds before detaching the filter holder by turning the handle from right to left.
- To remove the used coffee grounds, retain the filter in position using the special lever fitted to the handle (fig. 12).
- If you want to remove the Never Fail Crema system, turn the filter holder face-down and knock the system out. The removal of the Never Fail Crema system must be carried out when the filter is cold.
- If the machine is not to be used for a long time, turn it off and empty the water tank.
A pre-wash should be performed, as described above, before using it the next time.
MAKING A CAPPUCCINO
- Use a deep metal container, preferably of small diameter.
-
Do not fill to more than 1/3rd, otherwise the milk may overflow when it boils.
-
Switch the machine on by pressing the "ON/OFF" switch (8).
- Press the steam switch (10). After about 3 minutes, the OK pilot lamps (9 and 10) lights to indicate that the machine has reached the correct temperature for the generation of steam (fig. 13).
- When using the steam function, a few drops of water may escape from the nozzle: this is completely normal. However, care should be taken to avoid scalding.
- Immerse the steam tube deeply into the milk in order to heat it (fig. 14) and turn the steam knob gradually counterclockwise until steam is produced. Adjust the position of the knob to regulate the quantity of steam delivered by the nozzle.
- over the container until the tube skims the surface of milk, immersing the tube slightly from time to time for a few seconds (fig. 14).
- If your coffee machine is equipped with a cappuccino nozzle, immerse the nozzle into the milk down to the mark on the "cappuccino" nozzle (fig. 15).
For a few moments, the steam will come out mixed together with a little water. In order to obtain drier steam, hold the steam knob open for a few seconds.
- Immediately after use, unscrew and rinse the cappuccino nozzle to remove any milk deposit (fig. 16).
From time to time, use a pin to clean the holes in the cappuccino nozzle (fig. 17).
WARNING: Whenever you make use of the steam function, first be certain that there is water in the boiler compartment. Do so in the following way:
1) Make sure that there is water inside the removable tank (1).
2) Push the ON/OFF (8) and the coffee emission buttons (9). The indicator light for the ON/OFF switch will turn on. The pump will begin to "load up" water.
Wait until water begins to come out of the boiler tap, then turn off the coffee emission switch. Now proceed as you would for the regular use of the steam function.
PRODUCING STEAM
(for heating liquids, such as tea, etc.) Press the ON/OFF switch (8) and the steam switch (10). After a few minutes, the OK pilot lamp (10) lights to indicate that the machine has reached the correct temperature for the selected function (in this case, to make steam).
Immerse the steam nozzle in the liquid to be heated and turn the steam control knob counterclockwise.
Adjust the position of the knob to regulate the quantity of steam delivered by the nozzle.
When the liquid is hot, completely close the steam knob and turn the ON/OFF switch off.
HOT WATER
(to prepare tea, etc.)
- Switch the machine on by pressing the ON/OFF switch (8) and wait until the OK pilot lamp lights.
- Place a cup or glass under the steam tube (15).
- Press the delivery switch (9) and, at the same time, open the steam outlet lever.
- Hot water will flow from the tube. As soon as the desired quantity of hot water has been obtained, close the lever and press the delivery switch again.
- Before using your Drip Coffee Maker for the first time, fill the drip coffee carafe with water to the 10-cup level, and pour into the water reservoir. Follow the instruction below, omitting the paper filter and coffee. This will thoroughly cleanse the unit prior the initial brew of coffee.
- Always use fresh, cold tap water to brew coffee.
- The Drip Coffee Maker brews a maximum of 10 cups. Never exceed this maximum amount as shown by the markings on the carafe.
- Use a fine drip grind coffee - that is recommended for drip coffee makers.
- The warming plate heats up when the drip coffee maker is switched ON. Avoid touching it, and never allow the power cord to come into contact with it.
- The amount of freshly brewed coffee delivered after the brewing process will always be slightly less than the amount of water poured into the reservoir. This is due to the absorption of some water by the ground coffee. Therefore put in a little more water to begin with.
HOW TO MAKE DRIP AND/OR BARLEY COFFEE
- Remove the carafe from the recessed warming plate. Grasp the handle, lift it up, slide the carafe straight out. Open the lid, and fill the carafe with cold water to the desired level (fig. 18).
- Open the drip coffee reservoir cover, and pour the water into the reservoir (5) (fig. 19). Close the lid of the carafe and place carafe on warming plate.
- Turn the drip coffee water tube (6) to the right (fig. 20).
- Place paper filter into the filter holder (fig. 21) or permanent filter (if provided). We recommend 1 × 4 cone style filters.
- Measure coffee into the filter, using the handy measuring spoon provided (fig. 22). Measure slightly less than one level spoon of ground coffee for every cup of water measured into the reservoir. Personal tastes differ. Experiment with varying amounts of coffee, until the desired strength is reached. If you are using the permanent filter and want to make coffe using a blend of barley, chicory and so on, remember to halve the amount of powder (one measuring cup every two cups of coffee) to prevent the coffee from seeping out of the filter. Replace filter holder.
- Replace the drip coffee water tube (6) in the centre.
- Plug the coffee maker.
- Push the ON/OFF drip coffee switch to the ON position (fig. 23). The red light indicates that the machine is operating.
- The carafe rests on a warming plate that will keep your coffee at serving temperature. Turn switch to the OFF position if carafe is empty.
During the brewing cycle, the coffee maker will create some steam. This is normal and to be expected.
KEEPING THE COFFEE HOT
The coffee is kept warm on a warming plate which begins to heat up when the drip ON/OFF coffee switch is switched on and will keep the coffe hot until the coffeemaker is switched off.
DRIP-INTRRUPTION FEATURE
This special feature is for the person who can't wait for all of the coffee to be brewed, especially when making 8-10 cups. When carafe is half-filled, remove the carafe and serve. Replace carafe. The flow of coffee into carafe will resume.
To prevent coffee from overflowing from the filter holder during the brewing cycle, the carafe should be immediately returned to the warming-plate after pouring.
CAUTION: If you plan to serve coffee and espresso at the same time, make sure that you start preparing the drip coffee first, which needs a longer time for brewing.
Always be present when the espresso/cappuccino part of the machine is in the ON position. Make sure that the machine is turned OFF immediately after preparing use.
CLEANING AND MAINTENANCE
- Before carrying out any cleaning operations of the exterior parts, switch the machine off, remove the plug from the socket and leave the machine to cool.
- Do not use solvents, detergents or abrasive products to clean the machine. A soft damp cloth is sufficient.
-
Clean the filter holder, filters, drip tray, carafe and water reservoir regularly.
-
To remove the drip coffe filter holder, press the filter holder then rotate it leftwards and lift it (fig. 24). When reassembling it, be careful to insert it correctly.
- To extract the Never Fail Crema system, once the filter has been removed rotate the filter holder and hit it against a plane surface so the device falls out.
- Do not wash the machine: it is an electrical appliance
DESCALING
It is advisable to de-scale the appliance every 4 - 8 months, depending on the hardness of the water and the frequency of use. De-scale using water and vinegar as follows:
- Fill the tanks with water, diluting 100cc of vinegar or descending agent in it.
- Operate the machine as though making the espresso and coffee filter until the tanks has been emptied, then rinse.
- Repeat the operation with water only for 2-3 tanks, rinsing until there is no longer any smell of vinegar or descending agent
D escaling with other substances may be hazardous to your health.
ELECTRICAL CONNECTION (UK ONLY)
A) If your appliance comes fitted with a plug, it will incorporate a 13 Amp fuse. If it does not fit your socket, the plug should be cut off from the mains lead, and an appropriate plug fitted, as below. WARNING: Very carefully dispose of the cut off plug after removing the fuse: do not insert in a 13 Amp socket elsewhere in the house as this could cause a shock hazard. With alternative plugs not incorporating a fuse, the circuit must be protected by a 15 Amp fuse.
WARNING - THIS APPLIANCE MUST BE EARTHED IMPORTANT
The wires in the mains lead are coloured in accordance with the following code:
Green and yellow:
Blue:
Brown:
Earth
Neutral
Live

If the plug is a moulded-on type, the fuse cover must be re-fitted when changing the fuse using a 13 Amp Asta approved fuse to BS 1362. In the event of losing the fuse cover, the plug must NOT be used until a replacement fuse cover can be obtained from your nearest electrical dealer. The colour of the correct replacement fuse cover is that as marked on the base of the plug.
B) If your appliance is not fitted with a plug, please follow the instructions provided below:
As the colours of the wires in the mains lead may not correspond with the coloured markings identifying the terminals in your plug, proceed as follows:
The green and yellow wire must be connected to the terminal in the plug marked with the letter E or the earth symbol or coloured green or green and yellow.
The blue wire must be connected to the terminal marked with the letter N or coloured black.
The brown wire must be connected to the terminal marked with the letter L or coloured red.
FRANÇAIS
BESCHRIJVING VAN HET APPARAAT
(on thee te zetten, enz.)
CÓMO PREPARAR EL CAFÉ FILTRO/MALTA
desligue completement. DISPOSITIO DE INTERPULPGAO
DISPOSIVO DE INTERKUPCAO MOMENTANEA