SSOT 6 A1 - Medical thermometer SILVERCREST - Free user manual and instructions
Find the device manual for free SSOT 6 A1 SILVERCREST in PDF.
User questions about SSOT 6 A1 SILVERCREST
0 question about this device. Answer the ones you know or ask your own.
Ask a new question about this device
Download the instructions for your Medical thermometer in PDF format for free! Find your manual SSOT 6 A1 - SILVERCREST and take your electronic device back in hand. On this page are published all the documents necessary for the use of your device. SSOT 6 A1 by SILVERCREST.
USER MANUAL SSOT 6 A1 SILVERCREST
Before reading, unfold both pages containing illustrations and familiarise yourself with all functions of the device.
FI
Last Information Update
Tietojen tila
Informationsstatus
Tilstand af information: 11/2011
Ident.-No.: SSOT 6 A1 - 10/2011 - V3

natural_image
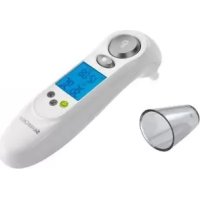
White medical or cleaning device with digital display and glass lid, no visible text or symbols on the device itself.GB Forehead & Ear Thermometer
IE Operation and Safety Notes

Introduction
Intended use...... Page 7
Scope of delivery....Page 8
Description of parts...... Page 8
Technical data Page 9
Safety
General safety instructions ...... Page 11
Safety instructions ...... Page 13
Safety Instructions for the Battery ...... Page 14
Before getting started
Removing the battery fuse....Page 15
Operation
Setting the date/time (Fig. C)...... Page 15
Temperature measurements...... Page 16
Measuring time (stopwatch mode)...... Page 23
Functions / error analysis
Selecting the temperature unit...... Page 24
The memory function (memory mode)......Page 24
Changing the battery...... Page 25
Problem-solving Page 26
Cleaning and care...... Page 28
Guarantee and Service ...... Page 29
Disposal Page 31
Conformity......Page 32
SILVERCREST®
| The following pictograms are used in these directions for use or on the device itself: | |
 | Read the directions for use! |
 | Please observe the warning and safety instructions! |
 | Risk of explosion! |
 | Direct current (type of current and voltage) |
 | Milliampere |
 | Danger to life and danger of accidents for infants and children! |
 | Medical device type B |
 2012-01 2012-01 | Year and month of manufacture |
 | Dispose of the packaging and appliance in an environmentally friendly way! |
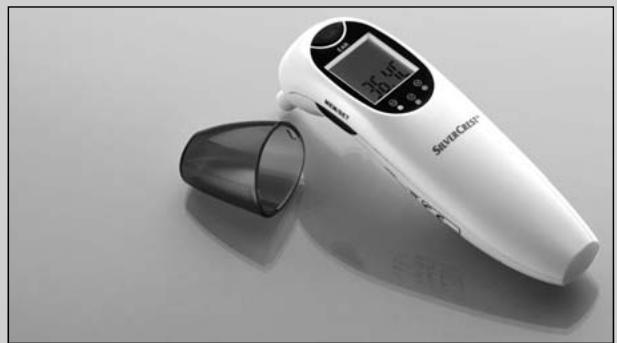
Forehead & Ear Thermometer
- Introduction

Before starting the device up for the first time, familiarise yourself with its functions. Read the following directions for use. Please keep these instructions in a safe place. When handing the device on to a third party, hand all instructions on, too.
- Intended use
The device is intended for use indoors for the measurement of body temperature on the ear or temple/forehead, the measurement of room temperature and the measurement of surface temperatures in the household, as well as a clock with stopwatch function. In no way does it replace an examination by a qualified doctor. This appliance is solely intended for private use. Any use other than that previously described or any change to the product is not permitted and may lead to injuries and/or damage to the product. The manufacturer does not assume any liability for damage arising from improper use.
- Scope of delivery
1 x Forehead and ear thermometer (incl. battery and protective head guard 9)
1 x Directions for use
• Description of parts
1 "MEM/SET" button
(information retrieval from the memory etc.)
2 Measuring head
3 "EAR" button
(temperature measurement in the ear / scan mode)
4 "FOREHEAD" button
(temperature measurement on the forehead/temple)
5 LC display
6 LED red: fever 38.0 °C-42.9 °C (100.4 °F-109.2 °F)
7 LED orange: slight increase in temperature 37.5 °C-37.9 °C (99.5 °F-100.2 °F)
8 LED green: no fever 34.0 °C-37.4 °C (93.2 °F-99.3 °F)
9 Protective head guard
(can also be attached to the foot for better grip)
10 Battery compartment lid
11 Battery
LC display
12 Battery change symbol
13 Year display symbol
14 Date display symbol
15 Ear mode symbol
16 Standard mode symbol
17 Scan mode symbol
18 Temperature display
19 Forehead mode symbol
20 Sleep mode symbol
21 Setup mode symbol
22 Memory mode symbol
23 PM / AM display
24 Month and hour in standard mode
25 Stopwatch mode symbol
- Technical data
Measurement
method: Infrared (non-contact)
Electrical
power supply: Lithium battery 3V---CR2032
Power consumption: < 30 mA
Memory: 9 temperature measurements with details of date, time and measurement method (ear or forehead measurement)
Introduction
| Temperature scale: | °C (°Celsius) |
| °F (°Fahrenheit) | |
| Time display: | 12/24-hour format |
| Automatic switch-off: | Automatic switch-off after 1 minute |
| Measurement range forehead & ear mode: | 32°C-42.9°C (89.6°F-109.2°F) |
| Measurement accuracies: | ±0.2°C (±0.4°F) in the range from 35.5°C-42.0°C (95.9°F-107.6°F) ±0.3°C (±0.5°F) in the range from 32.0°C-35.4°C (89.6°F-95.7°F) and in the range from 42.1°C-42.9°C (107.8°F-109.2°F) |
| Measurement range room temperature: | 5.0°C-59°C (41.0°F-138.2°F) |
| Measurement accuracy: | ±2.0°C (±4.0°F) |
| Measurement range scan mode: | -22.0°C-80.0°C (-7.6°F-176°F) |
| Measurement accuracy: | ±2.0°C (±4.0°F) |
Ambient temperature
| Ear and scan mode: | +10.0 °C-+40.0 °C(50.0 °F-104.0 °F) |
| Forehead mode: | +15.0 °C-+40.0 °C(59.0 °F-104.0 °F) |
Storage temperature: -10.0^-+55.0^
(14.0°F-131.0°F) at
20% RH ^ -85% RH ^
Atmospheric pressure: 700 \~ 1060 hPa
Dimensions: approx. 135×37×58 mm (LxB×H)
Weight: approx. 50 g
*RH = relative humidity
- Safety
PLEASE KEEP ALL SAFETY INFORMATION AND INSTRUCTIONS FOR FUTURE USE!

General safety instructions
natural_image
Simple line drawing of a person holding hands, no text or symbols presentWARNING! DANGER TO LIFE AND DANGER OF ACCIDENTS FOR INFANTS AND CHILDREN! Never leave children alone and unsupervised with the packaging material. Danger of suffocation. Children often underestimate risks. Always keep children away from the product.
⚠️ DANGER TO LIFE! Batteries can be swallowed, which may represent a danger to life. If a battery has been swallowed, medical help is required immediately.
This device is not designed to be used by people (including children) with limited physical, sensory or mental abilities or who lack the experience and/or knowledge to use it, unless they are supervised by a person responsible for safety or receive instructions from such a person as to how the device should be used. Children have to be supervised to ensure that they do not play with the device.
■ Do not expose the device to
- extreme temperatures,
- strong vibrations,
- heavy mechanical loads,
- direct sunlight.
Otherwise there is a danger that the device will be damaged.
Please note that the guarantee does not cover damage caused by incorrect handling, non-compliance with the operating instructions or interference with the device by unauthorised individuals.
■ Under no circumstances should you take the device apart. Improper repairs may place the user in considerable danger. Repairs should only be carried out by specialist personnel.
Do not use the device if it is damaged. Otherwise the consequence may be injuries and/or inaccurate readings.
Please consult a doctor if the thermometer indicates that the body temperature measured is high. With this measuring method, a fever is indicated if the temperature is above 38.0 °C (100.4 °F). The red LED 6 is a warning. Please take several measurements at intervals of 0.5 to 1 hour in order to follow the progression of the temperature. The values you measure will help your doctor make a diagnosis.
Do not use the temperature under extreme temperature conditions and/or outdoors. This will result in inaccurate measuring results. Please observe the details regarding ambient and storage temperatures (see "Technical data").
The measurement sensor should not be touched directly or be blown on. This will result in inaccurate measuring results.
■ Mobile telephones should not be used in the immediate vicinity when the thermometer is being used. Otherwise the consequence may be inaccurate measurement results.

Safety instructions
This appliance is solely intended for private use. That is why it is not subject to mandatory verification.
Discontinue using the appliance if it is damaged or if you feel that the measured values are unrealistic. Consult the chapter "Functions/Error analysis - Troubleshooting" for advice or contact our service centre.

Safety Instructions for the Battery
■ Remove the battery from the device if it is not going to be used for a prolonged period.
natural_image
Warning symbol depicting a explosion or impact with radiating lines inside a triangle (no text or numbers)CAUTION! DANGER OF EXPLOSION!
The battery must never be recharged!
- Ensure correct polarity when inserting the battery! This is indicated in the battery compartment.
If necessary, clean the battery and device contacts before inserting the battery.
- Batteries must not be disposed of in the normal domestic waste!
■ Every consumer is legally obliged to dispose of batteries in the proper manner!

natural_image
Warning symbol depicting a explosion with radiating lines, no text or numbers presentCAUTION! RISK OF EXPLOSION!
Keep batteries away from children; do not throw batteries into a fire; do not short-circuit the batteries and do not take them apart.
Avoid contact with the skin, eyes and mucous membranes. Any parts of the body coming into contact with battery acid should be rinsed off with copious amounts of water and/or a doctor contacted if necessary!
- Avoid contact with skin, eyes and mucous membranes. Upon contact with battery acid, rinse the affected area with lots of water and/or consult a doctor!
● Before getting started
- Removing the battery fuse
☐ Push the battery compartment lid 10 downwards.
☐ Pull the tab of the protective film out of the battery compartment.
☐ Push the battery compartment lid 10 onto the battery compartment until it clicks into place (Fig. A).
- When it is switched on, an internal alignment and a self-test of the LC display are carried out.
- To verify that all of the bars of the numbers are being managed correctly, when you switch on check the display of the LC display 5 on your appliance against the example (Fig. B).
Operation
- Setting the date/time (Fig. C)
You only have to set the date and time when you operate the appliance for the first time and after you change the battery.
-
Press and hold the "MEM/SET" button 1 down for two seconds in standard mode. An acoustic signal will sound. The device is now in set-up mode.
-
Press the "MEM/SET" button 1 to choose between the 12-hour or 24-hour format.
-
Press the "FOREHEAD" button 4. The hours will flash and can be corrected with the "MEM/SET" button 1.
- Press the "FOREHEAD" button 4 again. The minutes will flash and can be corrected with the "MEM/SET" button 1.
☐ Repeat steps 3 and 4 to set the values for the year, month and day or to switch the sleep mode on or off.
Finally, press the "FOREHEAD" button 4. The settings will be taken over and the appliance reverts to standard mode.
● Temperature measurements
Measuring room temperature (standard mode)
When you have finished setting the time and date and do not carry out any further procedures, the device switches to sleep mode after 1 minute in order to save the battery. In the condition as supplied to the customer the sleep mode is activated, as shown by the Z^z symbol, and the LC display 5 is completely switched off. When the sleep mode is deactivated, the device remains switched on, while the time and room temperature are still shown and updated once a minute. The LC display 5 shows the time and date alternately (Illustration D).
Measuring body temperature (ear mode)
⚠️ IMPORTANT! It is advisable to carry out 3 measurements in a row on the same ear and to take the highest temperature as the measured value. A new measurement
can be taken when the display "000" goes out.
☐ Do not use the thermometer if pain occurs when the measurement is being taken. This could damage the ear canal.
☐ Do not use the thermometer with external ear disorders (e.g. inflammation of the ear canal, injuries to the outer ear). The condition of the affected areas could worsen.
☐ Do not use the thermometer straight after bathing or swimming when the ear canal is wet. This could damage the ear canal.
☐ Due to the risk of contamination of the measuring head, clean the appliance after every use.
☐ In this mode, only measure the temperature in the ear and at no other place on the body.
- If the sleep mode has been activated, activate the thermometer again by pressing any button before taking the measurement.
- Carefully press on the protective cap 9 and remove it with a gentle rotary motion and without using any force.
- Check that the measuring head 2 and the measuring sensors are clean.
- Carefully clean the ear canal with a cotton bud.
-
Pull the outer ear, tilted slightly upwards/to the rear, towards the back of his head, so that the ear canal is freely accessible and there are no impediments between the measurement sensor and the eardrum.
-
Please keep the outer ear slightly extended and now carefully insert the measuring head 2 into the ear canal.
- Briefly press the "EAR" button 3. The symbol ⚙ will appear in the LC display 5 and the measurement will start after an acoustic signal.
- The end of the measurement is indicated by means of 2 acoustic signals.
- Now you can read off the measurement result on the LC display 5. At the same time, one of the 3 LEDs will come on.
Note: LED green 8: no fever 34.0 °C-37.4 °C (93.2 °F-99.3 °F)
LED orange 7: slight increase in temperature 37.5 °C-37.9 °C (99.5 °F-100.2 °F)
LED red 6: fever 38.0 °C-42.9 °C (100.4 °F-109.2 °F) - Values can be displayed in °C as well as in °F (see "Functions/ error analysis - selecting the temperature unit").
- Wait until the display "000" goes out before you start taking a new measurement.
Note: The appliance automatically switches off if it is not operated for longer than 1 minute. When the sleep mode has been activated, the LC display 5 switches itself off. When the sleep mode has been deactivated, the appliance switches to standard mode. If the thermometer has been operated under normal conditions, the result of the last measurement taken before the appliance was switched off
is stored. The measured value is available again along with information on the date, time and measurement mode when the "MEM/SET" button 1 is pressed again. The device has 9 storage spaces (see section on "Functions/ error analysis - the memory function").
Measuring the body temperature (forehead mode)
⚠️ IMPORTANT! It is advisable to carry out 3 measurements in a row at the same place and to take the highest temperature as the measured value.
☐ With different room temperatures, let the appliance lie in the room where the temperature is to be taken for at least 30 minutes to “acclimatise” it.
Before measuring your body temperature, you should relax for about 5 minutes.
☐ If you have done any physical activity or taken a bath, wait for at least 30 minutes before taking a measurement in order to get a measurement that is as accurate as possible.
☐ Ensure that the forehead or temple is clean, free of injuries and not covered with sweat, cosmetics or ointment.
Take a note of what measurement method you used to measure the temperature and inform your doctor of it.
-
If the sleep mode has been activated, activate the thermometer again by pressing any button before taking the measurement.
-
Carefully press on the protective cap 9 and remove it with a gentle rotary motion and without using any force.
- Check that the measuring head 2 and the measuring sensors are clean.
- Hold the measuring sensor 1 cm away from the forehead or temple.
- To start the measurement, press on the "FOREHEAD" button 4. The symbol 😊 will appear in the LC display 5 and the measurement will start after an acoustic signal.
- The end of the measurement is indicated by 2 acoustic signals.
- Now you can read off the measurement result on the LC display 5. At the same time, one of the 3 LEDs will come on.
Note: LED green 8 no fever 34.0 °C-37.4 °C (93.2 °F-99.3 °F)
LED orange 7 slight increase in temperature 37.5 °C-37.9 °C (99.5 °F-100.2 °F)
LED red fever 6 38.0 °C-42.9 °C (100.4 °F-109.2 °F) - Values can be displayed in °C as well as in °F (see "Functions/ error analysis - selecting the temperature unit").
- Repeat steps 3 to 6 to carry out further measurements.
Note: The appliance automatically switches off if it is not operated for longer than 1 minute. When the sleep mode has been activated, the LC display 5 switches itself off. When the sleep mode has been deactivated, the appliance switches to standard mode. If the thermometer has been operated under normal conditions, the result of the last measurement taken before the appliance was switched off is stored. The measured value is available again along with information on the date, time and measurement mode when the "MEM/SET" button 1 is pressed again. The appliance has 9 storage spaces (see "Functions/error analysis - the memory function").
Use as a household thermometer (scan mode)
The thermometer can also be used in the house for non-contact temperature measurements in the range of -22.0^-80.0^ ( -7.6^-176.0^ ).
⚠ Attention! Do not use this mode for measuring body temperature.
- With this measurement, the current surface temperature of the object is displayed. It can be different from its internal temperature, especially if the surface is exposed to direct sunlight or a draught!
☐ Due to its design, the thermometer measures the precise value when its casing has adjusted to room temperature. That is why you should not hold it in the hand for a long time when you want to take a measurement and why you should keep it away from direct sunlight!
☐ Do not use the appliance immediately after cleaning the measuring head 2. The evaporative cooling effect of the detergent may falsify the measuring result.
Sample applications:
- The temperature of milk in baby bottles
-
The temperature of bathwater
-
If the sleep mode has been activated, activate the thermometer again by pressing any button before taking a measurement.
- Carefully press on the protective cap 9 and remove it with a gentle rotary motion and without using any force.
- Make sure that the measuring head 2 and the measuring sensor are clean.
- Press the "FOREHEAD" button 4 and the "EAR" button 3 repeatedly at the same time until "Food" is shown in the LC display 5 (Illustration E).
- Hold the measuring head at a distance of 1 cm from the liquid and/or surface whose temperature you want to measure.
- Press the "EAR" button 3 to start the measurement.
- Now you can read off the measurement result on the LC display 5 (Illustration E).
-
Values can be displayed in °C as well as in °F (see "Functions/ error analysis - selecting the temperature unit").
-
Press the "EAR" button 3 again to carry out further measurements.
-
The appliance automatically switches off if it is not operated for longer than 1 minute. This application is not stored in the device.
In order to return to standard mode, proceed as follows:
-
Press the "FOREHEAD" button 4 and the "EAR" button 3 repeatedly at the same time until the LC display 5 again shows the room temperature, date and time, as well as the symbol (Illustration D).
-
You are now back in standard mode.
● Measuring time (stopwatch mode)
The integrated watch can be used as a stopwatch in the range of 0.01 seconds to 3 minutes. This function is required to calculate the pulse rate. The appliance has to be switched over to stopwatch mode to do so.
-
If the sleep mode has been activated, activate the thermometer again by pressing any button before taking a measurement.
-
Press the "FOREHEAD" button 4 and the "EAR" button 3 repeatedly at the same time until the LC display 5 shows the ℓ symbol (Illustration F).
-
The stopwatch is started by pressing the "FOREHEAD" button 4 and stopped by pressing it again.
Operation / Functions / error analysis
- You can start a new measurement by pressing the "MEM/SET" button 1 to delete the previously measured time.
In order to return to standard mode, proceed as follows:
- Press the "FOREHEAD" button 4 and the "EAR" button 3 repeatedly at the same time until the LC display 5 again shows the room temperature, date and time, as well as the symbol (Illustration D).
- You are now in standard mode again.
● Functions/ error analysis
- Selecting the temperature unit
☐ Press and hold down the "EAR" button 3 and the "FOREHEAD" button 4 at the same time until "°F" appears behind the temperature display. Switching from "°F" to "°C" is possible with the same procedure.
● The memory function (memory mode)
IMPORTANT!
The current measurement is always stored in the last storage space. When all storage spaces have been occupied, the oldest measurement is always deleted from the memory.
Measurements taken in ear and forehead mode are automatically stored in the appliance. The measured values are available again along with information on the date, time and measurement mode when the "MEM/SET" button 1 is operated in standard mode. Press the "MEM/SET" button 1 once to retrieve the value of the last measurement. The "Memory" symbol (memory mode), the number of the measurement, date, time and measurement mode will appear in the LC display 5 (Fig. G). By pressing the "MEM/SET" button 1 the next storage space along with its associated measured value will appear. A maximum of 9 measurements can be stored.
In order to return to standard mode, proceed as follows:
-
Press the "FOREHEAD" button 4 and the "EAR" button 3 repeatedly at the same time until the LC display 5 again shows the room temperature, date and time, as well as the symbol (Illustration D).
-
You are now in standard mode again.
- Changing the battery
The appliance is fitted with a lithium battery (CR2032, 3V---) that allows a lot of measurements to be taken. If the battery is empty, you will be made aware of that by means of an appropriate error message (see "Functions/ error analysis - problem-solving").
Functions / error analysis
☐ Push the battery compartment lid 10 downwards. Lever the battery 11 out with a small screwdriver.
☐ Avoid short-circuiting the battery at all cost. A short-circuit can occur if the screwdriver comes into contact with the battery and the live parts in the battery compartment at the same time.
☐ Insert the new battery into the battery compartment.
Note: Ensure correct polarity. The plus sign on the battery must point upwards.
☐ Push the new battery under the metal nose and press it down until it clicks into place.
☐ Push the battery compartment lid 10 onto the battery compartment until it clicks into place (Fig. A).
- Problem-solving
If the appliance cannot take a measurement in the designated range, it will generate an error message. This message should help to solve the problem.
| Error | Problem | Solution |
| Appliance does not react / automatically resets itself when protective film is removed | Empty battery? | Insert a new battery |
| Wrong battery polarity? | Removing battery and insert it correctly | |
| Faulty battery contact? | ||
| Battery symbol on the LC display5 | Weak battery | Insert a new battery |
| “Lo” on the LC display5 (measured value below 32.0°C or 89.6°F) | Thermometer correctly positioned in the ear or on the forehead/temple? | Pay heed to the operating instructions in regard to positioning in the ear or on the forehead/temple. |
| “Hi” on the LC display5 (measured value above 42.9°C or 109.2°F) | Check the measurement mode. | Please observe the directions for use with regard to taking correct measurements. |
| “ErrE” on the LC display5 | Ambient temperature outside the range of 15.0°C - 40.0°C / 59.0°F - 104.0°F (forehead mode) and 10.0°C - 40.0°C /50.0°F - 104.0°F (ear and scan mode). | Please ensure an ambient temperature in the range of 15.0°C - 40.0°C / 59.0°F - 104.0°F (forehead mode) and 10.0°C - 40.0°C / 50.0°F - 104.0°F (ear and scan mode) |
| “ErrU” on the LC display 5 | No measurement result after measurement. | Please observe the directions for use with regard to taking correct measurements. |
| “ErrH” on the LC display 5 | Error detected during self-test. | Contact the service centre. |
| “ErrP” in LC display 5 | Hardware problem | Contact the service centre. |
- Cleaning and care
The lens in the opening of the measuring sensor is the most sensitive part of the appliance.
Be very careful when you have to clean it. In order to avoid contamination with germs, the lens has to be rubbed after every use with a soft cloth that has been moistened with 70% medical alcohol. The use of hygiene attachments is, therefore, not necessary. After that, wait for at least 30 minutes before taking another measurement. Please keep in mind that due to the evaporative cooling effect of the alcohol, even the smallest amounts can falsify the result. Clean the housing with a soft, slightly damp cloth. In the case of more severe soiling a mild detergent can also be added to the water.
Cleaning and care / Guarantee and Service
Keep the appliance in a dry environment and protect from direct sunlight. The appliance can be stored at temperatures of -10.0 ^-55.0 ^ ( 14.0 ^-131.0 ^ ). Temperatures over 80.0 ^ are to be avoided! In order to measure with it, however, it is necessary to let the appliance adjust to room temperature for a sufficient length of time - otherwise an error message will be generated (see "Functions/Fault Analysis - Correction of Problems"). A room temperature of 5.0 ^-59.0 ^ ( 41.0 ^-138.2 ^ ) should also be maintained for the purposes of measurement. If the temperature is outside this range, an error message is shown (see "Functions/Fault Analysis - Correction of Problems"). Remove the battery when not using the appliance for any length of time.
● Guarantee and Service
This appliance is guaranteed for 3 years from the date of purchase. It has been carefully produced and meti-culously checked before delivery. Please keep your receipt as proof of purchase. Contact your service centre by telephone in case of questions pertaining to the warranty. Your goods can be transmitted free of cost only in this manner.
Guarantee and Service
The warranty covers only material or manufacturing faults, not normal wear or damage to fragile parts such as switches or rechargeable batteries. The appliance is intended solely for private, not commercial, use.
If this product has been subjected to improper or inappropriate handling, abuse, or interventions not carried out by one of our authorised sales and service outlets, the warranty will be considered void. This warranty does not affect your statutory rights.
The guarantee period is not extended by the warranty. This also applies to replaced and repaired parts. Any damage or defects present when the device is purchased must be reported immediately upon unpacking, and not later than two days after the date of purchase. All repairs required after the guarantee period has expired are subject to a charge.
GB
Service Great Britain
Tel.: 0871 5000 720 (£ 0.10/Min.)
E-Mail: kompernass@lidl.co.uk
IAN 71652
IE
Service Ireland
Tel.: 1890 930 034
(0,08 EUR/Min., (peak))
(0,06 EUR/Min., (off peak))
E-Mail: kompernass@lidl.ie
IAN 71652
- Disposal

The packaging is made entirely of recyclable materials, which you may dispose of at local recycling facilities.
Contact your local refuse disposal authority for more details of how to dispose of your worn-out product.

The product is subject to Directive 2002/96/EC (WEEE). In the interests of environmental protection, do not throw the product away with domestic waste when it is worn out, but take it to a proper disposal facility. Contact your local authority to find out about collection centres and their opening times.
Disposal / Conformity
Faulty or used batteries must be recycled in accordance with Council Directive 2006/66/EC. Take used batteries and/or the appliance itself to the collection facilities provided.

Batteries should not be disposed of with domestic waste!
Take batteries and/or the product itself to the collection facilities provided.
- Conformity
The CE Mark C€ 0197 has been attached to this product in accordance with the following European Directive:
Directive for Medical Products 93/42/EEC, as amended by Directive 2007/47/EC.
The associated declaration of conformity has been deposited with the importer:
KOMPERNASS GMBH
BURGSTRASSE 21
44867 BOCHUM, GERMANY
www.kompernass.com
Manufacturer:
Shenzhen Dongdixin
Technology Co., Ltd.
No. 3 Building XiliBaimang
Xusheng Industrial Estate
518108 Nanshan, Shenzhen, China
Tel.: +86 755 27 652 471
Fax: +86 755 27 652 674
E-Mail: info@dundex.com
EU Representative:
Shanghai International
Holding Corp. GmbH (Europe)
Eiffestrasse 80
20537 Hamburg, Germany
Tel.: +49 (0) 40 2513175
Fax: +49 (0) 40 255726
Johdanto
natural_image
Warning symbol depicting a explosion or impact with radiating lines inside a triangle (no text or numbers)No. 3 Building XiliBaimang
Xusheng Industrial Estate
518108 Nanshan, Shenzhen, China
Tel.: +86 755 27 652 471
Fax: +86 755 27 652 674
E-Mail: info@dundex.com
EY-valtuutettu:
Shanghai International
Holding Corp. GmbH (Europe)
Eiffestraße 80
20537 Hamburg, Germany
Tel.: +49 (0) 40 2513175
Fax: +49 (0) 40 255726
Inledning
Mätnoggrannhet: ±2,0 °C (±4,0 °F)
| Mätområde scanläge: | -22,0 ^ - 80,0 ^ (-7,6 ^ - 176 ^) |
Mätnoggrannhet: ±2,0 °C (±4,0 °F)
natural_image
Warning symbol depicting a explosion with radiating lines, no text or numbers presentOBSERVERA! EXPLOSIONSRISK!
Ladda aldrig batteriet.
No. 3 Building XiliBaimang
Xusheng Industrial Estate
518108 Nanshan, Shenzhen, China
Tel.: +86 755 27 652 471
Fax: +86 755 27 652 674
E-Mail: info@dundex.com
EU-fullmäktig:
Shanghai International
Holding Corp. GmbH (Europe)
Eiffestraße 80
20537 Hamburg, Germany
Tel.: +49 (0) 40 2513175
Fax: +49 (0) 40 255726
Indledning
(14,0 °F-131,0 °F) ved
20%RH ^ -85%RH ^
Atmosfærisk tryk: 700 \~ 1060 hPa
natural_image
Warning symbol depicting an explosion with radiating lines, no text or numbers presentPAS PÅ! RISIKO FOR EKSPLOSION!
OBS! RISIKO FOR EKSPLOSION!
No. 3 Building XiliBaimang
Xusheng Industrial Estate
518108 Nanshan, Shenzhen, China
Tel.: +86 755 27 652 471
Fax: +86 755 27 652 674
E-Mail: info@dundex.com
EF-fuldmægtig:
Shanghai International
Holding Corp. GmbH (Europe)
Eiffestraße 80
20537 Hamburg, Germany
Tel.: +49 (0) 40 2513175
Fax: +49 (0) 40 255726